
Search results for "Inspection" in Home Design Ideas

 The Design Studio | MTS Renovations
Basement Development – Fort Sask Fitness
The Design Studio | MTS Renovations transformed an unfinished residential basement into a fully functional, home-based fitness gym—Fort Sask. Fitness. This custom-designed space provides an inviting yet high-performance environment tailored for personal training and fitness sessions.
Project Scope & Features:
Design & Permitting - We prepared concept design layouts that we converted to construction drawings. We prepared and submitted all permitting applications for this home based business and provided client representation through each phase of the project up to and including final occupancy inspection.
Space Planning & Layout Optimization – We maximized the existing footprint for optimal functionality, ensuring seamless equipment placement, circulation, and safety.
Flooring Selection – We installed durable, shock-absorbing gym flooring to support high-impact training and reduce noise transfer.
Lighting & Electrical Upgrades – We enhanced brightness and visibility with LED lighting, strategically placed for an energizing atmosphere. We added dedicated electrical circuits to accommodate specialized fitness equipment.
Ventilation & Climate Control – We incorporated efficient HVAC solutions to maintain air quality and temperature for a comfortable workout space.
Custom Storage & Organization – We integrated built-in under-stair equipment shelving and storage solutions for weights, resistance bands, and fitness accessories.
Aesthetic & Branding Integration – We designed a modern, motivating environment with finishes that align with the Fort Sask. Fitness brand identity.
Soundproofing Enhancements – We implemented acoustic treatments to minimize noise impact on the rest of the home.
By blending function with design, this basement transformation created a professional-grade fitness space that caters to both personal and client needs—all within the convenience of a residential setting.

 Refresh and Build
Master Bathroom Remodel with Freestanding Tub and Walk-In Shower, Twin Peaks, San Francisco CA (2015)
This stunning master bathroom remodel in Twin Peaks, San Francisco was completed with a $20,000 investment, delivering the ultimate luxury combination, a freestanding soaking tub AND a separate walk-in shower — in a beautifully designed San Francisco home.
One of our earlier San Francisco bathroom renovations, this project showcases the craftsmanship and attention to detail that has made Refresh and Build a trusted name in SF home remodeling for over a decade.
San Francisco Master Bathroom — Key Features:
Freestanding soaking tub with floor-mounted chrome faucet, a true luxury centerpiece
Separate frameless glass walk-in shower with ceiling-mounted rain head and dual body sprays
Large format porcelain tile shower surround — warm neutral tones
Custom white shaker double vanity with granite countertop
Full wall mirror with Hollywood-style vanity lighting
Premium wood-look porcelain floor tile throughout
Recessed LED lighting throughout
Chrome fixtures and hardware for a cohesive premium finish
San Francisco Permits , Fully Managed:
All San Francisco building permits pulled and managed by Refresh and Build, rough and final inspections passed first time.
Project Stats:
Investment: $20,000
Location: Twin Peaks, San Francisco CA 94114
Building Type: Single Family Home
Project Type: Full master bathroom remodel, tub and shower
Year Completed: 2015
Contractor: Refresh and Build. Licensed CA #1036042

 Naikoon Contracting Ltd
Architect: M3 Architecture Inc.
Interior Design: Mocoro Studio
We recently completed a development project in the Pemberton Heights area of North Vancouver. These 2 houses were built to benefit the long-term durability through the selection of efficient materials and process which will give a longer lifespan with lower maintenance and energy costs. This project was a perfect fit for us to assist in the design and execute the construction while working with some outstanding clients and consultants. A win for all of us!
The original home was recycled hitting our target goals of 90%, leading way to a couple of stealth looking homes with performance levels right there with the best of them. Our mechanical engineer designed the mechanical systems to achieve maximum efficiency and hit our internal target goals that we have set for ourselves in accordance with our Vision here at Naikoon. These homes came in at EnerGuide score of 85% which can also be referenced in GJ with a score of 54GJ. To give you an idea of how this rating relates to an average home of this size, these 2 beauties on Mackay are about 80% more efficient. The main components in the design and equipment selection that leads to this are:
1) Space heating and Cooling
2) Water Heating
3) Lights and Appliances
4) Wall assemblies and insulation
Like all of our projects, we take pride in looking at the small details of the house. Things like, insulated water lines, domestic hot water heat recovery units, electric car plug-ins, solar power ready, extensive use of environmentally friendly materials, hot water heat pumps and stringent testing and inspection point along the way, led to a successful completion of 2 certified high-performance homes with Built Green Platinum and EnergyStar certifications.
Photo credits: vopenhouse.ca
Find the right local pro for your project
 Green Home Systems
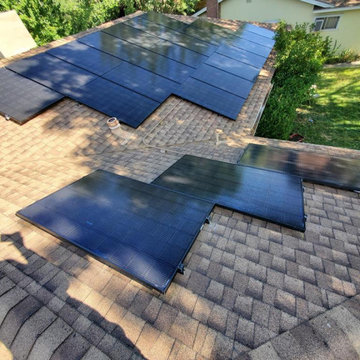
Residents of Bishop, California have seen many benefits from installing a 7.56 kW LG & ENPHASE system with the help of Green Home Systems. The project was completed in less than a month and has already made an impact on the local community.
Green Home Systems has been providing unparalleled solar solutions at the most economical price and best customer service in the industry for decades. They specialize in providing customized renewable energy solutions to meet individual needs and goals, all while ensuring performance and durability guarantees and excellent customer service.
The customer was looking for a way to reduce their utility bill, take advantage of government incentives, and utilize utility company incentives. After extensive research, they decided that Green Home Systems would be the perfect choice for their home solar installation project.
The customer chose Green Home Systems due to their wide selection of solar panels, performance and durability guarantees, and excellent reputation. The team inspected the roof and then got started on the installation process. The project was completed quickly and efficiently thanks to Green Home System's expert craftsmanship.
The results of this project have been impressive - increased home value, reduced carbon footprint, and increased property value are just some of the positive outcomes that residents are seeing from their new solar panel system installation. In addition, they are now taking advantage of competitive pricing which has allowed them to save money on their monthly utility bills as well as receive credits back from the utility company for unused power generated by their new system.
At Green Home Systems we strive to provide our customers with the best service possible - from our knowledgeable staff to our competitive pricing - we put our customers first every time. We are proud to have been able to help this Bishop resident go solar and make a positive impact on both their wallet and environment through renewable energy solutions.
 Naikoon Contracting Ltd
Architect: M3 Architecture Inc.
Interior Design: Mocoro Studio
We recently completed a development project in the Pemberton Heights area of North Vancouver. These 2 houses were built to benefit the long-term durability through the selection of efficient materials and process which will give a longer lifespan with lower maintenance and energy costs. This project was a perfect fit for us to assist in the design and execute the construction while working with some outstanding clients and consultants. A win for all of us!
The original home was recycled hitting our target goals of 90%, leading way to a couple of stealth looking homes with performance levels right there with the best of them. Our mechanical engineer designed the mechanical systems to achieve maximum efficiency and hit our internal target goals that we have set for ourselves in accordance with our Vision here at Naikoon. These homes came in at EnerGuide score of 85% which can also be referenced in GJ with a score of 54GJ. To give you an idea of how this rating relates to an average home of this size, these 2 beauties on Mackay are about 80% more efficient. The main components in the design and equipment selection that leads to this are:
1) Space heating and Cooling
2) Water Heating
3) Lights and Appliances
4) Wall assemblies and insulation
Like all of our projects, we take pride in looking at the small details of the house. Things like, insulated water lines, domestic hot water heat recovery units, electric car plug-ins, solar power ready, extensive use of environmentally friendly materials, hot water heat pumps and stringent testing and inspection point along the way, led to a successful completion of 2 certified high-performance homes with Built Green Platinum and EnergyStar certifications.
Photo credits: vopenhouse.ca
 The Design Studio | MTS Renovations
Basement Development – Fort Sask Fitness
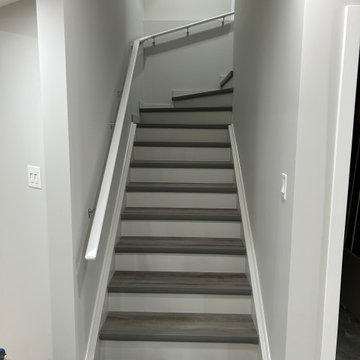
The Design Studio | MTS Renovations transformed an unfinished residential basement into a fully functional, home-based fitness gym—Fort Sask. Fitness. This custom-designed space provides an inviting yet high-performance environment tailored for personal training and fitness sessions.
Project Scope & Features:
Design & Permitting - We prepared concept design layouts that we converted to construction drawings. We prepared and submitted all permitting applications for this home based business and provided client representation through each phase of the project up to and including final occupancy inspection.
Space Planning & Layout Optimization – We maximized the existing footprint for optimal functionality, ensuring seamless equipment placement, circulation, and safety.
Flooring Selection – We installed durable, shock-absorbing gym flooring to support high-impact training and reduce noise transfer.
Lighting & Electrical Upgrades – We enhanced brightness and visibility with LED lighting, strategically placed for an energizing atmosphere. We added dedicated electrical circuits to accommodate specialized fitness equipment.
Ventilation & Climate Control – We incorporated efficient HVAC solutions to maintain air quality and temperature for a comfortable workout space.
Custom Storage & Organization – We integrated built-in under-stair equipment shelving and storage solutions for weights, resistance bands, and fitness accessories.
Aesthetic & Branding Integration – We designed a modern, motivating environment with finishes that align with the Fort Sask. Fitness brand identity.
Soundproofing Enhancements – We implemented acoustic treatments to minimize noise impact on the rest of the home.
By blending function with design, this basement transformation created a professional-grade fitness space that caters to both personal and client needs—all within the convenience of a residential setting.
 The Design Studio | MTS Renovations
Basement Development – Fort Sask Fitness
The Design Studio | MTS Renovations transformed an unfinished residential basement into a fully functional, home-based fitness gym—Fort Sask. Fitness. This custom-designed space provides an inviting yet high-performance environment tailored for personal training and fitness sessions.
Project Scope & Features:
Design & Permitting - We prepared concept design layouts that we converted to construction drawings. We prepared and submitted all permitting applications for this home based business and provided client representation through each phase of the project up to and including final occupancy inspection.
Space Planning & Layout Optimization – We maximized the existing footprint for optimal functionality, ensuring seamless equipment placement, circulation, and safety.
Flooring Selection – We installed durable, shock-absorbing gym flooring to support high-impact training and reduce noise transfer.
Lighting & Electrical Upgrades – We enhanced brightness and visibility with LED lighting, strategically placed for an energizing atmosphere. We added dedicated electrical circuits to accommodate specialized fitness equipment.
Ventilation & Climate Control – We incorporated efficient HVAC solutions to maintain air quality and temperature for a comfortable workout space.
Custom Storage & Organization – We integrated built-in under-stair equipment shelving and storage solutions for weights, resistance bands, and fitness accessories.
Aesthetic & Branding Integration – We designed a modern, motivating environment with finishes that align with the Fort Sask. Fitness brand identity.
Soundproofing Enhancements – We implemented acoustic treatments to minimize noise impact on the rest of the home.
By blending function with design, this basement transformation created a professional-grade fitness space that caters to both personal and client needs—all within the convenience of a residential setting.

 Windy City Painters
Every Chicago home carries its own unique history—and its own set of restoration challenges. From moisture-damaged plaster and decades of paint layers to the harsh thermal cycles of Chicago winters, generic painting approaches simply won't cut it.
At Windy City Painters, we take a tailored, craftsmanship-first approach to local properties across the North Side and Near West Side.
Our 4-Step Restoration Process:
Prep & Surface Repair: Thorough cleaning, sanding, skim coating, and patching for plaster, drywall, and historic wood trim.
Substrate Priming: Applying high-performance primers (such as Zinsser) tailored to the exact surface for maximum adhesion.
Precision Application: Coating with premium, long-lasting finishes using Sherwin-Williams Duration and Benjamin Moore Aura.
Final Inspection: Rigorous multi-point review ensuring pristine line work and surface consistency.
Whether you're restoring a historic greystone in Lincoln Park or updating a modern loft in River North, we deliver durable, beautiful finishes designed to withstand Chicago's demanding four-season climate.
Get Started: Ready to elevate your interior or exterior spaces? Request your free estimate at windypainters.com.
 Windy City Painters
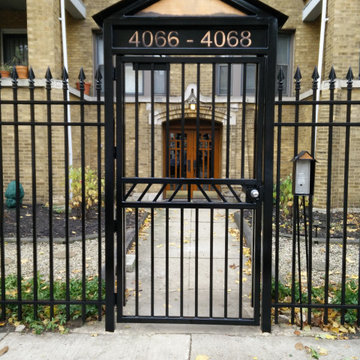
s your ornamental iron fence flaking rust onto the sidewalk every time Chicago wind kicks up? That is not a cosmetic problem - it is a sign that bare metal is exposed to moisture and the corrosion cycle is accelerating. Windy City Painters restores iron fencing on Chicago greystones, two-flats, Victorian brownstones, and courtyard buildings using professional-grade rust conversion and rust-inhibitive systems designed for the Midwest climate.
PROJECT OVERVIEW
Ornamental iron fence painting in Chicago is a multi-stage restoration process, not a simple brush-and-go job. Chicago properties - particularly the dense residential streetscapes of the North Side and Near West Side - feature decorative iron fencing that ranges from simple tubular picket to elaborate spear-top and scroll designs. When paint fails on iron, rust accelerates quickly. Windy City Painters evaluates each fence for structural rust-through, surface rust, and paint adhesion before recommending a scope of work.
MATERIALS AND PRODUCTS
Rust conversion: Ospho (phosphoric acid-based) or Corroseal (latex rust converter) depending on rust severity and surface porosity. Both chemically convert iron oxide into a stable compound that primer bonds to permanently rather than simply coating over active rust.
Primer: Rust-Oleum DTM (Direct to Metal) rust-inhibitive primer or Sherwin-Williams DTM Acrylic Coating primer, both formulated to penetrate weld seams, crevices, and pitted metal surfaces where brush application is essential.
Finish coat: Sherwin-Williams DTM Acrylic in satin or semi-gloss for UV resistance, color retention, and flexibility through freeze-thaw cycles. Two finish coats applied by brush for full coverage on ornamental profiles.
THE PROCESS
Step 1 - Mechanical Preparation: Wire wheel grinding with angle grinders removes loose rust and failing paint across flat rail surfaces. Needle gun descaling reaches weld joints, picket bases, and decorative scroll details where wire wheels cannot access. Windy City Painters inspects for rust-through after mechanical prep and flags any sections needing welding before painting proceeds.
Step 2 - Rust Conversion: Ospho or Corroseal is applied by brush to all remaining rust-affected surfaces. Ospho reacts with iron oxide over 24 hours, converting it to iron phosphate. Corroseal encapsulates and converts simultaneously. Both products create a chemically stable surface that dramatically improves primer adhesion on previously rusted iron fence sections.
Step 3 - Primer Application: Rust-Oleum DTM or Sherwin-Williams DTM rust-inhibitive primer is worked into every joint, crevice, and ornamental detail by brush - never sprayed alone on open ironwork where overspray and thin coverage risk undercutting. Full wet film thickness is verified before drying. Windy City Painters does not rush cure times between coats.
Step 4 - Finish Coats: Two coats of Sherwin-Williams DTM Acrylic topcoat are applied by brush for maximum film build on vertical pickets and horizontal rails. Color is matched to original or updated per homeowner preference. Semi-gloss finish resists dirt accumulation and makes future cleaning easier between repainting cycles.
CHICAGO-SPECIFIC CHALLENGES
Chicago presents iron fence painting conditions that milder climates do not. Road salt spray from city streets migrates onto fence bases through snowplow activity and foot traffic. Freeze-thaw cycling - sometimes occurring 30 or more times per winter - expands and contracts metal faster than paint can flex if film build is inadequate. High summer humidity slows cure times and risks blushing in topcoats applied too early in the morning. Windy City Painters schedules iron fence work during appropriate temperature and humidity windows and never applies coatings when rain is forecast within 24 hours.
WHAT TO EXPECT LONG-TERM
A properly prepped and primed iron fence in Chicago should hold a quality DTM finish for 5-8 years before needing significant maintenance. Annual inspection of base welds and picket bottoms - areas where water pools - catches early rust before it requires full mechanical prep again. Touch-up painting of isolated spots extends coating life significantly.
PRO TIPS
Tip 1: Never let a painter skip straight to topcoat on a rusty fence. Active rust under paint fails within one or two seasons. Ospho or Corroseal conversion is non-negotiable on Chicago iron.
Tip 2: Inspect fence picket bases at ground level every fall. That is where water collects, salt concentrates, and rust begins its worst work. Early touch-up costs far less than full restoration.
Tip 3: Request brush application on ornamental ironwork rather than spray-only. Brush work ensures wet paint is physically worked into every joint and crevice where rust originates.
Ready to restore your iron fence? Visit windypainters.com to schedule a free estimate with Windy City Painters.
Q: What does iron fence painting cost in Chicago? A: Iron fence painting in Chicago typically runs $8-$18 per linear foot. Rust severity, fence height, ornamental detail complexity, and whether welding repairs are needed all affect the final cost for professional iron fence restoration.
Q: How do you treat rust before painting an iron fence? A: Windy City Painters uses Ospho or Corroseal rust converters after mechanical prep. These products chemically neutralize iron oxide, creating a stable surface that rust-inhibitive primer bonds to permanently rather than painting over active corrosion.
Q: What primer is best for painting a rusty iron fence in Chicago? A: Rust-Oleum DTM and Sherwin-Williams DTM rust-inhibitive primers are our go-to products for iron fence painting in Chicago. Both are formulated for direct metal application and resist the moisture and freeze-thaw stress Chicago winters produce.
Q: How long does painted iron fencing last in Chicago? A: A professionally prepped and primed iron fence in Chicago holds a quality DTM finish for 5-8 years. Annual inspection of base welds and low points, with spot touch-up as needed, extends that service life considerably.
Q: Do I need a welder before painting my iron fence? A: If rust has eaten through fence rails or pickets structurally, Windy City Painters will identify those sections during prep and recommend welding before any primer or paint is applied. Painting over structurally failed metal is a waste of money.
Q: Can I paint an iron fence myself? A: DIY iron fence painting without proper rust conversion and DTM primer systems almost always fails within two seasons in Chicago. Professional prep, product selection, and application technique are why Windy City Painters results last 5-8 years.
Q: What neighborhoods does Windy City Painters serve for iron fence work? A: Windy City Painters serves Chicago North Side and Near West Side neighborhoods, working on greystones, two-flats, Victorian brownstones, courtyard buildings, and coach houses throughout the city.

 SUPERIOR CHIMNEY SERVICES CORPORATION
Let’s be honest. Chimney cleaning probably isn’t the first thing on your spring to-do list. But if you used your fireplace this past winter, scheduling a chimney sweep before warm weather arrives is one of the best home maintenance decisions you can make. Here’s why Spring is the best time to schedule your chimney cleaning.
Your Chimney Just Worked Hard All Winter
It’s tired, simply burnt out! Every time you burned wood this season, creosote, also known as soot, was clinging to the inner walls of your chimney. It’s a natural byproduct of burning wood, but it’s also highly flammable and the leading cause of chimney fires. The longer it sits, the more it builds up. A professional chimney sweep, such as Superior Chimney, takes a look at your chimney flue liner, damper, and firebox — clearing it all out before that creosote becomes a serious issue.
Spring is the Best Time to Take Care of the Chimney
Fall is when everyone panics. The temperature drops, and the fireplace suddenly seems appealing. By scheduling now, in spring, you get to clean your chimney now so your house doesn’t smell from the creosote left in your fireplace and chimney Superior Chimney includes a FREE 14-Point Certified Written Inspection with photo documentation sent straight to your email with every chimney sweep we do. That’s the kind of full-service you want, and you’re more likely to get it when things aren’t hectic.
Catch Problems Before They Get Expensive
Here’s something homeowners don’t regularly remember: a chimney sweep isn’t just about cleaning. It’s about integrity. When a CSIA Certified Chimney Sweep technician pushes rods and brushes through your chimney system, if pieces of fire clay tile, tile joints, or brick start falling, that tells you exactly where a structural issue exists. That’s critical information for fireworthy, continued use of your fireplace.
Avoid Any Obstructions
Obstruction-free chimney systems is another key reason for a spring chimney sweep. Birds, squirrels, and raccoons love a quiet chimney during the warmer (and definitely the cold) months. Nesting, debris, and feces can create blockages, and a simple cleaning alone won’t remove most of them. Knowing what’s going on inside your chimney before critters move in is a whole lot easier than dealing with it in October.
It’s the National Safety Standard — Not Just a Suggestion
The NFPA 211, CSIA, NCSG, and IRC all recommend annual chimney inspections and cleanings for both wood burning and gas fireplaces. It’s not optional; it’s a safety standard. As the CSIA puts it simply: clean chimneys don’t catch fire. Well put CSIA.
Did You Know?
All of Superior Chimney’s technicians are certified by the CSIA, so you know you’re getting expertise you can trust. Then we take the extra step of taking pictures so you can ‘see’ exactly what’s going on with the chimney. Everything looks good from the ground. We’ll email the pictures to you so you can keep your own records of what we all saw during the last visit. Now you know why spring is the best time to schedule your chimney cleaning.
Contact us or give us a call today at 877-244-6349 to get started.

 Atlantis Plumbing
When your pipes burst, a toilet overflows, or you notice suspicious dampness, you need more than a plumber—you need an emergency plumber in Atlanta
you can trust. Meet Atlantis Plumbing, a family-owned, trusted local company serving the greater Atlanta area with fast, friendly, and reliable plumbing services 24/7.
Decades of Experience Rooted in the Community
Established over 60 years ago and now with thousands of satisfied customers, Atlantis Plumbing has built a reputation on steady, dependable service. Their licensed professionals bring years of experience to every job, giving you peace of mind when you're dealing with urgent, unexpected plumbing disasters.
24/7 Availability When You Need It Most
Emergencies don't wait for business hours—and neither does Atlantis. With around-the-clock service, including live operators ready to take your call, they ensure help is just a phone call away. Whether it’s the middle of the night or a busy weekend, Atlantis is on call and on site fast.
Upfront Pricing and Honest Communication
A plumbing emergency shouldn't add financial stress. Atlantis offers transparent, upfront pricing so you're never blindsided. Before any work begins, they'll provide a clear estimate—no hidden fees, no surprises.
Speed Meets Expertise
Emergencies demand swift action—but not at the cost of quality. Atlantis strikes the perfect balance: rapid response paired with the skilled, licensed professionals who understand the complexity of modern plumbing systems.
Fully Equipped to Handle Any Crisis
From burst water lines to sewer backups and leaking water heaters, Atlantis’s team carries the tools and know-how to address your emergency promptly:
• Water leaks: Quick diagnosis and repair, including high water bill analysis.
• Clogged drains and sewer issues: Advanced solutions ranging from snaking to hydro-jetting or camera inspection.
• Sewer repair & replacement: Trenchless methods available to minimize disruption.
• Water heaters: Repair or replacement—gas, electric, or tankless.
• Polybutylene pipes: Experts in identifying and replacing this outdated material.
• Gas leaks: Safe, professional response (after gas company clearance).
Trusted Service with a Personal Touch
Emergencies are stressful. Atlantis eases the burden with professional, courteous technicians who get the job done with respect and care for your home. Their approach is old-fashioned in the best way—friendly, honest, and dedicated to customer satisfaction.
Multiple local voices have recommended them as the one plumber they’d always call. It's that level of trust that assures homeowners and businesses alike in times of crisis.
Comprehensive Coverage Throughout Metro Atlanta
Whether you're in Atlanta proper or surrounding areas—like Marietta, Smyrna, Roswell, or Lawrenceville—Atlantis covers it. Their reach spans Fulton, Cobb, Gwinnett, Dekalb, Cherokee, and more, ensuring emergency plumbing help isn't far when you need it most.
Value Beyond the Emergency
Atlantis doesn’t just put out fires—they help prevent them. With services like free high water bill analysis and long-term maintenance options, they add value that stretches well beyond the immediate fix.
They offer senior and military discounts, plus financing with approved credit—helping ease the financial burden of unavoidable plumbing repairs.
Hiring an Emergency Plumber: Why Atlantis Stands Out
1. 24/7 live support—get help when it counts.
2. Licensed, experienced plumbers—quality you can rely on.
3. Transparent pricing—know what you're paying.
4. Quick, efficient responses—fast relief without sacrificing standards.
5. Wide range of services—from leaks to sewers to water heaters.
6. Easy scheduling and flexible payment options—designed for your convenience.
Sample Emergency Scenarios & How Atlantis Helps
Your Basement Is Flooding at 2 AM
A frozen pipe has burst, sending water everywhere. You call Atlantis. Their team answers immediately, dispatches licensed plumbers within the hour, stops the leak, assesses the damage, and begins cleanup and pipe repair—all before breakfast.
Sewer Backup During Dinner Party
Your main sewer line backs up, and your guests are greeting more than your cooking. Atlantis arrives pronto, uses a camera inspection to pinpoint the blockage, resolves it with hydro-jetting or replacement, and gets everything draining again—without using your yard as a trench.
Unexplained Spike in Your Water Bill
You notice a huge spike in your bill—but no visible leak. Atlantis sends a tech for a free high water bill analysis, finds a small underground leak, and repairs it promptly—saving you money on unnecessary wastage.
Water Heater Fails on a Winter Morning
No hot water on a chilly morning? Atlantis arrives, diagnoses the heater issue, and either repairs it or replaces it with a similarly warranted unit—serving gas, electric, or tankless systems with equal confidence.
Outdated Polybutylene Pipes Start Failing
You suspect your home has older polybutylene piping prone to leaks. Atlantis offers specialized inspection and replacement options, bringing your plumbing system back up to modern safety and reliability standards.
Final Thought
In crisis situations, you don’t want to waste time or money. Atlantis Plumbing delivers fast, knowledgeable, and compassionate emergency plumbing services across Atlanta. With fair pricing, skilled professionals, and full-service capabilities—from leak detection to sewer repair to water heater replacement—you’re not just hiring a plumber. You’re hiring peace of mind.
When plumbing emergencies strike, remember: Atlantis Plumbing is standing by, 24/7, ready to restore order to your home or business.
 Tile Doctor Ltd
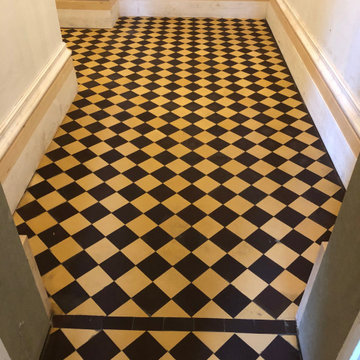
I thought I would share this case history of a Yellow and Black Victorian Tiled floor that we worked on at a large house in Lancaster last year. It’s a great example of the typical problems we face with old Victorian floors, especially around door thresholds where the transition between the different foundation invariable cause problems.
I didn’t know the full history of the floor, but it was now in quite a state and recent renovation work had left the floor unstable with loose and cracked tiles. The tiles needed to be removed and then the damaged subfloor carefully scraped out and replaced. Once that was done the floor would need relaying and then cleaned and sealed so everything would blend in.
After visiting the property and providing a quotation we were given the go ahead and agreed a date to do the work.
We returned on the agreed date and set about carefully removing the loose and cracked Victorian tiles and put them aside for later use. Some would need replacing however this would not present a problem and they are still widely available, and I have several contacts I can turn to for this.
Once this was done and the subfloor exposed and cleaned up, I used self-levelling cement to bring the floor level up and in-line with the existing. This now needed to set hard, so the rest of the day was spent cleaning up the tiles we removed earlier with Tile Doctor Grout Clean-up and Pro-clean. Our goal is to reuse as many of the original tiles as possible to preserve the heritage of the floor.
The next day with the new subfloor set it was ready for tiling. This involves laying out the tiles first without adhesive carefully cutting and fitting new tiles as needed to maintain the overall pattern of the floor. Once I was happy the tiles were moved to a board and then fitted with fresh adhesive.
I came back on day three with the aim of cleaning the floor so it could be sealed however whilst inspecting my new tiling I was disappointed to discover some were not as level as I had hoped. I had noticed the replacement tiles were not the same thickness as the originals the previous day but I had worked around this by using different levels of adhesive, clearly this plan was not as effective as I had hoped for.
To counter this problem, I used a set of 50-Grit, 100-grit and then 200-grit diamond pads in sequence to mill the floor flat and remove the lippage between them. This is done with water to lubricate the process and a weighted floor buffer. The pads generate a lot of slurry and so you need to rinse this off with more water and extract all the soil after each pad.
I followed this up with various Diamond burnishing pads of increasingly finer grits across the whole floor until we achieved a consistent finish and had the added benefit of getting the whole floor clean. More water is used to rinse the tiles after burnishing and the soil extracted with a wet vacuum as before. Once done and inspected the floor was left to dry off overnight.
Tile Doctor Colour Grow was applied to enhance the appearance of the tiles and protect them going forward. This product copes well with damp which can always be a problem with old floors like this one with no damp proof membrane present.
The floor looked amazing when finished and our attention to detail had really paid off, in fact you simply could not tell we had done any tiling work or replaced any tiles. For aftercare I recommend the use of Tile Doctor Neutral Cleaner which is designed for the regular cleaning of sealed tiles.
Russell Taylor
Lancashire Tile Doctor

 User
Photo by Philip Crocker
The Iconic Erickson Building
\Collaborative design work between our clients and ourselves incorporating their own tastes, furniture and artwork as they downsized from a large home to an almost new condo. As with many of our projects we brought in our core group of trade specialists to consult and advise so that we could guide our clients through an easy process of option selections to meet their standards, timeline and budget. A very smooth project from beginning to end that included removal of the existing hardwood and carpet throughout, new painting throughout, some new lighting and detailed art glass work as well as custom metal and millwork. A successful project with excellent results and happy clients!
Do you want to renovate your condo?
Showcase Interiors Ltd. specializes in condo renovations. As well as thorough planning assistance including feasibility reviews and inspections, we can also provide permit acquisition services. We also possess Advanced Clearance through Worksafe BC and all General Liability Insurance for Strata Approval required for your proposed project.
Showcase Interiors Ltd. is a trusted, fully licensed and insured renovations firm offering exceptional service and high quality workmanship. We work with home and business owners to develop, manage and execute small to large renovations and unique installations. We work with accredited interior designers, engineers and authorities to deliver special projects from concept to completion on time & on budget. Our loyal clients love our integrity, reliability, level of service and depth of experience. Contact us today about your project and join our long list of satisfied clients!
We are a proud family business!

 Lolly & Me
 Bailey 4-in-1 Convertible Crib, Cherry
Traditional and transitional, the Bailey 4-in-1 crib will take your baby from toddler to teenager. Clever engineering allows you to convert it from a crib to toddler bed to daybed to full-size bed. Rigorously tested to exceed US-safety standards, the Bailey has extra safety bolts and thick slats to keep your baby safe and sound. The stains are applied by hand in three steps for extra durability and color depth. Turned feet and beveled edges complement simple lines and a glossy, cherry finish for a rich, classic look. Open slats all the way around provide a clear view to your little one, while a graceful headboard awaits your child's growth into a young adult. User-friendly instructions eliminate assembly headaches so even the busiest parents can put it together. To complete the look with a changing table, purchase the Bailey complete nursery. All our Lolly & Me products are created by two moms, dedicated to dressing up today's nursery with affordable style that's fresh, functional and safe.
Crib grows with your child: converts from toddler bed to day bed to full-size bed
Certifications: JPMA, CPSIA, ASTM; USA-inspected
Construction: New Zealand pine, yellow poplar, formaldehyde-free adhesives
3-step finish: hand-applied, high-gloss stain and clear coat
Maximum weight capacity: 50.0 lb.
Assembled dimensions: 45.3" H x 55.7" W x 31.8" D
Care: clean with mild soap and water
3-position metal mattress support
� Conversion kit included
� Mattress and standard-size bed frame sold separately
� Warranty: one year for all manufacturing defects

 Five Star Tree Care
There are a few reasons why it is critical that your trees have a regular schedule for pruning and maintenance. Pruning helps trees to maintain a tree’s health as well as form it to a pleasing aesthetic shape. Furthermore, pests and diseases are also controlled by regular pruning and care. When pruning is properly performed, your trees will be healthy and attractive all year long. Five Star Tree Services has put together a list of seven things you should keep in mind regarding your tree pruning.
Tree Inspection
Before any tree pruning job, the tree should be properly inspected. This will allow you or our tree care service team to determine which branches should be cut. It will also allow any diseases or pests to be identified and dealt with.
Remove Dead, Weak & Crossed Branches
Dead and weak branches are a hazard to your property and those who happen to walk or lounge under the tree. They also suck vital nutrients away from healthy branches and the tree trunk. Removing them will prevent accidents and allow your tree to thrive. Crossed branches can also cause problems later down the line. They affect the airflow to the crown and can also prevent sunlight from passing through the tree.
Pay Attention to Spacing
It’s important to pay attention to branch spacing when pruning your tree. Lateral branches should be spaced evenly, especially when pruning trees that have yet to mature.
Follow the Basic Pruning Rules
It’s important that the 1/4th and 1/3rd rules of pruning are followed. This means that you should never cut more than a third of the total height of the tree. This length is measured from the bottom up. You should also only cut 1/4th or less of a tree’s crown when you prune at any one time.
Get Your Tools Ready
The tools you use to prune should be ready well before you make the first cut. You should start your project equipped with a pole pruner, pruning saws, hedge shears, loppers, and pruning shears. They also need to be properly sharpened before you start your pruning project. Each of these tools will allow you to reach different parts of the tree and prune them in a safe manner. If your tools are dull, they can damage the tree or even cause accidents when you attempt to cut.
Prune on Schedule
There are schedules for pruning that should be followed according to the type of tree you are caring for. Summer blooming trees should be pruned in early spring while evergreens and hedges should be taken care of in the early part of summer. Fruit-bearing trees should be pruned late in winter ahead of the frost. If there is damage to your tree, it doesn’t matter what time of year it may be, correct the problem as soon as possible.
Avoid Protecting Post-Pruning
Pruning leaves behind wounds, but they will heal. Though they may be unsightly for a while, the marks will heal and return back to its natural beauty. Don’t paint the pruning wounds to protect the tree, it actually has no effect on decay prevention. Painting may even trigger diseases or encourage pests to take up residence.
How We Can Help
Tree pruning is a complication job, but with our tips, you can do it right. It is always a good idea to leave the job to the professionals here at Five Star Tree Services instead. Our Toronto tree care experts have the tools, experience, and skills to get the job done right the first time. Get in touch with us at (416) 990-3355 today for more information.
 Five Star Tree Care
Most trees have leaves that will change colours every time the seasons change. This means that you may see changes three to four times a year depending on where you live. However, they will typically retain some measure of green colouring on their leaves until fall rolls around.
During the fall season, trees explode with bright reds, oranges, and vibrant yellows. This is a natural part of their growth and hibernation process. However, if you see these colours in the offseason, it may be a sign that there is a problem. Below, Five Star Tree Services discusses why your leaves may be yellow during the summer and what you can do about it.
Should Leaves Turn Yellow in the Summer?
If your trees have yellow leaves in the summer, it is a sign that it is suffering from disease, or having a problem with its growth cycle. Having your trees inspected periodically by a trained professional will help you catch problems early. If your trees already have yellow leaves in the offseason, they can identify the cause and suggest a solution. When diagnosed early, suggested treatments can help save the tree. Keep reading for some common causes of yellowing leaves.
Improper Watering
One of the most common reasons trees start to develop yellow leaves in the summer is due to dehydration. Checking the soil moisture levels will help determine if your trees are getting enough water. Hydration is important all year long, but especially crucial during the hot summer months. If there are dry areas around your tree trunk, it is a good idea to partake in deep root watering to help keep your trees healthy and well-watered. Make sure that you don’t overwater your trees because flooding their roots can also be unhealthy.
Lacking Nutrition
Just like people, trees need to get the right blend of nutrients in order to remain healthy. If your tree has yellow leaves in the summer and is also getting enough water, chances are it is not getting the nutrients it needs from the soil. If soil testing shows low levels of nutrients, it is a good idea to schedule a deep root fertilization treatment to adjust the levels. In many instances, correcting the soil will help you save the tree.
Insect or Pest Infestation
Yellow summer leaves are also a sign that a tree has been infested with pests. Some pest is only active in the summer. Some of the most common are:
Emerald Ash Borer
Asian Long-Horned Beetle
Yellownecked Caterpillar
Ash Flower Gall
Bronze Birch Borer
Apple-and-Thorn Skeletonizer
Eastern Tent Caterpillar
Birch Leafminer
Fall Webworm
Gypsy Moth
And many others
The first thing you should do is call an arborist to have the tree inspected. They will be able to identify the root of the problem and formulate a solution to treat the pest infestation. This will help you get rid of the bugs once and for all and save your tree in the process.
How We Can Help
If you have noticed that one of your trees have begun to develop yellow leaves, give Five Star Tree Services a call as soon as possible. We have been providing tree care services in Toronto for over 10 years. Our skilled arborist would be more than happy to evaluate your tree and suggest a solution to treat the problem, so don’t wait. Contact us at (416) 990-3355 today!
 Windy City Painters
Elevate Your Chicago High-Rise: Expert Painting and Drywall Repair
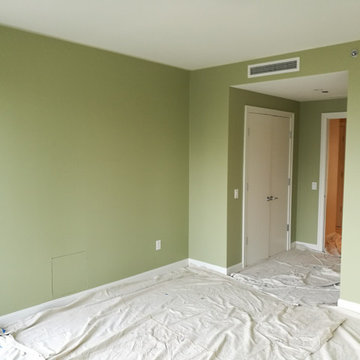
Looking for a professional painter near me in downtown Chicago? From the sleek glass towers of the Loop and Lakeshore East to the historic loft conversions in the West Loop, our team delivers premium craftsmanship tailored to the heart of the city. This recent project in a luxury downtown condo highlights our expertise in blending modern aesthetics with the structural demands of urban living.
We specialize in high-end finishes, utilizing premium Benjamin Moore and Sherwin-Williams coatings specifically selected for Chicago’s unique interior environments. Whether it's refreshing a contemporary penthouse or performing seamless drywall repair in a River North flat, we ensure a flawless finish every time.
OUR PROCESS: PRECISION IN THE HEART OF CHICAGO
1. Expert Drywall Repair & Prep
Living in downtown Chicago means dealing with building vibrations and settling. Our thorough surface inspection often reveals hairline cracks or settling gaps. As a leading Chicago painting contractor, we perform expert drywall repair, patching, and sanding to ensure a perfectly smooth "Level 5" finish before a drop of paint even touches the wall.
2. Specialized Priming
High-rise walls often feature various textures or previous high-gloss finishes. We apply specialized, low-VOC primers to ensure maximum adhesion and color vibrance while keeping your indoor air quality clean—a must for city dwellers.
3. Professional Paint Application
Using a combination of precision brushwork and specialized rollers, we apply multiple coats to achieve rich, even depth. Our techniques are designed to highlight the architectural lines of modern Chicago floor plans.
4. Meticulous Final Review
The "Windy City" standard means no mess left behind. Our team performs a rigorous final inspection and deep cleanup, ensuring your downtown home is move-in ready the moment we finish.
WHY CHICAGO DOWNTOWN HOMES REQUIRE SPECIALISTS
Urban painting presents specific challenges that suburban contractors might miss:
Building Regulations: We navigate strict HOA rules, freight elevator bookings, and insurance requirements (COIs) common in Loop high-rises.
Climate Control: Managing humidity and temperature fluctuations in glass-walled units to ensure proper paint curing.
Drywall Integrity: Addressing cracks caused by the natural swaying and settling of Chicago’s tallest buildings.
Pro Tip: When hiring a Chicago painter, always verify they carry the high-limit liability insurance required by downtown property management companies.
FREQUENTLY ASKED QUESTIONS
Q: Why choose a painter near me for downtown Chicago?
A: Local contractors are familiar with the logistical hurdles of the Loop and Gold Coast, including parking, building access, and specific structural challenges of high-rise units.
Q: Can you handle drywall repair and painting in one project?
A: Yes! As a full-service painting contractor, we handle everything from water damage repair and settling cracks to the final decorative coat, providing a seamless experience.
Q: Are your paints safe for small condo spaces?
A: Absolutely. We prioritize low-VOC and Zero-VOC premium paints that are odorless and safe for high-density living environments.
Q: How do I get an estimate for my downtown unit?
A: We offer flexible scheduling for on-site consultations throughout the West Loop, Streeterville, and the South Loop.
Ready to transform your urban space?
See more of our work and request a free estimate at windypainters.com.
Windy City Painters | Chicago’s Premier Painting & Drywall Specialists

 Ketti Kupper Conscious Life Design
Photo by Ketti Kupper
Design ideas for a mid-sized contemporary backyard landscaping in Los Angeles.
Design ideas for a mid-sized contemporary backyard landscaping in Los Angeles.

 StoneUnlimited Kitchen and Bath Remodeling
This aesthetically pleasing master bathroom is the perfect place for our clients to start and end each day. Fully customized shower fixtures and a deep soaking tub will provide the perfect solutions to destress and unwind. Our client's love for plants translates beautifully into this space with a sage green double vanity that brings life and serenity into their master bath retreat. Opting to utilize softer patterned tile throughout the space, makes it more visually expansive while gold accessories, natural wood elements, and strategically placed rugs throughout the room, make it warm and inviting.
Committing to a color scheme in a space can be overwhelming at times when considering the number of options that are available. This master bath is a perfect example of how to incorporate color into a room tastefully, while still having a cohesive design.
Items used in this space include:
Waypoint Living Spaces Cabinetry in Sage Green
Calacatta Italia Manufactured Quartz Vanity Tops
Elegant Stone Onice Bianco Tile
Natural Marble Herringbone Tile
Delta Cassidy Collection Fixtures
Want to see more samples of our work or before and after photographs of this project?
Visit the Stoneunlimited Kitchen and Bath website:
www.stoneunlimited.net
Stoneunlimited Kitchen and Bath is a full scope, full service, turnkey business. We do it all so that you don’t have to. You get to do the fun part of approving the design, picking your materials and making selections with our guidance and we take care of everything else. We provide you with 3D and 4D conceptual designs so that you can see your project come to life. Materials such as tile, fixtures, sinks, shower enclosures, flooring, cabinetry and countertops are ordered through us, inspected by us and installed by us. We are also a fabricator, so we fabricate all the countertops. We assign and manage the schedule and the workers that will be in your home taking care of the installation. We provide painting, electrical, plumbing as well as cabinetry services for your project from start to finish. So, when I say we do it, we truly do it all!
 Tile Doctor Ltd
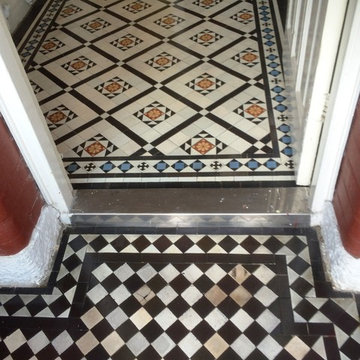
Recently I travelled down to the village of Prestwood in the Chiltern Hills of southern Buckinghamshire, to work on a Victorian tiled porch and hallway. Victorian tiles are commonly found in the entrance areas of older houses and unfortunately in this case the tiles had become heavily ingrained with dirt over time, and had suffered from additional paint and plaster spillages. The result was an unsightly mess; my client was considering covering the floor with lino after several unsuccessful attempts at cleaning it. I was called upon to provide a professional clean and seal, restoring these great Victorian tiles back to looking their best again.
On my first day at the house, I mixed up a solution of 50 per cent Tile Doctor Pro-Clean, a high alkaline cleaner, and NanoTech HBU (formerly known as Ultra Clean), which is a cleaning product that contains nano-sized abrasive particles that penetrate deep into the stone to lift ingrained dirt to the surface. This solution was worked into the tiles using abrasive scrubbing pads fitted to one of my commercial rotary machines.
The cleaning process left over a slurry of residue which I rinsed away with clean water and extracted with a wet vacuum. I was still left with the issue of stubborn paint spillages, so I applied a layer of Tile Doctor Remove & Go, a stripper with cleaning properties which is very effective at breaking down paint and adhesive stains.
Once the paint spillages had been dealt with I gave the area another rinse with clean water. I then left the house, allowing the floor enough time to dry overnight.
Upon my return the day I set about sealing the newly cleaned Victorian tiles. Before starting the sealing process I inspected the floor to check for any dampness, knowing that any excess moisture could potentially damage the performance of the sealer.
When I was satisfied that the tiles were fully dried, I applied Tile Doctor Seal & Go, a sealer which offers durable surface protection, along with an aesthetically pleasing, low-sheen finish which brings out the colour in the stone. This product can be used to seal internal, porous surfaces including Victorian, Slate, textured Quarry and Sandstone tiles.
The process made an amazing difference to the floor as you can see from the photographs; additionally the restoration of such an original feature adds a lot of value and looks so much better than lino!
Colin Ford
South Buckinghamshire Tile Doctor
159