
Search results for "Inspection" in Home Design Ideas
 Tile Doctor Ltd
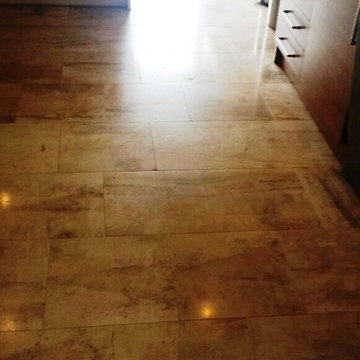
This customer from the historic city of Cardiff was keen to see what Tile Doctor could do to put some life back into their treasured Limestone kitchen floor that was laid in 2008. My first observations were mainly centred on the horrific condition of the surface which although adequately sealed initially the floor had not received any subsequent maintenance and its condition had deteriorated over time. The light shining in from the patio doors highlighted all the imperfections in the floor caused by surface wear and tear commonly seen in high traffic areas such as a kitchen.
Upon closer inspection, there were further problems: the floor was stained and scuffed, and in most places the sealer had worn off completely allowing the dirt to become ingrained into the pores of the Limestone. Additionally the grout was recessed but was now flush with the tile surface due to dirt build-up. There were also areas contaminated with grease and kitchen cooking oil.
The Limestone floor tiles were 20mm thick French Limestone, and had been laid very well so there was no requirement to do any tile or grout repairs however to get this floor back to its original condition the surface would need to be reconditioned using the Tile Doctor four stage burnishing system.
I started by giving the floor a wash with a medium dilution of Tile Doctor Pro-Clean, focusing mainly on the grout lines in order to remove the muck that had built-up there. I used a special stiff grout brush for this activity; it’s quite narrow and ideal for grout scrubbing.
This worked well, but the significant build-up of dirt along some of the grout lines meant more work was required. I tackled this problem with a hand scraper assisted with steam. At the end of this process, the whole floor was then rinsed down with water to remove any soil and the resulting slurry was then extracted using a wet vacuum.
The next step was to start the burnishing process, which basically involves applying four diamond encrusted floor pads in sequence over the floor. Each pad is a different grade, starting with the most abrasive coarse pad and moving through to the finer grades using a little water to lubricate and rinsing away any slurry between each pad.
I eventually finished with the extra fine pad which builds up shine and lustre on the tile; it had taken two days to clean the grout and burnish the Limestone but the floor was much improved and so after a final rinse down I left the floor to dry off overnight with the aid of the underfloor heating.
During this time, I also addressed the stained Limestone in the area of the kitchen where the dustbin was situated. This had been a major upset for the customer and I’m happy to report I managed to deal with it. However, it was quite an involved process, so I’ll write about this in a separate post.
On the third day I came back to seal the floor, checking first that it had dried sufficiently with a damp meter. Fortunately, the underfloor heating had done a great job of drying the stone and I was able to seal the floor using three coats of Tile Doctor Colour Grow sealant. This sealant not only provides a durable seal but also penetrates deep into the pores of the stone protecting it from within and enhancing the natural colours of the Limestone in the process.
After the final layer of sealant, I worked over the floor again with the extra fine burnishing pad both to add shine again following sealing, and to ensure that no smear marks were visible as the lighting conditions were unforgiving and highlighted any imperfections.
The customer was delighted with the results: so much so, in fact, that they booked me in to restore their Victorian hallway floor as well but that’s a story for another time!
Julian Iancono
SE Wales Tile Doctor
 Windy City Painters
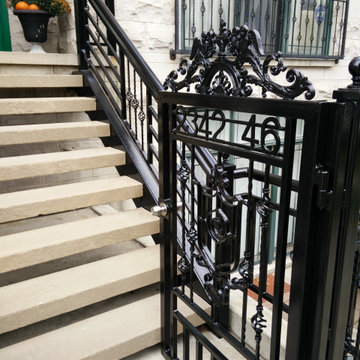
Ever notice how your iron fence looks more rust than paint after another brutal Chicago winter? That is usually the moment homeowners start searching for a painting contractor who actually understands metal - not just someone who will brush a coat of black paint over active corrosion and call it done. At Windy City Painters, iron fence restoration is one of our most requested services on the North Side and Near West Side, and for good reason. These fences are old, they are beautiful, and they deserve a proper finish system.
PROJECT OVERVIEW
This project involved a full ornamental iron fence on a North Side greystone property. The fence was original to the building - likely installed in the 1910s or 1920s - and had gone through multiple paint cycles without any rust conversion work. By the time Windy City Painters arrived, the horizontal rails showed active pitting, the vertical spindles had surface rust under lifting paint, and two corner posts had minor joint separation. The homeowner wanted the fence restored to a sharp satin black finish that would hold through multiple Chicago winters.
MATERIALS AND PRODUCTS
Ospho Rust Converter - phosphoric acid formula that chemically neutralizes iron oxide and converts it to iron phosphate, a stable paintable surface. Used on all pitted and actively corroded areas before primer application.
Rust-Oleum DTM Rust-Inhibitive Primer - direct-to-metal primer that bonds to both converted rust zones and bare metal, blocking moisture intrusion at the substrate level.
Sherwin-Williams DTM Acrylic Topcoat - flexible, moisture-resistant finish formulated to expand and contract with metal through temperature cycling. Applied in two finish coats in satin black.
For cases with deeper rust penetration, Corroseal Water-Based Rust Converter and Metal Primer is an alternative that combines conversion and priming in a single product, useful on complex ornamental profiles where two-product systems are harder to apply.
THE PROCESS
Step 1 - Mechanical Preparation. Windy City Painters wire-wheels all loose rust, flaking paint, and scale using angle grinders fitted with wire wheel attachments. On heavily pitted sections, needle gun descaling is used to reach rust in tight ornamental grooves. This step is non-negotiable. No coating bonds reliably to iron oxide, and skipping this step is the single most common reason iron fence paint fails within a year.
Step 2 - Rust Conversion. Ospho is brushed into all pitted and bare metal areas and allowed to fully react. The surface shifts from orange to a grayish-black iron phosphate layer. This stable base accepts primer without the risk of rust migrating upward through the paint film over time.
Step 3 - Primer Coat. Rust-Oleum DTM rust-inhibitive primer is applied full coverage over the entire fence surface, including areas that appeared clean but showed minor surface oxidation. DTM primer acts as a moisture barrier and mechanical adhesion layer for the finish coats.
Step 4 - Finish Coats. Two coats of Sherwin-Williams DTM acrylic topcoat are applied in satin black, with adequate dry time between coats. The DTM formula remains flexible after cure, allowing the iron to expand and contract through Chicago temperature swings without the topcoat cracking or peeling at joints.
CHICAGO-SPECIFIC CHALLENGES
Ornamental iron on Chicago greystones, two-flats, and Victorian brownstones was almost never hot-dip galvanized. It was painted from installation and has relied on continuous paint maintenance ever since. Chicago winters add specific stress: freeze-thaw cycles force water into any paint film crack, expanding it; road salt spray elevates corrosive chloride exposure; and humidity during spring thaw keeps metal surfaces wet for extended periods. This combination accelerates rust spread beneath paint films that appear intact on the surface.
WHAT TO EXPECT LONG-TERM
A properly prepped and primed iron fence finished with a DTM topcoat system should hold 5-8 years in Chicago conditions before any touch-up is warranted. Annual inspection of joints, welds, and areas near grade level will catch early moisture entry before it becomes a larger rust issue. Windy City Painters recommends scheduling touch-up earlier rather than waiting for full paint failure to protect the prep investment.
PRO TIPS
Tip 1 - Address joint separation before painting. If fence rails have separated at welds or mechanical joints, water will enter and rust will restart from inside the connection point regardless of the exterior coating. Flag any separated joints for welding before any paint system is applied.
Tip 2 - Never use latex house paint on iron fences. Standard exterior latex lacks the adhesion and flexibility for bare metal. Always use a product labeled DTM or specify a rust-inhibitive primer underneath any finish coat applied to iron.
Tip 3 - Paint in late spring or early fall. Iron fences exposed to full sun in peak summer heat can reach surface temperatures that cause solvent-based coatings to blister during application. Ideal application conditions are 50-85 degrees Fahrenheit with low humidity and no direct intense sun on the metal surface.
Learn more about iron fence painting cost in Chicago and schedule your free estimate at windypainters.com
FAQ
Q: What does iron fence painting cost in Chicago?
A: Windy City Painters typically prices residential iron fence painting at $8-$18 per linear foot. Variables include rust severity, spindle density, ornamental profile complexity, and whether rust conversion products like Ospho or Corroseal are required before priming.
Q: Can you paint over rust without grinding it off first?
A: No. Windy City Painters always performs mechanical prep before any coating. Wire wheel grinding removes loose scale and flaking paint. Rust converters handle residual oxidation chemically. Skipping this step means the new paint film will delaminate within one season.
Q: How do I know if my iron fence needs a welder before painting?
A: Windy City Painters inspects all joints and rail connections during the estimate. Rail separation, cracked welds, or sections that flex when pressed indicate structural issues that should be welded before any paint system is applied to avoid reopening at stress points.
Q: What is the difference between Ospho and Corroseal?
A: Both are rust converters. Ospho is a phosphoric acid solution applied as a separate step before priming, giving maximum control over conversion and primer selection. Corroseal combines conversion and primer in one product, which works well on complex ornamental profiles where a two-step system is harder to apply evenly.
Q: How long does the paint last on an iron fence in Chicago?
A: With full mechanical prep, rust conversion, DTM primer, and two DTM topcoats, Windy City Painters clients typically see 5-8 years of performance before touch-up is needed, even through Chicago freeze-thaw cycling and road salt exposure.
Q: Do you paint iron fences that are still structurally sound but heavily rusted on the surface?
A: Yes. Surface rust, even heavy pitting, does not necessarily indicate structural failure. Windy City Painters evaluates each fence individually. As long as the metal is sound under the rust, proper mechanical prep and a rust converter restore the surface to a paintable condition.

 Five Star Tree Care
When you have found the home of your dreams, having a beautiful tree in the yard is simply an added bonus. Many people specifically search for homes that have one or more trees when considering a new property. Trees are an essential part of our environment, but it is important to note that these beautiful living pieces of art can also be dangerous.
Five Star Tree Services has come across quite a few situations where trees have done some incredible damage to homes. So if you have a tree or several trees on your property, it is important to keep a few things in mind to avoid similar accidents.
Mind the Tree Roots
The roots of a tree help it to grow up straight and tall. They also help to anchor it in its position. While the roots are important in keeping the tree firmly in the ground, they are also one of the leading causes of damage. Roots can move the soil and materials of your foundation which can weaken the overall structure of your home. In addition to the foundation, roots have the strength to break underground pipes as well. Many homeowners with leaking water in their basement or puddles in their lower levels can trace the problem back to roots disturbing the plumbing.
In order to repair these issues, you must call a professional tree care company. In some cases, the roots can be moved from around your plumbing or foundations, but in most cases, tree removal is required.
Dead or Dying Trees
Trees that are on the verge of dying or those that have already died need to be removed as soon as possible. It is important to pay attention to the health of your trees to keep your family and your property safe. The biggest sign of a tree that is at risk of falling over is deep cracks in the trunk and branches. The tree may have died due to old age, diseases, or an infestation. The cause could have also been a result of storm damage. Regardless of the cause, dead trees can tip over and fall on your home or even people who happen to be passing by. Instead of risking your family’s health or your property, have ailing trees removed as soon as possible.
Natural Pests
Pest control is important, especially if you have one or more trees on your property. Trees attract critters no matter how well you maintain them, from owls and squirrels to termites and other bugs. Depending on how close the trees in your yard are to your home, you may need to watch out for pests invading your home. Termites are the most harmful, so it is important to have both your trees and your home inspected on a regular basis. The other pests can be controlled with proper pruning and regular maintenance. Squirrels are the second-largest danger. If they can reach your roof from nearby trees, you will have to worry about holes in your roof, insulation, and even in your foundation.
Taking Care of Your Trees
Trees are an important part of our environment and can add beauty and value to any property. With the right care and regular maintenance from Five Star Tree Services, you can enjoy the beauty of your trees while avoiding the dangers. Give us a call at (416) 990-3355 to find out more about our Toronto tree care services.
Find the right local pro for your project

 Envision Web
Stuart Wade, Envision Virtual Tours
Mountain Reflections on Lake Burton
Recently renovated both inside and out, this 5 bedroom, 5.5 bath home with sweeping views of Lake Burton is fit for entertaining large crowds. The open floor plan features a spacious great room with a 2-story stacked stone fireplace, abundant natural ligthing, dining for 10+ and a large chef's kitchen with granite countertops, custom cabinets to house every utensil, exposed beams and access to a lakeside porch. Three sets of french doors open to a magnificent curved veranda accented by columns. Western sunsets make this the place to be in the cool evenings watching the sun reflect off the jewel tone water. A private master bedroom on the main floor provides access to the covered porch. The master bath features a double vanity with granite countertops, built-in storage drawers and cabinets, jetted tub and seperate shower. Spacious guest bedrooms feature private baths and lake views. Mature landscaping including an incredible array of pink and purple rhododendron, eyebrow windows, columns and curved porches highlight the newly painted exterior.
The terrace level features a second family room/rec room with a stacked stone fireplace, wet bar, and a wall of triple french doors that open to a lakeside stone terrace. Two additional guest bedrooms with full baths also have access to the terrace patio. A large laundry room and gym/art studio with outside entrance, double sink and ample storage completes the terrace level.
Lake Burton is a unique Life Style. Cherry Lane is a paved street accessed by 4 single family homes. This home features a private, gated driveway off Cherry Lane. There is not a homeowner’s association, there are no fees or dues. Over 800 lake properties are managed and leased by the Georgia Power Company.
Location is a major advantage for this property with close proximity to Clayton, the hospital, Waterfall Country Club, the Appalachian Trail, shopping, quaint restaurants and only about a 45 minute drive to Highlands, N.C. This house is located on deep water and has breathtaking lake and mountain views that will capture your heart!
General Information:
• 5 bedrooms and 5 ½ baths
• All bathrooms have new updated granite counter tops.
• 2 fireplaces ( 1 gas non vent logs and 1 wood burning with gas starter and built in wood storage)
• Both fireplaces have raised hearths.
• House has poured concrete walls with reinforced steel.
• All Floor trusses were engineered for proper application.
• During construction the house and grounds were pre-treated for termites. The house is inspected for termites annually. To date, no termites have been found. The termite bond is with American Pest control out of Toccoa, GA.
• The main entrance has double Mahogany leaded glass door. All other exterior doors and windows are deluxe Anderson thermo pane. All Anderson windows are tilt out for easy inside cleaning. Windows have Planter shutter and/or wood blinds.
• All lake side doors are 8 feet. Doors have triple locks and are adjustable for the best fit.
• All exterior walls have house wrap and heavy insulation- R-17 for walls and R 30 in the attic.
• House has 3 levels. Each level has its own Trane High Efficiency Weathertron heat pump XE 1200. The 2 units for the main and basement levels also have dual fuel, propane gas for extra heat if needed.
• Beam Central Vacuum system for all 3 levels.
• All 3 levels are wired for Stereo speakers as well as the main level outside deck.
• All ceilings are 10 ft. or higher.
• Bar sinks have granite counter tops
*Brand new (2014) roof with HD architectural shingles has transferable lifetime warranty
Entry Foyer:
-Double Mahogany lead glass doors
-2 lead glass side windows
-Marble floor, heavy moldings, tray ceiling
Great Room:
-Vaulted wood ceiling with multi light chandelier
-Doors can be adjusted in many different positions for easy operations
-Anderson Windows and doors
-All doors facing lake side are 8 ft. doors
-Planter shutters in all windows on main floor
Kitchen:
-Vaulted ceiling with beadboard and exposed beams
-Custom Gillespie cabinets with space for every utensil
-Large kitchen island with breakfast bar
-Walk-in pantry
-Granite counter tops with plenty of prep space
-Breakfast nook
-Access to lakeside porch
-Central Vac and crumb catcher
-GE Monogram Fridge
-Kitchenaid built in oven and microwave
-Jen-air 4 burner gas stove with exhaust
-Kitchenaid trash compactor
-Scotsman Ice Machine
-Over and under counter accent lighting
Master Bedroom:
-Heavy Molding, hardwood flooring,
-Plantation shutters on bedroom French doors opening to deck
-4 closets
Master Bath:
-Granite counter tops with double sinks
-Separate shower with glass door and delta shower system
-Jetted Tub
-14 drawer built-in cabinets for clothing
Upstairs level:
-Two bedrooms, each with full baths, tile floors, double vanities, granite countertops, ample closets and linen closets
Terrace Level:
-Spacious family room with stone fireplace and wet bar
-Guest bedroom with full bath
-Office with full bath
-Art studio or exercise room with double sink
-Separate tool room
-Laundry room/utility room with tile floors and cabinets
-Covered stone terrace with access to boathouse
Boat House:
-Two stall for up to 25 ft. boat
-2 electric boat lifts
-Large deck on top of boathouse with ½ covered roof
-Large storage area for boat supplies
-Swim dock

 Gallery KBNY
The owner of this historic and landmarked town-home renovation in Hudson Square, originally built in 1826, hired Gallery Kitchen and Bath to fully gut-renovate this 3-unit row-home. The scope of work included a full-scale renovation of the owners unit, including the renovation of the kitchen, one 4-piece master ensuite bathroom, one 3-piece bathroom with a walk-in steam shower, and a beautiful powder room. Additional work in the owners unit also included flooring, electrical upgrade, major plumbing work, new HVAC system, restoration of a fireplace, installation of a fully integrated smart home system and landmarked approved windows.
CELLAR RENOVATION IN NYC LANDMARKED TOWN-HOME
Rounding out the owners unit we renovated the cellar, which was converted into an entertainment space and featured a custom glass curtain wall, along with a custom staircase with an exposed brick wall. During the demolition phase of the cellar, our team discovered 56 wine jugs filled with wine from the prohibition era, leading us to name this project the prohibition house. For the two tenant units, Gallery Kitchen and Bath undertook the renovation of 2 kitchens, 4 bathrooms, new hardwood flooring throughout, along with detailed carpentry work in the entire home.
WHY GALLERY KITCHEN AND BATH
After interviewing multiple contractors, our client decided on Gallery Kitchen and Bath primarily because of our turnkey design, selection, and build process. In a renovation of this magnitude it is crucial to have a centralized full service contractor under one roof to handle all of the aspects and simultaneous moving parts of the project. Decentralizing the entire process by having multiple unaffiliated vendors handle various parts of the process can easily become chaotic, time consuming, and costly.
Because Gallery Kitchen and Bath undertook the entire process, from the design of the entire space to the selection and procurement of all finishes and fixtures, down to the procurement of all permits and LPC filings, it made a seemingly chaotic project a’lot more manageable.
PHASE 1: DESIGN, SELECTION, PROCUREMENT
Our client wanted the renovation to incorporate a fully modern design into his Hudson Square town-house. Being that this is a landmarked property, the exterior facade had to be restored and kept with the original aesthetic, the interior of the home however was a whole different story.
In keeping up with the modern aesthetic, our designers went to work to design a custom kitchen that included fully custom flat panel base cabinets in a white high gloss finish and an absolute matte black appliance/pantry wall. The kitchen design also included a white quartz countertop and backsplash with a waterfall edge island. To bring warmth to the modern kitchen, our designers incorporated a rifted and quartered select oak wood floor in a herringbone pattern, and custom blended stain with matte polyurethane finish. For continuity, the wood floor was also extended throughout the entire owners unit.
In the ensuite bathroom we created a “wet area” which houses a standalone soaking tub as well as a beautiful rainfall shower, completely leveled with the rest of the floor in the bathroom. Some highlights within this space include a tiled square drain, large niche cutouts with a carrera marble accents. Once again, to bring warmth to this modern bathroom, our designers incorporated a floating rustic oak vanity and carrera marble mosaic floor tile.
Last on the list on the owners unit floor was the cellar, which our client wanted to utilize as an entertainment space for his friends and family. During the design phase, we incorporated an open concept layout, wedding the indoor and outdoor space with a custom glass curtain wall. The design also included custom walnut built-ins that serve as a custom wet bar and storage piece.
With the design approved and selections made our office liaisons moved to procure all of the material selections and finishes.
PHASE 2: DEMO
Because this home is almost two centuries old, we had to take extra precaution during the interior demolition phase of the project. One specific area that we had to pay special attention to was the existing brick. Over time the mortar in old brick homes deteriorates and turns into dust – for this reason it was extremely important that a thorough and ongoing inspection of the exteriors and interior walls took place during the demolition of the space.
After 14 30-yard debris containers and 56 wine filled jugs from the prohibition era later , the demolition of this historic Hudson Square town-home came to an end. If you are wondering whether we tried the wine? After notifying the owner we agreed to open one of the jugs and try them together – nothing but vinegar.
PHASE 3: BUILD
One of the challenges in a renovation project of this scope is nailing down the logistics and delivery of fixtures and finish material. Adding to this challenge was a narrow entry door that required us to use a boom truck in order to deliver some of the larger materials on site. To ensure a succinct time schedule, we boomed all of the materials through the 3rd floor for the entire project and worked our renovation work from top floor to cellar. This technique also insured that any unexpected water issues during the renovation process would not damage a finished floor.
With all roughing and framing complete, the Gallery KBNY team proceeded to execute on the design plan.
THE REVEAL
From what was once a dilapidated town-home with nothing but potential, to a glamorous and luxurious modern interior space – the prohibition house was complete. Ready to speak with us about your renovation project? Contact us to schedule your free consultation and let Gallery KBNY show you why our all-inclusive approach to your renovation is the smartest way to renovating in NYC.
 Tile Doctor Ltd
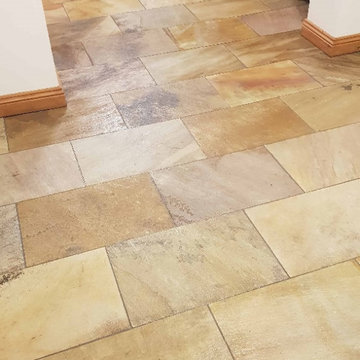
The photos on this page are of a Sandstone Kitchen floor at a house in the High Green suburb of Sheffield. The Sandstone tiles looked grubby and needed some love and attention. Our client was getting fed up trying to keep the stone clean, particularly around the kitchen area where cleaning didn’t seem to make much. You can see how dirty it had become on the before picture below, this is stark contrast to the middle of the of the kitchen where the portable kitchen island normally sits.
I went to the property to get a better look at the problem floor and carried out a small test clean to see which products and methods would have the best impact. The patch came up really clean without much difficulty, so I was confident on being able to restore its appearance.
It was clear to me the original protective sealer had worn off and dirt had become ingrained in the pores of the stone where it was proving difficult to remove. My client was very encouraged by the test clean initial result and agreed to go ahead with the quote. We arranged a suitable time to carry out the work on a day when the family would be out of the way.
I started by taping up the area to make sure the skirting and woodwork were protected from splashing. Once done a strong dilution of Tile Doctor Pro-Clean was sprayed onto Sandstone tile and grout. It was left to dwell for approximately ten minutes to help break down all the grime and dirt and was then worked into the stone using a rotary floor machine fitted with a stiff bristled brush.
This method totally transformed the dull sandstone, the stunning sandstone colours started to leap out and I could see the stone was well on its way to being transformed. The floor was then rinsed several times with water and the now soiled cleaning solution carefully removed with an industrial wet vacuum.
With the floor clean I inspected all the tiles and repeated the process until I was happy the floor was total clean. I should mention It’s not always this easy to clean a stone floor and quite often I find myself having to utilise all sorts of products and methods before I’m totally satisfied it’s as clean as it could possibly be.
With the cleaning done I left the floor to dry out overnight aided with heaters and air blowers.
I returned to seal the floor the next day checking first that the stone was dry with a damp meter. Leaving the blowers on overnight had helped and the readings I took from the floor confirmed it was now ready for sealing.
Earlier I had discussed the different types of sealer available with my clients and they had chosen to have the floor sealed with Tile Doctor Seal & Go. This works really well on Sandstone, enhancing its appearance, improving colour and of course adding protection to the stone to prevent grime and dirt stuck in the pores of the stone. Several coats were applied until I could see if was fully sealed and the right level of finish had been achieved. Sealing a floor can take some time as you need to allow each coat to dry before applying the next.
Once done the floor looked meticulously clean and the new sealer had added a lovely subtle sheen to the stone. My client was very please with the transformation and left the following feedback.
‘Very professional approach, friendly, and offered great advice throughout the job. Very pleased with the finish Cheers Matt we will see you again’
One of the problems we find with many homeowners is that for cleaning they use strong bleach-based cleaning product on their sealed tiles, and this actually strips off the sealer leaving the stone vulnerable to ingrained dirt. As a result, Tile Doctor has developed Tile Doctor Neutral Tile Cleaner, it is pH neutral and gentle enough for everyday use without affecting the sealer.
Matthew Lovett
South Yorkshire Tile Doctor
 Tile Doctor Ltd
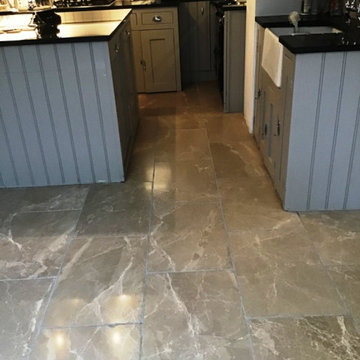
This Limestone tiled floor installed in a kitchen and family room at a property in Wellingborough is a great example of how this material can lose its appearance without a regular maintenance plan in place.
The customer called me as not only was she concerned that the floor had lost its lustre the grey grout had become very stained and almost black in heavy traffic areas, in fact my customer had originally asked about re-grouting but I was confident it could be cleaned.
I provided a quote which they were happy to accept.
The area was a nice wide 6 metre by 5 metre space and except for a few items of furniture that would need moving around there were relatively few obstacles. I reasoned the most efficient way to restore the polished appearance of the Limestone would be to use a set of diamond encrusted Burnishing Pads. These are fitted to a rotary machine and applied to the stone in sequence from coarse to smooth. It’s an effective process that cuts back the layer of dirt on the floor and then we build back up the polish.
We started burnishing the Limestone with a coarse 400-grit pad fitted to a rotary machine and applied with a little water for lubrication. The coarse pad is very good at removing dirt and old sealers from stone and once completed the resultant surface water and loose dirt is removed using a wet vacuum.
At this point I turned my attention to the badly stained grout lines, and applied a strong solution of Tile Doctor Pro-Clean which was scrubbed in along the grout lines using a stiff grout brush, this is necessary as the recessed nature of the grout makes it difficult for the rotary pads to reach it.
I then repeated the burnishing process with the medium 800-grit pad and fine 1500-grit pad, the 800-grit pad removes any small surface scratches and the 1500-grit further refines the look of the Limestone slowly restoring its polished appearance.
After the whole floor had been burnished in this way it was given a further rinse with water and the soil extracted as before. I then inspected the floor to see if more work would be needed.
I was not fully happy with how some of the grout lines had responded, some were still slightly stained, and some marks were visible in the high traffic areas. I had already discussed on my initial visit with the client that this might be the case and it was agreed between us that should this be the case I would apply a Tile Doctor Grout Colourant in Light Grey to recolour all the grout lines and achieve a uniform finish.
The stone and grout was still damp from cleaning and polishing, so I decided to leave the grout colouring until the following day.
On day two I started by grout recolouring all the grout lines, it’s a straight forward process but can be a little tedious where there is a lot of grout to cover. Once complete I allowed the grout colour to dry for a couple of hours before moving onto the next step.
The last pad to be applied in the stone burnishing process is the very fine 3000-grit polishing pad which is applied dry to the tiles using a small amount of water sprayed onto the floor and leaves the stone dry and with a polished silk finish.
The floor was then sealed using two coats of Tile Doctor Ultra Seal Sealant allowing the first coat to dry before applying the second. Ultra-Seal is an impregnating sealer that works by occupying the pores in the stone thereby preventing dirt from becoming ingrained there. It’s also a natural look sealer that doesn’t affect the appearance of the stone.
My customer was very happy with the transformation of her floor and provided the feedback copies below. In-fact she was so impressed with the results that she also used our services to restore the grout and silicon in one of her bathrooms.
“Phil was on time & easy to deal with and did an amazing job on my kitchen and bathroom floors and the carpets & sofa. No fuss, just a great job. Liz O.”
Phil Vissian
Northamptonshire Tile Doctor

 highland
Renovating a home can completely transform the way a space looks, feels, and functions, but successful improvements require thoughtful planning rather than rushing into expensive changes. These renovation tips and tricks house ideas can help homeowners organize projects, control costs, select practical materials, and create rooms that remain useful for years. Start by identifying what genuinely needs improvement, such as outdated finishes, poor lighting, inefficient storage, damaged surfaces, or an inconvenient layout. Create a realistic budget that includes materials, labor, permits where applicable, and a contingency amount for unexpected issues. Taking measurements, collecting inspiration, and deciding priorities before work begins can prevent unnecessary purchases and make the renovation process much easier to manage.
One of the most useful renovation tips and tricks house projects can benefit from is improving the layout before focusing on decoration. A beautiful room will still feel inconvenient if furniture blocks walkways or storage is insufficient. Consider how people actually use each space and whether doors, windows, lighting, electrical outlets, and storage are positioned effectively. In kitchens, for example, practical work zones and accessible storage can make everyday tasks easier. In bedrooms and living rooms, built-in shelving, multifunctional furniture, and organized storage can reduce clutter without making the space feel crowded. Whenever possible, repair or improve the existing structure before replacing everything, because thoughtful upgrades can deliver significant results without creating unnecessary renovation costs.
Choosing materials carefully is another important part of renovation tips and tricks house planning. Look beyond appearance and consider durability, maintenance, safety, and suitability for the room. High-moisture areas require materials that can handle regular exposure to water, while frequently used floors and work surfaces should be selected for durability. Neutral foundations can also provide flexibility because wall colors, textiles, artwork, and accessories can be changed later without another major renovation. Lighting deserves equal attention: combine general illumination with task and accent lighting to make rooms more functional and visually comfortable. Energy-efficient lighting, improved insulation, weather sealing, and efficient fixtures may also contribute to better long-term household performance.
Before beginning major work, divide the project into manageable stages. A useful approach is to complete structural or repair work first, followed by electrical or plumbing updates when necessary, then walls, flooring, cabinetry, fixtures, and finally decorative details. This order can reduce the chance of damaging newly finished surfaces. Keep a record of measurements, product specifications, receipts, and important project decisions so replacements or future repairs are easier. For specialized work involving structural changes, electrical systems, plumbing, gas, or other regulated areas, consult appropriately qualified professionals and follow local requirements. Among the most practical renovation tips and tricks house owners can follow is to avoid changing too many things simultaneously; completing priority areas systematically makes budgets, timelines, and quality easier to control.
Finally, focus on improvements that combine appearance with everyday usefulness. Fresh paint, updated hardware, better organization, improved lighting, refreshed flooring, and carefully selected fixtures can make a noticeable difference without requiring a complete transformation. Outdoor areas can also benefit from simple maintenance, improved lighting, seating, planting, or repaired surfaces that extend the usable living space. Before declaring the project finished, inspect each room for functionality, storage, lighting, ventilation, safety, and finishing quality. The best renovation tips and tricks house approach is not necessarily about spending more it is about making informed choices that solve real problems and create a home that feels comfortable, practical, and personal.
One of the most useful renovation tips and tricks house projects can benefit from is improving the layout before focusing on decoration. A beautiful room will still feel inconvenient if furniture blocks walkways or storage is insufficient. Consider how people actually use each space and whether doors, windows, lighting, electrical outlets, and storage are positioned effectively. In kitchens, for example, practical work zones and accessible storage can make everyday tasks easier. In bedrooms and living rooms, built-in shelving, multifunctional furniture, and organized storage can reduce clutter without making the space feel crowded. Whenever possible, repair or improve the existing structure before replacing everything, because thoughtful upgrades can deliver significant results without creating unnecessary renovation costs.
Choosing materials carefully is another important part of renovation tips and tricks house planning. Look beyond appearance and consider durability, maintenance, safety, and suitability for the room. High-moisture areas require materials that can handle regular exposure to water, while frequently used floors and work surfaces should be selected for durability. Neutral foundations can also provide flexibility because wall colors, textiles, artwork, and accessories can be changed later without another major renovation. Lighting deserves equal attention: combine general illumination with task and accent lighting to make rooms more functional and visually comfortable. Energy-efficient lighting, improved insulation, weather sealing, and efficient fixtures may also contribute to better long-term household performance.
Before beginning major work, divide the project into manageable stages. A useful approach is to complete structural or repair work first, followed by electrical or plumbing updates when necessary, then walls, flooring, cabinetry, fixtures, and finally decorative details. This order can reduce the chance of damaging newly finished surfaces. Keep a record of measurements, product specifications, receipts, and important project decisions so replacements or future repairs are easier. For specialized work involving structural changes, electrical systems, plumbing, gas, or other regulated areas, consult appropriately qualified professionals and follow local requirements. Among the most practical renovation tips and tricks house owners can follow is to avoid changing too many things simultaneously; completing priority areas systematically makes budgets, timelines, and quality easier to control.
Finally, focus on improvements that combine appearance with everyday usefulness. Fresh paint, updated hardware, better organization, improved lighting, refreshed flooring, and carefully selected fixtures can make a noticeable difference without requiring a complete transformation. Outdoor areas can also benefit from simple maintenance, improved lighting, seating, planting, or repaired surfaces that extend the usable living space. Before declaring the project finished, inspect each room for functionality, storage, lighting, ventilation, safety, and finishing quality. The best renovation tips and tricks house approach is not necessarily about spending more it is about making informed choices that solve real problems and create a home that feels comfortable, practical, and personal.

 Village Home Stores
Full-overlay Rustic Beech cabinets in the "Charleston" door style and "Briarwood" finish.
Village Home Stores
Example of a large mountain style kitchen design in Chicago
Example of a large mountain style kitchen design in Chicago
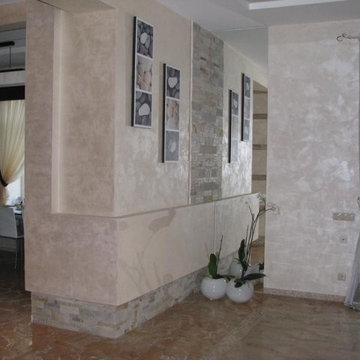
 BKNY PAINTING
Venetian plaster New York,
Venetian plaster brooklyn ny
Venetian plaster manhattan,
Venetian plaster staten island,
Venetian plaster queens ny,
Venetian plaster bronx ny,
Venetian plaster nassau county,
Venetian plaster suffolk county,
Venetian plaster long island,
Venetian plaster in brooklyn,
Venetian plaster central brooklyn,
Venetian plaster southwest brooklyn,
Venetian plaster borough park,
Venetian plaster canarsie,
Venetian plaster flatlands,
Venetian plaster southern brooklyn,
Venetian plaster northwest brooklyn,
Venetian plaster flatbush,
Venetian plaster east new york,
Venetian plaster new lots,
Venetian plaster greenpoint,
Venetian plaster sunset park,
Venetian plaster bushwick,
Venetian plaster williamsburg,
Venetian plaster in manhattan,
Venetian plaster central harlem ny,
Venetian plaster chelsea and clinton,
Venetian plaster east harlem ny,
Venetian plaster gramercy park ny,
Venetian plaster murray hill ny,
Venetian plaster greenwich village,
Venetian plaster soho manhattan,
Venetian plaster lower manhattan,
Venetian plaster lower east side,
Venetian plaster upper east side,
Venetian plaster upper west side,
Venetian plaster inwood manhattan,
Venetian plaster washington heights,

 Heritage Construction Companies, LLC.
Example of a huge trendy metal floating open staircase design in Minneapolis
 Tile Doctor Ltd
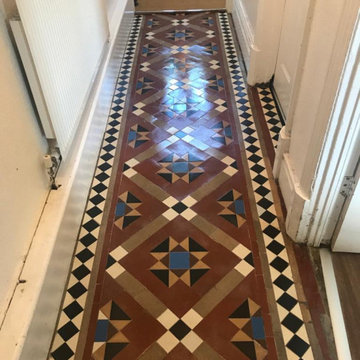
I recently worked on the restoration of a Victorian tiled hallway in Cwmbran Wales which is six miles North of Newport. As you can see from the photographs the floor was in quite a neglected dirty state and many of the the black and white border tiles needed removing and replacing. The worst part was the area by the front door where most of the tiles had been removed and then backfilled with concrete. I can only assume at some point in the past it was deemed to difficult or expensive to restore the floor, so they simply covered it up.
After visiting to survey the floor I did offer to source replacements for the concreted section and restore that as part of the work however my client’s budget would not stretch to that at the time. My quote was therefore focused on the main section of flooring and included replacing border tiles, deep cleaning the whole floor and then sealing the tiles to add protection. Although I did need to check that I could indeed source the replacement tiles before being able to provide the quote which as it turned out would not be an issue.
They were happy to go ahead and we arranged a suitable time to carry out the work which would enable me to work in the property whilst minimising contact with the owners due to the Covid-19 situation.
I spend the first day sorting out the black and white border tiles which needed to be gently prised out of position without upsetting the main part of the floor. The exposed subfloor was then cleaned up to remove old adhesive and replacements were fitted where required and secured into place. The floor would need to be solid before cleaning so that was left for day two so the new adhesive could go off overnight.
On day two I gave the floor an initial clean using a combination of Tile Doctor Pro-Clean and Remove and Go diluted with water. This produces a strong cleaner/stripper that will tackle dirt and remove coatings such as previous sealers. The old tiles had accumulated years of ingrained dirt, so I needed this extra power to remove the years of dirt and contaminates from the tile. It was sprayed onto the tiles and then left to soak in for ten minutes before being actively scrubbed into the tile using a rotary machine fitted with a black scrubbing pad. The soil was then rinsed off with water and extracted with a wet vacuum. The floor was inspected, and the process repeated on the tough stains until I was satisfied all the dirt had been removed.
Next the floor was treated to an acid wash using Tile Doctor Acid Gel using a similar method as before. This is an important treatment for these old Victorian floors that have no damp proof course as it neutralises efflorescent salts trapped in the tile which can appear as white salt deposits later. Once I was happy with the condition of the floor it was given a final rinse and left to dry off. I use a wet vacuum to remove liquids from the floor and on this last extraction I spent extra time to remove as much moisture from the tiles as possible.
I came back a few days later and after checking the tiles were dry using a damp meter, I started the application of the sealer. For this floor I applied seven coats of Tile Doctor Seal and Go for a satin finish. Tile Doctor Seal and Go is a specially formulated water-based sealer that provides both stain resistance and a durable low-sheen finish. It is perfect on a floor of this age where it leaves a lovely finish and will remain durable in what is a essentially a high traffic area.
Although we didn’t manage to sort out the area by the front door the client managed to fit a made to measure coir door mat along with carpet bar which was quite practical and looked fine so they were able to resolve that problem without blowing their budget.
The client was over the moon with results, the floor had a lovely pattern and the colours now shone through. I suggested the use of Tile Doctor Neutral Tile Cleaner to keep the floor clean and in good condition. It is neutral in pH so will ensure that the newly applied sealer stays in place and will ensure maintenance is nice and easy for them.
Paul Wales
Monmouthshire Tile Doctor
 J&S by STARK
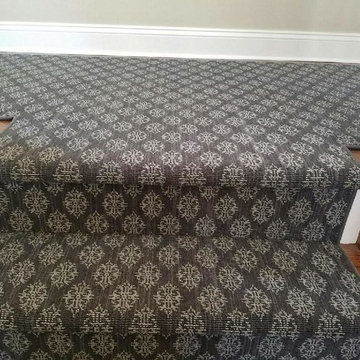
Mid-sized elegant carpeted straight wood railing home design photo in New York with carpeted risers

 Bloomington Carpet One
Example of a mid-sized classic carpeted hallway design in Minneapolis with white walls

 JM Carpets
Large country u-shaped medium tone wood floor kitchen photo in Milwaukee with white cabinets and a peninsula

 HAUS | Architecture For Modern Lifestyles
Exterior siding deails contrasts metal and wood - Bridge House - Fenneville, Michigan - Lake Michigan - HAUS | Architecture For Modern Lifestyles, Christopher Short, Indianapolis Architect, Tom Rigney, TR Builders
 Wiler Fence Company
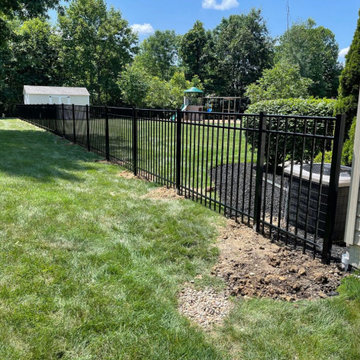
Elegant 4-Foot Black Ornamental Aluminum Fence by Wiler Fence Company – Elite EFF-20 Model Installed for a New Inground Pool in Medina, OhioWiler Fence Company recently completed a stunning 4-foot tall black ornamental aluminum fence installation in Medina, Ohio, perfectly complementing a brand-new inground swimming pool for a growing family. Manufactured by Elite Fence Products (a trusted American-made brand), the EFF-20 model delivers timeless wrought-iron style with modern durability and zero-maintenance appeal—making it an ideal choice for poolside safety, curb appeal, and long-term value.The EFF-20 is one of Elite's most popular residential-grade styles, featuring a clean, flat top rail with a subtle beveled edge for a sleek, contemporary look that mimics traditional wrought iron without the rust or upkeep. Key specifications include:Height: 4 feet (48 inches) – precisely meeting Medina's minimum 4-foot requirement for residential pool enclosures while keeping the yard feeling open and inviting.
Construction: Extruded aluminum panels with 1-1/8" x 1" horizontal rails (three rails total for strength and stability), 5/8" x 5/8" vertical pickets spaced approximately 3-13/16" apart (standard residential spacing that allows visibility while preventing small children or pets from slipping through).
Finish: Premium powder-coated black – a durable TGIC polyester coating that resists fading, chipping, and corrosion, backed by Elite's limited lifetime warranty. This rich matte-to-semi-gloss black finish enhances any home's exterior and blends beautifully with modern landscaping.
Strength: Residential-grade design supports up to 350 lbs of pressure on the top rail, ensuring it stands up to Ohio's weather extremes and everyday use.
Panels: Pre-assembled sections (typically 72.5" wide) for efficient, precise installation with minimal visible hardware (screws on one side only for a cleaner appearance from the street).
This installation was specifically chosen for the new inground pool to provide essential safety and code compliance. In Medina, Ohio, local regulations require pool fences to be at least 4 feet tall, with no more than 3 inches of ground clearance, self-closing/latching gates, and spacing that prevents a 4-inch sphere from passing through—standards the Elite EFF-20 easily satisfies (and often exceeds for pool applications). The open picket design maintains great sightlines for supervision while creating a secure barrier that deters unsupervised access.Wiler Fence Company's expert crew handled the full process seamlessly:Coordinated with the City of Medina for the required building permit and zoning certificate (including site plans and pool setback compliance—no front-yard placement, minimum distances from structures, etc.).
Called 811 for utility locates and prepared post holes to frost-line depth (typically 36-42 inches in Medina's soil) for rock-solid concrete footings.
Installed line, corner, and end posts (2" x 2" or 2-1/2" x 2-1/2" aluminum) with matching black powder coat.
Set pre-assembled EFF-20 panels level and plumb, then added self-closing, self-latching gates (with child-proof latches at least 54 inches high) for easy pool access.
Left the site spotless, with final walkthrough and city inspection passed on the first try.
The homeowners now enjoy a safe, elegant pool area that looks upscale and professional—enhancing their backyard oasis without the ongoing painting, rust worries, or sagging common with other materials. The black aluminum provides a sophisticated contrast against the pool's blue water and surrounding greenery, while the 4-foot height keeps the view open to the house and yard.At Wiler Fence Company, we're proud to bring Elite Fence Products' high-quality craftsmanship to Northeast Ohio homes. If you're adding an inground pool, upgrading your perimeter, or seeking low-maintenance elegance, the EFF-20 in black is a top performer for safety, style, and satisfaction.Ready for your own Elite aluminum fence project in Medina, Brunswick, or surrounding areas? Contact us for a free estimate today! (216) 714-3337
www.wiler.org
#WilerFenceCompany #EliteFence #OrnamentalAluminumFence #PoolFence #MedinaOhio #IngroundPool #BlackAluminumFence #NortheastOhioFencing
 highland
Plumbing issues rarely occur at a convenient moment. When selecting whom to install plumbing in Melbourne homes, one must find someone who is licensed, readily available and has the right to tell you the costs upfront before work is commenced. This guide includes what to look at prior to hiring a plumber melbourne and common hiring mistakes to avoid.
Explaining how to choose the right plumber Melbourne homeowners
Why choosing the right plumber matters
Poor plumbing repair may be more expensive to repair than the original problem. Experience, licensing, and communication are also all issues that impact on a job being done right the first time round. A few minutes checking credentials will save later on down the line. Difficult hiring choices may result in:
● Repeat callouts: Incomplete repairs, which fail once again in the matter of weeks, necessitate a visit by another tradesperson, and additional expense. ● Hidden charges: Unclear price estimates that become unexpected bills after the project has begun. ● Property damage: Rushing or unlicensed work that causes damage to pipes, fittings and adjacent walls and floors.
Check licensing and qualifications first
All plumbers operating in Victoria have to have the valid licence issued by the Building and Plumbing Commission. Licensing validates the formal training as well as legal responsibility of the work done. This is checked within a few minutes prior to securing any job. Pre-hiring ensure the following before the hiring:
● Licence number: A registered plumber is able to issue a licence number which is confirmed by the appropriate authority. ● Insurance coverage: Public liability insurance insures the property in the case of damage at the time of plumbing work. ● Trade specialization: Gas fitting and hot water work need to be covered by certain qualifications other than, in general, a plumbing licence. ● Membership bodies: The association with established industry organizations is usually an indication of continued training and accountability benchmarks.
Ask about availability and response time
Plumbing emergencies do not follow business hours. An explosion of a pipe or gas break should be addressed immediately, irrespective of the days or the time of the day. Skill is no more crucial than availability in the matter of picking a plumber. Some useful questions to ask before making a reservation are:
● Emergency availability: Checking that the callouts are not provided on weekends, evenings or during public holidays with long delays. ● Response time: Inquiring about the speed at which a plumber can commonly arrive to address an emergency in the house under contact. ● Call-out fee: An explanation of whether or not a call-out fee is charged and whether or not the fee is waived when the work is carried out. ● Service area: In this case, it will be necessary to check whether the plumber visits the given suburb of Melbourne on a regular basis.
Understand pricing before work begins
The most frustrating aspect among the plumbing customers is unclear pricing. An honest plumber discusses prices and alternatives with him/her prior to commencing any job. Written quotes insure the homeowner and the tradesperson. Fair pricing practices normally involve:
● Fixed quotes: An open quote properly quoted and then inspected, not an hourly estimate. ● Written breakdowns: Detailed expenses showing labour, materials as well as any other expenses prior to beginning of work. ● No pressure tactics: Time to study the options without requesting a decision to be made immediately on-site. ● Transparent extras: All other costs including after-hours costs would be explicitly known prior to the job.
Common errors one should not make when employing a plumber
Hasty judgments made in the plumbing crisis tended to come back to bite. The failure to do basic checks may lead to low-quality workmanship or high prices. Most frequent hiring issues are avoided with a brief wait before making a booking. Frequent mistakes include:
● Skipping licence checks: Recruiting solely on price without first ensuring they are properly licensed and insured. ● Accepting verbal quotes only: Accepting oral estimates rather than writing down, making itemised price explanations. ● Ignoring reviews: Finding a plumber without examining customer feedback in the past few reviews on different independent review sites. ● Overlooking guarantees: Not enquiring of work done, whether it comes with any part or labour warranty.
A look at the frequently asked questions
What is the average price of a Melbourne plumber?
Prices are depending on the type of job hence a written estimate is always advisable.
Is a call-out fee always charged?
Not necessarily; lots of plumbers cancel a charge after the job is done.
Is there a plumber who can do gas fitting?
No, the other licence qualification is a separate gas fitting licence qualification.
Is it necessary to base a hiring decision on reviews?
Yes, there are some patterns in the quality of reliability and workmanship according to recent reviews.
Is emergency plumbing available on weekends?
There are numerous certified plumbers who have emergency services available on weekends and after hours.
Explaining how to choose the right plumber Melbourne homeowners
Why choosing the right plumber matters
Poor plumbing repair may be more expensive to repair than the original problem. Experience, licensing, and communication are also all issues that impact on a job being done right the first time round. A few minutes checking credentials will save later on down the line. Difficult hiring choices may result in:
● Repeat callouts: Incomplete repairs, which fail once again in the matter of weeks, necessitate a visit by another tradesperson, and additional expense. ● Hidden charges: Unclear price estimates that become unexpected bills after the project has begun. ● Property damage: Rushing or unlicensed work that causes damage to pipes, fittings and adjacent walls and floors.
Check licensing and qualifications first
All plumbers operating in Victoria have to have the valid licence issued by the Building and Plumbing Commission. Licensing validates the formal training as well as legal responsibility of the work done. This is checked within a few minutes prior to securing any job. Pre-hiring ensure the following before the hiring:
● Licence number: A registered plumber is able to issue a licence number which is confirmed by the appropriate authority. ● Insurance coverage: Public liability insurance insures the property in the case of damage at the time of plumbing work. ● Trade specialization: Gas fitting and hot water work need to be covered by certain qualifications other than, in general, a plumbing licence. ● Membership bodies: The association with established industry organizations is usually an indication of continued training and accountability benchmarks.
Ask about availability and response time
Plumbing emergencies do not follow business hours. An explosion of a pipe or gas break should be addressed immediately, irrespective of the days or the time of the day. Skill is no more crucial than availability in the matter of picking a plumber. Some useful questions to ask before making a reservation are:
● Emergency availability: Checking that the callouts are not provided on weekends, evenings or during public holidays with long delays. ● Response time: Inquiring about the speed at which a plumber can commonly arrive to address an emergency in the house under contact. ● Call-out fee: An explanation of whether or not a call-out fee is charged and whether or not the fee is waived when the work is carried out. ● Service area: In this case, it will be necessary to check whether the plumber visits the given suburb of Melbourne on a regular basis.
Understand pricing before work begins
The most frustrating aspect among the plumbing customers is unclear pricing. An honest plumber discusses prices and alternatives with him/her prior to commencing any job. Written quotes insure the homeowner and the tradesperson. Fair pricing practices normally involve:
● Fixed quotes: An open quote properly quoted and then inspected, not an hourly estimate. ● Written breakdowns: Detailed expenses showing labour, materials as well as any other expenses prior to beginning of work. ● No pressure tactics: Time to study the options without requesting a decision to be made immediately on-site. ● Transparent extras: All other costs including after-hours costs would be explicitly known prior to the job.
Common errors one should not make when employing a plumber
Hasty judgments made in the plumbing crisis tended to come back to bite. The failure to do basic checks may lead to low-quality workmanship or high prices. Most frequent hiring issues are avoided with a brief wait before making a booking. Frequent mistakes include:
● Skipping licence checks: Recruiting solely on price without first ensuring they are properly licensed and insured. ● Accepting verbal quotes only: Accepting oral estimates rather than writing down, making itemised price explanations. ● Ignoring reviews: Finding a plumber without examining customer feedback in the past few reviews on different independent review sites. ● Overlooking guarantees: Not enquiring of work done, whether it comes with any part or labour warranty.
A look at the frequently asked questions
What is the average price of a Melbourne plumber?
Prices are depending on the type of job hence a written estimate is always advisable.
Is a call-out fee always charged?
Not necessarily; lots of plumbers cancel a charge after the job is done.
Is there a plumber who can do gas fitting?
No, the other licence qualification is a separate gas fitting licence qualification.
Is it necessary to base a hiring decision on reviews?
Yes, there are some patterns in the quality of reliability and workmanship according to recent reviews.
Is emergency plumbing available on weekends?
There are numerous certified plumbers who have emergency services available on weekends and after hours.
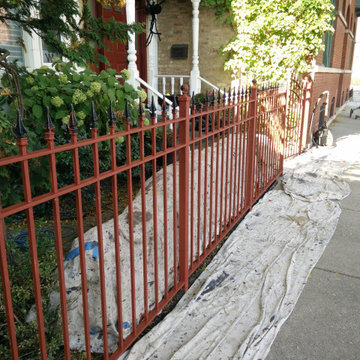 Windy City Painters
Iron Fence Painting in Wicker Park: A Windy City Painters Case Study
Iron fence painting in Wicker Park is one of the most requested exterior services Windy City Painters performs each season, and this recent project shows exactly why. Set behind an ornate 1890s greystone two-flat, the client's wrought iron fence had endured years of Chicago winters without professional attention. Rust had spread across the pickets, the original black enamel was flaking away in sheets, and the fence's structural hardware had begun to loosen at several joints.
As the trusted local expert for Chicago's North Side and Near West Side, Windy City Painters approached this project the same way we approach every iron fence painting job in Wicker Park: with a methodical, multi-step process designed to outlast Midwest weather rather than simply mask the damage.
The Process, Step by Step
Step 1 — Rust Removal and Surface Preparation. Our crew wire-brushed and mechanically ground every rusted section down to clean, stable metal. For pitted or heavily corroded areas, we applied a chemical rust converter to neutralize corrosion at the molecular level before any coating touched the surface. Furthermore, because this greystone was built well before 1978, Windy City Painters tested the existing paint layers for lead and followed strict containment protocols throughout the removal process.
Step 2 — Spot Repairs. Loose pickets were re-secured, small pits were filled, and hardware at the gate hinges was tightened. In contrast to a quick spray-paint refresh, this stage ensures the fence is structurally sound before a single drop of primer goes on.
Step 3 — Priming. A full coat of rust-inhibiting primer, engineered specifically for ferrous metal, was applied by brush to every surface — with particular attention to welds and joints where moisture tends to collect and restart the corrosion cycle.
Step 4 — Topcoat Application. Two finish coats of industrial-grade, direct-to-metal enamel were applied by brush and roller. This built a durable, uniform barrier in classic gloss black, the most popular finish among Wicker Park's historic properties. Finally, our team inspected every inch of the fence for thin spots or missed sections before calling the job complete.
Project Specs
Surface: Ornamental wrought iron fence, posts, and gate hardware
Products used: Rust-inhibiting DTM primer, chemical rust converter, industrial-grade direct-to-metal enamel
Coats applied: 1 primer coat, 2 finish coats
Finish: Gloss black
Timeline: Completed in under two days
Advice for Wicker Park Homeowners
Before starting a similar iron fence painting project in Wicker Park, homeowners should keep a few things in mind. Notably, never paint directly over active rust — trapped moisture underneath will cause the new coat to fail within a season. Additionally, always ask whether a contractor tests for lead paint on pre-1978 homes, since many Wicker Park greystones fall into that category. Meanwhile, hand brushwork matters: the intricate scrollwork common on Wicker Park ironwork requires careful, detailed application that spray equipment simply cannot replicate. Therefore, hiring a crew experienced specifically in historic Chicago ironwork, like Windy City Painters, makes a measurable difference in the finished result.
Windy City Painters also handles related exterior and interior work for Wicker Park properties, including interior painting, drywall and plaster repair, and additional metal refinishing for porches and railings.
Iron fence painting in Wicker Park protects one of the neighborhood's most defining architectural features while restoring curb appeal instantly. As a result, this greystone now has a fence that matches the quality of the home behind it — and will hold up through many more Chicago winters.
See more of our work and request a free estimate at www.windypainters.com.
Ready to transform your Wicker Park home? Contact Windy City Painters for a free estimate — visit www.windypainters.com today. Proudly serving Wicker Park, West Town, Lincoln Park, Roscoe Village, Lakeview, Ukrainian Village, River North, and all of Chicago.
 Gallery KBNY
The owner of this historic and landmarked town-home renovation in Hudson Square, originally built in 1826, hired Gallery Kitchen and Bath to fully gut-renovate this 3-unit row-home. The scope of work included a full-scale renovation of the owners unit, including the renovation of the kitchen, one 4-piece master ensuite bathroom, one 3-piece bathroom with a walk-in steam shower, and a beautiful powder room. Additional work in the owners unit also included flooring, electrical upgrade, major plumbing work, new HVAC system, restoration of a fireplace, installation of a fully integrated smart home system and landmarked approved windows.
CELLAR RENOVATION IN NYC LANDMARKED TOWN-HOME
Rounding out the owners unit we renovated the cellar, which was converted into an entertainment space and featured a custom glass curtain wall, along with a custom staircase with an exposed brick wall. During the demolition phase of the cellar, our team discovered 56 wine jugs filled with wine from the prohibition era, leading us to name this project the prohibition house. For the two tenant units, Gallery Kitchen and Bath undertook the renovation of 2 kitchens, 4 bathrooms, new hardwood flooring throughout, along with detailed carpentry work in the entire home.
WHY GALLERY KITCHEN AND BATH
After interviewing multiple contractors, our client decided on Gallery Kitchen and Bath primarily because of our turnkey design, selection, and build process. In a renovation of this magnitude it is crucial to have a centralized full service contractor under one roof to handle all of the aspects and simultaneous moving parts of the project. Decentralizing the entire process by having multiple unaffiliated vendors handle various parts of the process can easily become chaotic, time consuming, and costly.
Because Gallery Kitchen and Bath undertook the entire process, from the design of the entire space to the selection and procurement of all finishes and fixtures, down to the procurement of all permits and LPC filings, it made a seemingly chaotic project a’lot more manageable.
PHASE 1: DESIGN, SELECTION, PROCUREMENT
Our client wanted the renovation to incorporate a fully modern design into his Hudson Square town-house. Being that this is a landmarked property, the exterior facade had to be restored and kept with the original aesthetic, the interior of the home however was a whole different story.
In keeping up with the modern aesthetic, our designers went to work to design a custom kitchen that included fully custom flat panel base cabinets in a white high gloss finish and an absolute matte black appliance/pantry wall. The kitchen design also included a white quartz countertop and backsplash with a waterfall edge island. To bring warmth to the modern kitchen, our designers incorporated a rifted and quartered select oak wood floor in a herringbone pattern, and custom blended stain with matte polyurethane finish. For continuity, the wood floor was also extended throughout the entire owners unit.
In the ensuite bathroom we created a “wet area” which houses a standalone soaking tub as well as a beautiful rainfall shower, completely leveled with the rest of the floor in the bathroom. Some highlights within this space include a tiled square drain, large niche cutouts with a carrera marble accents. Once again, to bring warmth to this modern bathroom, our designers incorporated a floating rustic oak vanity and carrera marble mosaic floor tile.
Last on the list on the owners unit floor was the cellar, which our client wanted to utilize as an entertainment space for his friends and family. During the design phase, we incorporated an open concept layout, wedding the indoor and outdoor space with a custom glass curtain wall. The design also included custom walnut built-ins that serve as a custom wet bar and storage piece.
With the design approved and selections made our office liaisons moved to procure all of the material selections and finishes.
PHASE 2: DEMO
Because this home is almost two centuries old, we had to take extra precaution during the interior demolition phase of the project. One specific area that we had to pay special attention to was the existing brick. Over time the mortar in old brick homes deteriorates and turns into dust – for this reason it was extremely important that a thorough and ongoing inspection of the exteriors and interior walls took place during the demolition of the space.
After 14 30-yard debris containers and 56 wine filled jugs from the prohibition era later , the demolition of this historic Hudson Square town-home came to an end. If you are wondering whether we tried the wine? After notifying the owner we agreed to open one of the jugs and try them together – nothing but vinegar.
PHASE 3: BUILD
One of the challenges in a renovation project of this scope is nailing down the logistics and delivery of fixtures and finish material. Adding to this challenge was a narrow entry door that required us to use a boom truck in order to deliver some of the larger materials on site. To ensure a succinct time schedule, we boomed all of the materials through the 3rd floor for the entire project and worked our renovation work from top floor to cellar. This technique also insured that any unexpected water issues during the renovation process would not damage a finished floor.
With all roughing and framing complete, the Gallery KBNY team proceeded to execute on the design plan.
THE REVEAL
From what was once a dilapidated town-home with nothing but potential, to a glamorous and luxurious modern interior space – the prohibition house was complete. Ready to speak with us about your renovation project? Contact us to schedule your free consultation and let Gallery KBNY show you why our all-inclusive approach to your renovation is the smartest way to renovating in NYC.
172