
Search results for "Intensifies" in Home Design Ideas

 Spire North
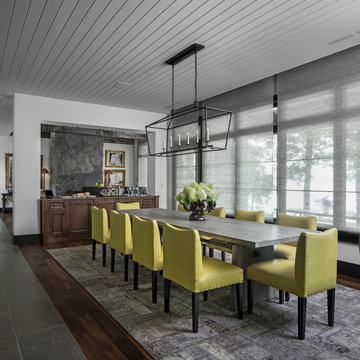
Tucked away in the backwoods of Torch Lake, this home marries “rustic” with the sleek elegance of modern. The combination of wood, stone and metal textures embrace the charm of a classic farmhouse. Although this is not your average farmhouse. The home is outfitted with a high performing system that seamlessly works with the design and architecture.
The tall ceilings and windows allow ample natural light into the main room. Spire Integrated Systems installed Lutron QS Wireless motorized shades paired with Hartmann & Forbes windowcovers to offer privacy and block harsh light. The custom 18′ windowcover’s woven natural fabric complements the organic esthetics of the room. The shades are artfully concealed in the millwork when not in use.
Spire installed B&W in-ceiling speakers and Sonance invisible in-wall speakers to deliver ambient music that emanates throughout the space with no visual footprint. Spire also installed a Sonance Landscape Audio System so the homeowner can enjoy music outside.
Each system is easily controlled using Savant. Spire personalized the settings to the homeowner’s preference making controlling the home efficient and convenient.

Find the right local pro for your project
 Tile Doctor Ltd
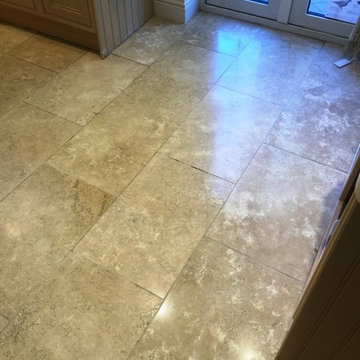
This customer, who lives in East Byfleet had been experiencing difficulties in keeping her fantastic Travertine tiled kitchen floor in good condition. Over the years it had suffered from a heavy build up of dirt and oily stains, not to mentioned a number of cracks and small holes. Needless to say, the customer was keen to restore the Travertine tiles to their former glory.
To begin the restoration, I applied Tile Doctor Remove and Go across the entirety of the large tiled area. This heavy duty remover breaks down any old sealers and other coatings, leaving the area ready to cleaned or, in this case, burnished.
Burnishing is a method for cleaning and polishing certain types of high-end stone, including Travertine, Marble, and Limestone. Our burnishing system involves the application of four diamond encrusted pads of varying grits. Firstly, I applied the Coarse grit pad, which helps to break down any dirt and stains on the surface of the tiles. Then, I worked my way through the Medium, Fine, and Very Fine pads, using a little water as lubricant, to gradually refine the polish on the Travertine. It was then rinsed and left to dry.
To round off the first day of work, I filled any cracks and holes using our two-part resin system which greatly improved the look of the tile.
The following day I returned to the property to seal the tiles checking first that the floor had dried. All was well so I proceeded to seal the floor using our colour intensifying impregnating sealer Tile Doctor Colour Grow. Once that was dry, I added the finishing touches by buffing the floor with a soft white buffing pad. As you can see from the photographs, the combination of a fresh seal and polish worked wonders.
We did such a good job with the floor that the customer asked if we could also improve the appearance of their natural stone fireplace which was suffering from bad rust and oil stains however I do a separate write up on that.
Wayne White
West Surrey Tile Doctor
 Tile Doctor Ltd
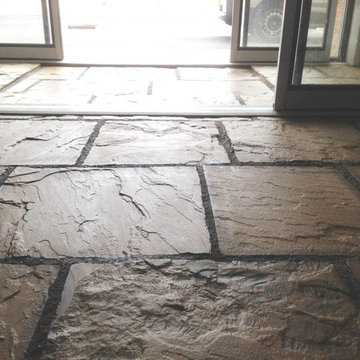
We work on a lot of residential tile installations but also cover commercial properties too, such as this new farm office which was in the process of being built in the market town of Driffield, East Yorkshire where a Flagstone tiled floor had been laid at the entrance. Driffield is known as the ‘Capital of the Yorkshire Wolds’ and lies near the source of the River Hull.
The farm office project was very big and, with the pressure on to complete it in time, the floor had been laid without being sealed first. As a result, the floor was getting dirty very easily, and was proving difficult to keep clean. It was clear that the Flagstone tiles would need to be cleaned and sealed, and I was called upon to get the job done.
To clean the floor I first mixed a 50:50 solution of clean water and Tile Doctor Pro Clean. Pro Clean is a high-alkaline cleaner which is safe to use on a wide range of natural stone floors. The cleaning solution was worked in using a rotary machine fitted with a black buffing pad which proved an effective method, lifting off the dust and residue that had been left on the surface of the Flagstone tiles during the course of construction work.
The excess residue was extracted using a wet-vac machine. I then repeated the whole process over again several times in order to get the floor as clean as possible.
To seal the floor I used a combination of two different Tile Doctor sealers. Firstly, I applied a layer of Tile Doctor Colour Grow to the floor. This colour intensifying sealer is specially formulated to enhance the fantastic natural colours in the stone, while at the same time providing durable surface protection.
The floor was then finished off with a couple of coats of Tile Doctor Seal & Go. This added to the stain resistance of the floor, while also delivering a very nice subtle shine on the surface.
All signs of building work have been removed from the stone floor and it is now looking presentable ready for the opening of the new office, the combination sealer applied to the floor will also make sure it stays that way for some time to come.
Ronnie Phipps
East Yorkshire Tile Doctor
 Tile Doctor Ltd
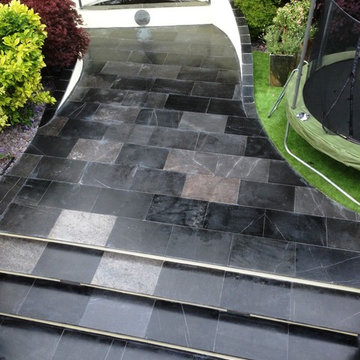
Details of a Limestone patio I was asked to clean at a property in the affluent neighbourhood of Alderly Edge, Cheshire, famous for being the home of choice for several Premier League footballers. In fact Alderly Edge, which lies not too far south of Manchester and is one of the most sought after places to live in the UK. My client was unhappy with the look of the patio had previously been sealed using a topical sealer, and this had left the tiles looking dull and lifeless.
Limestone is a fantastic natural stone, popularly used for internal floors as well as patios, it comes in a variety of fantastic colours and shades. What my client really wanted for the patio was a wet look to bring out the character of the Limestone. So, my job was to strip the old sealer off and replace it will one that would achieve the desired finish.
To strip the old sealer from the patio, I used a series of fine diamond encrusted burnishing pads which are applied in order from Coarse, Medium, Fine and then Super Fine. The coarse pad is effective at stripping off sealer without damaging the tile, and without the need to use a liquid product. The finer burnishing pads then rebuild the appearance of the Limestone to provide a nice deep shine.
The new sealer of choice was Tile Doctor Colour Grow, which can be used on both internal and external natural stone surfaces. Colour Grow is an impregnating sealer which penetrates deep into the pores of the stone, providing both long-lasting resistance and durable protection against ingrained dirt and stains. As you can see from the photos, Colour Grow is also specially formulated to intensify the natural colours in the stone, and it really helped to bring the Limestone back to life again.
The finished job left this patio with the wet, polished look my client had requested. She was very pleased with the result and amazed by just how quickly such a marked difference could be made. Another happy client!
Steve Keary
North Cheshire Tile Doctor
 Trilogy Construction Company
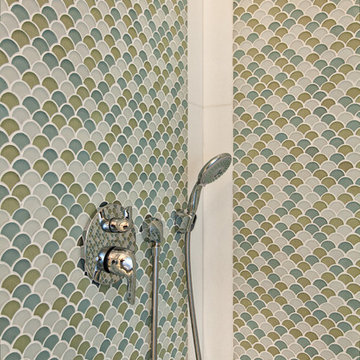
Great glass scallop tile detail. This tile is bordered by slabs of white marble.
Bathroom - modern bathroom idea in Miami
Bathroom - modern bathroom idea in Miami

 Breathe Design Studio
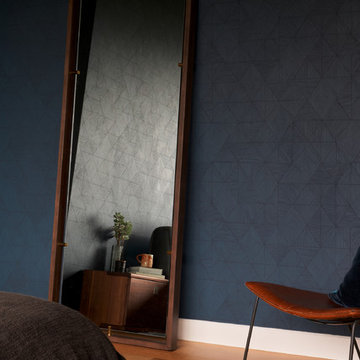
Completed in 2018, this Westlake Hills duplex, designed by Alterstudio Architects, underwent a dramatic transformation by mixing light & airy with dark & moody design. The goal of the project was to create a more intimate environment using a more saturated and dramatic palette. Additionally, it draws from warmer wood tones such as walnut alongside luxurious textures, particularly in navy, dark grey, and emerald green. The end result is an elegant, timeless, and comfortable space conducive to cozying up with a book at the end of a long day.
 Gappsi
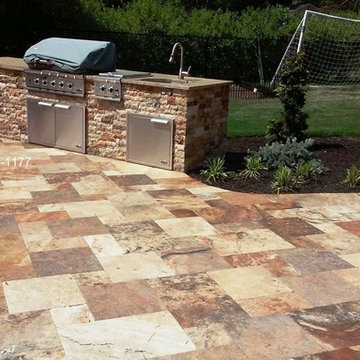
In this backyard design at a private residence on Long Island, the Fiorito Travertine French Pattern was used for the patio as well as the custom barbecue veneer. Gappsi is a direct importer of various Natural Stones. Gappsi provides all supplies & installation of natural stone pavers and wall veneers. In this particular design, you can see the movement of the fiorito travertine's vibrant colors. The high gloss sealer intensifies the details of the natural stone veins. To learn more about our natural stone products you may visit our showroom where you can browse our displayed selection. Our water based urethane sealer is environmentally safe to plants and pets, while rejuvenating your old distressed pavers or simply protecting your newly installed patio or driveway.
Gappsi provides Gunite, Vinyl, Fiberglass Swimming pools and Hot Tubs for Residential and commercial application in Suffolk and Nassau County Long Island NY, http://gappsi.com/long-island-swimming-pool-companies-designs-builders-construction-ny.html
Gappsi also provides Design and installation of Landscape and Masonry for all Suffolk and Nassau County Long Island NY. http://gappsi.com/landscape-design-long-island-ny-landscaping-companies.html
Gappsi also provides Home Remodeling Kitchens and Baths Roofing and siding for residence of Suffolk and Nassau County Long Island NY. http://gappsi.com/long-island-home-improvement-remodeling-general-contractor-ny.html
If in need of Lawn and garden irrigation, in Suffolk and Nassau Gappsi can provide these services http://gappsi.com/irrigation/ along with PVC, wood aluminum and lop-loc fences installation. http://gappsi.com/fences/
To preserve and beautify your natural Paving stones in Suffolk and Nassau County Long Island NY Gappsi offers cleaning and sealing of patios Driveways and retaining walls. For commercial and residential Applications in Suffolk and Nassau County Long Island NY. http://gappsi.com/patio-cleaning-and-sealing/
Our Showroom displays the most unique Travertine, Porphyry, Granite, Marble, Limestone and Sandstone pavers along with pool copings and veneers. Ready to be picked up at our Yard at 1015 West Jericho Turnpike Smithtown NY or delivered to your Location in Suffolk and Nassau County Long Island NY http://pavingstoneselect.com/
To complete your landscapes outdoor Sports and recreations Gappsi offers Bocce Courts, Putting greens, Sports and Tennis Courts also supply and installation of Synthetic Turf. http://deckandpationaturalstones.com/artificial-grass-synthetic-turf-installation-long-island-ny.html+
 Tile Doctor Ltd
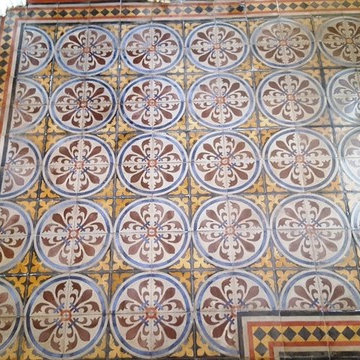
This very old Encaustic tiled flooring was uncovered at a property in Chester when the present owners started to undertake renovation. They removed the carpets and vinyl tiles from the hallway, revealing the Encaustic tiles to find that they were in truly horrific condition. This included being covered by heavy dirt, dust and, in some parts, by a sticky black bitumen.
Encaustic tiles are made out of compressed cement, and were commonly used in properties built during the Edwardian and Victorian period. This gives us a good idea of just how old these tiles are – but the owners were keen to see what Tile Doctor could do to restore their condition.
The black bitumen was my main concern when it came to cleaning the tiles. To remove this, along with all the other dirt and dust, our powerful cleaner for heavy soil buildup, known as Tile Doctor Remove and Go, was applied.
The product, which is also effective for removing adhesive and paint stains, was worked into the tiles then left to dwell for thirty minutes, before being scrubbed with a black pad fitted to a rotary machine. The resulting cleaning residue was soaked up with a wet vac machine. This cleaning process was repeated once more over to get the tiles as clean as possible, before leaving them to dry overnight.
The next day, damp readings were taken to make sure the floor was dry enough to seal. It’s essential to take damp readings before sealing – especially with old tiled floors that may not have a damp proof membrane installed – as even the slightest amount of excess moisture can damage the performance of the sealer.
Two types of sealer were used in this situation. First to be applied was a single coat of Tile Doctor Colour Grow, an impregnating, colour intensifying sealer which enhances the best shades in the tiles. Following this, four coats of Tile Doctor Seal and Go were applied. This is a topical sealer, which means it builds a layer of protection on the surface of the floor, while also providing an aesthetically pleasing low-sheen finish.
The customer was over the moon at the end result. At first the floor looked to be with a lost cause, but with the right cleaning methods and products it has been a restored to a standard where it almost appears new. Another satisfied customer!
Alastair Robb
West Cheshire Tile Doctor
 Tile Doctor Ltd
Another quick job here in Cheshire, this time in the town of Wilmslow. Much like Alderly Edge, where I recently completed another job, Wilmslow is an affluent area known for its upmarket lifestyle and as a popular option for residence amongst celebrities and famous figures. In fact it is currently, and has previously been, home to several Premier League footballers from the nearby clubs Manchester United and Manchester City.
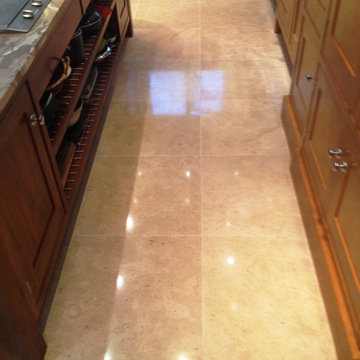
This job was another case of where a tiled floor had lost its shine due to the sealer wearing away over time. In this instance, my client had a Travertine tiled floor in her kitchen that she wanted to me to restore back to looking at its best.
Travertine is a fantastic natural stone which possesses unique features that no other stone can offer. It offers a particularly distinctive design style, making it a popular choice both for commercial and residential use. Many homeowners use Travertine tiles for kitchen flooring, bathroom walls and floors and for external floors, such as patios.
The process of stripping off old sealer can be done effectively and relatively quickly without using a liquid stripper. The best method is to use a series of fine diamond encrusted burnishing pads, which is exactly what I did in this case. The burnishing pads are applied in sequence from coarse, medium, fine and superfine to remove the old sealer without damaging the Travertine and then re-polish to a lovely polished shine.
One the floor had been burnished, rinsed and dried; I proceeded to re-seal the floor with Tile Doctor Colour Grow. Colour Grow is particularly effective when to seal porous natural stone surfaces such as Travertine and Limestone, whether internal or external. This is because the product is specially formulated to penetrate deep into the pores of the stone, providing durable surface protection from within.
The other key benefit of Colour Grow is that it intensifies the colours within the stone, as you can from the photos. This adds additional character and flair to already impressive household features like this Travertine floor.
The finished results were exactly what my client had hoped for. It goes to show that with the right methods and know-how such a big difference can be made to the appearance of tiled floors. I was very happy to help.
Steve Keary
North Cheshire Tile Doctor
 Interior Pros - Design Studio
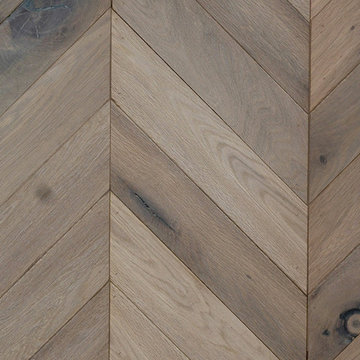
The grey trend has evolved in the last twelve months. Nowadays browns, beige and a touch of grey are in demand. Greige is the new buzzword.
Heavier hand scraped or contoured products, the rage that started around 2005 has taken a back seat in most areas, while a softer wire brushed "ceruse effect" seen mostly on White Oak has been remarkably strong showing no effects of becoming “dated” like the others mentioned.
Ceruse Color Possibilities
There are numerous color combinations to the "cerused" process with the most popular being white or off white. This design trend in hardwood flooring can have darker gray white oak with a mild ceruse off white effect.
There are limitless possibilities in either a prefinished hardwood floor or with what we can create for you in a custom on-site finished hardwood floor.
If something suits your fancy, contact us and we can work on creating just the look and sense of style you are looking for.
 Tile Doctor Ltd
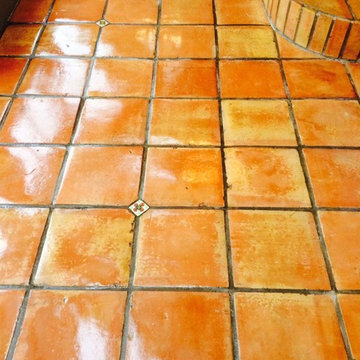
This Terracotta tiled floor was installed in the conservatory of a house in the old market town of Garstang, Lancashire, famous for being the world’s first ever ‘Fairtrade Town’.
There were quite a few problems with this floor; for one, my client had not re-sealed the tiles in many years and had therefore allowed the existing seal to become very worn and almost completely ineffectual. This had subsequently allowed the floor to become very dirty and marked with white blotches. These white blotches had occurred where the fertilizer held in decorative plant pots had started to eat away at the sealer.
The tiles were cleaned with a strong solution of Tile Doctor Pro-Clean, which is a strong alkaline cleaner. The solution was liberally applied to the floor and left to dwell for a short period, allowing time for the cleaner to seep into the pores of the Terracotta and lift the ingrained dirt to the surface. The solution was then agitated using a black scrubbing pad fitted to a heavy rotary machine, making a marked difference to the appearance of the tiles within a matter of minutes.
Tile Doctor Acid Gel was then used to spot treat the white marks, the acid content in the product breaks down the alkaline salts that had developed, left behind by the leaked plant fertilizer.
The entire floor was then rinsed several times to remove the soiled cleaning residue and the excess moisture was extracted using a wet-vac machine.
The Terracotta tiles were left to dry for an entire week as there was no evident damp proof membrane in place at the property. I used damp testers to approximate when the tiles would be dry enough to seal, which was very important as any excess moisture can upset the performance of the sealer.
My first choice of sealer was Tile Doctor Colour Grow, an impregnating sealer that also intensifies the natural colours in the stone. A single coat of Colour Grow was applied, before I opted to follow this up with six coats of Tile Doctor Seal & Go, which provides a very robust surface seal and also helped to give the Terracotta the aesthetically pleasing my client had requested.
Before leaving the property with its newly restored Terracotta tiled conservatory, I made sure to give my client some tile maintenance advice. Needless to say, she was very pleased with the results.
Russell Taylor
Lancashire Tile Doctor
 Tile Doctor Ltd
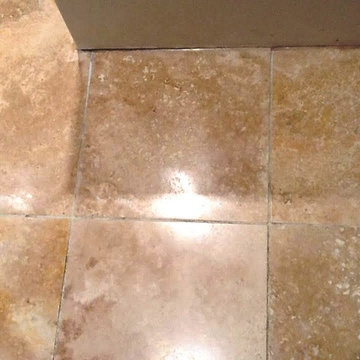
Earlier this month I was in the town of Northampton, to see a client who had reported a problem with her Travertine kitchen tiles. Basically the grout between the tiles was badly stained, to the point of appearing almost black.
The Travertine tiles were also in need of some maintenance, and so I was commissioned to provide a clean, polish and a fresh seal. Travertine is a popular choice for kitchen flooring due to its relatively high durability and distinct features. My task was to get this floor back to looking its best.
My priority was to address the badly stained grout so I cleaned the grout lines by hand using a combination of hand brushes and Tile Doctor Grout Clean-Up. The surface was pre-wet with water, before a solution of Grout-Clean Up and clean water was applied to the surface. The brushes were then used to agitate the solution. Grout Clean-Up contains a mix of concentrated phosphoric acid and cleaner designed to penetrate below the surface of the grout to remove grout stains, smears and mineral deposits.
As you can see from the photos, Grout Clean-Up made an immediate difference to the appearance of the tiles. This product is suitable for use on masonry and acid resistant surfaces. After completing the clean, I gave the floor a thorough rinse to neutralise the floor after cleaning and removed as much of the water as possible using a wet vacuum.
Following this, I paid attention to the tiles themselves, cleaning them to achieve a polished effect by using a system of burnishing pads. Tile Doctor burnishing pads comprise a set of four pads varying in grit type, from Coarse and Medium to Fine and Very Fine. I applied all four pads in turn to the floor, stopping to rinse the floor in between each. The result was a high quality polished finish.
I then left the floor to dry completely overnight, before commencing the seal the next day. My choice of sealing product was Tile Doctor Colour Grow which is a colour intensifying sealer that both enhances the natural appearance of the stone and provides a durable surface seal.
My client was very pleased with the finished product, and left the following comment on the Tile Doctor feedback system: “efficiently done”, yielding “good results”.
Phil Vissian
Northamptonshire Tile Doctor
 Village Home Stores
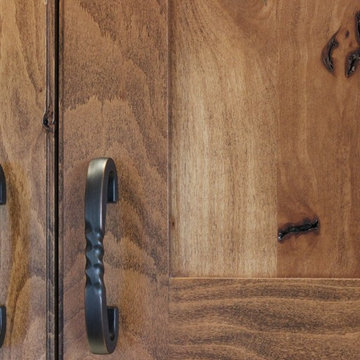
Full-overlay Rustic Beech cabinets in the "Charleston" door style and "Briarwood" finish.
Village Home Stores
Example of a large mountain style kitchen design in Chicago
Example of a large mountain style kitchen design in Chicago
 Heritage Construction Companies, LLC.
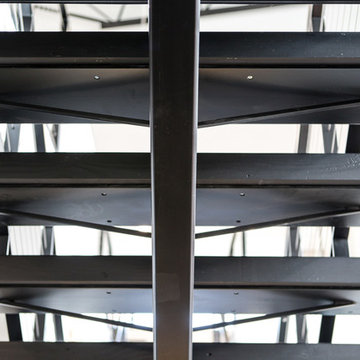
Example of a huge trendy metal floating open staircase design in Minneapolis

 Tile Doctor Ltd
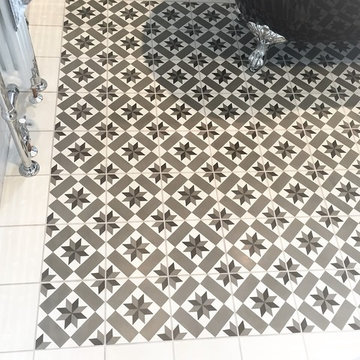
I’m often asked if you should seal a tile before grouting and the answer is a definite yes, and this Encaustic Cement tiled bathroom floor installation in Stockport is a great example as to why. The tiles had not been sealed before grouting and then, once the tiler went to grout the newly installed tiles with a grey grout, the colour ran into the tiles, staining them and leaving them looking grubby and dirty. Had the tiles been sealed it would of made the process of removing the grout from the surface of the tile much easier.
If you haven’t come across them before Encaustic cement tiles are often hand painted and are available in a range of beautifully artistic patterns, so it was a real shame that these tiles were allowed to be spoilt by an avoidable mistake. As you can imagine, the property owner was keen to have the tiles professionally restored, and she contacted me to get the job done. I took some photographs but I’m not sure that they do justice to the problem.
Rather than use a liquid cleaning product, I opted to use diamond encrusted handheld burnishing pads to remove the grout stains. Our burnishing system comprises four pads of varying grits. I started with the Coarse grit burnishing pads applying to the tiles it with a small amount of water as lubricant to grind down the grubby marks. Following this I worked my way through the system, applying Medium, Fine and Very Fine pads to gradually restore the appearance of the floor. Once the burnishing process has been completed I rinsed the tiles and then accelerated the drying process using a heat gun to prepare them to be sealed.
Removing any excess moisture before sealing is essential as even a small amount can cloud the sealer and prevent it from properly protecting the tiles from dirt and stains. Once satisfied that the floor was dry, I proceeded to seal it using Tile Doctor Colour Grow. As an impregnating sealer Colour Grow penetrates deep into the pores of the stone to fill them and thus prevent dirt from becoming ingrained. Colour Grow’s colour intensifying properties also really accentuated the patterns of the Encaustic Cement tiles.
Now that these fantastic tiles have been properly sealed it will be far easier for the customer to keep them clean in future. Needless to say, she was very happy with the result. We recommend topping up your sealer on a regular basis to ensure problems like those which occurred here do not damage the appearance of your tiles.
Steve Keary
Greater Manchester Tile Doctor
 Bloomington Carpet One
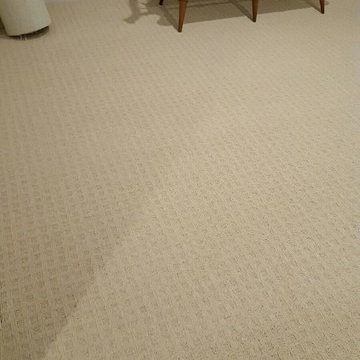
Example of a mid-sized classic carpeted hallway design in Minneapolis with white walls
8