
Search results for "Intensifies" in Home Design Ideas
 Tile Doctor Ltd
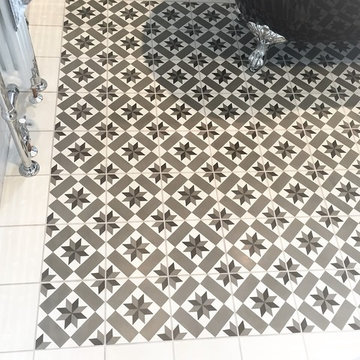
I’m often asked if you should seal a tile before grouting and the answer is a definite yes, and this Encaustic Cement tiled bathroom floor installation in Stockport is a great example as to why. The tiles had not been sealed before grouting and then, once the tiler went to grout the newly installed tiles with a grey grout, the colour ran into the tiles, staining them and leaving them looking grubby and dirty. Had the tiles been sealed it would of made the process of removing the grout from the surface of the tile much easier.
If you haven’t come across them before Encaustic cement tiles are often hand painted and are available in a range of beautifully artistic patterns, so it was a real shame that these tiles were allowed to be spoilt by an avoidable mistake. As you can imagine, the property owner was keen to have the tiles professionally restored, and she contacted me to get the job done. I took some photographs but I’m not sure that they do justice to the problem.
Rather than use a liquid cleaning product, I opted to use diamond encrusted handheld burnishing pads to remove the grout stains. Our burnishing system comprises four pads of varying grits. I started with the Coarse grit burnishing pads applying to the tiles it with a small amount of water as lubricant to grind down the grubby marks. Following this I worked my way through the system, applying Medium, Fine and Very Fine pads to gradually restore the appearance of the floor. Once the burnishing process has been completed I rinsed the tiles and then accelerated the drying process using a heat gun to prepare them to be sealed.
Removing any excess moisture before sealing is essential as even a small amount can cloud the sealer and prevent it from properly protecting the tiles from dirt and stains. Once satisfied that the floor was dry, I proceeded to seal it using Tile Doctor Colour Grow. As an impregnating sealer Colour Grow penetrates deep into the pores of the stone to fill them and thus prevent dirt from becoming ingrained. Colour Grow’s colour intensifying properties also really accentuated the patterns of the Encaustic Cement tiles.
Now that these fantastic tiles have been properly sealed it will be far easier for the customer to keep them clean in future. Needless to say, she was very happy with the result. We recommend topping up your sealer on a regular basis to ensure problems like those which occurred here do not damage the appearance of your tiles.
Steve Keary
Greater Manchester Tile Doctor
 Tile Doctor Ltd
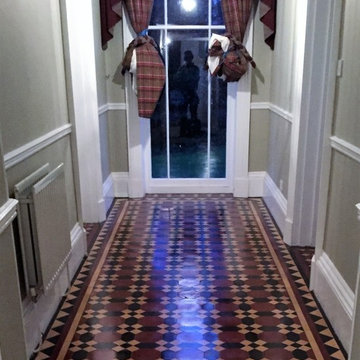
It’s fairly common for owners of older properties – especially houses those that are over 100 years old or more – to find original Victorian tiled flooring hidden underneath carpet. It can wait years for the tiles to be discovered, by which time they have amassed huge amounts of dirt and dust.
Such was the case at this property in Bridlington, a Yorkshire town through which a stream known as the ‘Gypsey Race’ runs, before emptying in the North Sea at the Bridlington Harbour. Interestingly enough, folklore says that when the stream is flowing, bad fortune is at hand. The stream must not have been running on the day that we restored this Victorian hallway, as we managed to achieve some truly fantastic results!!
The hallway had been severely dulled after going years without professional care. We set about giving it the thorough clean and fresh seal that I’d des partly needed. Here’s how we did it.
Our first task was to remove any old, no longer effectual sealer. We did this by liberally applying a strong dilution of our alkaline-based Tile a Doctor Pro Clean, which doubles as a reliable cleaner and a stripper capable of stripping away old sealer. The product was worked into the tiles using a black stripping pad fitted to a 17″ rotary machine, and the process was repeated three times.
I noticed that there was still some stubborn dirt and old sealer around the edges of the hallway, so I used some of our handheld diamond encrusted burnishing blocks to grind it away. To finish the cleaning process, we washed the floor with Tile Doctor pH Neutral Tile Cleaner, leaving it fresh and ready to be sealed once left to dry overnight.
Upon our return to the property the next day, we ran some quick tests to check for any excess moisture (even a small amount could have damaged the performance of the new sealer). Once satisfied with the the condition of the floor, we proceeded to see it with an impregnating sealer, meaning a sealer that penetrates into the pores of the tile to fill them and therefore prevent trapped dirt and ingrained stains.
Our impregnating sealer, Tile Doctor Colour Grow, has the added benefit of being colour intensifying, which really highlights the unique colourful patterns of the tiles. To give the floor a durable sheen finish, as requested by the customer, we also added a coat of Tile Doctor Seal and Go sealer.
The result was a complete transformation of the condition and appearance of this great Victorian tiled hallway. Our customer is very pleased – the floor is now a complete asset to any property, and will now be easier to keep looking great in future.
Ronnie Phipps
East Yorkshire Tile Doctor

 The Bodily Works
Example of a mid-sized transitional enclosed carpeted and beige floor home theater design in Salt Lake City with gray walls and a wall-mounted tv
Find the right local pro for your project

 Shuler Architecture
This 3 BR, 3 1/2 bath home allows the owners to live on one level most of the time. The Master Suite is on the main level along with the Living Room, Kitchen, Dining, pantries, Sun Room and service areas. The upper level houses two ample bedrooms while the lower level supports a rec center, media room, wine cellar, shop and full wet bar. Conceived as a Great Room house, the main level is designed as one seamless space that flows onto an ample deck overlooking the rear yard.
We also incorporated a variety of green building techniques - photo-voltaic shingles on the roof of the garage to generate a portion of the home's energy, a super insulated building envelope, rain water harvesting, high performance windows and doors, a high efficiency heat pump, low flow bath & kitchen fixtures, Energy Star appliances and LED lighting - that greatly reduced this structure's carbon footprint. All of the strategies amounted to a 30% reduction in the energy consumption in this home relative to comparable structures.
 Tile Doctor Ltd
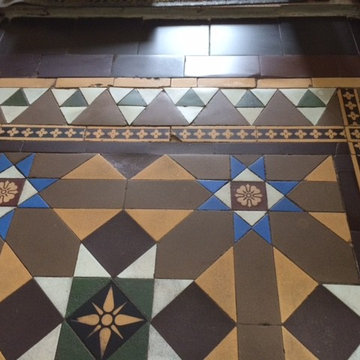
Recently Heidi and I worked on a Victorian tiled hallway floor at a house in Turton, Lancashire, an area which lies on the southern slopes of the West Pennine Moors. Victorian tile floors are commonly found in the reception area and hallways of older houses and public buildings, many of which date back to the reign of Queen Victoria (hence ‘Victorian’ tiles). It was during this time that the tile industry really started to boom.
Upon inspection it was evident that the floor in question had suffered from some settlement in the past resulting in a crack in the base under the tiles which had lifted one side and dropped the other; this is quite common in old houses resulting in some of the tiles becoming loose and would need to be fixed back in place before the floor could be given a good clean and re-seal.
Removing Lippage from Victorian Tiles
The concrete floor under the tile was patched as best as could be without pulling up more of the floor and the tiles were fixed in place, unfortunately however many of the triangular tiles in the adjacent border would not lay flat resulting in a lippage issue between them which naturally the customer was not very happy about.
Not wishing to cause the customer the extra expense of pulling up more tiles and relaying the concrete subfloor I left the tiles to fully set and then came back a few days later with a handheld Flex Machine fitted with a small 220 Grit Diamond pad to grind the tiles flat. As the pictures show, this made the difference and the diamond did not scratch the tiles despite the surface being dry.
Diamond pads are usually used on stone floors but after some investigation back at the Tile Doctor training centre we also realised they can be used on other types of tile including Victorian.
Once this was resolved the entire floor was given a thorough clean using a strong dilution of Tile Doctor Pro-Clean worked in with a scrubbing pad. As well as cleaning the tile and grout it also removed any remaining sealer which is important if you don’t know the history of the floor as the previous coating maybe incompatible with the new sealer. Once done the floor was given a thorough rinse with water which was then extracted from the floor with a wet vacuum.
Sealing Victorian Tiles
The floor was left to dry and I returned later to seal the tiles with a couple of coats of Tile Doctor Colour Grow which is an impregnating sealer that soaks into the pores of the tile and intensifies colour whilst also providing durable protection from within. Normally I use Seal and Go on Victorian Tiles however in this case the customer had specified a matt finish.
The results were fantastic and the client was very pleased with the now flat Victorian tiled floor which, thanks to the cleaning and sealing, was back to looking its best. Another happy customer for the Lancashire Tile Doctor!

 Plaistow Cabinet
Shiloh Cabinetry. Polar White, Inset
Kitchen - transitional kitchen idea in Manchester with white cabinets, beaded inset cabinets, marble countertops, white backsplash, marble backsplash and stainless steel appliances
Kitchen - transitional kitchen idea in Manchester with white cabinets, beaded inset cabinets, marble countertops, white backsplash, marble backsplash and stainless steel appliances

 Tile Doctor Ltd
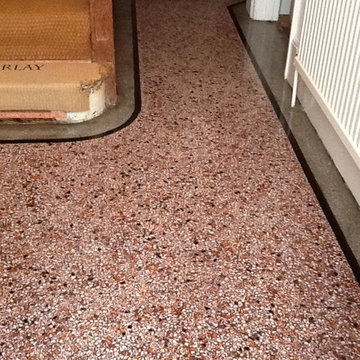
This Terrazzo tiled hallway at a property in Northampton was in a really bad state. It was heavily soiled and suffered from glue marks where the original carpet covering it had been removed. Additionally, there was some damage to the edges of the doorway, and a large crack in the floor running across the width of the hallway.
Terrazzo is an interesting material, originally produced in Italy, that consists mainly of concrete with segments of marble and other stone interspersed and held together with a resin. Since Terrazzo is formed in this way, I explained to the customer that I would fill the crack along the floor and the small holes around the edges with concrete, before then using tile paint to match in the colours as best as possible. This would be the most cost-effective solution, which was ideal since the customer had a limited budget for the repairs.
Before beginning the restoration, I tested a small area using a diamond encrusted burnishing pad, thereby giving the customer an indication of the type of results that could be achieved. With the customer pleased by the results, the job was booked in for the following week.
To begin, Tile Doctor Remove & Go was applied to the floor and was left to dwell for ten minutes to soften the carpet glue and break down any old sealer. This was then scrubbed in to the tiles with a pad fitted to a rotary machine. To remove the remaining residue and marks in the particularly stubborn areas, I used a manual hand scraper. The entire floor was then wet vaxed to soak up the soiled cleaner and leave the area clean for burnishing.
This was followed by the use of Tile Doctor diamond encrusted burnishing pads to polish the tiles, starting with a coarse grit pad, followed by wet vaxing and repeating the process with a medium grit pad and finally the fine grit pad to achieve the desired effect. I then installed a turbo dryer to dry the floor.
I returned to the property once the floor was dry and carried out the repairs which had been discussed earlier with the customer (filling the holes and cracks in the floor with concrete), cleaning off any concrete residue before I finished for the day.
Upon my return to the property the next day, I refined the polish on the floor even further by applying the extra fine grit burnishing pad.
To finish off the three day restoration, I sealed the Terrazzo tiles using two coats of Tile Doctor Colour Grow sealer. As an impregnating sealer, Colour Grow soaks into the pores of the stone, protecting it from ingrained dirt. Colour Grow also contains colour intensifying properties, allowing it to enhance the naturally occurring shades in the stone, and therefore stopping it from appearing dull.
This floor certainly was in a bad state, with damage as well as dirt to deal with, but I’m pleased to say that the work went a long way in transforming its appearance, leaving a very happy customer.
Phil Vissian
Northamptonshire Tile Doctor
 Riddle Construction & Design
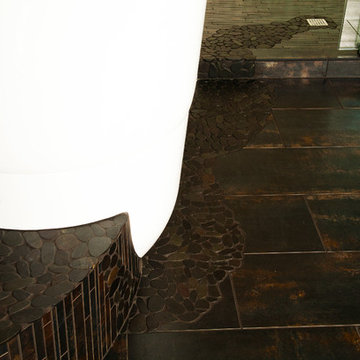
close up of pebble tile design around soaking tub.
Inspiration for a large asian master white tile and porcelain tile porcelain tile home design remodel in Seattle with a vessel sink, flat-panel cabinets, medium tone wood cabinets, quartz countertops, a two-piece toilet and beige walls
Inspiration for a large asian master white tile and porcelain tile porcelain tile home design remodel in Seattle with a vessel sink, flat-panel cabinets, medium tone wood cabinets, quartz countertops, a two-piece toilet and beige walls
 Tile Doctor Ltd
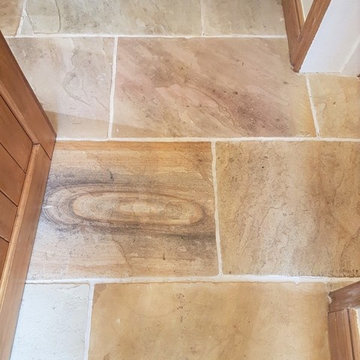
The pictures below are of a multi coloured sandstone floor installed at a property in East Keswick which is a village approximately halfway between Harrogate and Leeds. (Not to be confused with the more famous Keswick in the Lake District)
The stone floor had not been cleaned professionally for ten years and although the grout looked clean It was clear that any sealer that was once present had long since worn off leaving the stone unprotected. The result was dirt had become deeply ingrained in the Sandstone leading causing the stone to darken and hide its true beauty and rich colouring. The client had tried lots of different products to clean the floor but had not had any luck.
I visited the property and carried out a few successful patch tests resulting in the floor becoming much cleaner. They were happy to go ahead with my quote and we arranged a time to return and complete the work.
I prepared the area before starting, taping up the skirting boards and doors to protect them from the splashing that can happen during the intensive cleaning process.
To get the sandstone clean I applied a medium dilution of Tile Doctor Pro-Clean to the floor and allowed it to soak in for ten minutes. The solution was then worked into the Sandstone using a rotary floor machine fitted with a black scrubbing pad. More Pro-Clean was applied with a hand-held scrubbing brush to get deep into the grout lines and to reach into the corners.
Once done the floor was rinsed with water and the soil extracted with a wet vacuum. The floor was inspected, and the process repeated until I was satisfied that the stone and grout had released all the trapped dirt. After a final rinse, the wet vacuum was used to get as much moisture out of the stone as possible and then the floor left to dry out fully overnight.
Returning the following morning, I first checked that the floor was dry using a damp meter. The sealer won’t cure if there is any moisture in the stone and I’ve been known to reschedule sealing a floor if the readings are too high. On this occasion I was satisfied that the floor was within acceptable levels, so I was ready to seal the floor.
I used three coats of Tile Doctor Colour Grow to seal the floor, this is an impregnating sealer which intensifies natural colours whilst providing durable protection against stains, an essential feature in an area such as a hallway which is subject to constant foot traffic.
As you can see from the photos the transformation was quite impressive, the floor became much lighter and almost unrecognisable, the natural colours of the stone were now visible, and the floor looked beautiful. The client was very happy with the end result and has said they would not hesitate to recommend me to others.
Nigel Stoker
North West Yorkshire Tile Doctor
 Tile Doctor Ltd
The pictures showed are of an Encaustic Cement tiled floor that had been installed in the bathroom of a property in Twickenham. At the time the tiles were installed, they did not seal them and had since accumulated dirt, especially in the grout lines.
Encaustic cement tiles have become extremely popular in the last few years with many beautiful artistic often geometric patterns available to choose from. The very nature of the cement-based tile however does make it slightly porous, and if left unsealed dirt will become ingrained in the tile making it difficult to remove and keep clean. Like grout they do therefore need to be sealed in order to keep them looking at their best for longer.
Now we normally recommend using diamond encrusted burnishing pads when renovating Encaustic Cement tiles however in this case the face of the tiles were not too bad and it was really the grout that needed the most attention. So, to cut the cost for customer, I advised a straightforward alkaline scrub clean and seal.
To clean the tile and grout I sprayed the floor with a strong dilution of Tile Doctor Pro-Clean and left it to soak into the dirt for ten minutes. Space in the bathroom was quite tight so instead of using a mechanical floor scrubber I scrubbed the tile and grout by hand working the alkaline cleaning solution into the pores to release the grout in dirt.
After scrubbing the floor was rinsed with a little water and the soil removed with a wet vacuum. Afterwards the floor was inspected, and any stubborn areas retreated with repeat of the process. After a final rinse, the floor was dried as much as possible with the wet vacuum.
Fortunately, the weather has been amazing of late and so it did not take long for the floor to dry, being a small space and a little encouragement from a heat gun always helps. Removing excess moisture before sealing is essential as even a small amount can cloud the sealer resulting in an uneven appearance.
Once satisfied that the floor was dry, I proceeded to seal it by applying a couple two coats of Tile Doctor Colour Grow across the Encaustic tile and grout. As an impregnating sealer Colour Grow penetrates the pores of the cement occupying the space and thus prevent any dirt from becoming ingrained there. Colour Grow’s colour intensifying properties also helped to deepen the black colour of the tile enhancing the contrast between the tiles and grout.
Now the floor has been properly sealed it will be far easier for the customer to keep them clean in future. For maximum longevity of the sealer I recommend maintenance cleaning with Tile Doctor Neutral Cleaner. Don’t be tempted to use supermarket cleaning products without reading the label first, many are simply too strong for cleaning sealed surfaces and will strip off the sealer prematurely leaving the tiles unprotected.
Jonathan Oldham
South Middlesex Tile Doctor
 Tile Doctor Ltd
Yorkstone is a variety of Sandstone unique to Yorkshire, and is known for its hard wearing and durable qualities. It was first manufactured during medieval times, but is still used for a range of building and construction purposes including, of course, tiled floors in houses. Yorkstone comes in a variety of natural colours, depending on the mineral makeup of the stone, and means that the tiled floors often have a unique look to them.
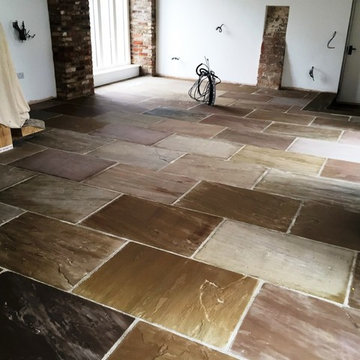
This customer, living in the small Yorkshire town of Driffield is the lucky owner of a fantastic new Yorkstone tiled living room floor. Unfortunately, the floor had been installed by an independent builder, as opposed to a professional tiling company, and had been left with no sealer to ensure it would stay looking great for a long time to come. Over time, the lack of a sealer has allowed the dirt to become ingrained in the stone, making it increasingly difficult for the customer to keep the tiles clean. I was called in to bring completion to what was an unfinished job!
As you can see from the photographs, the entire floor was quite dusty and dull looking following the recent installation. To get the tiles clean, I mixed a strong 60-40 mix of Tile Doctor Pro Clean and clean water. Pro Clean is a reliable alkaline cleaner suitable for use on most natural stone floors, including Sandstone, Quarry, and Slate.
The cleaning solution was applied to the floor and left to dwell for 20 minutes, allowing it time to penetrate the stone. Then, using my 17” rotary machine fitted with a black scrubbing pad, I proceeded to deep clean the tiles, leaving them looking immediately cleaner and more vibrant. Any resulting cleaning residue was promptly soaked up using a wet vacuum.
The process was repeated in the more stubborn areas, and I gave the floor a final rinse with water and left it to dry. Typically, we would leave a 12 to 24 hour drying period, depending on whether there is a damp proof membrane installed. However, this floor had underfloor heating and so dried really quickly, allowing me to seal it on the same day.
The customer wished to have a matt, natural finish for the Yorkstone tiled living room, so I applied two coats of Tile Doctor Colour Grow, our impregnating sealer which offers a natural, no-sheen look for textured floors, while providing durable protection against ingrained dirt and stains.
As the name of the product suggests, Colour Grow contains colour intensifying properties which really helped to accentuate the rich variety of colours in the customer’s Yorkstone tiles. The results were fantastic and you can see from the water test we performed after the sealer dried how water now bubbles up on the surface of the stone.
Ronnie Phipps
East Yorkshire Tile Doctor
 Tile Doctor Ltd
Sandstone is a particularly popular choice for kitchen and hallway floors amongst home owners in the UK. It not only possesses beautiful natural shades and features, but it is also typically hard wearing, making it an ideal stone for tiled flooring in high traffic areas of a house and can often be found laid as large riven flagstones in pubs and other commercial premises.
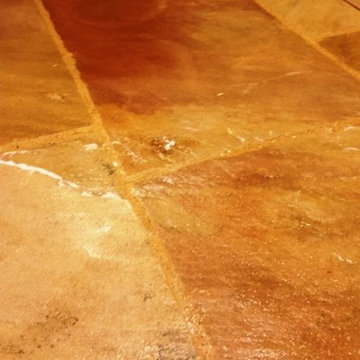
Naturally, just like any other type of tiled floor, Sandstone needs to be maintained using appropriate products and methods. A lack of adequate surface sealer in particular leaves Sandstone susceptible to ingrained dirt, and can leave distinct, unsightly patches such as those in the photograph below.
In this instance, I visited a client in the old Essex town of Thaxted, who believed that her four square meter Sandstone tiled floor might be suffering from damp issues after lifting up the mats covering the area.
However, when I arrived at the property and ran damp tests, I found the issue to be superficial. The Sandstone floor however did require attention in the form of a deep clean and a fresh seal to tackle the white patches and prevent further discolouration.
To begin the cleaning process I spread Tile Doctor Remove & Go evenly across the floor. It was left to dwell for approximately 15 minutes, during which time it worked to break down the old sealer remaining on the tiles. I then agitated the area twice over with both a black scrubbing pad fitted to a rotation machine lift away any dirt.
The resultant slurry was removed using a wet vacuum and the floor was then rinsed with water and then mixed a strong solution of one part Tile Doctor Pro Clean to three parts water which was used to give the floor a final clean and scrub the grout clean before using the wet vacuum again and giving the floor a final rinse with water.
After completing the cleaning process I left the floor to dry over the weekend. Upon my return to the house I proceeded to seal the tiles with three coats of Tile Doctor Colour Grow which is an impregnating sealer that soaks into the pores of the stone and provide durable surface protection going forward. Colour Grow is also specially designed to let the floor breathe and enhance the natural colours in the stone and, in this case, really helped to intensify the natural sand-coloured shades in the tiles.
The difference made to these Sandstone tiles was really noticeable, with the white patches completely removed and the surface more generally back to looking like new, needless to say, my client was very happy with the results.
Nick Murphy
South Essex Tile Doctor

 Regina Sturrock Design Inc.
This grand residence is situated on the picturesque Lakeshore Road of Burlington, Ontario Canada. Representing a 'from-the-ground-up' project, the 10,000 square foot home boasts classic architecture with a fresh contemporary overlay.
Roy Timm Photography
 Supreme Pools
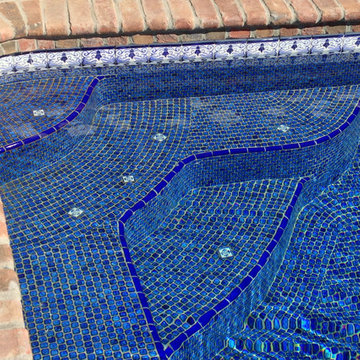
Hot tub - large southwestern backyard brick and rectangular lap hot tub idea in Phoenix
 Tile Doctor Ltd
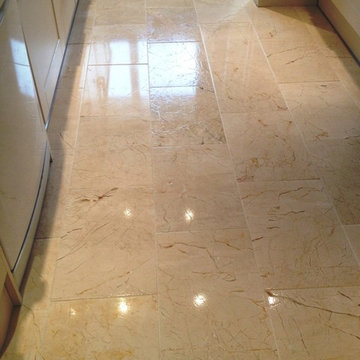
For this job I travelled to the town of Albrighton, which is actually the most easterly settlement in the whole of Shropshire. My client had an issue with their Marble tiled floor which was installed in the kitchen and hallway. They had dropped and broke a bottle of vinegar in the kitchen, and the substance unfortunately came in contact with the tiles. Since Marble is highly sensitive to acid, the vinegar (an acetic acid) had basically etched the surface of the tiles make it impossible clean chemically.
Although the tiles were a nice, expensive Marble, the person who had first installed them had done a poor job, leaving lippage of up to 5mm in some areas, which would make work trickier. Undeterred I could see it would be possible to restore the floor using a combination of burnishing for the tiles and cleaning with a high alkaline product for the grout lines. I demonstrated this to my client on one tile which went well and I was then given the go ahead to restore the entire floor.
My first task focused on cleaning the grout lines using a solution of Tile Doctor Pro-Clean worked in with a stiff grout brush. Pro-Clean is a high alkaline cleaner suitable for use on most types of natural stone floor. It helped to alleviate most of the grout staining caused by the vinegar, whilst also lifting out any ingrained dirt and muck, and this left the grout looking a lot cleaner.
After cleaning the grout lines I was able to move on to burnishing the tiles. As previously mentioned, no chemical product would be able to have an effect on the damaged tiles, so I resolved to burnish them using a system of four diamond encrusted burnishing pads fitted to a rotary machine. Working first with a coarse burnishing pad, and moving through to medium, fine and very fine pads, lubricated with a little water, I was able to significantly reduce the appearance of the acid stains, while also giving the tiles a nice polished finish.
Following the cleaning and burnishing processes I gave the tiles a good rinse to remove any remaining residue and then ensured the floor was completely dry before starting on the sealing.
To seal the floor and maximise the appearance I used Tile Doctor Colour Grow and Tile Doctor Shine powder. Colour Grow is an impregnating sealer that seeps into the pores of the stone intensifying and enhancing the natural shades and colours in the stone whilst also providing stain protection;
Shine Powder on the other hand is a crystallising powder that is ground directly into the tiles to provide a high shine finish and durable surface protection.
My client and her husband were really happy with the results and left the following message on the Tile Doctor Feedback system:
“Jozsef was a charming young man in every respect, who worked very hard and achieved an amazing result. The tiles look better than the day they were laid. We are absolutely delighted with the work he has done and will recommend him to all our acquaintances. Thank you, Jozsef!”
Jozsef Hoffmann
Shropshire Tile Doctor


 ROAM Architecture
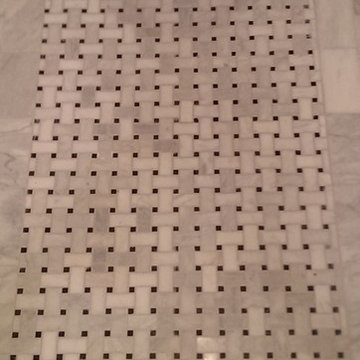
Detail of LED wall sconce with white glass tile background
Inspiration for a small contemporary kids' white tile and glass tile porcelain tile and gray floor alcove bathtub remodel in New York with flat-panel cabinets, dark wood cabinets, a two-piece toilet, green walls and an integrated sink
Inspiration for a small contemporary kids' white tile and glass tile porcelain tile and gray floor alcove bathtub remodel in New York with flat-panel cabinets, dark wood cabinets, a two-piece toilet, green walls and an integrated sink
 Big Bear Remodeling
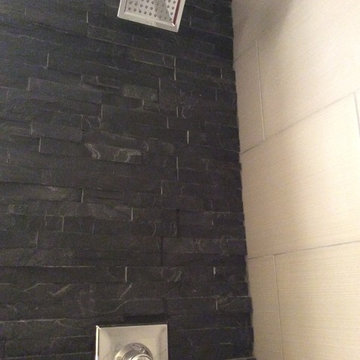
Stylish modern walk in shower with stacked stone shower wall and chrome shower head
Inspiration for a small modern 3/4 black and white tile and pebble tile porcelain tile doorless shower remodel in Cleveland with white walls
Inspiration for a small modern 3/4 black and white tile and pebble tile porcelain tile doorless shower remodel in Cleveland with white walls
9