
Search results for "Involves electrical" in Home Design Ideas
 Allreno
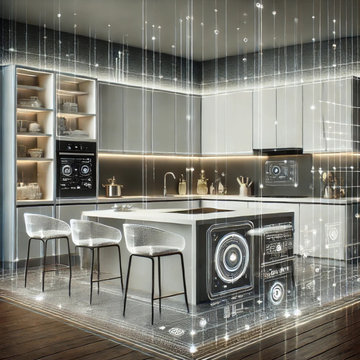
In What Order Should You Renovate a Kitchen? Revolutionizing Kitchen and Bath Renovation with Allreno's Design AI
Renovating a kitchen can be one of the most exciting and rewarding home improvement projects. However, with so many decisions to make, it can also be overwhelming. From selecting kitchen cabinets to choosing countertops and appliances, the process often involves careful planning and organization. So, how do you ensure the renovation goes smoothly? One important factor is knowing the right order in which to tackle the project.
The Right Order for Kitchen Renovation
Renovating a kitchen involves multiple steps, and knowing the proper order of operations is crucial for both time efficiency and cost savings. Here’s a general guideline for how to approach your kitchen renovation:
1. Planning and Design: The first step in any renovation is planning. This includes deciding on the layout, design, and features you want in your kitchen. At this stage, you’ll also need to think about your budget and timeline. It’s essential to finalize these details before moving forward with the actual work.
2. Demolition: Once the design is set, it’s time to remove old fixtures, cabinets, appliances, and flooring. Demolition can be a messy process, but it’s necessary for starting fresh. Having a professional handle this phase is often a smart move to ensure everything is safely removed.
3. Structural Work: If you plan on altering the layout of the kitchen by knocking down walls or adding new plumbing or electrical work, now is the time to do it. Structural changes can be complicated and costly, so it’s important to ensure these are completed before installing any new elements.
4. Plumbing and Electrical Work: With the structure in place, you can begin installing plumbing and electrical systems. This might include adding new water lines, sinks, or electrical outlets for appliances. It’s best to bring in licensed professionals for this stage, as electrical and plumbing work requires expert knowledge.
5. Cabinet Installation: Once the plumbing and electrical work are in place, you can install the kitchen cabinets. Cabinets are one of the most important elements of the kitchen, and the Allreno design AI can make this process easier. Allreno's AI-driven platform allows you to visualize how different kitchen cabinets will fit into your space, ensuring you make the best choice based on your preferences and layout.
6. Countertops: After the cabinets are installed, it’s time to add countertops. Whether you choose granite, quartz, or a more budget-friendly option, countertops are a focal point of the kitchen, and they should complement the cabinets and other design elements.
7. Flooring: Now that the major structural elements are in place, it’s time to install your flooring. Whether you opt for tile, hardwood, or vinyl, flooring should be installed after the cabinets and countertops to prevent any damage during the installation process.
8. Appliances and Fixtures: With the foundation in place, you can now add your appliances (oven, refrigerator, dishwasher, etc.) and fixtures (sink, faucets, lighting). Allreno’s AI can also help here by offering kitchen design recommendations based on available appliances and space dimensions.
9. Final Touches: The last step is adding the finishing touches to your kitchen. This includes painting the walls, adding backsplash tiles, and installing accessories like handles and knobs on your cabinets. This is also the stage where you can implement any stylistic choices to make the space uniquely yours.
How Allreno's AI Transforms the Renovation Process
One of the biggest challenges of a kitchen renovation is visualizing how everything will come together. Allreno’s design AI changes that by offering an intuitive platform that brings your ideas to life. Here’s how:
• Personalized Design Recommendations: Allreno’s AI suggests design elements based on your preferences, style, and space dimensions. Whether it’s selecting the perfect kitchen cabinets or countertop finishes, the AI ensures everything works together cohesively.
• 3D Visualization: With Allreno’s AI-driven design tools, you can visualize your kitchen layout in 3D before any work begins. This allows you to see how different elements will fit into your space and make adjustments as needed.
• Efficient Project Management: Allreno helps you streamline the entire renovation process by generating accurate material lists, estimates, and timelines. This means you can avoid costly errors and keep your renovation on track.
Conclusion
Renovating a kitchen is an exciting project, but it requires careful planning and organization to ensure it’s done right. By following a strategic order of operations and leveraging cutting-edge technology like Allreno’s design AI, homeowners can streamline the process, save time and money, and bring their dream kitchen to life with ease. Allreno not only simplifies the design process but also provides innovative solutions that make kitchen and bath renovations faster and more efficient than ever before.
Ready to get started with your kitchen renovation? Allreno's AI-powered design platform is here to help you every step of the way.
 BMR BelMax Remodeling
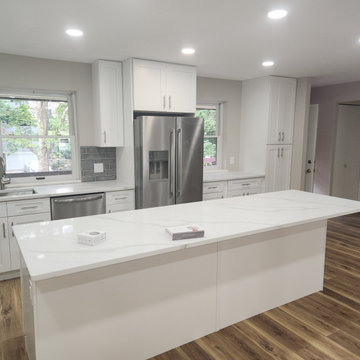
Open-Concept Kitchen Remodeling in West Windsor Township
This ambitious kitchen remodeling project involved a comprehensive overhaul of the existing kitchen area to create a modern, open-concept space. The transformation included significant structural, electrical, and aesthetic upgrades to enhance functionality and visual appeal. Below is a detailed breakdown of the work completed:
Structural Changes:
Walls Removal: To achieve an open-concept layout, four walls were removed.
Support Beam Installation: A new support beam was put in place to ensure structural integrity following the removal of the walls.
Electrical Updates:
Appliance Wiring: New electrical wiring was installed to accommodate all kitchen appliances.
Over-Countertop Outlets: Additional outlets were added above the countertop for convenience.
Lighting: The kitchen now features 27 new recessed lights, providing ample illumination.
Aesthetic Enhancements:
Paint: The entire room received a fresh coat of paint, giving it a new, vibrant look.
Cabinetry: Beautiful white cabinets were installed, offering both style and storage solutions.
Flooring: New Luxury Vinyl Plank (LVP) flooring was laid down, providing durability and a modern touch.
Backsplash: A stunning tile backsplash was added, complementing the overall design.
Appliances and Fixtures: The project included the installation of new appliances and the strategic relocation of the gas stove and sink to optimize kitchen flow and functionality.
This comprehensive remodeling project has successfully transformed the kitchen into a spacious, well-lit, and modern cooking and gathering space that stands out in West Windsor Township.
 Alair Homes Chilliwack
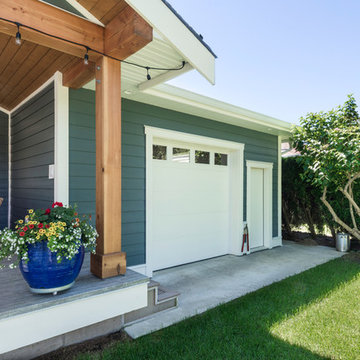
This was a challenging project for very discerning clients. The home was originally owned by the client’s father, and she inherited it when he passed. Care was taken to preserve the history in the home while upgrading it for the current owners. This home exceeds current energy codes, and all mechanical and electrical systems have been completely replaced. The clients remained in the home for the duration of the reno, so it was completed in two phases. Phase 1 involved gutting the basement, removing all asbestos containing materials (flooring, plaster), and replacing all mechanical and electrical systems, new spray foam insulation, and complete new finishing.
The clients lived upstairs while we did the basement, and in the basement while we did the main floor. They left on a vacation while we did the asbestos work.
Phase 2 involved a rock retaining wall on the rear of the property that required a lengthy approval process including municipal, fisheries, First Nations, and environmental authorities. The home had a new rear covered deck, garage, new roofline, all new interior and exterior finishing, new mechanical and electrical systems, new insulation and drywall. Phase 2 also involved an extensive asbestos abatement to remove Asbestos-containing materials in the flooring, plaster, insulation, and mastics.
Photography by Carsten Arnold Photography.
Find the right local pro for your project
 BMR BelMax Remodeling
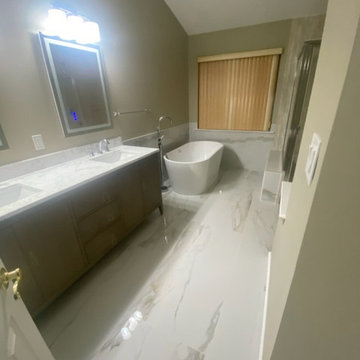
Master Bathroom Remodeling in Maple Glen, PA: A Stunning Transformation by BMR Belmax Remodeling
At BMR Belmax Remodeling, we pride ourselves on delivering exceptional remodeling services that combine elegance, functionality, and personalized design. One of our recent projects involved a master bathroom remodeling in Maple Glen, PA, where we transformed a dated bathroom into a luxurious retreat. This comprehensive bathroom renovation in Maple Glen, PA showcases our commitment to craftsmanship and attention to detail, leaving our client thrilled with the results.
A Vision for the Perfect Master Bathroom
Our client envisioned a serene and modern master bathroom that would elevate the aesthetics and functionality of their space. They sought a design that offered a balance of contemporary style and practicality, incorporating sleek fixtures, premium materials, and improved lighting. We collaborated closely with the client to bring their vision to life, ensuring that every detail met their expectations. The result was a master bathroom that perfectly aligned with their lifestyle and design preferences.
Key Features of the Master Bathroom Remodel
Our team tackled every aspect of this master bathroom remodeling project with precision and care. Here’s a breakdown of the upgrades and improvements we completed:
1. Plumbing Reconfiguration
To accommodate the updated design, we reconfigured the bathroom’s plumbing to support a sleek, smaller vanity and a stylish freestanding bathtub. This change not only optimized the layout but also created a more open and inviting feel.
2. Upgraded Bathroom Fixtures
The client opted for high-quality bathroom fixtures to enhance the space’s overall look and functionality. We installed a modern bathtub faucet, a new toilet, and other premium fixtures that seamlessly complemented the updated design.
3. Enhanced Lighting and Electrical Work
Lighting was a crucial element of this remodel. We installed new electrical wiring to accommodate lighted mirrors, which added a touch of sophistication and practicality. Additional lighting was installed above the mirrors to ensure optimal brightness for daily grooming routines, and a new exhaust fan was added to improve ventilation and maintain air quality.
4. Large-Format Tile Installation
To achieve a luxurious and contemporary look, we used 24″x48″ large-format tiles for the walls in the bathtub area and on the flooring. These tiles created a clean, seamless aesthetic, with fewer grout lines to maintain and a striking visual impact. The client was particularly impressed with the elegance and durability of this choice.
5. Freestanding Bathtub Installation
A standout feature of this remodel was the addition of a stunning freestanding bathtub. Positioned as a focal point of the bathroom, it offered both aesthetic appeal and a relaxing space for unwinding after a long day.
A Seamless Process and Impressive Results
The project was completed in just eight working days, thanks to our efficient project management and skilled team of professionals. From the initial consultation to the final walkthrough, we ensured clear communication with the client to address their questions and keep them updated on progress.
Our streamlined process involved careful planning, precise execution, and meticulous attention to detail. This approach not only delivered a beautiful transformation but also minimized disruptions for the client, ensuring a stress-free remodeling experience.
Why Choose BMR Belmax Remodeling?
This master bathroom remodeling in Maple Glen, PA exemplifies the quality and care that define our work. Here are some reasons why homeowners trust us for their bathroom renovation needs:
Expert Craftsmanship: Our team is skilled in delivering high-quality finishes and innovative solutions tailored to your preferences.
Personalized Designs: We work closely with you to create a space that aligns with your style, needs, and budget.
Premium Materials: We use top-tier materials to ensure durability, functionality, and aesthetic appeal.
Efficient Project Management: Our well-coordinated approach ensures that projects are completed on time without compromising quality.
Customer Satisfaction: We prioritize your satisfaction, striving to exceed your expectations in every aspect of the project.
Client Satisfaction and Lasting Value
The client was overjoyed with their newly remodeled master bathroom, expressing appreciation for the seamless process and stunning results. They particularly loved the enhanced lighting, the luxurious feel of the large-format tiles, and the functionality of the upgraded features. The renovation not only improved the bathroom’s aesthetics but also added significant value to their home.
Transform Your Bathroom with BMR Belmax Remodeling
If you’re considering a bathroom renovation in Maple Glen, PA, BMR Belmax Remodeling is here to help. Whether you’re looking for a complete master bathroom transformation or specific upgrades, we bring expertise, creativity, and a commitment to excellence to every project.
Contact us today to schedule a consultation and let us bring your dream bathroom to life. With BMR Belmax Remodeling, your ideal space is closer than you think!
 VA Electric Ltd
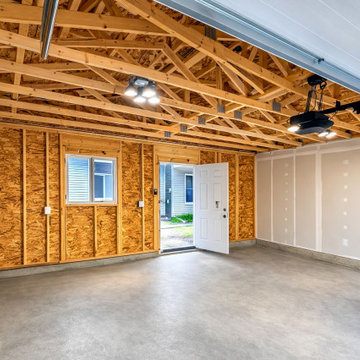
This project involved a complete electrical upgrade in a residential garage in Calgary, transforming the space into a clean, functional, and well-lit environment.
We installed new LED lighting to provide bright, even coverage throughout the garage, along with additional receptacles to support tools, equipment, and future use such as a home gym or workspace. The layout was designed to improve usability and eliminate dark areas, making the space more practical for everyday use.
The electrical system was upgraded to safely handle increased demand, with proper circuit distribution and code-compliant installation throughout.
Whether used for storage, projects, or additional living space, this garage is now fully equipped with reliable, modern electrical infrastructure.
 Kungsäter Kök Göteborg
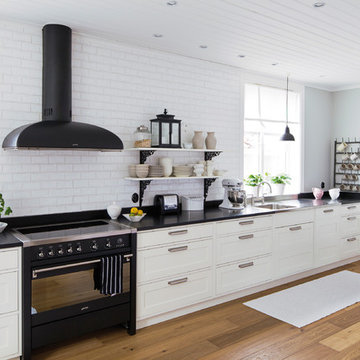
Kitchen - large scandinavian medium tone wood floor kitchen idea in Gothenburg with a single-bowl sink, shaker cabinets, black appliances and an island
 BMR BelMax Remodeling
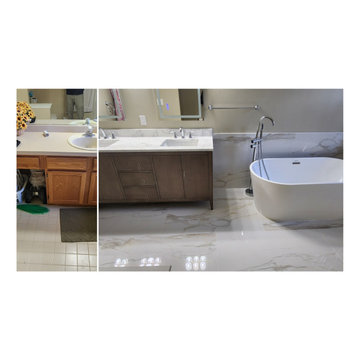
Master Bathroom Remodeling in Maple Glen, PA: A Stunning Transformation by BMR Belmax Remodeling
At BMR Belmax Remodeling, we pride ourselves on delivering exceptional remodeling services that combine elegance, functionality, and personalized design. One of our recent projects involved a master bathroom remodeling in Maple Glen, PA, where we transformed a dated bathroom into a luxurious retreat. This comprehensive bathroom renovation in Maple Glen, PA showcases our commitment to craftsmanship and attention to detail, leaving our client thrilled with the results.
A Vision for the Perfect Master Bathroom
Our client envisioned a serene and modern master bathroom that would elevate the aesthetics and functionality of their space. They sought a design that offered a balance of contemporary style and practicality, incorporating sleek fixtures, premium materials, and improved lighting. We collaborated closely with the client to bring their vision to life, ensuring that every detail met their expectations. The result was a master bathroom that perfectly aligned with their lifestyle and design preferences.
Key Features of the Master Bathroom Remodel
Our team tackled every aspect of this master bathroom remodeling project with precision and care. Here’s a breakdown of the upgrades and improvements we completed:
1. Plumbing Reconfiguration
To accommodate the updated design, we reconfigured the bathroom’s plumbing to support a sleek, smaller vanity and a stylish freestanding bathtub. This change not only optimized the layout but also created a more open and inviting feel.
2. Upgraded Bathroom Fixtures
The client opted for high-quality bathroom fixtures to enhance the space’s overall look and functionality. We installed a modern bathtub faucet, a new toilet, and other premium fixtures that seamlessly complemented the updated design.
3. Enhanced Lighting and Electrical Work
Lighting was a crucial element of this remodel. We installed new electrical wiring to accommodate lighted mirrors, which added a touch of sophistication and practicality. Additional lighting was installed above the mirrors to ensure optimal brightness for daily grooming routines, and a new exhaust fan was added to improve ventilation and maintain air quality.
4. Large-Format Tile Installation
To achieve a luxurious and contemporary look, we used 24″x48″ large-format tiles for the walls in the bathtub area and on the flooring. These tiles created a clean, seamless aesthetic, with fewer grout lines to maintain and a striking visual impact. The client was particularly impressed with the elegance and durability of this choice.
5. Freestanding Bathtub Installation
A standout feature of this remodel was the addition of a stunning freestanding bathtub. Positioned as a focal point of the bathroom, it offered both aesthetic appeal and a relaxing space for unwinding after a long day.
A Seamless Process and Impressive Results
The project was completed in just eight working days, thanks to our efficient project management and skilled team of professionals. From the initial consultation to the final walkthrough, we ensured clear communication with the client to address their questions and keep them updated on progress.
Our streamlined process involved careful planning, precise execution, and meticulous attention to detail. This approach not only delivered a beautiful transformation but also minimized disruptions for the client, ensuring a stress-free remodeling experience.
Why Choose BMR Belmax Remodeling?
This master bathroom remodeling in Maple Glen, PA exemplifies the quality and care that define our work. Here are some reasons why homeowners trust us for their bathroom renovation needs:
Expert Craftsmanship: Our team is skilled in delivering high-quality finishes and innovative solutions tailored to your preferences.
Personalized Designs: We work closely with you to create a space that aligns with your style, needs, and budget.
Premium Materials: We use top-tier materials to ensure durability, functionality, and aesthetic appeal.
Efficient Project Management: Our well-coordinated approach ensures that projects are completed on time without compromising quality.
Customer Satisfaction: We prioritize your satisfaction, striving to exceed your expectations in every aspect of the project.
Client Satisfaction and Lasting Value
The client was overjoyed with their newly remodeled master bathroom, expressing appreciation for the seamless process and stunning results. They particularly loved the enhanced lighting, the luxurious feel of the large-format tiles, and the functionality of the upgraded features. The renovation not only improved the bathroom’s aesthetics but also added significant value to their home.
Transform Your Bathroom with BMR Belmax Remodeling
If you’re considering a bathroom renovation in Maple Glen, PA, BMR Belmax Remodeling is here to help. Whether you’re looking for a complete master bathroom transformation or specific upgrades, we bring expertise, creativity, and a commitment to excellence to every project.
Contact us today to schedule a consultation and let us bring your dream bathroom to life. With BMR Belmax Remodeling, your ideal space is closer than you think!

 Corts Family Construction, LLC
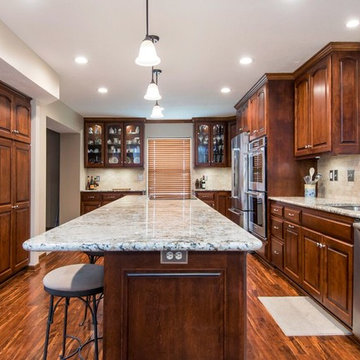
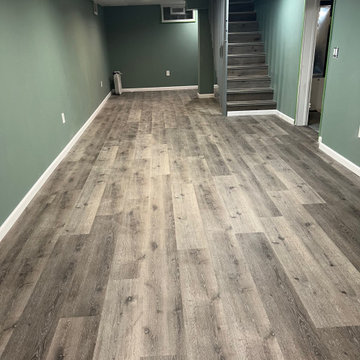
This project involved finishing a basement living space with permitted electrical work and recessed lighting installation. Framing and insulation were completed during an earlier phase, with final electrical layout and lighting added to create a clean, functional, and comfortable lower-level living area. The result is a bright, flexible space suitable for everyday use within the finished basement.

 Free Lancing
Effective residential construction project management is crucial in today’s fast-moving building industry. It means overseeing every step of building a home, from planning to finishing, to ensure projects are completed time, within budget, and with high quality. Unlike commercial projects, residential projects require special attention to meet homeowners' unique needs and wishes, requiring a customized approach from the beginning to the end.
In 2025, the construction sector will use advanced technologies like AI and integrated project delivery (IPD) to streamline processes and improve stakeholder collaboration. However, project managers face significant challenges, including managing risks, maintaining quality control, and ensuring effective communication among team members.
A WIP Report (Work-in-Progress Report) is a key tool that helps track a project's budget, progress, and resource use. It provides clear insights, making managing costs easier, avoiding delays, and making informed decisions.
By adopting best practices and using modern construction management tools, project managers can overcome these challenges and deliver successful residential construction projects that meet client expectations and contribute to a sustainable future.
This article provides a brief overview of residential construction project management, highlights its importance, and touches on the challenges faced by project managers while incorporating the latest trends and technologies in the field.
Types of Residential Construction Management
Here are the different types of Residential Construction Management:
Single-Family Homes: These are standalone houses built for individual families. Managing these projects involves overseeing construction from planning to completion, ensuring that the home meets the owner's preferences and budget.
Multi-Family Housing: This includes apartments, condominiums, and townhouses. Projects of this type require managing multiple units, often with shared facilities, and ensuring compliance with local building codes.
Custom Home Building: This involves constructing homes tailored to specific client needs. Close collaboration with architects and designers is required to ensure the house reflects the owner's personality and preferences.
Home Renovation and Remodeling: These projects focus on updating or expanding existing homes. They often involve working with subcontractors for specialized tasks like electrical or plumbing work.
Components of Residential Construction Project Management
Managing a residential construction project requires carefully coordinating people, materials, and timelines. A well-structured approach ensures efficiency, cost control, and high-quality results.
Roles and Responsibilities
A project manager plays a vital role in residential construction. They oversee every step from planning to completion and ensure the project stays on schedule, within budget, and meets quality standards.
Project Manager’s Role in Home Construction
The project manager is responsible for organizing tasks, managing resources, and solving problems that arise during construction. They coordinate between different teams, track progress, and ensure safety regulations are followed.
Collaboration with Contractors, Architects, and Stakeholders
Successful residential construction requires teamwork. Project managers work closely with architects to bring designs to new heights, coordinate with contractors to manage labor and materials, and keep stakeholders (such as homeowners and investors) informed about project updates.
Client Communication and Expectations Management
Clear communication with clients is essential. The project manager keeps homeowners updated on timelines, changes, and challenges. Setting realistic expectations and providing regular updates, they help avoid misunderstandings and keep the project running smoothly.
Project Scope & Planning
Practical project planning sets the foundation for a successful residential construction project. It ensures clear goals, minimizes risks, and keeps the project on track.
Defining Project Objectives and Deliverables:
Clearly outlining what needs to be done and what the final result should look like is essential. This involves setting specific, measurable goals that align with the homeowner's vision and budget.
Managing Homeowner Expectations and Scope Creep:
Homeowners often have changing needs or ideas. Effective project managers must manage these expectations to prevent "scope creep," which can delay projects and increase costs. This involves open communication and setting clear boundaries.
Ensuring Compliance with Zoning Laws and Permits:
Before construction begins, it's crucial to ensure that all necessary permits are obtained and that the project complies with local zoning laws. This step avoids costly fines and delays, ensuring the project moves forward smoothly.
Budgeting & Cost Control
Proper budgeting is essential for keeping residential construction projects financially viable. Effective cost management prevents overspending and ensures profitability.
Accurate Cost Estimation for Residential Projects
A precise cost estimate considers labor, materials, permits, and unexpected expenses. Using historical data and Sage 300 CRE for financial management improves accuracy and helps set realistic budgets.
Budget Allocation and Tracking
Allocating funds efficiently ensures that each phase of the project receives the necessary resources. Tracking expenses through Construction & Financial Dashboards allows for real-time monitoring and early detection of budget deviations.
Preventing Budget Overruns
Uncontrolled costs can derail a project. Regular financial reviews, automated alerts for overspending, and contingency planning help keep expenses in check and prevent financial strain.
Scheduling & Timeline Management
Timely project completion is crucial in residential construction. Effective scheduling minimizes delays and ensures a smooth workflow.
Creating Detailed Project Schedules
A structured schedule outlines all tasks, deadlines, and dependencies. Breaking down the project into phases, planning, execution, and finishing, helps maintain order and clarity.
Preventing Delays & Meeting Deadlines
Delays can result from labor shortages, weather conditions, or supply chain issues. To avoid problems, it’s good to check for risks ahead of time, add extra time to schedules, and keep everyone on the same page.
Using Gantt Charts and Critical Path Methods
CPM for Construction helps identify critical activities that directly impact project completion, while Gantt charts provide a visual timeline of tasks. Both tools optimize scheduling and improve efficiency.
Residential Construction Project Management Phases
Managing a residential construction project effectively requires a structured approach through various phases. Each phase plays a critical role in ensuring the project's success, from initial planning to completion.
Pre-Construction Phase
The pre-construction phase sets the foundation for a smooth and efficient building process. Proper planning at this stage helps prevent costly changes and delays later.
Site Analysis & Approvals: A thorough site analysis assesses soil conditions, topography, and environmental factors. Feasibility studies evaluate project viability, including costs and regulatory compliance. Obtaining zoning approvals, permits, and other legal clearances is crucial before breaking ground.
Selecting Materials and Procurement Strategies: Choosing the right materials impacts durability, sustainability, and cost efficiency. A well-planned procurement strategy, including bulk purchasing and reliable supplier partnerships, ensures timely delivery and cost savings. Using Sage 300 CRE for procurement management helps streamline material sourcing and financial planning.
Construction Phase
The construction phase transforms plans into reality. Effective coordination and strict quality control ensure a successful build.
Resource Allocation and Workflow Coordination: Efficiently managing labor, equipment, and materials is key to maintaining progress. Using CPM for Construction, project managers can allocate resources strategically, prevent bottlenecks, and optimize workflows for timely completion.
Project Closeout & Handover
The final phase of residential construction project management is crucial for ensuring a smooth transition from construction to occupancy. Proper closeout procedures guarantee quality, client satisfaction, and long-term project success.
Final Inspections and Quality Assurance: Before finishing the project, a final inspection checks that everything meets safety rules and quality standards. Any problems need to be fixed quickly. Using Procore helps make inspections and tracking issues easier, ensuring a high-quality final product.
Client Walkthrough and Support: A final check helps homeowners see the finished work, ask questions, and make sure it meets their expectations. This is also a chance to explain important home features and maintenance tips. Good communication here builds trust and strengthens relationships.
Warranty Management and Feedback: Efficient warranty management ensures clients get quick help for any issues after construction. A clear process for tracking requests and keeping in touch with homeowners boosts satisfaction. Collecting feedback helps improve future projects. Using S-Curve Forecasting tracks performance trends and refines management strategies.
Software for Residential Construction Project Management
The integration of technology in residential construction project management has revolutionized the way projects are planned, executed, and monitored. Digital tools streamline operations, reduce costs, and improve communication, making them essential for modern construction firms.
Importance of Digital Tools
Investing in digital tools is crucial for construction firms as it transforms the industry by enhancing efficiency, accuracy, and collaboration across the entire project lifecycle. They also improve project management by streamlining processes, automating tasks, and facilitating real-time stakeholder communication.
Top Construction Management Software for Residential Projects
Several software solutions are available for managing residential construction projects:
Procore: Known for its comprehensive project management features, including document management and collaboration tools.
Sage 300 CRE: Offers robust accounting and financial management capabilities, ideal for large-scale construction projects.
Buildertrend: Specializes in residential construction, providing tools for project scheduling, budgeting, and client communication.
CoConstruct: Focuses on custom home building and remodeling, offering features for estimating, scheduling, and project management.
WIP Reports: Useful for tracking work-in-progress and managing project finances effectively.
Features Comparison and Best Use Cases:
Procore: Best for large projects requiring extensive collaboration and document management.
Sage 300 CRE: Ideal for firms needing robust financial management.
Buildertrend: Suitable for residential builders focusing on client communication and project scheduling.
CoConstruct: Perfect for custom home builders who need detailed estimating and scheduling tools.
WIP Reports: Useful for firms needing to track project finances closely.
How Software Improves Project Efficiency
Construction management software significantly enhances project efficiency in several ways:
Automating Accounting and Job Costing: Software like Sage 300 CRE automates financial tasks, reducing manual errors and improving budget tracking.
Streamlining Document Management and Communication: Tools like Procore centralize documents and facilitate real-time communication among team members, reducing misunderstandings and delays.
Mobile-Friendly Solutions for Real-Time Tracking: Mobile apps from platforms like Buildertrend allow for on-site access to project data, enabling real-time tracking and decision-making.
These digital tools and software solutions are essential for modern residential construction project management, offering benefits such as improved efficiency, enhanced collaboration, and better financial control.
Challenges in Residential Construction Project Management
Residential construction projects face a variety of challenges that can impact their success. Here are some of the key issues project managers encounter:
Managing Subcontractors and Labor Shortages
One of the biggest challenges in residential construction is managing subcontractors and dealing with labor shortages. Subcontractors often have their own schedules and priorities, which can lead to delays if not coordinated properly. Additionally, labor shortages can slow down projects and increase costs due to the need for overtime or hiring temporary workers.
Budget Overruns and Unexpected Costs
Budget overruns are common in residential construction due to factors like material price fluctuations, unexpected site conditions, or changes in project scope. Effective budget management involves regularly monitoring expenses and having contingency plans for unexpected costs.
Changing Construction and Eco Rules
Construction and Eco Rules are always changing, so project managers need to keep up with the latest regulations. This involves following guidelines for saving energy, protecting the environment, and ensuring safety. Ignoring these rules can lead to fines, delays, or even stopping the project.
Best Practices
To ensure your residential construction projects run smoothly and successfully, follow these essential best practices:
Setting Clear Project Goals and Milestones
Clearly defining what you want to achieve is the first step to success. Set specific, measurable, achievable, relevant, and time-bound (SMART) goals. This helps everyone involved understand what needs to be done and by when. For example, instead of saying "build a house," say "build a house with three bedrooms and two bathrooms within the next nine months."
Stakeholder Collaboration
Good communication is key to keeping everyone on the same page. Regular meetings with contractors, suppliers, and homeowners help prevent misunderstandings and ensure that everyone knows what's happening and what's next. This open dialogue also helps resolve issues quickly, preventing small problems from becoming big delays.
Using Data-Driven Insights for Decision-Making
Making decisions based on facts rather than guesses is crucial. Use data and analytics to understand project progress, identify potential issues early, and make informed decisions. For instance, if data shows that a particular material is consistently causing delays, you can plan ahead to avoid those delays in the future.
Proactive Risk Management Strategies
Things don't always go as planned, so being prepared is essential. Identify potential risks early and have a plan to manage them. This might include having backup suppliers, planning for weather conditions, or setting aside extra funds for unexpected expenses. Being proactive can prevent small issues from turning into major problems.
Conclusion
Effective residential construction project management requires careful planning, clear communication, and the right digital tools. From single-family homes to multi-family housing and custom projects, managing timelines, budgets, and quality is essential for success.
By following best practices, using project management software, and staying ahead of industry trends, project managers can ensure smooth execution and client satisfaction despite challenges like labor shortages, budget overruns, and regulatory compliance; modern technology and strategic planning help mitigate risks.
Construction firms can improve efficiency, enhance collaboration, and maintain financial control by adopting advanced tools like Procore, Sage 300 CRE, and Buildertrend. A well-managed project delivers a quality home and builds trust and long-term success in the industry.
FAQs
What is residential construction project management?
It involves overseeing all aspects of building residential properties, from initial planning and design to construction and completion, ensuring projects are completed on time, within budget, and to the desired quality standards.
How can I prevent budget overruns in my construction project?
Accurate cost estimation, continuous budget tracking, and having contingency plans for unexpected expenses are key strategies to prevent budget overruns.
What are the main stages of a residential construction project?
The primary stages include design, pre-construction, procurement, and construction.
How does construction management software improve project efficiency?
It streamlines processes like scheduling, budgeting, and communication, providing real-time data access and collaboration among stakeholders, which enhances overall project efficiency.
How can I ensure my project complies with local building codes and regulations?
Engage professionals familiar with local laws, obtain all necessary permits before starting, and conduct regular inspections to ensure adherence to building codes and regulations.
 Lemon Remodeling & Services
Planning a Modern Kitchen Remodel
Every successful kitchen remodeling project begins with careful planning. Before construction starts, it is important to evaluate the existing layout, cabinet storage, lighting conditions, appliance placement, and how the kitchen connects to surrounding living spaces.
For this project, the primary design goals included:
Creating a brighter open concept kitchen
Improving functionality and circulation
Increasing pantry and cabinet storage
Maximizing natural light with skylight integration
Creating a clean and timeless design aesthetic
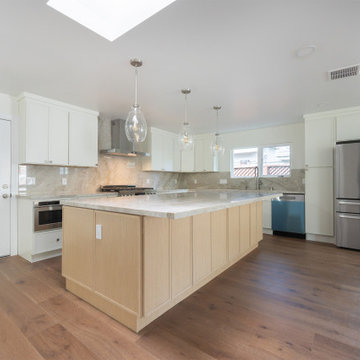
The final layout centered around a large kitchen island that functions as both a workspace and gathering area. Open concept kitchens remain highly desirable because they improve communication between living areas while helping the home feel larger and more connected.
Importance of Natural Light
Natural lighting plays a major role in modern kitchen remodeling. In this renovation, the skylight significantly improved brightness throughout the space and helped create a softer, more inviting atmosphere during the day.
Combined with recessed lighting and pendant fixtures above the island, the layered lighting design provides both functional task lighting and balanced ambient illumination.
Construction and Material Selection
Kitchen remodeling projects require coordination between multiple construction trades including demolition, framing, electrical, plumbing, drywall, flooring, cabinetry, countertops, and finish carpentry.
Bi-Color Kitchen Remodel Design
One of the standout features of this project is the bi-color kitchen remodel design. The warm natural wood island creates contrast against the surrounding white cabinetry while maintaining a clean and balanced appearance.
This approach helps:
Add visual depth to the kitchen
Create separation between functional zones
Prevent the space from feeling overly monochromatic
Introduce warmth into modern kitchen designs
The oversized island also provides additional storage, countertop workspace, and seating opportunities for everyday use and entertaining.
Countertops, Cabinetry, and Finishes
The kitchen includes:
Quartz countertops with waterfall-style edges
Custom shaker-style cabinetry
Stainless steel appliances
Modern pendant lighting
Wide plank engineered hardwood flooring
Full-height backsplash surfaces
The neutral color palette was selected to create a timeless appearance while allowing flexibility for future décor and furniture changes.
Pantry Kitchen Renovation
Storage planning is one of the most important aspects of kitchen remodeling. The pantry kitchen renovation focused on improving organization and accessibility while maximizing usable storage space.
Modern pantry systems help homeowners:
Reduce countertop clutter
Improve kitchen organization
Store small appliances more efficiently
Increase long-term functionality
Thoughtful storage design can significantly improve the daily usability of a kitchen without increasing square footage.
Real Estate Value and Long-Term Benefits
Kitchen remodeling remains one of the highest-value residential renovation projects in the Bay Area real estate market. A professionally designed open concept kitchen can improve buyer perception, increase property appeal, and modernize outdated layouts.
Features such as large islands, skylights, pantry storage, and bi-color cabinetry continue to remain highly desirable among homeowners and future buyers alike.
Common Kitchen Remodeling Mistakes
Some common mistakes homeowners should avoid include:
Insufficient lighting design
Poor circulation planning
Limited storage solutions
Choosing low-durability materials
Overcrowded layouts
Inadequate electrical preparation
Working with experienced remodeling professionals can help avoid costly design and construction issues later in the process.
Common Questions
How long does a kitchen remodel usually take?
Most kitchen remodeling projects take approximately 6–12 weeks depending on the project scope, inspections, material lead times, and structural modifications.
Do kitchen remodels require permits?
Permits are often required when plumbing, electrical, structural, or layout changes are involved. Requirements vary depending on the city and scope of work.
What is a bi-color kitchen remodel?
A bi-color kitchen remodel uses two cabinet finishes or tones to create visual contrast and a more customized design appearance.
Does an open concept kitchen increase home value?
Open concept kitchens are highly desirable because they improve functionality, natural lighting, and overall flow throughout the home.
Conclusion
A well-planned kitchen remodeling project combines thoughtful design, quality craftsmanship, and durable materials to create a space that is both functional and visually appealing. Features such as skylight integration, open concept layouts, pantry kitchen renovations, and bi-color cabinetry continue to remain popular among Bay Area homeowners seeking timeless and practical kitchen designs.
Careful planning, professional coordination, and attention to detail are essential for creating a kitchen that performs well aesthetically and functionally for many years.
------->
If you’re planning a kitchen remodeling project, consulting with an experienced contractor can help simplify the design and construction process while avoiding costly mistakes.
Book a consultation:
calendly.com/lemonremodeling
 VA Electric Ltd
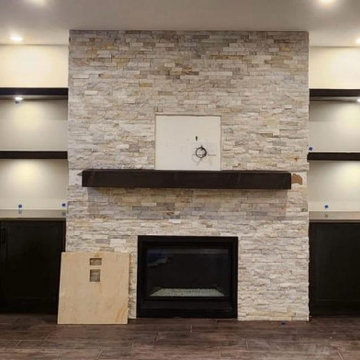
This project involved a custom basement feature wall installation in a Calgary home, combining clean design with functional electrical upgrades.
We installed floating shelves on both sides of the fireplace, each fitted with integrated LED puck lighting to create a warm, modern accent. The lighting highlights the shelving while adding depth and ambiance to the space.
The centre fireplace acts as the focal point, with concealed wiring installed above for a wall-mounted TV. All wiring was carefully hidden within the wall to maintain a clean, streamlined look with no visible cables.
This setup creates a polished entertainment area that blends lighting, layout, and functionality, turning the basement into a comfortable and visually striking living space.
All work was completed to current electrical code standards with attention to detail and finish.
 Ashton Renovations
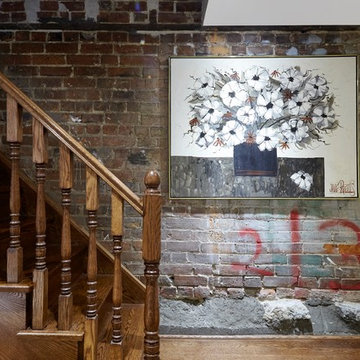
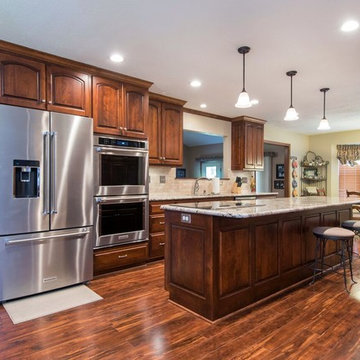
Renovations of this 100 year old home involved two stages: the first being the upstairs bathroom, followed by the kitchen and full scale update of the basement.
The original basement was used mainly for storage. The ceiling was low, with no light, and outdated electrical and plumbing. The new basement features a separate laundry, furnace, bathroom, living room and mud room. The most prominent feature of this newly renovated basement is the underpinning, which increased ceiling height. Further is the beautiful new side entrance with frosted glass doors.
Extensive repairs to the upstairs bathroom was much needed. It as well entailed converting the adjacent room into a full 4 pieces ensuite bathroom. The new spaces includes new floor joists and exterior framing along with insulation, HVAC, plumbing, and electrical. The bathrooms are a traditional design with subway tiles and mosaic marble tiles. The cast iron tub is an excellent focal feature of the bathroom that sets it back in time.
The original kitchen was cut off from the rest of the house. It also faced structural issues with the flooring and required extensive framing. The kitchen as well required extensive electrical, plumbing, and HVAC modifications. The new space is open, warm, bright and inviting. Our clients are most exited about now being able to enjoy the entire floor as one. We hope Stephan, Johanna, and Liam enjoy the home for many years to come along with the other improvements to the house.
Aristea Rizakos
 Ashton Renovations
Renovations of this 100 year old home involved two stages: the first being the upstairs bathroom, followed by the kitchen and full scale update of the basement.
The original basement was used mainly for storage. The ceiling was low, with no light, and outdated electrical and plumbing. The new basement features a separate laundry, furnace, bathroom, living room and mud room. The most prominent feature of this newly renovated basement is the underpinning, which increased ceiling height. Further is the beautiful new side entrance with frosted glass doors.
Extensive repairs to the upstairs bathroom was much needed. It as well entailed converting the adjacent room into a full 4 pieces ensuite bathroom. The new spaces includes new floor joists and exterior framing along with insulation, HVAC, plumbing, and electrical. The bathrooms are a traditional design with subway tiles and mosaic marble tiles. The cast iron tub is an excellent focal feature of the bathroom that sets it back in time.
The original kitchen was cut off from the rest of the house. It also faced structural issues with the flooring and required extensive framing. The kitchen as well required extensive electrical, plumbing, and HVAC modifications. The new space is open, warm, bright and inviting. Our clients are most exited about now being able to enjoy the entire floor as one. We hope Stephan, Johanna, and Liam enjoy the home for many years to come along with the other improvements to the house.
Aristea Rizakos
 VA Electric Ltd
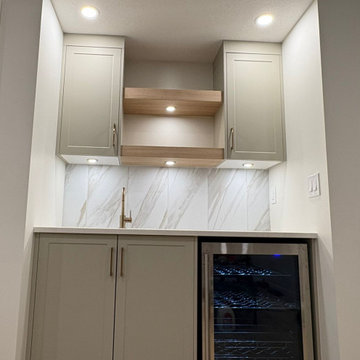
This project involved a custom basement wet bar installation in a Calgary home, designed to create a functional and inviting space for entertaining.
We installed LED puck lighting to provide clean, focused illumination across the bar area, enhancing both visibility and ambiance. The lighting was carefully placed to highlight the workspace while maintaining a warm, modern feel.
A dedicated electrical setup was provided for the mini fridge, along with properly placed receptacles to support small appliances and future use. All wiring was concealed to ensure a clean, seamless finish that complements the overall design.
The result is a polished and practical wet bar setup that adds both value and usability to the basement, making it a perfect space for hosting and everyday enjoyment.
All work was completed to current electrical code standards with attention to detail and long-term reliability.
 DLP Electrical Ltd.
At DLP Electrical, we recently had the privilege of enhancing the heart and soul of a residence with a comprehensive wiring and lighting upgrade during a renovation project. Our dedicated team undertook the task of reinvigorating this home, creating a seamless blend of modern functionality and timeless aesthetics.
The project involved a complete wiring overhaul, ensuring safety and reliability for years to come. We took meticulous care to upgrade the electrical infrastructure, accommodating the changing needs of the household. But our commitment to this transformation didn't stop there.
We also worked closely with the homeowners to craft a customized lighting scheme that reflected their unique vision. From ambient and task lighting to accentuating architectural features, our team meticulously designed and installed lighting upgrades throughout the house. The result? An inviting, well-lit space that radiates warmth and charm.
This project stands as a testament to our dedication to excellence and our ability to marry functionality with aesthetics seamlessly. We're proud to have played a role in making this house a true home, where every room now tells its own story through the magic of light and the dependability of modern electrical systems.
 Alair Homes Chilliwack
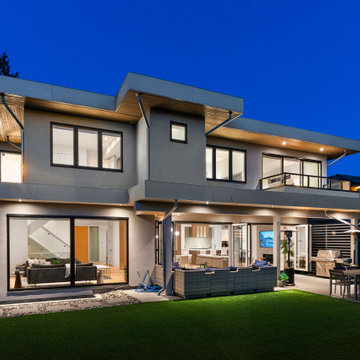
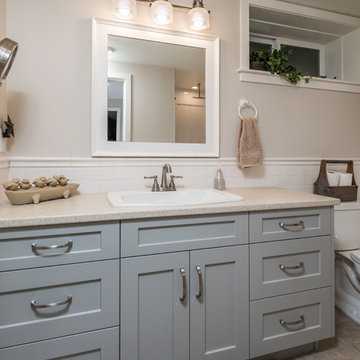
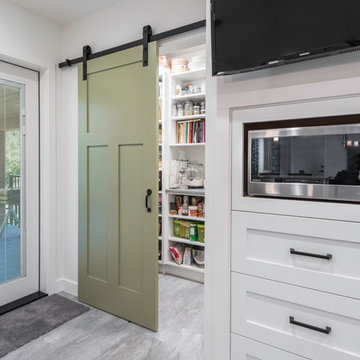
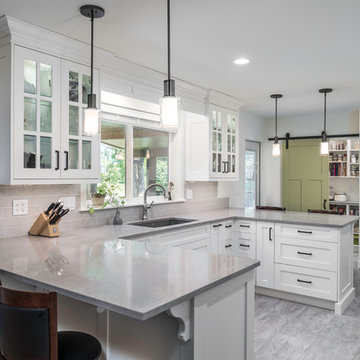
This was a challenging project for very discerning clients. The home was originally owned by the client’s father, and she inherited it when he passed. Care was taken to preserve the history in the home while upgrading it for the current owners. This home exceeds current energy codes, and all mechanical and electrical systems have been completely replaced. The clients remained in the home for the duration of the reno, so it was completed in two phases. Phase 1 involved gutting the basement, removing all asbestos containing materials (flooring, plaster), and replacing all mechanical and electrical systems, new spray foam insulation, and complete new finishing.
The clients lived upstairs while we did the basement, and in the basement while we did the main floor. They left on a vacation while we did the asbestos work.
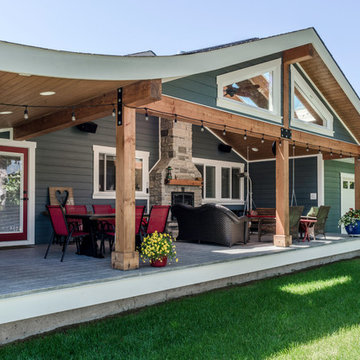
Phase 2 involved a rock retaining wall on the rear of the property that required a lengthy approval process including municipal, fisheries, First Nations, and environmental authorities. The home had a new rear covered deck, garage, new roofline, all new interior and exterior finishing, new mechanical and electrical systems, new insulation and drywall. Phase 2 also involved an extensive asbestos abatement to remove Asbestos-containing materials in the flooring, plaster, insulation, and mastics.
Photography by Carsten Arnold Photography.
 Alair Homes Chilliwack
This was a challenging project for very discerning clients. The home was originally owned by the client’s father, and she inherited it when he passed. Care was taken to preserve the history in the home while upgrading it for the current owners. This home exceeds current energy codes, and all mechanical and electrical systems have been completely replaced. The clients remained in the home for the duration of the reno, so it was completed in two phases. Phase 1 involved gutting the basement, removing all asbestos containing materials (flooring, plaster), and replacing all mechanical and electrical systems, new spray foam insulation, and complete new finishing.
The clients lived upstairs while we did the basement, and in the basement while we did the main floor. They left on a vacation while we did the asbestos work.
Phase 2 involved a rock retaining wall on the rear of the property that required a lengthy approval process including municipal, fisheries, First Nations, and environmental authorities. The home had a new rear covered deck, garage, new roofline, all new interior and exterior finishing, new mechanical and electrical systems, new insulation and drywall. Phase 2 also involved an extensive asbestos abatement to remove Asbestos-containing materials in the flooring, plaster, insulation, and mastics.
Photography by Carsten Arnold Photography.
 Alair Homes Chilliwack
This was a challenging project for very discerning clients. The home was originally owned by the client’s father, and she inherited it when he passed. Care was taken to preserve the history in the home while upgrading it for the current owners. This home exceeds current energy codes, and all mechanical and electrical systems have been completely replaced. The clients remained in the home for the duration of the reno, so it was completed in two phases. Phase 1 involved gutting the basement, removing all asbestos containing materials (flooring, plaster), and replacing all mechanical and electrical systems, new spray foam insulation, and complete new finishing.
The clients lived upstairs while we did the basement, and in the basement while we did the main floor. They left on a vacation while we did the asbestos work.
Phase 2 involved a rock retaining wall on the rear of the property that required a lengthy approval process including municipal, fisheries, First Nations, and environmental authorities. The home had a new rear covered deck, garage, new roofline, all new interior and exterior finishing, new mechanical and electrical systems, new insulation and drywall. Phase 2 also involved an extensive asbestos abatement to remove Asbestos-containing materials in the flooring, plaster, insulation, and mastics.
Photography by Carsten Arnold Photography.
 Alair Homes Chilliwack
This was a challenging project for very discerning clients. The home was originally owned by the client’s father, and she inherited it when he passed. Care was taken to preserve the history in the home while upgrading it for the current owners. This home exceeds current energy codes, and all mechanical and electrical systems have been completely replaced. The clients remained in the home for the duration of the reno, so it was completed in two phases. Phase 1 involved gutting the basement, removing all asbestos containing materials (flooring, plaster), and replacing all mechanical and electrical systems, new spray foam insulation, and complete new finishing.
The clients lived upstairs while we did the basement, and in the basement while we did the main floor. They left on a vacation while we did the asbestos work.
Phase 2 involved a rock retaining wall on the rear of the property that required a lengthy approval process including municipal, fisheries, First Nations, and environmental authorities. The home had a new rear covered deck, garage, new roofline, all new interior and exterior finishing, new mechanical and electrical systems, new insulation and drywall. Phase 2 also involved an extensive asbestos abatement to remove Asbestos-containing materials in the flooring, plaster, insulation, and mastics.
Photography by Carsten Arnold Photography.
 Alair Homes Chilliwack
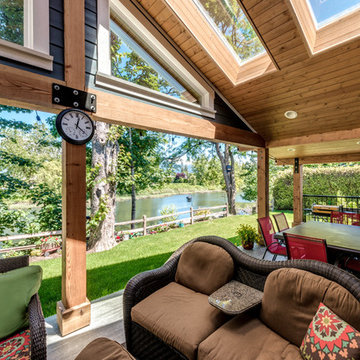
This was a challenging project for very discerning clients. The home was originally owned by the client’s father, and she inherited it when he passed. Care was taken to preserve the history in the home while upgrading it for the current owners. This home exceeds current energy codes, and all mechanical and electrical systems have been completely replaced. The clients remained in the home for the duration of the reno, so it was completed in two phases. Phase 1 involved gutting the basement, removing all asbestos containing materials (flooring, plaster), and replacing all mechanical and electrical systems, new spray foam insulation, and complete new finishing.
The clients lived upstairs while we did the basement, and in the basement while we did the main floor. They left on a vacation while we did the asbestos work.
Phase 2 involved a rock retaining wall on the rear of the property that required a lengthy approval process including municipal, fisheries, First Nations, and environmental authorities. The home had a new rear covered deck, garage, new roofline, all new interior and exterior finishing, new mechanical and electrical systems, new insulation and drywall. Phase 2 also involved an extensive asbestos abatement to remove Asbestos-containing materials in the flooring, plaster, insulation, and mastics.
Photography by Carsten Arnold Photography.
7