
Search results for "Leaving" in Home Design Ideas
 Ecnomus Construction Group Inc.
Jarrett Ford
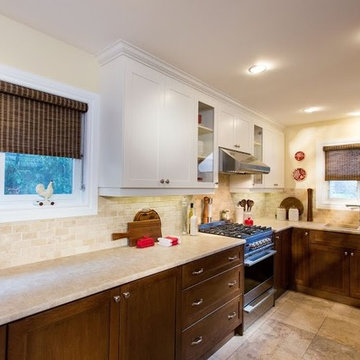
Example of a mid-sized classic galley marble floor eat-in kitchen design in Toronto with a drop-in sink, shaker cabinets, dark wood cabinets, laminate countertops, beige backsplash, stone tile backsplash, stainless steel appliances and a peninsula
Example of a mid-sized classic galley marble floor eat-in kitchen design in Toronto with a drop-in sink, shaker cabinets, dark wood cabinets, laminate countertops, beige backsplash, stone tile backsplash, stainless steel appliances and a peninsula


Find the right local pro for your project

 Tile Doctor Ltd
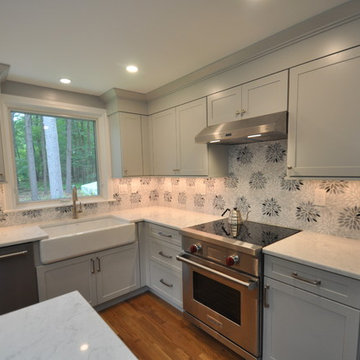
My client had recently moved into a bungalow in Godalming where they inherited the Limestone tiled kitchen floor pictured below. The previous owner had not looked after the floor very well and by the time they moved in it was pretty filthy. Limestone is a natural but porous stone where, unless sealed, attracts dirt into its tiny holes and as you would expect Cream Limestone shows the dirt easily. The protective seal had long since worn off this floor and was now ingrained with dirt it was now looking permanently dirty.
Before quoting I conducted a small test clean to work out the best method to renovate the stone and this also gives the client a good idea of how the floor will look after its finished. They were delighted with the initial result and happy with my quote gave me the go ahead.
On arrival first I helped the customer remove his tables and chairs and I then set about tapping up the plinths in the kitchen and the skirtings to protect them from cleaning solutions and equipment. The cleaning equipment I have invested in works more efficiently in open spaces, so it’s worth spending time at the beginning preparing the area first.
Next, I used a deck brush to apply a mixture of water and Tile Doctor Pro-Clean to the dirtiest tiles. Tile Doctor Pro-Clean works well when left to dwell for ten minutes or so. I also applied the same product to the grout over half the room so it could get a head start breaking down the dirt. Then using a stiff brush, I scrubbed the grout clean. Once it was worked loose, I extracted the now dirty solution with a wet vacuum.
With the grout clean I turned my attention back to the tiles with where the Pro-Clean had been left to soak in. Giving them a quick brush, I noted that what appeared to be permanently ingrained dirt had now come loose. To get the tiles really clean I used a 17″ rotary machine fitted with diamond encrusted buffer pads. This removes the tiny dots of dirt on the stone and with it comes any existing sealer and dirt.
A set of four burnishing pads were used, starting with a 400-grit, and finishing with a 3000-grit pad. The first 400-grit pad is coarse, and the grits become smoother as you work through the set. Water is used to lubricate the process and the released dirt is extracted in-between using the wet vacuum mentioned earlier. This process does take time but by the end of day one the floor was looking a lot better.
The next step is sealing however the floor needs to be bone dry for that, so I left a couple of industrial fans in place and left the Limestone to dry off overnight.
Returning the following day my first job was to ensure the floor was dry by taking multiple moisture readings with a damp meter. The readings were good, so I was able to make a start applying the sealer which for this floor was Tile Doctor Ultra Seal.
Ultra-Seal is an impregnating sealer that soaks into those small holes in the stone I mentioned earlier, I occupies the pores thus preventing dirt from becoming ingrained. The other feature of this sealer is it doesn’t change the appearance or colour of the stone leaving it with a very natural finish. Two coats of sealer were applied, leaving the seal to dry between each coat.
After the final coat was dried, I gave it a final polish with a soft nylon pad and the floor was finished. Before leaving we discussed after care which for this floor, I recommended Tile Doctor Stone Soap and I requested that the customer to stay out of the kitchen for a couple of hours while the sealer cured. They were over the moon with the new floor and could not believe the difference it had made to their kitchen.
Rupert Mcleod
West Surrey Tile Doctor


 Cabinet Artistry
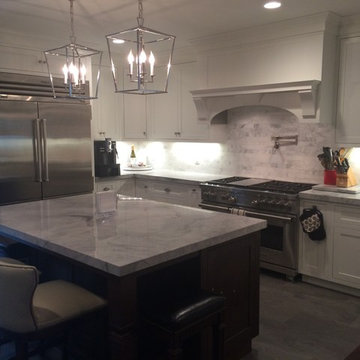
Inspiration for a large transitional u-shaped porcelain tile eat-in kitchen remodel in New York with an undermount sink, shaker cabinets, white cabinets, quartzite countertops, white backsplash, subway tile backsplash, stainless steel appliances and an island

 Proven Winners
This is a photo of 'Miss Ruby' Butterfly Bush in the landscape. Miss Ruby is known for its compact habit and vivid, rich pink blooms. Its a known attractor to butterflies and hummingbirds and grows best in full sun.


 Fox Mowing & Gardening
Lawn care maintenance by the seasons is a year long, continuous affair. To keep your lawn healthy and looking its best all through the year requires a considerable effort. Lawn care maintenance differs from season to season so here are some tips to get you started:
Lawn Care Maintenance in Summer
1 Proper watering is important in this season so that the soil does not dry out.
2 In summer the grass grows faster, so you'll need to mow it more often. However ensure that you don't cut off more than 1/3rd portion of the grass blades.
3 Just like the grass, weeds also thrive in warmer climates. Make sure to do some timely weeding in this season so that weed growth does not go out of hand.
4 During summer insects and pests are very active. Check the lawn soil for grubs, larvae of beetles and other insects that cause bare or dry patches. Go for pest control if you find an infestation. Re-seed the bare patches if needed.
Lawn Care Maintenance in the Fall
1 Falling leaves must be cleared more often during fall. This allows the grass to breathe and utilise the sunlight in preparation for the coming winter.
2 Clear any dead grass and other debris from the lawn in this season.
3 It is important to fertilise your lawn during the fall so that it gets the nourishment required for the dormant wintertime.
Lawn Care Maintenance in Winter
1 Leave the grass level as short as possible in preparation for the winter. This will prevent the blades from bending under the weight of the snow.
2 Just before the onset of winter is a good time to prune the shrubs and trees to encourage new growth and flowering as spring approaches.
3 It is a good idea to clear the lawn and yard of all outdoor furniture, pots, planters, logs, etc. This prevents the formation of dead patches as the snow vanishes.
4 Try to keep the side-walks and other spaces free of snow as much as possible.
Lawn Care Maintenance in Spring
1 Clean up the lawn of debris like leaves, twigs and other dead material that has collected over the winter.
2 Early spring is the time to fertilise the lawn which helps in its growth.
3 To get ready for mowing, begin by tuning up your lawn mower. Now is the time for a routine maintenance check.
4 Check for weed growth and de-weed your lawn so that it not only looks neat, but also ensures healthy growth.
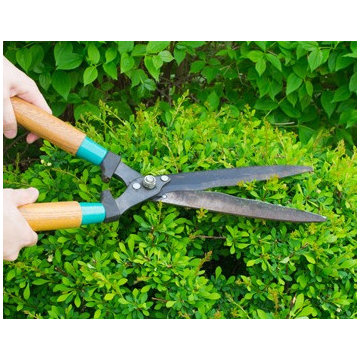
You can follow these lawn care maintenance tips and do it all yourself or you could hire a professional lawn maintenance service like Fox Mowing to keep up the schedules. Fox Mowing( http://foxmowing.com.au/) takes up lawn and Garden Maintenance Professionals contracts along with other jobs like weeding and pest control, fertilising, mulching, debris removal, pruning, hedge maintenance, etc.
Lawn Care Maintenance in Summer
1 Proper watering is important in this season so that the soil does not dry out.
2 In summer the grass grows faster, so you'll need to mow it more often. However ensure that you don't cut off more than 1/3rd portion of the grass blades.
3 Just like the grass, weeds also thrive in warmer climates. Make sure to do some timely weeding in this season so that weed growth does not go out of hand.
4 During summer insects and pests are very active. Check the lawn soil for grubs, larvae of beetles and other insects that cause bare or dry patches. Go for pest control if you find an infestation. Re-seed the bare patches if needed.
Lawn Care Maintenance in the Fall
1 Falling leaves must be cleared more often during fall. This allows the grass to breathe and utilise the sunlight in preparation for the coming winter.
2 Clear any dead grass and other debris from the lawn in this season.
3 It is important to fertilise your lawn during the fall so that it gets the nourishment required for the dormant wintertime.
Lawn Care Maintenance in Winter
1 Leave the grass level as short as possible in preparation for the winter. This will prevent the blades from bending under the weight of the snow.
2 Just before the onset of winter is a good time to prune the shrubs and trees to encourage new growth and flowering as spring approaches.
3 It is a good idea to clear the lawn and yard of all outdoor furniture, pots, planters, logs, etc. This prevents the formation of dead patches as the snow vanishes.
4 Try to keep the side-walks and other spaces free of snow as much as possible.
Lawn Care Maintenance in Spring
1 Clean up the lawn of debris like leaves, twigs and other dead material that has collected over the winter.
2 Early spring is the time to fertilise the lawn which helps in its growth.
3 To get ready for mowing, begin by tuning up your lawn mower. Now is the time for a routine maintenance check.
4 Check for weed growth and de-weed your lawn so that it not only looks neat, but also ensures healthy growth.
You can follow these lawn care maintenance tips and do it all yourself or you could hire a professional lawn maintenance service like Fox Mowing to keep up the schedules. Fox Mowing( http://foxmowing.com.au/) takes up lawn and Garden Maintenance Professionals contracts along with other jobs like weeding and pest control, fertilising, mulching, debris removal, pruning, hedge maintenance, etc.

 Schreffler Custom Wood Flooring
Living room - transitional medium tone wood floor living room idea in Other with brown walls
 Linwood Custom Homes
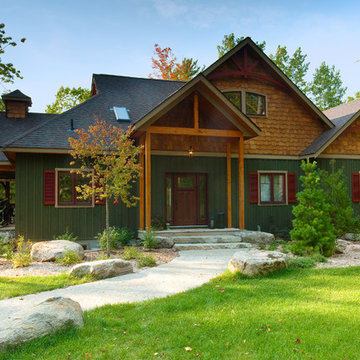
Large beach style brown two-story concrete fiberboard gable roof photo in Vancouver

 Boca do Lobo
Inspiration for a huge timeless formal medium tone wood floor living room remodel in DC Metro with no fireplace and no tv
 Re:Location Design
Carolyn Fullerton
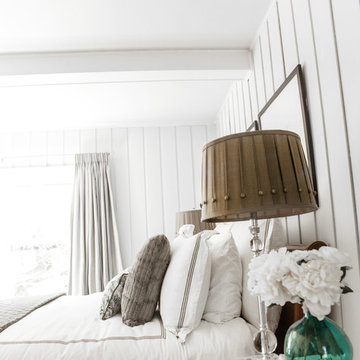
Example of a mid-sized transitional guest medium tone wood floor bedroom design in Toronto with white walls and no fireplace
Example of a mid-sized transitional guest medium tone wood floor bedroom design in Toronto with white walls and no fireplace




 Sierra Living Concepts Inc
Dimension:
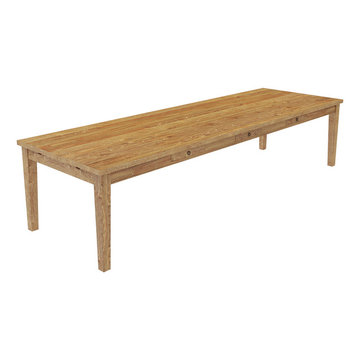
178" L X 44" D X 31" H ( With 2 leaves of 20" each ) 138" L X 44" D X 31" H (Without Leaf)
Table Top: 1.5"
Distance Between Legs: 126"
Drawers: 16" L X 16" D X 2.5" H
The 100% handcrafted Brussels Teak Wood Large Dining Table with Extension For 16 People is made to provide you with comfort during large get-together while enhancing the room decor with its neat looks. The table comes with wide table top with two additional leaves. It further features three drawers with delicate loop pullouts to tuck away handy dining accessories, napkins, and cutlery. The sleek frame with modern legs, make it a perfect addition to larger modern homes. Elegant from every angle, this extension Teak wood table adds a sophisticated style to your dining room.
Materials: This extra large dining table is handcrafted from 100% solid Teak wood giving it enough sturdiness and elegance for you to use it for years and enjoy meal times even more with friends and family.
Special Features:
• 100% Handcrafted
• Extra large dining table
• Solid Teak wood construction
• Features extendable leaves
• Three drawers for storage
• Heirloom quality
Note: Real wood is a product of nature, and as such, no two pieces are alike. Variations in solid wood grain patterns are to be expected and make each furniture uniquely beautiful, just like us humans.

 PrintMySpace
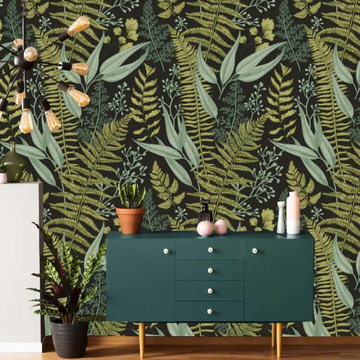
Buy Tropical Green Fern Leaf Wallpaper Online. Great quality wallpapers from printmyspace.com. Shop for a large range of wallpaper and mural patterns on www.etsy.com/shop/printmyspace. Free Shipping to USA, UK, Canada. Very low shipping charges to Australia and Europe!
 Full Bloom Cottage
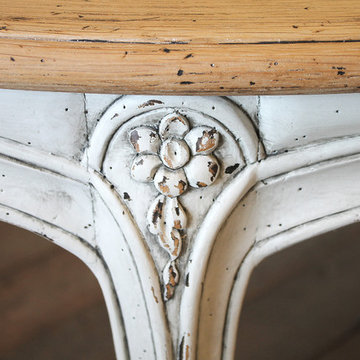
20th century French Provincial parquetry dining table. Beautiful French Provincial dining table with natural wood parquetry top. Table base has been painted in a soft oyster white finish, with subtle distressed edges, and finished with an antique glaze. Table is 48" diameter, with two 18" leaves to make this table 84" long Measures: 84" total length 48" W 30" H leg clearance 25" H Two 18" leaves 48 RD without leaves.
93