
Search results for "Lifting process" in Home Design Ideas

 Jennifer Gardner Design
A classic Seattle craftsman home is reimagined and restored. We cherished the opportunity to help a young couple in Seattle develop a materials, fixtures and lighting package for their beloved home remodel. The master bathroom is layered with a mix of white and black marble hex mosaic floor tile, classic white offset brick pattern subway wall tile, and beautifully crafted wood wainscoting. Kohler's Artifacts plumbing trim collection brings fresh vintage style to the vanity and shower. An easy to care for quartz counter and backsplash adds a bright contrast to the a gorgeous providence blue custom vanity. The powder room which doubles as a guest bathroom is dressed in Pratt and Larson's ceramic mosaic floor tile and paired with a space saving pedestal sink by American Standard. Wall niches lined with white quartz are incorporated into both showers creating a dedicated place to store bathing amenities. The checkboard cork floor in the kitchen adds a FUN pop of personality. Custom mudroom cubbies and a built in eating nook were beautifully crafted and finished in a crisp white paint. Light fixtures by Rejuvenation bathe the room in beautiful period appropriate light. Clever storage hides small appliances and a stand mixer. This project was a labor of love for he homeowners who took an active part in the process and a joy for our team to be involved in!
Interior Design (Materials, Fixtures and Lighting Package) by Jennifer Gardner Design
Architecture by Gant Nychay Architecture
Custom Mudroom, Kitchen Table and Eating Nook Built-ins: Hosburgh Custom Woodwork
Photography by Emily Keeney
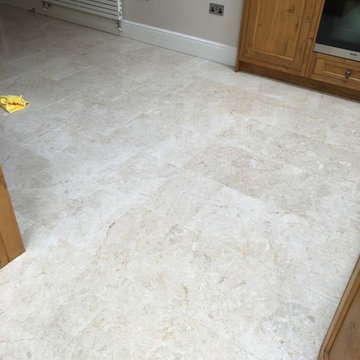
 Tile Doctor Ltd
Marble tiles can be tumbled in large drums to achieve an aged and softened effect, and this can look very nice providing that the stone is adequately maintained.
In the case of this floor at a property in Twickenham South West London, the Marble tiles that had been laid over five years ago, and in that time the sealer had worn down offering the floor little protection. Dirt had now become ingrained in the pores of the stone and grout, and a deep clean and fresh seal were required to restore the stone’s original colour and lustre. The property owner asked me to complete the job and I was more than happy to oblige.
To begin the restoration, I applied both Tile Doctor Pro-Clean, which is a high alkaline cleaner, and Tile Doctor Remove and Go, which a heavy-duty stripper and remover, to the floor and scrubbed the products in using a scrubbing pad fitted to a professional rotary machine.
The chemical solvents in the Remove and Go helped to break down any old sealer that remained inside the stone, allowing the Pro Clean to then work its magic on the stubborn ingrained dirt the customer had struggled to remove previously. Some of the deeper veins and grout lines I chose to scrub by hand to ensure the fullest and most meticulous clean possible.
The resulting soiled cleaning solution was then pressure rinsed with water and the soil extracted with a wet-vacuum, leaving a completely clean floor that was now ready to be sealed using a new sealant.
I returned to the property the following day after allowing the Marble tiles to dry fully. Drying the tiles is a crucial part of the restoration process, since even a small quantity of excess moisture can cloud the sealer and prevent it from working to its fullest capabilities.
I applied two coats of our solvent-based impregnating sealer known as Tile Doctor Colour Grow. As the name of the product suggests, Colour Grow not only protects the tiles against ingrained soil, it also thoroughly lifts and enhances the natural colours in the stone.
The new seal will make it easy for our customer to maintain the floor, making daily cleaning easier. It will also protect the stone against the nasty spillages that are common in kitchens and living rooms.
The customer was thrilled with the much-improved appearance of the Marble tiles and is very reassured that they will now stay in great condition for a long time. Another satisfied client!
Jonathan Oldham
South Middlesex Tile Doctor
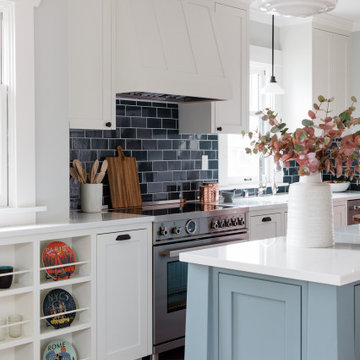 Jennifer Gardner Design
A classic Seattle craftsman home is reimagined and restored. We cherished the opportunity to help a young couple in Seattle develop a materials, fixtures and lighting package for their beloved home remodel. The master bathroom is layered with a mix of white and black marble hex mosaic floor tile, classic white offset brick pattern subway wall tile, and beautifully crafted wood wainscoting. Kohler's Artifacts plumbing trim collection brings fresh vintage style to the vanity and shower. An easy to care for quartz counter and backsplash adds a bright contrast to the a gorgeous providence blue custom vanity. The powder room which doubles as a guest bathroom is dressed in Pratt and Larson's ceramic mosaic floor tile and paired with a space saving pedestal sink by American Standard. Wall niches lined with white quartz are incorporated into both showers creating a dedicated place to store bathing amenities. The checkboard cork floor in the kitchen adds a FUN pop of personality. Custom mudroom cubbies and a built in eating nook were beautifully crafted and finished in a crisp white paint. Light fixtures by Rejuvenation bathe the room in beautiful period appropriate light. Clever storage hides small appliances and a stand mixer. This project was a labor of love for he homeowners who took an active part in the process and a joy for our team to be involved in!
Interior Design (Materials, Fixtures and Lighting Package) by Jennifer Gardner Design
Architecture by Gant Nychay Architecture
Custom Mudroom, Kitchen Table and Eating Nook Built-ins: Hosburgh Custom Woodwork
Photography by Emily Keeney
Find the right local pro for your project
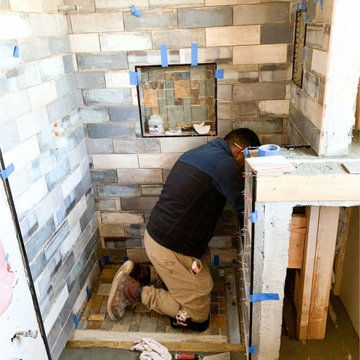
 Adar Builders Inc.
This beautiful bathroom remodeling features a full building using unique and colorful tiles both inside and outside of the shower. The small bathroom instantly got a lift of space and style by incorporating different tile elements for a farmhouse bathroom twist. In this gallery you can see the final look as well as the process, before and 3D model design.
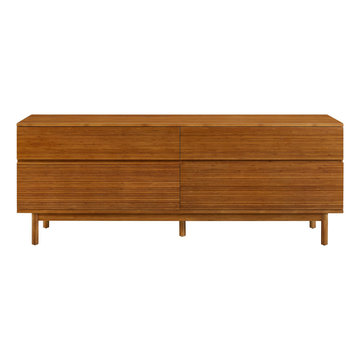
 Greenington LLC
The quiet elegance of the Ventura four drawer double dresser is all about celebrating the beautiful grain of solid Amber bamboo. The modern style and simple clean lines of the double dresser show off the rich variety of Amber’s colors and feature a craftsman-built frame made from solid bamboo, resting on legs that lift the chest up off the floor. Four wide solid bamboo drawers display expanses of rich bamboo grain uninterrupted by hardware, with each drawer beautifully finished inside and out. Each drawer is built using English dovetail joinery, and sit on under-mounted, soft-close glides for easy opening and closing. Sustainable and earth friendly, Amber is not a surface stain, the color is the result of an innovative new process using earth friendly heat and steam, to entirely transform the solid bamboo material into Amber’s deep color. Each Ventura double dresser is beautifully finished on all four sides and ships professionally assembled. Discover the expert craftsmanship packed into each piece of Greenington bamboo furniture. Greenington furniture is made using an earth friendly, renewable resource harvested from fully sustainable and rapidly growing forests.
Features:
• Crafted in 100% solid Moso bamboo
• No plywood, particle board, or MDF
• Earth friendly, sustainable resource
• 20% harder than Red Oak
• Solid Amber bamboo
• Fully assembled nightstand and chests
• Beautifully finished on all 4 sides
• Solid bamboo drawer box with English dovetail
• Under mount, soft closing drawer glides
• Tough metal to metal connecting hardware
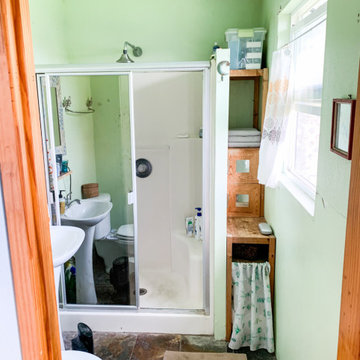 Adar Builders Inc.
This beautiful bathroom remodeling features a full building using unique and colorful tiles both inside and outside of the shower. The small bathroom instantly got a lift of space and style by incorporating different tile elements for a farmhouse bathroom twist. In this gallery you can see the final look as well as the process, before and 3D model design.
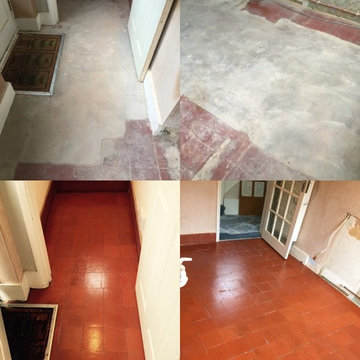 Tile Doctor Ltd
This customer from Woking had a Quarry tiled kitchen floor that she simply didn’t think could be restored. The floor had been unearthed after many years of being covered by a layer of levelling compound cement and then linoleum. Indeed, the situation certainly looked dire, but I carried out a successful test clean on a patch of the floor where the cement was at its thickest to show that it would be possible to conduct a full restoration. Having seen the results, the customer was more than happy for me to get the work underway.
To begin the restoration, I soaked small sections with water and Tile Doctor Remove and Go our heavy duty coatings remover. The solution was left to dwell for a short period to soften the cement, before I used the heat from a steamer in combination with a hand scraper to begin lifting away the muck. As you can probably imagine, this was an arduous and intensive process which took a full four days to fully complete.
Next, I cleaned the cement-free tiles using our high alkaline tile cleaning product Tile Doctor Pro Clean diluted 1 part cleaner with 3 parts water. This helped to eradicate the leftover muck once I had removed the bulk of the cement. I then sprayed Tile Doctor Grout Clean Up onto the grout lines and tiles to fully neutralise them and also remove any cement residue. Finally, I steamed the floor and left it for a week to dry out completely.
Upon my return to the property I sealed the floor with two coats of Tile Doctor Colour Grow, an impregnating sealer which really enhances the natural colours stone, and four coats of Tile Doctor Seal and Go, a topical sealer which provides a high quality sheen finish and durable protection against stains.
The customer was over the moon with the results and left some great feedback:
“Wayne did a really superb job. It was a very tough task, hot and exhausting, but he was fantastically good-humoured throughout, and kept me really well-informed. He was 100% reliable and very good at communicating between visits. I’m absolutely thrilled with the results! Thank you Wayne and thank you Tile Doctor! Would definitely recommend, and use your services again.”
 BJOID Inc.
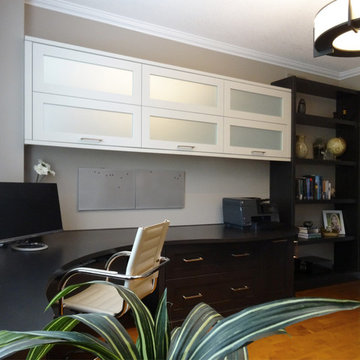
ELITE DESIGN AWARD WINNER 2016:
This academic professor works from home, and decided to come up from the basement to take advantage of the natural light on the main floor. We turned this playroom into a fully functioning multi-person office space that allows customization and flexibility no matter the task. His research is far from square and boring – so we came up with a unique curvilinear countertop design using Maple desktops from Décor Cabinets, which truly add a touch of whimsy to the everyday. Against his wife’s preference, his creative process requires access to many types of material at once, so solutions like bi-fold cabinets and the large aluminum tambour doors allow him to organize loose papers, but shut away the mess when the day is done.
Mixing a few different finishes creates enough interest so that staying in the same room for long periods is far from boring, and the acid etch mirror inserts give a frosted glass look without showing any of the mess inside.
With this design, the move upstairs was a benefit for everyone.

 Southern Dreamscapes LLC
The front lawn, a section of 'Mahogany' colored concrete, landing and steps to the entrance.
Demolition of the entire front yard to the house resulted in removing a 10' high retaining wall, walkway and steps, numerous large pine trees and 20 yr old buried builders trash.
Grading consisted of a cut and fill process totaling 20- 6" lifts and compaction tests for each layer to withstand 4000 psi... in summary the driveway is 3500psi (very difficult for color, especially Mahogany).
We endured 'torrential rains' resulting in massive mud flows overflowing the straw bales around the entire perimeter.
 Reico Kitchen & Bath
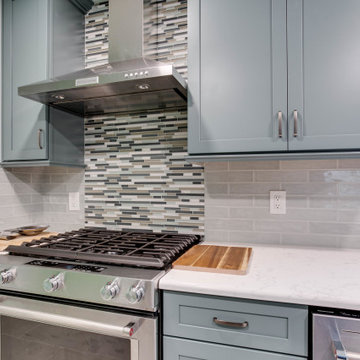
Designed by Jen Denham of Reico Kitchen & Bath in White Plains, MD in collaboration with Potomac LLC, this kitchen remodeling project features a transitional style inspired design with Merillat Masterpiece cabinets in the door style Martel in the finish Evercore Rainfall. The kitchen countertops are Cambria Torquay.
The kitchen also includes Roma Splendor Keystone Blend tile, Adex Habitat Leaf Glossy tile and 12x24 Nashville Nord Cement tile.
“The clients were a joy to work with! They were able to roll with the process during all the issues and delays with Covid and were gracious and kind when everything was finished. They were so full of inspiration and were not afraid of color. They wanted to incorporate their favorite shades of green into each aspect of the kitchen,” said Jen.
“We tried to open up the kitchen as much as possible and allow a bit more counter and storage space. A nice feature was being able to take the cabinets up to the ceiling to give more storage. Adding accessories like roll outs, a utensil pull out by the stove and a mixer lift up brought the extra storage needed.”
Photos courtesy of BTW Images.
 Adar Builders Inc.
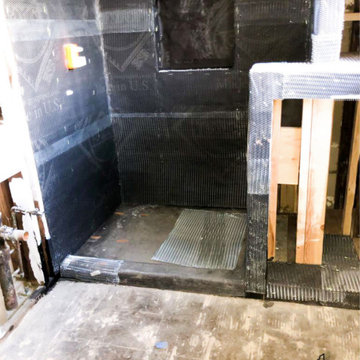
This beautiful bathroom remodeling features a full building using unique and colorful tiles both inside and outside of the shower. The small bathroom instantly got a lift of space and style by incorporating different tile elements for a farmhouse bathroom twist. In this gallery you can see the final look as well as the process, before and 3D model design.
 Tile Doctor Ltd
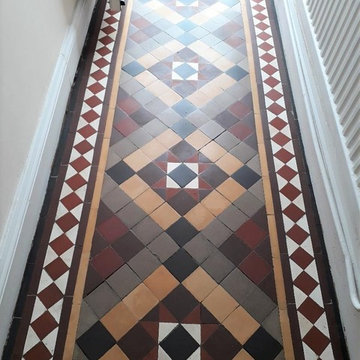
As is often the case in years past and for whatever reason many homeowners covered their decorative Victorian hallway tiles in a variety of products from carpet to laminate flooring. These days the trend has reversed and quite rightly many homeowners now realise the value a tiled floor can bring to a property and look to us to have it restored.
Our client had purchased a property in Norfolk seaport of Kings Lynn and, on lifting the dirty old carpet and decaying underlay in the hallway, discovered a beautiful tiled entrance hall. It was obvious that a previous owner had decided to lay carpet over the tiles as an easy way of hiding the result of careless renovation and decorating which had resulted in a thick coating of plaster, paint, carpet tape glue and various other contaminants which had become firmly stuck to the surface. There were also two small rectangular black and brown tiles missing behind the front door which had been damaged during the removal of some old lead pipes.
This was clearly a job which would need somewhat more than a scrubbing brush and a bottle of Flash!
Our first job was to remove as much of the solid contaminants as possible by hand with floor scrapers and a steamer which softened the more stubborn lumps. We then applied Tile Doctor Remove & Go which is a powerful alkaline stripper to the whole area, left it to dwell on the surface for twenty minutes and then scrubbed it in using a rotary machine fitted with a black scrubbing pad. The resulting slurry was then power rinsed and extracted away using our Ninja machine which is a high-power industrial vacuum. Any remaining patches where the carpet tape had been stuck down were spot treated using Tile Doctor Nanotech HBU which made short work of the hardened glue.
The result was a clean floor, but the surface still felt slightly rough and pitted, a problem which we resolved using the rotary machine fitted with a 200-grit diamond burnishing pad followed by a 400-grit pad with a little 400 grit honing powder which left the surface smooth, silky and ready for the application of a sealer.
Finally, we acid washed the whole area using Tile Doctor Acid Gel, a slow release product which would neutralise any remaining chemicals, improve new sealer adhesion and inhibit the future production of any efflorescence salts. We had used a fair amount of water during the cleaning process, so we left the floor to dry off thoroughly overnight with assistance from our commercial dehumidifier.
On our return the following day, we discussed the sealer options with the client and recommended using microporous Tile Doctor Colour Grow which is an impregnating sealer that seeps into the pores of the stone protecting it from within. It will provide an excellent fluid resistant seal whilst enhancing the natural colours in the stone, additionally it’s fully breathable thereby enabling any moisture trapped under the floor to rise through the floor and evaporate. This is important on old floors like this where no damp-proof membrane was installed. The sealer was applied with a paint pad in tow coats and allowed to dry for an hour before buffing the floor with a hog’s hair pad to give a rich natural-look sheen finish.
The Victorian tiles responded well to the treatments which were completed in two consecutive days. My client was extremely pleased with the results and left the following comment:
“My floor was in poor condition after being buried under carpet as well as many, many years of paint and muck. I enjoyed the time they spent at my home and wouldn’t hesitate to use (or recommend) the Tile Doctor service in the future.”
Nick White
Norfolk Tile Doctor
 DCS Built LLC
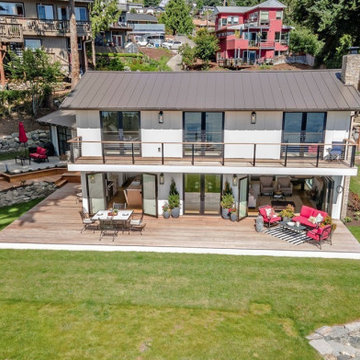
LAKE SAMMAMISH CONTEMPORARY LAKE FRONT
Are you ready to start your project?
We look forward to working with you on your next remodel or new custom built home, from the design process through construction and delivery.
Book a service with us!
Consultations, Property Research and Project Consultations, Permit Set, Pierce County Site Visit, Washington State Project Design Review.
Indoor, outdoor, and all general construction contracting services!
All other services, we have got you covered!
DCS BUILT: Contact Us
https://dcsbuilt.com/contact-us
Exterior, Porch, Structural, Concrete construction, Driveway, Concrete patio, Bedroom Additions, Square Footage, Custom Flatwork, remodel, renovate, near me, Electrical, Plumbing, Mechanical, Upgrades, Roofing, Paint, Windows, Doors, Finishing, Trim, Stairway, Framing, Existing, New Addition, fascia, siding, HVAC, fence contractor, fence company near me, fence company, fence installation near me, fence builders, fence installers, local, near me, deck company, house lift company, house foundation leveling, foundation repair, beam repair, flexural repair, non-destructive testing, repair materials, repeated loading, reinforce beam, structural beam repair near me, structural support, structural support jacks, beam support, floor joist repair, beam replacement, remodeler, bathroom renovation, kitchen renovation, new kitchen cost, bathroom remodelers, kitchen remodelers, bathroom designer, bathroom remodel, basement remodeling, cost to finish, basement finishing, deck builders near me, plumber near me, electrician near me, hvac near me, flooring near me, roofing near me, framing near me, carpentry near me, structural repair.
Anderson Island, Vashon Island, Mcneil Island, Washington, Puget Sound, Key Peninsula, Gig Harbor, University Place, Lakewood, Steilacoom, Long Branch, Fort Lewis, Fox Island, Mcchord, Olympia, Shelton, Belfair, Pierce County, King County, Sumner, Puyallup, South Hill, Edgewood, Auburn, Enumclaw, Federal Way, Parkland, Graham, Spanaway, Eatonville, Covington, Elk Plain, Tacoma, Kent, Lakewood, Maple Valley, Des Moines, Auburn, Issaquah, New Castle, Tukwilla
 Proline Range Hoods
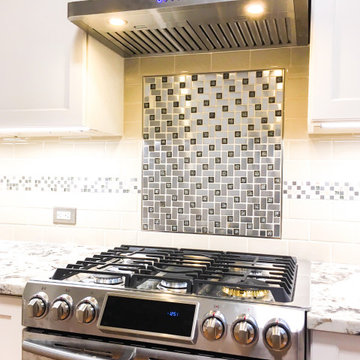
The PLJW 185 is one of our most popular under cabinet range hoods. It's incredibly affordable and packs a strong punch for its size; at just 5 inches tall, this under cabinet hood features a 600 CFM single blower! The control panel in the front of the hood is easy to navigate, featuring stainless steel push buttons with a blue LED display.
This model also includes two LED lights to speed up your cooking process in the kitchen. You won't spend much time cleaning either, thanks to dishwasher-safe stainless steel baffle filters. Simply lift them out of your range hood and toss them into your dishwasher – it takes less than a minute!
The PLJW 185 comes in two sizes; for more details on each of these sizes, check out the links below.
PLJW 185 30"
https://www.prolinerangehoods.com/30-under-cabinet-range-hood-pljw-185-30.html/
PLJW 185 36"
https://www.prolinerangehoods.com/36-under-cabinet-range-hood-pljw-185-36.html/
 Norfolk Kitchen & Bath
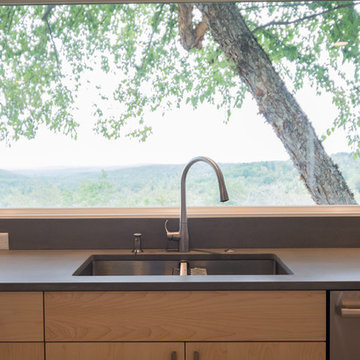
This beautiful contemporary kitchen was designed by Mariah from our Nashua, NH showroom. The design features a full-access slab door cabinet with granite & quartz countertops, an island with a waterfall countertop edge, an induction cooktop with a built-in ceiling vent, and an existing 10ft. window behind the sink. The original kitchen did not use the entire space, which was a main focus during the design process. Pushing the sink against the wall allowed for a bigger island and more space to move around within the kitchen. The homeowners originally wanted concrete countertops, but in the end decided on a more durable granite countertop that looked just like concrete!
Special features in this kitchen include two mixer lift cabinets, under-cabinet lighting, a spice rack, double trash, roll out trays and floating shelves above the countertop.
Mariah also designed a laundry room cabinetry unit, featuring JSI Designer Cabinetry & a butcher block top, and an entertainment center in this home.
Cabinets: ShowplaceEVO Milan
Finish: Natural
Countertops: Quartz & Granite
Color: Calacatta Nuvo/Unknown
 Greenington LLC
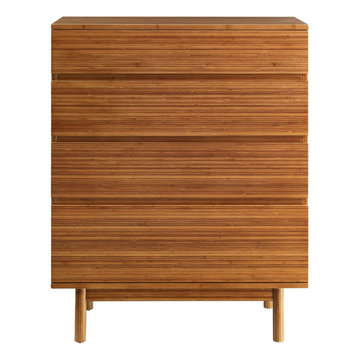
The quiet elegance of the Ventura four drawer high chest is all about celebrating the beautiful grain of solid Amber bamboo. The modern style and simple clean lines of the chest show off the rich variety of Amber’s colors and feature a craftsman-built frame made from solid bamboo, resting on legs that lift the chest up off the floor. Four wide solid bamboo drawers display expanses of rich bamboo grain uninterrupted by hardware, with each drawer beautifully finished inside and out. Each drawer is built using English dovetail joinery, and sit on under-mounted, soft-close glides for easy opening and closing. Sustainable and earth friendly, Amber is not a surface stain, the color is the result of an innovative new process using earth friendly heat and steam, to entirely transform the solid bamboo material into Amber’s deep color. Each Ventura high chest is beautifully finished on all four sides and ships professionally assembled. Discover the expert craftsmanship packed into each piece of Greenington bamboo furniture. Greenington furniture is made using an earth friendly, renewable resource harvested from fully sustainable and rapidly growing forests.
Features:
• Crafted in 100% solid Moso bamboo
• No plywood, particle board, or MDF
• Earth friendly, sustainable resource
• 20% harder than Red Oak
• Solid Amber bamboo
• Fully assembled nightstand and chests
• Beautifully finished on all 4 sides
• Solid bamboo drawer box with English dovetail
• Under mount, soft closing drawer glides
• Tough metal to metal connecting hardware"
 Adar Builders Inc.
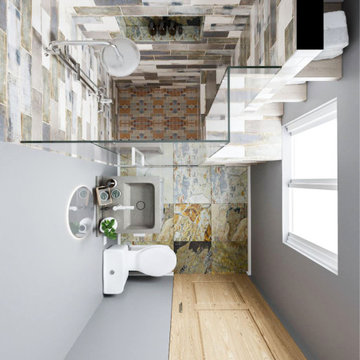
This beautiful bathroom remodeling features a full building using unique and colorful tiles both inside and outside of the shower. The small bathroom instantly got a lift of space and style by incorporating different tile elements for a farmhouse bathroom twist. In this gallery you can see the final look as well as the process, before and 3D model design.
 Norfolk Kitchen & Bath
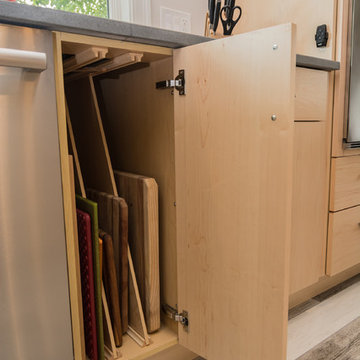
This beautiful contemporary kitchen was designed by Mariah from our Nashua, NH showroom. The design features a full-access slab door cabinet with granite & quartz countertops, an island with a waterfall countertop edge, an induction cooktop with a built-in ceiling vent, and an existing 10ft. window behind the sink. The original kitchen did not use the entire space, which was a main focus during the design process. Pushing the sink against the wall allowed for a bigger island and more space to move around within the kitchen. The homeowners originally wanted concrete countertops, but in the end decided on a more durable granite countertop that looked just like concrete!
Special features in this kitchen include two mixer lift cabinets, under-cabinet lighting, a spice rack, double trash, roll out trays and floating shelves above the countertop.
Mariah also designed a laundry room cabinetry unit, featuring JSI Designer Cabinetry & a butcher block top, and an entertainment center in this home.
Cabinets: ShowplaceEVO Milan
Finish: Natural
Countertops: Quartz & Granite
Color: Calacatta Nuvo/Unknown
 Reico Kitchen & Bath
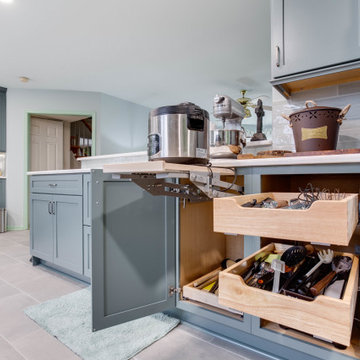
Designed by Jen Denham of Reico Kitchen & Bath in White Plains, MD in collaboration with Potomac LLC, this kitchen remodeling project features a transitional style inspired design with Merillat Masterpiece cabinets in the door style Martel in the finish Evercore Rainfall. The kitchen countertops are Cambria Torquay.
The kitchen also includes Roma Splendor Keystone Blend tile, Adex Habitat Leaf Glossy tile and 12x24 Nashville Nord Cement tile.
“The clients were a joy to work with! They were able to roll with the process during all the issues and delays with Covid and were gracious and kind when everything was finished. They were so full of inspiration and were not afraid of color. They wanted to incorporate their favorite shades of green into each aspect of the kitchen,” said Jen.
“We tried to open up the kitchen as much as possible and allow a bit more counter and storage space. A nice feature was being able to take the cabinets up to the ceiling to give more storage. Adding accessories like roll outs, a utensil pull out by the stove and a mixer lift up brought the extra storage needed.”
Photos courtesy of BTW Images.
 Tile Doctor Ltd
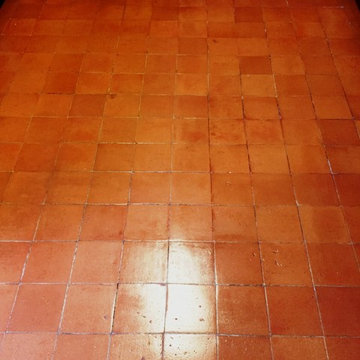
Not too long ago I visited a client who had just moved into a lovely old cottage in Milton, Oxfordshire. She wanted to restore many of the antique features of the building, including a fantastic Quarry tiled floor in the kitchen.
Quarry is typically a robust, hard wearing stone, but in a high traffic area like a kitchen, the tiles will need regular maintenance. These tiles clearly hadn’t seen a thorough clean and fresh seal in a long time, and so I was called in to provide just that.
On the first day of work, I gave the Quarry tiles a deep clean using a strong solution of Tile Doctor Pro-Clean and water. Pro-Clean is a versatile alkaline cleaner that also helps to break down any old and no longer effectual sealer remaining on the tiles.
The solution was applied evenly to the floor and left to dwell for half an hour, allowing time for it to seep into the stone to get underneath and lift out the ingrained dirt. I then removed the dirt by agitating the solution with a scrubbing pad fitted to a rotary floor scrubber. I worked in small sections at first, and gradually finished the entire floor.
After completing the initial clean, I rinsed away the soiled solution and vacuumed up the excess moisture using a wet-vac machine. I then scrubbed the floor an acid wash using a dilution of Tile Doctor Grout Clean-Up to remove grout smears and other mineral type deposits. The resulting solution was then removed in a similar fashion using a wet-vac.
The final step in the cleaning process was to rinse the floor with Tile Doctor pH Neutral Cleaner to remove any trace of product helps to tackle any remaining dirt and reset the pH balance of the tiles before sealing.
After leaving the floor to dry overnight, I returned the next day to the house to seal the floor with Tile Doctor Seal & Go, a water-based topical sealer which gives the floor an aesthetically pleasing sheen and a robust surface seal.
The photos demonstrate the results better than this short account can, needless to say the floor is now transformed.
Barry Woodward
Oxfordshire Tile Doctor
14