Search results for "Lubricant" in Home Design Ideas

Barry Grossman Photography
Trendy master carpeted bedroom photo in Miami with no fireplace and gray walls

The sink base features two full extension rollouts that handle trash and recyclables in the front and have divided storage for cleaning supplies in the back. No more getting on your hands and knees to access this cabinet. Idea found in Fine Homebuilding magazine. Small tilt drawer holds sponges.
The raised panel, French blue cabinets are finished with a dark brown glazing. These are full overlay doors and drawers, constructed with high precision to maintain a 1/8” gap between every side of a door and drawer.
PHOTO CREDIT: John Ray

Trendy black and white tile gray floor and single-sink bathroom photo in Phoenix with gray walls, an integrated sink and gray countertops
Find the right local pro for your project

THE DOOR NAME ORIGIN - "ALLUMINIO ELIVIA VERTICAL WOOD GRAIN 4HS"
Of all the interior door models in the Elivia collection, this one is perhaps the most unapologetically elegant. Why? Hmm … That which is self-evident can be the most difficult to explain.
Is it because it is built using the latest breakthroughs in interior door making technology? Look at the finish: the process of applying it utilizes something called “stretching” by professionals, which is to say that instead of simply slapping the finish on top of the interior door’s surface, our company fuses (for lack of a better word) the materials (on molecular level, no less), the result being that the finished product is more warp-resistant, scratch-resistant, and fade-proof than any interior door put together in the past. This is especially important in climates known for their high humidity levels. Yes, but this has more to do with engineering than aesthetics, right?
Okay, so, is this interior door super-elegant because it features all the wonderful state-of-the-art hardware, specifically, the 3D adjustable, self-lubricating concealed hinges (made in Italy, by the way – a country which is, arguably, the birthplace of elegance as a concept)? Self-lubricating means your interior door will never creak. 3D-adjustable means that the installation is quick and precise (far more so than what you’d expect from ordinary hinges). Concealed means, of course, that the pin will not be visible from either side of the interior door when it’s closed. Actually, there is no pin. Neat, isn’t it? Would that be it?
Perhaps. Elegance in interior doors is a tricky concept. It combines (well, at least in the case of this particular interior door model it does) the “wow!” effect with the long-term agreeability. How so, you might ask. Well. It gets your favorable attention the first time you set eyes on it (the “wow” part); after which, you’ll never get tired of looking at it. For as long as you own it, it’ll always be easy on the eyes.
That must be it.
Maybe. Maybe not. There’s more.
This interior door is almost certainly Italian in spirit. Italian culture is rooted in Greco-Roman (Italian designers are very proud of that fact). Look at the vertical latitudinal orientation (which is to say the direction) of the wood grain. Pointing upward means creating additional visual space, pushing the ceiling higher (because your ceilings can never be too high). This is a time-proven architectural trick which ancient Greeks, with their characteristic tongue-in-cheek humor, referred to as “optical correction.” (By the way, if you’d sooner increase, the visual horizontal space of your room, you should look into this interior door’s sister – with the appropriate direction of the wood grain).
And then there’s the 4HS part, which stands for four horizontal stripes – resembling the four strings on the violin: the ultimate elegant musical instrument if there ever was one.
In its present form, the violin appeared in early Sixteenth Century in (guess …) northern Italy. Of course. To be fair, it quickly gained popularity throughout Europe, and the rest of the world soon after.
It’s elegance (the appearance as well as the sound) agreed with both street musicians and the nobility. The French king Charles IX ordered an Italian master to construct twenty-four violins for him in the year 1560.
Was the violin the source of inspiration for our designers?
Let’s move on to the finish.

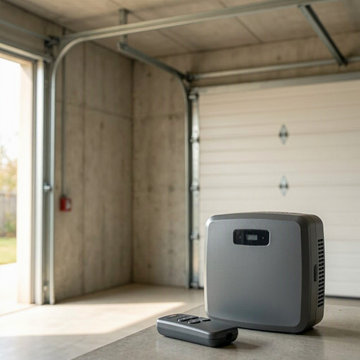
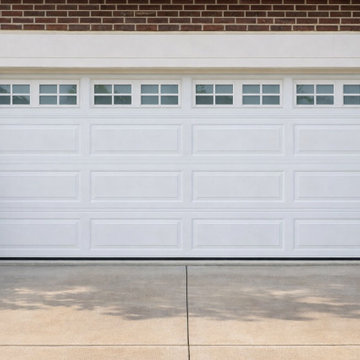
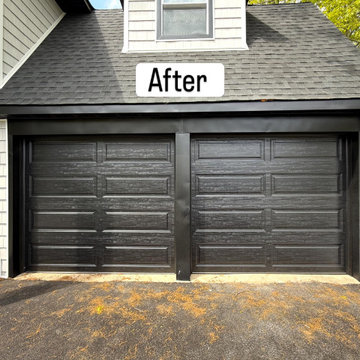
This project features a complete garage door maintenance service, including lubrication, tightening hardware, balancing the door, adjusting tracks, and performing a full safety inspection. The goal was to extend the door’s lifespan and prevent future breakdowns.

When used to clean natural stone, supermarket products can often cause more harm than good as this recent customer of mine discovered this the hard way!
Originally from South Africa, she had lived in a flat in Clapham for a couple of years, but had to suddenly return home earlier than expected. However, part of her flat rental agreement required her to leave the property clean and as she found it, including the fantastic Slate shower cubicle.
In a rush, the customer had attempted to clean the Slate using a popular supermarket bathroom cleaner. She left the product to sit on the base of the shower before scrubbing it in with an abrasive pan scourer.
This was a big mistake – and the customer called me in a panic after discovering that her attempts had left the Slate severely stained. I traveled to the property to see what could be done to set the situation straight.
Upon observing the damage in person, I decided that the best course of action would be to use a process known as burnishing to grind away the stains. I tested a small area of the cubicle with one of our handheld diamond encrusted burnishing blocks.
Happy with the results of the test Clean, I started to burnish the whole cubicle using our system of four burnishing blocks, starting with the coarsest first and working my way down to the finest. A small amount of water was used as lubrication for each pad.
Through the burnishing process, the white stains started to disappear, exposing the lighter grey coloured Slate shower base.
After drying the area completely with a heat gun, I was able to seal the stone with two coats of Tile Doctor Colour Grow.
This impregnating sealer not only protects the stone but also importantly it restores the natural dark shades in the Slate, enhancing its overall appearance. As an impregnating sealer, Colour Grow penetrates the pores in the stone to fill them and prevent trapped dirt.
To say the customer was very relieved would be a complete understatement! By hiring in professional assistance, the customer was able to resolve the situation quickly and painlessly – and more importantly hold onto her £3,000 deposit!
Rupert Mcleod
West Surrey Tile Doctor

( 27 ) STEEL NON INSULATED STEEL CLOPAY DOOR, 8' X 7' & 8' X 6'6"
PERFORM TOTAL REBUILD ON EACH OF THE ( 27 ) GARAGE DOORS. THE REBUILD WILL INCLUDE THE FOLLOWING:
SECURE THE WOOD PADS TO THE BRICK WALL WITH SHIELDS & LAGS
REPLACE ALL EXTENSION SPRINGS
INSTALL SAFETY CABLES
REPLACE ALL LIFTING CABLES
REPLACE ALL 2" ROLLERS
REPLACE ALL PULLEYS
TIGHTEN ALL SURFACE HARDWARE
SECURE THE TRACKS TO THE WOOD PADS, AND CHECK FOR
ROPER SPACING
LUBRICATE ALL HARDWARE AND TRACKS
ADJUST THE LOCK ASSEMBLY FOR PROPER OP

This project showcases a complete garage door spring replacement for a homeowner in Naperville, IL. The door was stuck due to a broken torsion spring, causing the system to become unsafe and non‑functional. Our certified technician inspected the entire door system, replaced the damaged spring with a high‑cycle, heavy‑duty spring, lubricated all moving parts, and performed a full balance and safety test. The repair restored smooth, quiet, and reliable operation for the homeowner on the same day.

Introducing the groundbreaking retractable option, providing an unobstructed view of the sky above. Louvretec’s innovative designs elevate outdoor spaces, transforming them into versatile and enjoyable environments. Powered by cutting-edge technology, the Louvretec Opening Roof system features an award-winning Spiral Pivot system. With full 180-degree pivot capabilities at the touch of a button, this system offers unparalleled flexibility and control.
The hidden “Down-under” gear system, featuring a tubular motor and self-lubricating brass gearbox, ensures smooth and quiet operation. The high-quality extruded aluminum blades allow for impressive spans, providing optimum coverage without the need for mid-beams or exposed rod shafts.

This project involved replacing a worn and damaged garage door spring for a homeowner in Evanston, IL. The door had become heavy, noisy, and difficult to lift, creating a safety concern for the family. Our team inspected the system, identified the failing spring, and installed a new high‑cycle torsion spring designed for long‑term durability.
We also performed a full system balance, tightened all hardware, and lubricated the moving components to ensure smooth and quiet operation. The result was a safer, easier‑to‑use garage door with improved performance and reliability.
Projects like this highlight the importance of proper garage door maintenance and professional installation. Our goal is always to provide homeowners with safe, dependable, and long‑lasting solutions.

This project involved replacing a broken torsion spring for a homeowner in Evanston IL. The garage door was stuck and unsafe to operate, so we installed a high‑cycle spring, balanced the door, lubricated all moving parts, and performed a full safety inspection. The repair was completed the same day, restoring smooth and reliable door operation.

This project involved adjusting misaligned garage door tracks for a homeowner in Skokie, IL. The door was dragging and creating noise due to uneven track positioning. Our technician realigned the tracks, tightened all hardware, lubricated the rollers, and performed a full system check. The adjustment restored smooth, quiet, and safe door movement.

when we add our Glideout, and attach your door, there's no need to move the knob due to the heavy duty, smooth glide rail. The rail is full extension, zinc coated cold rolled steel with self lubricating ball bearings and holds over 100 lbs.
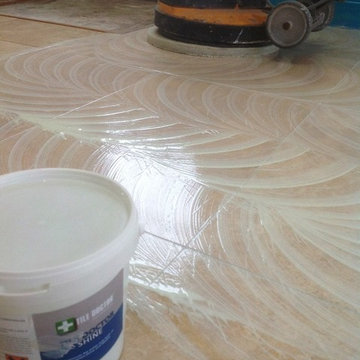
Here at Tile Doctor we can’t stress often enough how careful you have to be when choosing a cleaning product for use on natural stone. Acid bases cleaners in particular can etch the surface so always read the label before buying. Unfortunately, this customer, who lives in Twickenham, learned this the hard way.
Limescale build-up on shower tiles can be an unsightly problem in hard water areas and this customer’s house cleaner had attempted to treat it with Cillit Bang on their Marble tiled shower room floor. Whilst good at removing Limescale on ceramic tiles, the product is acid-based and in this case caused severe etching to the surface of the Marble.
This customer is not the first to experience this problem with Cillit Bang and we have looked into this before and I can confirm it does say on the back on the bottle that you should not use it on all natural stone including Marble and Granite.
The mistake had really damaged the appearance of this lovely floor however the good news is etched Marble can be refinished and we do offer this service. Fortunately, this customer found us on-line and called us in to rectify the problem as
With high quality, acid-sensitive stone we find that rather than cleaning with a liquid product, it is lot effective to use a process known as burnishing. This involves the application of abrasive diamond encrusted pads to cut back through the damaged stone. This removes a layer from the surface to expose the undamaged stone, which in then polished.
Using different grades of small diamond pads fitted to a hand buffer I began burnishing the floor tiles. I started the process with a Coarse pad and worked my way through to Medium, Fine and eventually the Very Fine pad. A small amount of lubrication in the form water is used with each pad, but no chemical products are needed, making this a completely natural process. The floor was rinsed with water afterwards to remove any slurry from the polishing.
After allowing the floor dry out overnight, I returned to apply two coats of Tile Doctor Colour Grow, which is a solvent-based, impregnating sealer designed to enhance the variety of natural colours and shades in the stone. It also protects the stone against daily exposure to chemical-based shampoo and soaps.
The customer was worried that the floor could not be restored, but she can now rest assured knowing not only knowing that the floor is back into top condition, but that professional help is at hand in case mistakes happen again in the future! Another happy customer for the Middlesex Tile Doctor.
Jonathan Oldham
South Middlesex Tile Doctor

We were contacted by a customer in West Kirby who needed help renovating a Victorian tiled hallway in a house they had just purchased. Kirby is a desirable seaside location North of Heswall that expanded with the arrival of the railway in 1848. The railway brought a demand for property and so it’s not unusual to find housing stock in this area dating back to the Victorian era.
The Victorian tiles at this property appear to have been neglected by the previous owner and were now looking very dull and marked by paint from decorating; all the colours looked washed out and the floor was now looking very unappealing.
The good news however is that this problem is not uncommon and with a deep clean and a fresh sealer applied it can be transformed. I gave the owner a quote which was accepted a date agreed for my return to do the work.
On the first day the floor was sprayed with a neat solution of Tile Doctor Remove and Go which is a powerful alkaline cleaning and stripping agent used to remove old seals and paint. The solution was left to dwell for about twenty minutes so it could soak in and get to work. It was then scrubbed into the tiles using a coarse 200-grit pad fitted to a heavy buffing machine. Water was then added to the floor for lubrication and the soils released from the pores of the tile during scrubbing was removed by with a wet vacuum.
To treat the stubborn paint stains and remains of what I suspect was carpet adhesive a hand scraper and wire brush was used, this was made easier by the Remove and Go which had softened the paint etc.
The next stage was to give the Victorian tiles a mild acid wash using Acid Gel which is applied to the floor, scrubbed in, and rinsed off with a little water then extracted using the wet vacuum. We always recommend an acid wash for old floors like these as it will counter any efflorescent salts resident in the tiles and helps to remove other mineral contaminates and old grout that can mask the true beauty of the tiles.
I left the tiles to dry out for two days before returning to apply the sealer, first checking it was dry by testing for moisture in various places with an electronic damp tester. It’s not a good idea to apply a sealer to a damp floor so we always check first.
Satisfied the floor was dry, I started applying a coat of Tile Doctor Colour Grow which is a colour enhancing impregnating sealer that helps to bring out the true colours in the tile. This was allowed to dry for thirty minutes and then followed up five coats of Tile Doctor Seal and Go Extra which is a breathable sealer that leaves a lovely satin finish and builds on the protection.
Once done the Victorian hallway tiles looked so much cleaner and healthier. It was quite a transformation and the new sealer had given the floor a nice low sheen shine which the customer was very happy with.
For aftercare cleaning I left them with a bottle of Tile Doctor Neutral Cleaner which is specially formulated for cleaning sealed tiles. We don’t recommend tile cleaning products you find on supermarket shelves as the are usually too strong and can strip a sealer off the floor prematurely. If your choosing another product to clean your floor always read the label to make sure its compatible.
Andrew Robb
Merseyside Tile Doctor

I was contacted about a Georgian property in the Kent village of Leeds , to see if I could do anything to improve a Travertine tiled floor. The use of Travertine was extensive and had been installed throughout the ground floor including the kitchen, dining room, utility and bathroom WC. Travertine is probably my favourite stone, but it is acid sensitive and attracts dirt easily, due to its ‘holey’ composition.
Initially we discussed the floor over the phone where I got to know about the issues they were experiencing, and I detailed the renovation process I normally use to restore it including the products and timelines. Naturally they wanted to me to provide a quote for the work however its tricky to do that accurately without seeing the floor, so I arranged a date to pop over.
Upon arriving I could see the tiles and the wide grout joints had extensive, ingrained dirt indicating the previous sealer had long since worn away. This is a common issue with stone floors, and to re-assure myself and the client it could be resolved I cleaned a small area in the utility room with pleasing results!
This test clean helped me to understand which products and methods would work best on the floor and later that day I emailed over a detailed quote for the renovation. Happy with the quote I received a reply the same day asking when I could start.
My colleague and I arrived on the agreed date and work started with adding protection to all areas that required it. We use a lot of water during the cleaning process and some materials such as MDF can become damaged with water ingress, so it makes sense to do this.
To get the floor clean, a coarse Carbide Brush fitted to a rotary machine was run over the Travertine tiles to scrub in a strong solution of Tile Doctor Pro-Clean. This process generates a lot of slurry as the dirt was washed out of the stone and grout which is extracted with a wet vacuum as we progressed.
Next it was on hands and knees with more Tile Doctor Pro-Clean and handheld brushes run over stubborn areas and along the grout lines to take them from 80% up to 100%.
Happy with the results, the next step was to renovate the stone using a series of diamond encrusted burnishing pads. Using only water for lubrication this process starts with the application of a coarse 400-grit burnishing pad attached to the floor buffer. This produces a lot of slurry which again was removed with a wet vacuum.
This left the Travertine clean, but the pores of the stone had been opened giving the floor a matt finish and more absorbent than it was originally. To further refine the appearance of the stone the next two burnishing pads were applied which are 800 and 1500-grit. These pads polish the stone and close the pores, restoring the natural sheen in the process. After each pad was applied the slurry was rinsed off the floor with water and extracted with the wet vacuum. Once complete the floor was left to dry off fully overnight.
I arrived the next day and took several moisture readings from the floor to check that it had dried off sufficiently overnight. The results were good, so work moved onto sealing the Travertine with two coats of Tile Doctor Ultra Seal which is a natural look impregnating sealer. It works by soaking into the stone, occupying the pores and thereby preventing dirt from becoming ingrained there. This ensures dirt remains on the surface where it is easily cleaned away.
The final step in the floor’s renovation was to apply the last of the diamond polishing pads which is a very fine 3000-grit. This pad further improves the polished appearance of the stone resulting in a satisfying sheen.
The work made a massive difference to the floor, and I received an email the next day from one of the owners who was really pleased with the transformation:
”Floors look brilliant. Very pleased.”
For the care and maintenance of polished sealed floors I recommend the use of Tile Doctor’s Stone Soap which is a gentle but effective cleaning product that won’t impact the sealer and contains a patina enhancer. When it comes to sealed floors my mantra is:
“If you look after the sealer, the sealer will look after the floor!”
Graham Davis
North Kent Tile Doctor

My client had recently moved into a bungalow in Godalming where they inherited the Limestone tiled kitchen floor pictured below. The previous owner had not looked after the floor very well and by the time they moved in it was pretty filthy. Limestone is a natural but porous stone where, unless sealed, attracts dirt into its tiny holes and as you would expect Cream Limestone shows the dirt easily. The protective seal had long since worn off this floor and was now ingrained with dirt it was now looking permanently dirty.
Before quoting I conducted a small test clean to work out the best method to renovate the stone and this also gives the client a good idea of how the floor will look after its finished. They were delighted with the initial result and happy with my quote gave me the go ahead.
On arrival first I helped the customer remove his tables and chairs and I then set about tapping up the plinths in the kitchen and the skirtings to protect them from cleaning solutions and equipment. The cleaning equipment I have invested in works more efficiently in open spaces, so it’s worth spending time at the beginning preparing the area first.
Next, I used a deck brush to apply a mixture of water and Tile Doctor Pro-Clean to the dirtiest tiles. Tile Doctor Pro-Clean works well when left to dwell for ten minutes or so. I also applied the same product to the grout over half the room so it could get a head start breaking down the dirt. Then using a stiff brush, I scrubbed the grout clean. Once it was worked loose, I extracted the now dirty solution with a wet vacuum.
With the grout clean I turned my attention back to the tiles with where the Pro-Clean had been left to soak in. Giving them a quick brush, I noted that what appeared to be permanently ingrained dirt had now come loose. To get the tiles really clean I used a 17″ rotary machine fitted with diamond encrusted buffer pads. This removes the tiny dots of dirt on the stone and with it comes any existing sealer and dirt.
A set of four burnishing pads were used, starting with a 400-grit, and finishing with a 3000-grit pad. The first 400-grit pad is coarse, and the grits become smoother as you work through the set. Water is used to lubricate the process and the released dirt is extracted in-between using the wet vacuum mentioned earlier. This process does take time but by the end of day one the floor was looking a lot better.
The next step is sealing however the floor needs to be bone dry for that, so I left a couple of industrial fans in place and left the Limestone to dry off overnight.
Returning the following day my first job was to ensure the floor was dry by taking multiple moisture readings with a damp meter. The readings were good, so I was able to make a start applying the sealer which for this floor was Tile Doctor Ultra Seal.
Ultra-Seal is an impregnating sealer that soaks into those small holes in the stone I mentioned earlier, I occupies the pores thus preventing dirt from becoming ingrained. The other feature of this sealer is it doesn’t change the appearance or colour of the stone leaving it with a very natural finish. Two coats of sealer were applied, leaving the seal to dry between each coat.
After the final coat was dried, I gave it a final polish with a soft nylon pad and the floor was finished. Before leaving we discussed after care which for this floor, I recommended Tile Doctor Stone Soap and I requested that the customer to stay out of the kitchen for a couple of hours while the sealer cured. They were over the moon with the new floor and could not believe the difference it had made to their kitchen.
Rupert Mcleod
West Surrey Tile Doctor

Detailed below is the restoration of a Victorian tiled hallway floor that we started back in June in Preston. Although we started in June there was so much damage to the subfloor and the tiles it took some time to complete, additionally, the client did not like the colour samples of the replacement tiles we had brought along and so decided to source their own which took some time.
Three months later with replacement tiles now sourced we were given the go ahead to start the restoration. The first day’s focus was cleaning the original floor using very coarse 100-grit and 200-grit Diamond pads fitted to a rotary buffer machine and applied to the floor using a strong dilution of Tile Doctor Remove and Go to add extra cleaning power. Tile edges were given special attention using a flex machine fitted with small diamond grit pads.
The floor was rinsed with water to remove the soil generated and this was followed up with an acid rinse using a 1:3 dilution of Tile Doctor Grout Clean Up. This last step in the cleaning process is especially recommend for old floors like this which don’t have a damp proof membrane and can suffer from efflorescence issues.
The next stage focused on repairing the floor and started by carefully knocking out all the broken and chipped tiles. We had previously estimated over 30 tiles needed replacing and so the client had bought two boxes, meaning I had plenty of spares to work with.
Before tiling however, the subfloor had suffered over the years and needed attention first. To deal with this the damaged areas were raked out, cleaned up and then back filled with rapid setting self-levelling screed from Mapie adhesives. Once the sub-base was fixed then we put the new tiles back in, they were not an exact match, about 5mm too short and lighter in tone, but the colour was pretty close.
Tiling an old Victorian floor like this can be a bit like dominoes as you move one out of place 2 decent ones come loose and then they also need refixing. Some of the tiles had hair line cracks in them and once they were loose, they just cracked in half. As such the 20 spare tiles that I thought were spare came into good use and I actually ended up using all of them. I could have done with a few more so it was decided to reset the last four broken tiles and grout them in. Luckily for me the client was very understanding about the nature of tile restoration and had accepted that there would be some imperfections and they were not expecting a new floor.
The Tiles were fixed down using Ultralite Rapid Flex (another product from Mapie) and then grouted using the same adhesive (not a grout, as they did not have grout back in the day, just cement and screed).
The floor was left this to cure overnight, and we came back the next day to finish the clean using a 200-grit diamond pad fitted to a buffing machine and lubricated with water, then one last acid rinse to get the tiles as clean as possible and remove any lingering grout haze. This last clean helps to blend the new tiles in with the original.
Before applying a protective sealer, the floor was left to dry for a couple of days, the tiles need to be thoroughly dry before sealing or you can end up with a patchy appearance.
For this floor with no damp proof membrane, it was important to use a fully breathable sealer that will allow moisture to rise through the tile and evaporate at the surface, so Tile Doctor Colour Grow was chosen. This is a good choice for old floors like this as its fully breathable, head wearing, and it contains a colour enhancer that improves the overall appearance of the tile.
Three coats of Tile Doctor Colour Grow which is a fully breathable, colour enhancing sealer hat works by soaking into the pores of the tile protecting it from within. It has a matt finish, and it works really well with all clay tiles and is ideal for these types of floors.
You can probably spot the lighter coloured tiles in the after photos on this page, however it’s a very subtle difference and I think they have blended in quite well with the original. Certainly, my client was very pleased with the newly restored floor, its completely transformed from when we first visited the client, and the floor has now gained character and history. For aftercare we recommend Tile Doctor Neutral Cleaner, its an effective pH neutral product that is compatible with the new sealer.
Russell Taylor
Lancashire Tile Doctor
1