
Search results for "Machines running" in Home Design Ideas
 Wise Home + Design
Hopewell Residential
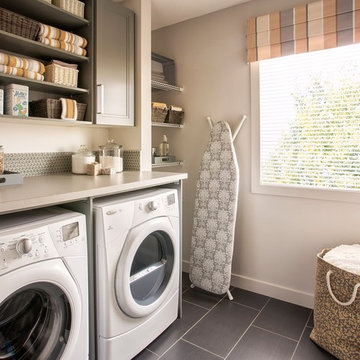
Transitional black floor dedicated laundry room photo in Edmonton with open cabinets, gray cabinets, gray walls and a side-by-side washer/dryer
Transitional black floor dedicated laundry room photo in Edmonton with open cabinets, gray cabinets, gray walls and a side-by-side washer/dryer
 Leon House Design
Peter Ellery
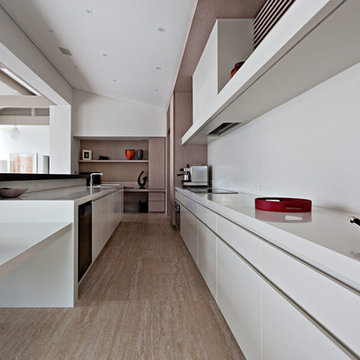
Trendy single-wall open concept kitchen photo in Perth with an undermount sink, flat-panel cabinets, white cabinets, white backsplash and an island
Trendy single-wall open concept kitchen photo in Perth with an undermount sink, flat-panel cabinets, white cabinets, white backsplash and an island

 Diego Bringas
vi-deo! Person of Interest S.eason 5, E.pisode 12 F.ull O.nline. Here we go thhen for sure all the fans, this is the nice and wonderful time for all of us to start watch into the rest about Person of Interest season 5, episode 12 online. Entitled as .exe, here's such a wonderful over view to explore more, As Reese and Shaw race to catch up with Finch, he infiltrates a maximum-security government facility in a desperate mission which could mean the end for not only Samaritan, but for himself and The Machine as well.
"Synecdoche" reminder looks fantastic, When Reese, Shaw and Fusco travel to Washington, D.C. to protect their next number, The President of the United States, the Machine classifies this threat as extremely relevant - in terms of national security - but Shaw is worried about the implications behind Samaritan's neglecting to intervene. The threat is neutralized, but the inner-governmental privacy-activist group with a mole in the U.S.S.S. has turned the full force of the Secret Service on Reese and Shaw.
The Machine has secretly enlisted Logan Pierce, Joey Durban and Harper Rose to secure a clever exit strategy, with each of whom camouflaging into various resourceful associations; when Reese and Fusco are extracted, they band together with Logan, Joey and Harper to discuss their enlistment by the Machine, what has happened and what is to come.
Harold, meanwhile, is grieving over the loss of Root, and reaches a conclusion that brings him to a highly-secured government facility in San Antonio, Texas with a weaponized virus capable of destroying Samaritan. Harold has become ready to go to any lengths, and Reese and Shaw prepare for their final battle.
Series over view, They are helped by NYPD Detectives Lionel Fusco, a corrupt officer whom Reese coerces into helping them, and Joss Carter, who in early episodes investigates Reese for his vigilante activities.
Reese arranges for Fusco to spy on Carter by becoming her partner, but Carter eventually becomes Reese's ally and drops her investigation on him. Nevertheless, for the entirety of season one neither Fusco nor Carter is aware that the other is also working with Finch and Reese and both detectives are kept in the dark about the Machine. Periodically, the team enlists the aid of Zoe Morgan, a professional "fixer" who applies her skills to particularly difficult tasks.
The series features several subplots. One significant story arc involves "HR", an organization of corrupt NYPD officers who are initially in league with budding mob boss Carl Elias and later with the Russian mafia; in earlier parts of this arc, Fusco is forced to go undercover. Another important story line revolves around Root, a psychopathic hacker who is determined to gain access to The Machine.
During season two, another organization of powerful business figures, Decima Technologies, is revealed to be attempting to gain access to the Machine. Carter vows vengeance against HR after they have her boyfriend, Detective Cal Beecher, murdered. Reese and Finch encounter Sameen Shaw, an ISA assassin, on the run after being betrayed by her employers.
Shaw learns about The Machine in the season two finale and subsequently becomes a member of Reese and Finch's team. In Season three, Carter delves deeper into her investigation of HR, eventually uncovering its leader; but she is killed. In his grief, Reese briefly leaves the team. The team also battles Vigilance, a violent anti-government organization devoted to securing people's privacy.
100% working here:
http://tinyurl.com/zkfrsad
http://tinyurl.com/j6kjlsz
During the second half of season three, Decima Technologies starts to acquire hardware to bring to life a new artificial intelligence called Samaritan, using the codes from Harold's old college classmate, Arthur Claypool. In the season three finale, it is revealed that Vigilance was created by Decima to make them appear as domestic terrorists. This allowed Decima to obtain all the NSA feeds to make Samaritan operational. The Machine creates new identities for the Team so that they can fly beneath Samaritan's radar. Go for it finally fans, start watching for Person of Interest season 5, episode 12 : .exe online.
Find the right local pro for your project
 lavish
Walking into this reimagined primary bath feels like stepping into a boutique spa. The entire space is wrapped in a soft, barely-there blush-white wall color that reads almost like warm light itself, creating an instantly calming atmosphere that the design then builds upon thoughtfully.
Twin sage blue-gray vanities run along both sides of the room, each finished in a shaker-style painted cabinetry with polished chrome bar pulls and topped with a gorgeous Calacatta-style quartz — the same material flowing seamlessly across countertops and up as a low backsplash. Above each vanity hang individual black rounded-rectangle mirrors with matching chrome picture-light sconces, creating a clean, modern hotel-bath aesthetic that feels crisp without being cold.
The walk-in shower is the undeniable heart of the room — a generous double-entry wet room featuring dual rainfall showerheads, dual handheld wand fixtures, and a natural light source through a privacy glass window that floods the space with soft, diffused daylight. Large format white wall tile set in a simple grid pattern keeps the shower feeling expansive and serene, while large-format Calacatta marble-look porcelain tile on the floor carries the quartz veining language from the vanities underfoot throughout the entire bathroom. A polished chrome heated towel rack mounted on the bathroom wall adds a luxurious, spa-grade detail — warm towels waiting after every shower. A teak wood bath mat on the floor completes the spa atmosphere perfectly.
The Laundry Room
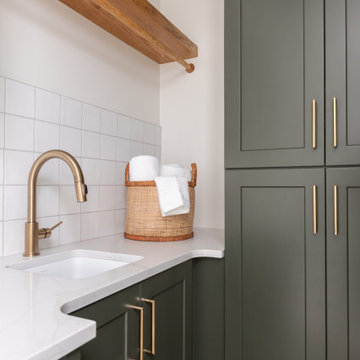
Just steps away, the laundry room received an equally remarkable transformation — one that proves this hardworking space can be just as design-forward as any other room in the house. Deep hunter green painted cabinetry with brushed brass bar pulls commands the room from floor to ceiling, creating a rich, dramatic palette that feels collected and intentional rather than builder-grade.
Upper shaker-style cabinets maximize storage above the machines, while a tall pantry-style column cabinet on the end wall provides floor-to-ceiling concealed storage for supplies. A painted shiplap accent panel between the upper cabinets and the counter is fitted with a row of brass coat hooks — a dual-purpose detail that adds texture and hang space for bags and reusable totes. The counter surface in white quartz sits above the side-by-side front-load washer and dryer, creating a functional folding station. A white square tile backsplash behind the machines adds a clean, easy-care surface that holds its own against the bold green cabinetry. A built-in wood bench with open storage below creates a secondary mudroom function, while a warm-toned live-edge wood floating shelf adds organic contrast. A custom built walnut open bookcase tucked at the room's end provides stylish overflow storage that gives the space personality beyond its utility.
 lavish
Walking into this reimagined primary bath feels like stepping into a boutique spa. The entire space is wrapped in a soft, barely-there blush-white wall color that reads almost like warm light itself, creating an instantly calming atmosphere that the design then builds upon thoughtfully.
Twin sage blue-gray vanities run along both sides of the room, each finished in a shaker-style painted cabinetry with polished chrome bar pulls and topped with a gorgeous Calacatta-style quartz — the same material flowing seamlessly across countertops and up as a low backsplash. Above each vanity hang individual black rounded-rectangle mirrors with matching chrome picture-light sconces, creating a clean, modern hotel-bath aesthetic that feels crisp without being cold.
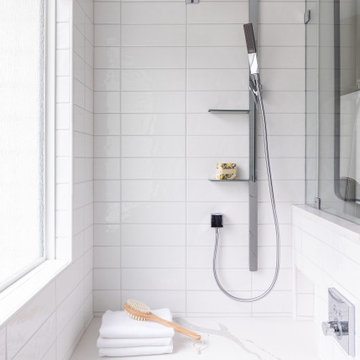
The walk-in shower is the undeniable heart of the room — a generous double-entry wet room featuring dual rainfall showerheads, dual handheld wand fixtures, and a natural light source through a privacy glass window that floods the space with soft, diffused daylight. Large format white wall tile set in a simple grid pattern keeps the shower feeling expansive and serene, while large-format Calacatta marble-look porcelain tile on the floor carries the quartz veining language from the vanities underfoot throughout the entire bathroom. A polished chrome heated towel rack mounted on the bathroom wall adds a luxurious, spa-grade detail — warm towels waiting after every shower. A teak wood bath mat on the floor completes the spa atmosphere perfectly.
The Laundry Room
Just steps away, the laundry room received an equally remarkable transformation — one that proves this hardworking space can be just as design-forward as any other room in the house. Deep hunter green painted cabinetry with brushed brass bar pulls commands the room from floor to ceiling, creating a rich, dramatic palette that feels collected and intentional rather than builder-grade.
Upper shaker-style cabinets maximize storage above the machines, while a tall pantry-style column cabinet on the end wall provides floor-to-ceiling concealed storage for supplies. A painted shiplap accent panel between the upper cabinets and the counter is fitted with a row of brass coat hooks — a dual-purpose detail that adds texture and hang space for bags and reusable totes. The counter surface in white quartz sits above the side-by-side front-load washer and dryer, creating a functional folding station. A white square tile backsplash behind the machines adds a clean, easy-care surface that holds its own against the bold green cabinetry. A built-in wood bench with open storage below creates a secondary mudroom function, while a warm-toned live-edge wood floating shelf adds organic contrast. A custom built walnut open bookcase tucked at the room's end provides stylish overflow storage that gives the space personality beyond its utility.
 Soda Pop Design Inc.
Stephani Buchman Photography
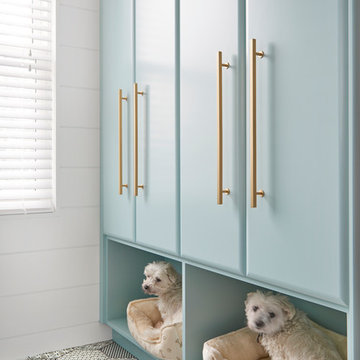
Inspiration for a transitional laundry room remodel in Toronto with blue cabinets and white walls
Inspiration for a transitional laundry room remodel in Toronto with blue cabinets and white walls
 Stairbuilders and Manufacturers Association
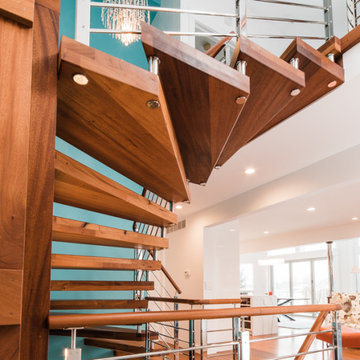
Aesthetic Value: The designer wanted a nautical themed stair that fit a small space and gave the area a more open feel than the original outdated stair. Mirror polished stainless steel and Honduran Mahogany accomplished the objectives.
Stair Safety: Each tread is skewed but careful layout provided for a very comfortable stride when traversing the stair.
Quality of Workmanship: Solid Honduran Mahogany treads and rail. Horizontal bar balustrade and custom machined posts are mirror polished stainless steel.
Technical Challenge: Providing a structure that was freestanding on one side of the lower portion and completely freestanding on the upper portion. Laying out the stair to fit the small well hole and still feel comfortable.


 lavish
Walking into this reimagined primary bath feels like stepping into a boutique spa. The entire space is wrapped in a soft, barely-there blush-white wall color that reads almost like warm light itself, creating an instantly calming atmosphere that the design then builds upon thoughtfully.
Twin sage blue-gray vanities run along both sides of the room, each finished in a shaker-style painted cabinetry with polished chrome bar pulls and topped with a gorgeous Calacatta-style quartz — the same material flowing seamlessly across countertops and up as a low backsplash. Above each vanity hang individual black rounded-rectangle mirrors with matching chrome picture-light sconces, creating a clean, modern hotel-bath aesthetic that feels crisp without being cold.
The walk-in shower is the undeniable heart of the room — a generous double-entry wet room featuring dual rainfall showerheads, dual handheld wand fixtures, and a natural light source through a privacy glass window that floods the space with soft, diffused daylight. Large format white wall tile set in a simple grid pattern keeps the shower feeling expansive and serene, while large-format Calacatta marble-look porcelain tile on the floor carries the quartz veining language from the vanities underfoot throughout the entire bathroom. A polished chrome heated towel rack mounted on the bathroom wall adds a luxurious, spa-grade detail — warm towels waiting after every shower. A teak wood bath mat on the floor completes the spa atmosphere perfectly.
The Laundry Room
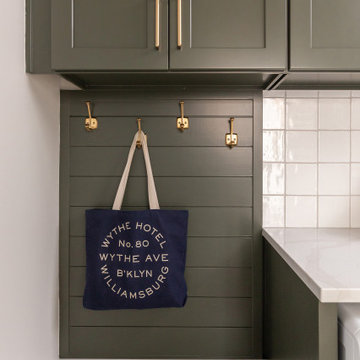
Just steps away, the laundry room received an equally remarkable transformation — one that proves this hardworking space can be just as design-forward as any other room in the house. Deep hunter green painted cabinetry with brushed brass bar pulls commands the room from floor to ceiling, creating a rich, dramatic palette that feels collected and intentional rather than builder-grade.
Upper shaker-style cabinets maximize storage above the machines, while a tall pantry-style column cabinet on the end wall provides floor-to-ceiling concealed storage for supplies. A painted shiplap accent panel between the upper cabinets and the counter is fitted with a row of brass coat hooks — a dual-purpose detail that adds texture and hang space for bags and reusable totes. The counter surface in white quartz sits above the side-by-side front-load washer and dryer, creating a functional folding station. A white square tile backsplash behind the machines adds a clean, easy-care surface that holds its own against the bold green cabinetry. A built-in wood bench with open storage below creates a secondary mudroom function, while a warm-toned live-edge wood floating shelf adds organic contrast. A custom built walnut open bookcase tucked at the room's end provides stylish overflow storage that gives the space personality beyond its utility.
 Century Stair Company
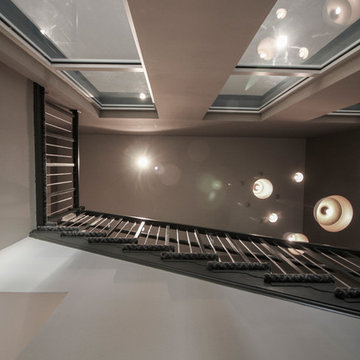
With an extensive set of 3 & 5 axis machines, Century Stair continues to invest in top-of-the-line technology; by improving our machining abilities we are able to maintain close-tolerance precision work for our stringers, treads, risers and balusters. We proudly present some of our straight run stairways and winding stairs final results, reflecting architects', builders' and designers' visions.
Copyright © 2017 Century Stair Company All Rights Reserved
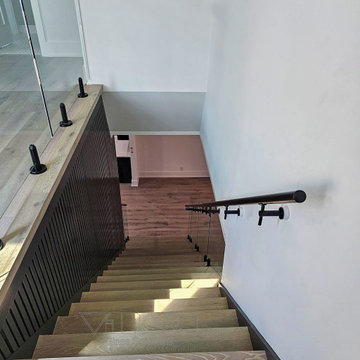
 Vitralum Glass Solutions Inc
Frameless spigot railing system with side mounted handrail.
Our custom builder needed an original design that incorporated a modern glass railing with other transitional elements in this Winter Park home.
We were able to design, manufacture and install this unique glass railing system which exceeded the builders expectations. Each glass panel was fabricated with our new state of the art CNC machine that allows to make intricate cuts with a perfect flat polished edge. Please contact us to provide unique designs that will enhance the look your home with our custom glass railing systems.
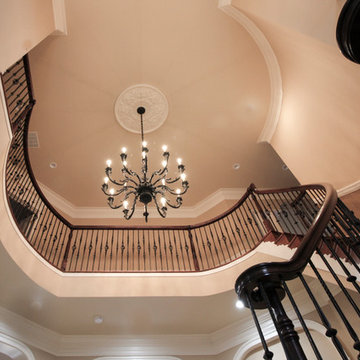 Century Stair Company
With an extensive set of 3 & 5 axis machines, Century Stair continues to invest in top-of-the-line technology; by improving our machining abilities we are able to maintain close-tolerance precision work for our stringers, treads, risers and balusters. We proudly present some of our straight run stairways and winding stairs final results, reflecting architects', builders' and designers' visions.
Copyright © 2017 Century Stair Company All Rights Reserved
 lavish
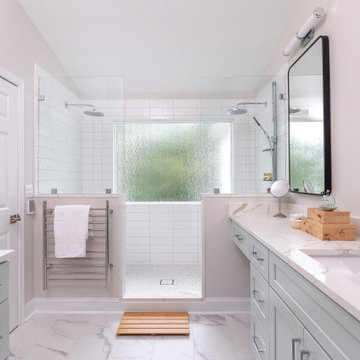
Walking into this reimagined primary bath feels like stepping into a boutique spa. The entire space is wrapped in a soft, barely-there blush-white wall color that reads almost like warm light itself, creating an instantly calming atmosphere that the design then builds upon thoughtfully.
Twin sage blue-gray vanities run along both sides of the room, each finished in a shaker-style painted cabinetry with polished chrome bar pulls and topped with a gorgeous Calacatta-style quartz — the same material flowing seamlessly across countertops and up as a low backsplash. Above each vanity hang individual black rounded-rectangle mirrors with matching chrome picture-light sconces, creating a clean, modern hotel-bath aesthetic that feels crisp without being cold.
The walk-in shower is the undeniable heart of the room — a generous double-entry wet room featuring dual rainfall showerheads, dual handheld wand fixtures, and a natural light source through a privacy glass window that floods the space with soft, diffused daylight. Large format white wall tile set in a simple grid pattern keeps the shower feeling expansive and serene, while large-format Calacatta marble-look porcelain tile on the floor carries the quartz veining language from the vanities underfoot throughout the entire bathroom. A polished chrome heated towel rack mounted on the bathroom wall adds a luxurious, spa-grade detail — warm towels waiting after every shower. A teak wood bath mat on the floor completes the spa atmosphere perfectly.
The Laundry Room
Just steps away, the laundry room received an equally remarkable transformation — one that proves this hardworking space can be just as design-forward as any other room in the house. Deep hunter green painted cabinetry with brushed brass bar pulls commands the room from floor to ceiling, creating a rich, dramatic palette that feels collected and intentional rather than builder-grade.
Upper shaker-style cabinets maximize storage above the machines, while a tall pantry-style column cabinet on the end wall provides floor-to-ceiling concealed storage for supplies. A painted shiplap accent panel between the upper cabinets and the counter is fitted with a row of brass coat hooks — a dual-purpose detail that adds texture and hang space for bags and reusable totes. The counter surface in white quartz sits above the side-by-side front-load washer and dryer, creating a functional folding station. A white square tile backsplash behind the machines adds a clean, easy-care surface that holds its own against the bold green cabinetry. A built-in wood bench with open storage below creates a secondary mudroom function, while a warm-toned live-edge wood floating shelf adds organic contrast. A custom built walnut open bookcase tucked at the room's end provides stylish overflow storage that gives the space personality beyond its utility.
 Tile Doctor Ltd
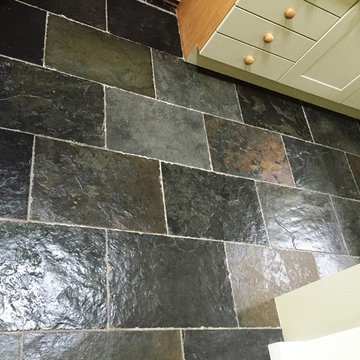
This small rough Chinese Slate floor in the kitchen of a house in the village of Cheadle near Stockport in Greater Manchester had not had any sealer put on it for many years and was very grubby (dishevelled as described by the customer) looking even after the customer had tried to clean it.
Sealers do take a lot of punishment, especially in a high traffic area such as a small kitchen and will wear off over time and once this happens the floor will start to lose its appearance as dirt becomes ingrained in the stone and it can no longer be cleaned effectively.
As we have to apply a liberal amount of water with this sort of work, the first step was to remove the Kicker boards at the bottom of the Kitchen units and silicone the Kitchen units that were fixed; this stops water seeping in and blowing the MDF allowing us to concentrate on cleaning the Slate without causing any damage.
I started the cleaning process by applying a strong dilution of Tile Doctor Pro-Clean to get rid of the built up dirt and any remaining sealer, leaving it to soak into the Slate before scrubbing the floor with a black scrub pad fitted to buffing machine running at slow speed. Tile Doctor Pro-Clean is a strong alkaline cleaner/stripper that is safe to use on natural stone, we do have stronger products available if required but in this case a strong dilution of Pro-Clean was sufficient to tackle any remaining sealer.
This process gave the Slate and grout lines a good deep clean and after rinsing the floor with water which was then extracted using a wet vacuum I repeated the process on stubborn areas until satisfied the floor was as clean and free of old sealer. Last stage of the cleaning process was to give the floor a final rinse and then get it as dry as possible using the wet vacuum to soak up the moisture.
The floor was quite small so I was able to leave the floor to dry off over lunch time and then on my return managed to get it fully dry with a little heat from a heat gun. The customer wanted a mat finish so once dry I applied Tile Doctor Colour Grow sealer which impregnates into the pores of the natural stone protecting it from within and enhancing the natural colours of the Slate at the same time.
For general cleaning of Sealed stone floors, we recommend the use of a PH Neutral Cleaner as anything with a strong PH will degrade the life of the sealer over time.
Steve Keary
Greater Manchester Tile Doctor
Sponsored
Columbus, OH

Trish Takacs Design
Award Winning & Highly Skilled Kitchen & Bath Designer in Columbus
 Tile Doctor Ltd
I was contacted about a Georgian property in the Kent village of Leeds , to see if I could do anything to improve a Travertine tiled floor. The use of Travertine was extensive and had been installed throughout the ground floor including the kitchen, dining room, utility and bathroom WC. Travertine is probably my favourite stone, but it is acid sensitive and attracts dirt easily, due to its ‘holey’ composition.
Initially we discussed the floor over the phone where I got to know about the issues they were experiencing, and I detailed the renovation process I normally use to restore it including the products and timelines. Naturally they wanted to me to provide a quote for the work however its tricky to do that accurately without seeing the floor, so I arranged a date to pop over.
Upon arriving I could see the tiles and the wide grout joints had extensive, ingrained dirt indicating the previous sealer had long since worn away. This is a common issue with stone floors, and to re-assure myself and the client it could be resolved I cleaned a small area in the utility room with pleasing results!
This test clean helped me to understand which products and methods would work best on the floor and later that day I emailed over a detailed quote for the renovation. Happy with the quote I received a reply the same day asking when I could start.
My colleague and I arrived on the agreed date and work started with adding protection to all areas that required it. We use a lot of water during the cleaning process and some materials such as MDF can become damaged with water ingress, so it makes sense to do this.
To get the floor clean, a coarse Carbide Brush fitted to a rotary machine was run over the Travertine tiles to scrub in a strong solution of Tile Doctor Pro-Clean. This process generates a lot of slurry as the dirt was washed out of the stone and grout which is extracted with a wet vacuum as we progressed.
Next it was on hands and knees with more Tile Doctor Pro-Clean and handheld brushes run over stubborn areas and along the grout lines to take them from 80% up to 100%.
Happy with the results, the next step was to renovate the stone using a series of diamond encrusted burnishing pads. Using only water for lubrication this process starts with the application of a coarse 400-grit burnishing pad attached to the floor buffer. This produces a lot of slurry which again was removed with a wet vacuum.
This left the Travertine clean, but the pores of the stone had been opened giving the floor a matt finish and more absorbent than it was originally. To further refine the appearance of the stone the next two burnishing pads were applied which are 800 and 1500-grit. These pads polish the stone and close the pores, restoring the natural sheen in the process. After each pad was applied the slurry was rinsed off the floor with water and extracted with the wet vacuum. Once complete the floor was left to dry off fully overnight.
I arrived the next day and took several moisture readings from the floor to check that it had dried off sufficiently overnight. The results were good, so work moved onto sealing the Travertine with two coats of Tile Doctor Ultra Seal which is a natural look impregnating sealer. It works by soaking into the stone, occupying the pores and thereby preventing dirt from becoming ingrained there. This ensures dirt remains on the surface where it is easily cleaned away.
The final step in the floor’s renovation was to apply the last of the diamond polishing pads which is a very fine 3000-grit. This pad further improves the polished appearance of the stone resulting in a satisfying sheen.
The work made a massive difference to the floor, and I received an email the next day from one of the owners who was really pleased with the transformation:
”Floors look brilliant. Very pleased.”
For the care and maintenance of polished sealed floors I recommend the use of Tile Doctor’s Stone Soap which is a gentle but effective cleaning product that won’t impact the sealer and contains a patina enhancer. When it comes to sealed floors my mantra is:
“If you look after the sealer, the sealer will look after the floor!”
Graham Davis
North Kent Tile Doctor
 Tile Doctor Ltd
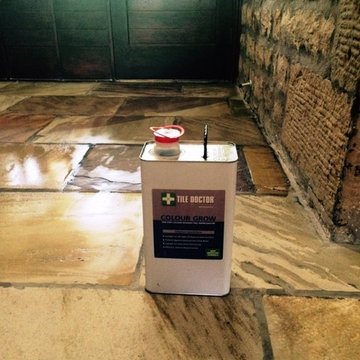
Here we have a six year old Indian Sandstone tiled floor located a property on the outskirts of Lancaster. Measuring 100 metres squared, the very large floor had under floor heating in the concrete sub base. The type of stone used inside the property is what we commonly refer to as ‘patio Sandstone’, a material which is usually used outside because of its very rough texture. It’s not particularly comfortable to walk across in bare feet, hence why many people consider it be impractical for internal flooring.
Nonetheless, the property owner was keen to make the rough textured floor as feet-friendly as possible for people walking over it. At Tile Doctor we have developed a process known as milling, which utilises diamond encrusted pads combined with a weighted rotary machine to smooth the rough surface, leaving it looking and feeling a lot nicer and more practical to live with. The milling process is only done once, but while the Sandstone will still need cleaning and sealing in the future, it won’t be nearly as difficult as when it was rough.
The job would take over two weeks to complete due to the fact that the existing grout needed to be removed and replaced with a flexible floor grout: a very time consuming process.
As mentioned, the surface of the Sandstone was very rough, and so needed to be milled down to make it a lot smoother to look after and make it easy to clean and seal. This was achieved by using Tile Doctor’s 50 Grit diamond encrusted burnishing pads, fitted to a weighed rotary machine and run along the entire surface area of the floor. Through this process the stone became much smoother and more aesthetic – completing one of our main objectives for the customer.
Next, we started breaking out the already loose and badly applied grout with our grout removal tools. The builder who had installed the floor had used a sand/cement-based grout which wasn’t flexible. As a result, it started to crumble and loosen quite quickly after exposure to the underfloor heating. We removed this and replaced it with a far more flexible grout.
Once the whole area had been successfully milled and the grout replaced, the Sandstone floor was left to dry out over the weekend. Upon our return to the property, we cleaned off any dust and resin left over from the milling and grouting processes, before leaving it to dry for a further 24 hours.
The next day we returned to seal the whole floor with two coats of our impregnating sealer Tile Doctor Colour Grow. The sealer fills the pores of the Sandstone to prevent ingrained dirt and stains, while also emphasising the natural colours in the stone. It also provides a robust matte finish, which is what the customer wished for.
It wasn’t the easiest of processes to get the Indian Sandstone into a condition where it would be both suitable for internal flooring and aesthetically pleasing, but the results proved to be very much worth the time and effort invested. The customer was very pleased with the transformation.
Russell Taylor
Lancashire Tile Doctor
 Pioneer Family Pools
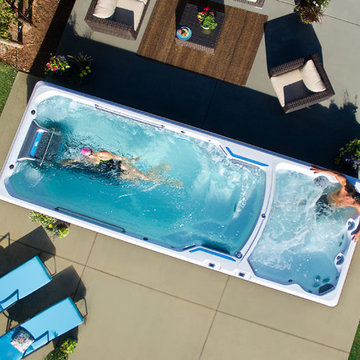
Take a sneak peak at the all new Endless Pool E2000 Dual Temperature Fitness System. This revolutionary swim spa blends the best of both a fitness pool and a rejuvenating hot tub in one elegant design. The most unique feature to the E2000 is the ability to independently set temperatures for both the pool and hot tub sections so you can enjoy your laps in a cooler pool while friends and family enjoy the soothing warmth from the hot tubs hydrotherapy jets.
The 3 Illuminated Waterfalls playfully cascade water into both sections of this swim spa while the Underwater Multi-Colour LED Lighting shimmers as the waves ripple. Kick back and relax with 5 Hydrotherapy Massage Seating Options in the hot tub that each provide different therapeutic relief. When you’re ready for your workout, hop on over to the fitness section to use the Endless Pool Swim Machine Unit that sends a powerful current for you to swim against in stream. If you used to run but felt it in your joints, then the Underwater Treadmill is the perfect option to get back to your favourite pastime while saving your joints. Take a moment to relax on one of the two seats placed next to the Swim Machine Unit that let you rest whenever you like.
The modern design of the E2000 features horizontal slatted panels, Exterior LED Lighting, Stain Stainless Steel Rails and a crisp and polished shell. Make the best use of this revolutionary blend of fitness and function using the dual LCD Topside Control Panels that allow you to manage your temperature, lighting, waterfalls, and more.
Features:
Hydrotherapy Massage Seating For 5
Endless Pool Swim Machine Unit
Underwater Treadmill
3 Illuminated Waterfalls
26 Multi-Colour LED Points Of Light
5″ Main Light & LED Illumination Bar
2 Satin Stainless Steel Rails
2 LCD Control Panels
*Specs Reflect The 58″ Swim Machine & Treadmill Model
 Tile Doctor Ltd
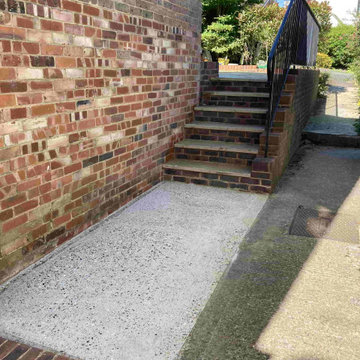
I am sure you will be able relate to this client in Folkstone who had a concrete and brick path and steps to the side of their house that had turned black with dirt. I know many of you reading this post will probably own a Karcher pressure washer and would be happy to do this job themselves, however for those that do not it’s good to know that we don’t just cover expensive patios and driveways and happily deep clean concrete paths as well.
The machine I use for this type of work operates at very high pressure, far higher than that of a Karcher and is so large and heavy its actually installed in a van. This type of machine is known in the trade as a Truck Mount and results in a much deeper clean that cleans and extracts the waste at the same time.
I popped over to see the client to see what needed to be done and gave them a quote for the work. Having looked round the property I was confident of making a difference. I also noted that steps were not only black with dirt but had become green with algae in places which is slippery when wet and dangerous for the elderly.
Before going over with the machine, I wetted the path with Tile Doctor Patio & Brick Driveway Cleaner and left it to soak into the concrete for a good twenty to thirty minutes so it could breakdown the dirt and deal with blackspots, lichen, moss, and general staining.
The concrete path was in several sections so whilst I was waiting for the cleaner to soak into one section, I was able to run the Truck Mount pressure washer over another section. When you use the jet wash at home, it can be a very messy business, bringing up all the dirt and spreading it around the nearby walls and usually the user. With our machine washing and extracting the dirt at the same time there is zero mess, and you can literally see the path become transformed in front of your eyes which is very satisfying.
Once done the concrete path looked like it was laid yesterday. The client was amazed saying it now complimented the work they had recently done on the front and back patios. It does show up the neighbour’s path though so I would not be surprised if I get a call soon to do their path as well!
There was no need to apply any type of sealer to this path. Regular cleaning will maintain it and a once a year deep clean like this would keep it in great shape.
Michael Conlon
South Kent Tile Doctor
 Tile Doctor Ltd
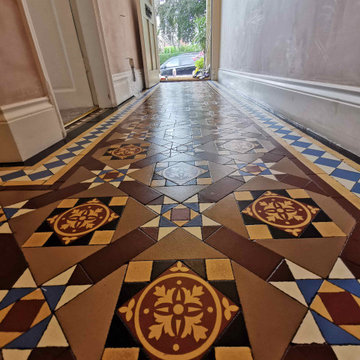
A young couple recently bought a house in Barnsley and were renovating it from top to bottom, included in the plan was the desire to have the previously unloved Victorian floor made beautiful again. The house stands in an area of Barnsley famous for its’ big Victorian villas and quite rightly they felt it was important to ensure period features like this original floor were correctly maintained.
Due to the floor being covered up for many years the floor had developed damp staining, it also had a lot of paint splattered on it. There were also some loose tiles that needed fixing back in place and the layer of old floor polish was present which would need removing.
I started by protecting all the skirting boards, doors and carpets bordering the tiles from splashing. The loose tiles were then cleaned up and then secured back in place using a fast-setting adhesive.
Once the adhesive was set, I turned my attention to stripping and cleaning the floor starting with the application of a coarse 200-grit diamond pad fitted to a weighted rotary buffing machine. The pad was lubricated using a dilution of Tile Doctor Remove & Go which was applied to small sections of the floor and left to soak in for ten minutes first. I run the buffing machine at a slow speed to minimise splashing. Remove & Go is amazing at removing old floor coatings (i.e. sealers), dirt and grime from the floor. When the diamond pad had been used on each section of the floor for five minutes the slurry was vacuumed up using a wet vac machine and I moved onto the next section. Once the whole floor had been cleaned in this way it was time to start the next step.
Old floors like this which don’t have the benefit of a damp proof membrane, and have been covered up for a long time, can suffer from efflorescence issues due to moisture being trapped in the tile. This will result in white salt staining appearing on the tiles for days, weeks and sometimes months afterwards. To counter this the alkaline salts are neutralised by giving the floor an acid rinse using Tile Doctor Acid Gel and leaving it to dwell for five minutes before going over the floor again with the coarse diamond pad. The slurry was again removed with a wet vacuum and the floor was scrubbed clean with damp cloths.
I returned a few days later once the floor had dried to seal the floor. The client wanted a satin finish so knowing the floor had damp and efflorescence issues I opted for Tile Doctor Seal and Go Extra. This is a topical sealer which leaves a lovely satin finish but also allows for the floor to breathe. six coats were required to make the floor look perfect, allowing the lovely colours to come through.
Once complete the floor looked much brighter and the colours really shone through. The owners were really happy with the renovation we carried out and before leaving I took time to discuss how best to maintain the tiles going forward including the use of Neutral Tile cleaner.
Matthew Lovett
South Yorkshire Tile Doctor
 Tile Doctor Ltd
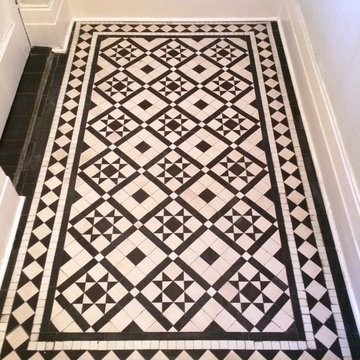
This job was at a house in near Windermere in South Cumbria, a place which is very popular amongst tourists to the Lake District. My client had a Black and White Victorian tiled floor in dire need of a clean and re-seal.
Prior to the application of any cleaning products, my first task was to run damp tests to make sure there were no inherent damp problems. With old floors of this type it’s good to know if there is a damp problem as this will affect the choice of sealer and also the length of time the floor requires to dry.
Fortunately, there were no damp issues present, and I was able to proceed however had the floor been damp and being December I would have offered to carry out the clean and seal in the Summer, when the water tables were lower and the damp levels would be more settled, thus creating a better environment for the sealer to operate in.
I started cleaning the Victorian tiles with Tile Doctor Remove & Go, a product which breaks down old sealers in preparation for a fresh seal to be applied. The product is diluted with water and then scrubbed into the floor with a scrubbing pad fitted to rotary machine; the resulting slurry is then removed using a wet vacuum.
Next step was to apply Tile Doctor Pro-Clean which was applied liberally to the floor, left to dwell for a short period and then agitated with a black scrubbing pad to lift out the ingrained dirt. I also paid special attention to cleaning the grout lines with a stiff scrubbing brush. The floor was then rinsed with clean water, and the resulting residue was extracted using a wet-vac machine.
After the cleaning was completed, the tiles were left for a couple of days to allow them ample time to dry. Upon my return to the house I checked the damp levels again and then applied two coats of the impregnating, colour enhancing sealer Tile Doctor Colour Grow which gives the black tiles more depth of colour, along with the robust surface seal and Matt finish my client had requested.
My client was exceptionally pleased the results – but really, the photographs speak for themselves.
Heidi Taylor
South Cumbria
 User
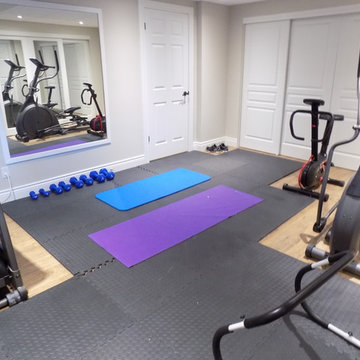
UserTucked into the back area of the basement is another open space for working out. There is plenty of room for a tread machine, stationary bike, layers of mats and other gym equipment. There are large mirrors installed on both sides of the room so it is easy to see your correct body position during a workout. This is a basement where everyone can have fun!
8