
Search results for "Managing future" in Home Design Ideas
 Elite Empire Construction Inc.
Hayden Estate Spa: The DTV Digital Command Center & Total Hydrotherapy
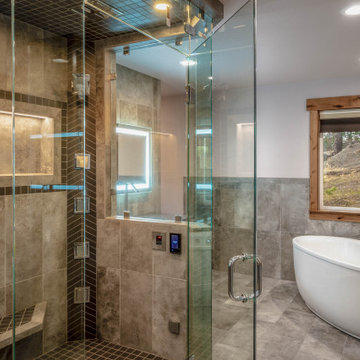
This close-up perspective dives into the high-tech core of the en-suite’s 18-head steam suite. This view demonstrates the sophisticated integration required to pull off a private, residential spa. By utilizing a central Kohler DTV digital command center, we provided the homeowner with total, computerized control over their hydrotherapy, steam, and environmental settings in one seamless, wall-mounted interface.
Advanced Technical & Design Specs:
DTV Digital Interface: This wall-mounted, computerized controller is the hub of the entire system. It orchestrates water temperature, flow, steam duration, integrated lighting, and the Bluetooth Polk Audio soundscape, all from a user-friendly digital display.
18-Outlet Command Matrix: The system manages an expansive array of 18 total water sources, including the visible column of high-pressure wall-mounted massaging body sprayers. Note the precision vertical alignment, engineered to provide a customizable full-body massage.
Racing-Grade Steam Suite: This view highlights the steam-tight glass enclosure, essential for maintaining the custom "racing-grade" steam generator's efficiency. The deep, radius-cornered LED-lit shampoo niche adds functionality while proving that technical spaces don’t sacrifice artisan finish.
Integrated Precision Lighting: The subtle linear LED lighting in the recessed niche and the computerized ambient light settings controlled by the DTV panel ensure the perfect atmosphere, from an energizing morning shower to a relaxing evening steam.
Material Integrity: The large-format Italian porcelain tile flows directly into the shower floor over the thermostat-controlled radiant heating system, providing a "cold-spot-free" transition into the hydrotherapy zone.
 Sosna Inc
This young couple, busy raising two young boys (plus a playful cat), had always planned to renovate—it was just a matter of finding the right people for the job.
Their biggest concern? Hiring a contractor they could truly rely on to bring their vision to life without added stress.
The master ensuite simply wasn’t working. A large, unused deck-mount tub dominated the space, while the tiny, dim shower made daily routines uncomfortable. The layout didn’t make sense for how they actually used the room, which ended up being mostly for the toilet and vanity. On top of that, the master bedroom sat in an open loft without proper walls or a door, making privacy nearly impossible.
Our solution involved a thoughtful reconfiguration of the ensuite. We removed the oversized tub and replaced it with a spacious walk-in shower. The old, cramped shower space became the perfect spot for a relocated vanity, allowing for better flow and use of the room. Up in the loft, we built a new wall with a door to give the bedroom the privacy it was missing. The stairway was also refreshed with new oak treads and a stained handrail to match the existing flooring.
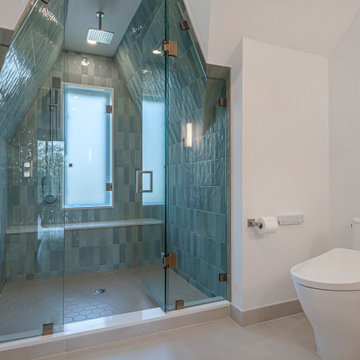
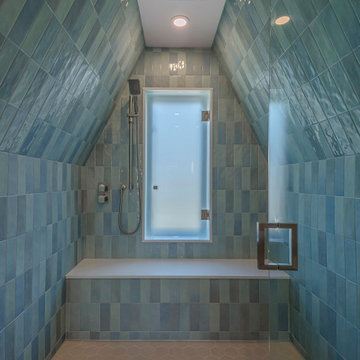
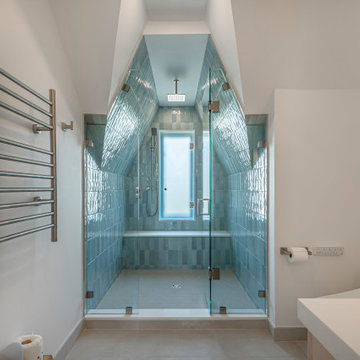
One challenge during construction was installing the custom shower glass and tile within the sloped ceilings and angled walls—but our team carefully managed every detail to ensure a precise and polished finish.
The new master ensuite now feels like a retreat.
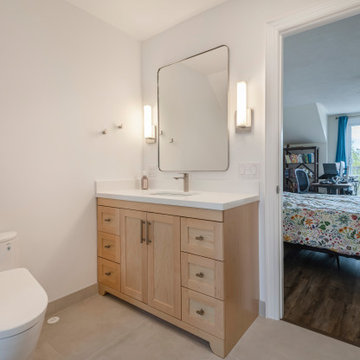
Handmade-style blue subway tiles add a calming pop of colour in the shower, paired with crème porcelain floor tiles. A prefabricated solid wood vanity with quartz countertop, brushed nickel fixtures, and an electric towel warmer complete the space—bringing comfort and functionality together beautifully.
A fun moment during the design phase? We used stools, tables, and even a piano to mock up the future layout—helping the homeowners get a real feel for the spacing between the new vanity and toilet. It was a creative, hands-on way to ensure everyone felt confident moving forward.
Now, the ensuite functions exactly as it should: a fully usable and relaxing 3-piece bathroom, styled just the way they wanted. And with the new loft wall and door, the bedroom finally feels like a true primary suite—private, peaceful, and made for them.
 Sosna Inc
This young couple, busy raising two young boys (plus a playful cat), had always planned to renovate—it was just a matter of finding the right people for the job.
Their biggest concern? Hiring a contractor they could truly rely on to bring their vision to life without added stress.
The master ensuite simply wasn’t working. A large, unused deck-mount tub dominated the space, while the tiny, dim shower made daily routines uncomfortable. The layout didn’t make sense for how they actually used the room, which ended up being mostly for the toilet and vanity. On top of that, the master bedroom sat in an open loft without proper walls or a door, making privacy nearly impossible.
Our solution involved a thoughtful reconfiguration of the ensuite. We removed the oversized tub and replaced it with a spacious walk-in shower. The old, cramped shower space became the perfect spot for a relocated vanity, allowing for better flow and use of the room. Up in the loft, we built a new wall with a door to give the bedroom the privacy it was missing. The stairway was also refreshed with new oak treads and a stained handrail to match the existing flooring.
One challenge during construction was installing the custom shower glass and tile within the sloped ceilings and angled walls—but our team carefully managed every detail to ensure a precise and polished finish.
The new master ensuite now feels like a retreat.
Handmade-style blue subway tiles add a calming pop of colour in the shower, paired with crème porcelain floor tiles. A prefabricated solid wood vanity with quartz countertop, brushed nickel fixtures, and an electric towel warmer complete the space—bringing comfort and functionality together beautifully.
A fun moment during the design phase? We used stools, tables, and even a piano to mock up the future layout—helping the homeowners get a real feel for the spacing between the new vanity and toilet. It was a creative, hands-on way to ensure everyone felt confident moving forward.
Now, the ensuite functions exactly as it should: a fully usable and relaxing 3-piece bathroom, styled just the way they wanted. And with the new loft wall and door, the bedroom finally feels like a true primary suite—private, peaceful, and made for them.
Find the right local pro for your project
 Sosna Inc
This young couple, busy raising two young boys (plus a playful cat), had always planned to renovate—it was just a matter of finding the right people for the job.
Their biggest concern? Hiring a contractor they could truly rely on to bring their vision to life without added stress.
The master ensuite simply wasn’t working. A large, unused deck-mount tub dominated the space, while the tiny, dim shower made daily routines uncomfortable. The layout didn’t make sense for how they actually used the room, which ended up being mostly for the toilet and vanity. On top of that, the master bedroom sat in an open loft without proper walls or a door, making privacy nearly impossible.
Our solution involved a thoughtful reconfiguration of the ensuite. We removed the oversized tub and replaced it with a spacious walk-in shower. The old, cramped shower space became the perfect spot for a relocated vanity, allowing for better flow and use of the room. Up in the loft, we built a new wall with a door to give the bedroom the privacy it was missing. The stairway was also refreshed with new oak treads and a stained handrail to match the existing flooring.
One challenge during construction was installing the custom shower glass and tile within the sloped ceilings and angled walls—but our team carefully managed every detail to ensure a precise and polished finish.
The new master ensuite now feels like a retreat.
Handmade-style blue subway tiles add a calming pop of colour in the shower, paired with crème porcelain floor tiles. A prefabricated solid wood vanity with quartz countertop, brushed nickel fixtures, and an electric towel warmer complete the space—bringing comfort and functionality together beautifully.
A fun moment during the design phase? We used stools, tables, and even a piano to mock up the future layout—helping the homeowners get a real feel for the spacing between the new vanity and toilet. It was a creative, hands-on way to ensure everyone felt confident moving forward.
Now, the ensuite functions exactly as it should: a fully usable and relaxing 3-piece bathroom, styled just the way they wanted. And with the new loft wall and door, the bedroom finally feels like a true primary suite—private, peaceful, and made for them.
 Sosna Inc
This young couple, busy raising two young boys (plus a playful cat), had always planned to renovate—it was just a matter of finding the right people for the job.
Their biggest concern? Hiring a contractor they could truly rely on to bring their vision to life without added stress.
The master ensuite simply wasn’t working. A large, unused deck-mount tub dominated the space, while the tiny, dim shower made daily routines uncomfortable. The layout didn’t make sense for how they actually used the room, which ended up being mostly for the toilet and vanity. On top of that, the master bedroom sat in an open loft without proper walls or a door, making privacy nearly impossible.
Our solution involved a thoughtful reconfiguration of the ensuite. We removed the oversized tub and replaced it with a spacious walk-in shower. The old, cramped shower space became the perfect spot for a relocated vanity, allowing for better flow and use of the room. Up in the loft, we built a new wall with a door to give the bedroom the privacy it was missing. The stairway was also refreshed with new oak treads and a stained handrail to match the existing flooring.
One challenge during construction was installing the custom shower glass and tile within the sloped ceilings and angled walls—but our team carefully managed every detail to ensure a precise and polished finish.
The new master ensuite now feels like a retreat.
Handmade-style blue subway tiles add a calming pop of colour in the shower, paired with crème porcelain floor tiles. A prefabricated solid wood vanity with quartz countertop, brushed nickel fixtures, and an electric towel warmer complete the space—bringing comfort and functionality together beautifully.
A fun moment during the design phase? We used stools, tables, and even a piano to mock up the future layout—helping the homeowners get a real feel for the spacing between the new vanity and toilet. It was a creative, hands-on way to ensure everyone felt confident moving forward.
Now, the ensuite functions exactly as it should: a fully usable and relaxing 3-piece bathroom, styled just the way they wanted. And with the new loft wall and door, the bedroom finally feels like a true primary suite—private, peaceful, and made for them.
 Elite Empire Construction Inc.
Custom Knotty Alder Daughter's Suite: Integrated Storage & Home Tech
We designed this daughter's bedroom as a fully unified sanctuary, leveraging intricate, hand-finished millwork to create a seamless living and media hub. By strictly utilizing the same custom Knotty Alder found throughout the entire Hayden estate, we ensured the secondary rooms deliver the identical "no-expense-spared" standard as the primary master suite.
Artisan Features & Construction Excellence:
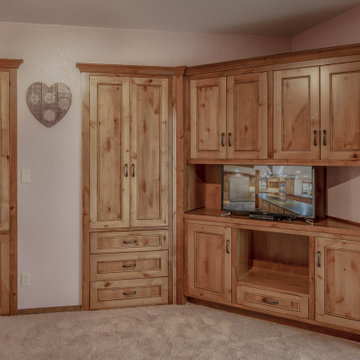
Complete Knotty Alder Media Wall: The centerpiece of the room is a comprehensive Knotty Alder built-in system. This isn't just cabinetry; it's a structural element designed to define the room’s function, showcasing the natural, rustic texture that balances the home’s modern technology.
Integrated Media Console: The lower cabinetry features a dedicated media console with open component shelving and concealable storage drawers. We engineered the console to support a integrated smart TV (note the kitchen construction detail on the screen!), seamlessly hiding all wiring behind the precision panel work.
High-Capacity Floor-to-Ceiling Storage: Flanking the media zone are massive linen towers and wardrobes, providing sophisticated, long-term organization. Every door and drawer utilizes furniture-grade joinery and substantial, traditional hardware to match the luxury aesthetic of the home's plumbing.
Unified Architectural Details: We extended the Knotty Alder into substantial architectural casings, framing the expansive window/slider and tying the room into the surrounding Idaho landscape. This continuity of material creates a sophisticated, "Mountain Modern" environment throughout the entire residence.
Technical Flow: Note the complex integration of the built-ins into the room’s geometry, including the perfectly fit baseboard trim. This level of finish work demonstrates our capability to manage complex millwork installations as effectively as our advanced Kohler hydrotherapy systems.

 User
How To Build A Fish Pond, seems to be a frequently asked question in today's day and age, what with Extreme Home Make Over, HGTV, P. Allen Smith and all of the other "Do-It-Yourself" television programs that are flooding our airways.
Once you finally decide that you want a beautiful ecosystem pond to come home to, the next step is to come up with an ecosystem pond design that works for you. This pond design can be a front yard waterscape with curb appeal or a Backyard Waterfall creating your own private get away. If your having trouble designing it yourself you could always have BJL Aquascapes Colts Neck, Monmouth County, NJ help design and build it for you !
Click Here To See Our Website Page Links
Visit our website links to more information on Backyard Garden Ponds, CLICK ON THE LINKS BELOW TO LEARN MORE !!!
Pond Filtration
Ecosystem Pond
Small Pond Filter Urn
UV Pond Sterilization
Bog Filtration
Our Display Ponds
Semi-Formal Ponds
Our Display At Brock's
Large Pond Management
Pond Portfolio
Construction Process

 Advance Design Studio, Ltd.
Richard and Monica of Huntley, IL, needed to make better use of their kitchen as well as more storage for pots, pans, and countertop appliances. Their space was laid out unconventionally, making cooking a challenge. A triangular nook held their refrigerator, hard-to-reach cabinets, and a cramped pantry. They needed to find a solution, so they searched Facebook for home remodeling companies in their area. Soon they found Advance Design Studio’s profile and were immediately impressed.
“Advance Design was the first and last studio I contacted,” Richard said.
Richard called Advance Design and felt an immediate connection with Project Designer Nicole. She was knowledgeable and thorough and offered many unique solutions to their kitchen layout problem.
A week later, Nicole came out to their home to meet the couple. They talked about their kitchen remodeling project and told Nicole what they wanted in their dream kitchen. Nicole saw that the kitchen had weird angles that hindered the cabinets you could use. She knew that designing a space that met both the client’s needs and dreams would be challenging.
Nicole worked with Richard and Monica to create an innovative design. When the couple came out to Advance Design Studio in Gilberts, they were blown away by the 3D illustrations Nicole showed them.
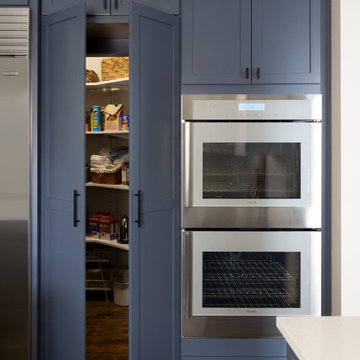
“I incorporated a hidden pantry cabinet to not only be a cool feature but also allowed me to square off the walls to gain more cabinet space,” Nicole said.
The hidden pantry added storage and squared off the strange triangular nook, creating a more traditional and functional kitchen layout. With the layout problems solved, they worked together to select materials. Richard and Monica wanted something brighter than their previous dark brown kitchen. They chose a combination of blue and white cabinetry with a white subway tile backsplash and white quartz countertops. The design was finalized, the materials were selected. It was time to begin construction.
One fear most homeowners have when beginning a home remodel is dust. Advance Design uses BuildClean HEPA filters to eliminate dust throughout the house while construction is going on. Project Manager Jason and his crew created temporary walls and cleaned up after every day of work.
“We were very impressed with how clean and organized the crew kept things while the remodeling process was underway,” Richard said.
The result is just what Richard and Monica envisioned when they began the process. Richard’s love for cooking can be explored through all-new Thermador appliances, featuring an easy-to-use induction cooktop, built-in double oven, and spacious refrigerator. Matte black hardware contrasts the bright white backsplash, countertops, and cabinets, while the stunning blue cabinets complement the dark hardwood floor and stainless-steel appliances. The dual pendant light fixtures over the reconfigured island are eye-catching and add necessary lighting.
This Huntley kitchen renovation turned out better than Richard and Monica hoped. Their experience with Advance Design’s Common Sense Remodeling process has them thinking about other projects they could do in the future.
Our award-winning design team would love to create a beautiful, functional, and spacious place for you and your family. With our “Common Sense Remodeling” approach, the process of renovating your home has never been easier. Contact us today at 847-665-1711 or schedule an appointment.
 Klopf Architecture
From Mid-Century Classic to the Present
An iconic design updated with comfort, function, and flow for today.
A Remodel That Balances Past and Present
What started as a desire to update a classic Eichler soon became an exploration of how Mid-Century Modern design can successfully evolve for today. The client, a tech professional with a passion for scuba diving and underwater photography, wanted a home that would both honor its original character and feel tailored to his daily life. A lifelong technology enthusiast, he still owns the very first Mac desktop he saved up for as a teenager working at Radio Shack, a detail that underscores his appreciation for design that melds function and form.
Honoring Separation While Expanding Possibility
Unlike many contemporary remodels where walls are opened up to create expansive living spaces, this project took a more restrained approach. The client valued the defined rooms of the original plan and wanted to preserve as much wall space as possible for displaying his large-format underwater photography. The emphasis was not on dramatic spatial reinvention, but on thoughtful refinements. Klopf Architecture shaped a gallery-like backdrop while also expanding the primary suite, modernizing materials and fixtures throughout the home, and improving the functionality and layout of the kitchen. The finished home feels at once timeless and renewed, an Eichler that continues to inspire while fully supporting the lifestyle of its present-day owner.
A major turning point came mid-design. The original project brief had not included an addition, but as the reconfiguration of the primary bedroom and bath unfolded, it became clear that an expansion was the best approach to achieve the client’s vision of a more spacious suite. Fortunately, the adjustment came at a stage when revisions were still manageable and was integrated seamlessly, showing how thoughtful course corrections can strengthen a project rather than hinder it.
Navigating Challenges With Precision
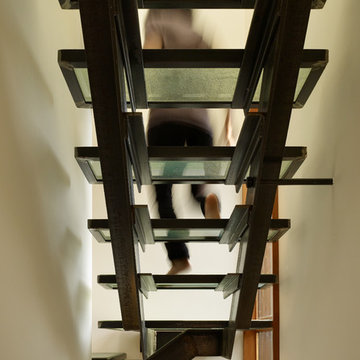
The design development included multiple conceptual rounds, balancing preservation with subtle expansion. During construction, an existing post previously thought to be load-bearing turned out not to be. The structural engineer was able to pivot quickly, and both the post and the cross beam that had been intended to replace it could be omitted, allowing the original rhythm of the Eichler beam bays to be preserved.
Sustainability was not just a checklist item, but a way to align the home with the client’s values of simplicity, efficiency, and long-term functionality. R-38 roof insulation reduced energy usage, solar panels with battery storage provided independence and resilience, and passive comfort strategies eliminated the need forenergy-intensive air conditioning. An electric vehicle charger and an on-demand hot water recirculation system (with call buttons as opposed to having constant circulation) add to the home’s long-term efficiency factors. Together, these moves created a home that is quieter, more comfortable, and better equipped for the future, qualities that supported the client’s pragmatic approach to design and living lightly.
Details That Respect the Eichler DNA
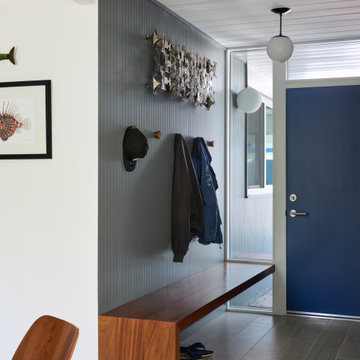
The remodel carries forward the Eichler’s original spirit while introducing new layers of modern livability. Originally, the house was approached along a deep, narrow walk, with the garage on one side and the house on the other, leaving the front door tucked far back within this chasm-like space. By pulling the entry forward, the design reshaped the arrival experience, creating a clearer threshold and a natural drop-off zone for bags, shoes, and keys. This shift also made room for a custom bench at the entry that extends seamlessly through the glass sidelight. The bench and drop-off zone now work together as a single, integrated sequence that supports everyday living while offering a tactile reminder of Eichler’s philosophy of connectedness.
At the client’s request, Klopf reintroduced a classic Eichler gesture by extending the exterior siding into the entry and living room. The detail reinforces a sense of indoor/outdoor continuity while providing a subtle architectural surface that allows the client’s photography to take visual precedence.
The signature concrete masonry wall at the front was reconstructed using blocks sourced to match the originals, now strengthened with rebar for seismic resilience while maintaining a private outdoor courtyard, visually extending the kitchen outward. A decorative trellis element, a detail borrowed from a neighboring Eichler, restores a familiar mid-century modern architectural motif. At the courtyard entry door, a custom etched glass sidelight with an ocean-themed design featuring kelp and jellyfish serves as a subtle homage to the client’s passion for deep-sea diving.
Landscaping became an integral part of the overall transformation. The homeowner engaged landscape architect Randi Johnsen of Third Nature Studio to shape a series of calm, inviting outdoor rooms that read as a natural extension of the interiors. While technically outside of the core construction scope, the landscape design proved central to achieving a sense of completeness and connectedness across the property. Such whole-property considerations often emerge as design ideas take shape, underscoring the importance of flexibility in planning and budgeting, as well as close collaboration among the design team starting early in the process.
The Value of Evolving Scope
As with many custom residential projects, the scope evolved during the design process. What began as a targeted remodel grew to include a new/expanded primary suite, a rebuilt CMU patio wall for strength and longevity, and a solar panel array and battery storage for energy resilience and carbon-reduction. Each thoughtful decision represented a conscious investment in the home’s performance and character, rather than a cost overrun.
The result was a project delivered on schedule, tailored precisely to the client’s lifestyle, and positioned to add long-term value both functionally and aesthetically. By embracing scope evolution as an opportunity rather than a challenge, and relying on good design paired with transparent communication, this remodel demonstrates how Eichler homes can be adapted for contemporary living without erasing their DNA.
Klopf Architecture project team: John Klopf, AIA, and Klara Kevane, Elise Webb and Nicholas LaNasa.
Contractor: Golden Cove Construction
Landscape Design: Third Nature Studio
Structural Engineer: Daniel Bastiao Design
Photography: ©2025 Mariko Reed
Year Completed: 2024
Location: Sunnyvale, CA

 Tile Doctor Ltd
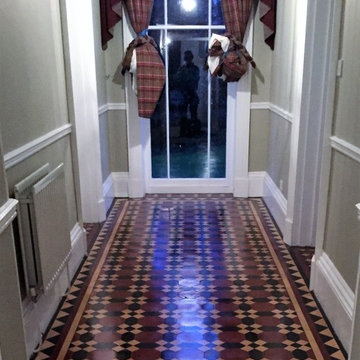
It’s fairly common for owners of older properties – especially houses those that are over 100 years old or more – to find original Victorian tiled flooring hidden underneath carpet. It can wait years for the tiles to be discovered, by which time they have amassed huge amounts of dirt and dust.
Such was the case at this property in Bridlington, a Yorkshire town through which a stream known as the ‘Gypsey Race’ runs, before emptying in the North Sea at the Bridlington Harbour. Interestingly enough, folklore says that when the stream is flowing, bad fortune is at hand. The stream must not have been running on the day that we restored this Victorian hallway, as we managed to achieve some truly fantastic results!!
The hallway had been severely dulled after going years without professional care. We set about giving it the thorough clean and fresh seal that I’d des partly needed. Here’s how we did it.
Our first task was to remove any old, no longer effectual sealer. We did this by liberally applying a strong dilution of our alkaline-based Tile a Doctor Pro Clean, which doubles as a reliable cleaner and a stripper capable of stripping away old sealer. The product was worked into the tiles using a black stripping pad fitted to a 17″ rotary machine, and the process was repeated three times.
I noticed that there was still some stubborn dirt and old sealer around the edges of the hallway, so I used some of our handheld diamond encrusted burnishing blocks to grind it away. To finish the cleaning process, we washed the floor with Tile Doctor pH Neutral Tile Cleaner, leaving it fresh and ready to be sealed once left to dry overnight.
Upon our return to the property the next day, we ran some quick tests to check for any excess moisture (even a small amount could have damaged the performance of the new sealer). Once satisfied with the the condition of the floor, we proceeded to see it with an impregnating sealer, meaning a sealer that penetrates into the pores of the tile to fill them and therefore prevent trapped dirt and ingrained stains.
Our impregnating sealer, Tile Doctor Colour Grow, has the added benefit of being colour intensifying, which really highlights the unique colourful patterns of the tiles. To give the floor a durable sheen finish, as requested by the customer, we also added a coat of Tile Doctor Seal and Go sealer.
The result was a complete transformation of the condition and appearance of this great Victorian tiled hallway. Our customer is very pleased – the floor is now a complete asset to any property, and will now be easier to keep looking great in future.
Ronnie Phipps
East Yorkshire Tile Doctor
 highland
Creating the perfect fall home design, Pedrovazpaulo Real Estate and floorplan is one of the best ways to make your living space warm, functional, and visually attractive during the cozy autumn season. Fall is the time when families spend more time indoors, enjoy warm colors, and focus on comfort. A well-planned home layout not only improves beauty but also increases convenience for everyday living. A smart fall home design and floorplan should include open spaces, natural lighting, warm textures, and practical room arrangements. Whether you are building a new home or renovating your current one, choosing the right layout is essential. Modern homeowners also look for stylish house design plan options that combine beauty with efficiency. In this article, we will explore how to create the perfect fall home design and floorplan, discuss modern layout trends, and explain how house plan design, home architecture design, home design plans, and home plan design work together to build a dream home.
Why Fall Home Design Matters
A good fall home design and floorplan helps your house feel welcoming and peaceful. During autumn, people prefer warm interiors, comfortable seating areas, and rooms that allow better natural light. A thoughtful layout supports these needs while improving the overall value of the property. Fall-inspired homes often include earthy tones like brown, beige, orange, and cream. Large windows are also common because they allow sunlight to brighten indoor spaces. Open kitchens connected to dining and living rooms are another popular feature in modern house design plan ideas. When your fall home design and floorplan is properly planned, every room serves a purpose while maintaining visual harmony.
Key Features of a Perfect Floorplan
1. Open Living Spaces
One major part of a strong fall home design and floorplan is an open-concept living area. Combining the kitchen, dining room, and living room creates a spacious feeling and improves family interaction. Modern house plan design focuses on flexibility. Open spaces make entertaining guests easier and allow better furniture arrangement for seasonal decorations.
2. Functional Entryway
Your entrance should feel warm and organized. A good mudroom or foyer is essential in any fall home design and floorplan because it helps manage shoes, coats, and seasonal accessories. This practical idea is often included in professional home design plans for families who want both beauty and convenience.
3. Cozy Bedrooms
Bedrooms should provide comfort and privacy. Soft lighting, warm colors, and smart furniture placement improve relaxation. A strong home plan design ensures bedrooms are away from noisy areas for better peace.
4. Outdoor Connection
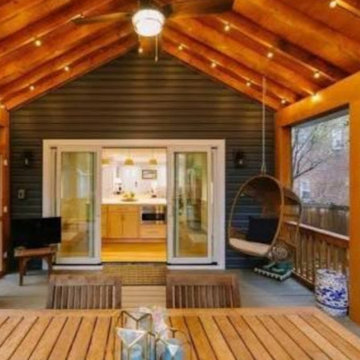
Fall is perfect for enjoying patios, balconies, and garden views. Many experts in home architecture design recommend adding sliding glass doors or covered patios to connect indoor and outdoor spaces. This improves both beauty and property value.
Importance of House Design Planning
A successful fall home design and floorplan starts with a detailed house design plan. Without proper planning, homes may look attractive but fail in functionality. A professional house design plan includes room sizes, traffic flow, ventilation, and furniture placement. It also ensures your budget is used wisely. Many homeowners regret skipping this step because poor layouts create long-term inconvenience. Good planning also supports future needs such as children, guests, or work-from-home spaces.
Role of Home Architecture Design
Strong home architecture design gives personality to your house. It combines exterior beauty with interior efficiency. The roof style, wall structure, windows, and natural light all affect the success of your fall home design and floorplan. For example, homes with high ceilings and large windows feel brighter and more open during fall. Natural materials like wood and stone also add warmth and seasonal charm. Professional home architecture design creates a balance between modern trends and personal lifestyle needs.
Choosing the Right Home Design Plans
Selecting the right home design plans helps avoid expensive mistakes. Your plan should match your land size, family size, and future goals. Single-story homes are ideal for small families and elderly residents, while double-story layouts work better for growing families. Your fall home design and floorplan should also include storage spaces, laundry areas, and practical bathroom locations. Customized home design plans are often better than copied layouts because they reflect your exact needs.
Modern Trends in Home Plan Design
Today’s home plan design focuses on simplicity, energy efficiency, and natural comfort. Some popular trends include:
- Minimalist kitchens with hidden storage
- Multi-purpose rooms for office and guest use
- Energy-saving windows and insulation
- Smart lighting systems
- Indoor plants and natural decoration
Conclusion
A well-planned fall home design and floorplan creates a home that feels warm, beautiful, and highly functional. From open living spaces to cozy bedrooms and outdoor connections, every detail matters when designing a seasonal home. Using a smart house design plan, strong house plan design, creative home architecture design, detailed home design plans, and practical home plan design helps you achieve the perfect balance of style and comfort. Whether you are building from scratch or improving your current house, investing in the right fall home design and floorplan will bring long-term satisfaction and better living quality. A thoughtful home is not just a place to live—it becomes a place to truly enjoy every season. Also you can read in homemaxe website for Pedrovazpaulo Real Estate
FAQs
1. What is a fall home design and floorplan?
A fall home design and floorplan is a home layout designed to create warmth, comfort, and functionality during the autumn season using cozy interiors and smart room arrangements.
2. Why is a house design plan important?
A house design plan helps organize room sizes, movement flow, lighting, and budget management before construction begins.
3. How does home architecture design improve a house?
Home architecture design improves both exterior appearance and interior comfort by balancing beauty, structure, and natural lighting.
4. What should be included in home design plans?
Good home design plans should include bedrooms, bathrooms, kitchen layout, storage spaces, outdoor areas, and future family needs.
5. What makes a modern home plan design successful?
A successful home plan design focuses on comfort, energy efficiency
 Housing & Building Association of Colorado Springs
The Home
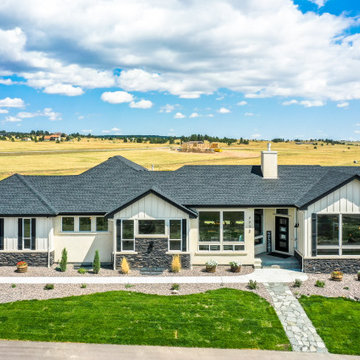
The Bannockburn is a uniquely-designed ranch home that features amazing mountain views from multiple rooms. Situated on
two-and-a-half acres, this “rustic, industrial farmhouse” includes four bedrooms, four baths and an oversized four-car finished
garage, along with a whole-house stereo. The 12-foot tall main ceilings and bright open rooms, with the natural white oak
floors, immediately give the sense of home entertainment.
The unique butler bar connects to the gourmet kitchen, blending the ten-and-a-half foot granite-surface island with unique
gabion features. The spacious quartz counter for food prep, along with the rear windows for viewing the wildlife, are a bonus.
For eating spaces, along with the butler bar and island, there is a large dinette and large dining/flex room with oversized
windows overlooking the covered sun deck. The master suite features a rustic wood and iron-trimmed fireplace, a super shower
with gabion vanity accents, large mirrors, a makeup station and floor-to-ceiling tile. The master closet connects to the laundry,
featuring an eight-foot bench and cubby row, diamond plate tile flooring, plenty of cabinets and a desk with filing space.
The lower-level, iron and rusted metal fireplace with an exposed aggregate concrete floor enhance the natural industrial look.
The rec room and full galley leads to the walkout patio for a future barbecue, hot tub or firepit.
The Builder
Albano Homes is a family-owned, custom and luxury homebuilder, building in the Colorado Springs area since 1991. Al Albano comes from a family of homebuilders and tradesmen. With almost 50 years of building experience, he personally works with every client to ensure unique architectural designs, functionality and quality of products to meet every clients’ needs and desires for their home. With design trends constantly changing, we believe it is critical to research the markets to give our clients the design possibilities that can be integrated into their new home. Al melds current design features with time-tested architectural stability and the highest-quality workmanship.
Al is the overall home designer and planner. His son, Adam, is the project manager, supervisor and scheduler. Al’s wife, Paula, is the specialty designer as well as the color & finish materials selector. Joni, Al’s daughter, is the marketing and sales director and supervisor.
The Interior Design
Blending both farmhouse and industrial styles in several features, this home seamlessly flows from room to room. The classicstyle trim and over-the-door transoms on the main level meld the past with the present. Soft grays and whites coupled with stark reds and blacks bring the home to life. Distinctive gabion features throughout the home, coupled with natural granite, white oak and alder woods, bring in the outdoors. Uniqueness, flow, design and superior quality are the hallmarks of this 2020 Parade home.



 highland
Renovating a home can completely transform the way a space looks, feels, and functions, but successful improvements require thoughtful planning rather than rushing into expensive changes. These renovation tips and tricks house ideas can help homeowners organize projects, control costs, select practical materials, and create rooms that remain useful for years. Start by identifying what genuinely needs improvement, such as outdated finishes, poor lighting, inefficient storage, damaged surfaces, or an inconvenient layout. Create a realistic budget that includes materials, labor, permits where applicable, and a contingency amount for unexpected issues. Taking measurements, collecting inspiration, and deciding priorities before work begins can prevent unnecessary purchases and make the renovation process much easier to manage.
One of the most useful renovation tips and tricks house projects can benefit from is improving the layout before focusing on decoration. A beautiful room will still feel inconvenient if furniture blocks walkways or storage is insufficient. Consider how people actually use each space and whether doors, windows, lighting, electrical outlets, and storage are positioned effectively. In kitchens, for example, practical work zones and accessible storage can make everyday tasks easier. In bedrooms and living rooms, built-in shelving, multifunctional furniture, and organized storage can reduce clutter without making the space feel crowded. Whenever possible, repair or improve the existing structure before replacing everything, because thoughtful upgrades can deliver significant results without creating unnecessary renovation costs.
Choosing materials carefully is another important part of renovation tips and tricks house planning. Look beyond appearance and consider durability, maintenance, safety, and suitability for the room. High-moisture areas require materials that can handle regular exposure to water, while frequently used floors and work surfaces should be selected for durability. Neutral foundations can also provide flexibility because wall colors, textiles, artwork, and accessories can be changed later without another major renovation. Lighting deserves equal attention: combine general illumination with task and accent lighting to make rooms more functional and visually comfortable. Energy-efficient lighting, improved insulation, weather sealing, and efficient fixtures may also contribute to better long-term household performance.
Before beginning major work, divide the project into manageable stages. A useful approach is to complete structural or repair work first, followed by electrical or plumbing updates when necessary, then walls, flooring, cabinetry, fixtures, and finally decorative details. This order can reduce the chance of damaging newly finished surfaces. Keep a record of measurements, product specifications, receipts, and important project decisions so replacements or future repairs are easier. For specialized work involving structural changes, electrical systems, plumbing, gas, or other regulated areas, consult appropriately qualified professionals and follow local requirements. Among the most practical renovation tips and tricks house owners can follow is to avoid changing too many things simultaneously; completing priority areas systematically makes budgets, timelines, and quality easier to control.
Finally, focus on improvements that combine appearance with everyday usefulness. Fresh paint, updated hardware, better organization, improved lighting, refreshed flooring, and carefully selected fixtures can make a noticeable difference without requiring a complete transformation. Outdoor areas can also benefit from simple maintenance, improved lighting, seating, planting, or repaired surfaces that extend the usable living space. Before declaring the project finished, inspect each room for functionality, storage, lighting, ventilation, safety, and finishing quality. The best renovation tips and tricks house approach is not necessarily about spending more it is about making informed choices that solve real problems and create a home that feels comfortable, practical, and personal.
One of the most useful renovation tips and tricks house projects can benefit from is improving the layout before focusing on decoration. A beautiful room will still feel inconvenient if furniture blocks walkways or storage is insufficient. Consider how people actually use each space and whether doors, windows, lighting, electrical outlets, and storage are positioned effectively. In kitchens, for example, practical work zones and accessible storage can make everyday tasks easier. In bedrooms and living rooms, built-in shelving, multifunctional furniture, and organized storage can reduce clutter without making the space feel crowded. Whenever possible, repair or improve the existing structure before replacing everything, because thoughtful upgrades can deliver significant results without creating unnecessary renovation costs.
Choosing materials carefully is another important part of renovation tips and tricks house planning. Look beyond appearance and consider durability, maintenance, safety, and suitability for the room. High-moisture areas require materials that can handle regular exposure to water, while frequently used floors and work surfaces should be selected for durability. Neutral foundations can also provide flexibility because wall colors, textiles, artwork, and accessories can be changed later without another major renovation. Lighting deserves equal attention: combine general illumination with task and accent lighting to make rooms more functional and visually comfortable. Energy-efficient lighting, improved insulation, weather sealing, and efficient fixtures may also contribute to better long-term household performance.
Before beginning major work, divide the project into manageable stages. A useful approach is to complete structural or repair work first, followed by electrical or plumbing updates when necessary, then walls, flooring, cabinetry, fixtures, and finally decorative details. This order can reduce the chance of damaging newly finished surfaces. Keep a record of measurements, product specifications, receipts, and important project decisions so replacements or future repairs are easier. For specialized work involving structural changes, electrical systems, plumbing, gas, or other regulated areas, consult appropriately qualified professionals and follow local requirements. Among the most practical renovation tips and tricks house owners can follow is to avoid changing too many things simultaneously; completing priority areas systematically makes budgets, timelines, and quality easier to control.
Finally, focus on improvements that combine appearance with everyday usefulness. Fresh paint, updated hardware, better organization, improved lighting, refreshed flooring, and carefully selected fixtures can make a noticeable difference without requiring a complete transformation. Outdoor areas can also benefit from simple maintenance, improved lighting, seating, planting, or repaired surfaces that extend the usable living space. Before declaring the project finished, inspect each room for functionality, storage, lighting, ventilation, safety, and finishing quality. The best renovation tips and tricks house approach is not necessarily about spending more it is about making informed choices that solve real problems and create a home that feels comfortable, practical, and personal.
 Advance Design Studio, Ltd.
Richard and Monica of Huntley, IL, needed to make better use of their kitchen as well as more storage for pots, pans, and countertop appliances. Their space was laid out unconventionally, making cooking a challenge. A triangular nook held their refrigerator, hard-to-reach cabinets, and a cramped pantry. They needed to find a solution, so they searched Facebook for home remodeling companies in their area. Soon they found Advance Design Studio’s profile and were immediately impressed.
“Advance Design was the first and last studio I contacted,” Richard said.
Richard called Advance Design and felt an immediate connection with Project Designer Nicole. She was knowledgeable and thorough and offered many unique solutions to their kitchen layout problem.
A week later, Nicole came out to their home to meet the couple. They talked about their kitchen remodeling project and told Nicole what they wanted in their dream kitchen. Nicole saw that the kitchen had weird angles that hindered the cabinets you could use. She knew that designing a space that met both the client’s needs and dreams would be challenging.
Nicole worked with Richard and Monica to create an innovative design. When the couple came out to Advance Design Studio in Gilberts, they were blown away by the 3D illustrations Nicole showed them.
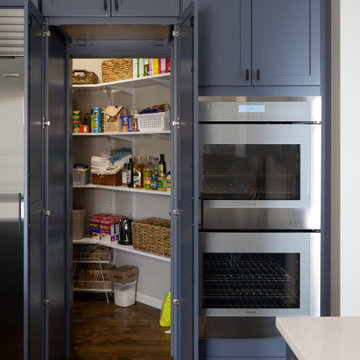
“I incorporated a hidden pantry cabinet to not only be a cool feature but also allowed me to square off the walls to gain more cabinet space,” Nicole said.
The hidden pantry added storage and squared off the strange triangular nook, creating a more traditional and functional kitchen layout. With the layout problems solved, they worked together to select materials. Richard and Monica wanted something brighter than their previous dark brown kitchen. They chose a combination of blue and white cabinetry with a white subway tile backsplash and white quartz countertops. The design was finalized, the materials were selected. It was time to begin construction.
One fear most homeowners have when beginning a home remodel is dust. Advance Design uses BuildClean HEPA filters to eliminate dust throughout the house while construction is going on. Project Manager Jason and his crew created temporary walls and cleaned up after every day of work.
“We were very impressed with how clean and organized the crew kept things while the remodeling process was underway,” Richard said.
The result is just what Richard and Monica envisioned when they began the process. Richard’s love for cooking can be explored through all-new Thermador appliances, featuring an easy-to-use induction cooktop, built-in double oven, and spacious refrigerator. Matte black hardware contrasts the bright white backsplash, countertops, and cabinets, while the stunning blue cabinets complement the dark hardwood floor and stainless-steel appliances. The dual pendant light fixtures over the reconfigured island are eye-catching and add necessary lighting.
This Huntley kitchen renovation turned out better than Richard and Monica hoped. Their experience with Advance Design’s Common Sense Remodeling process has them thinking about other projects they could do in the future.
Our award-winning design team would love to create a beautiful, functional, and spacious place for you and your family. With our “Common Sense Remodeling” approach, the process of renovating your home has never been easier. Contact us today at 847-665-1711 or schedule an appointment.
 Tile Doctor Ltd
Along with internal tiled floors at residential and commercial properties, we also specialise in the cleaning, restoration and sealing of all types of external tiled floors, including patios.
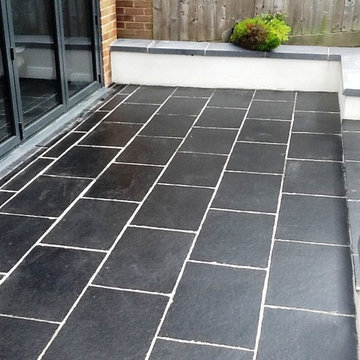
This customer, who lives in the small town of Brackley in Northamptonshire, had made the unfortunate mistake of sealing a brand new Slate tiled patio without removing the layer of grout haze smeared across the surface of the tile first. With the grout trapped between the tile and the new sealant the sealer was unable to fulfil its potential and the entire floor appeared really dull and patchy. The customer contacted me about setting the situation right.
My initial course of action was to remove the new sealer using Tile Doctor Remove & Go, which is specially designed to strip away sealant, as well as adhesives and paints in cases where building and decorating works have left the tiles stained. The product was applied liberally across the surface area of the patio and agitated using a rotary machine fitted with a special stripping pad. Of course, this was necessary because the grout haze could not be treated without removing the sealant first. The soiled cleaning solution was promptly soaked up using a wet-vac machine.
Once the tiles were exposed I applied Tile Doctor Acid Gel, which is a blend of phosphoric and hydrochloric acids in more manageable gel form, all over the patio and allowed it to dwell for ten minutes to begin neutralising the grout haze. I then added a little water and worked the product into the patio with a stiff scrubbing brush and a rotary machine to ensure all grout haze was removed from the surface of the tiles. The remaining slurry was then removed using the wet vacuum, and I rinsed the area twice with plain water to ensure all cleaning products had been removed. It was them left to dry completely.
I returned to the property several days later to give the patio a fresh seal now that it was free from grout haze. First, I gave the patio a vacuum and light mop to remove any dust and debris. The customer wanted the tiles as dark as possible, therefore I suggested we use Tile Doctor Stone Oil before sealing, as this would darken the Slate significantly.
Once this was agreed, I applied one coat of Stone Oil, allowed an hour for the product to dry, and then followed this applying two coats of Tile Doctor Colour Grow sealer. This is our impregnating, colour enhancing sealant which provides maximum protection against ingrained dirt and stains, as well as a durable no-sheen finish.
As you can see from the photographs, the Slate tiles experienced an impressive transformation. The fresh sealant, combined with the Stone Oil, really took the appearance of the tiles to a new level and, what’s more, it will be easier for the happy customer to keep it clean in the future.
Phil Vissian
Northamptonshire Tile Doctor
 Regenesis Ecological Design
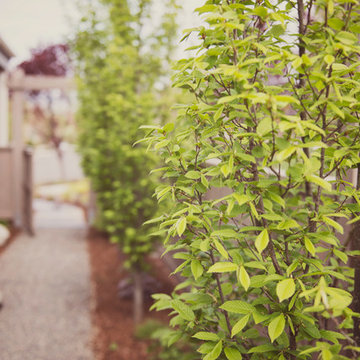
Low-maintenance side yard with gravel pathway and lined by Carpinus betulus 'Fastigiata' (Upright Hornbeam).
This is an example of a small modern full sun side yard gravel landscaping.
This is an example of a small modern full sun side yard gravel landscaping.
 McCullough's Flooring
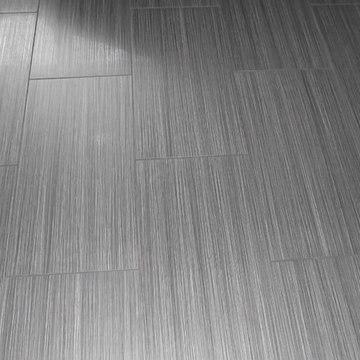
Gorgeous master bath finished with Dal-Tile's Fabrique porcelain tile in the color Noir Linen polished. Tile size is 12"x24" installed in a brick joint pattern. The floor boasts underfloor heating on a timed thermostat.
 The Galante Architecture Studio, Inc.
Originally built in 1972, these eight interlocked residential units and the accompanying House Master’s Residence won an AIA award for their unique spatial complexity, balancing standard units of construction with volumetric interplay, all while bringing natural light into living spaces. However, nearly 40 years later
These 1970’s era, interlocked faculty housing units won an AIA award when first completed. They were unique in spatial complexity, By early 2,000’s they were showing signs of age, and had become outdated on many levels. Working with project management for the Faculty of Arts & Sciences, we prepared one prototype design to bring the buildings into the 21st century. New insulated skylights, standing seam metal siding, cedar decks and trellises, exchanging black roofs for well insulated white roofs, were all part of a larger planning program to renovate all nine units. The prototype was implemented in 2012, to great approval and result. In 2013 a few more units were done. In 2014 the “House Masters” unit was done, with the remaining four units planned for future budgets.
Sustainable features include re-use of most materials on site, (former siding was able to become sheathing below metal panels), implementing the Stretch Energy Code for insulation, and putting new white roof membranes in place. Using FSC certified wood for decks and trellises, and using Rheinzink siding, a “200 year material” according to the manufacturer.
After nearly 40 years, Ronald Gourley’s AIA award winning Faculty Housing (1972) was beginning to show its age – plywood siding was delaminating, wooden decks splintering, and custom windows failing. Therefore, the opportunity to reinvent a piece of Mid-Century Modernism presented itself when two of the building’s eight alternating rooftop designs were to be rebuilt as prototypes for the remainder of the structure.
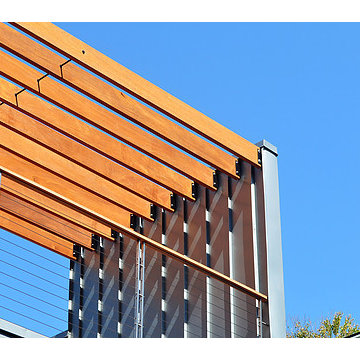
The strength of the original design was its rectilinear and symmetrical arrangement of internal and external spaces, but the difference between the two had become blurred over the decades. New zinc siding, mahogany decking, and stainless steel railings accentuate the defining elements and more clearly articulate the living spaces, breathing new life into the building and reinvigorating the surrounding campus.
Furthermore, the renovation also provided a chance to bring the structure up to modern energy standards and help meet Harvard’s lofty environmental goals. Insulation within the ceilings was more than tripled, white TPO roofing reduces the heat island effect, construction waste was minimized by recasting the siding as sheathing, and materials were selected not only for aesthetics, but for their longevity and ability to be recycled as well.
Harvard’s energy standards brought an uncharacteristic level of environmental care to this building. Roof structures are triple insulated, allowing separating interior from exterior in the most thermally efficient manner. North facing triple insulated skylights and white TPO roofing reduces the heat gain, but allows natural light to pour in. Materials were selected not only for aesthetics, but for their longevity. Zinc, for example, is made of 100% recycled material, and has duration of 200 years. Uncharacteristic levels of environmental care were common on this project.
30