
Search results for "Master blog" in Home Design Ideas

 FOUR POINT DESIGN BUILD INC
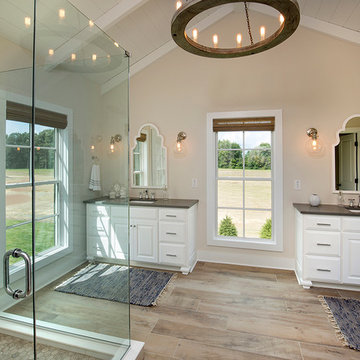
DESIGN BUILD REMODEL | Bathroom Remodel | FOUR POINT DESIGN BUILD INC | Part Four
This completely transformed 3500+ sf family dream home sits atop the gorgeous hills of Calabasas CA and celebrates the strategic and eclectic merging of contemporary and classic forms, with mid-century modern accents earthy touches of a world traveler.
Home to a very active family, when considering the needs our client's beautiful young daughter, our focus was on function, longevity, openness, daylight, privacy, and the future; As we planned ahead to a time when this bathroom might serve as another master suite!
AS SEEN IN Better Homes and Gardens | BEFORE & AFTER | 10 page feature and COVER | Spring 2016
To see more of this fantastic transformation, watch for the launch of our NEW website and blog THE FOUR POINT REPORT, where we celebrate this and other incredible design build journey! Launching September 2016.
Photography by Riley Jamison
#bathroom #remodel #LAinteriordesigner #builder #dreamproject #oneinamillion
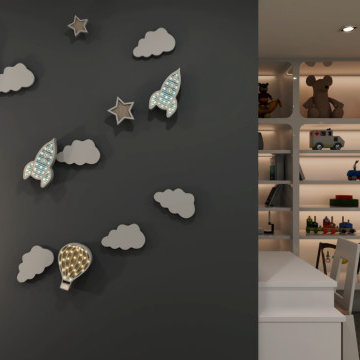
 Yantram Animation Studio - Interior Designer
If you’re looking for some architectural interior rendering inspiration for your Kid's Bedroom, Then look no further In this blog post, we will explore the best Interior Design for Your Great Bedroom With Child Decoration.
This is an example of how used to create a fully immersive environment. It’s an icon designed by Yantram 3D Architectural Animation Company and a demo of how they can use 3D architectural animation and 3D virtual reality to create a functional and rich immersive environment For a Great Bedroom and Study Room.
A separate bedroom for children also means more storage for their things, from toys and clothes to books, stationery, and several other items important for a growing child, storage space is an important advantage when planning an interior for a children’s bedroom.
If You Are Planning To hire a 3d architectural interior rendering Service Provider then Do not Forget To Contact Yantram 3d architectural animation company. Please Look At The Our Portfolio.
 FOUR POINT DESIGN BUILD INC
DESIGN BUILD REMODEL | Bathroom Remodel | FOUR POINT DESIGN BUILD INC | Part Four
This completely transformed 3500+ sf family dream home sits atop the gorgeous hills of Calabasas CA and celebrates the strategic and eclectic merging of contemporary and classic forms, with mid-century modern accents earthy touches of a world traveler.
Home to a very active family, when considering the needs our client's beautiful young daughter, our focus was on function, longevity, openness, daylight, privacy, and the future; As we planned ahead to a time when this bathroom might serve as another master suite!
AS SEEN IN Better Homes and Gardens | BEFORE & AFTER | 10 page feature and COVER | Spring 2016
To see more of this fantastic transformation, watch for the launch of our NEW website and blog THE FOUR POINT REPORT, where we celebrate this and other incredible design build journey! Launching September 2016.
Photography by Riley Jamison
#bathroom #remodel #LAinteriordesigner #builder #dreamproject #oneinamillion
Find the right local pro for your project

 INTERIORED
Inspiration for a contemporary master white floor bedroom remodel in Miami with white walls

 Paintzen, Inc.
As the saying goes, “It’s what inside that counts.” But sometimes, what’s on the outside is just as important… especially the exterior of your house.
Homeowners planning renovations often spend most of their time focusing on their interior space. There are countless design decisions to be made – from kitchen cabinets and countertops to bathroom tile and plumbing, paint colors and wall coverings to carpets and other flooring options. But to really boost your “curb appeal,” it’s important to remember your home’s exterior.
Two years ago, we were connected with bloggers Kelly and Mitch Larkin, founders of Kelly in the City. “Kelly in the City is a blog where we document our lives from family to friends, New York to Chicago, fashion, traveling…and our miniature dachshund, Noodle,” Mitch described. “Our dream has always been to have a little home in a big city and we pulled it off! We bought the tiniest half a house in Lincoln Park, Chicago… but man was it ugly! We’ve been working since move in day to bring it up to speed.” Back in 2016, Paintzen helped Mitch and Kelly with the master bedroom of their new home, adding some color to brighten up the space. Two years later, the Larkins (who are now a family of three with the addition of their adorable daughter, Emma!) were tackling a different project – their exterior trim, doors, and railings.
“After all the hard work, expense, and trips to Home Depot to make the inside of our place water tight and up to snuff, we had a surprising revelation on a family walk this past year: ‘Woah. The outside of our house is really ugly.’” Mitch shared on the blog, describing the moment they realized the exterior of their house needed some TLC. “But as you might imagine, life with a toddler at home leaves little time for painting.” The Larkins’ townhouse railings were previously painted a dark teal color – the aesthetic felt a bit dated to them. And after all the hard work spent updating the interior, Kelly and Mitch wanted their house to be perfect, inside and out.
Paintzen was thrilled to help “turn everything from ‘1960s ugh’ to ‘timeless’.” They chose a glossy black paint for their front door and to replace the dark teal railings, and a soft white for window trim and front door frames. The final result was classically beautiful.
Mitch shared, “Things went amazingly well with the exterior project, too. [Paintzen] worked on the house for three days, but it was as if they weren’t even here! They tried SO hard not to interrupt our day-to-day lives, yet did an absolutely perfect job. My wife is a tough lady to please, and Kelly loved the result.”
“Thank god for Paintzen! Thanks to their hard work and incredible craftsmanship our place is ready for prime time. We can even have friends over during the day now!”

 Mottram Architecture
Timber frame homes offer unique challenges during a remodel. What often makes them beautiful and attractive to most homeowners, also makes them challenging for space requirements.
Context: The lovely couple that owned this home were struggling with some interesting floor plan challenges that just didn't work for their family. The loved the beautiful timbers and woodwork of their home, but the dramatically sloping ceilings on the second floor, particularly in the bathroom, just didn't work for this 1 1/2 bath home. Needing to use the skylight to approach the toilet was a less then ideal scenario. Although the bathroom footprint was more then adequate, the sloped ceiling only made half of the space useable. Check out the Before/After post on our blog to see the photos of the house pre-renovation. As much as they loved all the wood features in their home, another challenge they had was light. The wood ceiling made everything inside the house darker, even with a fantastic array of south facing windows, there were spaces in the home that felt dark and small. When they contacted us they wanted to know how could they make their brighter and more inviting, were there solutions to the 2nd floor sloped ceiling issues, and if they were going to do all of this work, how could they make their home more comfortable and efficient. A nagging water leak in the upstairs bathroom spurred them into action and here is how we solved their dilemma.
Conclusion: First, we added a little dormer to the rear of the house so we could get full headroom in nearly all of the upstairs bathroom! Then we decided to extend that dormer one more timber bay over to create a walk in closet with natural light and plenty of space. Since we were contemplating energy efficiency, we resolved a nagging issue that is present in a lot of timber frame construction, air tightness. Commonly found in timber frame construction, fiberglass insulation is installed in the rafter bays and board ceilings are installed over top. Unfortunately, board ceilings are anything but air tight, and fiberglass insulation needs to be in an airtight cavity for maximum effectiveness. So we were able to solve two issues at the same time for this homeowner. We removed the board ceiling and fiberglass insulation, we dense packed the rafter bays with cellulose insulation, and installed sheetrock in place of the boards. The boards were salvaged for re-use by the homeowner, and the space and light quality was dramatically improved. Some may think that losing the board ceiling took something away from the space, but what you'll see in the pictures is that it highly accentuates the heavy timbers and really makes them stand out in a beautiful way. Now with this added airtightness, better insulation, and brighter space, the homeowner hardly runs their wood stove, and it's so quiet in the space, an added bonus from changing the insulation. It became necessary to also add a sheetrock ceiling to the living room to hide the plumbing from the new bathroom layout above. Changing this ceiling gave the homeowner some real quality lighting that was lacking in the living room before. The brighter ceiling and new lighting layout completely transforms the living room into a space you want to hang out, even though the layout didn't change at all. When the homeowner saw the finished spaces she said "I can't believe this is my house, I want to live in this house"
Energy Efficiency: I touched a little on the efficiency above, but like all projects done with Mottram Architecture, we always want to leave you with a little extra. Timber frame construction with board ceilings and fiberglass insulation are notoriously leaky! If you want to know what we think about fiberglass insulation, check our our blog post on Why Fiberglass Insulation Sucks. By installing cellulose insulation and covering it with sheetrock we were able to greatly reduce the heat flowing out of this home. It not only improves cashflow it improves the comfort level in the space. Who wants to sit in their living room and feel a draft? Let us remind you, we are not saying cellulose insulation is an air barrier, we use the sheetrock to help with that, but it does significantly reduce the air flow over fiberglass insulation. And when we reduce the airflow, we reduce the heat flow. And when we reduce the heat flow, we reduce the need to re-heat that drafty air from outside. When it comes to energy efficiency the first and best place to start is air infiltration. We greatly reduced the air infiltration with the new insulation, but we also added a hat and warm boots. What I mean by that is, we improved the insulation in the roof, and we installed insulation in the basement. Maybe it's a silly analogy, but when you think about keeping warm, we always start with the hat and boots! With sustainability in mind, the next project will be to add a deck to the front of this house with rain catchment barrels from the metal roof. They are planning to plant a garden in the spring and the rain catchment system will help to irrigate the new garden.
Builder: East Shore Builders
Photographer: Michael Eric Berube

 Joel Reis Architecture and Real Estate Photography
Bathroom - mid-sized farmhouse master gray tile and marble tile bathroom idea in Los Angeles with recessed-panel cabinets, distressed cabinets, white walls, an undermount sink, marble countertops and white countertops
Sponsored
Columbus, OH

Wannemacher Interiors
Customized Award-Winning Interior Design Solutions in Franklin Cnty OH


 Davetta Moore Designs
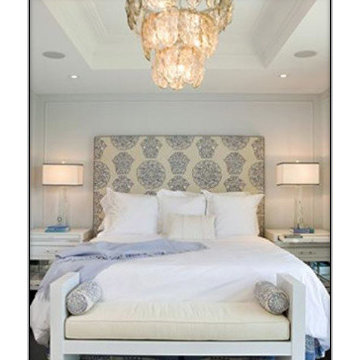
Using a printed fabric gives the headboard a whole different look. Photo Credit: http://blog.amandacarolinteriors.com/2011/09/lighting-rules.html

 TRU Landscape Services
A closeup of our interlocking pavers work. This paver is a darker almost bluish color which accents the white stucco walls of the rest of the landscape. TRU Landscape Services

 Anderson Design / ErosionZ. Minnesota Landscape.
Bright red fruit of winterberry stands out against the fresh snow in our back yard. Credit: Tad Anderson. All rights exclusively reserved.
This is an example of an eclectic partial sun backyard landscaping in Minneapolis for winter.
This is an example of an eclectic partial sun backyard landscaping in Minneapolis for winter.

 Mend
Laure Joliet
Inspiration for a mid-sized modern master blue tile and cement tile concrete floor freestanding bathtub remodel in Los Angeles with flat-panel cabinets, white cabinets, a one-piece toilet, white walls, an undermount sink and quartz countertops
Inspiration for a mid-sized modern master blue tile and cement tile concrete floor freestanding bathtub remodel in Los Angeles with flat-panel cabinets, white cabinets, a one-piece toilet, white walls, an undermount sink and quartz countertops

 Design Depot Furniture Inc
Amelia symbolizes simplicity. Straight lines and a touch of distinction. Available in different sizes, configurations and finishes.
Made in Canada
Call 1-800-880-7154 for a quote


 Heritage Construction Companies, LLC.
Example of a huge trendy metal floating open staircase design in Minneapolis


 MEC
'Bricked Look by Sarah Ryan' Glass Mosaic - Classic brick pattern with a modern glass tiles twist prfect for outdoors. Looking for a subway tile design with twist? This mosaic wall pattern sure stand out! | Have a custom mosaic idea? We can help, with our brilliant Italian-trained mosaicists and easy-to-install tiled masterpieces. Worldwide shipping available on the complete range of quality handcrafted marble & glass mosaic products. For inquires and more info, contact us: http://mecartworks.com


 Miriam's River House Designs, LLC
Photo shows the tight fitted side panel construction after three years. This design is perfect for any heavy vine plants that require a solid backing on which to grow.
Photo credits: Dan Drobnick

 BEVOLO GAS & ELECTRIC LIGHTS
French Quarter gas lantern on a yoke hanger bracket lights the converted garage/seating area.
The French Quarter® on yoke hanger bracket is a perfect fit when you have a broad area to address. The light is still very versatile architecturally and can be used on almost any home. This light is available in natural gas, liquid propane, and electric.
Standard Lantern Sizes
Height Width Depth
14.0" 9.25" 9.25"
18.0" 10.5" 10.5"
21.0" 11.5" 11.5"
24.0" 13.25" 13.25"
27.0" 14.5" 14.5"
 Mottram Architecture
Timber frame homes offer unique challenges during a remodel. What often makes them beautiful and attractive to most homeowners, also makes them challenging for space requirements.
Context: The lovely couple that owned this home were struggling with some interesting floor plan challenges that just didn't work for their family. The loved the beautiful timbers and woodwork of their home, but the dramatically sloping ceilings on the second floor, particularly in the bathroom, just didn't work for this 1 1/2 bath home. Needing to use the skylight to approach the toilet was a less then ideal scenario. Although the bathroom footprint was more then adequate, the sloped ceiling only made half of the space useable. Check out the Before/After post on our blog to see the photos of the house pre-renovation. As much as they loved all the wood features in their home, another challenge they had was light. The wood ceiling made everything inside the house darker, even with a fantastic array of south facing windows, there were spaces in the home that felt dark and small. When they contacted us they wanted to know how could they make their brighter and more inviting, were there solutions to the 2nd floor sloped ceiling issues, and if they were going to do all of this work, how could they make their home more comfortable and efficient. A nagging water leak in the upstairs bathroom spurred them into action and here is how we solved their dilemma.
Conclusion: First, we added a little dormer to the rear of the house so we could get full headroom in nearly all of the upstairs bathroom! Then we decided to extend that dormer one more timber bay over to create a walk in closet with natural light and plenty of space. Since we were contemplating energy efficiency, we resolved a nagging issue that is present in a lot of timber frame construction, air tightness. Commonly found in timber frame construction, fiberglass insulation is installed in the rafter bays and board ceilings are installed over top. Unfortunately, board ceilings are anything but air tight, and fiberglass insulation needs to be in an airtight cavity for maximum effectiveness. So we were able to solve two issues at the same time for this homeowner. We removed the board ceiling and fiberglass insulation, we dense packed the rafter bays with cellulose insulation, and installed sheetrock in place of the boards. The boards were salvaged for re-use by the homeowner, and the space and light quality was dramatically improved. Some may think that losing the board ceiling took something away from the space, but what you'll see in the pictures is that it highly accentuates the heavy timbers and really makes them stand out in a beautiful way. Now with this added airtightness, better insulation, and brighter space, the homeowner hardly runs their wood stove, and it's so quiet in the space, an added bonus from changing the insulation. It became necessary to also add a sheetrock ceiling to the living room to hide the plumbing from the new bathroom layout above. Changing this ceiling gave the homeowner some real quality lighting that was lacking in the living room before. The brighter ceiling and new lighting layout completely transforms the living room into a space you want to hang out, even though the layout didn't change at all. When the homeowner saw the finished spaces she said "I can't believe this is my house, I want to live in this house"
Energy Efficiency: I touched a little on the efficiency above, but like all projects done with Mottram Architecture, we always want to leave you with a little extra. Timber frame construction with board ceilings and fiberglass insulation are notoriously leaky! If you want to know what we think about fiberglass insulation, check our our blog post on Why Fiberglass Insulation Sucks. By installing cellulose insulation and covering it with sheetrock we were able to greatly reduce the heat flowing out of this home. It not only improves cashflow it improves the comfort level in the space. Who wants to sit in their living room and feel a draft? Let us remind you, we are not saying cellulose insulation is an air barrier, we use the sheetrock to help with that, but it does significantly reduce the air flow over fiberglass insulation. And when we reduce the airflow, we reduce the heat flow. And when we reduce the heat flow, we reduce the need to re-heat that drafty air from outside. When it comes to energy efficiency the first and best place to start is air infiltration. We greatly reduced the air infiltration with the new insulation, but we also added a hat and warm boots. What I mean by that is, we improved the insulation in the roof, and we installed insulation in the basement. Maybe it's a silly analogy, but when you think about keeping warm, we always start with the hat and boots! With sustainability in mind, the next project will be to add a deck to the front of this house with rain catchment barrels from the metal roof. They are planning to plant a garden in the spring and the rain catchment system will help to irrigate the new garden.
Builder: East Shore Builders
Photographer: Michael Eric Berube
15