
Search results for "Master job" in Home Design Ideas
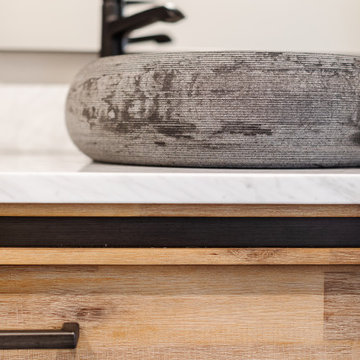
 Alair Homes Plano
This 1964 Preston Hollow home was in the perfect location and had great bones but was not perfect for this family that likes to entertain. They wanted to open up their kitchen up to the den and entry as much as possible, as it was small and completely closed off. They needed significant wine storage and they did want a bar area but not where it was currently located. They also needed a place to stage food and drinks outside of the kitchen. There was a formal living room that was not necessary and a formal dining room that they could take or leave. Those spaces were opened up, the previous formal dining became their new home office, which was previously in the master suite. The master suite was completely reconfigured, removing the old office, and giving them a larger closet and beautiful master bathroom. The game room, which was converted from the garage years ago, was updated, as well as the bathroom, that used to be the pool bath. The closet space in that room was redesigned, adding new built-ins, and giving us more space for a larger laundry room and an additional mudroom that is now accessible from both the game room and the kitchen! They desperately needed a pool bath that was easily accessible from the backyard, without having to walk through the game room, which they had to previously use. We reconfigured their living room, adding a full bathroom that is now accessible from the backyard, fixing that problem. We did a complete overhaul to their downstairs, giving them the house they had dreamt of!
As far as the exterior is concerned, they wanted better curb appeal and a more inviting front entry. We changed the front door, and the walkway to the house that was previously slippery when wet and gave them a more open, yet sophisticated entry when you walk in. We created an outdoor space in their backyard that they will never want to leave! The back porch was extended, built a full masonry fireplace that is surrounded by a wonderful seating area, including a double hanging porch swing. The outdoor kitchen has everything they need, including tons of countertop space for entertaining, and they still have space for a large outdoor dining table. The wood-paneled ceiling and the mix-matched pavers add a great and unique design element to this beautiful outdoor living space. Scapes Incorporated did a fabulous job with their backyard landscaping, making it a perfect daily escape. They even decided to add turf to their entire backyard, keeping minimal maintenance for this busy family. The functionality this family now has in their home gives the true meaning to Living Better Starts Here™.

 HomeSource Builders
THIS TRANSITIONAL KITCHEN AND AND BATH REMODEL IN NORTH ASHEVILLE HAS CLEAN LINES AND A SLEEK LOOK.
HomeSource Builders completed the demolition and subcontracted the installation, under the expert guidance of Project Manager Corey Rogers. A striking feature, he relates, is the tiling installed by Mosaic Custom Tile.
“In my opinion,” he said, “the tile setters really made the kitchen stand out with the clean lines and sleek look the clients were trying to achieve.”
In addition to the backsplash tile, HomeSource installed the kitchen and bathroom cabinets as well as the kitchen and bath quartz countertops.
It’s extraordinarily helpful when clients have well-defined goals. “These clients were ideal, and made my job much easier,” Corey said. “They were very detailed and knew exactly what they wanted.”
Since the clients were renovating all bathrooms in the house, a challenge to overcome was phasing the project so that the client had a working bathroom at all times. This hurdle was easily overcome, though, with skillfully choreographed scheduling.
Designer Christy Dunlap of HomeSource Design Center led the design charge. “Besides the pleasure of working with two delightful people,” she said, “it was great to design a beautiful navy kitchen with walnut accents.”
Subcontractors employed to complete the remodel were French Broad Plumbing, Wired Right Electrical, Mountain Air Mechanical Contractors, Inc., Mosaic Custom Tile, Haywood Appliance, New Image Home Improvement, and Victor Chapina Painting.
CREDITS:
Kitchen Backsplash: Daltile Color Wheel Arctic White Gloss
Kitchen Countertops: Cambria Britannica w/ eased edge profile
Kitchen Cabinets: North American Cabinets – Austin (shaker) door style, Maple wood w/ Benjamin Moore Paint Evening Sky
Kitchen Cabinets Upper: Black Walnut with clear glass doors
Master Bath Cabinets: North American Cabinets, MDF Frameless with Taupe Paint
Master Bath Countertops: Cambria Britannica
Guest Bath Cabinet: Wellborn Premier Series: Alto Door Style, MDF, Bleu Paint
Guest Bath Countertop: Caesar Stone Quartz: Bianco Drift
 HomeSource Builders
THIS TRANSITIONAL KITCHEN AND AND BATH REMODEL IN NORTH ASHEVILLE HAS CLEAN LINES AND A SLEEK LOOK.
HomeSource Builders completed the demolition and subcontracted the installation, under the expert guidance of Project Manager Corey Rogers. A striking feature, he relates, is the tiling installed by Mosaic Custom Tile.
“In my opinion,” he said, “the tile setters really made the kitchen stand out with the clean lines and sleek look the clients were trying to achieve.”
In addition to the backsplash tile, HomeSource installed the kitchen and bathroom cabinets as well as the kitchen and bath quartz countertops.
It’s extraordinarily helpful when clients have well-defined goals. “These clients were ideal, and made my job much easier,” Corey said. “They were very detailed and knew exactly what they wanted.”
Since the clients were renovating all bathrooms in the house, a challenge to overcome was phasing the project so that the client had a working bathroom at all times. This hurdle was easily overcome, though, with skillfully choreographed scheduling.
Designer Christy Dunlap of HomeSource Design Center led the design charge. “Besides the pleasure of working with two delightful people,” she said, “it was great to design a beautiful navy kitchen with walnut accents.”
Subcontractors employed to complete the remodel were French Broad Plumbing, Wired Right Electrical, Mountain Air Mechanical Contractors, Inc., Mosaic Custom Tile, Haywood Appliance, New Image Home Improvement, and Victor Chapina Painting.
CREDITS:
Kitchen Backsplash: Daltile Color Wheel Arctic White Gloss
Kitchen Countertops: Cambria Britannica w/ eased edge profile
Kitchen Cabinets: North American Cabinets – Austin (shaker) door style, Maple wood w/ Benjamin Moore Paint Evening Sky
Kitchen Cabinets Upper: Black Walnut with clear glass doors
Master Bath Cabinets: North American Cabinets, MDF Frameless with Taupe Paint
Master Bath Countertops: Cambria Britannica
Guest Bath Cabinet: Wellborn Premier Series: Alto Door Style, MDF, Bleu Paint
Guest Bath Countertop: Caesar Stone Quartz: Bianco Drift
Find the right local pro for your project
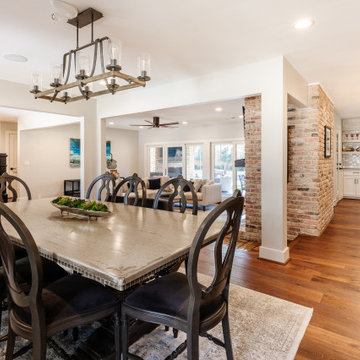 Alair Homes Plano
This 1964 Preston Hollow home was in the perfect location and had great bones but was not perfect for this family that likes to entertain. They wanted to open up their kitchen up to the den and entry as much as possible, as it was small and completely closed off. They needed significant wine storage and they did want a bar area but not where it was currently located. They also needed a place to stage food and drinks outside of the kitchen. There was a formal living room that was not necessary and a formal dining room that they could take or leave. Those spaces were opened up, the previous formal dining became their new home office, which was previously in the master suite. The master suite was completely reconfigured, removing the old office, and giving them a larger closet and beautiful master bathroom. The game room, which was converted from the garage years ago, was updated, as well as the bathroom, that used to be the pool bath. The closet space in that room was redesigned, adding new built-ins, and giving us more space for a larger laundry room and an additional mudroom that is now accessible from both the game room and the kitchen! They desperately needed a pool bath that was easily accessible from the backyard, without having to walk through the game room, which they had to previously use. We reconfigured their living room, adding a full bathroom that is now accessible from the backyard, fixing that problem. We did a complete overhaul to their downstairs, giving them the house they had dreamt of!
As far as the exterior is concerned, they wanted better curb appeal and a more inviting front entry. We changed the front door, and the walkway to the house that was previously slippery when wet and gave them a more open, yet sophisticated entry when you walk in. We created an outdoor space in their backyard that they will never want to leave! The back porch was extended, built a full masonry fireplace that is surrounded by a wonderful seating area, including a double hanging porch swing. The outdoor kitchen has everything they need, including tons of countertop space for entertaining, and they still have space for a large outdoor dining table. The wood-paneled ceiling and the mix-matched pavers add a great and unique design element to this beautiful outdoor living space. Scapes Incorporated did a fabulous job with their backyard landscaping, making it a perfect daily escape. They even decided to add turf to their entire backyard, keeping minimal maintenance for this busy family. The functionality this family now has in their home gives the true meaning to Living Better Starts Here™.
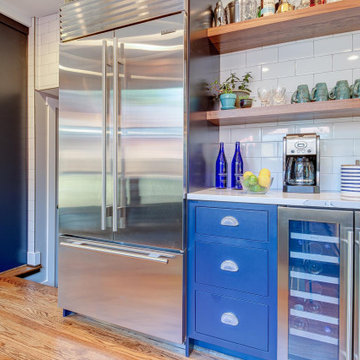 HomeSource Builders
THIS TRANSITIONAL KITCHEN AND AND BATH REMODEL IN NORTH ASHEVILLE HAS CLEAN LINES AND A SLEEK LOOK.
HomeSource Builders completed the demolition and subcontracted the installation, under the expert guidance of Project Manager Corey Rogers. A striking feature, he relates, is the tiling installed by Mosaic Custom Tile.
“In my opinion,” he said, “the tile setters really made the kitchen stand out with the clean lines and sleek look the clients were trying to achieve.”
In addition to the backsplash tile, HomeSource installed the kitchen and bathroom cabinets as well as the kitchen and bath quartz countertops.
It’s extraordinarily helpful when clients have well-defined goals. “These clients were ideal, and made my job much easier,” Corey said. “They were very detailed and knew exactly what they wanted.”
Since the clients were renovating all bathrooms in the house, a challenge to overcome was phasing the project so that the client had a working bathroom at all times. This hurdle was easily overcome, though, with skillfully choreographed scheduling.
Designer Christy Dunlap of HomeSource Design Center led the design charge. “Besides the pleasure of working with two delightful people,” she said, “it was great to design a beautiful navy kitchen with walnut accents.”
Subcontractors employed to complete the remodel were French Broad Plumbing, Wired Right Electrical, Mountain Air Mechanical Contractors, Inc., Mosaic Custom Tile, Haywood Appliance, New Image Home Improvement, and Victor Chapina Painting.
CREDITS:
Kitchen Backsplash: Daltile Color Wheel Arctic White Gloss
Kitchen Countertops: Cambria Britannica w/ eased edge profile
Kitchen Cabinets: North American Cabinets – Austin (shaker) door style, Maple wood w/ Benjamin Moore Paint Evening Sky
Kitchen Cabinets Upper: Black Walnut with clear glass doors
Master Bath Cabinets: North American Cabinets, MDF Frameless with Taupe Paint
Master Bath Countertops: Cambria Britannica
Guest Bath Cabinet: Wellborn Premier Series: Alto Door Style, MDF, Bleu Paint
Guest Bath Countertop: Caesar Stone Quartz: Bianco Drift


 50 Lakes Cabinet Design
The homeowner wanted a distressed look for her island cabinets so she brought in a local tradeswoman to handle this. She did a fabulous job!
This also gives you a great view of these custom glass cabinet pulls!
This home is one of Southport's Historical Cottages. The E.B. Daniel Homestead was built in 1875 and purchased by our client upon her retirement in 2014. The home, now known as "The Mermaid Manor" was in dire need of some TLC.
Tracy, along with her builder Fred Fiss of Green Harmony Homes, had the vision to bring her dream into a reality and to give this home the love it deserved. When Fred introduced Tracy to David she knew he was THE kitchen designer to give her that Dream Kitchen!
Tracy showed David her idea notebook and trusted him to design her dream kitchen and he did just that! They communicated by telephone and email with Tracy only being in Southport four times over the construction period. Not only did David design the kitchen and laundry room, he also installed the cabinetry in the kitchen, laundry, and a makeup table in the master bath.
What we love about this project
- Open and Inviting Kitchen especially perfect for entertaining
- The natural flow from one room to another
- That expansive island with drawer storage and lots of seating
- The Big Chill Appliances are AMAZING
- Italian Glass Subway Tile Backsplash
- Custom Glass Cabinet Pulls


 TaylorPro Design and Remodeling, Inc.
"When we bought our house in Poway 11 years ago, we were so happy with our huge master bath and Jacuzzi tub. It was such a huge step-up from our prior home. But just like the rest of the house, the master bath was already almost 20 years old and getting out dated and in need of remodeling. We broke up our remodeling projects into every couple of years, doing what we could ourselves and hiring out for the rest. The master bath was the last project and much too big for us to do on our own. We got 3 quotes from 3 contractors listed on Angie’s list which all had good reviews. One was a major re modeler and the other two were smaller contractors. We ended up going with TaylorPro because he was right in the middle and had great reviews.
Kerry was very responsive getting us a timely estimate and had great suggestions for what we were looking for. From the start to finish it turned out to be a wonderful experience! To our delight, they were able to get started ahead of what we were told. Everything went almost as scheduled and we were informed constantly on where we were in the project. Kerry was very responsive to all our concerns or requests and we were never left wondering what the next step would be. His crew was wonderful, so polite and hard working. They were very professional, on time, considerate and knew exactly what they were doing.
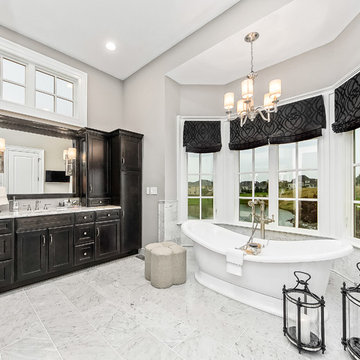
There were certain things we were really looking for in the remodel. First off, the bathroom was pretty large with a high ceiling. In the winter months, it was always really cold and hard to heat. To solve that we had TaylorPro install heated flooring beneath the travertine tiles. We also needed a custom vanity that would conceal hair appliances, most of our personal toiletries and have enough storage for everything else. The cabinetry was custom designed to exactly what we were looking for. Lastly, we wanted a classic, timeless look using tumbled travertine. After consulting with his designer we were able to select all the tile, accent tile and a beautiful frameless glass shower enclosure.
The finished project was beyond our highest expectations and we won’t hesitate to use Kerry and his crew for any future jobs or recommend him to family and friends."
~ Mark and Amy B, Clients
Frameless shower door, glass tile with rope border, dark and light travertine tiles on walls, travertine on floor, heated floor by NuHeat, tub and sinks by Kohler, shower/tub/vanity fixtures Hansgrohe, toilet Toto, custom cabinets by Thead Custom Cabinetry.
Photo by Kerry W. Taylor
 Sosna Inc
TThis young couple, busy raising two young boys (plus a playful cat), had always planned to renovate—it was just a matter of finding the right people for the job.
Their biggest concern? Hiring a contractor they could truly rely on to bring their vision to life without added stress.
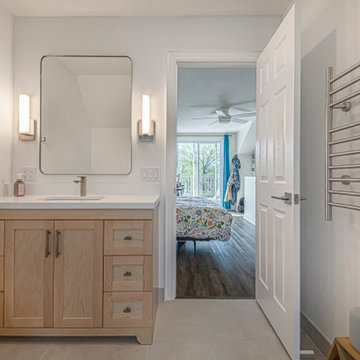
The master ensuite simply wasn’t working. A large, unused deck-mount tub dominated the space, while the tiny, dim shower made daily routines uncomfortable. The layout didn’t make sense for how they actually used the room, which ended up being mostly for the toilet and vanity. On top of that, the master bedroom sat in an open loft without proper walls or a door, making privacy nearly impossible.
Our solution involved a thoughtful reconfiguration of the ensuite. We removed the oversized tub and replaced it with a spacious walk-in shower. The old, cramped shower space became the perfect spot for a relocated vanity, allowing for better flow and use of the room. Up in the loft, we built a new wall with a door to give the bedroom the privacy it was missing. The stairway was also refreshed with new oak treads and a stained handrail to match the existing flooring.
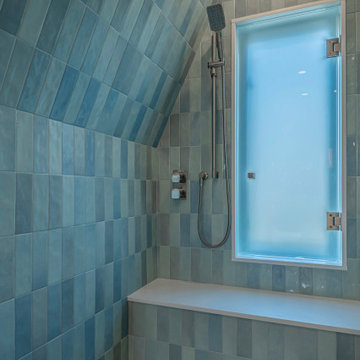
One challenge during construction was installing the custom shower glass and tile within the sloped ceilings and angled walls—but our team carefully managed every detail to ensure a precise and polished finish.
The new master ensuite now feels like a retreat.
Handmade-style blue subway tiles add a calming pop of colour in the shower, paired with crème porcelain floor tiles. A prefabricated solid wood vanity with quartz countertop, brushed nickel fixtures, and an electric towel warmer complete the space—bringing comfort and functionality together beautifully.
A fun moment during the design phase? We used stools, tables, and even a piano to mock up the future layout—helping the homeowners get a real feel for the spacing between the new vanity and toilet. It was a creative, hands-on way to ensure everyone felt confident moving forward.
Now, the ensuite functions exactly as it should: a fully usable and relaxing 3-piece bathroom, styled just the way they wanted. And with the new loft wall and door, the bedroom finally feels like a true primary suite—private, peaceful, and made for them.
 Sosna Inc
This young couple, busy raising two young boys (plus a playful cat), had always planned to renovate—it was just a matter of finding the right people for the job.
Their biggest concern? Hiring a contractor they could truly rely on to bring their vision to life without added stress.
The master ensuite simply wasn’t working. A large, unused deck-mount tub dominated the space, while the tiny, dim shower made daily routines uncomfortable. The layout didn’t make sense for how they actually used the room, which ended up being mostly for the toilet and vanity. On top of that, the master bedroom sat in an open loft without proper walls or a door, making privacy nearly impossible.
Our solution involved a thoughtful reconfiguration of the ensuite. We removed the oversized tub and replaced it with a spacious walk-in shower. The old, cramped shower space became the perfect spot for a relocated vanity, allowing for better flow and use of the room. Up in the loft, we built a new wall with a door to give the bedroom the privacy it was missing. The stairway was also refreshed with new oak treads and a stained handrail to match the existing flooring.
One challenge during construction was installing the custom shower glass and tile within the sloped ceilings and angled walls—but our team carefully managed every detail to ensure a precise and polished finish.
The new master ensuite now feels like a retreat.
Handmade-style blue subway tiles add a calming pop of colour in the shower, paired with crème porcelain floor tiles. A prefabricated solid wood vanity with quartz countertop, brushed nickel fixtures, and an electric towel warmer complete the space—bringing comfort and functionality together beautifully.
A fun moment during the design phase? We used stools, tables, and even a piano to mock up the future layout—helping the homeowners get a real feel for the spacing between the new vanity and toilet. It was a creative, hands-on way to ensure everyone felt confident moving forward.
Now, the ensuite functions exactly as it should: a fully usable and relaxing 3-piece bathroom, styled just the way they wanted. And with the new loft wall and door, the bedroom finally feels like a true primary suite—private, peaceful, and made for them.

 S Squared Design, LLC
This loft was in need of a mid century modern face lift. In such an open living floor plan on multiple levels, storage was something that was lacking in the kitchen and the bathrooms. We expanded the kitchen in include a large center island with trash can/recycles drawers and a hidden microwave shelf. The previous pantry was a just a closet with some shelves that were clearly not being utilized. So bye bye to the closet with cramped corners and we welcomed a proper designed pantry cabinet. Featuring pull out drawers, shelves and tall space for brooms so the living level had these items available where my client's needed them the most. A custom blue wave paint job was existing and we wanted to coordinate with that in the new, double sized kitchen. Custom designed walnut cabinets were a big feature to this mid century modern design. We used brass handles in a hex shape for added mid century feeling without being too over the top. A blue long hex backsplash tile finished off the mid century feel and added a little color between the white quartz counters and walnut cabinets. The two bathrooms we wanted to keep in the same style so we went with walnut cabinets in there and used the same countertops as the kitchen. The shower tiles we wanted a little texture. Accent tiles in the niches and soft lighting with a touch of brass. This was all a huge improvement to the previous tiles that were hanging on for dear life in the master bath! These were some of my favorite clients to work with and I know they are already enjoying these new home!

 Fieldstone Cabinetry
A new home in Pipersville, Pennsylvania, has a vanity with two sinks and classic good looks. This vanity was designed by Kristin B. Filosa, of LA Kitchens & Baths, a Fieldstone Cabinetry dealer in Lansdale, Pennsylvania. Kristin specified the Harbor door style in Maple finished in an off white cabinet color called Macadamia with Chocolate glaze. Great job Kristin! The Harbor door style is a beautiful, traditional door style featuring decorative trim around the center panel (technically, it's called "applied moulding"). At Fieldstone Cabinetry, this decorative trim is applied by hand onto the door. Hand applying is the best way to insure that the moulding is fitted tightly and is aligned.

 Chicology
 Cordless Honeycomb Cellular Shades are efficient. Efficient in function. Efficient in performance. Efficient in style. Efficient in design. Efficient in energy. By combining function with stylish design, Chicology Honeycomb Cellular modern blackout shades highlight any room in need while helping against penetrating summer heat or winter air.
The cordless honeycomb cellular shade hexagon unique structure cells design has been mastered to become a premium draft and heat barrier. Chicology Cordless honeycomb cellular blackout shade's marvelous design does an excelent job at being the most energy efficient shades in the market. The honeycomb design does a marvelous job at blocking light out of any room, while also trapping air keeping your home cool in the summer heat and a great insulator in the winter; saving you money on summer/heating energy bills year round. 9/18-inch single cells are lined with blackout fabric that creates the best functional eco-friendly shades while maintaining the Chic look you want. The unique honeycomb cellular fabric is rich, timeless but yet durable. The honeycomb cells open and close in an accordion fashion, with a simple child and pet safe cordless, hassle free lift or pull of a hand. Our cordless lift system provides a fresh look by removing the need for operating cords. Simply cordless, the easy to use cellular shade stays exactly where you want, with no cords attached. Styled in blackout UV protection, energy saver fabrics that block any incoming light beautifully – our blackout window coverings create total sun-cover and complete privacy protection during the day and at night.
The rich crisp fabric is available in a range of stunning beautiful array of colors, from Morning Mist (White), Morning Croissant (Beige), Morning Pebble (Grey), Morning Fog (Dark Grey), Morning Ocean (Blue), Evening Mist (White with Blackout). All colors come with fabric matching head rail and bottom rail color coordinated to match your shade – for a complete and finished look. Installation is quick and easy. Just install the brackets to the wall or ceiling and clip the head rail on. Capable of both inside and outside mount, the width you purchase is exactly the width you get – there is no deduction. It is available in 3 different lengths: 48, 64, and 84.
Sponsored
Sunbury, OH

J.Holderby - Renovations
Franklin County's Leading General Contractors - 2X Best of Houzz!
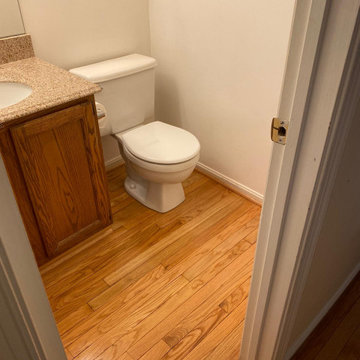
 MD Flooring Solutions, LLC
Natural
1x coat of ZINSSER®SealCoat™ Universal Sanding Sealer.
1x coat of Water-Based Oil-Modified polyurethane by default.
1x final coat of SamSeal or Masterline Oil-based polyurethane by default.
---} Finish: Semi-Gloss.
- To cover with plastic and use vacuum to do the job
- To remove current toilet from powder room and KEEP.
- Sand and refinish 2-1/4" red oak Prefinished Hardwood floors on First floor: front foyer, closet, dining room, kitchen, hallway & powder room (no family room, no living room) - 404.12 sqft
- To remove Bevels from floors on First floor: front foyer, closet, dining room, kitchen, hallway & powder room (no family room, no living room) - 404.12 sqft
- To Sand & Refinish T-moldings 3LFT + 3LFT + 3LFT between foyer to family room, dining room to living room
- To Install Unfinished Red Oak Shoe Molding to be polyurethaned on First floor: front foyer, closet, dining room, kitchen, hallway & powder room (no family room, no living room) + around powder room vanity
- To reinstall same toilet, including new ring after refinish.
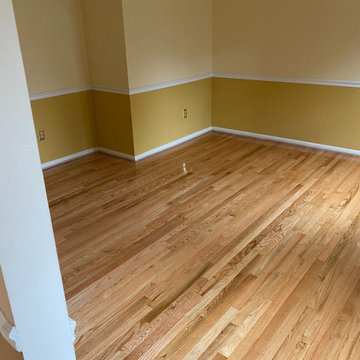 MD Flooring Solutions, LLC
Natural
1x coat of ZINSSER®SealCoat™ Universal Sanding Sealer.
1x coat of Water-Based Oil-Modified polyurethane by default.
1x final coat of SamSeal or Masterline Oil-based polyurethane by default.
---} Finish: Semi-Gloss.
- To cover with plastic and use vacuum to do the job
- To remove current toilet from powder room and KEEP.
- Sand and refinish 2-1/4" red oak Prefinished Hardwood floors on First floor: front foyer, closet, dining room, kitchen, hallway & powder room (no family room, no living room) - 404.12 sqft
- To remove Bevels from floors on First floor: front foyer, closet, dining room, kitchen, hallway & powder room (no family room, no living room) - 404.12 sqft
- To Sand & Refinish T-moldings 3LFT + 3LFT + 3LFT between foyer to family room, dining room to living room
- To Install Unfinished Red Oak Shoe Molding to be polyurethaned on First floor: front foyer, closet, dining room, kitchen, hallway & powder room (no family room, no living room) + around powder room vanity
- To reinstall same toilet, including new ring after refinish.
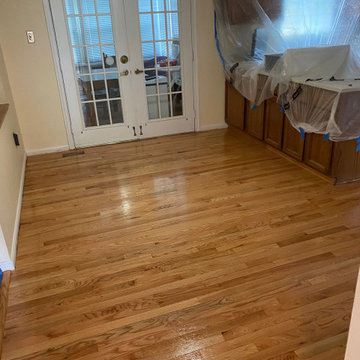 MD Flooring Solutions, LLC
Natural
1x coat of ZINSSER®SealCoat™ Universal Sanding Sealer.
1x coat of Water-Based Oil-Modified polyurethane by default.
1x final coat of SamSeal or Masterline Oil-based polyurethane by default.
---} Finish: Semi-Gloss.
- To cover with plastic and use vacuum to do the job
- To remove current toilet from powder room and KEEP.
- Sand and refinish 2-1/4" red oak Prefinished Hardwood floors on First floor: front foyer, closet, dining room, kitchen, hallway & powder room (no family room, no living room) - 404.12 sqft
- To remove Bevels from floors on First floor: front foyer, closet, dining room, kitchen, hallway & powder room (no family room, no living room) - 404.12 sqft
- To Sand & Refinish T-moldings 3LFT + 3LFT + 3LFT between foyer to family room, dining room to living room
- To Install Unfinished Red Oak Shoe Molding to be polyurethaned on First floor: front foyer, closet, dining room, kitchen, hallway & powder room (no family room, no living room) + around powder room vanity
- To reinstall same toilet, including new ring after refinish.
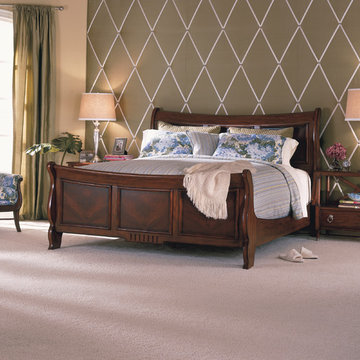
 CAP Carpet & Flooring
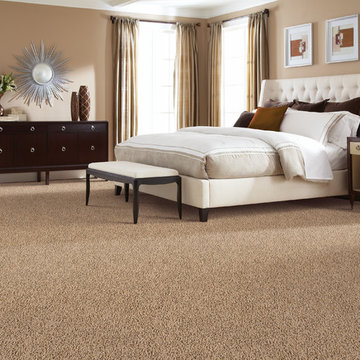
 is the leading provider of flooring & area rugs in the Twin Cities. CAP Carpet & Flooring is a locally owned and operated company, and we pride ourselves on helping our customers feel welcome from the moment they walk in the door. We are your neighbors. We work and live in your community and understand your needs. You can expect the very best personal service on every visit to CAP Carpet & Flooring and value and warranties on every flooring purchase. Our design team has worked with homeowners, contractors and builders who expect the best. With over 30 years combined experience in the design industry, Angela, Sandy, Sunnie,Maria, Caryn and Megan will be able to help whether you are in the process of building, remodeling, or re-doing. Our design team prides itself on being well versed and knowledgeable on all the up to date products and trends in the floor covering industry as well as countertops, paint and window treatments. Their passion and knowledge is abundant, and we're confident you'll be nothing short of impressed with their expertise and professionalism. When you love your job, it shows: the enthusiasm and energy our design team has harnessed will bring out the best in your project. Make CAP Carpet & Flooring your first stop when considering any type of home improvement project- we are happy to help you every single step of the way.

Sponsored
Sunbury, OH
J.Holderby - Renovations
Franklin County's Leading General Contractors - 2X Best of Houzz!
 CAP Carpet & Flooring
 is the leading provider of flooring & area rugs in the Twin Cities. CAP Carpet & Flooring is a locally owned and operated company, and we pride ourselves on helping our customers feel welcome from the moment they walk in the door. We are your neighbors. We work and live in your community and understand your needs. You can expect the very best personal service on every visit to CAP Carpet & Flooring and value and warranties on every flooring purchase. Our design team has worked with homeowners, contractors and builders who expect the best. With over 30 years combined experience in the design industry, Angela, Sandy, Sunnie,Maria, Caryn and Megan will be able to help whether you are in the process of building, remodeling, or re-doing. Our design team prides itself on being well versed and knowledgeable on all the up to date products and trends in the floor covering industry as well as countertops, paint and window treatments. Their passion and knowledge is abundant, and we're confident you'll be nothing short of impressed with their expertise and professionalism. When you love your job, it shows: the enthusiasm and energy our design team has harnessed will bring out the best in your project. Make CAP Carpet & Flooring your first stop when considering any type of home improvement project- we are happy to help you every single step of the way.

 Advance Design Studio, Ltd.
Scott and Janet of Elgin have had four design to build renovations with Advance Design over the last decade. We got the chance to sit down and talk with Janet about her experience working with Advance Design on so many different areas of her home. Starting with her kitchen in 2009, Janet proclaimed, “The reason we kept coming back is because our first [renovation] went so extremely well, exceeding all of my expectations.”
Since their kitchen renovation with Advance Design ten years ago, Scott and Janet have also worked with Advance to remodel their master bedroom, their power room, a wet bar, and most recently their master bath. Having renovated practically every major room in the house with the team, we asked Janet what made her experience with Advance Design so special. “We went with Advance Design because we trusted them so much more, their experience, and everything that they brought. We were confident they were giving us what we wanted for the money we were spending.”
For their most recent renovation, Scott and Janet clearly knew what to expect going into their master bath renovation. They were familiar with Advance’s step by step design process that epitomizes the “Common Sense Remodeling” philosophy applied in every project Advance creates. After once again experiencing the careful budgeting analysis, the pointed design meetings, and the clear documentation that leads up the a thoroughly managed installation, Janet’s simple summary of their experience is this; “The word I would use to describe the process is – collaboration!”
Working closely with Advance Design kitchen designer Michelle Lecinski, together they were able to develop a new master bath design that not only worked with their investment goal, but also made sense for their lifestyle. “Oh Michelle, my designer! I connected with her immediately. She spent time getting to know us, our lifestyle, even the setting of our house.” The threesome had a great experience designing and producing yet another successful project together.
When it came to their new project plans, Scott and Janet were interested in creating a relaxing “spa-like” experience in their master bath. One of the many ideas Michelle introduced during the design process was installing a Kohler Alteo series showerhead for a rain-like shower experience. This designer showerhead, mixed with the warm ambiance of the lighting and pebble accent running throughout the shower make for what Janet calls a “luxury spa essence”. From the oversized glass sliding door to the recessed niche for accessories, each special detail was considered and implemented intentionally so as to create the maximumly optimized use of the compact space. Not only was this transformation one of beauty and luxury, but special attention was given to every way possible to provide additional storage to maximize the functionality of the bath area as a whole.
Once design was complete and the bath construction project began in their home, making sure everything happened efficiently and on schedule became new priority number one. “Having a project manager made an enormous difference,” Janet said, “It was so worth it to hire professionals that knew exactly what they were doing. Even after all of these years, I wouldn’t change a thing.”
“It was a pleasure working together with Janet and Scott to create this beautiful space that will enhance their lives for many years,” says Michelle. “It is so much fun to get to do this job every day, I love that I can have this sort of impact on their lives by doing something for them [Janet & Scott] that comes so naturally to me!”
After reviewing the long-term relationship with clients like Scott and Janet, owner Todd Jurs had this to say, “Clients returning and asking us to transform that next area of their home really warms my heart. It reaffirms that every decision to please clients no matter what is always the right choice, and that our honesty and integrity along with the immense collective talent of this team is recognized and appreciated by those who continue to return to us year after year.” He continued to say, “I always say how blessed we truly are to be able to do what we do, and experiences like this one put a smile on my face every time.”
 MD Flooring Solutions, LLC
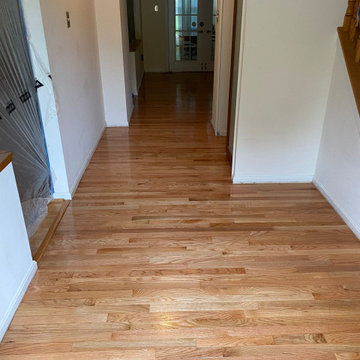
Natural
1x coat of ZINSSER®SealCoat™ Universal Sanding Sealer.
1x coat of Water-Based Oil-Modified polyurethane by default.
1x final coat of SamSeal or Masterline Oil-based polyurethane by default.
---} Finish: Semi-Gloss.
- To cover with plastic and use vacuum to do the job
- To remove current toilet from powder room and KEEP.
- Sand and refinish 2-1/4" red oak Prefinished Hardwood floors on First floor: front foyer, closet, dining room, kitchen, hallway & powder room (no family room, no living room) - 404.12 sqft
- To remove Bevels from floors on First floor: front foyer, closet, dining room, kitchen, hallway & powder room (no family room, no living room) - 404.12 sqft
- To Sand & Refinish T-moldings 3LFT + 3LFT + 3LFT between foyer to family room, dining room to living room
- To Install Unfinished Red Oak Shoe Molding to be polyurethaned on First floor: front foyer, closet, dining room, kitchen, hallway & powder room (no family room, no living room) + around powder room vanity
- To reinstall same toilet, including new ring after refinish.
118