
Search results for "Moving ahead" in Home Design Ideas
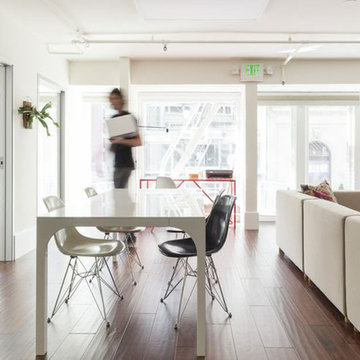


 Total System Service
As a manager of a building or property, you quickly learn the art of mediation. One minute you may be working with a vendor to keep the building’s operating system running efficient and smooth; the next moment you may be calming a tenant down after finding the change in the system disrupted his office’s workflow. Give and take; it’s the only way to make sure every day runs perfectly.
Overall, you have two goals to strive for in everything you do.
1. Keep the building running properly, upgrading systems as appropriate, and striving to do all you can on a pre-established budget.
2. Keep the building occupants happy, with as little disruption as possible.
While some changes are minor, barely registering on a building occupant’s mind, with HVAC challenges, that’s rarely the case. If a HVAC contractor is replacing an air handler, for instance, and disconnects one and moves to the next unit, it may cause major disruptions to sensitive areas of a building. And if the occupant wasn’t prepared for the disruption, you can have a mighty unhappy customer on your hand.
Anytime you are working on HVAC projects throughout your building, there are strategies you can put into place to keep things running smooth.
Communicate with occupants
Communication is key to any good relationship, and as a property manager, this rule is a great place to start. If you will be working with the HVAC equipment, block out the timeframe for work to be done, and understand the potential consequences of the process. Then communicate this process with every point of contact you have throughout the building. The more detail you can provide, the less surprises you’ll have throughout the process. You can also work with your building’s occupants before the process begins, finding out if there are better timeframes than others.
Establish a realistic schedule
As a property manager, its easy to provide your expectations for the HVAC project at hand, and request that the proposal be written in such a way that work is completed on your timeframe. Unfortunately, many contractors want your business and will agree to anything upfront in order to win the bid, knowing full well the work will take longer than specified. Instead of projecting your timeframes into the proposal process, ask for HVAC project bids to establish realistic schedules of how long the process will take, and what areas of your property will be most effected throughout the schedule. This will help you avoid crises between you and the contractor, and you and your tenants.
Plan for the whole system
If one small piece of your HVAC system is weak, its easy to fix that one small piece. But how will that impact your overall system? Will it cause weak spots in different parts of the building – maybe a corner office will have reduced air flow, and therefore be colder in the winter and warmer in the summer? When retrofitting new pieces with older existing systems, its easy to reduce the efficiency of your entire system. Before agreeing to certain repairs, make sure you understand how it will impact your entire system overall. An easy way of handling this problem is by working with the same HVAC contractor again and again, He will understand your system’s potential, and know when to make repairs, and when to replace.
Have points of contact available for immediate assistance
In many cases, problems arise because connections can’t be made. Can the HVAC contractor get a hold or you or another person that can make decisions at a moments notice if a problem arises? Do you have access to decision makers throughout the building that may be impacted by this change? Many projects have been put on hold simply because a person in authority can’t be found to give the go-ahead to move forward. If you have access to these people during the time of the project, you’ll be able to complete the project in record time.
Test
Finally, if you can test things in stages, or test when the potential for problems is the smallest, you reduce the chances of bigger emergency issues falling into your lap. If you’ll be installing a new terminal unit, can you make the switch on a Saturday morning when the building is largely unoccupied? If you’re replacing a large system, can you replace and test in phases so the entire project isn’t released at once?
Most issues can be avoided with just a little strategy from the beginning. If you’ve never had a HVAC maintenance team to help you stay on track with your building’s heating and cooling, now may be the time to find out how easy a team approach makes the process.

 ODS Architecture
Inspiration for a contemporary black tile and mosaic tile light wood floor and beige floor powder room remodel in San Francisco with flat-panel cabinets, light wood cabinets, a wall-mount toilet, black walls, an integrated sink, solid surface countertops and white countertops
Find the right local pro for your project
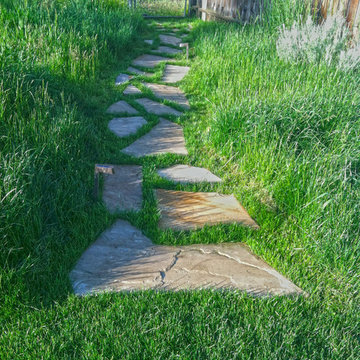
 Neils Lunceford, Inc.
Skinner Residence in Dillon, CO Company: Neils Lunceford, Inc.
Website: www.neilslunceford.com
Phone: 970-468-0340
Photo Credit: Dan Skinner
Inspiration for a traditional full sun backyard stone vegetable garden landscape in Denver for summer.
Inspiration for a traditional full sun backyard stone vegetable garden landscape in Denver for summer.
 Kelsey Leigh Design Co.
Small farmhouse kids' white tile and porcelain tile marble floor and white floor alcove shower photo in Oklahoma City with shaker cabinets, blue cabinets, a one-piece toilet, white walls, an undermount sink, quartz countertops, a hinged shower door and white countertops




Sponsored
Columbus, OH

Wannemacher Interiors
Customized Award-Winning Interior Design Solutions in Franklin Cnty OH
 Mark Mobley Architecture
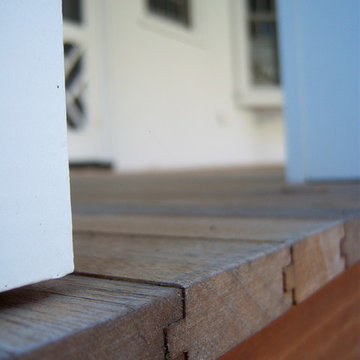
Mid-sized arts and crafts front porch idea in Baltimore with decking and a roof extension


 Tile Doctor Ltd
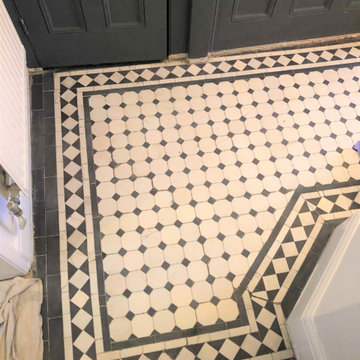
The owners of this Edwardian property in Finchley had purchased it a couple of years prior and since then had slowly been renovating it to restore its original character. The project was almost complete and now attention had turned to the tiled floor. The tiles were in quite a state and I was asked to work our Tile Doctor magic and bring it back to its original condition.
When they moved in the hallway had been covered with carpet which gave the tiles underneath some protection. Unfortunately, however the carpet has been secured with carpet grippers that had been glued to the tiles around the edges. There were also paint splashes on the surface that would need dealing with. On top of that the floor had a few missing tiles that had been back filled by cement to provide a level base for the carpet, the client wanted like them replaced if possible.
After surveying the floor, I explained what could be done and ever completed a small test clean to demonstrate how the tiles would look once deep cleaned. I was confident on being able to source very similar reclaimed tiles so replacing the missing should not be a problem. The client was very happy with the initial test result and my quotation so booked me in to restore the floor.
On my return I started by applying Tile Doctor Remove and Go to soften up the glue which allowed it to be carefully peeled off the tiles with scrappers. Once all the carpet adhesive was gone, I worked a strong dilution of Tile Doctor Remove and Go into the tiles using a black pad to work the cleaning solution deeper into the tiles. A wet vacuum was used to remove the slurry created, and I followed this by giving the tiles an extra clean using a 200-grit diamond burnishing pad lubricated with water.
The last step in the cleaning process was to give the floor an acid rinse using Tile Doctor Grout Clean-up, I did this for several reasons, first it removes old grout smears from the surface of the tile and second it neutralised any efflorescent salts lying dormant in the floor. This can be quite a problem for old floors which don’t have the benefit of a protective damp proof membrane under the floor. The floor was given a final rinse with water which was again extracted with a wet vacuum.
I then set about lifting all the loose tiles (approximately ten) and carefully removing the concrete infills. I had previously managed to source replacements for these holes from original features. Unfortunately, they didn’t sell the correct sized octagon tiles, so I had bought 150mm square tiles and then needed to cut them on site to get the right size.
After cutting and fixing the tiles I fixed them in place and regrouted the rest of the floor.
I then left the floor to dry out overnight and returned in the morning. Before applying a sealer, I took several moisture readings with the damp meter to make sure the tiles were dry enough to take the sealer.
I was able to confirm the floor was dry, so went ahead and applied three coats of Tile Doctor Colour Grow sealant. Colour Grow is an impregnating sealer that is fully breathable sealer which is important when it comes to old floors like these that don’t have a damp proof membrane installed.
My client was very happy with the renovated floor and for aftercare I left them with a bottle of Tile Doctor Neutral Tile Cleaner and gave advice on how best to clean the floor going forward.
Andrew Newstead
North London Tile Doctor
 J&S by STARK
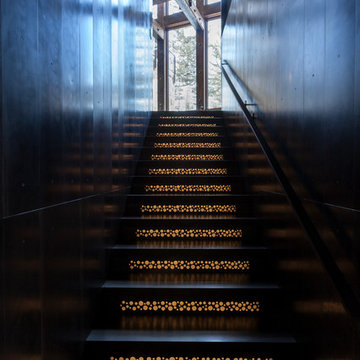
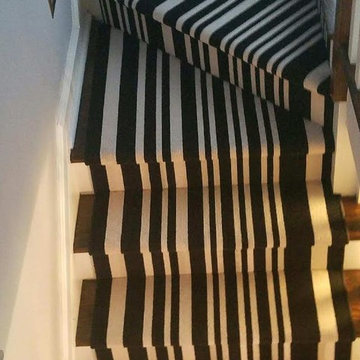
Mid-sized eclectic carpeted straight wood railing staircase photo in New York with carpeted risers
 Jasper + Phoenix
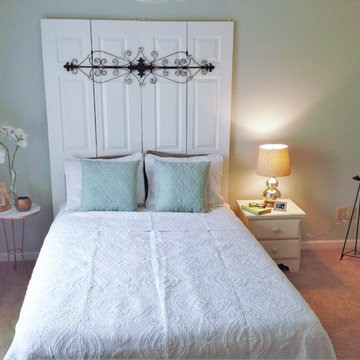
Amber works from home and was sacrificing a dining room for her home office. By utilizing the double wide closet space in her guest bedroom, she now walks into her home without the reminder of work, and can have guests over for a meal in her dining room (dining room reveal coming soon). The walls were freshly painted Sea Salt by Sherwin Williams. This gives the room a fresh, clean look and also adds contrast to the beige carpet.
Amber had her homework assignments cut out for her as she had to do some major purging in her throw all guest room. Once she started letting go, she was on a roll and continually surprised me as she cleaned out closets throughout the house. One dresser was filled with cds, dvds, books, albums, scrap-booking materials; items taking up precious real estate in her life that she didn't even know were there. There really wasn't a storage problem after-all, she was just holding on to a collection of things that no longer served her. Each time I would visit, and her space would become more open, I could see the weight lifting off her and her self love building. Amber had a recent breakup with her boyfriend and this makeover helped her not only focus on making a home sanctuary for herself, but helped her let go of the pains of the past and focus on the exciting future ahead. At one point when we were moving sofas in the living room (which we will also reveal soon), we found an ex's flip-flop. We were figuratively and literally sweeping away the past. Editing your home and your life makes room for your future; for new people and things. We are so happy to finally reveal the room to you! We can't wait to unveil the rest of Amber's home, once we complete the finishing touches.
Challenges:
Amber's home was filled with mix-matched furniture from family and college. She had no idea what her decorating style was. After shopping together and exchanging somepinterest boards, I was finally able to get a sense of what she loves.
I had to work on a tight budget, which meant really digging out the creativity and utilizing other items in the home. I transformed a table from the discard pile into this faux marble bedside table (click web link for more details).
Amber's dad was able to help with the desk materials and building to cut costs.
We wanted to save the closet doors in the event she sold her home or no longer needed an office someday. There wasn't any extra space to store these closet doors, so I used them as a headboard.
The only items purchased were: Curtains, Curtain Rod, Bedspread Set, Throw Pillows, 2 Lamps and Paint.
Those power cords in the closet were unsightly and we didn't have the patience to wait to drill a hole under the desk (Another task for Amber's dad). Solution: I found a large frame and extra fabric and made a quick pin board. I used the same fabric to cover the harsh black mouse pad.


 Jay Sifford
Staghorn fern (Platycerium superbum) in the garden of Robert Fuchs and Michael Coronado, Homestead, FL. Photo by Jay Sifford.
Home design - tropical home design idea in Miami
Home design - tropical home design idea in Miami
 Cali Floors
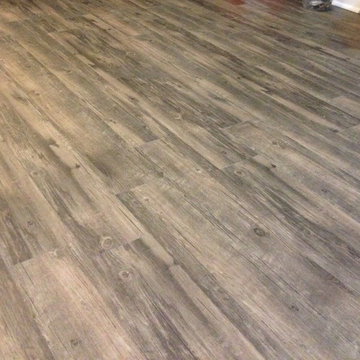
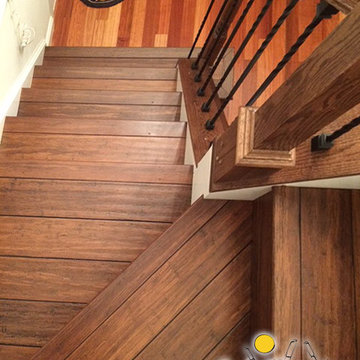
The entryway of this Sterling, VA home makes a statement with an elegant staircase featuring Antique Java Fossilized® flooring. The flooring continues onto the second story for a seamless, inviting look and feel.
 Tile Doctor Ltd
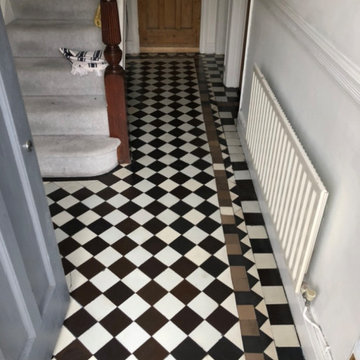
This job was carried out in a terraced property in Llanelli which had a Victorian Tiled Hallway laid in a diamond pattern that looking worse for wear and in need of some attention. The clients were a young couple who had moved in two years previously and had only recently decided they wanted the floor renovated. This was earlier in the year, so I was able to pop over to the property and take a detailed look at the floor before recommending a course of action to renovate the tiles.
Upon arrival the first thing we noticed was that the border had been laid with an inconsistent pattern, non- matching tiles had been patched in essentially filling voids as you can see in the images. The floor wasn’t terribly dirty however it wasn’t very clean either.
I discussed with the client replacing the non-matching tiles, so the floor pattern was uniform however they decided against it and were happy to just to have it cleaned and sealed. We can usually source either reclaimed original tiles or some great reproduction ones, so most floors can be restored if needed. I worked out a quote for the work and they were happy to go ahead.
If you have never been you should know that Llanelli is the largest town in the county of Carmarthenshire and famous for Rugby and the production of Tin. It is located on the Loughor Estuary, some 10 miles from Swansea and 12 miles from Carmarthen.
With no tiling to do the first job was to protect the woodwork such as skirting and staircase with tape. Once done the process of cleaning began with the application of a 400-grit burnishing pad fitted to a buffing machine. The process is lubricated with water and the pad run over the whole floor two to three times to remove dirt and refine the appearance of the tile. Even after the first application of the pad we could see a massive improvement to the appearance of the tiles. To get right into the edges of the tiled floor we use a 400-grit handheld diamond block, this proved especially useful under the stairs where our buffer machine could not reach.
During this process, the water turns into a fine slurry which is rinsed off with more water and extracted with a wet vacuum. On this occasion the floor was not dirty enough to require any chemicals, the use of water and the machine was enough to get the floor cleaned up.
This job was very straight forward, and we did not run into any problems at all. After allowing the floor to dry out for 24 hours we returned to seal the tiles checking first that the floor was sufficiently dry first using a damp meter. Fortunately, the burnishing method uses a lot less water than a chemical clean, so I was able to get straight on with sealing.
The client wanted a satin sheen finish, so I applied four coats of Tile Doctors Seal and Go which works well on Victorian tiles. The sealer really put the life back into the tiles and will protect them from staining going forward. It will also make the floor much easier to maintain and keep it looking good for much longer.
I’m pleased to say the owners were very happy with the floor and recommended us to one of their friends who we also did some work for. For aftercare I recommended the use of Tile Doctor Neutral Tile Cleaner. This is an everyday tile cleaning product that is sealer friendly and not prematurely reduce the life of the sealer which can happen with many household cleaning products which are simply too strong.
Adrian Iacono
Swansea Tile Doctor
 Custom Surface Solutions
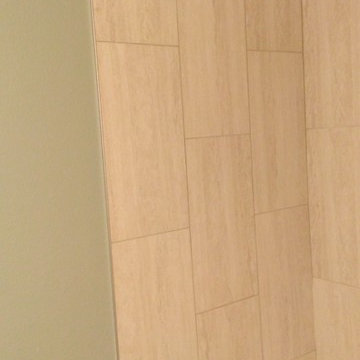
Custom Surface Solutions (www.css-tile.com) - Owner Craig Thompson (512) 430-1215. This project shows new 12 x 24 tile installed vertically with offset layout pattern on wall and floor. Includes shower box with linear glass accent tile back and vertical glass accent band. Tile edges are finished with Schluter Jolly satin aluminum profile edge trim.

 Advance Design Studio, Ltd.
Chris and Sofia of Arlington Heights knew when they purchased their home that they would finish the basement. They needed a space for the kids to hang out, for family and friends to stay, and to have a better space for hosting holidays and parties. The dark unfinished space went mostly unused for three years, but once their kids reached the ideal age for use of a well-built basement, they moved ahead with their plan.
“The old basement was dark and cold, and the kids came down and played, but they didn’t like it. The new space is like a whole other house, so we have this space for family game nights and for watching games or Super Bowl parties,” Chris said.
The couple found Advance Design Studio through a friend who had their entire home renovated by the remodeling company. After the initial meeting and visiting the showroom, Chris and Sofia were positive that Advance Design was the company that could best turn their unfinished basement into a family friendly space for everyone to enjoy.
“We really liked the showroom, we liked being able to choose all of those finishes and meet with them in one place,” Chris said.
A Custom Space for a Family with Multiple Needs
The project began with a fireplace focal point complete with an amazing entertainment wall, a fantastic full kitchen complete with every amenity, and a brand new full bath. The new basement truly has a space for everyone. If the kids want to watch a movie and hang out on the couch they can, if family wants to play games and have a pizza party on the large island they can, and if guests want to stay over night on the pull-out sofa they can enjoy the entire private “suite” complete with a full bath. It is the true definition of a multifunctional basement.
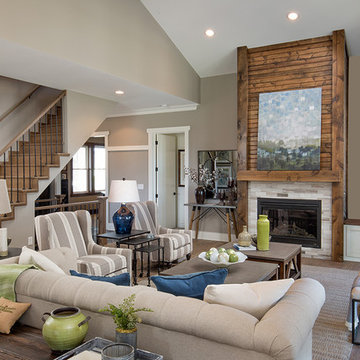
The stunning, full kitchen is the highlight of this now bright and airy basement. You walk down the stairs and are immediately impressed with the detailed metal tile work on the ceiling, bringing to mind the classic feel of a comfortable old pub. Cherry Merlot cabinets provide a rich contrast against the soft neutral walls and the contrasting copper tin ceiling tile and backsplash. Rich Santa Cecelia granite countertops pair nicely with timeless stonework on the outer walls.
The island is large enough to provide a more than adequate entertaining space, and provides plenty of both seating and storage. The well-appointed kitchen houses a regular size refrigerator, a full size oven for pizza parties and cookie baking anytime, a microwave oven as well as complete sink and trash set up. One could easily do without a home kitchen forever in this generously designed secondary space!
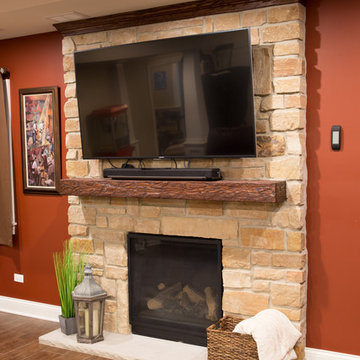
The fireplace and buffet wall seating area is the ideal place to watch movies or sporting events. The coordinating stonework on the fireplace flows throughout the basement, and a burnt orange accent wall brings color and warmth to otherwise ordinary basement space. The Elite Merlot media buffet compliments the kitchen as well as provides storage and a unique functional display option, giving this part of the basement a sophisticated, yet functional feel.
The full bath is complete with a unique furniture style cherry DuraSupreme vanity and matching custom designed mirror. The weathered look to the cabinets and mirror give the bathroom some earthy texture as does the stone floor in the walk-in shower. Soft blue makes the space a spa-like mini retreat, and the handsome wall to wall tile and granite speak luxury at every corner.
Advance Design added clever custom storage spaces to take advantage of otherwise wasted corners. They built a custom mudroom for the kids to house their sports equipment and a handy built in bench area with basket pull outs for a custom home gym. “They were able to custom fit this second mudroom with the lockers and the bench, they were able to custom build that, so the kids could store all of their equipment down here for the sports that they are in,” Chris said.
They Got The Amazing Space They Had Envisioned for Years!
The basement Chris and Sofia had envisioned had come to life in a few short months of planning, design and construction, just a perfect fit in the summer months. Advance Design Studio was able to design and build a custom, multifunctional space that the whole family can enjoy. “I would recommend Advance Design because of the showroom, because of the cleanliness on the jobsite and the professionalism, combined with Christine’s design side as well as Todd’s builder’s side - it’s nice to have it all together,” reminisced Chris after the project was complete.
 Tile Doctor Ltd
I thought I would share this case history of a Yellow and Black Victorian Tiled floor that we worked on at a large house in Lancaster last year. It’s a great example of the typical problems we face with old Victorian floors, especially around door thresholds where the transition between the different foundation invariable cause problems.
I didn’t know the full history of the floor, but it was now in quite a state and recent renovation work had left the floor unstable with loose and cracked tiles. The tiles needed to be removed and then the damaged subfloor carefully scraped out and replaced. Once that was done the floor would need relaying and then cleaned and sealed so everything would blend in.
After visiting the property and providing a quotation we were given the go ahead and agreed a date to do the work.
We returned on the agreed date and set about carefully removing the loose and cracked Victorian tiles and put them aside for later use. Some would need replacing however this would not present a problem and they are still widely available, and I have several contacts I can turn to for this.
Once this was done and the subfloor exposed and cleaned up, I used self-levelling cement to bring the floor level up and in-line with the existing. This now needed to set hard, so the rest of the day was spent cleaning up the tiles we removed earlier with Tile Doctor Grout Clean-up and Pro-clean. Our goal is to reuse as many of the original tiles as possible to preserve the heritage of the floor.
The next day with the new subfloor set it was ready for tiling. This involves laying out the tiles first without adhesive carefully cutting and fitting new tiles as needed to maintain the overall pattern of the floor. Once I was happy the tiles were moved to a board and then fitted with fresh adhesive.
I came back on day three with the aim of cleaning the floor so it could be sealed however whilst inspecting my new tiling I was disappointed to discover some were not as level as I had hoped. I had noticed the replacement tiles were not the same thickness as the originals the previous day but I had worked around this by using different levels of adhesive, clearly this plan was not as effective as I had hoped for.
To counter this problem, I used a set of 50-Grit, 100-grit and then 200-grit diamond pads in sequence to mill the floor flat and remove the lippage between them. This is done with water to lubricate the process and a weighted floor buffer. The pads generate a lot of slurry and so you need to rinse this off with more water and extract all the soil after each pad.
I followed this up with various Diamond burnishing pads of increasingly finer grits across the whole floor until we achieved a consistent finish and had the added benefit of getting the whole floor clean. More water is used to rinse the tiles after burnishing and the soil extracted with a wet vacuum as before. Once done and inspected the floor was left to dry off overnight.
Tile Doctor Colour Grow was applied to enhance the appearance of the tiles and protect them going forward. This product copes well with damp which can always be a problem with old floors like this one with no damp proof membrane present.
The floor looked amazing when finished and our attention to detail had really paid off, in fact you simply could not tell we had done any tiling work or replaced any tiles. For aftercare I recommend the use of Tile Doctor Neutral Cleaner which is designed for the regular cleaning of sealed tiles.
Russell Taylor
Lancashire Tile Doctor
 Advance Design Studio, Ltd.
Chris and Sofia of Arlington Heights knew when they purchased their home that they would finish the basement. They needed a space for the kids to hang out, for family and friends to stay, and to have a better space for hosting holidays and parties. The dark unfinished space went mostly unused for three years, but once their kids reached the ideal age for use of a well-built basement, they moved ahead with their plan.
“The old basement was dark and cold, and the kids came down and played, but they didn’t like it. The new space is like a whole other house, so we have this space for family game nights and for watching games or Super Bowl parties,” Chris said.
The couple found Advance Design Studio through a friend who had their entire home renovated by the remodeling company. After the initial meeting and visiting the showroom, Chris and Sofia were positive that Advance Design was the company that could best turn their unfinished basement into a family friendly space for everyone to enjoy.
“We really liked the showroom, we liked being able to choose all of those finishes and meet with them in one place,” Chris said.
A Custom Space for a Family with Multiple Needs
The project began with a fireplace focal point complete with an amazing entertainment wall, a fantastic full kitchen complete with every amenity, and a brand new full bath. The new basement truly has a space for everyone. If the kids want to watch a movie and hang out on the couch they can, if family wants to play games and have a pizza party on the large island they can, and if guests want to stay over night on the pull-out sofa they can enjoy the entire private “suite” complete with a full bath. It is the true definition of a multifunctional basement.
The stunning, full kitchen is the highlight of this now bright and airy basement. You walk down the stairs and are immediately impressed with the detailed metal tile work on the ceiling, bringing to mind the classic feel of a comfortable old pub. Cherry Merlot cabinets provide a rich contrast against the soft neutral walls and the contrasting copper tin ceiling tile and backsplash. Rich Santa Cecelia granite countertops pair nicely with timeless stonework on the outer walls.
The island is large enough to provide a more than adequate entertaining space, and provides plenty of both seating and storage. The well-appointed kitchen houses a regular size refrigerator, a full size oven for pizza parties and cookie baking anytime, a microwave oven as well as complete sink and trash set up. One could easily do without a home kitchen forever in this generously designed secondary space!
The fireplace and buffet wall seating area is the ideal place to watch movies or sporting events. The coordinating stonework on the fireplace flows throughout the basement, and a burnt orange accent wall brings color and warmth to otherwise ordinary basement space. The Elite Merlot media buffet compliments the kitchen as well as provides storage and a unique functional display option, giving this part of the basement a sophisticated, yet functional feel.
The full bath is complete with a unique furniture style cherry DuraSupreme vanity and matching custom designed mirror. The weathered look to the cabinets and mirror give the bathroom some earthy texture as does the stone floor in the walk-in shower. Soft blue makes the space a spa-like mini retreat, and the handsome wall to wall tile and granite speak luxury at every corner.
Advance Design added clever custom storage spaces to take advantage of otherwise wasted corners. They built a custom mudroom for the kids to house their sports equipment and a handy built in bench area with basket pull outs for a custom home gym. “They were able to custom fit this second mudroom with the lockers and the bench, they were able to custom build that, so the kids could store all of their equipment down here for the sports that they are in,” Chris said.
They Got The Amazing Space They Had Envisioned for Years!
The basement Chris and Sofia had envisioned had come to life in a few short months of planning, design and construction, just a perfect fit in the summer months. Advance Design Studio was able to design and build a custom, multifunctional space that the whole family can enjoy. “I would recommend Advance Design because of the showroom, because of the cleanliness on the jobsite and the professionalism, combined with Christine’s design side as well as Todd’s builder’s side - it’s nice to have it all together,” reminisced Chris after the project was complete.
14