
Search results for "Multiple step" in Home Design Ideas

 Superior Pools
 Custom Swimming Pool And Spa, Raised Area, Multiple LED Bubblers, Sun shelf, Glass tile, Travertine, Triple Raised Spa, Pentair Fx Fire Bowls, Fire Pit, Umbrella Sleeve, Pentair Heater, Pentair Variable Speed 3HP Pump, 2nd Pentair VS Pump, Pentair Salt, Pentair UV, Pentair Easytouch, Pentair Uv, Pentair Clean & Clear Rp Filters, 20/20 Screen, Heliocol Solar System w/ Automation (Price-Garczynski) ESTERO, FL 33928
- Premium Select Ivory Travertine / French Pattern
- Premium Select Ivory Travertine Coping - 12" x 24" w/ Bullnose -10" Beam
- Pool Waterline Tile: NPT Essence ES-Royal 1" x 2" (Glass)
- Spa and Raised Water Feature Tile: NPT Essence ES-Royal 1" x 1" (Glass)
- Stonescapes Aqua White
- +18" Raised Spa w/ 6 Therapy Jets and Extended Tile Spillway
- Two +18" Raised Columns w/ Pentair Magic Water Bowls (Pewter), Flanking a +12" Raised Beam/Wall w/ Shallow Bench and Three Pentair LED Bubblers (Transformer for All Bubblers)
- Extended Sun Shelf w/ Pentair LED Bubbler and Umbrella Sleeve
- 36' and Two 11'8" Picture Windows, 20/20 Screen, No Chair Rail Around Entire Enclosure
- Heliocol Solar System w/ Automation and Aqua Cal SQ125 Heat Pump
- 2nd Pentair VS Pump / To Run Water Features
Like What You See? Contact Us Today For A Free No Hassel Quote @ Info@SuperiorPools.com or www.superiorpools.com/contact-us
Superior Pools Teaching Pools! Building Dreams!
Superior Pools
Info@SuperiorPools.com
www.SuperiorPools.com
www.homesweethomefla.com
www.youtube.com/Superiorpools
www.g.page/SuperiorPoolsnearyou/
www.facebook.com/SuperiorPoolsswfl/
www.instagram.com/superior_pools/
www.houzz.com/pro/superiorpoolsswfl/superior-pools
www.guildquality.com/pro/superior-pools-of-sw-florida
www.yelp.com/biz/superior-pools-of-southwest-florida-port-charlotte-2
www.nextdoor.com/pages/superior-pools-of-southwest-florida-inc-port-charlotte-fl/
#SuperiorPools #HomeSweetHome #AwardWinningPools #CustomSwimmingPools #Pools #PoolBuilder
#Top50PoolBuilder #1PoolInTheWorld #1PoolBuilder #TeamSuperior #SuperiorFamily #SuperiorPoolstomahawktikibar
#TeachingPoolsBuildingDreams #GotQualityGetSuperior #JoinTheRestBuildWithTheBest #HSH #LuxuryPools
#CoolPools #AwesomePools #PoolDesign #PoolIdeas

 Talon Construction Inc.
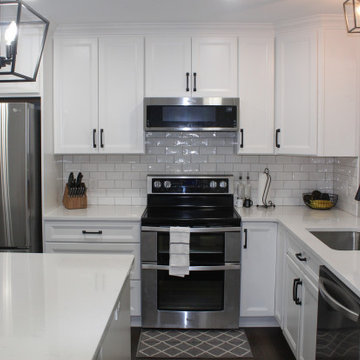
Designing and building a kitchen addition is a complex process that involves multiple steps and considerations. Here is a general outline to help you get started on your kitchen addition project:
Define Your Goals and Budget:
• Determine the purpose of the kitchen addition. Is it for more cooking space, a dining area, or a combination of both?
• Establish a realistic budget for your project. Consider all costs, including construction, permits, materials, and furnishings.
Hire a Design Professional:
• Seek the services of a design build company who specializes in kitchen additions.
• Discuss your vision, needs, and budget with the design professional to create a design concept.
Site Evaluation:
• Assess the existing space and structural condition of your home to ensure it can support the addition.
• Consider factors like zoning regulations, setbacks, and building codes.
Design Development:
• Collaborate with your design professional to refine the concept, including the layout, size, and architectural style.
• Choose materials, finishes, and fixtures that fit your design and budget.
Obtain Permits:
• Consult with your local design build contractor to determine the necessary permits and approvals.
• Prepare and submit all required documents, including architectural drawings and engineering plans.
Create Construction Documents:
• Work with your design build professional to develop detailed construction drawings and specifications.
• These documents will serve as a guide for contractors during construction.
Hire a design build contractor:
• Check references, credentials, and licenses before selecting a contractor.
• Sign a detailed contract that outlines the scope of work, timeline, and payment schedule.
Construction Phase:
• Demolition: If needed, remove any existing structures or walls.
• Foundation: Construct the foundation for the addition.
• Framing: Build the structural framework of the addition.
• Plumbing, Electrical, and HVAC: Install or update utilities as required.
• Insulation: Ensure proper insulation for energy efficiency.
• Drywall and Finish Work: Complete the walls and ceilings.
• Flooring and Cabinetry: Install flooring and kitchen cabinets.
• Appliances and Fixtures: Add appliances, plumbing fixtures, and lighting.
• Paint and Finish: Apply paint and finishes to achieve the desired look.
• Final Inspection: Schedule inspections to ensure compliance with building codes.
Final Inspections and Approvals:
• Arrange for final inspections to ensure the addition meets all safety and code requirements.
• Obtain any necessary certificates of occupancy or compliance.
Move In and Enjoy:
• Once all inspections and approvals are received, you can move into your new kitchen addition and start enjoying it.
Remember that every kitchen addition project is unique, so adapt this outline to your specific needs and circumstances. Consulting with professionals and obtaining the required permits and inspections is crucial to a successful and safe project.
 Talon Construction Inc.
Designing and building a kitchen addition is a complex process that involves multiple steps and considerations. Here is a general outline to help you get started on your kitchen addition project:
Define Your Goals and Budget:
• Determine the purpose of the kitchen addition. Is it for more cooking space, a dining area, or a combination of both?
• Establish a realistic budget for your project. Consider all costs, including construction, permits, materials, and furnishings.
Hire a Design Professional:
• Seek the services of a design build company who specializes in kitchen additions.
• Discuss your vision, needs, and budget with the design professional to create a design concept.
Site Evaluation:
• Assess the existing space and structural condition of your home to ensure it can support the addition.
• Consider factors like zoning regulations, setbacks, and building codes.
Design Development:
• Collaborate with your design professional to refine the concept, including the layout, size, and architectural style.
• Choose materials, finishes, and fixtures that fit your design and budget.
Obtain Permits:
• Consult with your local design build contractor to determine the necessary permits and approvals.
• Prepare and submit all required documents, including architectural drawings and engineering plans.
Create Construction Documents:
• Work with your design build professional to develop detailed construction drawings and specifications.
• These documents will serve as a guide for contractors during construction.
Hire a design build contractor:
• Check references, credentials, and licenses before selecting a contractor.
• Sign a detailed contract that outlines the scope of work, timeline, and payment schedule.
Construction Phase:
• Demolition: If needed, remove any existing structures or walls.
• Foundation: Construct the foundation for the addition.
• Framing: Build the structural framework of the addition.
• Plumbing, Electrical, and HVAC: Install or update utilities as required.
• Insulation: Ensure proper insulation for energy efficiency.
• Drywall and Finish Work: Complete the walls and ceilings.
• Flooring and Cabinetry: Install flooring and kitchen cabinets.
• Appliances and Fixtures: Add appliances, plumbing fixtures, and lighting.
• Paint and Finish: Apply paint and finishes to achieve the desired look.
• Final Inspection: Schedule inspections to ensure compliance with building codes.
Final Inspections and Approvals:
• Arrange for final inspections to ensure the addition meets all safety and code requirements.
• Obtain any necessary certificates of occupancy or compliance.
Move In and Enjoy:
• Once all inspections and approvals are received, you can move into your new kitchen addition and start enjoying it.
Remember that every kitchen addition project is unique, so adapt this outline to your specific needs and circumstances. Consulting with professionals and obtaining the required permits and inspections is crucial to a successful and safe project.
Find the right local pro for your project

 Water Creation
’s collection of premier single sink bathroom vanities will add a level of sophistication and class to any bathroom’s décor. The crossroads of timeless design and innovative modern manufacturing processes merge harmoniously to ensure each vanity’s finishes and function are as reliable as their unmistakable beauty. Constructed of 100% hardwood and not particle board, Water Creation prides itself on creating high-class vanities that are designed to last a lifetime. The marble countertop, ceramic sink, and elegantly crafted doors all lend credence to the durability and superior craftsmanship that Water Creation is known for. With the understanding that no one space is alike, all of Water Creation’s vanity designs come in multiple lengths to accommodate any room size.
Material: All of Water Creation's vanities are made from select hardwoods that have been kiln dried to ensure a stable product that will not expand, contract, or warp. Construction: Using joinery techniques that are made to hold together for a lifetime, all vanities come fully assembled and include interior shelving and a large cut out in the back for plumbing access.
Countertop: All of Water Creation’s vanities come with solid natural stone countertops that have been sealed at the factory to prevent staining and watermarks. The countertops are not made by sandwiching thin pieces of cheap stone together, they are solid pieces of stone.
Sink: Undermount oval shaped ceramic sink included. Finish: The multi-step finish process on the vanities is not only rich with color and pleasing to the eye, it is also a very durable; acting as an outer shell to help protect your vanity from wear and damage that may occur in everyday use. Actual color may vary slightly due to different computer monitor display settings.
FEATURES:
• Premier fully assembled single sink bathroom vanity.
• Solid hardwood construction - no cheap veneers.
• One shelf inside cabinet. • Five piece door construction.
• Soft closing drawers for a smooth and silent close.
• Premium five coated hand finish.
• Finish is properly sealed to prevent peeling and fading in elevated humidity levels.
• Solid brass hardware in triple plated chrome finish.
• Tempered glass knobs and pulls.
• 1" thick carrara white marble countertop, 1 solid piece, seamless.
• Pre-drilled 8" widespread faucet holes on countertop.
• 4" tall backsplash included. • Optional matching faucet and mirror available.
VANITY SPECIFICATIONS:
• Vanity Dimensions: 24" W X 21.5" D X 34" H.
• Optional Mirror Dimensions: 21" W X 30" H.
• Number of Doors: 2.
• Number of Drawers: 1 decorative non-functional drawer.
• Number of Interior Shelves: 1.
• Vanity Frame Material: Solid Hardwood.
• Countertop Material: Marble.
• Sink Material: Ceramic.
• Vanity Finish: Pure White.
• Countertop Finish: Carrara White.
• Faucet Centers: 8".
OPTIONAL FAUCET SPECIFICATIONS:
• Spout Height: 3".
• Spout Reach: 5-1/2".
• Deck to Aerator Height: 1-1/2".
• Flow Rate: 2.0 GPM@60PSI - Optimized for water efficiency without sacrificing performance.
• Material: Solid Brass.
• Finish: Hand Polished, Richly Triple Plated Chrome Finish.
• Handle Style Type: Cross handles.
• Valve Type: Ceramic disc. • Lead Free Compliant?: Yes.
• Drain Included?: Yes.

 Talon Construction Inc.
Designing and building a kitchen addition is a complex process that involves multiple steps and considerations. Here is a general outline to help you get started on your kitchen addition project:
Define Your Goals and Budget:
• Determine the purpose of the kitchen addition. Is it for more cooking space, a dining area, or a combination of both?
• Establish a realistic budget for your project. Consider all costs, including construction, permits, materials, and furnishings.
Hire a Design Professional:
• Seek the services of a design build company who specializes in kitchen additions.
• Discuss your vision, needs, and budget with the design professional to create a design concept.
Site Evaluation:
• Assess the existing space and structural condition of your home to ensure it can support the addition.
• Consider factors like zoning regulations, setbacks, and building codes.
Design Development:
• Collaborate with your design professional to refine the concept, including the layout, size, and architectural style.
• Choose materials, finishes, and fixtures that fit your design and budget.
Obtain Permits:
• Consult with your local design build contractor to determine the necessary permits and approvals.
• Prepare and submit all required documents, including architectural drawings and engineering plans.
Create Construction Documents:
• Work with your design build professional to develop detailed construction drawings and specifications.
• These documents will serve as a guide for contractors during construction.
Hire a design build contractor:
• Check references, credentials, and licenses before selecting a contractor.
• Sign a detailed contract that outlines the scope of work, timeline, and payment schedule.
Construction Phase:
• Demolition: If needed, remove any existing structures or walls.
• Foundation: Construct the foundation for the addition.
• Framing: Build the structural framework of the addition.
• Plumbing, Electrical, and HVAC: Install or update utilities as required.
• Insulation: Ensure proper insulation for energy efficiency.
• Drywall and Finish Work: Complete the walls and ceilings.
• Flooring and Cabinetry: Install flooring and kitchen cabinets.
• Appliances and Fixtures: Add appliances, plumbing fixtures, and lighting.
• Paint and Finish: Apply paint and finishes to achieve the desired look.
• Final Inspection: Schedule inspections to ensure compliance with building codes.
Final Inspections and Approvals:
• Arrange for final inspections to ensure the addition meets all safety and code requirements.
• Obtain any necessary certificates of occupancy or compliance.
Move In and Enjoy:
• Once all inspections and approvals are received, you can move into your new kitchen addition and start enjoying it.
Remember that every kitchen addition project is unique, so adapt this outline to your specific needs and circumstances. Consulting with professionals and obtaining the required permits and inspections is crucial to a successful and safe project.
 Talon Construction Inc.
Designing and building a kitchen addition is a complex process that involves multiple steps and considerations. Here is a general outline to help you get started on your kitchen addition project:
Define Your Goals and Budget:
• Determine the purpose of the kitchen addition. Is it for more cooking space, a dining area, or a combination of both?
• Establish a realistic budget for your project. Consider all costs, including construction, permits, materials, and furnishings.
Hire a Design Professional:
• Seek the services of a design build company who specializes in kitchen additions.
• Discuss your vision, needs, and budget with the design professional to create a design concept.
Site Evaluation:
• Assess the existing space and structural condition of your home to ensure it can support the addition.
• Consider factors like zoning regulations, setbacks, and building codes.
Design Development:
• Collaborate with your design professional to refine the concept, including the layout, size, and architectural style.
• Choose materials, finishes, and fixtures that fit your design and budget.
Obtain Permits:
• Consult with your local design build contractor to determine the necessary permits and approvals.
• Prepare and submit all required documents, including architectural drawings and engineering plans.
Create Construction Documents:
• Work with your design build professional to develop detailed construction drawings and specifications.
• These documents will serve as a guide for contractors during construction.
Hire a design build contractor:
• Check references, credentials, and licenses before selecting a contractor.
• Sign a detailed contract that outlines the scope of work, timeline, and payment schedule.
Construction Phase:
• Demolition: If needed, remove any existing structures or walls.
• Foundation: Construct the foundation for the addition.
• Framing: Build the structural framework of the addition.
• Plumbing, Electrical, and HVAC: Install or update utilities as required.
• Insulation: Ensure proper insulation for energy efficiency.
• Drywall and Finish Work: Complete the walls and ceilings.
• Flooring and Cabinetry: Install flooring and kitchen cabinets.
• Appliances and Fixtures: Add appliances, plumbing fixtures, and lighting.
• Paint and Finish: Apply paint and finishes to achieve the desired look.
• Final Inspection: Schedule inspections to ensure compliance with building codes.
Final Inspections and Approvals:
• Arrange for final inspections to ensure the addition meets all safety and code requirements.
• Obtain any necessary certificates of occupancy or compliance.
Move In and Enjoy:
• Once all inspections and approvals are received, you can move into your new kitchen addition and start enjoying it.
Remember that every kitchen addition project is unique, so adapt this outline to your specific needs and circumstances. Consulting with professionals and obtaining the required permits and inspections is crucial to a successful and safe project.


 Envision Web
Becky Hulsey, Envision Virtual Tours
The Lodge at Gold Mine Falls
A Once in a Lifetime Opportunity Awaits….
Have you dreamed of owning your own spectacular waterfall, a serene trout pond, or a one of a kind mountain lodge filled with high end touches, all near Lake Burton? If the answer is yes…..then “The Lodge at Gold Mine Falls” is for you!
Located just off HW 76 .3 miles to Anchorage Marina, this unique 2.8 acre property borders the National Forest, boasts a fully remodeled 3 bedroom, 3 bath, 2000+ square foot rock lodge that is adjacent to its own private, spectacular 60 foot waterfall all surrounded by native landscape such as rhododendron and mountain laurel. Tumbling under the 40 foot suspension bridge, the pristine, crystal clear water continues to ramble on its way to large pond ready to be stocked with trout. Picture yourself fly fishing for a trout dinner right at your front door, or delight your friends or family while entertaining on your new porch or extensive, multi-level deck that connects your new home to your own waterfall. The kids or grandkids will be entertained for hours wading in the pool at the base of the waterfall, exploring the crooks and crannies among the stream’s boulders while looking for salamanders, or panning for “fool’s gold” in the stream. Just imagine….The Lodge at Gold Mine Falls has all this and more!
As you walk up the front steps to The Lodge at Gold Mine Falls, you will notice the craftsmanship of this uniquely one of a kind home made from local stone and granite from a period gone by. If you look closely at some of the stones, you will find raw garnets, some the size of a nail head. Upon opening the front door constructed of solid oak and a tasteful piece of leaded glass, you will be amazed at the spaciousness of the lodge room. Once upon a time, the 20 x 30 foot room with 10 foot ceilings was the entire home. The focal piece of the room is the new floor to ceiling field stone fireplace, hand honed solid maple mantel, rounded hearth, accentuated by a hand-cut keystone, and flanked by raw cedar columns. The new gas logs can be remotely controlled with programmable heat. A built-in floor to ceiling cherry wood wall unit, with granite serving surface, highlights a side wall and is topped off with a large piece of stained glass from an English pub. The mood lighting behind the stained glass and the antique library ladder really highlights this unique bookcase. Distinctive lighting fixtures and fans provide dining area lighting and circulation from the cool breezes off of Lake Burton. On the bottom, the solid oak 1.5 inch flooring is a remnant of the past on the top, the height of the ceilings is enhanced by double crown moldings throughout and a touch of the outdoors is brought indoors by the three new skylights. Surrounded by rustic cedar window boxes, additional ambient light streams through the four windows facing south, and the new French doors.
As you open the French doors to the new porch, you are immediately struck by the sights and sound produced by the rushing water as it cascades over the spectacular multilevel waterfall. You will also notice that the mountain has literally been carved away as you view the layers and striations in the granite that surround the back of the porch. The peaked cathedral ceiling sports a glass apex and the bead board on the ceiling accentuated by the raw cedar plank framing and the five cedar trees used as cornerstones all bring the outdoors within your reach. The addition of “E-Z Breeze” vinyl windows along with the cast iron gas stove will allow you and your family to enjoy the beauty and continually changing scenery at The Lodge at Gold Mine Fall during all four seasons.
Opening the Adirondack style door on the other side of the lodge room allows you to step into the Lodge’s addition built at a later date. The four foot wide hallway boasts stained glass light fixtures and an architectural feature from the new stairwell that divides the living and the bedroom spaces. Knowing that the east wall in the kitchen and study were once on the home’s exterior allowed us to investigate and reveal the true character of these walls by removing the two layers of drywall and 4 inches of plaster exposing a striking addition to both rooms…… beautiful granite rock walls. The hallway flows into the granite breakfast bar which fully complements the newly exposed granite wall. From the Viking SS refrigerator to gas Jenn Air ceramic cooktop and microwave the appliances are a chef’s delight. Lighting is a critical component in a gourmet kitchen and the light from the double window is enhanced by two spotlights over the cooking area, LED task lighting under the cabinets, mood lighting over the top cabinets, and four “Murano” hand blown glass pendant lights over the sink and bar area. Scoring points in the design category, the full wood “Thomasville” two tone glazed cabinets that are country white and palomino scream style and sophistication, and are accentuated by the cool copper glass backsplash and refined stainless steel hardware. The porcelain, two bowl farmhouse sink is large enough for your biggest pots while the stainless steel sink guards will protect it from scratches. The SS faucet is professional quality and the Insinkerator will help the chef in the house save time with instant 190 degree water. An eight foot long exposed cedar tree trunk hangs over the cooking area allowing the chef to hang his/her favorite utensils and pots or pans in full lodge style. And who wouldn’t crave a large walk in pantry with commercial grade slides that will up to 120 pounds. With all these features, the cook/cooks in the family will love spending time in this room.
Across from the kitchen is a study/office area which can be closed off from the hallway by a double barn door. Except for the remarkable exposed granite rock wall mentioned earlier, the entire room has been paneled with raw cedar boards treated with Australian Tree Oil for true lodge feel. The triple crank out window provides a superb view of the pond and blazing Japanese maple trees in the fall. Outside, the hallway leads to the utility room which has been fully upgraded with all the modern amenities. The oak cabinetry with granite tops also has an extra deep sink with commercial kitchen sprayer. The sink area is surrounded by white subway tile while slate and green glass mini tile accents bring the outdoor colors inside. The doggy door, new exterior door and crank out window provide access to the back yard and additional light. From the new “Rinnai” point of use, gas hot water heater to the new “LG” full size, stackable washer and dryer, this utility room delivers.
The master bedroom has four windows which provide outstanding light and air circulation. To take the chill off of nippy evenings, this bedroom also has its own romantic fireplace with travertine marble surround, remote controlled gas logs, and a beautiful antique oak and mirror mantle. To top it off, the en-suite bath contains high end fixtures, a spacious vanity, and floor to ceiling rain shower with independent valves allowing you to turn on the shower and not get wet. Multiple safety handrails and a fold down shower seat give bathers assurance and provide an additional measure of safety. The earthy color tiles, glass tile accents and hand blown light fixtures continue the lodge theme in this end of the house. Located across the hall, the guest bedroom is light and airy with its white window boxes and double crown molding, and also has an attached bathroom. This bathroom also has an entrance door leading to the hallway and doubles as the guest bathroom for the house. Its antique oak vanity and mirror, stained glass lights and wrought iron accents remind me of a past era while the vessel sink, modern fixtures, and floor to ceiling travertine and glass tile rain shower all bring the bathroom up to modern standards.
Located at the end of the hallway, and next to the guest bathroom, is the handcrafted stairwell leading to the sleeping loft. The distinctive maple stair treads with their grain and raw edge being displayed, were milled locally in Clayton and then installed from underneath so that no screw or nail heads are visible. The staircase was completed with wrought iron spindles, raw cedar handrail and floor to ceiling end post. Upon your entry into the sleeping loft, you will notice the amount of light that enters through the two skylights and large window facing the pond. The sound of water rushing over the pond’s spillway is a delightful addition to this large sleeping loft. Finished with engineered hardwood flooring and two built in double beds with tree trunks for legs, the room can accommodate four additional twin beds. The sleeping loft is also equipped with a kitchenette and a distinctive cedar and rock walled bathroom. The bath features an antique dresser vanity with marble vessel sink, distinctive fixtures and a floor to ceiling polished travertine marble shower with rain head. This bathroom also has an exterior door leading to a secondary upstairs staircase in the back yard. Just envision the great sleepovers the kids or grandkids will have here or how your out of town friends or family will just love this special area designed with their comfort and needs in mind.
Originally constructed in 1925 by “off Broadway” star Rose Grant, this property is rich in history. In the early years, this home was one of the first in Rabun County to generate its own electric from the waterfall. Several small cabins were also built on the property and rented out to guests who came for the waterfall, swim in the pond and connect with nature. Other notable residents were Mrs. and Doctor Fowler who was a local pediatrician. According to an aged newspaper article, Mrs. Fowler was very interested in the indigenous flora and fauna and grew a variety of native plants on the property including some that were rare or endangered. Many metal name tags still remain along the various paths on the property thus reminding you of times gone by and the true beauty of property.
Lastly, this solidly built home has just been structurally solidified, become more energy efficient, and reconfigured to further usable space all while retaining the Lodge’s original charm. After removing the flooring in the kitchen, hall and both bathrooms, the home’s structure and roof were fortified with numerous concrete footers to support both bathrooms, kitchen, and stairwell walls that extend from floor to roof. To make this home more comfortable, energy efficient, and bring it up to modern standards, the electrical system was upgraded to 220 service with the wiring, outlets, electrical panels and fixtures replaced throughout the entire home. A whole house surge protector was also installed to protect against damage that may occur with lightning strikes. Speaking of electric…..the pond’s newly poured formed concrete wall contains a pipe enabling you to install your own hydro-electric system. And whether you might decide to tie into the grid or store you energy in a battery system, you could generate your own electric 24/7. The homes plumbing was also replaced with new pipes, energy/water efficient fixtures in each bathroom (including three Toto toilets), and a new cistern was installed behind the garage with a laboratory grade water filtration system. The task of water heating was completed by a gas Rinnai point of use hot water heater in the utility room and all windows were replaced with Anderson thermal pane and 6 Velux skylights were mounted to bring the outdoors inside. The home’s HVAC system was top of the line several years ago and both sets of new gas logs are controlled with remotes. Formerly a summer home, all exterior walls were studded out with insulation added, and whole house fans were installed in the attic and upstairs bathroom. Although many of these upgrades may not be visible, they allow the home to be more energy efficient and more comfortable……allowing The Lodge at Gold Mine Falls to become your four season retreat.

 Crystal Kitchen + Bath
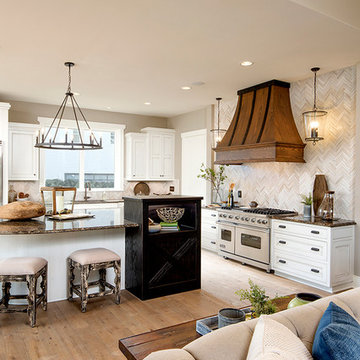
Tying multiple floors together using 6”x36” dark grey wood-looking tile, laid on a staggered patterned worked well with the tile and concrete floors next to it.
Two-toned cabinetry of wired brushed hickory with a grey stain wash, combined with maple wood in a dark slate finish is a current trend.
Counter tops: combination of splashy granite and white Caesarstone grounded the display. A custom-designed table of ash wood, with heavy distressing and grey washed stain added warmth.
Show custom features:
Arched glass door cabinets with crown moulding to match.
Unique Features: drawer in drawer for pot lids, pull out drawer in toe kick for dog dishes, toe space step stool, swing up mixer shelf, pull out spice storage.
Built in Banquette seating with table and docking station for family meals and working.
Custom open shelves and wine rack with detailed legs anchor the three sides of the island.
Backsplash rail with spice rack, knife and utensil holder add more storage space.
A floating soffit matches the shape of island and helps lower the showroom ceiling height to what would be found in a normal home. It includes: pendant lights for the snack bar, chandelier for the table and recess for task lights over the sink.
The large triangular shaped island has eleven foot legs. It fills the unusual space and creates three separate areas: a work space, snack bar/room divider and table area.

 A & R Iron Works
Delaware County's Highly Specialized Wrought Iron Design Experts
Amanda Adams
21 Nealy Blvd., Suite 2101
Trainer, PA 19061
Inspiration for a mid-sized timeless backyard stone patio remodel in Philadelphia with no cover
Inspiration for a mid-sized timeless backyard stone patio remodel in Philadelphia with no cover

 User
Inspiration for a large timeless carpeted curved staircase remodel in Chicago with carpeted risers

 Kenny Carpets & Floors
Inspiration for a mid-sized timeless wooden straight staircase remodel in New York with painted risers

 DGS Flooring
Example of a mid-sized arts and crafts wooden straight wood railing staircase design in Los Angeles with painted risers


 threshold interiors
Location: New York, NY, United States
This Loft was tastefully renovated back in the '90s, but was due for an update and an expansion of the kitchen and dining areas to accommodate the client's cooking skills and entertaining needs. EnlargIing the island and adding cabinetry to delineate the office, bar and dining areas was a priority. The bathroom was updated to feel like a tranquil spa with beautiful new tile, plumbing fixtures and cabinets. Our biggest challenge was coordinating the entire renovation while our client was out of town for the Summer!
Photographed by: James Salomon
 Triforce Construction
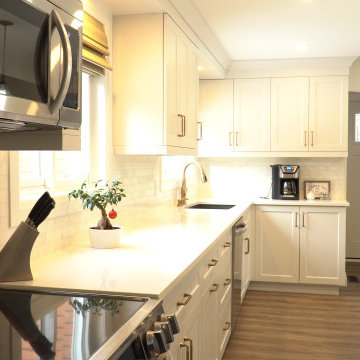
Welcome to this breathtaking fully custom two tone transitional kitchen, where elegance and functionality blend seamlessly to create the heart of your dream home.
Upon entering the space, you'll be instantly drawn to the striking white cabinets that adorn the perimeter of the kitchen. These beautifully crafted cabinets offer ample storage and are paired with sleek, white quartz countertops for a clean and sophisticated look. The large island, complete with additional storage and seating, serves as the focal point of the room, perfect for casual dining and entertaining guests.
The open concept design effortlessly connects the kitchen with the adjoining living and dining areas, fostering a sense of unity and flow throughout the space. The vaulted ceiling adds a sense of grandeur, while the skylight above floods the room with warm, natural light, creating a bright and inviting atmosphere.
Your eyes will be drawn to the stunning dark hexagonal backsplash tile, which provides a captivating contrast against the crisp white cabinetry. This bold design element not only adds visual interest but also ties the transitional style together with a modern twist.
High-end stainless steel appliances and well-placed fixtures ensure that this kitchen is as functional as it is stylish. The open shelves and glass-front cabinets provide the perfect opportunity to showcase your favorite dishware and decorative items.
This fully custom transitional kitchen is a perfect blend of traditional charm and contemporary design, creating a space that is both luxurious and welcoming. Experience the harmony of style and functionality in this one-of-a-kind culinary haven that will become the center of your home and the envy of all who visit.
triforcedesignbuild@gmail.com
Create a Houzz Description of a Fully custom Fireplace Wall with Builting cabinetry and accent lighting featuring a gas fireplace. with White cabinets, vaulted ceiling, open concept.
Step into this spectacular living space and experience the warmth and elegance of a fully custom fireplace wall that effortlessly combines style, function, and comfort. This stunning focal point is designed to captivate and create a cozy atmosphere, perfect for gathering with friends and family.
The centerpiece of this magnificent wall is the modern gas fireplace, which provides an inviting ambiance while requiring minimal maintenance. Framing the fireplace, you'll find impeccably crafted white built-in cabinetry that offers both storage and display options. These cabinets not only harmonize with the vaulted ceiling but also enhance the overall aesthetic of the open-concept space.
Accent lighting thoughtfully integrated within the built-in cabinetry and above the fireplace mantle adds a touch of sophistication and highlights your favorite decorative pieces or cherished family photos. The fireplace wall is further accentuated by the strategic placement of lighting, creating an inviting glow and showcasing the beautiful architectural details.
The open concept design seamlessly connects the living area with the rest of the home, allowing the warmth and elegance of the fireplace wall to be appreciated from multiple vantage points. The vaulted ceiling not only creates a sense of spaciousness but also draws the eye upward, emphasizing the grandeur of the space.
This fully custom fireplace wall with built-in cabinetry and accent lighting is the perfect blend of form and function, creating a warm and inviting environment that will serve as a true centerpiece of your home. Experience the charm and sophistication of this exceptional design, where every detail has been meticulously crafted to provide a sense of comfort and luxury.

 Art of Stone Gardening
Oklahoma flagstone steps with stone risers to the front door. The steps are flanked by shade loving ferns.
Design ideas for a traditional shade front yard stone garden path in Atlanta.
Design ideas for a traditional shade front yard stone garden path in Atlanta.

 Mood Design + Build
Sisel caroet runner with nail head detailing
Elegant wooden u-shaped staircase photo in Chicago with painted risers
Elegant wooden u-shaped staircase photo in Chicago with painted risers
Sponsored
Columbus, OH
Free consultation for landscape design!

Peabody Landscape Group
Franklin County's Reliable Landscape Design & Contracting

 Dordevic Architecture + Construction
Chilipics Photography
Large minimalist wooden l-shaped staircase photo in Atlanta with wooden risers
Large minimalist wooden l-shaped staircase photo in Atlanta with wooden risers


240