
Search results for "Optimal" in Home Design Ideas
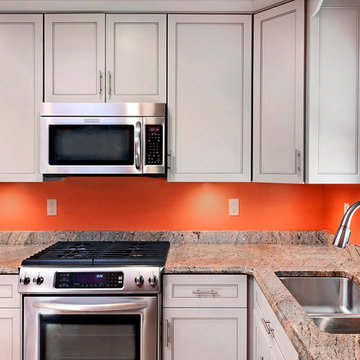
 Kitchen Saver
This gray kitchen was refaced with recessed panel doors and contemporary bar handles. The granite countertop has an ogee edge profile and an undermount double bowl sink. A range of conveniences were added, including a tip out tray and several cabinet optimizers, including a blind corner organizer.
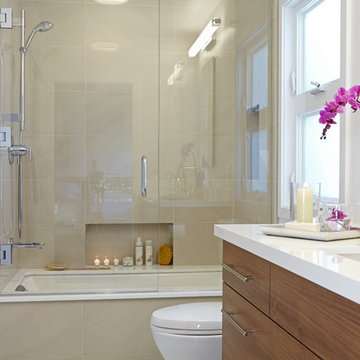
 SweisKloss
This bath remodel optimizes the limited space. Space saving techniques such as niches in the shower area and optimizing storage cabinets were key in making this small space feel spacious and uncluttered.
Photography: Doug Hill
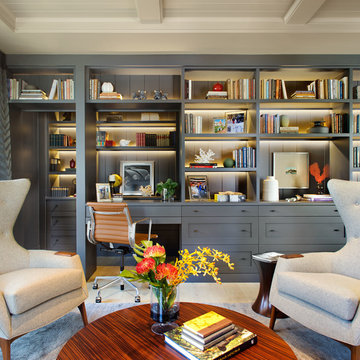
 Christian Rice Architects, Inc.
Coronado, CA
The Alameda Residence is situated on a relatively large, yet unusually shaped lot for the beachside community of Coronado, California. The orientation of the “L” shaped main home and linear shaped guest house and covered patio create a large, open courtyard central to the plan. The majority of the spaces in the home are designed to engage the courtyard, lending a sense of openness and light to the home. The aesthetics take inspiration from the simple, clean lines of a traditional “A-frame” barn, intermixed with sleek, minimal detailing that gives the home a contemporary flair. The interior and exterior materials and colors reflect the bright, vibrant hues and textures of the seaside locale.
Find the right local pro for your project
 User
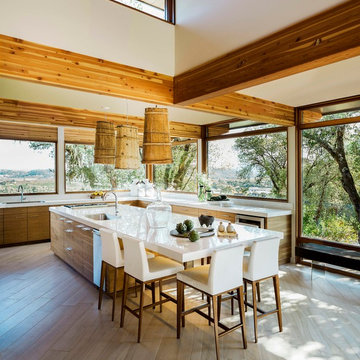
UserDesign by MAS Design in Oakland Ca
For more information on products and design visit http://www.houzz.com/projects/1409139/sonoma-county-organic-modern
 Western Window Systems
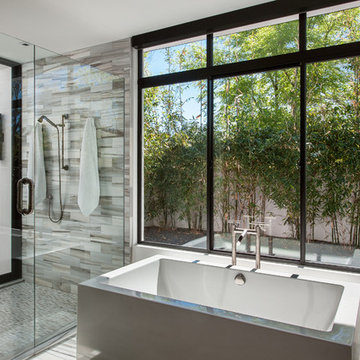
Praised for its visually appealing, modern yet comfortable design, this Scottsdale residence took home the gold in the 2014 Design Awards from Professional Builder magazine. Built by Calvis Wyant Luxury Homes, the 5,877-square-foot residence features an open floor plan that includes Western Window Systems’ multi-slide pocket doors to allow for optimal inside-to-outside flow. Tropical influences such as covered patios, a pool, and reflecting ponds give the home a lush, resort-style feel.
 KSI Kitchen & Bath
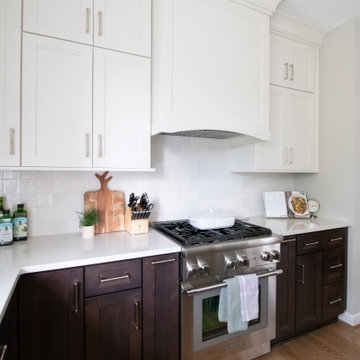
A couple from Seattle was preparing to move to Michigan and wanted to work with a design firm local to their new home for a kitchen remodel that would meet the needs of their growing family. They were referred to KSI and began their remodel journey with us from 2,000 miles away!
The client made it clear that there were several key challenges to address within the space:
Remove the double oven in the existing kitchen to optimize available space. Install a new hood vent above the range to add a sleek modern touch. Reconfigure the island to better utilize the space and provide more seating to enhance the functionality and movement within the space. Configure the cabinetry to be full height with a nice crown for more storage and a cohesive, elegant aesthetic. Changing the countertops, backsplash, and sink to refresh and modernize the appearance
 KSI Kitchen & Bath
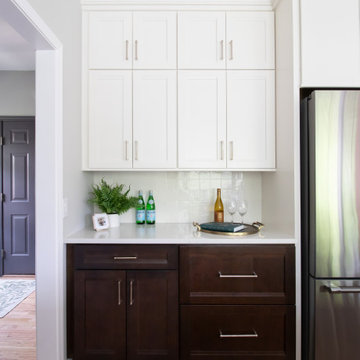
A couple from Seattle was preparing to move to Michigan and wanted to work with a design firm local to their new home for a kitchen remodel that would meet the needs of their growing family. They were referred to KSI and began their remodel journey with us from 2,000 miles away!
The client made it clear that there were several key challenges to address within the space:
Remove the double oven in the existing kitchen to optimize available space. Install a new hood vent above the range to add a sleek modern touch. Reconfigure the island to better utilize the space and provide more seating to enhance the functionality and movement within the space. Configure the cabinetry to be full height with a nice crown for more storage and a cohesive, elegant aesthetic. Changing the countertops, backsplash, and sink to refresh and modernize the appearance
 KSI Kitchen & Bath
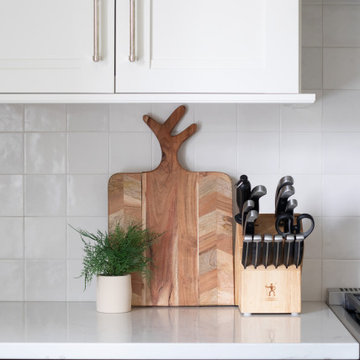
A couple from Seattle was preparing to move to Michigan and wanted to work with a design firm local to their new home for a kitchen remodel that would meet the needs of their growing family. They were referred to KSI and began their remodel journey with us from 2,000 miles away!
The client made it clear that there were several key challenges to address within the space:
Remove the double oven in the existing kitchen to optimize available space. Install a new hood vent above the range to add a sleek modern touch. Reconfigure the island to better utilize the space and provide more seating to enhance the functionality and movement within the space. Configure the cabinetry to be full height with a nice crown for more storage and a cohesive, elegant aesthetic. Changing the countertops, backsplash, and sink to refresh and modernize the appearance


 KSI Kitchen & Bath
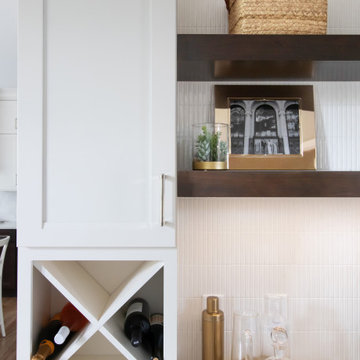
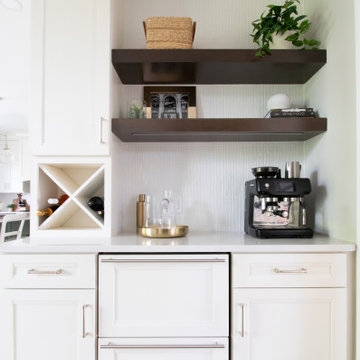
A couple from Seattle was preparing to move to Michigan and wanted to work with a design firm local to their new home for a kitchen remodel that would meet the needs of their growing family. They were referred to KSI and began their remodel journey with us from 2,000 miles away!
The client made it clear that there were several key challenges to address within the space:
Remove the double oven in the existing kitchen to optimize available space. Install a new hood vent above the range to add a sleek modern touch. Reconfigure the island to better utilize the space and provide more seating to enhance the functionality and movement within the space. Configure the cabinetry to be full height with a nice crown for more storage and a cohesive, elegant aesthetic. Changing the countertops, backsplash, and sink to refresh and modernize the appearance
 KSI Kitchen & Bath
A couple from Seattle was preparing to move to Michigan and wanted to work with a design firm local to their new home for a kitchen remodel that would meet the needs of their growing family. They were referred to KSI and began their remodel journey with us from 2,000 miles away!
The client made it clear that there were several key challenges to address within the space:
Remove the double oven in the existing kitchen to optimize available space. Install a new hood vent above the range to add a sleek modern touch. Reconfigure the island to better utilize the space and provide more seating to enhance the functionality and movement within the space. Configure the cabinetry to be full height with a nice crown for more storage and a cohesive, elegant aesthetic. Changing the countertops, backsplash, and sink to refresh and modernize the appearance
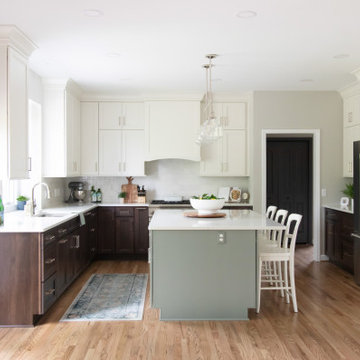 KSI Kitchen & Bath
A couple from Seattle was preparing to move to Michigan and wanted to work with a design firm local to their new home for a kitchen remodel that would meet the needs of their growing family. They were referred to KSI and began their remodel journey with us from 2,000 miles away!
The client made it clear that there were several key challenges to address within the space:
Remove the double oven in the existing kitchen to optimize available space. Install a new hood vent above the range to add a sleek modern touch. Reconfigure the island to better utilize the space and provide more seating to enhance the functionality and movement within the space. Configure the cabinetry to be full height with a nice crown for more storage and a cohesive, elegant aesthetic. Changing the countertops, backsplash, and sink to refresh and modernize the appearance
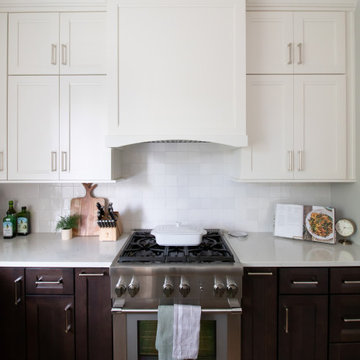 KSI Kitchen & Bath
A couple from Seattle was preparing to move to Michigan and wanted to work with a design firm local to their new home for a kitchen remodel that would meet the needs of their growing family. They were referred to KSI and began their remodel journey with us from 2,000 miles away!
The client made it clear that there were several key challenges to address within the space:
Remove the double oven in the existing kitchen to optimize available space. Install a new hood vent above the range to add a sleek modern touch. Reconfigure the island to better utilize the space and provide more seating to enhance the functionality and movement within the space. Configure the cabinetry to be full height with a nice crown for more storage and a cohesive, elegant aesthetic. Changing the countertops, backsplash, and sink to refresh and modernize the appearance
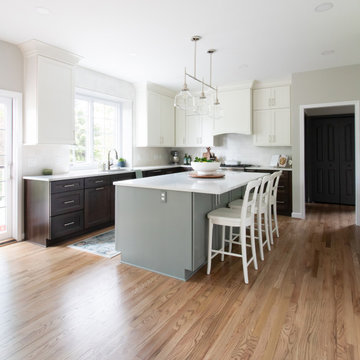 KSI Kitchen & Bath
A couple from Seattle was preparing to move to Michigan and wanted to work with a design firm local to their new home for a kitchen remodel that would meet the needs of their growing family. They were referred to KSI and began their remodel journey with us from 2,000 miles away!
The client made it clear that there were several key challenges to address within the space:
Remove the double oven in the existing kitchen to optimize available space. Install a new hood vent above the range to add a sleek modern touch. Reconfigure the island to better utilize the space and provide more seating to enhance the functionality and movement within the space. Configure the cabinetry to be full height with a nice crown for more storage and a cohesive, elegant aesthetic. Changing the countertops, backsplash, and sink to refresh and modernize the appearance
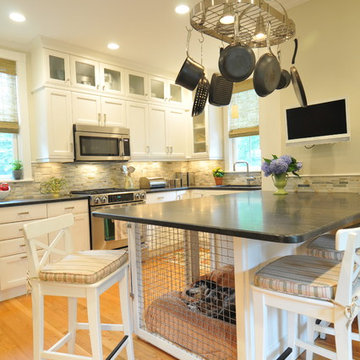
 Betsy Bassett Interiors
Recessed panel runs the length of the counter to create a finished look and to hide the dog den from guests.
Photo Credit: Betsy Bassett
Example of a mid-sized transitional u-shaped light wood floor and brown floor eat-in kitchen design in Boston with recessed-panel cabinets, white cabinets, gray backsplash, stainless steel appliances, an undermount sink, matchstick tile backsplash, a peninsula, gray countertops and soapstone countertops
Example of a mid-sized transitional u-shaped light wood floor and brown floor eat-in kitchen design in Boston with recessed-panel cabinets, white cabinets, gray backsplash, stainless steel appliances, an undermount sink, matchstick tile backsplash, a peninsula, gray countertops and soapstone countertops
 Dura Supreme Cabinetry
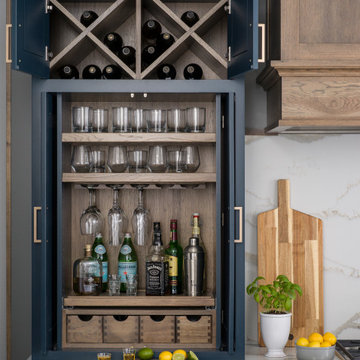
This modern farmhouse kitchen features a beautiful combination of Navy Blue painted and gray stained Hickory cabinets that’s sure to be an eye-catcher. The elegant “Morel” stain blends and harmonizes the natural Hickory wood grain while emphasizing the grain with a subtle gray tone that beautifully coordinated with the cool, deep blue paint.
The “Gale Force” SW 7605 blue paint from Sherwin-Williams is a stunning deep blue paint color that is sophisticated, fun, and creative. It’s a stunning statement-making color that’s sure to be a classic for years to come and represents the latest in color trends. It’s no surprise this beautiful navy blue has been a part of Dura Supreme’s Curated Color Collection for several years, making the top 6 colors for 2017 through 2020.
Beyond the beautiful exterior, there is so much well-thought-out storage and function behind each and every cabinet door. The two beautiful blue countertop towers that frame the modern wood hood and cooktop are two intricately designed larder cabinets built to meet the homeowner’s exact needs.
The larder cabinet on the left is designed as a beverage center with apothecary drawers designed for housing beverage stir sticks, sugar packets, creamers, and other misc. coffee and home bar supplies. A wine glass rack and shelves provides optimal storage for a full collection of glassware while a power supply in the back helps power coffee & espresso (machines, blenders, grinders and other small appliances that could be used for daily beverage creations. The roll-out shelf makes it easier to fill clean and operate each appliance while also making it easy to put away. Pocket doors tuck out of the way and into the cabinet so you can easily leave open for your household or guests to access, but easily shut the cabinet doors and conceal when you’re ready to tidy up.
Beneath the beverage center larder is a drawer designed with 2 layers of multi-tasking storage for utensils and additional beverage supplies storage with space for tea packets, and a full drawer of K-Cup storage. The cabinet below uses powered roll-out shelves to create the perfect breakfast center with power for a toaster and divided storage to organize all the daily fixings and pantry items the household needs for their morning routine.
On the right, the second larder is the ultimate hub and center for the homeowner’s baking tasks. A wide roll-out shelf helps store heavy small appliances like a KitchenAid Mixer while making them easy to use, clean, and put away. Shelves and a set of apothecary drawers help house an assortment of baking tools, ingredients, mixing bowls and cookbooks. Beneath the counter a drawer and a set of roll-out shelves in various heights provides more easy access storage for pantry items, misc. baking accessories, rolling pins, mixing bowls, and more.
The kitchen island provides a large worktop, seating for 3-4 guests, and even more storage! The back of the island includes an appliance lift cabinet used for a sewing machine for the homeowner’s beloved hobby, a deep drawer built for organizing a full collection of dishware, a waste recycling bin, and more!
All and all this kitchen is as functional as it is beautiful!
Request a FREE Dura Supreme Brochure Packet:
http://www.durasupreme.com/request-brochure
 Studio Dearborn
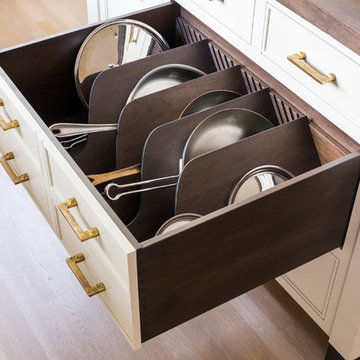
INTERNATIONAL AWARD WINNER. 2018 NKBA Design Competition Best Overall Kitchen. 2018 TIDA International USA Kitchen of the Year. 2018 Best Traditional Kitchen - Westchester Home Magazine design awards.
The designer's own kitchen was gutted and renovated in 2017, with a focus on classic materials and thoughtful storage. The 1920s craftsman home has been in the family since 1940, and every effort was made to keep finishes and details true to the original construction. For sources, please see the website at www.studiodearborn.com. Photography, Adam Kane Macchia and Timothy Lenz
 Living Stone Design + Build
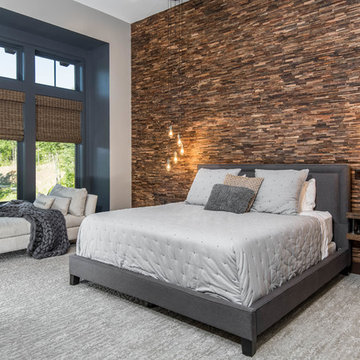
A rustic modern bedroom featuring warm reclaimed wood accents, a cozy ambiance, and large windows that invite natural light and mountain views, creating a relaxing and sustainable retreat in this organic mountain home.
 Dura Supreme Cabinetry
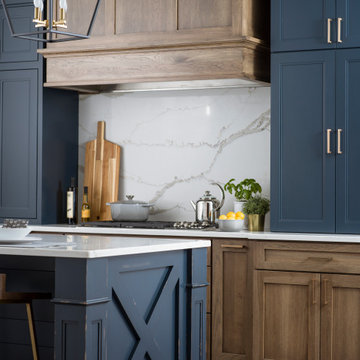
This modern farmhouse kitchen features a beautiful combination of Navy Blue painted and gray stained Hickory cabinets that’s sure to be an eye-catcher. The elegant “Morel” stain blends and harmonizes the natural Hickory wood grain while emphasizing the grain with a subtle gray tone that beautifully coordinated with the cool, deep blue paint.
The “Gale Force” SW 7605 blue paint from Sherwin-Williams is a stunning deep blue paint color that is sophisticated, fun, and creative. It’s a stunning statement-making color that’s sure to be a classic for years to come and represents the latest in color trends. It’s no surprise this beautiful navy blue has been a part of Dura Supreme’s Curated Color Collection for several years, making the top 6 colors for 2017 through 2020.
Beyond the beautiful exterior, there is so much well-thought-out storage and function behind each and every cabinet door. The two beautiful blue countertop towers that frame the modern wood hood and cooktop are two intricately designed larder cabinets built to meet the homeowner’s exact needs.
The larder cabinet on the left is designed as a beverage center with apothecary drawers designed for housing beverage stir sticks, sugar packets, creamers, and other misc. coffee and home bar supplies. A wine glass rack and shelves provides optimal storage for a full collection of glassware while a power supply in the back helps power coffee & espresso (machines, blenders, grinders and other small appliances that could be used for daily beverage creations. The roll-out shelf makes it easier to fill clean and operate each appliance while also making it easy to put away. Pocket doors tuck out of the way and into the cabinet so you can easily leave open for your household or guests to access, but easily shut the cabinet doors and conceal when you’re ready to tidy up.
Beneath the beverage center larder is a drawer designed with 2 layers of multi-tasking storage for utensils and additional beverage supplies storage with space for tea packets, and a full drawer of K-Cup storage. The cabinet below uses powered roll-out shelves to create the perfect breakfast center with power for a toaster and divided storage to organize all the daily fixings and pantry items the household needs for their morning routine.
On the right, the second larder is the ultimate hub and center for the homeowner’s baking tasks. A wide roll-out shelf helps store heavy small appliances like a KitchenAid Mixer while making them easy to use, clean, and put away. Shelves and a set of apothecary drawers help house an assortment of baking tools, ingredients, mixing bowls and cookbooks. Beneath the counter a drawer and a set of roll-out shelves in various heights provides more easy access storage for pantry items, misc. baking accessories, rolling pins, mixing bowls, and more.
The kitchen island provides a large worktop, seating for 3-4 guests, and even more storage! The back of the island includes an appliance lift cabinet used for a sewing machine for the homeowner’s beloved hobby, a deep drawer built for organizing a full collection of dishware, a waste recycling bin, and more!
All and all this kitchen is as functional as it is beautiful!
Request a FREE Dura Supreme Brochure Packet:
http://www.durasupreme.com/request-brochure
7