
Search results for "Outline' phases" in Home Design Ideas
 Ann Lowengart Interiors
The three-level Mediterranean revival home started as a 1930s summer cottage that expanded downward and upward over time. We used a clean, crisp white wall plaster with bronze hardware throughout the interiors to give the house continuity. A neutral color palette and minimalist furnishings create a sense of calm restraint. Subtle and nuanced textures and variations in tints add visual interest. The stair risers from the living room to the primary suite are hand-painted terra cotta tile in gray and off-white. We used the same tile resource in the kitchen for the island's toe kick.

 Zelaya Properties LLC
We used: Custom cherry cabinetry in Arts & Crafts Shaker style by Kabinart in Boulder and Espresso stains. Liberty Hardware Venetian bronze 1-1/2" cabinet knobs. KitchenAid Architect II Series 22 CF counter-depth French door refrigerator. KitchenAid Architect Series II 27" convection single wall oven. KitchenAid 36" 6-burner dual fuel freestanding commercial-style range. KitchenAid Architect II Series 24" dishwasher. Sharp Insight Pro Series 24" built-in microwave drawer (Model #KB6524PS). Crystorama Solaris 12" wide pendant lights in English bronze. Granite countertops in Brown Fantasy. 3"x6" polished marble backsplash.
Paint colors:
Walls: Glidden Silver Cloud 30YY 63/024
Ceilings/Trims/Doors: Glidden Swan White GLC23
Robert B. Narod Photography

 Moderne Builders
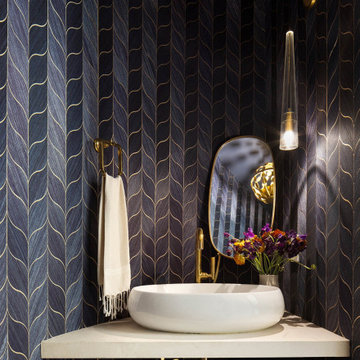
Gorgeous master bath with dramatic retro "wave" tile. Peak Photography
Example of a 1950s bathroom design in Los Angeles
Example of a 1950s bathroom design in Los Angeles
Find the right local pro for your project

 Moss Yaw Design studio
Engineered cedar siding creates beautiful gray-blue tones at the exterior of the home, while adding a textural element to activate the simple exterior design.
 Talon Construction Inc.
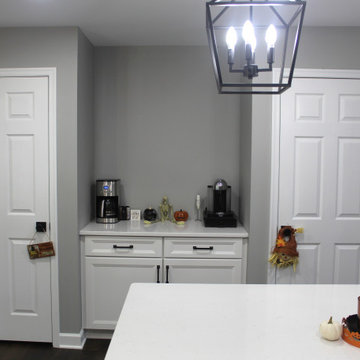
Designing and building a kitchen addition is a complex process that involves multiple steps and considerations. Here is a general outline to help you get started on your kitchen addition project:
Define Your Goals and Budget:
• Determine the purpose of the kitchen addition. Is it for more cooking space, a dining area, or a combination of both?
• Establish a realistic budget for your project. Consider all costs, including construction, permits, materials, and furnishings.
Hire a Design Professional:
• Seek the services of a design build company who specializes in kitchen additions.
• Discuss your vision, needs, and budget with the design professional to create a design concept.
Site Evaluation:
• Assess the existing space and structural condition of your home to ensure it can support the addition.
• Consider factors like zoning regulations, setbacks, and building codes.
Design Development:
• Collaborate with your design professional to refine the concept, including the layout, size, and architectural style.
• Choose materials, finishes, and fixtures that fit your design and budget.
Obtain Permits:
• Consult with your local design build contractor to determine the necessary permits and approvals.
• Prepare and submit all required documents, including architectural drawings and engineering plans.
Create Construction Documents:
• Work with your design build professional to develop detailed construction drawings and specifications.
• These documents will serve as a guide for contractors during construction.
Hire a design build contractor:
• Check references, credentials, and licenses before selecting a contractor.
• Sign a detailed contract that outlines the scope of work, timeline, and payment schedule.
Construction Phase:
• Demolition: If needed, remove any existing structures or walls.
• Foundation: Construct the foundation for the addition.
• Framing: Build the structural framework of the addition.
• Plumbing, Electrical, and HVAC: Install or update utilities as required.
• Insulation: Ensure proper insulation for energy efficiency.
• Drywall and Finish Work: Complete the walls and ceilings.
• Flooring and Cabinetry: Install flooring and kitchen cabinets.
• Appliances and Fixtures: Add appliances, plumbing fixtures, and lighting.
• Paint and Finish: Apply paint and finishes to achieve the desired look.
• Final Inspection: Schedule inspections to ensure compliance with building codes.
Final Inspections and Approvals:
• Arrange for final inspections to ensure the addition meets all safety and code requirements.
• Obtain any necessary certificates of occupancy or compliance.
Move In and Enjoy:
• Once all inspections and approvals are received, you can move into your new kitchen addition and start enjoying it.
Remember that every kitchen addition project is unique, so adapt this outline to your specific needs and circumstances. Consulting with professionals and obtaining the required permits and inspections is crucial to a successful and safe project.
 Talon Construction Inc.
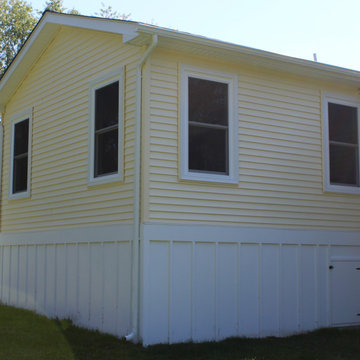
Designing and building a kitchen addition is a complex process that involves multiple steps and considerations. Here is a general outline to help you get started on your kitchen addition project:
Define Your Goals and Budget:
• Determine the purpose of the kitchen addition. Is it for more cooking space, a dining area, or a combination of both?
• Establish a realistic budget for your project. Consider all costs, including construction, permits, materials, and furnishings.
Hire a Design Professional:
• Seek the services of a design build company who specializes in kitchen additions.
• Discuss your vision, needs, and budget with the design professional to create a design concept.
Site Evaluation:
• Assess the existing space and structural condition of your home to ensure it can support the addition.
• Consider factors like zoning regulations, setbacks, and building codes.
Design Development:
• Collaborate with your design professional to refine the concept, including the layout, size, and architectural style.
• Choose materials, finishes, and fixtures that fit your design and budget.
Obtain Permits:
• Consult with your local design build contractor to determine the necessary permits and approvals.
• Prepare and submit all required documents, including architectural drawings and engineering plans.
Create Construction Documents:
• Work with your design build professional to develop detailed construction drawings and specifications.
• These documents will serve as a guide for contractors during construction.
Hire a design build contractor:
• Check references, credentials, and licenses before selecting a contractor.
• Sign a detailed contract that outlines the scope of work, timeline, and payment schedule.
Construction Phase:
• Demolition: If needed, remove any existing structures or walls.
• Foundation: Construct the foundation for the addition.
• Framing: Build the structural framework of the addition.
• Plumbing, Electrical, and HVAC: Install or update utilities as required.
• Insulation: Ensure proper insulation for energy efficiency.
• Drywall and Finish Work: Complete the walls and ceilings.
• Flooring and Cabinetry: Install flooring and kitchen cabinets.
• Appliances and Fixtures: Add appliances, plumbing fixtures, and lighting.
• Paint and Finish: Apply paint and finishes to achieve the desired look.
• Final Inspection: Schedule inspections to ensure compliance with building codes.
Final Inspections and Approvals:
• Arrange for final inspections to ensure the addition meets all safety and code requirements.
• Obtain any necessary certificates of occupancy or compliance.
Move In and Enjoy:
• Once all inspections and approvals are received, you can move into your new kitchen addition and start enjoying it.
Remember that every kitchen addition project is unique, so adapt this outline to your specific needs and circumstances. Consulting with professionals and obtaining the required permits and inspections is crucial to a successful and safe project.
 Talon Construction Inc.
Designing and building a kitchen addition is a complex process that involves multiple steps and considerations. Here is a general outline to help you get started on your kitchen addition project:
Define Your Goals and Budget:
• Determine the purpose of the kitchen addition. Is it for more cooking space, a dining area, or a combination of both?
• Establish a realistic budget for your project. Consider all costs, including construction, permits, materials, and furnishings.
Hire a Design Professional:
• Seek the services of a design build company who specializes in kitchen additions.
• Discuss your vision, needs, and budget with the design professional to create a design concept.
Site Evaluation:
• Assess the existing space and structural condition of your home to ensure it can support the addition.
• Consider factors like zoning regulations, setbacks, and building codes.
Design Development:
• Collaborate with your design professional to refine the concept, including the layout, size, and architectural style.
• Choose materials, finishes, and fixtures that fit your design and budget.
Obtain Permits:
• Consult with your local design build contractor to determine the necessary permits and approvals.
• Prepare and submit all required documents, including architectural drawings and engineering plans.
Create Construction Documents:
• Work with your design build professional to develop detailed construction drawings and specifications.
• These documents will serve as a guide for contractors during construction.
Hire a design build contractor:
• Check references, credentials, and licenses before selecting a contractor.
• Sign a detailed contract that outlines the scope of work, timeline, and payment schedule.
Construction Phase:
• Demolition: If needed, remove any existing structures or walls.
• Foundation: Construct the foundation for the addition.
• Framing: Build the structural framework of the addition.
• Plumbing, Electrical, and HVAC: Install or update utilities as required.
• Insulation: Ensure proper insulation for energy efficiency.
• Drywall and Finish Work: Complete the walls and ceilings.
• Flooring and Cabinetry: Install flooring and kitchen cabinets.
• Appliances and Fixtures: Add appliances, plumbing fixtures, and lighting.
• Paint and Finish: Apply paint and finishes to achieve the desired look.
• Final Inspection: Schedule inspections to ensure compliance with building codes.
Final Inspections and Approvals:
• Arrange for final inspections to ensure the addition meets all safety and code requirements.
• Obtain any necessary certificates of occupancy or compliance.
Move In and Enjoy:
• Once all inspections and approvals are received, you can move into your new kitchen addition and start enjoying it.
Remember that every kitchen addition project is unique, so adapt this outline to your specific needs and circumstances. Consulting with professionals and obtaining the required permits and inspections is crucial to a successful and safe project.
 Talon Construction Inc.
Designing and building a kitchen addition is a complex process that involves multiple steps and considerations. Here is a general outline to help you get started on your kitchen addition project:
Define Your Goals and Budget:
• Determine the purpose of the kitchen addition. Is it for more cooking space, a dining area, or a combination of both?
• Establish a realistic budget for your project. Consider all costs, including construction, permits, materials, and furnishings.
Hire a Design Professional:
• Seek the services of a design build company who specializes in kitchen additions.
• Discuss your vision, needs, and budget with the design professional to create a design concept.
Site Evaluation:
• Assess the existing space and structural condition of your home to ensure it can support the addition.
• Consider factors like zoning regulations, setbacks, and building codes.
Design Development:
• Collaborate with your design professional to refine the concept, including the layout, size, and architectural style.
• Choose materials, finishes, and fixtures that fit your design and budget.
Obtain Permits:
• Consult with your local design build contractor to determine the necessary permits and approvals.
• Prepare and submit all required documents, including architectural drawings and engineering plans.
Create Construction Documents:
• Work with your design build professional to develop detailed construction drawings and specifications.
• These documents will serve as a guide for contractors during construction.
Hire a design build contractor:
• Check references, credentials, and licenses before selecting a contractor.
• Sign a detailed contract that outlines the scope of work, timeline, and payment schedule.
Construction Phase:
• Demolition: If needed, remove any existing structures or walls.
• Foundation: Construct the foundation for the addition.
• Framing: Build the structural framework of the addition.
• Plumbing, Electrical, and HVAC: Install or update utilities as required.
• Insulation: Ensure proper insulation for energy efficiency.
• Drywall and Finish Work: Complete the walls and ceilings.
• Flooring and Cabinetry: Install flooring and kitchen cabinets.
• Appliances and Fixtures: Add appliances, plumbing fixtures, and lighting.
• Paint and Finish: Apply paint and finishes to achieve the desired look.
• Final Inspection: Schedule inspections to ensure compliance with building codes.
Final Inspections and Approvals:
• Arrange for final inspections to ensure the addition meets all safety and code requirements.
• Obtain any necessary certificates of occupancy or compliance.
Move In and Enjoy:
• Once all inspections and approvals are received, you can move into your new kitchen addition and start enjoying it.
Remember that every kitchen addition project is unique, so adapt this outline to your specific needs and circumstances. Consulting with professionals and obtaining the required permits and inspections is crucial to a successful and safe project.
 Talon Construction Inc.
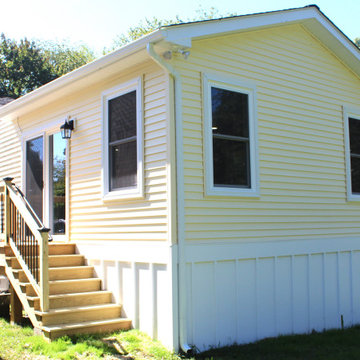
Designing and building a kitchen addition is a complex process that involves multiple steps and considerations. Here is a general outline to help you get started on your kitchen addition project:
Define Your Goals and Budget:
• Determine the purpose of the kitchen addition. Is it for more cooking space, a dining area, or a combination of both?
• Establish a realistic budget for your project. Consider all costs, including construction, permits, materials, and furnishings.
Hire a Design Professional:
• Seek the services of a design build company who specializes in kitchen additions.
• Discuss your vision, needs, and budget with the design professional to create a design concept.
Site Evaluation:
• Assess the existing space and structural condition of your home to ensure it can support the addition.
• Consider factors like zoning regulations, setbacks, and building codes.
Design Development:
• Collaborate with your design professional to refine the concept, including the layout, size, and architectural style.
• Choose materials, finishes, and fixtures that fit your design and budget.
Obtain Permits:
• Consult with your local design build contractor to determine the necessary permits and approvals.
• Prepare and submit all required documents, including architectural drawings and engineering plans.
Create Construction Documents:
• Work with your design build professional to develop detailed construction drawings and specifications.
• These documents will serve as a guide for contractors during construction.
Hire a design build contractor:
• Check references, credentials, and licenses before selecting a contractor.
• Sign a detailed contract that outlines the scope of work, timeline, and payment schedule.
Construction Phase:
• Demolition: If needed, remove any existing structures or walls.
• Foundation: Construct the foundation for the addition.
• Framing: Build the structural framework of the addition.
• Plumbing, Electrical, and HVAC: Install or update utilities as required.
• Insulation: Ensure proper insulation for energy efficiency.
• Drywall and Finish Work: Complete the walls and ceilings.
• Flooring and Cabinetry: Install flooring and kitchen cabinets.
• Appliances and Fixtures: Add appliances, plumbing fixtures, and lighting.
• Paint and Finish: Apply paint and finishes to achieve the desired look.
• Final Inspection: Schedule inspections to ensure compliance with building codes.
Final Inspections and Approvals:
• Arrange for final inspections to ensure the addition meets all safety and code requirements.
• Obtain any necessary certificates of occupancy or compliance.
Move In and Enjoy:
• Once all inspections and approvals are received, you can move into your new kitchen addition and start enjoying it.
Remember that every kitchen addition project is unique, so adapt this outline to your specific needs and circumstances. Consulting with professionals and obtaining the required permits and inspections is crucial to a successful and safe project.
 Talon Construction Inc.
Designing and building a kitchen addition is a complex process that involves multiple steps and considerations. Here is a general outline to help you get started on your kitchen addition project:
Define Your Goals and Budget:
• Determine the purpose of the kitchen addition. Is it for more cooking space, a dining area, or a combination of both?
• Establish a realistic budget for your project. Consider all costs, including construction, permits, materials, and furnishings.
Hire a Design Professional:
• Seek the services of a design build company who specializes in kitchen additions.
• Discuss your vision, needs, and budget with the design professional to create a design concept.
Site Evaluation:
• Assess the existing space and structural condition of your home to ensure it can support the addition.
• Consider factors like zoning regulations, setbacks, and building codes.
Design Development:
• Collaborate with your design professional to refine the concept, including the layout, size, and architectural style.
• Choose materials, finishes, and fixtures that fit your design and budget.
Obtain Permits:
• Consult with your local design build contractor to determine the necessary permits and approvals.
• Prepare and submit all required documents, including architectural drawings and engineering plans.
Create Construction Documents:
• Work with your design build professional to develop detailed construction drawings and specifications.
• These documents will serve as a guide for contractors during construction.
Hire a design build contractor:
• Check references, credentials, and licenses before selecting a contractor.
• Sign a detailed contract that outlines the scope of work, timeline, and payment schedule.
Construction Phase:
• Demolition: If needed, remove any existing structures or walls.
• Foundation: Construct the foundation for the addition.
• Framing: Build the structural framework of the addition.
• Plumbing, Electrical, and HVAC: Install or update utilities as required.
• Insulation: Ensure proper insulation for energy efficiency.
• Drywall and Finish Work: Complete the walls and ceilings.
• Flooring and Cabinetry: Install flooring and kitchen cabinets.
• Appliances and Fixtures: Add appliances, plumbing fixtures, and lighting.
• Paint and Finish: Apply paint and finishes to achieve the desired look.
• Final Inspection: Schedule inspections to ensure compliance with building codes.
Final Inspections and Approvals:
• Arrange for final inspections to ensure the addition meets all safety and code requirements.
• Obtain any necessary certificates of occupancy or compliance.
Move In and Enjoy:
• Once all inspections and approvals are received, you can move into your new kitchen addition and start enjoying it.
Remember that every kitchen addition project is unique, so adapt this outline to your specific needs and circumstances. Consulting with professionals and obtaining the required permits and inspections is crucial to a successful and safe project.
 Talon Construction Inc.
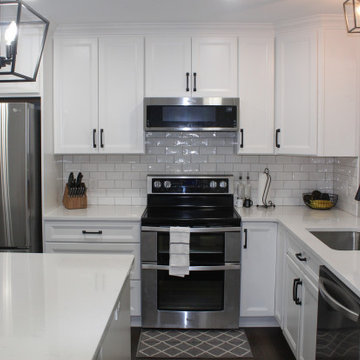
Designing and building a kitchen addition is a complex process that involves multiple steps and considerations. Here is a general outline to help you get started on your kitchen addition project:
Define Your Goals and Budget:
• Determine the purpose of the kitchen addition. Is it for more cooking space, a dining area, or a combination of both?
• Establish a realistic budget for your project. Consider all costs, including construction, permits, materials, and furnishings.
Hire a Design Professional:
• Seek the services of a design build company who specializes in kitchen additions.
• Discuss your vision, needs, and budget with the design professional to create a design concept.
Site Evaluation:
• Assess the existing space and structural condition of your home to ensure it can support the addition.
• Consider factors like zoning regulations, setbacks, and building codes.
Design Development:
• Collaborate with your design professional to refine the concept, including the layout, size, and architectural style.
• Choose materials, finishes, and fixtures that fit your design and budget.
Obtain Permits:
• Consult with your local design build contractor to determine the necessary permits and approvals.
• Prepare and submit all required documents, including architectural drawings and engineering plans.
Create Construction Documents:
• Work with your design build professional to develop detailed construction drawings and specifications.
• These documents will serve as a guide for contractors during construction.
Hire a design build contractor:
• Check references, credentials, and licenses before selecting a contractor.
• Sign a detailed contract that outlines the scope of work, timeline, and payment schedule.
Construction Phase:
• Demolition: If needed, remove any existing structures or walls.
• Foundation: Construct the foundation for the addition.
• Framing: Build the structural framework of the addition.
• Plumbing, Electrical, and HVAC: Install or update utilities as required.
• Insulation: Ensure proper insulation for energy efficiency.
• Drywall and Finish Work: Complete the walls and ceilings.
• Flooring and Cabinetry: Install flooring and kitchen cabinets.
• Appliances and Fixtures: Add appliances, plumbing fixtures, and lighting.
• Paint and Finish: Apply paint and finishes to achieve the desired look.
• Final Inspection: Schedule inspections to ensure compliance with building codes.
Final Inspections and Approvals:
• Arrange for final inspections to ensure the addition meets all safety and code requirements.
• Obtain any necessary certificates of occupancy or compliance.
Move In and Enjoy:
• Once all inspections and approvals are received, you can move into your new kitchen addition and start enjoying it.
Remember that every kitchen addition project is unique, so adapt this outline to your specific needs and circumstances. Consulting with professionals and obtaining the required permits and inspections is crucial to a successful and safe project.
 Modern Citi Group: Renovations & Remodeling
We helped Miki and David successfully execute a bathroom and kitchen remodel for their Co-op in New York City. The primary objective was to enhance the sense of space, functionality, and style while keeping the project on track and on budget.
To kickstart the project, Anna, the highly skilled project planner, conducted a thorough walkthrough with Miki and David. During the meeting, she captured their vision, outlined a realistic timeline, and carefully considered their budgetary restrictions.
Anna made sure to grasp their aspirations of modernizing the kitchen and bathroom, aiming to elevate both the aesthetics and practicality while incorporating a bespoke design tailored to their desires.
The design challenge was to modernize the outdated kitchen and bathroom while maintaining a budget-friendly approach. The clients opted for a Scandinavian style, featuring neutral olive green colors, stone, and natural wood materials. The designers explored various layouts to maximize functionality and accommodate the clients' preferences, providing Miki and David with multiple options. Eventually, the family made their design choices and felt assured as they entered the construction phase.
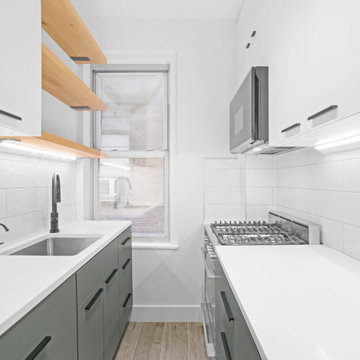
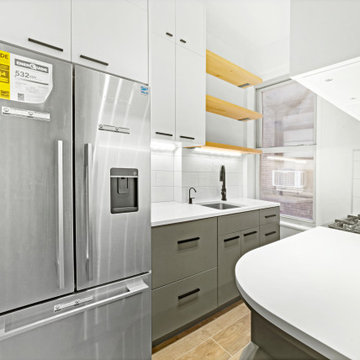
During the building phase, the construction team completed a gut renovation of the kitchen and bathroom, replacing ceilings, walls, floors, and all fixtures. The result was a stunning custom kitchen designed in the Scandinavian style featuring matte grey-green cabinetry, natural wood open shelving, a built-in pantry and appliances, and Vivid White Quartz countertops. The combination of sage base cabinets with grey undertones and modern, natural wood structures created a neutral and earthy impression, while the smooth white wall cabinets and countertops added a sleek and airy touch to the space.
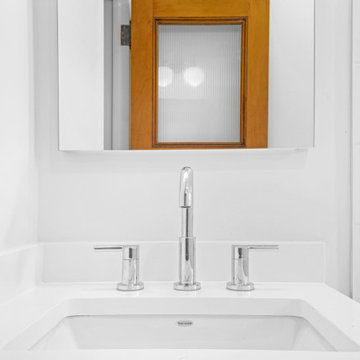
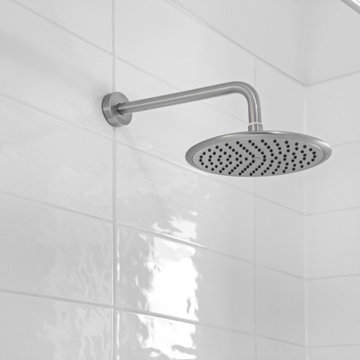
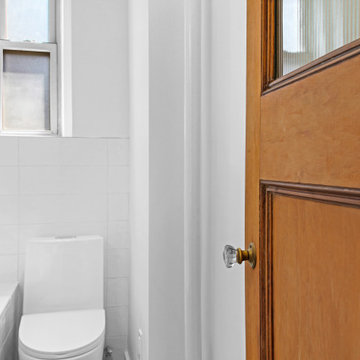
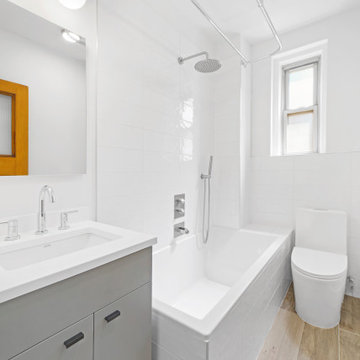
The bathroom renovation encompassed a full remodel, with all fixtures being replaced. A custom-ordered vanity in a matching grey-green shade was installed, along with the Maiolica White Polished Ceramic Wall Tile and Kohler and Delta fixtures. Within a few short weeks, Miki and David's new kitchen and bathroom were transformed to align perfectly with their style and vision, while significantly enhancing functionality.


 Modern Citi Group: Renovations & Remodeling
We helped Miki and David successfully execute a bathroom and kitchen remodel for their Co-op in New York City. The primary objective was to enhance the sense of space, functionality, and style while keeping the project on track and on budget.
To kickstart the project, Anna, the highly skilled project planner, conducted a thorough walkthrough with Miki and David. During the meeting, she captured their vision, outlined a realistic timeline, and carefully considered their budgetary restrictions.
Anna made sure to grasp their aspirations of modernizing the kitchen and bathroom, aiming to elevate both the aesthetics and practicality while incorporating a bespoke design tailored to their desires.
The design challenge was to modernize the outdated kitchen and bathroom while maintaining a budget-friendly approach. The clients opted for a Scandinavian style, featuring neutral olive green colors, stone, and natural wood materials. The designers explored various layouts to maximize functionality and accommodate the clients' preferences, providing Miki and David with multiple options. Eventually, the family made their design choices and felt assured as they entered the construction phase.
During the building phase, the construction team completed a gut renovation of the kitchen and bathroom, replacing ceilings, walls, floors, and all fixtures. The result was a stunning custom kitchen designed in the Scandinavian style featuring matte grey-green cabinetry, natural wood open shelving, a built-in pantry and appliances, and Vivid White Quartz countertops. The combination of sage base cabinets with grey undertones and modern, natural wood structures created a neutral and earthy impression, while the smooth white wall cabinets and countertops added a sleek and airy touch to the space.
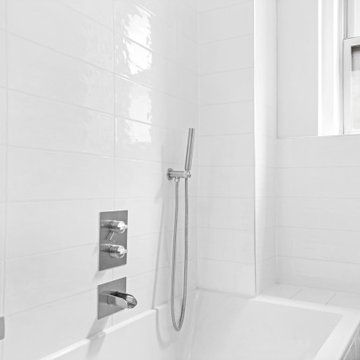
The bathroom renovation encompassed a full remodel, with all fixtures being replaced. A custom-ordered vanity in a matching grey-green shade was installed, along with the Maiolica White Polished Ceramic Wall Tile and Kohler and Delta fixtures. Within a few short weeks, Miki and David's new kitchen and bathroom were transformed to align perfectly with their style and vision, while significantly enhancing functionality.
 Modern Citi Group: Renovations & Remodeling
We helped Miki and David successfully execute a bathroom and kitchen remodel for their Co-op in New York City. The primary objective was to enhance the sense of space, functionality, and style while keeping the project on track and on budget.
To kickstart the project, Anna, the highly skilled project planner, conducted a thorough walkthrough with Miki and David. During the meeting, she captured their vision, outlined a realistic timeline, and carefully considered their budgetary restrictions.
Anna made sure to grasp their aspirations of modernizing the kitchen and bathroom, aiming to elevate both the aesthetics and practicality while incorporating a bespoke design tailored to their desires.
The design challenge was to modernize the outdated kitchen and bathroom while maintaining a budget-friendly approach. The clients opted for a Scandinavian style, featuring neutral olive green colors, stone, and natural wood materials. The designers explored various layouts to maximize functionality and accommodate the clients' preferences, providing Miki and David with multiple options. Eventually, the family made their design choices and felt assured as they entered the construction phase.
During the building phase, the construction team completed a gut renovation of the kitchen and bathroom, replacing ceilings, walls, floors, and all fixtures. The result was a stunning custom kitchen designed in the Scandinavian style featuring matte grey-green cabinetry, natural wood open shelving, a built-in pantry and appliances, and Vivid White Quartz countertops. The combination of sage base cabinets with grey undertones and modern, natural wood structures created a neutral and earthy impression, while the smooth white wall cabinets and countertops added a sleek and airy touch to the space.
The bathroom renovation encompassed a full remodel, with all fixtures being replaced. A custom-ordered vanity in a matching grey-green shade was installed, along with the Maiolica White Polished Ceramic Wall Tile and Kohler and Delta fixtures. Within a few short weeks, Miki and David's new kitchen and bathroom were transformed to align perfectly with their style and vision, while significantly enhancing functionality.
 Modern Citi Group: Renovations & Remodeling
We helped Miki and David successfully execute a bathroom and kitchen remodel for their Co-op in New York City. The primary objective was to enhance the sense of space, functionality, and style while keeping the project on track and on budget.
To kickstart the project, Anna, the highly skilled project planner, conducted a thorough walkthrough with Miki and David. During the meeting, she captured their vision, outlined a realistic timeline, and carefully considered their budgetary restrictions.
Anna made sure to grasp their aspirations of modernizing the kitchen and bathroom, aiming to elevate both the aesthetics and practicality while incorporating a bespoke design tailored to their desires.
The design challenge was to modernize the outdated kitchen and bathroom while maintaining a budget-friendly approach. The clients opted for a Scandinavian style, featuring neutral olive green colors, stone, and natural wood materials. The designers explored various layouts to maximize functionality and accommodate the clients' preferences, providing Miki and David with multiple options. Eventually, the family made their design choices and felt assured as they entered the construction phase.
During the building phase, the construction team completed a gut renovation of the kitchen and bathroom, replacing ceilings, walls, floors, and all fixtures. The result was a stunning custom kitchen designed in the Scandinavian style featuring matte grey-green cabinetry, natural wood open shelving, a built-in pantry and appliances, and Vivid White Quartz countertops. The combination of sage base cabinets with grey undertones and modern, natural wood structures created a neutral and earthy impression, while the smooth white wall cabinets and countertops added a sleek and airy touch to the space.
The bathroom renovation encompassed a full remodel, with all fixtures being replaced. A custom-ordered vanity in a matching grey-green shade was installed, along with the Maiolica White Polished Ceramic Wall Tile and Kohler and Delta fixtures. Within a few short weeks, Miki and David's new kitchen and bathroom were transformed to align perfectly with their style and vision, while significantly enhancing functionality.
 Modern Citi Group: Renovations & Remodeling
We helped Miki and David successfully execute a bathroom and kitchen remodel for their Co-op in New York City. The primary objective was to enhance the sense of space, functionality, and style while keeping the project on track and on budget.
To kickstart the project, Anna, the highly skilled project planner, conducted a thorough walkthrough with Miki and David. During the meeting, she captured their vision, outlined a realistic timeline, and carefully considered their budgetary restrictions.
Anna made sure to grasp their aspirations of modernizing the kitchen and bathroom, aiming to elevate both the aesthetics and practicality while incorporating a bespoke design tailored to their desires.
The design challenge was to modernize the outdated kitchen and bathroom while maintaining a budget-friendly approach. The clients opted for a Scandinavian style, featuring neutral olive green colors, stone, and natural wood materials. The designers explored various layouts to maximize functionality and accommodate the clients' preferences, providing Miki and David with multiple options. Eventually, the family made their design choices and felt assured as they entered the construction phase.
During the building phase, the construction team completed a gut renovation of the kitchen and bathroom, replacing ceilings, walls, floors, and all fixtures. The result was a stunning custom kitchen designed in the Scandinavian style featuring matte grey-green cabinetry, natural wood open shelving, a built-in pantry and appliances, and Vivid White Quartz countertops. The combination of sage base cabinets with grey undertones and modern, natural wood structures created a neutral and earthy impression, while the smooth white wall cabinets and countertops added a sleek and airy touch to the space.
The bathroom renovation encompassed a full remodel, with all fixtures being replaced. A custom-ordered vanity in a matching grey-green shade was installed, along with the Maiolica White Polished Ceramic Wall Tile and Kohler and Delta fixtures. Within a few short weeks, Miki and David's new kitchen and bathroom were transformed to align perfectly with their style and vision, while significantly enhancing functionality.
 Modern Citi Group: Renovations & Remodeling
We helped Miki and David successfully execute a bathroom and kitchen remodel for their Co-op in New York City. The primary objective was to enhance the sense of space, functionality, and style while keeping the project on track and on budget.
To kickstart the project, Anna, the highly skilled project planner, conducted a thorough walkthrough with Miki and David. During the meeting, she captured their vision, outlined a realistic timeline, and carefully considered their budgetary restrictions.
Anna made sure to grasp their aspirations of modernizing the kitchen and bathroom, aiming to elevate both the aesthetics and practicality while incorporating a bespoke design tailored to their desires.
The design challenge was to modernize the outdated kitchen and bathroom while maintaining a budget-friendly approach. The clients opted for a Scandinavian style, featuring neutral olive green colors, stone, and natural wood materials. The designers explored various layouts to maximize functionality and accommodate the clients' preferences, providing Miki and David with multiple options. Eventually, the family made their design choices and felt assured as they entered the construction phase.
During the building phase, the construction team completed a gut renovation of the kitchen and bathroom, replacing ceilings, walls, floors, and all fixtures. The result was a stunning custom kitchen designed in the Scandinavian style featuring matte grey-green cabinetry, natural wood open shelving, a built-in pantry and appliances, and Vivid White Quartz countertops. The combination of sage base cabinets with grey undertones and modern, natural wood structures created a neutral and earthy impression, while the smooth white wall cabinets and countertops added a sleek and airy touch to the space.
The bathroom renovation encompassed a full remodel, with all fixtures being replaced. A custom-ordered vanity in a matching grey-green shade was installed, along with the Maiolica White Polished Ceramic Wall Tile and Kohler and Delta fixtures. Within a few short weeks, Miki and David's new kitchen and bathroom were transformed to align perfectly with their style and vision, while significantly enhancing functionality.
 Modern Citi Group: Renovations & Remodeling
We helped Miki and David successfully execute a bathroom and kitchen remodel for their Co-op in New York City. The primary objective was to enhance the sense of space, functionality, and style while keeping the project on track and on budget.
To kickstart the project, Anna, the highly skilled project planner, conducted a thorough walkthrough with Miki and David. During the meeting, she captured their vision, outlined a realistic timeline, and carefully considered their budgetary restrictions.
Anna made sure to grasp their aspirations of modernizing the kitchen and bathroom, aiming to elevate both the aesthetics and practicality while incorporating a bespoke design tailored to their desires.
The design challenge was to modernize the outdated kitchen and bathroom while maintaining a budget-friendly approach. The clients opted for a Scandinavian style, featuring neutral olive green colors, stone, and natural wood materials. The designers explored various layouts to maximize functionality and accommodate the clients' preferences, providing Miki and David with multiple options. Eventually, the family made their design choices and felt assured as they entered the construction phase.
During the building phase, the construction team completed a gut renovation of the kitchen and bathroom, replacing ceilings, walls, floors, and all fixtures. The result was a stunning custom kitchen designed in the Scandinavian style featuring matte grey-green cabinetry, natural wood open shelving, a built-in pantry and appliances, and Vivid White Quartz countertops. The combination of sage base cabinets with grey undertones and modern, natural wood structures created a neutral and earthy impression, while the smooth white wall cabinets and countertops added a sleek and airy touch to the space.
The bathroom renovation encompassed a full remodel, with all fixtures being replaced. A custom-ordered vanity in a matching grey-green shade was installed, along with the Maiolica White Polished Ceramic Wall Tile and Kohler and Delta fixtures. Within a few short weeks, Miki and David's new kitchen and bathroom were transformed to align perfectly with their style and vision, while significantly enhancing functionality.

 14+CO Design Studio
Julie Florio Photography
Living room - mid-sized contemporary open concept light wood floor and beige floor living room idea in New York with white walls, a standard fireplace, a brick fireplace and a media wall
Living room - mid-sized contemporary open concept light wood floor and beige floor living room idea in New York with white walls, a standard fireplace, a brick fireplace and a media wall
2