
Search results for "Patio drain" in Home Design Ideas
 Tom's Outdoor Living
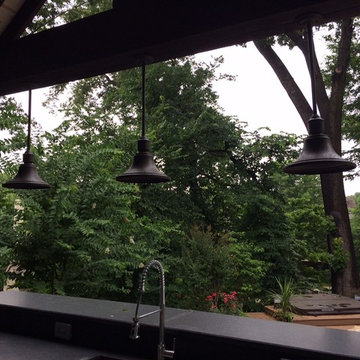
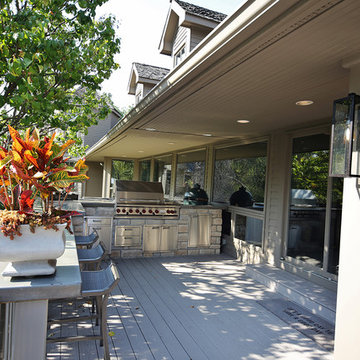
Here you can see the full extent of the fireplace and covered structure. We used copper drains to give it a nice, finished look, and topped it off with a new landscape.
 Horn & Co. (Previously JHLA)
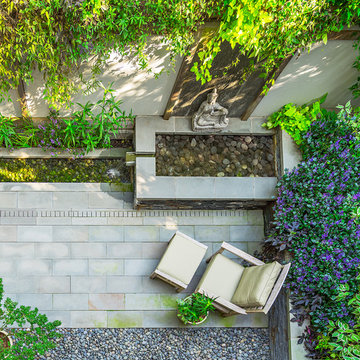
Inspiration for a small asian backyard stone patio fountain remodel in DC Metro with no cover
 Gallery KBNY
The owner of this historic and landmarked town-home renovation in Hudson Square, originally built in 1826, hired Gallery Kitchen and Bath to fully gut-renovate this 3-unit row-home. The scope of work included a full-scale renovation of the owners unit, including the renovation of the kitchen, one 4-piece master ensuite bathroom, one 3-piece bathroom with a walk-in steam shower, and a beautiful powder room. Additional work in the owners unit also included flooring, electrical upgrade, major plumbing work, new HVAC system, restoration of a fireplace, installation of a fully integrated smart home system and landmarked approved windows.
CELLAR RENOVATION IN NYC LANDMARKED TOWN-HOME
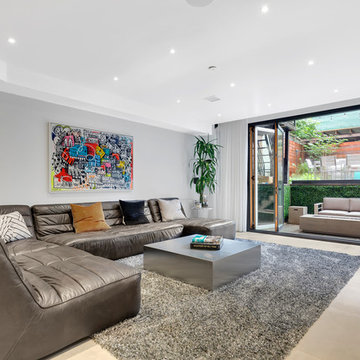
Rounding out the owners unit we renovated the cellar, which was converted into an entertainment space and featured a custom glass curtain wall, along with a custom staircase with an exposed brick wall. During the demolition phase of the cellar, our team discovered 56 wine jugs filled with wine from the prohibition era, leading us to name this project the prohibition house. For the two tenant units, Gallery Kitchen and Bath undertook the renovation of 2 kitchens, 4 bathrooms, new hardwood flooring throughout, along with detailed carpentry work in the entire home.
WHY GALLERY KITCHEN AND BATH
After interviewing multiple contractors, our client decided on Gallery Kitchen and Bath primarily because of our turnkey design, selection, and build process. In a renovation of this magnitude it is crucial to have a centralized full service contractor under one roof to handle all of the aspects and simultaneous moving parts of the project. Decentralizing the entire process by having multiple unaffiliated vendors handle various parts of the process can easily become chaotic, time consuming, and costly.
Because Gallery Kitchen and Bath undertook the entire process, from the design of the entire space to the selection and procurement of all finishes and fixtures, down to the procurement of all permits and LPC filings, it made a seemingly chaotic project a’lot more manageable.
PHASE 1: DESIGN, SELECTION, PROCUREMENT
Our client wanted the renovation to incorporate a fully modern design into his Hudson Square town-house. Being that this is a landmarked property, the exterior facade had to be restored and kept with the original aesthetic, the interior of the home however was a whole different story.
In keeping up with the modern aesthetic, our designers went to work to design a custom kitchen that included fully custom flat panel base cabinets in a white high gloss finish and an absolute matte black appliance/pantry wall. The kitchen design also included a white quartz countertop and backsplash with a waterfall edge island. To bring warmth to the modern kitchen, our designers incorporated a rifted and quartered select oak wood floor in a herringbone pattern, and custom blended stain with matte polyurethane finish. For continuity, the wood floor was also extended throughout the entire owners unit.
In the ensuite bathroom we created a “wet area” which houses a standalone soaking tub as well as a beautiful rainfall shower, completely leveled with the rest of the floor in the bathroom. Some highlights within this space include a tiled square drain, large niche cutouts with a carrera marble accents. Once again, to bring warmth to this modern bathroom, our designers incorporated a floating rustic oak vanity and carrera marble mosaic floor tile.
Last on the list on the owners unit floor was the cellar, which our client wanted to utilize as an entertainment space for his friends and family. During the design phase, we incorporated an open concept layout, wedding the indoor and outdoor space with a custom glass curtain wall. The design also included custom walnut built-ins that serve as a custom wet bar and storage piece.
With the design approved and selections made our office liaisons moved to procure all of the material selections and finishes.
PHASE 2: DEMO
Because this home is almost two centuries old, we had to take extra precaution during the interior demolition phase of the project. One specific area that we had to pay special attention to was the existing brick. Over time the mortar in old brick homes deteriorates and turns into dust – for this reason it was extremely important that a thorough and ongoing inspection of the exteriors and interior walls took place during the demolition of the space.
After 14 30-yard debris containers and 56 wine filled jugs from the prohibition era later , the demolition of this historic Hudson Square town-home came to an end. If you are wondering whether we tried the wine? After notifying the owner we agreed to open one of the jugs and try them together – nothing but vinegar.
PHASE 3: BUILD
One of the challenges in a renovation project of this scope is nailing down the logistics and delivery of fixtures and finish material. Adding to this challenge was a narrow entry door that required us to use a boom truck in order to deliver some of the larger materials on site. To ensure a succinct time schedule, we boomed all of the materials through the 3rd floor for the entire project and worked our renovation work from top floor to cellar. This technique also insured that any unexpected water issues during the renovation process would not damage a finished floor.
With all roughing and framing complete, the Gallery KBNY team proceeded to execute on the design plan.
THE REVEAL
From what was once a dilapidated town-home with nothing but potential, to a glamorous and luxurious modern interior space – the prohibition house was complete. Ready to speak with us about your renovation project? Contact us to schedule your free consultation and let Gallery KBNY show you why our all-inclusive approach to your renovation is the smartest way to renovating in NYC.
Find the right local pro for your project
 Horn & Co. (Previously JHLA)
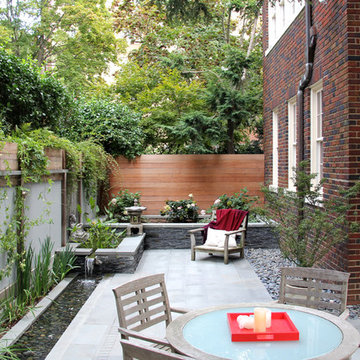
Our clients on this project were inspired by their travels to Asia and wanted to mimic this aesthetic at their DC property. We designed a water feature that effectively masks adjacent traffic noise and maintains a small footprint.


 The Crafted Garden
This dry river bed was designed and planted to connect with a French drain necessary to control water rolling across the driveway. I added a variety of different-sized gravel, stones and boulders for a natural look.
Design, install, photo - Susan Irving
 Charlotte DreamScapes
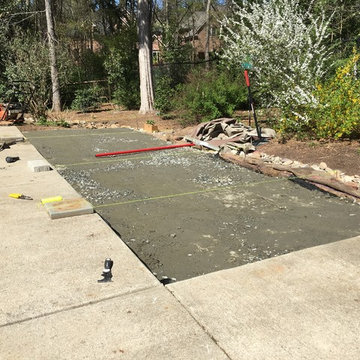
DURING construction: We are installing 5.1 tons of compacted ABC crush and run for the patio foundation and grading the surface to match the height of the surrounding concrete patio and drain to the back.

 Charlotte DreamScapes
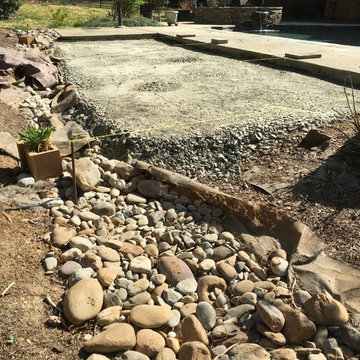
DURING construction: We are installing 5.1 tons of compacted ABC crush and run for the patio foundation and grading the surface to match the height of the surrounding concrete patio and drain to the back.
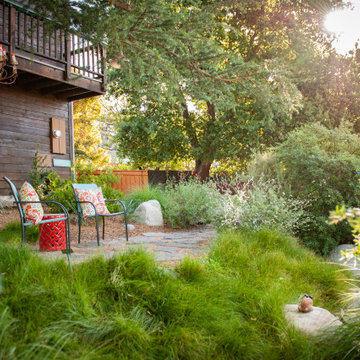
 FormLA Landscaping
This delightfully private patio sits under expansive tree canopy in the front garden. Wrapped in dense, native foliage it is full of fragrance and wildlife. Natural stone with decomposed granite joints allows water to sink into the soil to feed the surrounding foliage.
The homeowners enjoy taking their coffee and lunch under the vintage chandelier.
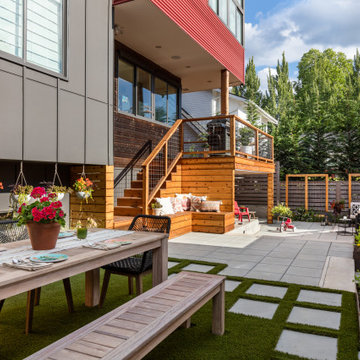

 RetractableAwnings.com Inc.
PROJECT DESCRIPTION:
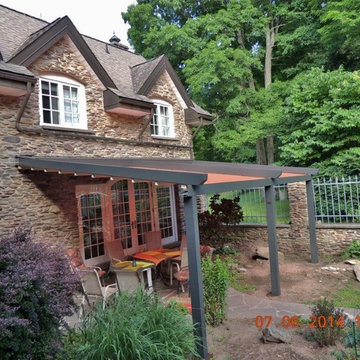
The client requested a large (19 foot wide by 15 foot projection) two-span retractable waterproof patio cover system to provide heavy rain, hail, heat, sun, glare and UV protection. This would allow our client to sit outside and enjoy their garden throughout the year, extending their outdoor entertainment space. For functionality they requested that water drain from the rear of the system into the front beam and down inside the right end post, exiting at the bottom from a tiny hole and draining into the flower beds thus preventing rain water from simply dropping off the front of the unit. The entire system used one continuous piece of fabric and one motor. The uprights and guides meet together at a smooth L-shaped angle, flush at the top for a perfectly smooth profile. The system has a Beaufort wind load rating Scale 10 (up to 63 mph) with the fabric fully extended and in use. A grey hood was also used to prevent rain water, debris and snow from collecting in the folds of fabric when not in use. A running profile from end to end in the rear of the unit was used to attach the Somfy RTS motor which is installed inside a motor safety box. Circular concrete footers were installed in the grassy area in front of the unit for mounting the 3 posts. To allow for a flat vertical mounting surface, a ledger board using pressure-treated wood was mounted the full 19-foot wall width, as the client’s house was made of uneven, thick stone.
PURPOSE OF THE PROJECT:
The client’s intention was for installation of a retractable waterproof patio cover system to provide heavy rain, hail, heat, sun, glare and UV protection for their backyard patio area.
What is unique or complex about the project?
This project was difficult for two main reasons: 1. Very large installation fasteners needed to be used to install through the above referenced ledger board and deep in to the stone structure of the house. 2. The motor cable needed to be placed through deeply drilled holes as the stone wall house wall is 15” thick. Drilling through en-even stone was definitely a challenge.
PROJECT RESULTS
The client was delighted with the results. The retractable patio cover system now makes it possible for the client to use a very large area in the rear of their house 24/7, 365 with the exclusion of snow. Since the client was very happy, they will be covering the ends, front and sides with our motorized vertical drop zippered awnings. Gable ends will also be covered with fixed fabric panels. Enclosing the entire area will allow the customer to heat the space in the winter and air condition the space in the summer.
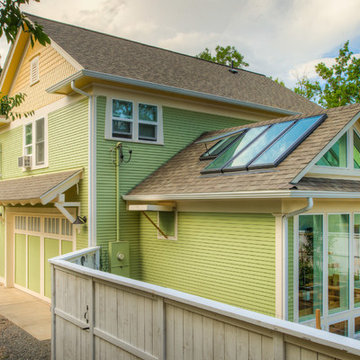
 Van Matre Construction, LLC
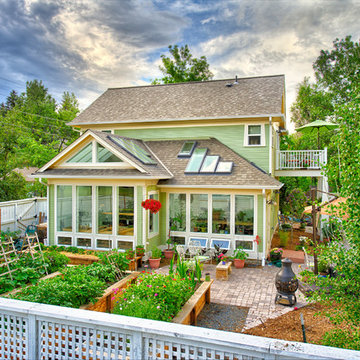
Patio, greenhouse, garage, artist's studio
Venting awning window, planter boxes
William Horton
Example of an arts and crafts shed design in Denver
Example of an arts and crafts shed design in Denver
 Van Matre Construction, LLC
Patio, greenhouse, garage, artist's studio
Venting awning window, planter boxes
William Horton
Shed - craftsman shed idea in Denver
Shed - craftsman shed idea in Denver
Sponsored
Columbus, OH

Snider & Metcalf Interior Design, LTD
Leading Interior Designers in Columbus, Ohio & Ponte Vedra, Florida

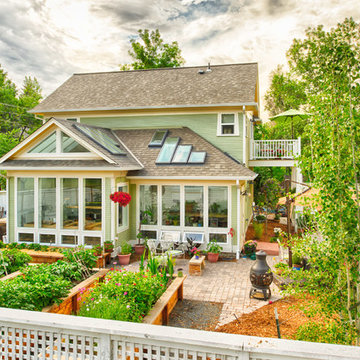 Van Matre Construction, LLC
Patio, greenhouse, garage, artist's studio
Venting awning window, planter boxes
William Horton
Example of an arts and crafts shed design in Denver
Example of an arts and crafts shed design in Denver
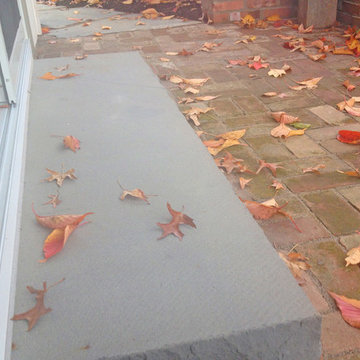
 C.E. Pontz Sons
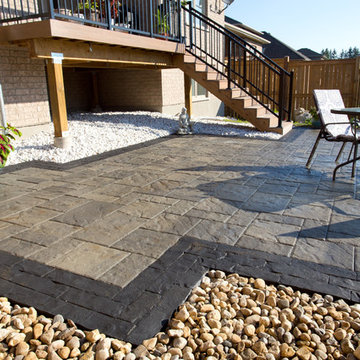
This Project consisted of lifting the existing bricks and storing them on site, remove a portion of the existing brick walls and remove wall caps, install new flagstone wall caps to provide 1″ overhang on each side, pressure wash sitting walls, excavate the existing patio stone dust base and discard of it, excavate patio to proper base depth of 8″+- and install a proper 2A Modified stone base. We then installed a 1″ sand setting bed and reinstalled the existing brick pavers. The new installation also included drainage pipe and catches to allow water to escape the patio and drain beyond the foot print of the patio, house and shed.
Also included were removal the existing upper flagstone patio and walking path, leveling the path and lay larger pieces of flagstone in the upper patio. We will also install proper joint material between the flagstone for a more uniform walking surface. We also used the existing flagstone to make small garden paths in place of the brick paths.
Lastly, included was grading a small swale in the back lawn to divert water around to the sides of the house and away from the rear patio area.
A drainage system along the right side of the shed to collect ground water as well as downspouts along that side of the shed and carport and move the water to the street through 4″ solid drainage pipes was also installed.
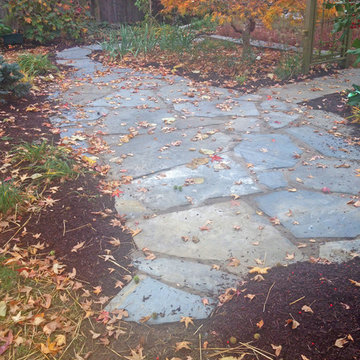 C.E. Pontz Sons
This Project consisted of lifting the existing bricks and storing them on site, remove a portion of the existing brick walls and remove wall caps, install new flagstone wall caps to provide 1″ overhang on each side, pressure wash sitting walls, excavate the existing patio stone dust base and discard of it, excavate patio to proper base depth of 8″+- and install a proper 2A Modified stone base. We then installed a 1″ sand setting bed and reinstalled the existing brick pavers. The new installation also included drainage pipe and catches to allow water to escape the patio and drain beyond the foot print of the patio, house and shed.
Also included were removal the existing upper flagstone patio and walking path, leveling the path and lay larger pieces of flagstone in the upper patio. We will also install proper joint material between the flagstone for a more uniform walking surface. We also used the existing flagstone to make small garden paths in place of the brick paths.
Lastly, included was grading a small swale in the back lawn to divert water around to the sides of the house and away from the rear patio area.
A drainage system along the right side of the shed to collect ground water as well as downspouts along that side of the shed and carport and move the water to the street through 4″ solid drainage pipes was also installed.
Sponsored
Columbus, OH

Structural Remodeling
Franklin County's Heavy Timber Specialists | Best of Houzz 2020!
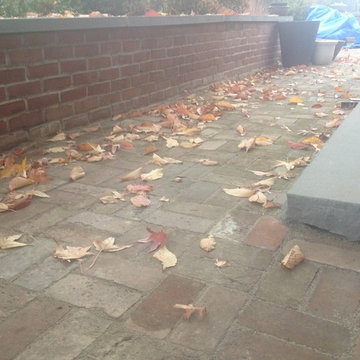 C.E. Pontz Sons
This Project consisted of lifting the existing bricks and storing them on site, remove a portion of the existing brick walls and remove wall caps, install new flagstone wall caps to provide 1″ overhang on each side, pressure wash sitting walls, excavate the existing patio stone dust base and discard of it, excavate patio to proper base depth of 8″+- and install a proper 2A Modified stone base. We then installed a 1″ sand setting bed and reinstalled the existing brick pavers. The new installation also included drainage pipe and catches to allow water to escape the patio and drain beyond the foot print of the patio, house and shed.
Also included were removal the existing upper flagstone patio and walking path, leveling the path and lay larger pieces of flagstone in the upper patio. We will also install proper joint material between the flagstone for a more uniform walking surface. We also used the existing flagstone to make small garden paths in place of the brick paths.
Lastly, included was grading a small swale in the back lawn to divert water around to the sides of the house and away from the rear patio area.
A drainage system along the right side of the shed to collect ground water as well as downspouts along that side of the shed and carport and move the water to the street through 4″ solid drainage pipes was also installed.
 C.E. Pontz Sons
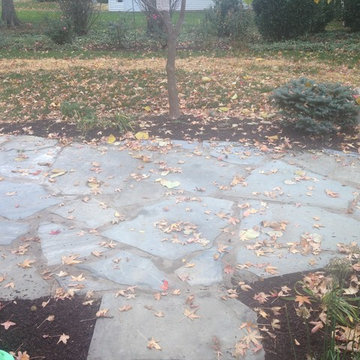
This Project consisted of lifting the existing bricks and storing them on site, remove a portion of the existing brick walls and remove wall caps, install new flagstone wall caps to provide 1″ overhang on each side, pressure wash sitting walls, excavate the existing patio stone dust base and discard of it, excavate patio to proper base depth of 8″+- and install a proper 2A Modified stone base. We then installed a 1″ sand setting bed and reinstalled the existing brick pavers. The new installation also included drainage pipe and catches to allow water to escape the patio and drain beyond the foot print of the patio, house and shed.
Also included were removal the existing upper flagstone patio and walking path, leveling the path and lay larger pieces of flagstone in the upper patio. We will also install proper joint material between the flagstone for a more uniform walking surface. We also used the existing flagstone to make small garden paths in place of the brick paths.
Lastly, included was grading a small swale in the back lawn to divert water around to the sides of the house and away from the rear patio area.
A drainage system along the right side of the shed to collect ground water as well as downspouts along that side of the shed and carport and move the water to the street through 4″ solid drainage pipes was also installed.
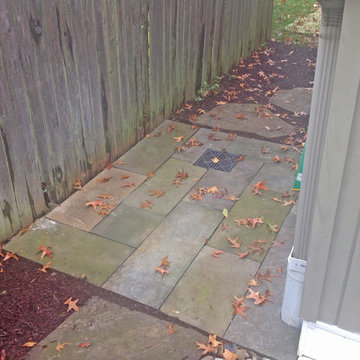 C.E. Pontz Sons
This Project consisted of lifting the existing bricks and storing them on site, remove a portion of the existing brick walls and remove wall caps, install new flagstone wall caps to provide 1″ overhang on each side, pressure wash sitting walls, excavate the existing patio stone dust base and discard of it, excavate patio to proper base depth of 8″+- and install a proper 2A Modified stone base. We then installed a 1″ sand setting bed and reinstalled the existing brick pavers. The new installation also included drainage pipe and catches to allow water to escape the patio and drain beyond the foot print of the patio, house and shed.
Also included were removal the existing upper flagstone patio and walking path, leveling the path and lay larger pieces of flagstone in the upper patio. We will also install proper joint material between the flagstone for a more uniform walking surface. We also used the existing flagstone to make small garden paths in place of the brick paths.
Lastly, included was grading a small swale in the back lawn to divert water around to the sides of the house and away from the rear patio area.
A drainage system along the right side of the shed to collect ground water as well as downspouts along that side of the shed and carport and move the water to the street through 4″ solid drainage pipes was also installed.
11