
Search results for "Perfect reward" in Home Design Ideas
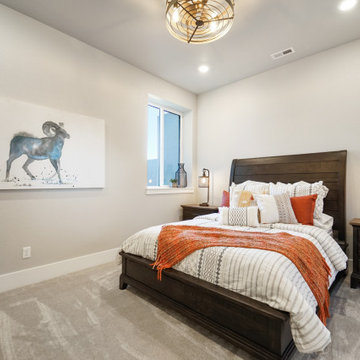
 Housing & Building Association of Colorado Springs
The Home
The Elbert, named after a Colorado fourteener, is designed in the modern farmhouse style with an open concept that creates a
welcoming feeling. The two-story entry light compliments the incredible view of Pikes Peak. The main level includes a gourmet kitchen
open to the great room, dining room and study. The master suite is an owner’s delight with a separate seating area that opens to a
spa-like master bathroom.
Moving up a level will reveal one of JS Homes’ specialties. Utilizing often overlooked space, we bring our East Coast influences to the
Colorado Springs market by using the attic for additional living space without adding another floor. This results in higher roof lines and a majestic appearance. Two bedrooms, a bathroom and a bonus room will be a delight for the kids in the family.
The ten-foot ceiling in the lower-level was designed with entertaining in mind. Two bedrooms, a shared bath and an exercise room complete the ensemble. Building within Flying Horse North, we were able to incorporate unique materials including stucco, barnwood, stone and pre-finished western red cedar.
JS Homes is proud to present The Elbert.
The Builder
Building homes for over 10 years, Jeff and Sonja Cole have been gifted to create a company that listens to our clients’ needs and desires and strives to capture those visions in their creations. Before becoming a home builder, Jeff was an interior trim carpenter specializing in new custom homes in the Denver and East Coast markets. This gave him a unique perspective on space and design. Jeff stays current with the changing plans and movements in home design by attending national shows and following contemporary design trends.
Sonja takes the lead on interior design, plan review and draw coordination, in addition to being the REALTOR® who makes all our transactions possible.
We are blessed to have an incredible staff of trade partners and vendors who are willing to spend time on our projects. Without them we would not be JS Homes Inc.
The Interior Design
This Flying Horse North lot was a perfect setting for The Elbert, a modern farmhouse. From the moment you walk through the front door, your sightline is drawn to the incredible Pikes Peak view. We sought to capture the large space by blending a mix of different materials and textures. Superior craftsmanship incorporates a mixture of materials, from knotty alder and walnut on the main level, to hickory and quarter-sawn oak elsewhere, creating a rich and rewarding feel. Luxe granites complimented by beautiful tile work add depth and movement in many areas of the house — creating a refined feeling. Working with Jessica Brown of La-Z-Boy Furniture Galleries, we designed a palette of colors, patterns and rich textures to enhance and compliment the interior finishes. A mixture of grays, blues and whites provides a timeless, fresh and family friendly environment that makes The Elbert a sanctuary for entertaining and relaxing.
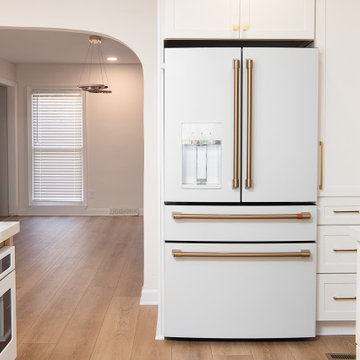
 Reico Kitchen & Bath
Lauren Hunt from Reico Kitchen and Bath in Charlotte, NC, worked with The Atta Group to design a transitional-inspired kitchen and bar using Masterpiece cabinetry. The kitchen features Masterpiece cabinets in the Martel Evercore doorstyle in a Frost finish on the perimeter.
The kitchen island and bar area both features the same doorstyle with a combination of two different finishes, Riverbed and Shortbread. The countertops are Calacatta Macchia Vecchia Sapien Stone Porcelain.
The client shared their experience, saying, “I love the range hood and the slatted island decor. Riverbed is a beautiful color in both sun and shade. Lauren’s advice to get samples and lay them out in different lighting was invaluable. She went above and beyond, even coming out in the parking lot on a hot summer day to help us. We truly couldn’t have done this without her. Lauren was always patient and supportive as we made decisions, and she never pressured us. Any future projects we have, we’ll 100% reach out to Lauren. She even welcomed our newborn to the showroom!”
Lauren shared, “The clients came with a clear aesthetic vision and plenty of inspiration photos, but they gave me the freedom to recommend and create a space that worked for their growing family while still looking great. We added design details like two-toned dining room cabinets, dark accent shelves in glass towers, an arched valance to match the doorways, and a custom hood that pulls from the island finishes. My favorite element is the slatted accent on the island, which the installers executed perfectly.
This renovation was a big project, starting with a blank slate, which can be overwhelming with so many options. But it was incredibly rewarding to work with these clients who had such a creative vision. We really worked together to create a space that met their needs while showcasing their style. It was a team effort, and I hope that comes through in the final design.”
Photos courtesy of Six Cents Media.
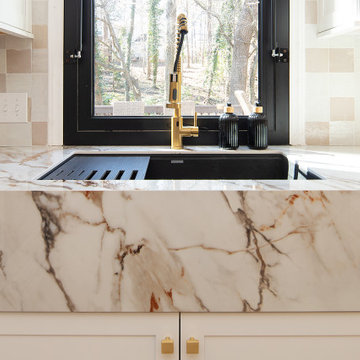 Reico Kitchen & Bath
Lauren Hunt from Reico Kitchen and Bath in Charlotte, NC, worked with The Atta Group to design a transitional-inspired kitchen and bar using Masterpiece cabinetry. The kitchen features Masterpiece cabinets in the Martel Evercore doorstyle in a Frost finish on the perimeter.
The kitchen island and bar area both features the same doorstyle with a combination of two different finishes, Riverbed and Shortbread. The countertops are Calacatta Macchia Vecchia Sapien Stone Porcelain.
The client shared their experience, saying, “I love the range hood and the slatted island decor. Riverbed is a beautiful color in both sun and shade. Lauren’s advice to get samples and lay them out in different lighting was invaluable. She went above and beyond, even coming out in the parking lot on a hot summer day to help us. We truly couldn’t have done this without her. Lauren was always patient and supportive as we made decisions, and she never pressured us. Any future projects we have, we’ll 100% reach out to Lauren. She even welcomed our newborn to the showroom!”
Lauren shared, “The clients came with a clear aesthetic vision and plenty of inspiration photos, but they gave me the freedom to recommend and create a space that worked for their growing family while still looking great. We added design details like two-toned dining room cabinets, dark accent shelves in glass towers, an arched valance to match the doorways, and a custom hood that pulls from the island finishes. My favorite element is the slatted accent on the island, which the installers executed perfectly.
This renovation was a big project, starting with a blank slate, which can be overwhelming with so many options. But it was incredibly rewarding to work with these clients who had such a creative vision. We really worked together to create a space that met their needs while showcasing their style. It was a team effort, and I hope that comes through in the final design.”
Photos courtesy of Six Cents Media.
Find the right local pro for your project

 Industrial Projects
Creating a comfortable outdoor living space is a priority for many homeowners and DIY enthusiasts. With rising summer temperatures, installing a shade tarp in your backyard offers an affordable and effective solution for sun protection. We’ve developed this detailed, step-by-step guide to help you confidently install a shade tarp that not only shields you from the sun but also adds aesthetic appeal to your outdoor area.
Benefits of Installing a Backyard Shade Tarp
Before diving into the installation process, let’s explore the key benefits of having a backyard shade tarp:
Provides UV Protection: Keeps your family and guests safe from harmful sun exposure.
Reduces Outdoor Temperatures: Creates a cooler, more enjoyable outdoor space.
Protects Outdoor Furniture: Extends the life of patio furniture by reducing sun damage.
Enhances Outdoor Aesthetics: Adds a modern, stylish look to your yard.
Budget-Friendly: More affordable compared to permanent structures like pergolas.
Materials and Tools You’ll Need
To begin your DIY backyard shade project, gather the following materials and tools:
Materials:
Shade tarp (UV-resistant and breathable)
Sturdy posts or existing structures (trees, fences, walls)
Mounting hardware (eye bolts, D-rings, turnbuckles, snap hooks)
Nylon or polyester rope, or stainless-steel wire
Concrete (if installing new posts)
Tools:
Power drill
Measuring tape
Level
Ladder
Wrench or adjustable spanner
Post hole digger (if installing new posts)
Step 1: Plan Your Shade Tarp Layout
The first step in installing your backyard shade tarp is careful planning. Take time to assess your outdoor area and answer these key questions:
Where is the sun’s path throughout the day?
What size and shape of tarp best suits your space?
Will you anchor the tarp to existing structures or install new posts?
What height do you want the tarp to sit at for maximum shade and airflow?
Pro Tip: Use string or garden hoses to visualize the tarp layout on the ground before making permanent decisions.
Step 2: Measure and Mark Anchor Points
Once you’ve determined the tarp’s location and orientation:
Measure the tarp dimensions.
Mark the exact points where each corner of the tarp will be anchored.
Ensure that the anchor points are at least 5–10% longer than the tarp size to allow for tensioning and slight adjustments.
Consider slope angles for water runoff. Aim for at least a 20-degree angle to prevent water pooling on the tarp.
Step 3: Install Support Posts (If Necessary)
If your backyard lacks existing anchor points like trees or fences, you’ll need to install sturdy support posts:
Dig post holes at least 24 inches deep and 8-12 inches wide for stability.
Set posts in concrete, making sure they remain plumb and level.
Allow the concrete to cure for at least 24–48 hours before applying tension from the tarp.
We recommend using pressure-treated wood, galvanized steel poles, or aluminum posts for longevity and strength.
Step 4: Install Mounting Hardware
With your anchor points ready, it’s time to install the necessary hardware:
Attach eye bolts or pad eyes securely into walls, posts, or other fixed structures.
For added flexibility and adjustability, install turnbuckles or tensioners to fine-tune the tarp’s tightness.
Connect snap hooks, D-rings, or carabiners to make assembly and disassembly easier.
Make sure all hardware is rated for outdoor use to prevent rust and corrosion.
Step 5: Attach and Tension the Shade Tarp
Now it’s time for the most satisfying part—mounting the shade tarp:
Begin by attaching one corner of the tarp to an anchor point.
Gradually attach the remaining corners, moving diagonally for even tension.
Adjust each connection point using your turnbuckles, ropes, or cables.
Pull the tarp tight enough to avoid sagging, but not so tight that it risks tearing.
Check that the tarp maintains the desired slope for rainwater runoff and adjust tension as needed.
Step 6: Final Adjustments and Safety Check
Before enjoying your new shaded area:
Inspect all anchor points and hardware for stability.
Test the tarp’s tension and make adjustments for even distribution.
Ensure that no sharp edges or loose connections remain that could damage the tarp or pose a safety hazard.
Confirm that the tarp is secure in windy conditions by giving it a gentle tug.
If you live in an area with frequent high winds, consider removing the tarp during storms to prevent damage.
Step 7: Enjoy Your Shaded Backyard Oasis
Once installed, your backyard shade tarp provides a comfortable and protective space for outdoor gatherings, relaxation, or family activities. You can decorate underneath with outdoor furniture, string lights, or potted plants to create a personalized outdoor retreat.
Maintenance Tips for Long-Lasting Shade Tarp Performance
To extend the life of your shade tarp, follow these maintenance guidelines:
Regularly check for wear and tear, especially around anchor points and seams.
Clean the tarp periodically with mild soap and water to prevent mildew buildup.
Store the tarp indoors during harsh weather seasons if it's not designed for year-round use.
Tighten hardware as needed to maintain proper tension and avoid sagging.
By following these simple care steps, your shade tarp will continue to deliver years of sun protection and outdoor comfort.
Conclusion: Upgrade Your Outdoor Space with a DIY Shade Tarp
Installing a shade tarp in your backyard is a cost-effective and rewarding DIY project. With careful planning, quality materials, and proper installation techniques, you’ll enjoy cool, shaded outdoor living all season long. This step-by-step guide ensures your project goes smoothly from start to finish.
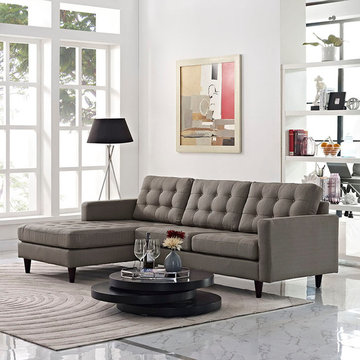
 Alice Welborn
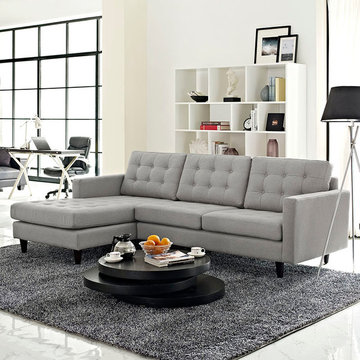
Empress is heralded with deeply tufted buttons, plush cushions and armrests that convey that perfect air of nobility. The solid wood legs come with plastic glides to prevent floor scratching, and the fine fabric upholstery leaves the recipients feeling richly rewarded. This is a very comfortable sofa with great support but cozy, not hard at all. This sofa also has great depth. Very nice!
Buy Now
OVERALL PRODUCT DIMENSIONS 99.5″L x 60.5″W x 34″H
LOVESEAT DIMENSIONS 56.5″L x 34″W x 34″H
CHAISE DIMENSIONS 31.5″L x 53.5″W x 6″H
LOVESEAT SEAT CUSHION SIZE 26.5″L x 27.5″W x 6″H
BACK CUSHION SIZE 26.5″L x 18.5″W x 6″H
CHAISE SEAT CUSHION SIZE 31.5″L x 53.5″W x 6″H
SEAT HEIGHT 18.5″H
ARM HEIGHT 25.5″H
 Housing & Building Association of Colorado Springs
The Home
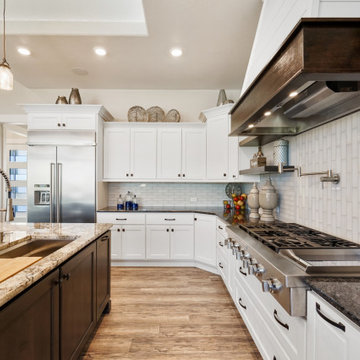
The Elbert, named after a Colorado fourteener, is designed in the modern farmhouse style with an open concept that creates a
welcoming feeling. The two-story entry light compliments the incredible view of Pikes Peak. The main level includes a gourmet kitchen
open to the great room, dining room and study. The master suite is an owner’s delight with a separate seating area that opens to a
spa-like master bathroom.
Moving up a level will reveal one of JS Homes’ specialties. Utilizing often overlooked space, we bring our East Coast influences to the
Colorado Springs market by using the attic for additional living space without adding another floor. This results in higher roof lines and a majestic appearance. Two bedrooms, a bathroom and a bonus room will be a delight for the kids in the family.
The ten-foot ceiling in the lower-level was designed with entertaining in mind. Two bedrooms, a shared bath and an exercise room complete the ensemble. Building within Flying Horse North, we were able to incorporate unique materials including stucco, barnwood, stone and pre-finished western red cedar.
JS Homes is proud to present The Elbert.
The Builder
Building homes for over 10 years, Jeff and Sonja Cole have been gifted to create a company that listens to our clients’ needs and desires and strives to capture those visions in their creations. Before becoming a home builder, Jeff was an interior trim carpenter specializing in new custom homes in the Denver and East Coast markets. This gave him a unique perspective on space and design. Jeff stays current with the changing plans and movements in home design by attending national shows and following contemporary design trends.
Sonja takes the lead on interior design, plan review and draw coordination, in addition to being the REALTOR® who makes all our transactions possible.
We are blessed to have an incredible staff of trade partners and vendors who are willing to spend time on our projects. Without them we would not be JS Homes Inc.
The Interior Design
This Flying Horse North lot was a perfect setting for The Elbert, a modern farmhouse. From the moment you walk through the front door, your sightline is drawn to the incredible Pikes Peak view. We sought to capture the large space by blending a mix of different materials and textures. Superior craftsmanship incorporates a mixture of materials, from knotty alder and walnut on the main level, to hickory and quarter-sawn oak elsewhere, creating a rich and rewarding feel. Luxe granites complimented by beautiful tile work add depth and movement in many areas of the house — creating a refined feeling. Working with Jessica Brown of La-Z-Boy Furniture Galleries, we designed a palette of colors, patterns and rich textures to enhance and compliment the interior finishes. A mixture of grays, blues and whites provides a timeless, fresh and family friendly environment that makes The Elbert a sanctuary for entertaining and relaxing.
 Artisan Kitchen & Bath GC License #107583
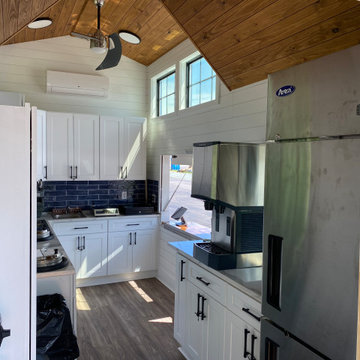
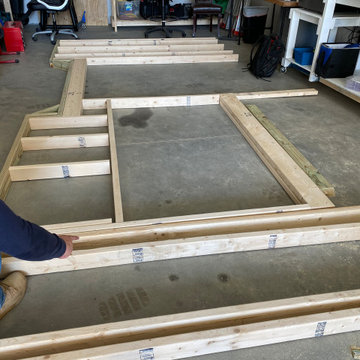
The Tiny Farmhouse Kitchen is by far one of the most complex, rewarding, and unforgettable projects we’ve ever completed. Designed to be fully mobile and 100% solar-powered, this one-of-a-kind kitchen on wheels pushed our creativity, craftsmanship, and problem-solving skills to new heights. Every time we transported it through town, it turned heads—people would literally stop in their tracks just to get a closer look.
Building a fully functional commercial kitchen in such a small footprint required precision in every detail. We carefully selected each piece of equipment to minimize electrical draw, including a commercial refrigerator and four recessed induction food warmers—all powered entirely by solar energy. Onboard water storage, filtration, and gray water management were meticulously engineered to maximize both functionality and space.
The Tiny Farmhouse Kitchen features:
• Custom handcrafted cabinetry
• Granite countertops
• Vaulted ceilings with dimmable LED lighting
• A full POS system with a built-in Wi-Fi hotspot
• A gas-shock lift service window with a live-edge oak flip-down counter, finished with crystal-clear epoxy for a stunning, natural look
Every inch of this mobile kitchen was designed for both beauty and efficiency, blending farmhouse charm with modern utility. It’s a project we are immensely proud of—and one that perfectly captures the spirit of what we do at Artisan Kitchen & Bath: bringing bold ideas to life with craftsmanship, innovation, and heart.

 Reico Kitchen & Bath
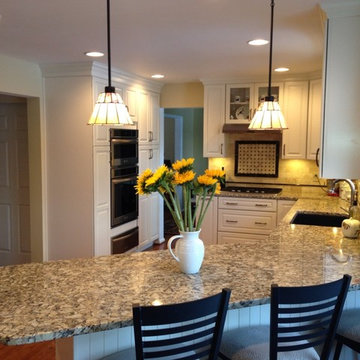
Lauren Hunt from Reico Kitchen and Bath in Charlotte, NC, worked with The Atta Group to design a transitional-inspired kitchen and bar using Masterpiece cabinetry. The kitchen features Masterpiece cabinets in the Martel Evercore doorstyle in a Frost finish on the perimeter.
The kitchen island and bar area both features the same doorstyle with a combination of two different finishes, Riverbed and Shortbread. The countertops are Calacatta Macchia Vecchia Sapien Stone Porcelain.
The client shared their experience, saying, “I love the range hood and the slatted island decor. Riverbed is a beautiful color in both sun and shade. Lauren’s advice to get samples and lay them out in different lighting was invaluable. She went above and beyond, even coming out in the parking lot on a hot summer day to help us. We truly couldn’t have done this without her. Lauren was always patient and supportive as we made decisions, and she never pressured us. Any future projects we have, we’ll 100% reach out to Lauren. She even welcomed our newborn to the showroom!”
Lauren shared, “The clients came with a clear aesthetic vision and plenty of inspiration photos, but they gave me the freedom to recommend and create a space that worked for their growing family while still looking great. We added design details like two-toned dining room cabinets, dark accent shelves in glass towers, an arched valance to match the doorways, and a custom hood that pulls from the island finishes. My favorite element is the slatted accent on the island, which the installers executed perfectly.
This renovation was a big project, starting with a blank slate, which can be overwhelming with so many options. But it was incredibly rewarding to work with these clients who had such a creative vision. We really worked together to create a space that met their needs while showcasing their style. It was a team effort, and I hope that comes through in the final design.”
Photos courtesy of Six Cents Media.
 Artisan Kitchen & Bath GC License #107583
The Tiny Farmhouse Kitchen is by far one of the most complex, rewarding, and unforgettable projects we’ve ever completed. Designed to be fully mobile and 100% solar-powered, this one-of-a-kind kitchen on wheels pushed our creativity, craftsmanship, and problem-solving skills to new heights. Every time we transported it through town, it turned heads—people would literally stop in their tracks just to get a closer look.
Building a fully functional commercial kitchen in such a small footprint required precision in every detail. We carefully selected each piece of equipment to minimize electrical draw, including a commercial refrigerator and four recessed induction food warmers—all powered entirely by solar energy. Onboard water storage, filtration, and gray water management were meticulously engineered to maximize both functionality and space.
The Tiny Farmhouse Kitchen features:
• Custom handcrafted cabinetry
• Granite countertops
• Vaulted ceilings with dimmable LED lighting
• A full POS system with a built-in Wi-Fi hotspot
• A gas-shock lift service window with a live-edge oak flip-down counter, finished with crystal-clear epoxy for a stunning, natural look
Every inch of this mobile kitchen was designed for both beauty and efficiency, blending farmhouse charm with modern utility. It’s a project we are immensely proud of—and one that perfectly captures the spirit of what we do at Artisan Kitchen & Bath: bringing bold ideas to life with craftsmanship, innovation, and heart.
 Fine Floorz
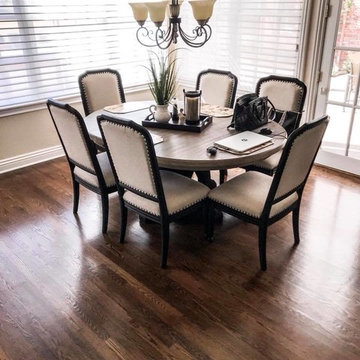
Sand & Finish Project Was Challenging But Rewarding. Everything came out to perfection!!! Color Stain- Antique Brown | Formula - 100% Stain / 2nd Coat 20% Antique Brown

 Life of Leisure Collection
ALL IN
This is a sure bet so go ALL IN on this beauty and reap the rewards! Perfect for you or someone who loves all kinds of gambling.
Inspiration for a contemporary porch remodel in Chicago
Inspiration for a contemporary porch remodel in Chicago
 CertaPro Painters - Main Line
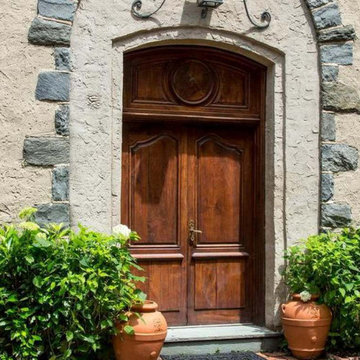
On the Main Line, few homes capture the romance of European design like Au Vallon in Villanova. Featured in Philadelphia Magazine, this estate blends French Normandy architecture with Pennsylvania stone and classic detailing—a masterpiece that deserves the highest level of care and craftsmanship.
When CertaPro Painters of the Main Line was entrusted with painting Au Vallon inside and out, we knew this was more than just a project—it was a responsibility to preserve a one-of-a-kind residence.
Exterior Painting: Stone, Stucco, and Sky-High Detail
The home’s exterior showcases steep rooflines, tall gables, and stone accents that required expert access solutions. Using professional lifts, our crew safely reached tough sections to ensure every inch was protected and finished to perfection.
Historic-style shutters, wood trim, and wrought-iron details were carefully prepped and painted with premium coatings designed for longevity. By respecting the original design while using modern products, we created a finish that enhances curb appeal while protecting the home for decades.
Interior Painting: European Elegance Restored
Inside, Au Vallon’s grand rooms called for the same meticulous approach. From arched ceilings and wood beams to paneled libraries and plaster walls, each surface was prepared with care to preserve the architectural beauty.
We collaborated closely with the homeowners to select colors that complement the stone and woodwork, balancing historic authenticity with modern warmth. Accent trim, window casings, and built-ins were refinished to highlight the craftsmanship that makes this estate extraordinary.
What Sets Us Apart
Painting a home like Au Vallon isn’t just a job—it’s a craft. Our team’s decades of experience with historic and luxury properties on the Main Line ensures:
Respect for architectural integrity
Specialized equipment (lifts, scaffolding, dust containment) for safe access
Knowledge of historic substrates like plaster, stone, and old-growth wood
Long-lasting finishes that honor the home’s legacy
Preserving Main Line History, One Brushstroke at a Time
From The Androssan Estate to Merion Cricket Club to Au Vallon, CertaPro Painters of the Main Line has become the trusted choice for painting the region’s most historic and celebrated properties.
For Mauricio and our team, the reward isn’t just in the finished product—it’s in knowing we’ve protected and preserved a piece of Main Line history.
 Alice Welborn
Empress is heralded with deeply tufted buttons, plush cushions and armrests that convey that perfect air of nobility. The solid wood legs come with plastic glides to prevent floor scratching, and the fine fabric upholstery leaves the recipients feeling richly rewarded. This is a very comfortable sofa with great support but cozy, not hard at all. This sofa also has great depth. Very nice!
Buy Now
OVERALL PRODUCT DIMENSIONS 99.5″L x 60.5″W x 34″H
LOVESEAT DIMENSIONS 56.5″L x 34″W x 34″H
CHAISE DIMENSIONS 31.5″L x 53.5″W x 6″H
LOVESEAT SEAT CUSHION SIZE 26.5″L x 27.5″W x 6″H
BACK CUSHION SIZE 26.5″L x 18.5″W x 6″H
CHAISE SEAT CUSHION SIZE 31.5″L x 53.5″W x 6″H
SEAT HEIGHT 18.5″H
ARM HEIGHT 25.5″H
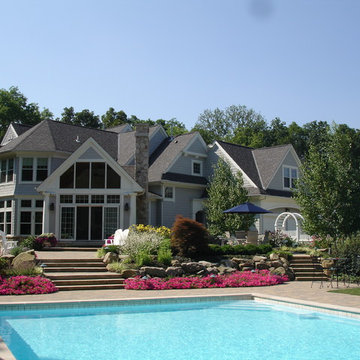
Sponsored
Columbus, OH
Free consultation for landscape design!

Peabody Landscape Group
Franklin County's Reliable Landscape Design & Contracting
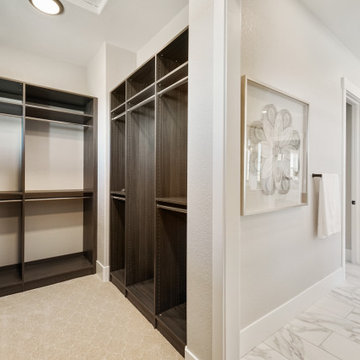 Housing & Building Association of Colorado Springs
The Home
The Elbert, named after a Colorado fourteener, is designed in the modern farmhouse style with an open concept that creates a
welcoming feeling. The two-story entry light compliments the incredible view of Pikes Peak. The main level includes a gourmet kitchen
open to the great room, dining room and study. The master suite is an owner’s delight with a separate seating area that opens to a
spa-like master bathroom.
Moving up a level will reveal one of JS Homes’ specialties. Utilizing often overlooked space, we bring our East Coast influences to the
Colorado Springs market by using the attic for additional living space without adding another floor. This results in higher roof lines and a majestic appearance. Two bedrooms, a bathroom and a bonus room will be a delight for the kids in the family.
The ten-foot ceiling in the lower-level was designed with entertaining in mind. Two bedrooms, a shared bath and an exercise room complete the ensemble. Building within Flying Horse North, we were able to incorporate unique materials including stucco, barnwood, stone and pre-finished western red cedar.
JS Homes is proud to present The Elbert.
The Builder
Building homes for over 10 years, Jeff and Sonja Cole have been gifted to create a company that listens to our clients’ needs and desires and strives to capture those visions in their creations. Before becoming a home builder, Jeff was an interior trim carpenter specializing in new custom homes in the Denver and East Coast markets. This gave him a unique perspective on space and design. Jeff stays current with the changing plans and movements in home design by attending national shows and following contemporary design trends.
Sonja takes the lead on interior design, plan review and draw coordination, in addition to being the REALTOR® who makes all our transactions possible.
We are blessed to have an incredible staff of trade partners and vendors who are willing to spend time on our projects. Without them we would not be JS Homes Inc.
The Interior Design
This Flying Horse North lot was a perfect setting for The Elbert, a modern farmhouse. From the moment you walk through the front door, your sightline is drawn to the incredible Pikes Peak view. We sought to capture the large space by blending a mix of different materials and textures. Superior craftsmanship incorporates a mixture of materials, from knotty alder and walnut on the main level, to hickory and quarter-sawn oak elsewhere, creating a rich and rewarding feel. Luxe granites complimented by beautiful tile work add depth and movement in many areas of the house — creating a refined feeling. Working with Jessica Brown of La-Z-Boy Furniture Galleries, we designed a palette of colors, patterns and rich textures to enhance and compliment the interior finishes. A mixture of grays, blues and whites provides a timeless, fresh and family friendly environment that makes The Elbert a sanctuary for entertaining and relaxing.
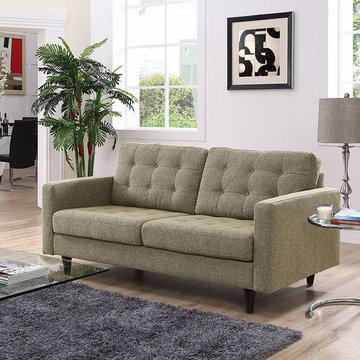 Alice Welborn
Empress is heralded with deeply tufted buttons, plush cushions and armrests that convey that perfect air of nobility. The solid wood legs come with plastic glides to prevent floor scratching, and the fine fabric upholstery leaves the recipients feeling richly rewarded. Firm but not too firm. Cozy, deep and gorgeous!
Buy Now
OVERALL PRODUCT DIMENSIONS 72.5″L x 35.5″W x 35.5″H
SEAT DIMENSIONS 28.5″L x 28.5 – 31.5″W x 18″H
BACKREST DIMENSIONS 6″L x 28.5″W x 13.5″H
ARMREST HEIGHT 25.5″H
LEG DIMENSIONS 1.5 – 3″W x 6″H
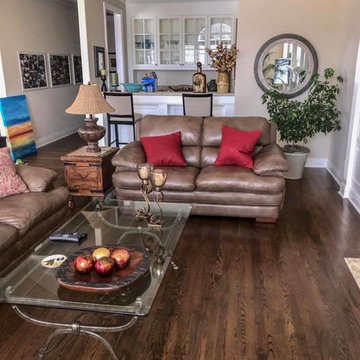 Fine Floorz
Sand & Finish Project Was Challenging But Rewarding. Everything came out to perfection!!! Color Stain- Antique Brown | Formula - 100% Stain / 2nd Coat 20% Antique Brown
 Concept Renovations, Inc.
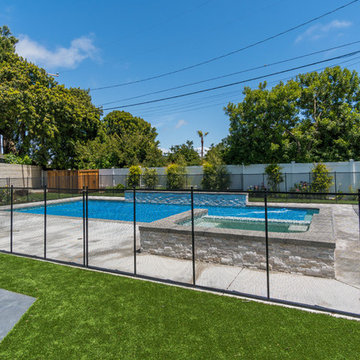
For this Rancho Palos Verdes Retreat Backyard project, the homeowners wanted to create an outdoor oasis that combines modern luxury with functional spaces for entertainment and relaxation. Concept completely transformed their backyard, designing a space that features a sleek pool surround, custom-built BBQ area, and ample seating zones. The pool deck, surrounded by stylish stone hardscaping, offers a clean and contemporary look that complements the bright, airy feel of the backyard. Artificial turf was installed to create a low-maintenance green area that stays lush year-round, while the outdoor kitchen, complete with high-end appliances and a bar area, is perfect for hosting family gatherings and parties.
This project was especially rewarding because the homeowners, long-time Rancho Palos Verdes residents, envisioned an outdoor space where they could unwind and entertain guests. Concept, known for its top-notch exterior remodels and hardscaping in Rancho Palos Verdes, used high-quality materials and expert craftsmanship to ensure the space will be enjoyed for years to come. Whether it’s the pool, BBQ, or comfortable seating areas, every aspect of this retreat reflects the homeowners’ desire for both luxury and convenience.
Sponsored
Columbus, OH
Free consultation for landscape design!
Peabody Landscape Group
Franklin County's Reliable Landscape Design & Contracting
 Reico Kitchen & Bath
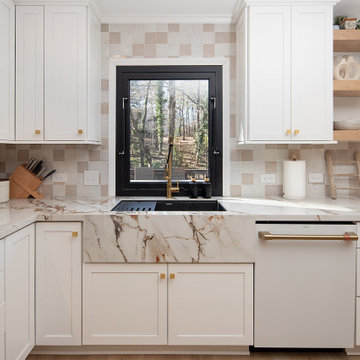
Lauren Hunt from Reico Kitchen and Bath in Charlotte, NC, worked with The Atta Group to design a transitional-inspired kitchen and bar using Masterpiece cabinetry. The kitchen features Masterpiece cabinets in the Martel Evercore doorstyle in a Frost finish on the perimeter.
The kitchen island and bar area both features the same doorstyle with a combination of two different finishes, Riverbed and Shortbread. The countertops are Calacatta Macchia Vecchia Sapien Stone Porcelain.
The client shared their experience, saying, “I love the range hood and the slatted island decor. Riverbed is a beautiful color in both sun and shade. Lauren’s advice to get samples and lay them out in different lighting was invaluable. She went above and beyond, even coming out in the parking lot on a hot summer day to help us. We truly couldn’t have done this without her. Lauren was always patient and supportive as we made decisions, and she never pressured us. Any future projects we have, we’ll 100% reach out to Lauren. She even welcomed our newborn to the showroom!”
Lauren shared, “The clients came with a clear aesthetic vision and plenty of inspiration photos, but they gave me the freedom to recommend and create a space that worked for their growing family while still looking great. We added design details like two-toned dining room cabinets, dark accent shelves in glass towers, an arched valance to match the doorways, and a custom hood that pulls from the island finishes. My favorite element is the slatted accent on the island, which the installers executed perfectly.
This renovation was a big project, starting with a blank slate, which can be overwhelming with so many options. But it was incredibly rewarding to work with these clients who had such a creative vision. We really worked together to create a space that met their needs while showcasing their style. It was a team effort, and I hope that comes through in the final design.”
Photos courtesy of Six Cents Media.
 Fine Floorz
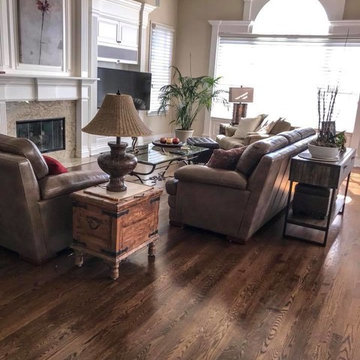
Sand & Finish Project Was Challenging But Rewarding. Everything came out to perfection!!! Color Stain- Antique Brown | Formula - 100% Stain / 2nd Coat 20% Antique Brown
 Concept Renovations, Inc.
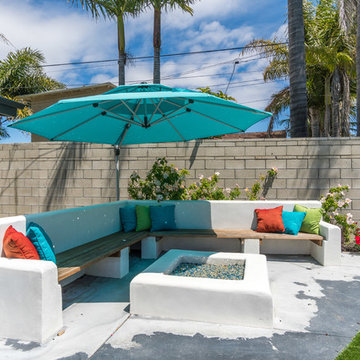
For this Rancho Palos Verdes Retreat Backyard project, the homeowners wanted to create an outdoor oasis that combines modern luxury with functional spaces for entertainment and relaxation. Concept completely transformed their backyard, designing a space that features a sleek pool surround, custom-built BBQ area, and ample seating zones. The pool deck, surrounded by stylish stone hardscaping, offers a clean and contemporary look that complements the bright, airy feel of the backyard. Artificial turf was installed to create a low-maintenance green area that stays lush year-round, while the outdoor kitchen, complete with high-end appliances and a bar area, is perfect for hosting family gatherings and parties.
This project was especially rewarding because the homeowners, long-time Rancho Palos Verdes residents, envisioned an outdoor space where they could unwind and entertain guests. Concept, known for its top-notch exterior remodels and hardscaping in Rancho Palos Verdes, used high-quality materials and expert craftsmanship to ensure the space will be enjoyed for years to come. Whether it’s the pool, BBQ, or comfortable seating areas, every aspect of this retreat reflects the homeowners’ desire for both luxury and convenience.
8