
Search results for "Performance goals" in Home Design Ideas
 Danze & Davis Architects, Inc.
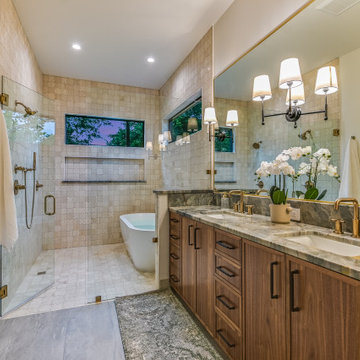
Bathroom - transitional master beige tile and stone tile ceramic tile, gray floor and double-sink bathroom idea in Austin with recessed-panel cabinets, medium tone wood cabinets, white walls, an undermount sink, quartz countertops, a hinged shower door, gray countertops and a built-in vanity
 User
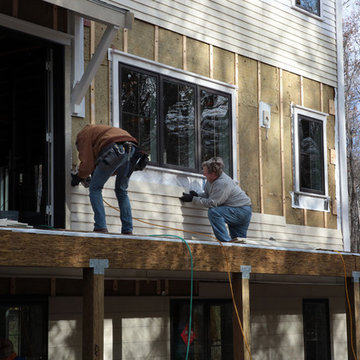
UserThe design team for the Fine Homebuilding ProHOME selected Boral TruExterior Bevel siding to capture the authentic vibe of the farmhouse style. Dimensionally stable, low maintenance, and resistant to moisture, it also meets the project's performance and durability goals.
 User
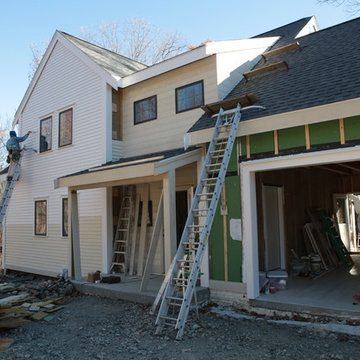
UserThe design team for the Fine Homebuilding ProHOME selected Boral TruExterior Bevel and Nickel Gap siding to capture the authentic vibe of the farmhouse style. Dimensionally stable, low maintenance, and resistant to moisture, it also meets the project's performance and durability goals.
Find the right local pro for your project
 H2D Architecture + Design
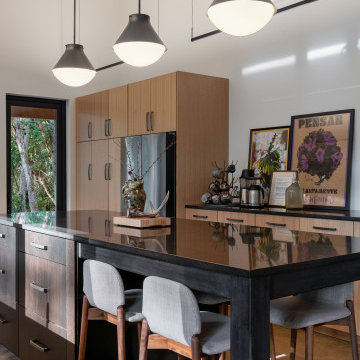
The owners of this wooded property on Whidbey Island came to H2D Architecture + Design with a vision to build a high-performance compact new home on the site. The goal of the design was to limit the impact and footprint on the site in order to maintain as many of the trees as possible. A select number of trees were removed to accommodate the new driveway, house and shed location, and a small yard area. The remainder of the site has been left untouched to remain a wooded sanctuary around the home. The home design was developed around a desire for creating only the minimum amount of space necessary for this family of two. The final design is a one-story home with approximately 1350 sf including two bedrooms, two bathrooms, laundry, storage, mechanical, and open living area. The open living area has a vaulted ceiling, wall of windows looking out to the yard, and connection directly out to a covered patio area. The structure of the home was designed to be built with SIPS (Structurally Insulated Panel System). Both the walls and roof were built with the SIPS panels creating a highly energy efficient building envelope. The cabinetry in the home was built by the homeowner.
+ Architecture: H2D Architecture + Design
+ Interior Design: H2D Architecture + Design
www.h2darchitects.com
+ Green Consultantation and Built by: Zero Energy Homes and Clifton View Homes
+ Photography: Anastasiya Homes
 H2D Architecture + Design
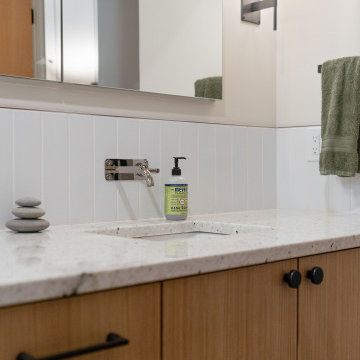
View of the wall mounted faucet in the main bathroom.
-
The owners of this wooded property on Whidbey Island came to H2D Architecture + Design with a vision to build a high-performance compact new home on the site. The goal of the design was to limit the impact and footprint on the site in order to maintain as many of the trees as possible. A select number of trees were removed to accommodate the new driveway, house and shed location, and a small yard area. The remainder of the site has been left untouched to remain a wooded sanctuary around the home. The home design was developed around a desire for creating only the minimum amount of space necessary for this family of two. The final design is a one-story home with approximately 1350 sf including two bedrooms, two bathrooms, laundry, storage, mechanical, and open living area. The open living area has a vaulted ceiling, wall of windows looking out to the yard, and connection directly out to a covered patio area. The structure of the home was designed to be built with SIPS (Structurally Insulated Panel System). Both the walls and roof were built with the SIPS panels creating a highly energy efficient building envelope. The cabinetry in the home was built by the homeowner.
+ Architecture: H2D Architecture + Design
+ Interior Design: H2D Architecture + Design
www.h2darchitects.com
+ Green Consultantation and Built by: Zero Energy Homes and Clifton View Homes
+ Photography: Anastasiya Homes
 H2D Architecture + Design
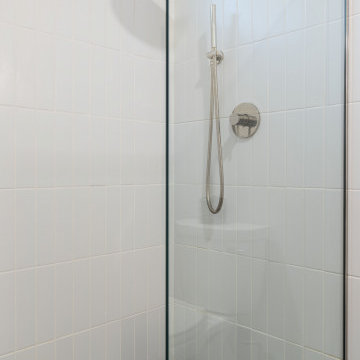
View of the curbless shower in the main bathroom.
---
The owners of this wooded property on Whidbey Island came to H2D Architecture + Design with a vision to build a high-performance compact new home on the site. The goal of the design was to limit the impact and footprint on the site in order to maintain as many of the trees as possible. A select number of trees were removed to accommodate the new driveway, house and shed location, and a small yard area. The remainder of the site has been left untouched to remain a wooded sanctuary around the home. The home design was developed around a desire for creating only the minimum amount of space necessary for this family of two. The final design is a one-story home with approximately 1350 sf including two bedrooms, two bathrooms, laundry, storage, mechanical, and open living area. The open living area has a vaulted ceiling, wall of windows looking out to the yard, and connection directly out to a covered patio area. The structure of the home was designed to be built with SIPS (Structurally Insulated Panel System). Both the walls and roof were built with the SIPS panels creating a highly energy efficient building envelope. The cabinetry in the home was built by the homeowner.
+ Architecture: H2D Architecture + Design
+ Interior Design: H2D Architecture + Design
www.h2darchitects.com
+ Green Consultantation and Built by: Zero Energy Homes and Clifton View Homes
+ Photography: Anastasiya Homes
 User
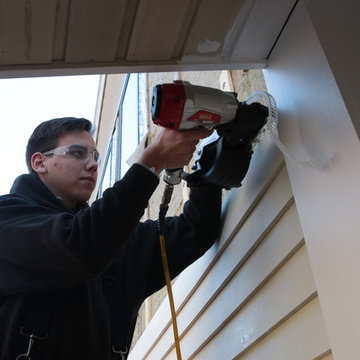
UserThe design team for the Fine Homebuilding selected Boral TruExterior Bevel siding to captures the authentic vibe of the farmhouse style. Dimensionally stable, low maintenance, and resistant to moisture, it also meets the project's performance and durability goals.
 H2D Architecture + Design
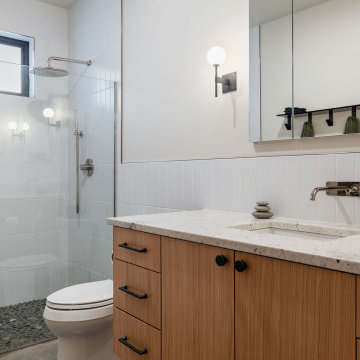
View of the vanity and curbless shower in the main bathroom.
---
The owners of this wooded property on Whidbey Island came to H2D Architecture + Design with a vision to build a high-performance compact new home on the site. The goal of the design was to limit the impact and footprint on the site in order to maintain as many of the trees as possible. A select number of trees were removed to accommodate the new driveway, house and shed location, and a small yard area. The remainder of the site has been left untouched to remain a wooded sanctuary around the home. The home design was developed around a desire for creating only the minimum amount of space necessary for this family of two. The final design is a one-story home with approximately 1350 sf including two bedrooms, two bathrooms, laundry, storage, mechanical, and open living area. The open living area has a vaulted ceiling, wall of windows looking out to the yard, and connection directly out to a covered patio area. The structure of the home was designed to be built with SIPS (Structurally Insulated Panel System). Both the walls and roof were built with the SIPS panels creating a highly energy efficient building envelope. The cabinetry in the home was built by the homeowner.
+ Architecture: H2D Architecture + Design
+ Interior Design: H2D Architecture + Design
www.h2darchitects.com
+ Green Consultantation and Built by: Zero Energy Homes and Clifton View Homes
+ Photography: Anastasiya Homes
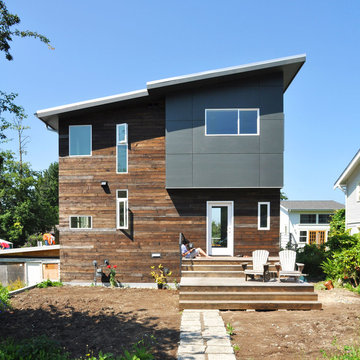
 b9 architects
Our client’s goal was to create a small, high-performance, healthy home for herself and her teenage son while providing a place for her father to age in place. An attached private accessory dwelling provides a space for him as well as flexibility in the future. The new home was designed to minimize its footprint on site, made smaller than the original 1930’s house.
Embracing adaptability and efficiency, the residence includes two dwellings: a one-bedroom 795 square-foot accessory dwelling at the lower grade and a two-story 1330 square-foot primary dwelling located above. Involved in all aspects of project execution, our client oversaw the process by living in a used trailer parked in the backyard throughout the project’s construction. Family-Share focused on maximizing the footprint’s performance, access to natural light and the health of the occupants. Sustainable features include high-performance glazing, solar preheat for domestic and hot water in-floor heating and reclaimed fir car decking rainscreen siding.

 Total System Service
As a manager of a building or property, you quickly learn the art of mediation. One minute you may be working with a vendor to keep the building’s operating system running efficient and smooth; the next moment you may be calming a tenant down after finding the change in the system disrupted his office’s workflow. Give and take; it’s the only way to make sure every day runs perfectly.
Overall, you have two goals to strive for in everything you do.
1. Keep the building running properly, upgrading systems as appropriate, and striving to do all you can on a pre-established budget.
2. Keep the building occupants happy, with as little disruption as possible.
While some changes are minor, barely registering on a building occupant’s mind, with HVAC challenges, that’s rarely the case. If a HVAC contractor is replacing an air handler, for instance, and disconnects one and moves to the next unit, it may cause major disruptions to sensitive areas of a building. And if the occupant wasn’t prepared for the disruption, you can have a mighty unhappy customer on your hand.
Anytime you are working on HVAC projects throughout your building, there are strategies you can put into place to keep things running smooth.
Communicate with occupants
Communication is key to any good relationship, and as a property manager, this rule is a great place to start. If you will be working with the HVAC equipment, block out the timeframe for work to be done, and understand the potential consequences of the process. Then communicate this process with every point of contact you have throughout the building. The more detail you can provide, the less surprises you’ll have throughout the process. You can also work with your building’s occupants before the process begins, finding out if there are better timeframes than others.
Establish a realistic schedule
As a property manager, its easy to provide your expectations for the HVAC project at hand, and request that the proposal be written in such a way that work is completed on your timeframe. Unfortunately, many contractors want your business and will agree to anything upfront in order to win the bid, knowing full well the work will take longer than specified. Instead of projecting your timeframes into the proposal process, ask for HVAC project bids to establish realistic schedules of how long the process will take, and what areas of your property will be most effected throughout the schedule. This will help you avoid crises between you and the contractor, and you and your tenants.
Plan for the whole system
If one small piece of your HVAC system is weak, its easy to fix that one small piece. But how will that impact your overall system? Will it cause weak spots in different parts of the building – maybe a corner office will have reduced air flow, and therefore be colder in the winter and warmer in the summer? When retrofitting new pieces with older existing systems, its easy to reduce the efficiency of your entire system. Before agreeing to certain repairs, make sure you understand how it will impact your entire system overall. An easy way of handling this problem is by working with the same HVAC contractor again and again, He will understand your system’s potential, and know when to make repairs, and when to replace.
Have points of contact available for immediate assistance
In many cases, problems arise because connections can’t be made. Can the HVAC contractor get a hold or you or another person that can make decisions at a moments notice if a problem arises? Do you have access to decision makers throughout the building that may be impacted by this change? Many projects have been put on hold simply because a person in authority can’t be found to give the go-ahead to move forward. If you have access to these people during the time of the project, you’ll be able to complete the project in record time.
Test
Finally, if you can test things in stages, or test when the potential for problems is the smallest, you reduce the chances of bigger emergency issues falling into your lap. If you’ll be installing a new terminal unit, can you make the switch on a Saturday morning when the building is largely unoccupied? If you’re replacing a large system, can you replace and test in phases so the entire project isn’t released at once?
Most issues can be avoided with just a little strategy from the beginning. If you’ve never had a HVAC maintenance team to help you stay on track with your building’s heating and cooling, now may be the time to find out how easy a team approach makes the process.
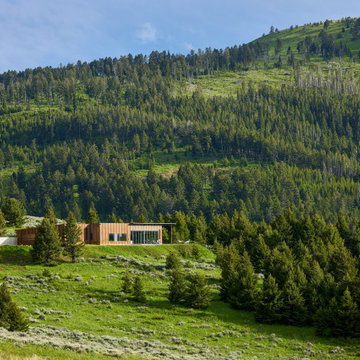
 NanaWall
Weather Performance for Year-Round Living
Energy-efficient windows support the home’s sustainability goals while providing tranquil living spaces protected from the elements. The NanaWall folding glass walls were specified with energy-efficient glazing to ensure optimal weather performance and minimal heat loss during winter. Specialized weather seals further keep the elements out and enhance insulation. The specified low profile saddle sill delivers an unobstructed threshold, successfully merging interiors with the outdoors without sacrificing weather performance, especially during heavy snowfall. “The NanaWall system is properly engineered for wind loads, designed not to leak, and has great R/U value,” says Ryker. “The folding doors combined with the core-ten steel exterior hold up to snow piled against the façade with no damage or leaks.”
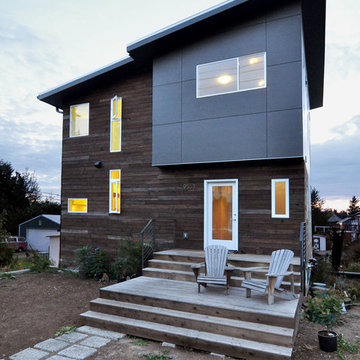 b9 architects
Our client’s goal was to create a small, high-performance, healthy home for herself and her teenage son while providing a place for her father to age in place. An attached private accessory dwelling provides a space for him as well as flexibility in the future. The new home was designed to minimize its footprint on site, made smaller than the original 1930’s house.
Embracing adaptability and efficiency, the residence includes two dwellings: a one-bedroom 795 square-foot accessory dwelling at the lower grade and a two-story 1330 square-foot primary dwelling located above. Involved in all aspects of project execution, our client oversaw the process by living in a used trailer parked in the backyard throughout the project’s construction. Family-Share focused on maximizing the footprint’s performance, access to natural light and the health of the occupants. Sustainable features include high-performance glazing, solar preheat for domestic and hot water in-floor heating and reclaimed fir car decking rainscreen siding.
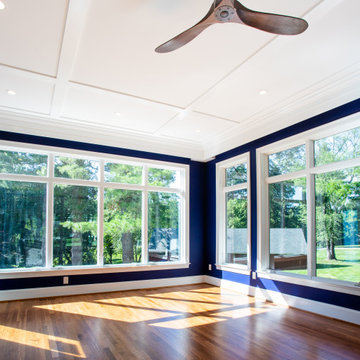
 Jordan Design Build Group
JDBG is wrapping up work on an expansive 2-story sunroom addition that also included modifications to the existing home’s interior and significant exterior improvements as well. The original project brief was to provide a conditioned 4-season sunroom addition where the homeowners could relax and enjoy their wooded views. As we delved deeper into our client’s overall objectives, it became clear that this would be no ordinary sunroom addition. The resulting 16’x25’ sunroom is a showstopper with 10’ high ceilings and wall to wall windows offering expansive views of the surrounding landscape.
As we recommend with most addition projects, the process started with our Preliminary Design Study to determine project goals, design concepts, project feasibility and associated budget estimates. During this process, our design team worked to ensure that both interior and exterior were fully integrated. We conducted in-depth programming to identify key goals and needs which would inform the design and performed a field survey and zoning analysis to identify any constraints that could impact the plans. The next step was to develop conceptual designs that addressed the program requirements.
Using a combination of 3-D massing, interior/exterior renderings, precedent imaging and space planning, the design concept was revised and refined. At the end of the study we had an approved schematic design and comprehensive budget estimates for the 2-story addition and were ready to move into design development, construction documentation, trade coordination, and final pricing. A complex project such as this involves architectural and interior design, structural and civil engineering, landscape design and environmental considerations. Multiple trades and subs are engaged during construction, from HVAC to electrical and plumbing, framers, carpenters and masons, roofers and painters just to name a few. JDBG was there every step of the way to ensure quality construction.
Other notable features of the renovation included expanding the home’s existing dining room, incorporating a custom ‘dish room,’ and providing fully conditioned storage and his & her workrooms on the lower level. A new front portico will visually connect the old and new structures and a brand new roof, shutters and paint will further transform the exterior. Thoughtful planning was also given to the landscape, including a back deck, stone patio and walkways, plantings and exterior lighting. Stay tuned for more photos as this sunroom addition nears completion.
 Change Your Bathroom©
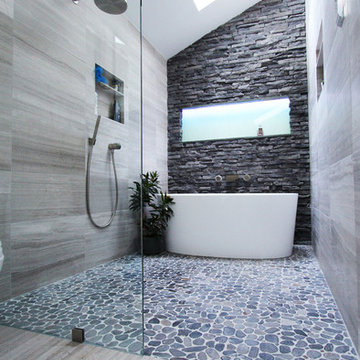
The goal of this project was to upgrade the builder grade finishes and create an ergonomic space that had a contemporary feel. This bathroom transformed from a standard, builder grade bathroom to a contemporary urban oasis. This was one of my favorite projects, I know I say that about most of my projects but this one really took an amazing transformation. By removing the walls surrounding the shower and relocating the toilet it visually opened up the space. Creating a deeper shower allowed for the tub to be incorporated into the wet area. Adding a LED panel in the back of the shower gave the illusion of a depth and created a unique storage ledge. A custom vanity keeps a clean front with different storage options and linear limestone draws the eye towards the stacked stone accent wall.
Houzz Write Up: https://www.houzz.com/magazine/inside-houzz-a-chopped-up-bathroom-goes-streamlined-and-swank-stsetivw-vs~27263720
The layout of this bathroom was opened up to get rid of the hallway effect, being only 7 foot wide, this bathroom needed all the width it could muster. Using light flooring in the form of natural lime stone 12x24 tiles with a linear pattern, it really draws the eye down the length of the room which is what we needed. Then, breaking up the space a little with the stone pebble flooring in the shower, this client enjoyed his time living in Japan and wanted to incorporate some of the elements that he appreciated while living there. The dark stacked stone feature wall behind the tub is the perfect backdrop for the LED panel, giving the illusion of a window and also creates a cool storage shelf for the tub. A narrow, but tasteful, oval freestanding tub fit effortlessly in the back of the shower. With a sloped floor, ensuring no standing water either in the shower floor or behind the tub, every thought went into engineering this Atlanta bathroom to last the test of time. With now adequate space in the shower, there was space for adjacent shower heads controlled by Kohler digital valves. A hand wand was added for use and convenience of cleaning as well. On the vanity are semi-vessel sinks which give the appearance of vessel sinks, but with the added benefit of a deeper, rounded basin to avoid splashing. Wall mounted faucets add sophistication as well as less cleaning maintenance over time. The custom vanity is streamlined with drawers, doors and a pull out for a can or hamper.
A wonderful project and equally wonderful client. I really enjoyed working with this client and the creative direction of this project.
Brushed nickel shower head with digital shower valve, freestanding bathtub, curbless shower with hidden shower drain, flat pebble shower floor, shelf over tub with LED lighting, gray vanity with drawer fronts, white square ceramic sinks, wall mount faucets and lighting under vanity. Hidden Drain shower system. Atlanta Bathroom.
 Rebel Builders
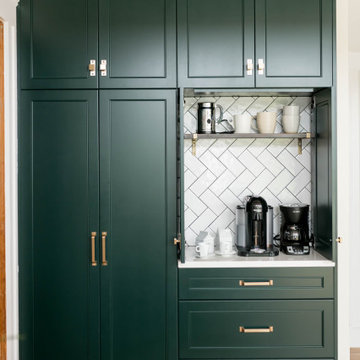
Industrial transitional English style kitchen. The addition and remodeling were designed to keep the outdoors inside. Replaced the uppers and prioritized windows connected to key parts of the backyard and having open shelvings with walnut and brass details.
Custom dark cabinets made locally. Designed to maximize the storage and performance of a growing family and host big gatherings. The large island was a key goal of the homeowners with the abundant seating and the custom booth opposite to the range area. The booth was custom built to match the client's favorite dinner spot. In addition, we created a more New England style mudroom in connection with the patio. And also a full pantry with a coffee station and pocket doors.

 FINNE Architects
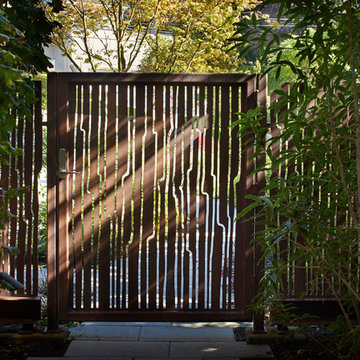
The steel fence at the front entry is composed of rusted steel panels with a custom, hand-drawn pattern based on ink brush lines.
Photos by Benjamin Benschneider
 Kathleen Jennison
An Arts & Crafts Bungalow is one of my favorite styles of homes. We have quite a few of them in our Stockton Mid-Town area. And when C&L called us to help them remodel their 1923 American Bungalow, I was beyond thrilled.
As per usual, when we get a new inquiry, we quickly Google the project location while we are talking to you on the phone. My excitement escalated when I saw the Google Earth Image of the sweet Sage Green bungalow in Mid-Town Stockton. "Yes, we would be interested in working with you," I said trying to keep my cool.
But what made it even better was meeting C&L and touring their home, because they are the nicest young couple, eager to make their home period perfect. Unfortunately, it had been slightly molested by some bad house-flippers, and we needed to bring the bathroom back to it "roots."
We knew we had to banish the hideous brown tile and cheap vanity quickly. But C&L complained about the condensation problems and the constant fight with mold. This immediately told me that improper remodeling had occurred and we needed to remedy that right away.
The Before: Frustrations with a Botched Remodel
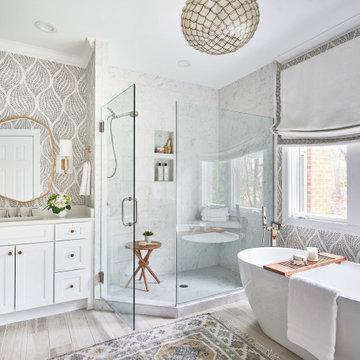
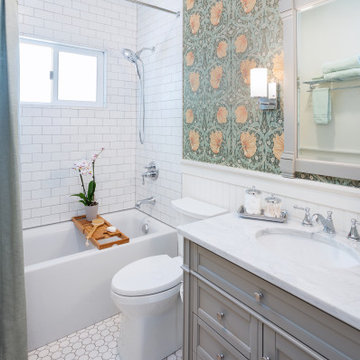
The bathroom needed to be brought back to period appropriate design with all the functionality of a modern bathroom. We thought of things like marble countertop, white mosaic floor tiles, white subway tile, board and batten molding, and of course a fabulous wallpaper.
This small (and only) bathroom on a tight budget required a little bit of design sleuthing to figure out how we could get the proper look and feel. Our goal was to determine where to splurge and where to economize and how to complete the remodel as quickly as possible because C&L would have to move out while construction was going on.
The Process: Hard Work to Remedy Design and Function
During our initial design study, (which included 2 hours in the owners’ home), we noticed framed images of William Morris Arts and Crafts textile patterns and knew this would be our design inspiration. We presented C&L with three options and they quickly selected the Pimpernel Design Concept.
We had originally selected the Black and Olive colors with a black vanity, mirror, and black and white floor tile. C&L liked it but weren’t quite sure about the black, We went back to the drawing board and decided the William & Co Pimpernel Wallpaper in Bayleaf and Manilla color with a softer gray painted vanity and mirror and white floor tile was more to their liking.
After the Design Concept was approved, we went to work securing the building permit, procuring all the elements, and scheduling our trusted tradesmen to perform the work.
We did uncover some shoddy work by the flippers such as live electrical wires hidden behind the wall, plumbing venting cut-off and buried in the walls (hence the constant dampness), the tub barely balancing on two fence boards across the floor joist, and no insulation on the exterior wall.
All of the previous blunders were fixed and the bathroom put back to its previous glory. We could feel the house thanking us for making it pretty again.
The After Reveal: Cohesive Design Decisions
We selected a simple white subway tile for the tub/shower. This is always classic and in keeping with the style of the house.
We selected a pre-fab vanity and mirror, but they look rich with the quartz countertop. There is much more storage in this small vanity than you would think.
The Transformation: A Period Perfect Refresh
We began the remodel just as the pandemic reared and stay-in-place orders went into effect. As C&L were already moved out and living with relatives, we got the go-ahead from city officials to get the work done (after all, how can you shelter in place without a bathroom?).
All our tradesmen were scheduled to work so that only one crew was on the job site at a time. We stayed on the original schedule with only a one week delay.
The end result is the sweetest little bathroom I've ever seen (and I can't wait to start work on C&L's kitchen next).
Thank you for joining me in this project transformation. I hope this inspired you to think about being creative with your design projects, determining what works best in keeping with the architecture of your space, and carefully assessing how you can have the best life in your home.
 Change Your Bathroom©
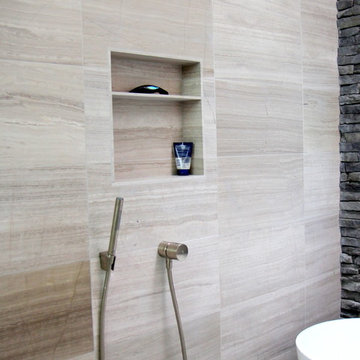
The goal of this project was to upgrade the builder grade finishes and create an ergonomic space that had a contemporary feel. This bathroom transformed from a standard, builder grade bathroom to a contemporary urban oasis. This was one of my favorite projects, I know I say that about most of my projects but this one really took an amazing transformation. By removing the walls surrounding the shower and relocating the toilet it visually opened up the space. Creating a deeper shower allowed for the tub to be incorporated into the wet area. Adding a LED panel in the back of the shower gave the illusion of a depth and created a unique storage ledge. A custom vanity keeps a clean front with different storage options and linear limestone draws the eye towards the stacked stone accent wall.
Houzz Write Up: https://www.houzz.com/magazine/inside-houzz-a-chopped-up-bathroom-goes-streamlined-and-swank-stsetivw-vs~27263720
The layout of this bathroom was opened up to get rid of the hallway effect, being only 7 foot wide, this bathroom needed all the width it could muster. Using light flooring in the form of natural lime stone 12x24 tiles with a linear pattern, it really draws the eye down the length of the room which is what we needed. Then, breaking up the space a little with the stone pebble flooring in the shower, this client enjoyed his time living in Japan and wanted to incorporate some of the elements that he appreciated while living there. The dark stacked stone feature wall behind the tub is the perfect backdrop for the LED panel, giving the illusion of a window and also creates a cool storage shelf for the tub. A narrow, but tasteful, oval freestanding tub fit effortlessly in the back of the shower. With a sloped floor, ensuring no standing water either in the shower floor or behind the tub, every thought went into engineering this Atlanta bathroom to last the test of time. With now adequate space in the shower, there was space for adjacent shower heads controlled by Kohler digital valves. A hand wand was added for use and convenience of cleaning as well. On the vanity are semi-vessel sinks which give the appearance of vessel sinks, but with the added benefit of a deeper, rounded basin to avoid splashing. Wall mounted faucets add sophistication as well as less cleaning maintenance over time. The custom vanity is streamlined with drawers, doors and a pull out for a can or hamper.
A wonderful project and equally wonderful client. I really enjoyed working with this client and the creative direction of this project.
Brushed nickel shower head with digital shower valve, freestanding bathtub, curbless shower with hidden shower drain, flat pebble shower floor, shelf over tub with LED lighting, gray vanity with drawer fronts, white square ceramic sinks, wall mount faucets and lighting under vanity. Hidden Drain shower system. Atlanta Bathroom.
 Living Stone Design + Build
Tim Burleson
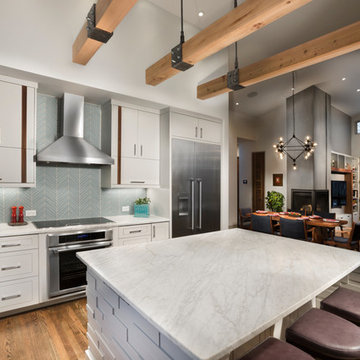
Large trendy medium tone wood floor and brown floor open concept kitchen photo in Other with flat-panel cabinets, white cabinets, marble countertops, gray backsplash, glass tile backsplash, stainless steel appliances, an island and white countertops
Large trendy medium tone wood floor and brown floor open concept kitchen photo in Other with flat-panel cabinets, white cabinets, marble countertops, gray backsplash, glass tile backsplash, stainless steel appliances, an island and white countertops
11