
Search results for "Ph level" in Home Design Ideas
 Tile Doctor Ltd
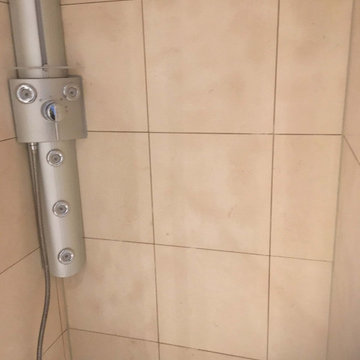
I was asked to look at renovating a shower cubicle at a property in in Manchester city centre that had been clad in White Limestone tiles. I understood the bathroom had been installed 12 years prior, but now the tiles were looking grubby, mouldy and dirty.
The client had lived at the property for the last two years and in an attempt to resolve the problems had used a few different household products such as flash and bleach, they had tried everything, and nothing had helped. I suspected that these strong acidic cleaners had actually made the problem worse by stripping off what was left of the sealer that was protecting the Limestone, allowing dirt to become ingrained in the stone.
I visited the property and ran a few cleaning tests in the shower cubicle with Tile Doctor products. This allows me to see which product will have the best results and gives the customer confidence that we can resolve their issues. The results were immediate, they could see the difference and they were happy to accept my quote and agree a date for my return to complete the work.
I arrived several weeks later and made a start. The tiles were scrubbed by hand with a strong dilution of Tile Doctor Remove and Go with excellent results. This product is designed to remove coatings and sealers, and in this case, it did a great job of drawing out the ingrained stains and dirt build-up. This removed what was left of the sealer and took off most of the dirt and mould. The Limestone tiles and grout were then rinsed with water to remove the soil.
Next I needed to restore the smooth surface of the limestone which had been etched by the use of strong acidic cleaning products. To do this I used a set of six-inch diamond burnishing pads attached to a hand buffer to hone and restore the stone.
I then dried the shower tiles and grout with a heat gun checking the moisture levels with damp meter until I was satisfied it was completely dry.
The last step was to re-seal the Limestone and Grout using a couple of coats of Tile Doctor Colour Grow. This is natural coloured intensifying sealer which provides durable protection to the surface allowing it to breathe and enhancing the colours.
The Customer was amazed with the difference and left the following feedback!
“Kamila was friendly, professional and kept me informed about what to expect before she took on the job and during the tile cleaning. The tiles look absolutely amazing after her work – I feel as though I have a brand new bathroom! Kamila also gave me helpful tips on looking after limestone tiles. I can’t recommend her highly enough.”
For future cleaning I recommended the use of Tile Doctor Aqua-Pro which is a pH neutral shower tile cleaner designed for use on sealed surfaces. Most cleaning products you find in supermarkets are overly strong and will erode the sealer prematurely, so when choosing a cleaning product always read the label and make sure it’s safe to use on Sealed Stone tiles.
Alex Logonzy
Greater Manchester Tile Doctor
 Tile Doctor Ltd
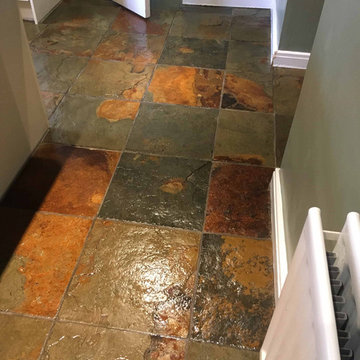
Except for general cleaning this multi-coloured slate floor had not been professionally cleaned since installation eleven years prior. Any sealer that had once been applied to the slate had long since worn off and dirt was now ingrained in the pores of the stone causing it to look dull and un-attractive. The property was in the lovely town of Staines Upon Thames, obviously situated on the banks of the River Thames and a popular place to live for London commuters.
I visited site to take a closer look at the floor and provide the client with an accurate price for renovating the stone. It turns out that the client had used all sorts of different household cleaners in an attempt to get the floor clean. Unfortunately, they were probably making the situation worse as these strong cleaning products would have actually stripped the sealant off the stone leaving it open to dirt. I carried out a test clean for them and they were very pleased to see how the floor could look. We agreed a price for the work and arranged a suitable date to carry out the work.
Cleaning a Multi-Coloured Slate Tiled Kitchen Floor
My first task was to strip off what was left of the old sealer and deep clean the stone using a dilution of Tile Doctor Remove and Go mixed 50:50 with Tile Doctor Pro-Clean. This powerful cocktail was applied to the floor and left to soak in for ten minutes before being scrubbed in using a rotary machine fitted with a black scrubbing pad.
The grout was hand scrubbed using more of the cleaning solution along the grout lines until I was happy the floor was as clean as it possibly could be. The floor was rinsed with water and the soil extracted by using the wet vacuum.
Once the floor was clear the Slate was inspected, and any stubborn areas were spot treated using the same process as before. After a final rinse and extraction, the floor was dried as much as possible using the wet vacuum and left to dry off overnight.
Sealing a Multi-Coloured Slate Tiled Kitchen Floor
I came back the next day and checked the moisture levels of the tiles using a damp meter. The floor had dried well so I had a green light for applying a new sealer. For this I used four Coats of Tile Doctor Seal and Go, allowing each coat to dry before applying the next. This product works really well on Slate and gave the tiles a nice sheen finish, the fresh sealer will also make maintenance cleaning far easier in the future.
The client was very happy with the result, the floor now looks great and the natural colours of the stone is so much more evident. For aftercare I recommended they throw away all those supermarket products and use Tile Doctor Neutral Tile Cleaner which is a pH neutral product that won’t prematurely erode the new sealer with use.
Jonathan Oldham
South Middlesex Tile Doctor
 TELFORD+BROWN STUDIO ARCHITECTURE
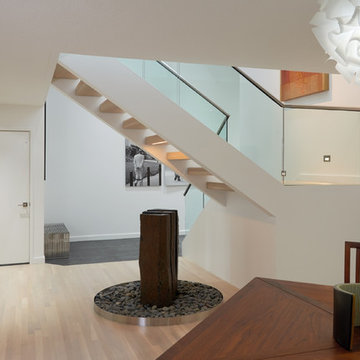
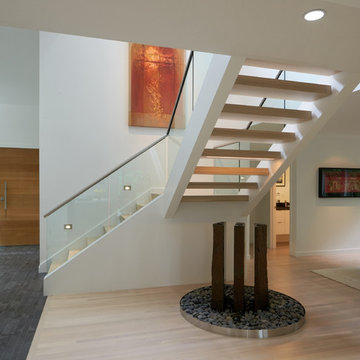
We were asked to create a new interior for a recently purchased 1970s house. The owners wanted to open up the living area spaces with quiet settings for their art collection. The big changes included removing walls, a new kitchen and finishes, and introducing a two-story, light filled space off the entry. A simple, elegant staircase was constructed in the space to connect the upper level. Its glass railings and open white oak treads allow for unobstructed views and the passage of light. LED lights recessed in the stair tread illuminate their stone fountain, positioned below.
Dale Christopher Lang, PhD, AIAP, NW Architectural Photography
Find the right local pro for your project
 ECustomFinishes
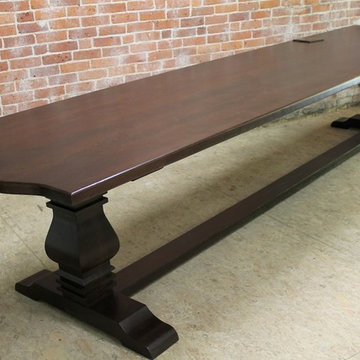
13' reclaimed trestle table
Made by http://www.ecustomfinishes.com
Ph: (978) 831-3106
If you are in the market for a 13’ foot long (or longer) reclaimed wood table you have come to the right place. Beautifully constructed from 2” thick reclaimed wide oak boards we sanded this table down to a smooth texture level to remove exterior weathering and expose the alluring soft and rich patina underneath. The arched end detail was added to “dress” it up a bit and compliment the custom turned trestle base. Finished to match their cabinetry, this is one magnificent casually-elegant farm table that is ready for the holidays!
 TELFORD+BROWN STUDIO ARCHITECTURE
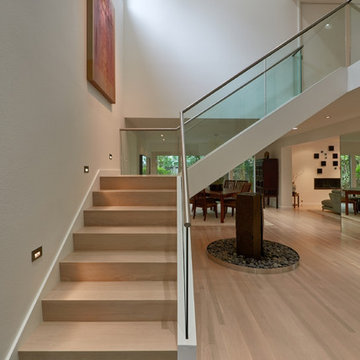
We were asked to create a new interior for a recently purchased 1970s house. The owners wanted to open up the living area spaces with quiet settings for their art collection. The big changes included removing walls, a new kitchen and finishes, and introducing a two-story, light filled space off the entry. A simple, elegant staircase was constructed in the space to connect the upper level. Its glass railings and open white oak treads allow for unobstructed views and the passage of light. LED lights recessed in the stair tread illuminate their stone fountain, positioned below.
Dale Christopher Lang, PhD, AIAP, NW Architectural Photography
 TELFORD+BROWN STUDIO ARCHITECTURE
We were asked to create a new interior for a recently purchased 1970s house. The owners wanted to open up the living area spaces with quiet settings for their art collection. The big changes included removing walls, a new kitchen and finishes, and introducing a two-story, light filled space off the entry. A simple, elegant staircase was constructed in the space to connect the upper level. Its glass railings and open white oak treads allow for unobstructed views and the passage of light. LED lights recessed in the stair tread illuminate their stone fountain, positioned below.
Dale Christopher Lang, PhD, AIAP, NW Architectural Photography

 User
UserRitz-Carlton PH Miami Beach
Our Britto Charette interior design team is thrilled to be designing a penthouse at the award-winning Ritz-Carlton Residences in Miami Beach, Florida.
In collaboration with the Miami architecture firm, Stantec, architect Piero Lissoni has designed an exciting new level of luxury living in Miami. The Ritz-Carlton Residences in Miami Beach boasts 111 condominium residences and 15 single-family villas and promises residents breathtaking views, Italian craftsmanship, and absolutely decadent amenities, including deeded boat slips.
Our clients’ penthouse is comprised of nearly 6,000 sqft of luxury living space and a terrace that provides captivating views. We have created a design for them that is simultaneously modern and elegant, honoring Lissoni’s architectural vision for the adaptive reuse building the penthouse sits atop.




10