
Search results for "Ph level" in Home Design Ideas
 SF Landscape Architecture
PEACE AND TRANQUILLITY IN A GARDEN
ON LAKE GARDA
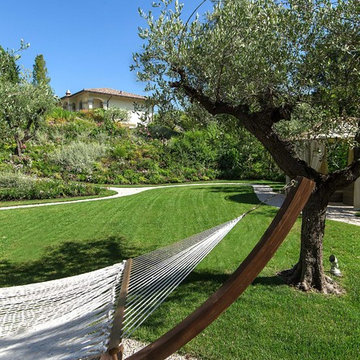
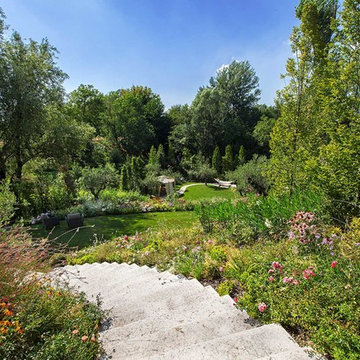
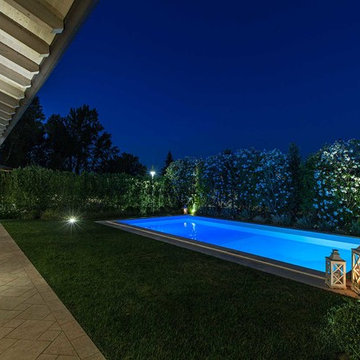
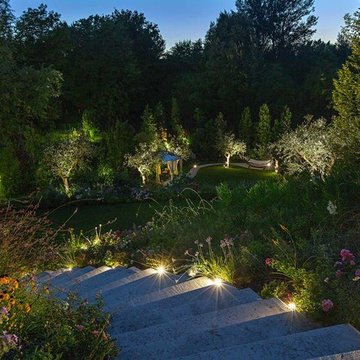
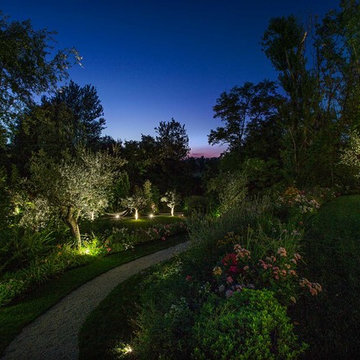
The relaxing sound of a stream provides the backdrop for this luxurious garden where peace and tranquillity reign. Stefano Filippini designed, and then, with the support of Cherubini Vivaio del Garda, created a garden set on two different levels. The first level is dominated by the swimming pool, by the green of the aromatic herbs and by an enchanting view over the second level below, characterised by flowers and plants in soft, elegant shades and by a relaxation area to fully enjoy the silence and privacy of this prestigious garden.
Landscape Designer: SFLandscapeArchitecture
Landscape Contractor: Cherubini VivaiodelGarda
Ph Mattia Aquila
 SF Landscape Architecture
PEACE AND TRANQUILLITY IN A GARDEN
ON LAKE GARDA
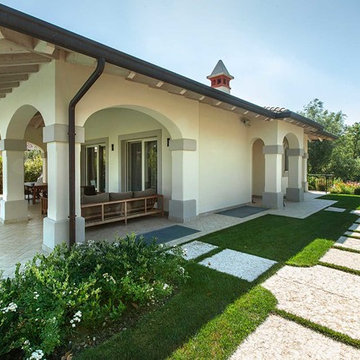
The relaxing sound of a stream provides the backdrop for this luxurious garden where peace and tranquillity reign. Stefano Filippini designed, and then, with the support of Cherubini Vivaio del Garda, created a garden set on two different levels. The first level is dominated by the swimming pool, by the green of the aromatic herbs and by an enchanting view over the second level below, characterised by flowers and plants in soft, elegant shades and by a relaxation area to fully enjoy the silence and privacy of this prestigious garden.
Landscape Designer: SFLandscapeArchitecture
Landscape Contractor: Cherubini VivaiodelGarda
Ph Mattia Aquila

 Tile Doctor Ltd
We received a request to renovate Victorian tiled hallway floor at a house in the London borough of Harlesden NW10. My client had modernised the heating system and this unfortunately required a section of the tiled flooring to be dug up so new pipework could be laid.
After speaking on the phone, I arranged an initial visit to the property so I could properly assess the work required and provide a price for restoring the floor. During my visit I could see there was another section of missing tiles at one of the door thresholds which would need attention. Except for the missing sections of floor I could see that the tiles themselves were in good condition for their age and would respond well to a deep clean and fresh seal.
I was confident on being able to source matching replacements for the missing tiles and reassured my client that we would be able not only repair the floor but also renovate it to a good standard. I gave them a price to do the restoration which they were happy to accept, and the work was booked.
After some research I managed to source replacement tiles from the Vintage Floor Tile Company in Kent; Victorian tiles are still popular so there a few companies that keep stock so we can usually find a match.
With the replacements in hand, work started by removing the cement and loose material from the missing sections of flooring and backfilling with self-levelling compound to bring the exposed base up to the right level for tiling.
The tiles were then cut to shape as required to match the existing patten and fixed into place with a quick setting adhesive and then grouted.
The floor was left to overnight to allow the adhesive to harden fully, and I returned the next day to deep clean the whole floor. To give the tiles are deep clean a strong dilution of Tile Doctor Remove and Go was sprayed onto the floor and left to soak in for ten minutes. It was then scrubbed into the floor using a rotary machine fitted with a with a black pad. This action lifted the dirt out of the tiles and the resulting slurry was removed with the wet vacuum.
It turned out that the pores of the tiles were holding a lot of dirt, so the process was repeated until I was satisfied. Due to the age of the property, there was no damp-proof membrane installed so I do try to minimise the amount of water I use in this process as there is always a chance of exacerbating any latent efflorescence issues.
Efflorescence occurs where moisture rises through the tile bringing with it salts from underneath the floor as it evaporates on the surface. This can lead to unsightly white marks appearing on the tile. To counteract this potential problem the cleaning was followed by an acid wash using Tile Doctor Acid Gel applied with a 100 then 200-grit pad, before finishing on a 400-grit burnishing pad. The floor was again rinsed with water after the application of each pad to remove the slurry and extracted with a wet vacuum.
Once I was satisfied the floor was as clean as possible, we left site and the area was left to dry over the weekend ready for application of a new sealer.
I returned on the Monday and started by taking a few moisture readings to check the floor was dry. The floor was in an acceptable range, so I applied the first of 4 coats of sealer. For this floor I chose Tile Doctor Seal and Go Extra which is specially formulated product that provides stain resistance with a hard wearing low-sheen finish.
This product is also breathable which is an important feature for old floors, anything that blocks moisture from rising through the tile will cause it to become trapped underneath where it will pool and eventually reach out to the walls and result in rising damp.
Once complete the floor looked brand new and I’m pleased to say with the deep clean and a fresh sealer applied it was impossible to tell the difference between the original and repaired sections of flooring.
For the aftercare of sealed Victorian tiled floors, I recommend Tile Doctor Neutral Cleaner, it’s a mild day to day cleaner with a neutral pH that won’t damage the sealer. Many of the tile cleaning products you find in supermarkets are simply too strong.
Andrew Newstead
North London Tile Doctor
Find the right local pro for your project
 SF Landscape Architecture
PEACE AND TRANQUILLITY IN A GARDEN
ON LAKE GARDA
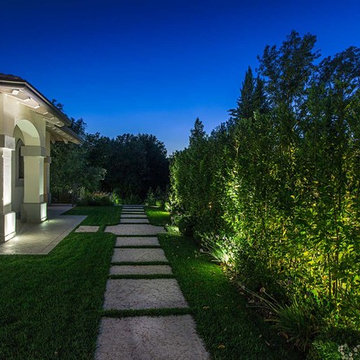
The relaxing sound of a stream provides the backdrop for this luxurious garden where peace and tranquillity reign. Stefano Filippini designed, and then, with the support of Cherubini Vivaio del Garda, created a garden set on two different levels. The first level is dominated by the swimming pool, by the green of the aromatic herbs and by an enchanting view over the second level below, characterised by flowers and plants in soft, elegant shades and by a relaxation area to fully enjoy the silence and privacy of this prestigious garden.
Landscape Designer: SFLandscapeArchitecture
Landscape Contractor: Cherubini VivaiodelGarda
Ph Mattia Aquila
 SF Landscape Architecture
PEACE AND TRANQUILLITY IN A GARDEN
ON LAKE GARDA
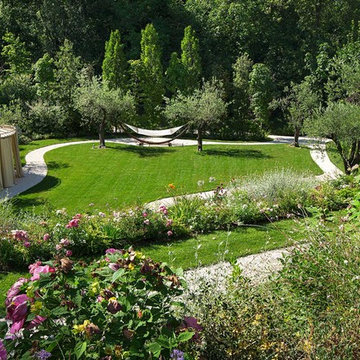
The relaxing sound of a stream provides the backdrop for this luxurious garden where peace and tranquillity reign. Stefano Filippini designed, and then, with the support of Cherubini Vivaio del Garda, created a garden set on two different levels. The first level is dominated by the swimming pool, by the green of the aromatic herbs and by an enchanting view over the second level below, characterised by flowers and plants in soft, elegant shades and by a relaxation area to fully enjoy the silence and privacy of this prestigious garden.
Landscape Designer: SFLandscapeArchitecture
Landscape Contractor: Cherubini VivaiodelGarda
Ph Mattia Aquila
 SF Landscape Architecture
PEACE AND TRANQUILLITY IN A GARDEN
ON LAKE GARDA
The relaxing sound of a stream provides the backdrop for this luxurious garden where peace and tranquillity reign. Stefano Filippini designed, and then, with the support of Cherubini Vivaio del Garda, created a garden set on two different levels. The first level is dominated by the swimming pool, by the green of the aromatic herbs and by an enchanting view over the second level below, characterised by flowers and plants in soft, elegant shades and by a relaxation area to fully enjoy the silence and privacy of this prestigious garden.
Landscape Designer: SFLandscapeArchitecture
Landscape Contractor: Cherubini VivaiodelGarda
Ph Mattia Aquila
 SF Landscape Architecture
PEACE AND TRANQUILLITY IN A GARDEN
ON LAKE GARDA
The relaxing sound of a stream provides the backdrop for this luxurious garden where peace and tranquillity reign. Stefano Filippini designed, and then, with the support of Cherubini Vivaio del Garda, created a garden set on two different levels. The first level is dominated by the swimming pool, by the green of the aromatic herbs and by an enchanting view over the second level below, characterised by flowers and plants in soft, elegant shades and by a relaxation area to fully enjoy the silence and privacy of this prestigious garden.
Landscape Designer: SFLandscapeArchitecture
Landscape Contractor: Cherubini VivaiodelGarda
Ph Mattia Aquila

 SF Landscape Architecture
PEACE AND TRANQUILLITY IN A GARDEN
ON LAKE GARDA
The relaxing sound of a stream provides the backdrop for this luxurious garden where peace and tranquillity reign. Stefano Filippini designed, and then, with the support of Cherubini Vivaio del Garda, created a garden set on two different levels. The first level is dominated by the swimming pool, by the green of the aromatic herbs and by an enchanting view over the second level below, characterised by flowers and plants in soft, elegant shades and by a relaxation area to fully enjoy the silence and privacy of this prestigious garden.
Landscape Designer: SFLandscapeArchitecture
Landscape Contractor: Cherubini VivaiodelGarda
Ph Mattia Aquila
 SF Landscape Architecture
PEACE AND TRANQUILLITY IN A GARDEN
ON LAKE GARDA
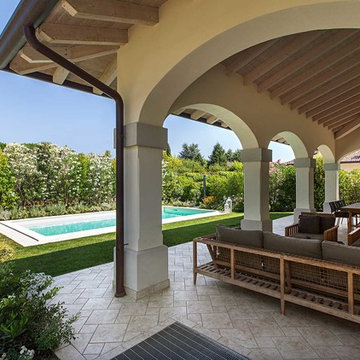
The relaxing sound of a stream provides the backdrop for this luxurious garden where peace and tranquillity reign. Stefano Filippini designed, and then, with the support of Cherubini Vivaio del Garda, created a garden set on two different levels. The first level is dominated by the swimming pool, by the green of the aromatic herbs and by an enchanting view over the second level below, characterised by flowers and plants in soft, elegant shades and by a relaxation area to fully enjoy the silence and privacy of this prestigious garden.
Landscape Designer: SFLandscapeArchitecture
Landscape Contractor: Cherubini VivaiodelGarda
Ph Mattia Aquila
 SF Landscape Architecture
PEACE AND TRANQUILLITY IN A GARDEN
ON LAKE GARDA
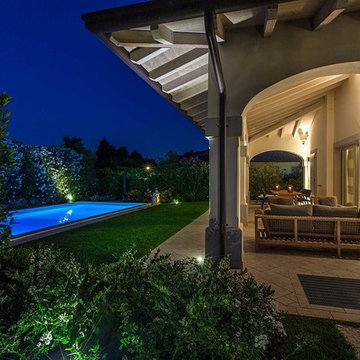
The relaxing sound of a stream provides the backdrop for this luxurious garden where peace and tranquillity reign. Stefano Filippini designed, and then, with the support of Cherubini Vivaio del Garda, created a garden set on two different levels. The first level is dominated by the swimming pool, by the green of the aromatic herbs and by an enchanting view over the second level below, characterised by flowers and plants in soft, elegant shades and by a relaxation area to fully enjoy the silence and privacy of this prestigious garden.
Landscape Designer: SFLandscapeArchitecture
Landscape Contractor: Cherubini VivaiodelGarda
Ph Mattia Aquila
 SF Landscape Architecture
PEACE AND TRANQUILLITY IN A GARDEN
ON LAKE GARDA
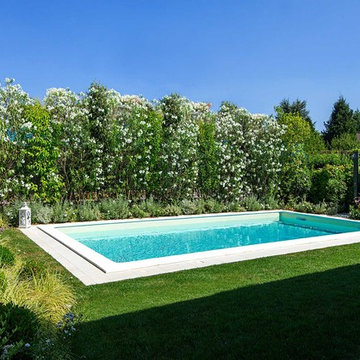
The relaxing sound of a stream provides the backdrop for this luxurious garden where peace and tranquillity reign. Stefano Filippini designed, and then, with the support of Cherubini Vivaio del Garda, created a garden set on two different levels. The first level is dominated by the swimming pool, by the green of the aromatic herbs and by an enchanting view over the second level below, characterised by flowers and plants in soft, elegant shades and by a relaxation area to fully enjoy the silence and privacy of this prestigious garden.
Landscape Designer: SFLandscapeArchitecture
Landscape Contractor: Cherubini VivaiodelGarda
Ph Mattia Aquila
 SF Landscape Architecture
PEACE AND TRANQUILLITY IN A GARDEN
ON LAKE GARDA
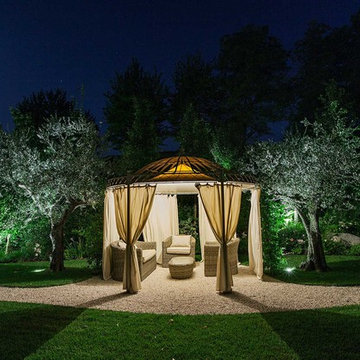
The relaxing sound of a stream provides the backdrop for this luxurious garden where peace and tranquillity reign. Stefano Filippini designed, and then, with the support of Cherubini Vivaio del Garda, created a garden set on two different levels. The first level is dominated by the swimming pool, by the green of the aromatic herbs and by an enchanting view over the second level below, characterised by flowers and plants in soft, elegant shades and by a relaxation area to fully enjoy the silence and privacy of this prestigious garden.
Landscape Designer: SFLandscapeArchitecture
Landscape Contractor: Cherubini VivaiodelGarda
Ph Mattia Aquila
 SF Landscape Architecture
PEACE AND TRANQUILLITY IN A GARDEN
ON LAKE GARDA
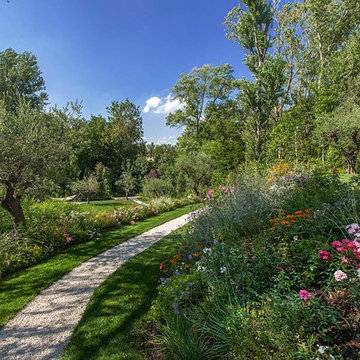
The relaxing sound of a stream provides the backdrop for this luxurious garden where peace and tranquillity reign. Stefano Filippini designed, and then, with the support of Cherubini Vivaio del Garda, created a garden set on two different levels. The first level is dominated by the swimming pool, by the green of the aromatic herbs and by an enchanting view over the second level below, characterised by flowers and plants in soft, elegant shades and by a relaxation area to fully enjoy the silence and privacy of this prestigious garden.
Landscape Designer: SFLandscapeArchitecture
Landscape Contractor: Cherubini VivaiodelGarda
Ph Mattia Aquila
 SF Landscape Architecture
PEACE AND TRANQUILLITY IN A GARDEN
ON LAKE GARDA
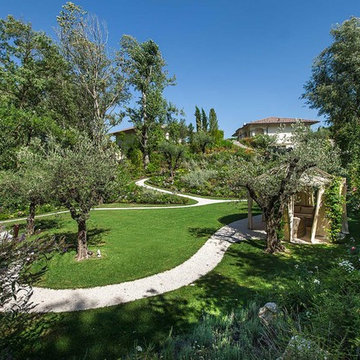
The relaxing sound of a stream provides the backdrop for this luxurious garden where peace and tranquillity reign. Stefano Filippini designed, and then, with the support of Cherubini Vivaio del Garda, created a garden set on two different levels. The first level is dominated by the swimming pool, by the green of the aromatic herbs and by an enchanting view over the second level below, characterised by flowers and plants in soft, elegant shades and by a relaxation area to fully enjoy the silence and privacy of this prestigious garden.
Landscape Designer: SFLandscapeArchitecture
Landscape Contractor: Cherubini VivaiodelGarda
Ph Mattia Aquila
 SF Landscape Architecture
PEACE AND TRANQUILLITY IN A GARDEN
ON LAKE GARDA
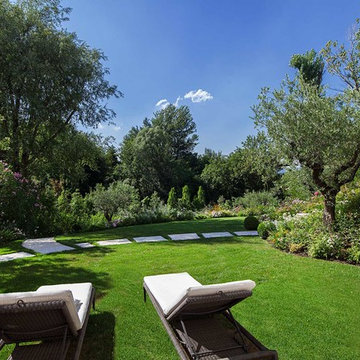
The relaxing sound of a stream provides the backdrop for this luxurious garden where peace and tranquillity reign. Stefano Filippini designed, and then, with the support of Cherubini Vivaio del Garda, created a garden set on two different levels. The first level is dominated by the swimming pool, by the green of the aromatic herbs and by an enchanting view over the second level below, characterised by flowers and plants in soft, elegant shades and by a relaxation area to fully enjoy the silence and privacy of this prestigious garden.
Landscape Designer: SFLandscapeArchitecture
Landscape Contractor: Cherubini VivaiodelGarda
Ph Mattia Aquila
 SF Landscape Architecture
PEACE AND TRANQUILLITY IN A GARDEN
ON LAKE GARDA
The relaxing sound of a stream provides the backdrop for this luxurious garden where peace and tranquillity reign. Stefano Filippini designed, and then, with the support of Cherubini Vivaio del Garda, created a garden set on two different levels. The first level is dominated by the swimming pool, by the green of the aromatic herbs and by an enchanting view over the second level below, characterised by flowers and plants in soft, elegant shades and by a relaxation area to fully enjoy the silence and privacy of this prestigious garden.
Landscape Designer: SFLandscapeArchitecture
Landscape Contractor: Cherubini VivaiodelGarda
Ph Mattia Aquila
 Tile Doctor Ltd
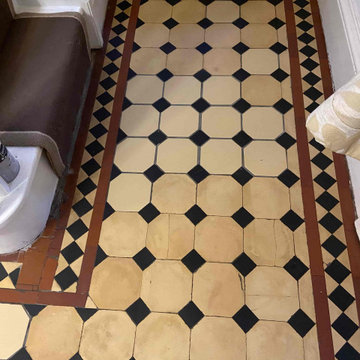
Detailed below is the restoration of a Victorian tiled hallway floor that we started back in June in Preston. Although we started in June there was so much damage to the subfloor and the tiles it took some time to complete, additionally, the client did not like the colour samples of the replacement tiles we had brought along and so decided to source their own which took some time.
Three months later with replacement tiles now sourced we were given the go ahead to start the restoration. The first day’s focus was cleaning the original floor using very coarse 100-grit and 200-grit Diamond pads fitted to a rotary buffer machine and applied to the floor using a strong dilution of Tile Doctor Remove and Go to add extra cleaning power. Tile edges were given special attention using a flex machine fitted with small diamond grit pads.
The floor was rinsed with water to remove the soil generated and this was followed up with an acid rinse using a 1:3 dilution of Tile Doctor Grout Clean Up. This last step in the cleaning process is especially recommend for old floors like this which don’t have a damp proof membrane and can suffer from efflorescence issues.
The next stage focused on repairing the floor and started by carefully knocking out all the broken and chipped tiles. We had previously estimated over 30 tiles needed replacing and so the client had bought two boxes, meaning I had plenty of spares to work with.
Before tiling however, the subfloor had suffered over the years and needed attention first. To deal with this the damaged areas were raked out, cleaned up and then back filled with rapid setting self-levelling screed from Mapie adhesives. Once the sub-base was fixed then we put the new tiles back in, they were not an exact match, about 5mm too short and lighter in tone, but the colour was pretty close.
Tiling an old Victorian floor like this can be a bit like dominoes as you move one out of place 2 decent ones come loose and then they also need refixing. Some of the tiles had hair line cracks in them and once they were loose, they just cracked in half. As such the 20 spare tiles that I thought were spare came into good use and I actually ended up using all of them. I could have done with a few more so it was decided to reset the last four broken tiles and grout them in. Luckily for me the client was very understanding about the nature of tile restoration and had accepted that there would be some imperfections and they were not expecting a new floor.
The Tiles were fixed down using Ultralite Rapid Flex (another product from Mapie) and then grouted using the same adhesive (not a grout, as they did not have grout back in the day, just cement and screed).
The floor was left this to cure overnight, and we came back the next day to finish the clean using a 200-grit diamond pad fitted to a buffing machine and lubricated with water, then one last acid rinse to get the tiles as clean as possible and remove any lingering grout haze. This last clean helps to blend the new tiles in with the original.
Before applying a protective sealer, the floor was left to dry for a couple of days, the tiles need to be thoroughly dry before sealing or you can end up with a patchy appearance.
For this floor with no damp proof membrane, it was important to use a fully breathable sealer that will allow moisture to rise through the tile and evaporate at the surface, so Tile Doctor Colour Grow was chosen. This is a good choice for old floors like this as its fully breathable, head wearing, and it contains a colour enhancer that improves the overall appearance of the tile.
Three coats of Tile Doctor Colour Grow which is a fully breathable, colour enhancing sealer hat works by soaking into the pores of the tile protecting it from within. It has a matt finish, and it works really well with all clay tiles and is ideal for these types of floors.
You can probably spot the lighter coloured tiles in the after photos on this page, however it’s a very subtle difference and I think they have blended in quite well with the original. Certainly, my client was very pleased with the newly restored floor, its completely transformed from when we first visited the client, and the floor has now gained character and history. For aftercare we recommend Tile Doctor Neutral Cleaner, its an effective pH neutral product that is compatible with the new sealer.
Russell Taylor
Lancashire Tile Doctor

Sponsored
Columbus, OH

Hope Restoration & General Contracting
Columbus Design-Build, Kitchen & Bath Remodeling, Historic Renovations
 Tile Doctor Ltd
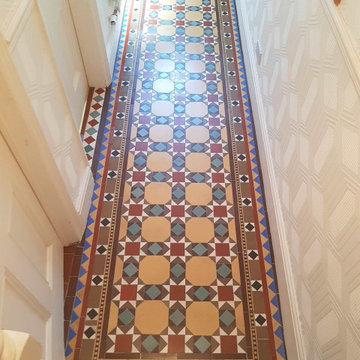
Recently we were asked to quote on restoring a Victorian tiled hallway floor in one of the large houses in the North Wales seaside resort of Rhos-on-Sea. It was a lovely period property that overlooked the sea and the floor a fine example of Victorian tiling and a real asset to the property.
Naturally, we have to take precautions when visiting properties these days, especially when surveying floors inside properties however we have amended our working practices to include more PPE and social distancing and so its not a problem.
On first impressions the floor looked to be in good order however it had some broken and loose tiles that needed replacing and then the floor given a good clean and seal. Fortunately, Victorian tiles are still popular, and you can find replacements, I also know that difficult to source tiles can often be found by asking other Tile Doctors many of whom have quite a collection. A quote was given for the work, which was accepted, and a date set to commence the work which would take three days.
Rhos-on-Sea is a very picturesque town situated between Llandudno and Colwyn Bay by passed by north wales main trunk road A55 leading to the main ferry port of Holyhead to Ireland. When you turn off the A55 into Rhos-on-Sea your transferred to a large seaside promenade with a wide walkway which is used by the towns many retired residents who appreciate the splendid coastal views.
The first job was to cut out and remove the damaged tiles then prepare the subbase with rapid set self-levelling compound to take the new tiles. Once this had set, I was able to cut and fit the replacements. There were a few areas that needed attention and so this work took up by most of the first day.
Once the sealer was dry, we were able to let the owner see the result who was really pleased and apparently has since received many compliments. For aftercare we recommend using Tile Doctor Neutral Cleaner which has a effective neutral pH formula that won’t prematurely erode the sealer with use like stronger products you find in supermarkets.
Andrew Robb
North Wales Tile Doctor
 Tile Doctor Ltd
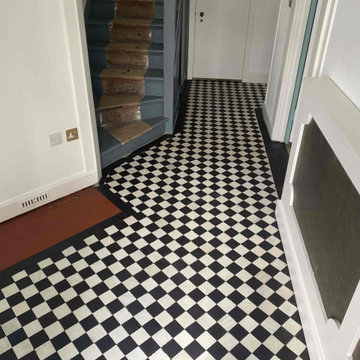
This client from North London had recently bought a property in Highgate N6 and during renovation had discovered an original Victorian tiled floor in the hallway. The floor was laid in a classic black and white diamond pattern but unfortunately a large section was missing and had been filled with concrete. Furthermore, most of the remaining floor had been covered in cement and glue.
I carried out a survey of the floor to determine the main issues and was then able to email over a quote later that day that included rebuilding the missing section of flooring. I suspect the floor had been excavated at some point in the past to install central heating and then rather than have the excavated section restored it was simply back filled and then levelled with a cement screed before finally gluing down a carpet on top.
Once the quote was accepted, I sourced replacement tiles from the Vintage Floor Tile company. Situated in Kent they are a reclamation yard that specialises in supplying original geometric and encaustic tiles including the major historical makers such as Minton and Craven Dunnill.
Armed with replacement tiles I started by removing the concrete that had been used to backfill the missing section and prepare a new surface for tiling with quick drying cement. When ready I was able to carefully build back the original pattern using the replacements. The tiles were secured with tile adhesive and once that had gone off, they were grouted.
The floor was left to set fully overnight and then the next day I was able to return and clean the whole floor using a strong dilution of Tile Doctor Remove and Go. As usual this was left to soak into the tiles for a good ten minutes before being scrubbed into the tiles using a black scrubbing pad. The Tile Doctor Remove and Go did a good job of cleaning the floor and the cleaning solution soon turned black with dirt during the scrubbing. The floor was rinsed with water and the soil extracted with a wet vacuum. After inspecting the floor any areas that needed further work were hand scrubbed and rinsed again until I was happy the floor was clean.
The last part of the cleaning process was to give the tiles an acid wash using Tile Doctor Acid Gel which further cleans the floor by removing old cement residue and grout haze. It also neutralises efflorescent salts in the tiles which are a common issue with floors of this age with no damp proof membrane. After another rinse and extraction, the floor was given a final rinse and then dried as much as possible using the wet vacuum.
I left the floor to dry out for a couple of days before returning to apply a protective sealer. Tile and Stone should be dry before sealing so I use a damp meter first to double check. All was well so to seal the tiles I proceeded to apply the first of what would be three coats of sealer. I used Tile Doctor Colour Grow for this, it works by impregnating the tile occupying the pores and thereby preventing dirt from becoming ingrained there. This product also enhances the black and white colour of the tiles and makes the floor much easier to clean.
Once done the floor was transformed and needless to say my customer was very pleased with the result. For the aftercare of Victorian Tiled floors, I recommend the use of a ph neural tile cleaner such as Tile Doctor Neutral Cleaner; most supermarket tile cleaners are simply too strong for use on sealed floors and can strip off the sealer prematurely.
Andrew Newstead
North London Tile Doctor
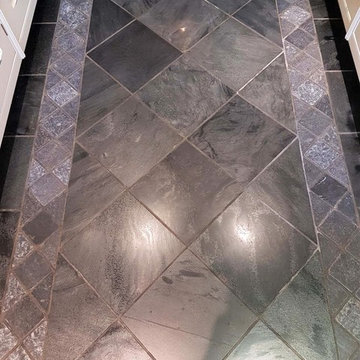 Tile Doctor Ltd
I was recently asked to survey an unusual stone floor at a house in in Harrogate comprising of Slate inlaid with Granite. The client advised that it had not been cleaned properly for 20 years and wanted it renovating! It was now definitely overdue a deep clean and professional attention. Fortunately, having worked on these floors for many years I knew I could make a substantial impact and transform its appearance. Fossilized slate is a beautiful stone when cleaned and sealed correctly.
The owner confessed they had actually been sealing the floor every two years but without a deep clean first, so they were effectively sealing in the dirt each time. I discussed with them the process I would use to clean and re-seal the floor and we agreed a price to carry to out the work.
To remove the layers of old sealer and dirt used a set of Tile Doctor Diamond Burnishing pads. The pads are attached to a rotary floor machine starting with the coarse 400-grit pad which was lubricated with a dilution of Tile Doctor Remove and Go to help strip the floor of dirt and layers of sealer. After rinsing and extracting the soil I worked through the different grades of pads in sequence finishing with the 1500-grit and this time using just water for lubrication.
A set of diamond handheld burnishing blocks were then used to clean up the edges and corners where the large 17” pads struggle to reach. This ensures all areas are treated and free of dirt and old sealer.
The floor was then rinsed and extracted again to remove the remaining soil. I find a wet vacuum is an invaluable tool for this. The floor was then left to dry out overnight ready for sealing the next day.
I returned the next day to seal the floor, first checking with a damp meter that the floor was dry, and the moisture reading was below the acceptable level. These results were fine, so I had a green light to continue and seal the stone.
The customer wanted a shine on the floor so rather than apply a satin sealer which I felt wouldn’t adhere to the stone properly I decided to polish the floor further with a the last of the four burnishing pads which is a very fine 3000-grit pad. You don’t need to use a lot of water with this last pad just a small amount sprayed onto the floor using a technique we refer to as a ‘Spray Burnish’.
To seal the floor, two coats of Tile Doctor Colour Grow were applied. This is an impregnating matt sealer which intensifies the natural colours of this beautiful stone and provides long lasting durable protection.
Even I was impressed with the finished result but more importantly the client was over the moon. To keep the floor looking its best I recommended they use Tile Doctor Stone Soap which is pH neutral. You should always read the label in detail when choosing a floor cleaning product as many are too strong and not recommended for sealed stone surfaces as they will prematurely erode the sealer.
Nigel Stoker
North West Yorkshire Tile Doctor
7