
Search results for "Ph neutral cleaners" in Home Design Ideas
 Tile Doctor Ltd
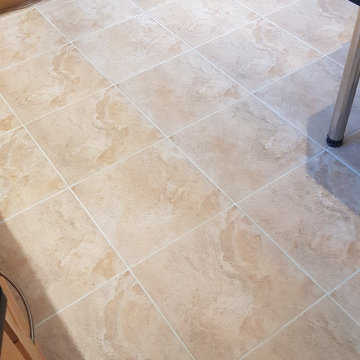
This Ceramic Tiled kitchen floor at a property in Wickersley was proving to be a pain for our clients, whatever they did the grout just looked dark, dirty, and unsightly. No amount of scrubbing would make a difference and eager to find a solution they wasted a lot of money on various products trying to clean the grout lines, but nothing had worked. Ceramic tiles are glazed which makes them very easy to clean, grout however is a different story.
Wickersley is in Rotherham close to the 3 main motorways in South Yorkshire, the M1, M18 and A1. The village took its’ name from the Wickersley family who eventually moved to Sheffield and built the famous Broom Hall, incredibly we restored 100sqm of stone flooring in that very house not too long back. It was a beautiful restoration.
On the first visit we tried a few of our products to clean the grout lines up but sometimes grout just can’t be cleaned, if the staining has penetrated the surface layer and gone right down into the grout it is stained forever. Grinding the grout out and putting in new grout is a big messy expensive job. For this reason, our grout recolouring service is an ideal option and the best thing about it is once it is recoloured the grout is protected and stain resistant.
Tile Doctor have a range of ten grout colours to choose from and in this case our client chose the light grey colour. They were happy to go ahead with our quote and just thankful that we were able to do it relatively inexpensively and without making a huge mess!
Work started by treating the grout lines with an acidic pre-treater that comes with the Grout Colourant kit that Tile Doctor sell, Tile Doctor Grout Colourant Pre-Treat cleaner, this gets rid of any contamination and prepares the grout for the colourant, so you get a superior bond.
Once dry the Light Grey Grout Colourant was applied the grout lines with a small brush. A steady hand is required, and you need to ensure any excess is immediately wiped away before it dries. It is quite a slow job, but very satisfying when you see the difference it makes. Glazed tiles are sealed during manufacture, so we do not need to apply a sealer like we do on most of our jobs.
The customer was over the moon with the transformation, the grubby grout lines had been irradicated and because the grout colourant forms a barrier over the grout, they will remain looking good for a long time to come. For aftercare cleaning I recommended using Tile Doctor Neutral Tile Cleaner which is pH neutral and gentle enough to use on a regular basis, it also has a nice fresh smell.
Matthew Lovett
South Yorkshire TIle Doctor
 Tile Doctor Ltd
It’s not just major restoration work we do at Tile Doctor, sometimes a simple clean and seal is all that is required and that was the case at this property in Evesham. This medieval market town lies within the Vale of Evesham and is encompassed by the River Avon. It is located between the larger towns of Worcester, Cheltenham and Stratford-upon-Avon.
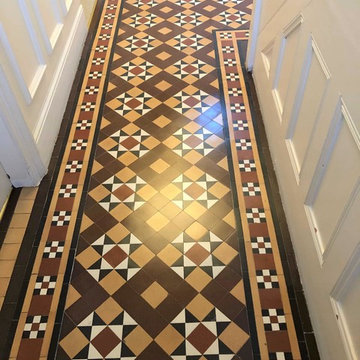
I was contacted by the owner and I arranged a visit to view their Victorian Hallway. The floor was in very good condition, but the previous sealer was now in-effective and the floor was dull and needed a good clean and seal. The colours were starting to fade, and it was due some attention. Sealers do wear off over time so if you have a similar floor to this it’s worth bearing that in mind. We discussed the work required and the cost involved, my quote was accepted, and the work scheduled.
On arrival I set up my equipment and covered any areas of carpet to protect from splashing during cleaning. I then used Tile Doctor Remove and Go spraying the product onto the floor allowing it to dwell for 10 minutes thus breaking down any sealers. This product is a non-flammable, multi-purpose stripper which works best when left to soak in for some time before scrubbing. This product is also great for drawing out ingrained stains and removing heavy grease build up.
The floor was then pasted with Tile Doctor Acid Gel which works to neutralise any alkaline salts in the tiles that can cause efflorescence later. This is a common issue with old floors which often do not have a damp proof membrane in place. I then went to work with my scrubbing machine and a black pad and worked the products into the tile. The resulting slurry was then rinsed off with water and removed with a wet vacuum.
I then went over the floor with microfibres and water to remove any remaining marks before leaving it to dry off overnight and ready for sealing.
I returned the following day and started by checking the floor was dry using a moisture meter. To seal the floor, I chose Tile Doctor Seal and Go Extra which is a fully breathable semi- gloss sealer which made a huge difference to the floor. Choosing a fully breathable sealer is important for floors that don’t have a damp proof membrane as you want to encourage any dampness to rise through the tile and not get trapped underneath where it might spread into the walls.
The deep clean and new seal brought out the vibrant colours in the tiles which were now shining through enhances by the lovely sheen which customer was very pleased with.
For aftercare I left the customer with a bottle of Tile Doctor Neutral Tile Cleaner which being concentrated goes a long way. Once diluted with water the product becomes completely pH neutral which unlike most household cleaners and washing up liquids which contain bleaches won’t prematurely degrade the sealer with use.
Mark Conway
Worcestershire Tile Doctor
 Tile Doctor Ltd
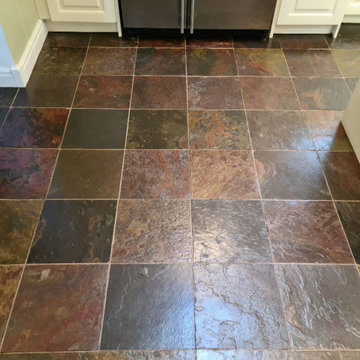
The pictures above are of a 12 metre squared Chinese slate floor in the kitchen of a property in Harrogate which had been laid ten years prior. You can see from the photographs that the grout had darkened and the slate itself had lost a lot of its character and colour.
Sealers typically last between three to five years so by now there was little protection left and so dirt had become trapped in the pores of the stone and grout making it difficult to keep clean. It was now overdue a deep clean and the application of a fresh seal.
I went over to survey the floor and provide a quote for stripping off what was left of the original sealer, cleaning the floor, and then resealing. I had been recommended by a previous customer so happy with my track record and the price I quoted, they asked me to do the work. They had received a quote from another firm which as it turned out was a lot more expensive than mine.
Given there was little sealer left to remove I decided to start by scrubbing the floor with a strong concentration of Tile Doctor Pro-Clean which was left to soak into the slate for ten minutes. Then I worked the solution in with a rotary machine fitted with a black scrubbing pad. Pro-Clean is a very versatile product that will strip the sealer off a floor when used in a strong dilution with water, it will also remove deep seated dirt too.
Due to the riven nature of the tiles however I found the black pad was struggling to reach into the crevices of the tile so to achieve the desired result I resorted to scrubbing the floor on my hands and knees with a scrubbing brush. Its important that the floor is as clean as it possibly can be before sealing otherwise you simply lock the dirt in and it will never look clean.
The floor was left to dry off overnight and I returned the next day to apply the new sealer. First, I checked to ensure that the floor was fully dry using a damp meter. The sealer would not cure properly if the floor damp and this can detract from the finished appearance.
I was happy with the readings, so I started to apply the first coat of Tile Doctor Seal and Go which I felt was the best product sealing Slate. The stone needed four coats; each one being left to dry before applying the next. Seal and Go is a stain resistant sealer which results in a low sheen silky appearance, it is good on surfaces such as the Chinese Slate which tend to be more porous and being water based it does not leave a smell as it dries.
The client was very happy with the result and mentioned to me that it had never looked that good even when new.
For aftercare cleaning I recommended the use of Tile Doctor Neutral Tile Cleaner which will keep the floor in the best condition. This is a pH neutral cleaner which can be used daily and won’t compromise the newly laid sealer like many of the stronger products you find in supermarkets.
Nigel Stoker
North West Yorkshire Tile Doctor
Find the right local pro for your project
 Tile Doctor Ltd
During an inspection for alteration work, this customer from Cheshunt discovered what appeared to be an original encaustic tiled floor under the hallway carpet. Keen to work out what it was, and have it restored, I was asked to pop round and look.
I went over as requested to survey the hallway floor and confirm their suspicions. The carpet had been secured with gripper rods glued onto the floor and that came away easily enough. Underneath, the tiles had been covered with self-levelling cement which had to be carefully scraped away to reveal the tiles.
I ran a test to see if the cement leveller could be easily removed and using a combination of a scraper with Tile Doctor Pro-Clean, I was able to confirm the tiled floor was indeed salvageable. The house was Edwardian, and the tiles had been laid in a classic black and white geometric pattern typical of the period so I suspect the floor was indeed original.
I worked out a quote to restore the whole floor including the removal of the cement, deep cleaning and then sealing the tiles. Without removing all the cement, it would be difficult to price for replacing broken tiles, but I suspected there may be a few as its quite usual for a floor of this age. Keen to have the floor restored we were given the go-ahead and a date scheduled for the work to start.
The first step was to remove all the carpet and gripper rod so we could see the full extent of the self-levelling screed. Once done it was a case of carefully chipping and scraping away to break up the cement until the tiled floor had been fully revealed. Its slow and detailed work but quite rewarding when the tiled floor is finally revealed. The tiles had survived well under the carpet and cement but as suspected a few repairs and replacement would be needed.
With all the cement brushed away work moved onto cleaning which started with a strong dilution of Tile Doctor Pro-Clean applied to the floor and left to soak in for fifteen minutes the scrubbed in with a rotary machine fitted with a Black pad. A lot of soiling is generated from this which is rinsed off with water and extracted with a wet vacuum. The floor was then inspected and the process repeated where required.
The next step was to treat the tiles to an acid wash using Tile Doctor Grout Clean-up. This is applied as before and has several benefits including dissolving the remaining cement residue and neutralising the pH of the floor after the use of Tile Doctor Pro-Clean which is a strong alkaline.
The floor was then inspected and the broken tiles carefully removed so they could be replaced. This is delicate work as lifting a tile can sometimes upset its neighbour and before you know it the size of the work has tripled. Replacement tiles were then cut to fit the existing geometric pattern and secured into place with a rapid set adhesive and grouted in.
Once the replacement tile and grout had set, the floor was given a light clean using Tile Doctor Neutral Tile Cleaner and then left to dry out overnight.
The next day the tiles were sealed using a single coat of Tile Doctor Colour Grow and the followed up with give coats of Tile Doctor Seal & Go. Colour Grow is an impregnator that soaks into the pores of the tile protecting it from within and improving colour, where as Seal and Go adds a nice subtle sheen to the tiles. Both products are breathable which is an important feature with old floors that don’t have a damp proof membrane.
For aftercare I recommended Neutral Tile Cleaner which is a gentle but effective tile cleaning product that won’t damage the sealer.
Robert Voyce
Hertfordshire TIle Doctor
 Tile Doctor Ltd
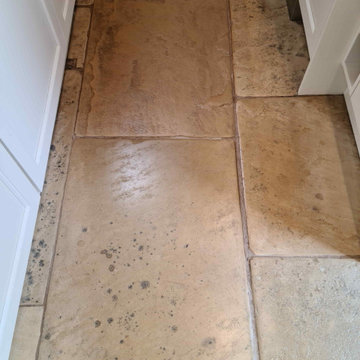
These pictures are of a beautiful Sandstone floor in Ilkley, the tiles were sourced from Lapicida of Harrogate and installed around twelve years prior. If you take a look at their website now you will see they are selling a similar London White Sandstone for nearly £100 per m2. This floor was 35 square metres so clearly this was a significant investment for the owner at the time.
After twelve years of use however the sealer had worn off the floor and dirt had become ingrained in the pores of the stone making it very difficult to keep clean. A good sealer takes a long time to wear off so the change to the appearance of the stone happens so slowly you don’t notice it. The floor was now looking permanently dirty, and the owner of the property had decided it was time to get it renovated.
Before quoting I paid a visit to the property to survey the floor and conduct an initial test clean which came out well. The test cleaning did not go as quickly as I had hoped it might however, due to traces of old satin sealer on some of the stone. It’s important to remove all the old sealer before applying new or you can end up with a patchy appearance. The remnants of old sealer proved challenging to remove as a result I had to try several products and methods before working out the right approach. In the end I resulted to using a product called Tile Doctor Wax Away. I had considered applying diamond burnishing pads which would have been a quicker option, but the flagstones had a riven finish, and the dirt was deeply pitted.
With a successful cleaning plan worked out I provided the client with a which was accepted, and a date agreed for my return.
The cleaning plan I had worked out was to apply a strong dilution of Tile Doctor Wax Away, leave it to soak into the stone for thirty minutes and then scrub it in with a rotary buffer fitted with a black scrubbing pad. The old sealer proved to be tough to remove and in total I used five litres of Tile Doctor Wax Away in the process, as I said it was a big floor!
On day three, I sealed the floor using three coats of Tile Doctor Seal and Go which gave the Sandstone a lovely satin finish that the client liked. This product is also water based so it doesn’t leave a smell as it dries.
Once done the floor was completely transformed, and my client very pleased with the floor which looked so much lighter and cleaner. For aftercare cleaning I recommended the use of Tile Doctor Neutral Tile Cleaner for maintenance, it is pH neutral so will ensure the newly applied seal is protected. It has a nice fresh smell and is gentle enough to use frequently keeping the newly renovated floor looking lovely.
Nigel Stoker
North West Yorkshire Tile Doctor
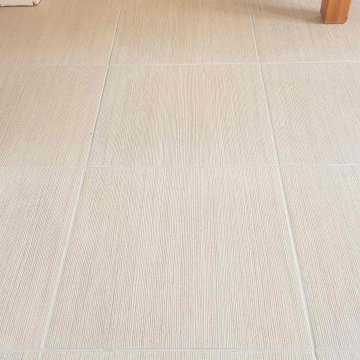 Tile Doctor Ltd
Recently it seems I am getting called out to an increasing number of new builds to sort out patchy grout issues. The reason why there have been so many issues arising is a bit of a mystery, but I put it down to a combination of things like poor quality grout, rushed installations, wet subfloors and the use of different batches.
This recently built house in the village of Darton is a great example and in this case, I suspect two different batches of the same grout had been applied. Darton by the way is a small village in the Borough of Barnsley.
Invariably these problems are picked up by the new owner on their snagging list, with the tiler long gone and the builder keen to get their final payment it is always a tricky situation to resolve. I find the best solution is to apply a Tile Doctor Grout Colourant, it’s a much quicker process than removing the old grout and replacing with new. Most new homeowners would not appreciate us ripping up their brand-new rooms and generating lots of dust in the process! Also, by using the Tile Doctor Grout Colourant it adds a barrier of the grout preventing dirt from discolouring it further down the line.
Even though the house was brand new, the Porcelain Tiled floor was not looking great. The client was happy for me to go ahead and would take up the bill with the housebuilder. I first pre-treated it with Tile Doctors Grout Colourant Pre-Treatment. This removes any contamination from the grout which might affect the adhesion of the colourant and being an acid, it also etches the surface of the grout to ensure a superior bond with the colourant.
The client chose our Light Grey colour which is one of 10 colours we offer. Once the pre-treatment had been applied, scrubbed, rinsed, and vacuumed away the floor was left to dry. Once dry we started applying the colourant, this is done with a small brush (a toothbrush is ideal) carefully scrubbing colourant into each grout joint and wiping off any excess that gets on the tiles before it is able to dry.
Once complete the newly coloured grout lines totally transformed the floor and because the grout colorant is epoxy based the grout lines will stay stain free and never get dirty.
The porcelain tiles were factory sealed so there is no need to apply a seal to the floor.
I recommended the use of Tile Doctor Neutral Tile Cleaner to keep the floor in the best condition. It is pH neutral so is far less harsh on the surface than the everyday household cleaners available. It has a minty fragrance and is mild enough to use daily. They were very happy that the floor now looked as it should have from the start and was the finishing touch to their beautiful new home.
Matthew Lovett
South Yorkshire Tile Doctor


Sponsored
Sunbury, OH

J.Holderby - Renovations
Franklin County's Leading General Contractors - 2X Best of Houzz!
 Tile Doctor Ltd
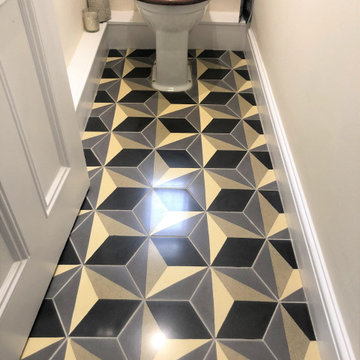
These photographs were taken of a bathroom and WC in a property in Histon The client had just had these modern Encaustic tiles laid a couple of months prior. The owner had never been happy with the final look of them and from the markings on the surface it looked like had been damaged in storage or left outside and neglected. They are a pretty unusual design so I can only assume the tiler thought their appearance was perfectly normal at the time of installation.
I was confident I could improve the appearance of the tiles and gave the client a quote for the work. Whilst she didn’t want to spend more money on her new floor, she did want it to look as it should, so rather reluctantly she agreed to go ahead.
Histon is next to Impington, they are small villages in Cambridgeshire, over the years the two villages have grown and have entwined together. Many villagers in fact do not know where one village starts and the other ends. The have 6 pubs in total!
I wasn’t sure what had been applied to the tiles so after adding protective tape to the wooden skirting I gave them a deep clean with Tile Doctor Remove and Go which was worked into the tiles with a black scrubbing pad. Then to renovate the surface and remove the markings I honed the surface with 400-grit and then 800-grit burnishing pad using water to lubricate the process and rinsing and extracting the soil away after each pad with the wet vacuum.
There were two areas that needed work so whilst one area was drying, I was able to get to work on the second and then return to the first later to apply a sealer. My product of choice for this floor was Tile Doctor Colour Grow which is an impregnating sealer which improves the colour and works by penetrating the pores of the tile and protecting it from within. I applied three coats allowing each one to dry before applying the next. The bathroom now looked as it should have done from the beginning.
My client was very happy with the improvement and left the following 5-Star review.
I only had my floor tiles fitted a few months or so ago and was so disappointed with them. I called Tom and within a few hours, he had transformed them! They look absolutely fantastic! Great value for money as well!
I recommended that in order to maintain the tiles, she should use Tile Doctor Neutral Cleaner, this is a pH neutral cleaner which will keep the floor without harming the sealer. Many tile cleaning products are only designed for Ceramic or Porcelain tiles and are too strong for use on sealed floors where they will strip the sealer off with time.
Tom Conlon
Cambridge Tile Doctor

 Banks Design Associates, LTD & Simply Home
This is an example of a coastal porch design in Portland Maine with decking.
 Webber + Studio, Architects
Ryann Ford Photography
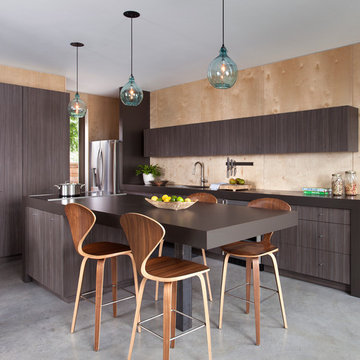
Mid-sized trendy galley concrete floor and gray floor eat-in kitchen photo in Austin with flat-panel cabinets, laminate countertops, stainless steel appliances, an island, a single-bowl sink, dark wood cabinets, brown backsplash and wood backsplash
Mid-sized trendy galley concrete floor and gray floor eat-in kitchen photo in Austin with flat-panel cabinets, laminate countertops, stainless steel appliances, an island, a single-bowl sink, dark wood cabinets, brown backsplash and wood backsplash
 Chango
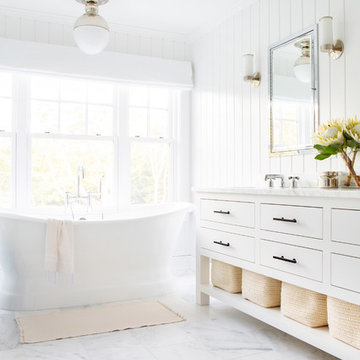
Architectural advisement, Interior Design, Custom Furniture Design & Art Curation by Chango & Co.
Photography by Sarah Elliott
See the feature in Domino Magazine


 PJCArchitecture
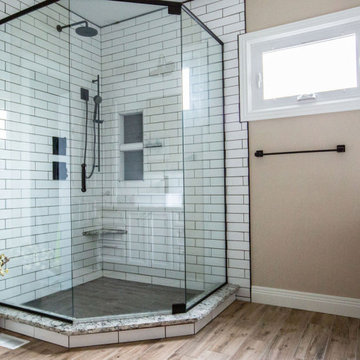
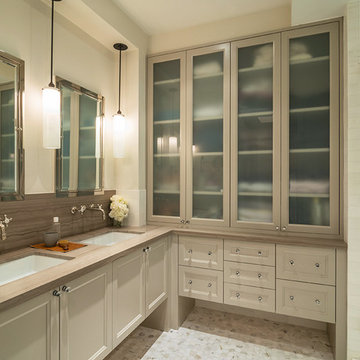
Example of a transitional brown tile mosaic tile floor bathroom design in New York with an undermount sink, recessed-panel cabinets, beige cabinets, beige walls and beige countertops

Living room - mid-sized mediterranean formal and open concept light wood floor and beige floor living room idea in Orange County with white walls, a standard fireplace, a stone fireplace and no tv
 Halper Architects LLC
Photography by Michael Moran
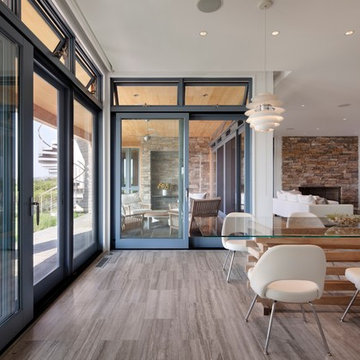
Example of a huge trendy two-story wood beige, laminate floor and brown floor great room design in New York with white walls and no fireplace
Example of a huge trendy two-story wood beige, laminate floor and brown floor great room design in New York with white walls and no fireplace
 Tile Doctor Ltd
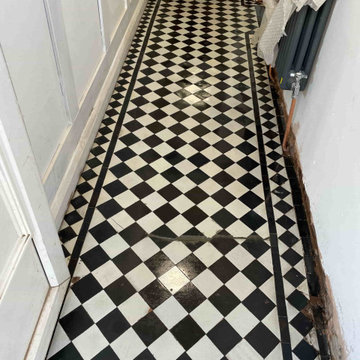
This 1920s single bay house in Earlsdon had been restored by the builder from top to bottom. The hallway floor had been covered in laminate flooring which had been removed, revealing an Edwardian tiled floor beneath. Unfortunately, the plasterer had not covered the floor when working on the walls, so the tiles were now covered in plaster!
The client was keen to keep as many original features as possible and called me in to see if the original 100-year-old floor could be renovated in keeping with the rest of the house. I visited the property to survey the tiles and explained that it certainly could be and having worked on hundreds of these renovations before I was confident of getting a good result. They were happy to go with my quotation and we arranged a time to carry out the work.
The floor tiles themselves were in good condition, but I had to hand carefully scrape the plaster off the tiles before starting on the deep clean. With the plaster removed from the floor I applied Tile Doctor Acid Gel and worked it into the tiles with a coarse 100-grit pad. The floor was then rinsed, and the waste extracted from the floor using a wet vacuum. The process was then repeated with a 200-Grit and then a 400-grit pad until I was happy.
The floor was then speed dried with fans whilst I worked on a repair around the threshold of one of the doors. The repair was relatively straight forward, and I managed to restore the tiling, so the repair was unnoticeable.
The floor was then left overnight to completely dry out. Floors of this age don’t have a damp proof membrane so moisture can build up if they have been covered as in this case. The next stage in the restoration would be to apply a sealer and the floor needs to be dry before you do this otherwise the result can be patchy.
Returning the following day, I first tested the floor with a damp meter to check the moisture levels in different parts of the floor to ensure it was dry enough to seal. The fans had done a good job and I was pleased to find that the floor was dry.
To seal this floor, I used Tile Doctor Seal and Go Extra, it’s a breathable acrylic based sealer that allows for moisture vapour to rise through the tile and evaporate at the surface. This makes it ideal for situations where no damp proof membrane has been installed and there is a low risk of mineral salt deposits being formed (efflorescence).
Once completed the transformation was huge and he Victorian tiles looked well suited to the hallway. Feedback from my client was they were over the moon with the newly restored floor!
For regular cleaning, I recommended Tile Doctor Neutral Tile Cleaner, this is a gentle pH neutral cleaner that will ensure the newly applied seal is retained and not eroded prematurely. This can be the problem with most household cleaning products which contain strong chemicals like bleach which can break down the sealer over time. Without a sealer dirt gets back into the pores of the tile which will mean the homeowner will need to get the floor cleaned and sealed again – a vicious circle!
Mick Gayton
Warwickshire Tile Doctor
Sponsored
Columbus, OH

Snider & Metcalf Interior Design, LTD
Leading Interior Designers in Columbus, Ohio & Ponte Vedra, Florida

 Design Wright Studios
Inspiration for a mid-sized mid-century modern formal and loft-style gray floor and medium tone wood floor living room remodel in Denver with a ribbon fireplace, a stone fireplace, gray walls and no tv
 Tile Doctor Ltd
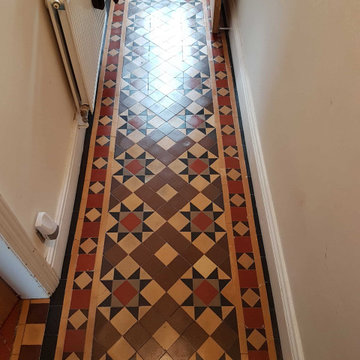
This client had just moved into a property in York and having pulled back the old carpet revealed a lovely old period Victorian tiled floor she didn’t know existed when she bought the house!
I went over at the beginning of this year to survey the floor and could see that fortunately, no glue or carpet grips had been used to secure the carpet; additionally the floor was in good physical condition considering its age with no cracks or loose tiles. The tiles were however very dusty and dirty with ingrained dirt and so had probably been covered with carpet for a very long time. The hallway was quite dark I’m afraid with little natural light so apologies for the photographs.
With old houses like this you never know what you are going to find so whilst I was there surveying the floor, I took some moisture readings with a damp meter on the floors and walls. The readings came back low so no sign of damp which was a relief to the owner.
We agreed a price for the work, and I arranged to come back the following week.
I must admit I do like York, its steeped in history and famous for its Cathedral and Viking museum. The houses in the city have loads of character and period features like this floor are quite common.
I deep cleaned the floor with a strong 1:3 dilution of Tile Doctor Pro-Clean worked in with a black scrubbing pad fitted to a rotary machine. Initially the solution was left to soak into the tile before being agitated by the machine. The soil was then rinsed off with minimal water and then extracted with a wet vacuum.
I followed this up with an Acid Wash using Tile Doctor Acid Gel to further clean up the tiles and help inhibit any potential efflorescent salt issues which are common in floors of this age due to the absence of the damp proof membrane. The floor was given a further rinse and extraction and allowed to dry out fully overnight. I needed the floor to be dry for the next day so it could be sealed.
I came back the next day and started by taking more damp readings which showed similar readings to the day before. Given the low readings I was able to move straight onto sealing which was done using four coats of Tile Doctor Seal and Go. This product works really well on old Victorian Tiles like these and being water based it doesn’t leave a smell as it dries.
Once the final coat of sealer had dried there was a significant improvement in the appearance of the floor which was much appreciated by client who was very happy with the end result.
For aftercare I recommended the use of Tile Doctor Neutral Tile Cleaner to maintain the floor, it has a nice fresh smell and can be used regularly due to its pH neutral nature which won’t prematurely erode the sealer like stronger bleach based cleaners.
Nigel Stoker
North West Yorkshire Tile Doctor

 Janet Brooks Design
Mark Boisclair
Inspiration for a large transitional open concept and formal dark wood floor living room remodel in Phoenix with white walls, a two-sided fireplace, a stone fireplace and no tv
Inspiration for a large transitional open concept and formal dark wood floor living room remodel in Phoenix with white walls, a two-sided fireplace, a stone fireplace and no tv
7