
Search results for "Posting updates" in Home Design Ideas

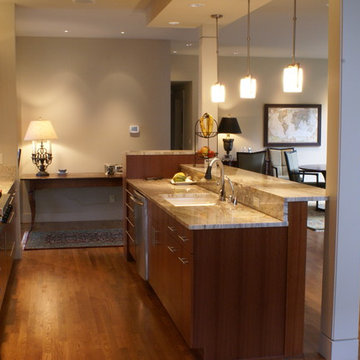
 Spears Design Build Group
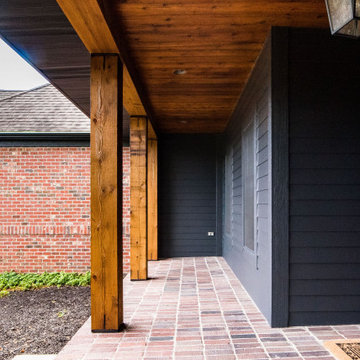
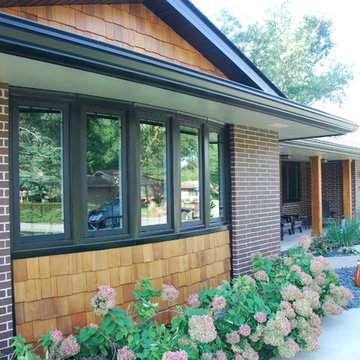
We replaced the porch posts with oversized 10” x 10” natural stained, rough cedar.
Modern exterior home idea in Chicago
Modern exterior home idea in Chicago

Find the right local pro for your project
 Drury Design
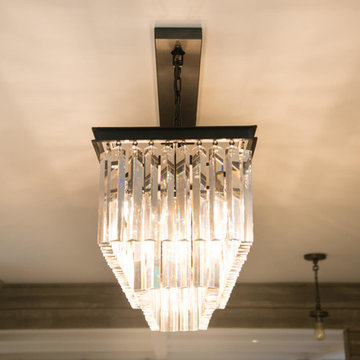
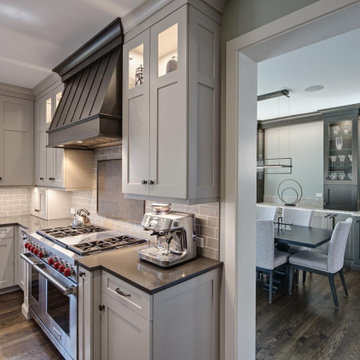
There were some druthers with the kitchen and there was a desire to make certain rooms more grown-up again. Unlike some of our clients who get rid of their formal dining rooms, this family wanted to keep theirs. They saw it as good space for entertaining and doing work – why not make it more stylish and purposeful?
THE REMODEL
Design Objectives
Keep the craftsman style of the home but make it more modern
Update the dining room to be more formal for entertaining and provide storage for china, stemware, wine, etc.
Open up the kitchen to improve flow
Incorporate new decorative lighting throughout the home to accent the home’s style
Transform the staircase into a statement piece that greets visitors – redesign it with arts & crafts details in the balusters, newel posts and handrails
Design Challenges:
Open up the dining room window for more light and a better view of the backyard. The previous window felt closed in with heavy shutters.
Improve kitchen flow without making the footprint larger
Make the entire home feel updated and cohesive while staying true to the house’s style.
THE RENEWED SPACES
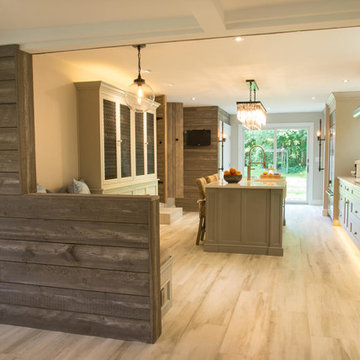
We bumped out the dining room window to make a new bay window. The glass mullion design mimics the craftsman style, setting the tone for the room while letting plenty of light in. It really opened up that end of the dining room. The view of the backyard is much bigger now, too. It’s also a great nook for playing board games, doing puzzles and playing with Legos.
We actually got rid of a walk-in pantry that had cut off a corner of the kitchen, and were able to keep all the main walls intact. The old pantry room is where the fridge is now, as well as a tall pantry cabinet, some additional cabinets and a new countertop surface. The flow is much better and it’s roomy now, with a kitchen table that’s great for informal meals, homework and kids seating when adults are entertaining in the dining room.
The cabinet, tile and countertop colors are still neutral but offer a more muted palette. To bring in the craftsman style, simple architectural details were added such as the hood and window valance, decorative furniture toes, a shaker door on the perimeter cabinets and a more modern cabinet door style on the island, pantry and refrigerator areas. New decorative lighting was added in the kitchen, dining room, living room, foyer and second-floor hallway to make the entire first floor feel updated. Also, the entire staircase was revamped. The existing hardwood was kept in place but stained medium brown to bring in some warmth.
“The Drury process made this project turn out better than we imagined,” one of the homeowners told us during the final photoshoot. “There were so many features we didn’t know about – like charging drawers – and ways of going about the remodel that didn’t come to us naturally. We’re so glad Alicia had so much experience and so many checklists. We got to think through everything and arrive at the best possible design for our family.”
 Kari P
When I bought my house in May 2014, there was one thing I really didn’t like about it – the 1950s bathroom complete with pink tile and mismatched gaudy fixtures was absolutely hideous. I knew redoing the bathroom would be a big, expensive project, so I vowed to just live with it while I fixed up parts of the house that were easier to update, such as putting a fresh coat of paint on the walls and updating the curtains (which I still haven’t done, by the way). Well my first winter in the new house turned out to be a bad one, and in February 2015, I noticed water stains on the walls and ceiling of the second bedroom that only got worse and worse each day. The water damage quickly spread to other rooms, and when contractors came to the house to access and fix the damage, they discovered moisture behind the pink tiled walls of my bathroom. And so started the bathroom remodel.
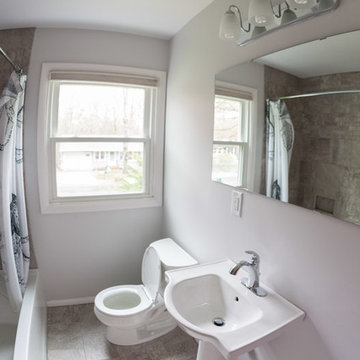
Start to finish, this project took close to six months, due to going back and forth with insurance and difficulty finding a contractor I liked. I lived without a shower for at least four of those months, showering at the gym where I worked or in a pop-up tent in my backyard once it was warm enough out. My friend Eric and I demoed the bathroom and for the remodel, I picked out all of the design components and had a local contractor, Fred Haas do the work. I kept the original layout – as my bathroom was small to begin with and it was both impractical and expensive to start moving things around – but just about everything else about the bathroom is new, except for maybe the window and door. New tub, sink, and toilet, new tile floor and shower surround, new walls and ceiling, fresh paint, new fixtures and mirror, updated lighting, and a better ventilation system were all added.
Tub – Sterling Vikrell
Toilet – Kohler Wellworth® two-piece round-front dual-flush toilet
Sink – Kohler Veer™ 21" pedestal bathroom sink
Fixtures – Kohler Alteo® line
Tile floor and shower surround – American Olean Laurel Heights ceramic tile in Summit Gray
Lighting – I don't remember... will have to see if I can find it
Ventilation system – NuTone
Mirror – Ikea
Paint – Behr
Shower Curtain – eBay
Here are photos of my project from start to finish. As you can see, I probably still need a thing or two (a toilet paper holder, mini storage shelf, and some art wouldn’t hurt, nor would replacing the door or painting it white), but overall I’m really happy with how my new bathroom came out. I LOVE it, which is the exact opposite of how I felt about the original bathroom.
Photos © Kari Post
Sponsored
Columbus, OH
Free consultation for landscape design!

Peabody Landscape Group
Columbus' Reliable Landscape Design & Contracting

 Renewal by Andersen of Des Moines
Kelly Baughman
Mid-sized minimalist red one-story brick exterior home photo in Other with a shingle roof
Mid-sized minimalist red one-story brick exterior home photo in Other with a shingle roof
 Ginkgo Leaf Studio
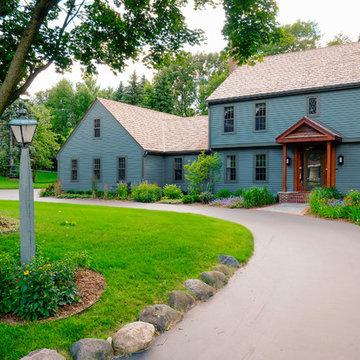
Looking up the driveway towards the new entrance to the home with revised planting beds.
Westhauser Photography
Photo of a mid-sized traditional front yard stone driveway in Milwaukee.
Photo of a mid-sized traditional front yard stone driveway in Milwaukee.
 Interior Re-Styling LLC.
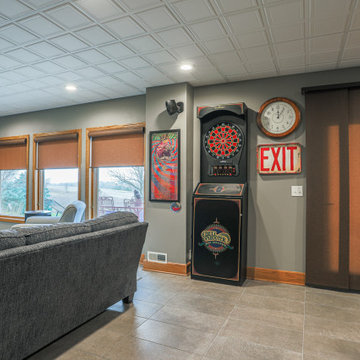
This walkout basement was in need of minimizing all of the medium oak tones and the flooring was the biggest factor in achieving that. Reminiscent Porcelain tile in Reclaimed Gray from DalTile with gray, brown and even a hint of blue tones in it was the starting point. The fireplace was the next to go with it's slightly raised hearth and bulking oak mantle. It was dropped to the floor and incorporated into a custom built wall to wall cabinet which allowed for 2, not 1, TV's to be mounted on the wall!! The cabinet color is Sherwin Williams Slate Tile; my new favorite color. The original red toned countertops also had to go. The were replaced with a matte finished black and white granite and I opted against a tile backsplash for the waterfall edge from the high counter to the low and it turned out amazing thanks to my skilled granite installers. Finally the support posted were wrapped in a stacked stone to match the TV wall.
 Beautiful Backyard Living
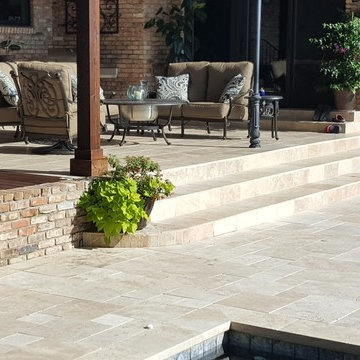
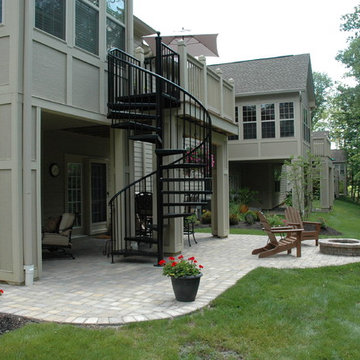
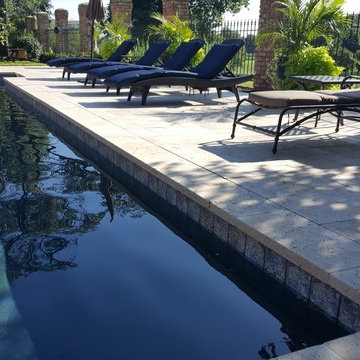
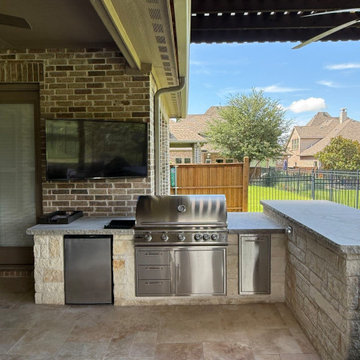
Our recent customer in Frisco already had a great outdoor living space, but after years of enjoying it...a few areas were definitely ready for an update. Instead of starting over, we focused on refreshing the features that mattered most. The outdoor kitchen received all new grilling equipment, which meant modifying the existing grill cutouts and updating portions of the luederstone to make sure everything fit perfectly. The result is a cleaner, more functional cooking space that's ready for the next backyard gathering!
Additionally, we gave the patio a refreshed new look by installing beautiful tumbled travertine tile, adding warmth, character and a timeless feel to the patio itself. We replaced the rotting wood at the bottom of several patio cover posts, helping restore the structure's appearance and longevity. Sometimes the best patio transformations aren't complete makeovers...they're thoughtful upgrades that make an already-loved space feel fresh, updated and ready for years of enjoyment ahead!
Sponsored
Delaware, OH

Buckeye Basements, Inc.
Central Ohio's Basement Finishing ExpertsBest Of Houzz '13-'21
 Topetcher Architecture
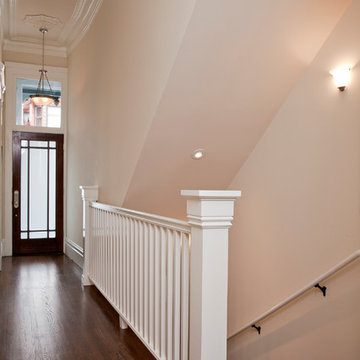
New staircase connecting main flat level to lower floor.
photo: Cherie Cordellos
Entryway - transitional entryway idea in San Francisco
Entryway - transitional entryway idea in San Francisco
 Portland Stair Company
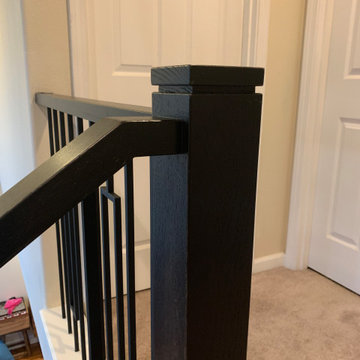
Modern newel cap
Mid-sized trendy carpeted u-shaped mixed material railing staircase photo in Portland with carpeted risers
Mid-sized trendy carpeted u-shaped mixed material railing staircase photo in Portland with carpeted risers
 Kari P
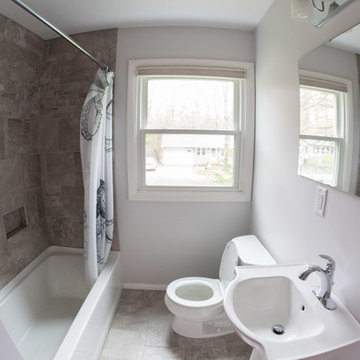
When I bought my house in May 2014, there was one thing I really didn’t like about it – the 1950s bathroom complete with pink tile and mismatched gaudy fixtures was absolutely hideous. I knew redoing the bathroom would be a big, expensive project, so I vowed to just live with it while I fixed up parts of the house that were easier to update, such as putting a fresh coat of paint on the walls and updating the curtains (which I still haven’t done, by the way). Well my first winter in the new house turned out to be a bad one, and in February 2015, I noticed water stains on the walls and ceiling of the second bedroom that only got worse and worse each day. The water damage quickly spread to other rooms, and when contractors came to the house to access and fix the damage, they discovered moisture behind the pink tiled walls of my bathroom. And so started the bathroom remodel.
Start to finish, this project took close to six months, due to going back and forth with insurance and difficulty finding a contractor I liked. I lived without a shower for at least four of those months, showering at the gym where I worked or in a pop-up tent in my backyard once it was warm enough out. My friend Eric and I demoed the bathroom and for the remodel, I picked out all of the design components and had a local contractor, Fred Haas do the work. I kept the original layout – as my bathroom was small to begin with and it was both impractical and expensive to start moving things around – but just about everything else about the bathroom is new, except for maybe the window and door. New tub, sink, and toilet, new tile floor and shower surround, new walls and ceiling, fresh paint, new fixtures and mirror, updated lighting, and a better ventilation system were all added.
Tub – Sterling Vikrell
Toilet – Kohler Wellworth® two-piece round-front dual-flush toilet
Sink – Kohler Veer™ 21" pedestal bathroom sink
Fixtures – Kohler Alteo® line
Tile floor and shower surround – American Olean Laurel Heights ceramic tile in Summit Gray
Lighting – I don't remember... will have to see if I can find it
Ventilation system – NuTone
Mirror – Ikea
Paint – Behr
Shower Curtain – eBay
Here are photos of my project from start to finish. As you can see, I probably still need a thing or two (a toilet paper holder, mini storage shelf, and some art wouldn’t hurt, nor would replacing the door or painting it white), but overall I’m really happy with how my new bathroom came out. I LOVE it, which is the exact opposite of how I felt about the original bathroom.
Photos © Kari Post
Sponsored
Columbus, OH

HomeCraft Remodeling
Custom Craftsmanship & Build Solutions in Franklin County, Ohio
 Drury Design
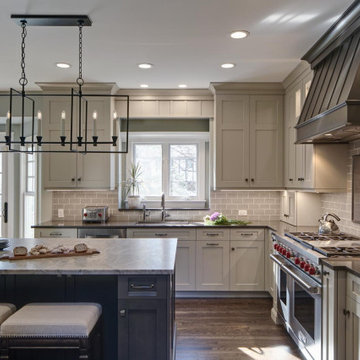
There were some druthers with the kitchen and there was a desire to make certain rooms more grown-up again. Unlike some of our clients who get rid of their formal dining rooms, this family wanted to keep theirs. They saw it as good space for entertaining and doing work – why not make it more stylish and purposeful?
THE REMODEL
Design Objectives
Keep the craftsman style of the home but make it more modern
Update the dining room to be more formal for entertaining and provide storage for china, stemware, wine, etc.
Open up the kitchen to improve flow
Incorporate new decorative lighting throughout the home to accent the home’s style
Transform the staircase into a statement piece that greets visitors – redesign it with arts & crafts details in the balusters, newel posts and handrails
Design Challenges:
Open up the dining room window for more light and a better view of the backyard. The previous window felt closed in with heavy shutters.
Improve kitchen flow without making the footprint larger
Make the entire home feel updated and cohesive while staying true to the house’s style.
THE RENEWED SPACES
We bumped out the dining room window to make a new bay window. The glass mullion design mimics the craftsman style, setting the tone for the room while letting plenty of light in. It really opened up that end of the dining room. The view of the backyard is much bigger now, too. It’s also a great nook for playing board games, doing puzzles and playing with Legos.
We actually got rid of a walk-in pantry that had cut off a corner of the kitchen, and were able to keep all the main walls intact. The old pantry room is where the fridge is now, as well as a tall pantry cabinet, some additional cabinets and a new countertop surface. The flow is much better and it’s roomy now, with a kitchen table that’s great for informal meals, homework and kids seating when adults are entertaining in the dining room.
The cabinet, tile and countertop colors are still neutral but offer a more muted palette. To bring in the craftsman style, simple architectural details were added such as the hood and window valance, decorative furniture toes, a shaker door on the perimeter cabinets and a more modern cabinet door style on the island, pantry and refrigerator areas. New decorative lighting was added in the kitchen, dining room, living room, foyer and second-floor hallway to make the entire first floor feel updated. Also, the entire staircase was revamped. The existing hardwood was kept in place but stained medium brown to bring in some warmth.
“The Drury process made this project turn out better than we imagined,” one of the homeowners told us during the final photoshoot. “There were so many features we didn’t know about – like charging drawers – and ways of going about the remodel that didn’t come to us naturally. We’re so glad Alicia had so much experience and so many checklists. We got to think through everything and arrive at the best possible design for our family.”
 Alair Homes Plano
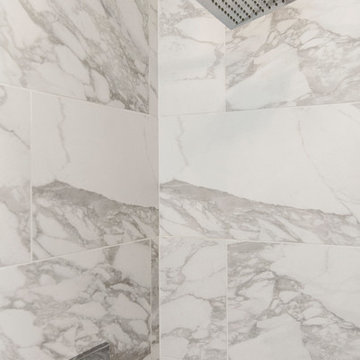
These bathrooms, shared by teenage sisters, needed an update from the girly bright pink on the walls to a contemporary young adult look. The rooms were given a trendy gray and white makeover with white shaker cabinets, modern calacatta tiling and popular super white granite countertops. Design-Build by Hatfield Builders & Remodelers; photography credits Versatile Imaging.
 Beautiful Backyard Living
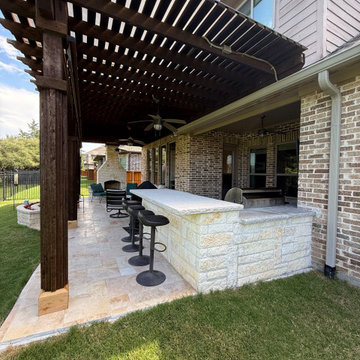
Our recent customer in Frisco already had a great outdoor living space, but after years of enjoying it...a few areas were definitely ready for an update. Instead of starting over, we focused on refreshing the features that mattered most. The outdoor kitchen received all new grilling equipment, which meant modifying the existing grill cutouts and updating portions of the luederstone to make sure everything fit perfectly. The result is a cleaner, more functional cooking space that's ready for the next backyard gathering!
Additionally, we gave the patio a refreshed new look by installing beautiful tumbled travertine tile, adding warmth, character and a timeless feel to the patio itself. We replaced the rotting wood at the bottom of several patio cover posts, helping restore the structure's appearance and longevity. Sometimes the best patio transformations aren't complete makeovers...they're thoughtful upgrades that make an already-loved space feel fresh, updated and ready for years of enjoyment ahead!
42