
Search results for "Precautions" in Home Design Ideas

 Southern Perfection Painting Inc.
Exterior Painters Tip: Get Rid Of Ice Dams
read more https://soperfectpaint.com/exterior-painters-tip-get-rid-of-ice-dams/
#exteriorpainter #housepainter #painteratlanta #paintcontractor #commercialpainter #residentialpainter #housepainteratlanta #exteriorpainteratlanta #interiorpainter #MondayTips

 Custom Wine Cellar
Our team applied a 3 ½ inch spray foam to prevent the formation of water droplets inside the wine cellar wall cavity. They also took the necessary precautions to ensure that the humidity in the wine cellar remains stable. Read more: https://www.customwinecellar.com/custom-metal-wine-racks/metal-wine-racks-for-an-under-the-stairs-wine-cellar/
Cachet Wine Cellars
3731 W. Warner Ave. Unit A13
Santa Ana, CA 92704
Phone: (949) 569-7857
 Advantage Construction
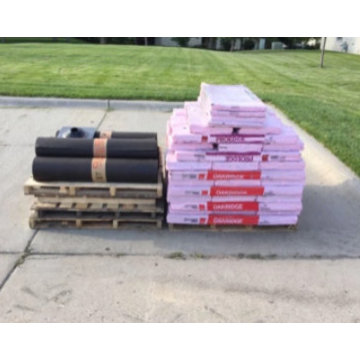
Advantage utilizes professional, efficient, and courteous workers. This ensures quality workmanship, a safe work environment, and a hassle free project for property owners. We take extra precautions to protect
your home and its surroundings.
Find the right local pro for your project
 CertaPro Painters of Woburn, MA
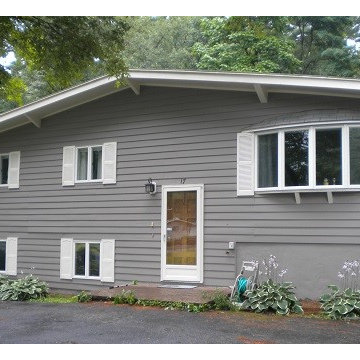
This simple multi-level house features white trim and shutters on a grey exterior, allowing the windows and entryway to stand out. With every exterior painting job we do, we pay attention to the little things. We take extra precautions to avoid paint splatter and overspray on other areas such as your driveway and landscaping.
 Absolute Exhibits
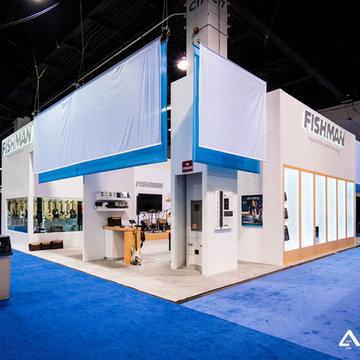
The Fishman custom booth flaunted 16 foot high, sleek white walls, 3D halo lit logos, two (2) private meeting rooms and two (2) product demo stations where attendees can test Fishman’s latest products.
Several precautions were set in place to properly insulate the individual rooms to block outside noise and keep music within the demo rooms.
For example, the rooms were spaced out as far apart as possible and utilized double-layered walls with built-in sound proofing to create an isolated experience for each room.
For more information about this custom exhibit, please visit:
https://www.absoluteexhibits.com/showtime/fishman-namm-show-2017/
 Craig Ebner Painting LLC
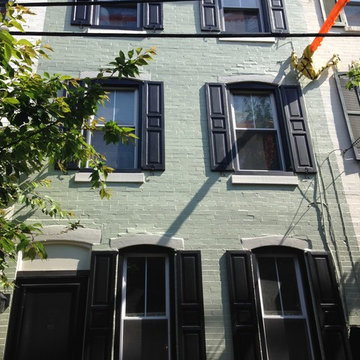
This house needed a lot of preparation, or "prep" work, before we painted the finishing coats. We restored a few of the shutters and brought the lintels (above windows) and sills back to life after they had been covered with several coats of old paint and normal wear and tear. In addition, you can see the protective orange and yellow sleeves covering the electric lines, we always approach a job with all the necessary safety precautions before we begin work.
 SUPERIOR CHIMNEY SERVICES CORPORATION
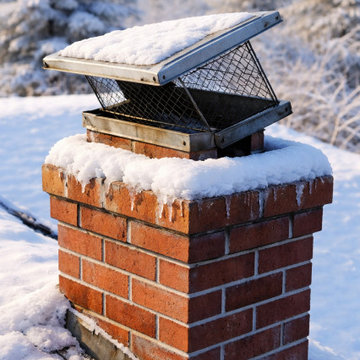
Is it crazy to think about chimney repairs in the winter? It’s cold and snowy outside and the rooftops are solid white, coated with a layer of ice. A homeowner called us with a concern about her home. She reported that a small stream of water was coming down the chimney and into the firebox. To keep the water from flooding the firebox, the homeowner placed a Tupperware container to collect the water. Not a good look. Can chimney repairs in the winter be done by a certified chimney technician?
Chimney Repairs in the Winter
Chimney repairs can be completed in the winter, although it depends on what type of chimney repair is needed. Let’s take a quick look at the different chimney repairs in our cold winter months.
Chimney Cap: If your chimney cap comes loose, or if the winter winds knocked it out of place or blew it off completely, our certified chimney technician can go up on the roof and take care of the chimney cap for you with a chimney cap replacement. Our technicians follow the guidelines for safety, especially in the winter months when roofing systems are the slipperiest.
Flashing: Flashing is the connector from the roofing system to the chimney. It is the barrier that protects water from finding its way into your home. However, if the flashing becomes loose or comes away from the roof and chimney, it is open season for the rain to come directly into your home and create chaos.
Chimney Crown: The chimney crown is the slab of cement that sits on top of the chimney and right below the chimney cap. Hairline cracks can form in the chimney crown allowing water, melted snow, to enter. Even the smallest hairline crack can cause the melted snow to find the weak spot on the chimney crown and make its way into your home.
Remember, hairline cracks can and will grow in width and length with the freeze thaw cycles. When the melted snow freezes at night, it expands inside of the crack. If the temperatures cooperate in the daytime, it melts the snow. But remember, it doesn’t necessarily dry out inside of the crack. It can remain moist and freeze again at night.
Chimney Tuckpointing: Tuckpointing the chimney can be done in the winter, but it certainly isn’t an easy process as we’re dealing with wet mortar. Cracks can create an entry point for melted snow to enter, further deteriorating the mortar.
Although it is not optimal to perform chimney repairs in the winter, Superior Chimney takes precautions to ensure a safe and effective repair. Now the homeowner can get rid of the streaming water in the firebox and enjoy the rest of the winter with a warm and dry fireplace.
Be sure to contact us today if you have a water leak in your fireplace. If you would like to have your chimney inspected and checked for water leaks coming this spring, contact us today to schedule it up in March. This way, you’ll be all set and not compete with others in the Spring.
 Betz Pools Limited
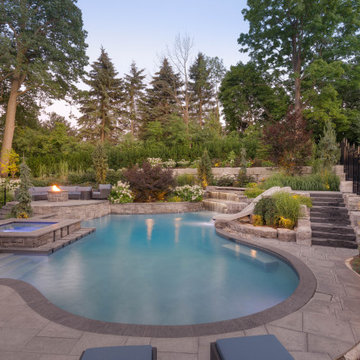
Although the natural rise along the back was perfectly suited to the design, special precautions had to be taken to avoid encroaching on the roots of the massive trees. The landscape architect is also an arborist so that issue was expertly handled, as was the addition of mature trees and shrubs to enhance privacy.
 Stairworks
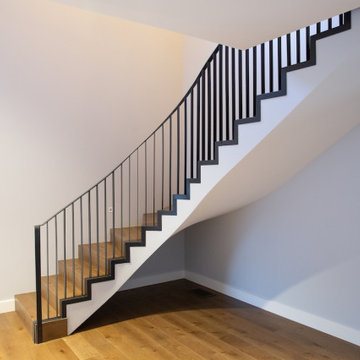
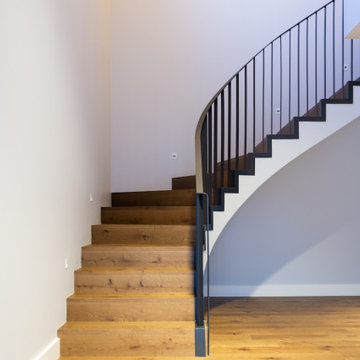
Martins Avenue is a beautiful, curved staircase made out of steel as the base material. Curved stairs are a challenge because you need to get the soffit (the underside of the staircase) curved and twisted around the base of the stairs to get the nice flowing lines. And because the timber work was outsourced to other builders, we had to work closely alongside them in order to get the soffit curved just right and ensure everything matched the flooring.
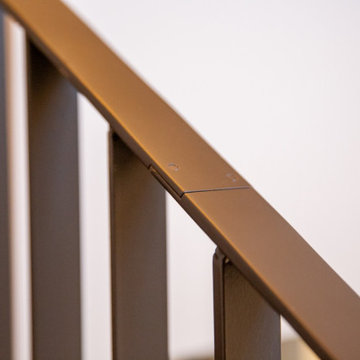
The other big challenge was that the curved balustrade needed to be an identical match to the staircase and have a nice, smooth, curved line. In order to achieve this, we built both the steel stairs and balustrade in the shop at the same time and match drilled the balustrade through. Therefore when we brought it to site we knew it would fit perfectly. The angle on the bottom of the balustrade was designed to cover the junction or zig zag angle between the steel and the timber.
Because of how this staircase had to be designed and built, it was extremely heavy and a challenging install. Additionally, as the walls of the site were all finished, we had to take all the necessary precautions to get the stairs installed without causing any damage or leaving any markings. Afterwards, the builders covered the underside with gib and closed risers to hide the cladding underneath.
There was absolutely no room for error with this staircase and we at Stairworks, the builders and the clients are all extremely happy with the end result!
 Tile Doctor Ltd
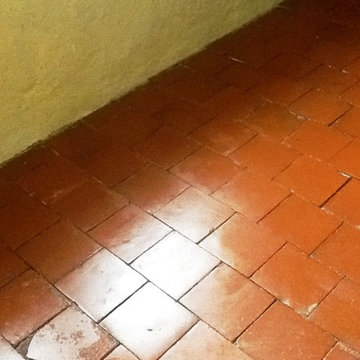
Here’s an interesting work I recently completed on a red Quarry tiled floor at a house in the town of Abington, Northampton. In post-war Britain (more specifically in the 1940s and 1950s), many new homes were built with Quarry tiled hallways and kitchens, so quite a popular feature back then. These floors are typically quite hard wearing and therefore ideal for such high traffic areas; additionally they don’t need a great deal of maintenance but their appearance will degrade over time.
In this particular house, the Quarry tiled floor had been covered with linoleum for many years, causing significant patches of visible black mould. The floor also had a loose tile (which I promptly reset to mitigate the potential tripping hazard) and splashes of paint due to a lack of precaution while the house was being renovated. Needless to say, the floor needed a lot of work.
Before beginning the cleaning I made sure to vacuum up all of the loose debris from the floor. I then applied Tile Doctor Remove & Go to the tiles, left it to dwell for a short period, and then agitated the area with a black stripping pad, adding water to aid the process. This helped to break down any old and ineffectual sealer, along with the paint splashes marking the tiles, leaving a much cleaner and more refined appearance.
I followed this up with Tile Doctor Grout Clean-Up to eliminate the odd speck of cement and grout haze dating back to when the floor was first installed; Gout Clean-up has an acid base so it’s not advised to leave it on the tiles for too long, consequently as soon as I was happy it had done the job I rinsed it off with water and give the floor a thorough wash down.
I used a wet-vacuum machine to extract as much water as possible and gave the floor a once over with steam cleaner which improves the evaporation of any remaining moisture by heating up the tiles.
After completing the cleaning process, I left the house to allow time for the floor to dry completely. Upon my return, I conducted a damp test which showed the floor needed to dry further before sealing so I left an industrial fan in place for a couple of hours to help speed things up.
Once I was satisfied that the floor was dry enough to take the sealant, I sealed the floor using Tile Doctor Colour Grow which is an interesting product that will not only provide durable stain protection but also improves the natural colours of the tile.
While the floor required a lot of time and work to restore, I think you will agree the results were certainly worth waiting for.
Phil Vissian
Northamptonshire Tile Doctor
 Stairworks
Martins Avenue is a beautiful, curved staircase made out of steel as the base material. Curved stairs are a challenge because you need to get the soffit (the underside of the staircase) curved and twisted around the base of the stairs to get the nice flowing lines. And because the timber work was outsourced to other builders, we had to work closely alongside them in order to get the soffit curved just right and ensure everything matched the flooring.
The other big challenge was that the curved balustrade needed to be an identical match to the staircase and have a nice, smooth, curved line. In order to achieve this, we built both the steel stairs and balustrade in the shop at the same time and match drilled the balustrade through. Therefore when we brought it to site we knew it would fit perfectly. The angle on the bottom of the balustrade was designed to cover the junction or zig zag angle between the steel and the timber.
Because of how this staircase had to be designed and built, it was extremely heavy and a challenging install. Additionally, as the walls of the site were all finished, we had to take all the necessary precautions to get the stairs installed without causing any damage or leaving any markings. Afterwards, the builders covered the underside with gib and closed risers to hide the cladding underneath.
There was absolutely no room for error with this staircase and we at Stairworks, the builders and the clients are all extremely happy with the end result!
 Stairworks
Martins Avenue is a beautiful, curved staircase made out of steel as the base material. Curved stairs are a challenge because you need to get the soffit (the underside of the staircase) curved and twisted around the base of the stairs to get the nice flowing lines. And because the timber work was outsourced to other builders, we had to work closely alongside them in order to get the soffit curved just right and ensure everything matched the flooring.
The other big challenge was that the curved balustrade needed to be an identical match to the staircase and have a nice, smooth, curved line. In order to achieve this, we built both the steel stairs and balustrade in the shop at the same time and match drilled the balustrade through. Therefore when we brought it to site we knew it would fit perfectly. The angle on the bottom of the balustrade was designed to cover the junction or zig zag angle between the steel and the timber.
Because of how this staircase had to be designed and built, it was extremely heavy and a challenging install. Additionally, as the walls of the site were all finished, we had to take all the necessary precautions to get the stairs installed without causing any damage or leaving any markings. Afterwards, the builders covered the underside with gib and closed risers to hide the cladding underneath.
There was absolutely no room for error with this staircase and we at Stairworks, the builders and the clients are all extremely happy with the end result!


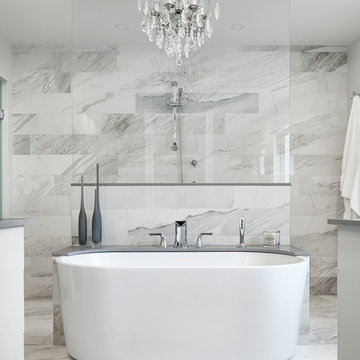
 Square Footage Inc.
Photo by Valerie Wilcox
Inspiration for a transitional master gray tile, white tile and marble tile marble floor bathroom remodel in Toronto with flat-panel cabinets and white cabinets
Inspiration for a transitional master gray tile, white tile and marble tile marble floor bathroom remodel in Toronto with flat-panel cabinets and white cabinets
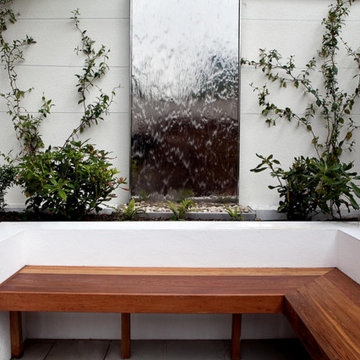
 Adlon Construction
Inspiration for a contemporary courtyard concrete paver water fountain landscape in London.
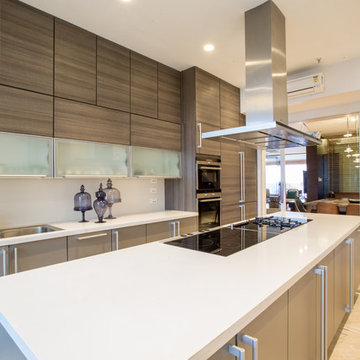
 Moriq
MoriqInspiration for a mid-sized contemporary galley kitchen remodel in Hyderabad with flat-panel cabinets, beige cabinets, solid surface countertops, stainless steel appliances and an island



9