
Search results for "Prevent generating" in Home Design Ideas
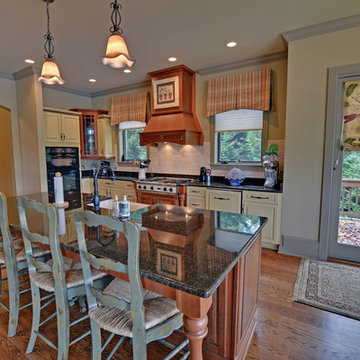
 Envision Web
Stuart Wade, Envision Virtual Tours
Envision Virtual Tours and High Resolution Photography is your best choice to find just what you are looking for in the Lake Chatuge Area . Knowing the areas and resources of Lake Chatuge is our specialty
The Jewel of the Mountains, Lake Chatuge is one of the most scenic lakes in the Tennessee Valley Authority (TVA)
system, was formed in 1942 when the construction on the earth-filled dam was completed. The dam is located off Myers Chapel Road, about 3 miles southeast of Hayesville, at the Barnett Bridge in North Carolina just over the Towns County, GA. line. Chatuge Dam is 144 feet high and stretches 2,850 feet across the Hiwassee River. Chatuge reservoir covers about 7200 acres, with approximately 133 miles of shoreline, and a flood-storage capacity of 62,619 acre-feet. Although Chatuge was originally built to for water storage to help prevent flooding downstream, it currently serves many purposes, including flood control, electric power generation, augmentation of water flows for navigation downstream, and provides numerous recreational opportunities, including boating, swimming, skiing, camping, hiking and fishing. Thirty-two species of fish inhabit Lake Chatuge, with smallmouth bass, large-mouth, spotted, white, and hybrids are stocked annually. More info. about fishing Chatuge:

 Allreno
In What Order Should You Renovate a Kitchen? Revolutionizing Kitchen and Bath Renovation with Allreno's Design AI
Renovating a kitchen can be one of the most exciting and rewarding home improvement projects. However, with so many decisions to make, it can also be overwhelming. From selecting kitchen cabinets to choosing countertops and appliances, the process often involves careful planning and organization. So, how do you ensure the renovation goes smoothly? One important factor is knowing the right order in which to tackle the project.
The Right Order for Kitchen Renovation
Renovating a kitchen involves multiple steps, and knowing the proper order of operations is crucial for both time efficiency and cost savings. Here’s a general guideline for how to approach your kitchen renovation:
1. Planning and Design: The first step in any renovation is planning. This includes deciding on the layout, design, and features you want in your kitchen. At this stage, you’ll also need to think about your budget and timeline. It’s essential to finalize these details before moving forward with the actual work.
2. Demolition: Once the design is set, it’s time to remove old fixtures, cabinets, appliances, and flooring. Demolition can be a messy process, but it’s necessary for starting fresh. Having a professional handle this phase is often a smart move to ensure everything is safely removed.
3. Structural Work: If you plan on altering the layout of the kitchen by knocking down walls or adding new plumbing or electrical work, now is the time to do it. Structural changes can be complicated and costly, so it’s important to ensure these are completed before installing any new elements.
4. Plumbing and Electrical Work: With the structure in place, you can begin installing plumbing and electrical systems. This might include adding new water lines, sinks, or electrical outlets for appliances. It’s best to bring in licensed professionals for this stage, as electrical and plumbing work requires expert knowledge.
5. Cabinet Installation: Once the plumbing and electrical work are in place, you can install the kitchen cabinets. Cabinets are one of the most important elements of the kitchen, and the Allreno design AI can make this process easier. Allreno's AI-driven platform allows you to visualize how different kitchen cabinets will fit into your space, ensuring you make the best choice based on your preferences and layout.
6. Countertops: After the cabinets are installed, it’s time to add countertops. Whether you choose granite, quartz, or a more budget-friendly option, countertops are a focal point of the kitchen, and they should complement the cabinets and other design elements.
7. Flooring: Now that the major structural elements are in place, it’s time to install your flooring. Whether you opt for tile, hardwood, or vinyl, flooring should be installed after the cabinets and countertops to prevent any damage during the installation process.
8. Appliances and Fixtures: With the foundation in place, you can now add your appliances (oven, refrigerator, dishwasher, etc.) and fixtures (sink, faucets, lighting). Allreno’s AI can also help here by offering kitchen design recommendations based on available appliances and space dimensions.
9. Final Touches: The last step is adding the finishing touches to your kitchen. This includes painting the walls, adding backsplash tiles, and installing accessories like handles and knobs on your cabinets. This is also the stage where you can implement any stylistic choices to make the space uniquely yours.
How Allreno's AI Transforms the Renovation Process
One of the biggest challenges of a kitchen renovation is visualizing how everything will come together. Allreno’s design AI changes that by offering an intuitive platform that brings your ideas to life. Here’s how:
• Personalized Design Recommendations: Allreno’s AI suggests design elements based on your preferences, style, and space dimensions. Whether it’s selecting the perfect kitchen cabinets or countertop finishes, the AI ensures everything works together cohesively.
• 3D Visualization: With Allreno’s AI-driven design tools, you can visualize your kitchen layout in 3D before any work begins. This allows you to see how different elements will fit into your space and make adjustments as needed.
• Efficient Project Management: Allreno helps you streamline the entire renovation process by generating accurate material lists, estimates, and timelines. This means you can avoid costly errors and keep your renovation on track.
Conclusion
Renovating a kitchen is an exciting project, but it requires careful planning and organization to ensure it’s done right. By following a strategic order of operations and leveraging cutting-edge technology like Allreno’s design AI, homeowners can streamline the process, save time and money, and bring their dream kitchen to life with ease. Allreno not only simplifies the design process but also provides innovative solutions that make kitchen and bath renovations faster and more efficient than ever before.
Ready to get started with your kitchen renovation? Allreno's AI-powered design platform is here to help you every step of the way.
![Kitchen Remodel - K. Wood [Clifton, VA]](https://st.hzcdn.com/fimgs/fe5160ac046c28a1_0621-w360-h360-b0-p0--.jpg)
 Quality Bath
About the faucet:
Extended Reach Pulldown Kitchen Faucet with Soap Dispenser and Air Switch
Unique “PLP” positive lock holds spray head in place.
Pre-positioned “Easy Pull” counterbalanced weight.
Spray head extends 18” from spout.
Lever selects spray from aerated stream.
1.75 gpm maximum flow rate with stream selected.
Solid brass construction.
Single lever control hot/cold ceramic disk valve cartridge.
3 handle caps included. Plain, and ceramic right hand or left hand operation indicated for hot and cold.
Handle adjusts for clearance from backsplash.
Braided connection hoses.
Adjustable Teflon® “Friction Lock” aids handle feel and prevents sag.
360 degree swivel spout.
Compatible with Reverse Osmosis.
Includes Soap/Lotion Dispenser (4060) and Air Switch (4010)
About the sink:
Farmhouse Copper Apron Front Kitchen Sink-
It's a winsome classic, done better. The Farmhouse apron-front kitchen sink from Native Trails renews this well-loved traditional design. The intriguing hand hammered copper texture is a feast for the eyes. Farmhouse single-bowl kitchen sink is artisan crafted; forged of high-quality recycled copper. You can trust that your heirloom sink will last for generations - Native Trails offers a lifetime warranty on all our copper sinks.
16 Gauge Copper
Outside Dimensions: 22" x 33" x 10.5"
Inside Dimensions: 17" x 28" x 10"
Apron Extends 4" on Sides
3.5" Drain Opening-recommend drains: DR320 or DR340
Find the right local pro for your project
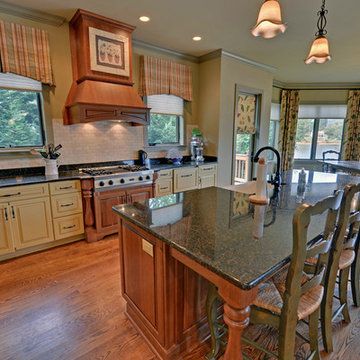 Envision Web
Stuart Wade, Envision Virtual Tours
Envision Virtual Tours and High Resolution Photography is your best choice to find just what you are looking for in the Lake Chatuge Area . Knowing the areas and resources of Lake Chatuge is our specialty
The Jewel of the Mountains, Lake Chatuge is one of the most scenic lakes in the Tennessee Valley Authority (TVA)
system, was formed in 1942 when the construction on the earth-filled dam was completed. The dam is located off Myers Chapel Road, about 3 miles southeast of Hayesville, at the Barnett Bridge in North Carolina just over the Towns County, GA. line. Chatuge Dam is 144 feet high and stretches 2,850 feet across the Hiwassee River. Chatuge reservoir covers about 7200 acres, with approximately 133 miles of shoreline, and a flood-storage capacity of 62,619 acre-feet. Although Chatuge was originally built to for water storage to help prevent flooding downstream, it currently serves many purposes, including flood control, electric power generation, augmentation of water flows for navigation downstream, and provides numerous recreational opportunities, including boating, swimming, skiing, camping, hiking and fishing. Thirty-two species of fish inhabit Lake Chatuge, with smallmouth bass, large-mouth, spotted, white, and hybrids are stocked annually. More info. about fishing Chatuge:

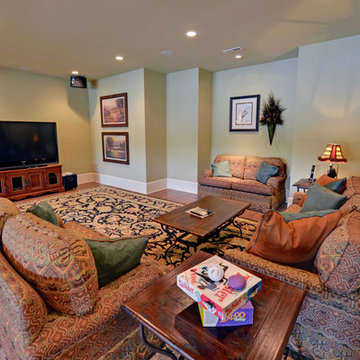 Envision Web
Stuart Wade, Envision Virtual Tours
Envision Virtual Tours and High Resolution Photography is your best choice to find just what you are looking for in the Lake Chatuge Area . Knowing the areas and resources of Lake Chatuge is our specialty
The Jewel of the Mountains, Lake Chatuge is one of the most scenic lakes in the Tennessee Valley Authority (TVA)
system, was formed in 1942 when the construction on the earth-filled dam was completed. The dam is located off Myers Chapel Road, about 3 miles southeast of Hayesville, at the Barnett Bridge in North Carolina just over the Towns County, GA. line. Chatuge Dam is 144 feet high and stretches 2,850 feet across the Hiwassee River. Chatuge reservoir covers about 7200 acres, with approximately 133 miles of shoreline, and a flood-storage capacity of 62,619 acre-feet. Although Chatuge was originally built to for water storage to help prevent flooding downstream, it currently serves many purposes, including flood control, electric power generation, augmentation of water flows for navigation downstream, and provides numerous recreational opportunities, including boating, swimming, skiing, camping, hiking and fishing. Thirty-two species of fish inhabit Lake Chatuge, with smallmouth bass, large-mouth, spotted, white, and hybrids are stocked annually. More info. about fishing Chatuge:
![Kitchen Remodel - K. Wood [Clifton, VA]](https://st.hzcdn.com/fimgs/fcb1efe4046c28e8_0621-w360-h360-b0-p0--.jpg) Quality Bath
Quality BathAbout the faucet:
Extended Reach Pulldown Kitchen Faucet with Soap Dispenser and Air Switch
Unique “PLP” positive lock holds spray head in place.
Pre-positioned “Easy Pull” counterbalanced weight.
Spray head extends 18” from spout.
Lever selects spray from aerated stream.
1.75 gpm maximum flow rate with stream selected.
Solid brass construction.
Single lever control hot/cold ceramic disk valve cartridge.
3 handle caps included. Plain, and ceramic right hand or left hand operation indicated for hot and cold.
Handle adjusts for clearance from backsplash.
Braided connection hoses.
Adjustable Teflon® “Friction Lock” aids handle feel and prevents sag.
360 degree swivel spout.
Compatible with Reverse Osmosis.
Includes Soap/Lotion Dispenser (4060) and Air Switch (4010)
About the sink:
Farmhouse Copper Apron Front Kitchen Sink-
It's a winsome classic, done better. The Farmhouse apron-front kitchen sink from Native Trails renews this well-loved traditional design. The intriguing hand hammered copper texture is a feast for the eyes. Farmhouse single-bowl kitchen sink is artisan crafted; forged of high-quality recycled copper. You can trust that your heirloom sink will last for generations - Native Trails offers a lifetime warranty on all our copper sinks.
16 Gauge Copper
Outside Dimensions: 22" x 33" x 10.5"
Inside Dimensions: 17" x 28" x 10"
Apron Extends 4" on Sides
3.5" Drain Opening-recommend drains: DR320 or DR340
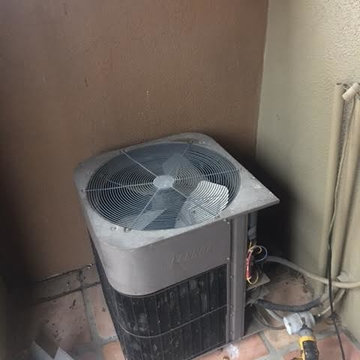
 1st Choice Heating & Air Conditioning, Inc.
Existing 2-Ton Lennox Air Conditioner
Patio - small backyard patio idea in Orange County
Patio - small backyard patio idea in Orange County
 Windy City Painters
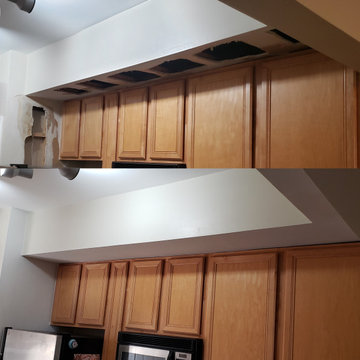
 Windy City Painters response to water damage in a kitchen:
Assessment and Inspection:
Windy City Painters initiates the process by conducting a thorough assessment of the water damage in the kitchen. This involves inspecting the soffit above the kitchen cabinets and the side wall to identify the areas that require repair. The severity of the damage is carefully evaluated to determine the scope of the restoration.
Insulation Replacement:
In cases where water has damaged insulation, Windy City Painters removes and replaces the affected insulation to ensure proper restoration of the affected areas. This step is crucial for preventing future issues related to moisture and maintaining the integrity of the space.
Drywall Replacement:
Damaged drywall is carefully removed and replaced during the repair process. This includes removing sections of drywall that have been compromised by water, ensuring that the new drywall seamlessly integrates with the existing structure.
Sealing Water Spots with Oil-Based Primer:
To prevent any potential water stains from bleeding through the new paint, Windy City Painters applies an oil-based primer to seal water spots. This step not only ensures a smooth and uniform finish but also provides additional protection against future water damage.
Cleaning and Restoration:
After completing the repair work, Chicago painter takes the extra step of cleaning the entire area to ensure a neat and polished final result. This includes removing any debris or dust generated during the repair process, leaving the kitchen in a clean and presentable condition.
Efficient Completion by Skilled Painter:
Windy City Painters prides itself on efficiency, and the entire drywall repair job is completed within one day by a skilled painter. This quick turnaround minimizes disruptions to the homeowner's routine and allows for a prompt return to normalcy.
Scheduling and Estimates:
Customers looking to schedule an appointment or obtain an online estimate can easily do so by visiting the official website at www.windypainters.com. The user-friendly platform facilitates convenient scheduling and access to estimates.
Customer Assurance and Reviews:
Windy City Painters emphasizes customer satisfaction and provides the highest quality service. Potential customers are encouraged to check the company's 5-star reviews on Yelp ( https://www.yelp.com/biz/windy-city-painters-chicago-2) and Google, offering a glimpse into the positive experiences of previous clients.
Windy City Painters offers a comprehensive and efficient drywall repair service, addressing water damage in kitchens with expertise, professionalism, and a commitment to customer satisfaction.
 Tile Doctor Ltd
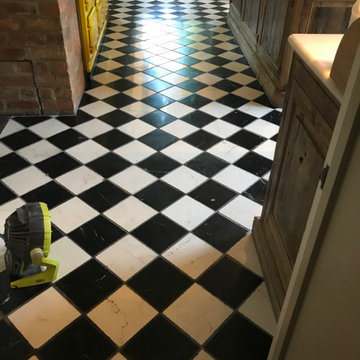
The tiles shown in the photographs below are classic distressed Black and White Italian Marble installed in the kitchen of a property in Bamber Bridge which is South of Preston. Some of the tiles had an issue with loose grout which I suspect was due to the suspended wooden floor and a small amount of movement had resulted in the grout cracking.
Ideally more support would be needed under the floor to prevent this, in the meantime however I recommended removing the grout and replacing with a flexible grout product that could cope with the movement. The tiles also needed a clean, polish and reseal so it made sense to address the issue with the grout as part of the work.
Working as a two-man team we started by cleaning the floor with a set of diamond burnishing pads starting with a coarse 400-grit, followed by 800 and 1500 grit. Water was used to lubricate the process and the floor was rinsed with water between pads with the fine slurry generated by the process extracted using a wet vacuum. These pads remove ingrained dirt and then slowly refine the appearance of the Marble building up its polished appearance in the process.
The next step was to rake out all the grout which as discussed was compromised and needed replacing. We had to be very careful when removing the grout due to the electric heating mat under the floor, any damage to that would require ripping the floor up. With the old grout removed and the floor cleaned the floor was then grouted using Mapei Ultra-colour which is a flexible and fully waterproof grout more than suitable for this situation.
Between us we managed to pack a lot into day one which was tough, however with the hardest tasks out of the way day two should be a lot easier.
Day two started with an initial clean making sure to remove any excess grout smeared on the surface that can affect the look of the tile if not removed. This was followed by the application of the last of the set of burnishing pads which is a 3,000-grit pad that really brings up the polish on the marble. You only need a small amount of water sprayed onto the floor when applying this last pad so by late morning the floor was dry and ready for sealing. The customer wanted a better sheen appearance than they previously had, fortunately we find the Diamond burnishing pads do this well, they also tighten up the pores of the stone as well which means less sealer is needed.
The floor was then sealed with Tile Doctor Colour Grow which is an impregnating sealer that improves colour and soaks into the stone occupying the pores and thereby preventing dirt from becoming ingrained. Once complete the floor looked great and the client was very happy.
Sealers and Polish do wear down with use over time so before leaving I discussed our annual maintenance plan option which will ensure the appearance of the Marble floor always looks good. The plan involves returning once a year to further polish the floor with a high-grade burnishing pad and to add more sealer if required. We also discussed the use of Tile Doctor Stone Soap for regular cleaning, it is a pH neutral cleaner which is ideal for stone floors like Marble which are acid sensitive.
Russell Taylor
Lancashire Tile Doctor
 Tile Doctor Ltd
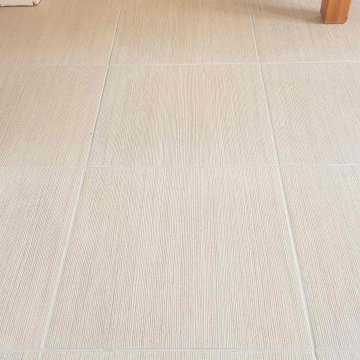
Recently it seems I am getting called out to an increasing number of new builds to sort out patchy grout issues. The reason why there have been so many issues arising is a bit of a mystery, but I put it down to a combination of things like poor quality grout, rushed installations, wet subfloors and the use of different batches.
This recently built house in the village of Darton is a great example and in this case, I suspect two different batches of the same grout had been applied. Darton by the way is a small village in the Borough of Barnsley.
Invariably these problems are picked up by the new owner on their snagging list, with the tiler long gone and the builder keen to get their final payment it is always a tricky situation to resolve. I find the best solution is to apply a Tile Doctor Grout Colourant, it’s a much quicker process than removing the old grout and replacing with new. Most new homeowners would not appreciate us ripping up their brand-new rooms and generating lots of dust in the process! Also, by using the Tile Doctor Grout Colourant it adds a barrier of the grout preventing dirt from discolouring it further down the line.
Even though the house was brand new, the Porcelain Tiled floor was not looking great. The client was happy for me to go ahead and would take up the bill with the housebuilder. I first pre-treated it with Tile Doctors Grout Colourant Pre-Treatment. This removes any contamination from the grout which might affect the adhesion of the colourant and being an acid, it also etches the surface of the grout to ensure a superior bond with the colourant.
The client chose our Light Grey colour which is one of 10 colours we offer. Once the pre-treatment had been applied, scrubbed, rinsed, and vacuumed away the floor was left to dry. Once dry we started applying the colourant, this is done with a small brush (a toothbrush is ideal) carefully scrubbing colourant into each grout joint and wiping off any excess that gets on the tiles before it is able to dry.
Once complete the newly coloured grout lines totally transformed the floor and because the grout colorant is epoxy based the grout lines will stay stain free and never get dirty.
The porcelain tiles were factory sealed so there is no need to apply a seal to the floor.
I recommended the use of Tile Doctor Neutral Tile Cleaner to keep the floor in the best condition. It is pH neutral so is far less harsh on the surface than the everyday household cleaners available. It has a minty fragrance and is mild enough to use daily. They were very happy that the floor now looked as it should have from the start and was the finishing touch to their beautiful new home.
Matthew Lovett
South Yorkshire Tile Doctor
 Tile Doctor Ltd
I was contacted about a Georgian property in the Kent village of Leeds , to see if I could do anything to improve a Travertine tiled floor. The use of Travertine was extensive and had been installed throughout the ground floor including the kitchen, dining room, utility and bathroom WC. Travertine is probably my favourite stone, but it is acid sensitive and attracts dirt easily, due to its ‘holey’ composition.
Initially we discussed the floor over the phone where I got to know about the issues they were experiencing, and I detailed the renovation process I normally use to restore it including the products and timelines. Naturally they wanted to me to provide a quote for the work however its tricky to do that accurately without seeing the floor, so I arranged a date to pop over.
Upon arriving I could see the tiles and the wide grout joints had extensive, ingrained dirt indicating the previous sealer had long since worn away. This is a common issue with stone floors, and to re-assure myself and the client it could be resolved I cleaned a small area in the utility room with pleasing results!
This test clean helped me to understand which products and methods would work best on the floor and later that day I emailed over a detailed quote for the renovation. Happy with the quote I received a reply the same day asking when I could start.
My colleague and I arrived on the agreed date and work started with adding protection to all areas that required it. We use a lot of water during the cleaning process and some materials such as MDF can become damaged with water ingress, so it makes sense to do this.
To get the floor clean, a coarse Carbide Brush fitted to a rotary machine was run over the Travertine tiles to scrub in a strong solution of Tile Doctor Pro-Clean. This process generates a lot of slurry as the dirt was washed out of the stone and grout which is extracted with a wet vacuum as we progressed.
Next it was on hands and knees with more Tile Doctor Pro-Clean and handheld brushes run over stubborn areas and along the grout lines to take them from 80% up to 100%.
Happy with the results, the next step was to renovate the stone using a series of diamond encrusted burnishing pads. Using only water for lubrication this process starts with the application of a coarse 400-grit burnishing pad attached to the floor buffer. This produces a lot of slurry which again was removed with a wet vacuum.
This left the Travertine clean, but the pores of the stone had been opened giving the floor a matt finish and more absorbent than it was originally. To further refine the appearance of the stone the next two burnishing pads were applied which are 800 and 1500-grit. These pads polish the stone and close the pores, restoring the natural sheen in the process. After each pad was applied the slurry was rinsed off the floor with water and extracted with the wet vacuum. Once complete the floor was left to dry off fully overnight.
I arrived the next day and took several moisture readings from the floor to check that it had dried off sufficiently overnight. The results were good, so work moved onto sealing the Travertine with two coats of Tile Doctor Ultra Seal which is a natural look impregnating sealer. It works by soaking into the stone, occupying the pores and thereby preventing dirt from becoming ingrained there. This ensures dirt remains on the surface where it is easily cleaned away.
The final step in the floor’s renovation was to apply the last of the diamond polishing pads which is a very fine 3000-grit. This pad further improves the polished appearance of the stone resulting in a satisfying sheen.
The work made a massive difference to the floor, and I received an email the next day from one of the owners who was really pleased with the transformation:
”Floors look brilliant. Very pleased.”
For the care and maintenance of polished sealed floors I recommend the use of Tile Doctor’s Stone Soap which is a gentle but effective cleaning product that won’t impact the sealer and contains a patina enhancer. When it comes to sealed floors my mantra is:
“If you look after the sealer, the sealer will look after the floor!”
Graham Davis
North Kent Tile Doctor
 Tile Doctor Ltd
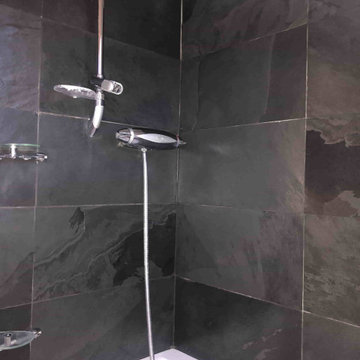
The photographs below are from a bathroom in Maida Vale W9 which had a lovely Slate tiled wall over a bath with shower. Unfortunately, the Slate tiles had been ruined by the use of harsh cleaning chemicals in an attempt to remove the limescale caused by hard water. The slate had now lost all its natural colour and looked completely washed out. The property had recently changed hands and the new owner was keen to have it renovated.
I went over to take a look and work out a solution, this in itself is a lot trickier these days with all the COVID precautions we need to take when working in someone’s house. It was clear that a strong acidic limescale remover had been used on the slate and this had etched the stone, leached all the natural oils away and generally ruined its appearance.
Fortunately, we have a solution for this (see below) and after conducting a small test I was able to confirm the problem could be resolved and gave them a quote which included a day’s labour, abrasive pads, stone oil and sealer. Our quote was gratefully accepted, and we booked a time in to carry out the work.
I returned to the property and I set about burnishing the slate wall tiles using a very coarse 200-grit six-inch burnishing pad fitted to a handheld buffing machine. This process resurfaces the stone slightly to remove the etching caused by the limescale remover. I used a medium dilution of Tile Doctor Grout Clean-up to lubricate the process and to remove the remaining limescale. Once done the slurry that is generated is rinsed off with more water. In a bathroom, it is easy the slurry can just be drained away. In other areas we would use a wet vacuum.
After the 200-grit pad the surface of the Slate was further refined using a 400-grit pad and then an 800-grit pad, this time only using water and giving the stone a thorough rinse after each pad to remove the soil.
The slate was then left to dry off over lunch and given more encouragement with a heat gun afterwards so I could move onto the next step. This involved applying a coat of Tile Doctor Stone Oil which puts back the natural oils back into the stone improving its appearance.
Once the Stone Oil had fully dried, I moved onto sealing for which I applied two coats of Tile Doctor Ultra-Seal; this is penetrating sealer that soaks into the stone to provide maximum stain protection without changing the colour of the stone. It is also an excellent grout sealer which is a bonus.
Before leaving I talked the client about how best to maintain the Slate and left them a complimentary bottle of Tile Doctor Aqua Pro tile cleaner which will help keep the limescale at bay. It is gentle enough to use every day but will help prevent the previous build-up and unlike the previous products used will not damage the newly applied sealer.
Jackson Davis
Central London Tile Cleaning
 nikki
nikkiJillian Jackson
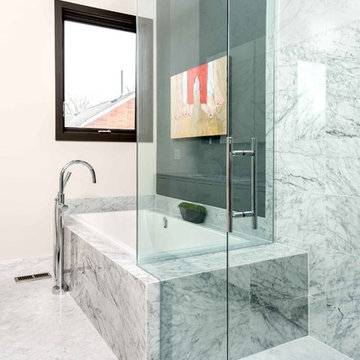
Inspiration for a contemporary gray tile bathroom remodel in Toronto with white walls
Inspiration for a contemporary gray tile bathroom remodel in Toronto with white walls

 Gasco Gaskets INC
Gasco INC is a trusted Gasket Manufacturer in Bangalore, offering high-quality sealing solutions for diverse industrial applications. Our products are manufactured using premium raw materials and advanced production techniques to ensure durability, leak prevention, and reliable performance. Designed to operate efficiently under extreme pressure and temperature conditions, our gaskets are widely used in industries such as petrochemical, oil & gas, power generation, marine, and processing plants.
We are a reliable Gasket Manufacturer in India, providing a wide range of sealing products that meet the requirements of various industrial sectors. Our commitment to quality, precision engineering, and timely delivery has made us a preferred choice among customers. The product range includes premium Ring Joint Gaskets, which are designed for critical sealing applications requiring superior strength, pressure resistance, and long-term operational reliability.
Recognized as a leading Gasket Supplier in Bangalore, we deliver advanced sealing products for demanding environments. Our portfolio includes high-performance Flexible Graphite Gaskets, known for excellent thermal stability and chemical resistance. We also supply premium Expanded PTFE Sheet Gaskets, offering exceptional sealing efficiency, corrosion resistance, and durability. These products are engineered to provide dependable performance and extended service life across a variety of industrial applications.
We are also a leading Gasket Supplier in Singapore.
 Gappsi
This project designed by Giuseppe Abbrancati and built by the Gappsi Group professionals.
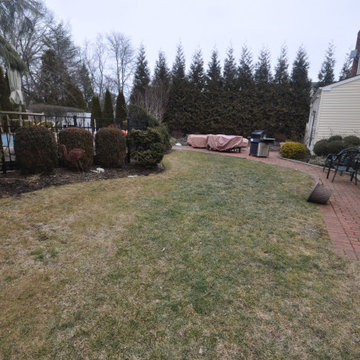
Starting with the removal of the existing and old oval swimming pool, it was built originally too high in one of the backyard corners and surrounded by overgrown landscape. The pool area was neither attractive or practical. The new pool and patio design process took a few months before the customer was completely happy and convinced that the old pool had to go. Once that was finalized, a total transformation of the backyard layout and landscape took place.
Due to the grade changes, the pool had to be lowered and a Nicolock Mini Colonial wall was built to retain the flowerbed soil. New rectangular concrete walls and a liner swimming pool was built along one side of the property, which allowed the grass area to be extended towards the pool. The swimming pool is equipped with many options including a safety auto cover that can be opened in one minute and also works as a solar cover. The auto cover also allows the customers to use the pool much longer during the year, starting from April 15 to October 15. This also saves in heating costs by preventing most of the heat evaporating in colder nights, and also in chemical consumption, maintenance of the water, and cleaning of the pool. A gas heater was also installed, along with a salt chlorine generator, LED lights, a fiberglass spa built next to the pool with a spillover, 2 sheer descent water features installed on the opposite to the spa, and an automation system that allows the homeowner to totally control pool, spa, lights, and heater from his or her smart phone. The swimming pool is 3 to 6 feet deep and it has full steps across the shallow area. The swimming pool coping, patio, and backyard sliding door steps were all built using Fiorito travertine pavers selected from the Gappsi showroom. if in need of a Pool And Patio Contractor contact Gappsi at 631-543-1177


 Gappsi
This project designed by Giuseppe Abbrancati and built by the Gappsi Group professionals.
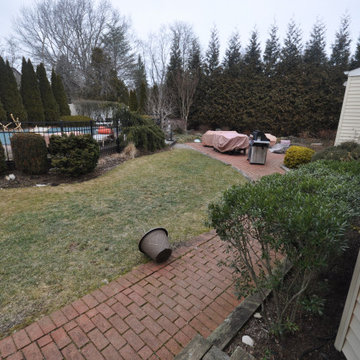
Starting with the removal of the existing and old oval swimming pool, it was built originally too high in one of the backyard corners and surrounded by overgrown landscape. The pool area was neither attractive or practical. The new pool and patio design process took a few months before the customer was completely happy and convinced that the old pool had to go. Once that was finalized, a total transformation of the backyard layout and landscape took place.
Due to the grade changes, the pool had to be lowered and a Nicolock Mini Colonial wall was built to retain the flowerbed soil. New rectangular concrete walls and a liner swimming pool was built along one side of the property, which allowed the grass area to be extended towards the pool. The swimming pool is equipped with many options including a safety auto cover that can be opened in one minute and also works as a solar cover. The auto cover also allows the customers to use the pool much longer during the year, starting from April 15 to October 15. This also saves in heating costs by preventing most of the heat evaporating in colder nights, and also in chemical consumption, maintenance of the water, and cleaning of the pool. A gas heater was also installed, along with a salt chlorine generator, LED lights, a fiberglass spa built next to the pool with a spillover, 2 sheer descent water features installed on the opposite to the spa, and an automation system that allows the homeowner to totally control pool, spa, lights, and heater from his or her smart phone. The swimming pool is 3 to 6 feet deep and it has full steps across the shallow area. The swimming pool coping, patio, and backyard sliding door steps were all built using Fiorito travertine pavers selected from the Gappsi showroom. if in need of a Pool And Patio Contractor contact Gappsi at 631-543-1177
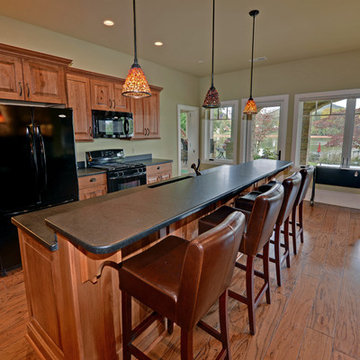 Envision Web
Stuart Wade, Envision Virtual Tours
Envision Virtual Tours and High Resolution Photography is your best choice to find just what you are looking for in the Lake Chatuge Area . Knowing the areas and resources of Lake Chatuge is our specialty
The Jewel of the Mountains, Lake Chatuge is one of the most scenic lakes in the Tennessee Valley Authority (TVA)
system, was formed in 1942 when the construction on the earth-filled dam was completed. The dam is located off Myers Chapel Road, about 3 miles southeast of Hayesville, at the Barnett Bridge in North Carolina just over the Towns County, GA. line. Chatuge Dam is 144 feet high and stretches 2,850 feet across the Hiwassee River. Chatuge reservoir covers about 7200 acres, with approximately 133 miles of shoreline, and a flood-storage capacity of 62,619 acre-feet. Although Chatuge was originally built to for water storage to help prevent flooding downstream, it currently serves many purposes, including flood control, electric power generation, augmentation of water flows for navigation downstream, and provides numerous recreational opportunities, including boating, swimming, skiing, camping, hiking and fishing. Thirty-two species of fish inhabit Lake Chatuge, with smallmouth bass, large-mouth, spotted, white, and hybrids are stocked annually. More info. about fishing Chatuge:
6