
Search results for "Prevent" in Home Design Ideas

 Texas ADA Home Remodeling
Vanity was updated for better leg room. Handles were added to diminish the risk of falling.
Transitional bathroom photo in Austin
Transitional bathroom photo in Austin
 Quality Interior Coatings
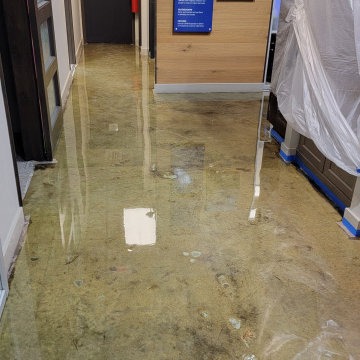
Next, we applied moisture remediation materials to prevent water intrusion.
Inspiration for a contemporary entryway remodel in Detroit
Inspiration for a contemporary entryway remodel in Detroit
 Custom Wine Cellars San Francisco
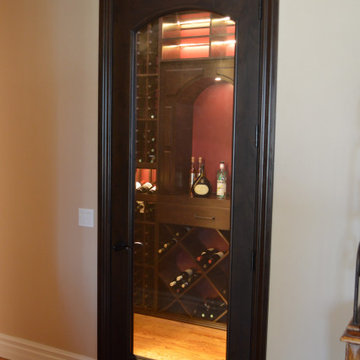
This glass wine cellar door is framed by wood which is comprised of Alder wood in laminated veneer lumber. LVL is a technique where sheets of Alder wood are glued together using a strong adhesive and enclosed in a hardwood material so they look like one whole slab of wood. The LVL technique improves durability and prevents warping no matter the temperature and moisture.
Get the full project details here: https://www.customwinecellarssanfrancisco.com/custom-wine-cellar-doors-san-francisco/
Custom Wine Cellars San Francisco
610 Leavenworth St.
San Francisco, CA 94109
+1 (415) 508 - 8419
https://www.customwinecellarssanfrancisco.com/
Find the right local pro for your project
 Sequoia Construction Group
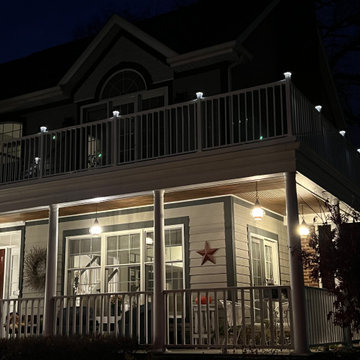
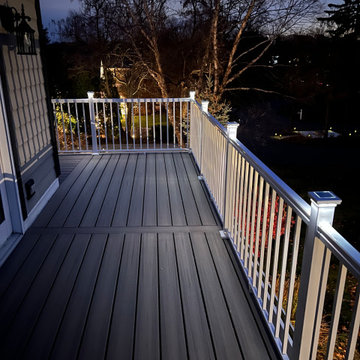
Update to second floor deck off master bedroom. Existing deck was rotting with compromised railing system. Removed existing composite decking and rotting joist members and replaced with new Trex composite decking. Additional water proofing and rot prevention methods were implemented to preserve integrity of new decking system. Barret Outdoor Living white aluminum railing system installed with white solar post caps.

 Willow Gates Landscaping
This backyard paradise began with a muddy site, with all the grading sloping directly to the proposed poolside patio. The design for this outdoor living area would need to incorporate many challenges:
* The grading issues would be corrected with retaining walls, which would create a warm yet expansive area and provide additional seating.
* The pillars would require careful notching to insert the hardware for the pool gate.
* The patio would need to incorporate stormwater storage underneath.
* The edge of the poolside patio would require stabilization to prevent future settlement adjacent to the concrete pool deck.

 Creating Sustainable Landscapes, LLC
Behind the pond is a storm drain at the lowest point of the two adjoining yards. Last year we built a berm around it to prevent storm water from entering it and put two rain gardens surrounding it. In front of one of the rain gardens is the pond. Water sheets down the backyard lawn, into the pond, and then overflows into the rain garden. Species in front of the pond are Southern Blue Flag Iris and Marsh Marigold. Behind the pond in the rain garden are only two species - Brown Fox Sedge and Cardinal Flower (if you look closely you will see the red flowers).
 User
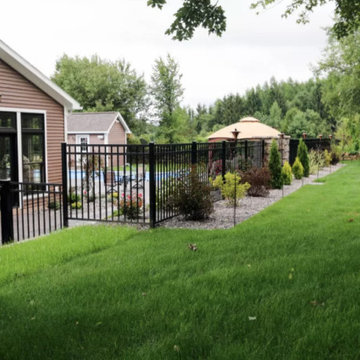
Looking for stylish privacy that lasts for 20+ years? Aluminum fence installation is the solution you need! Homeowners and property owners in Pittsburgh, PA continue to choose aluminum fence installation because it’s low-maintenance, sleek, and affordable. The residential and commercial aluminum fencing that we install not only looks lovely but functions exceedingly well, too. The fence panels are powder coated with extreme attention to detail to help prevent chipping, scratching, and fading.

 Cheng Design
Fu-Tung Cheng, CHENG Design
• Front Exterior, Del Mar House
Airstream trailers and Quonset huts inspired the design for this house docked against a gentle slope near San Diego. Cheng Design pits hard-edged industrial materials — concrete block, galvanized siding, steel columns, stainless steel cable and welded I-beams — against softer residential elements, such as stained-wood siding and a grid of exposed wood framing that supports the roof.
Photography: Matthew Millman
 Signature Stamped Concrete, LLC
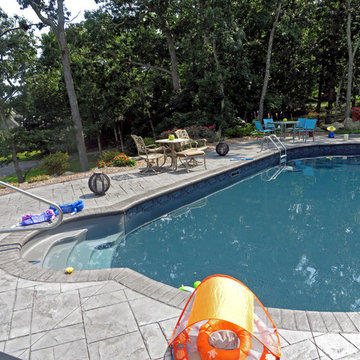
This pool deck was a lot of fun (and work) to install. The sidewalks were poured and stamped first, taking extra care to maintain the proper slope and elevation to make the water run away from the pool but also away from the house. The sidewalk is pinned to the patio with rebar dowels in plastic sleeves to allow for horizontal shifting, but no vertical movement. Expansion foam and caulk prevent chipping on these joints. The borders are poured integrally with the pool deck; they are hand stamped and chiseled in. Lots of patience and attention to detail. I am fortunate to have a great crew.


 Exclusive Iron Doors LLC
Heavy duty 14 gauge steel
Filled up with polyurethane for energy saving
Double pane E glass, tempered and sealed to avoid conditioning leaks
Included weatherstrippings to reduce air infiltration
Operable glass panels that can be opened independently from the doors
Thresholds made to prevent water infiltration
Barrel hinges which are perfect for heavy use and can be greased for a better use
Double doors include a pre-insulated flush bolt system to lock the dormant door or unlock it for a complete opening space
We can make any design hurricane resistant
 Twelve Stones Designs, LLC
The owners of this kitchen had spent the money to upgrade the finishes in their kitchen upon building the home 12 years ago, but after living in the space for several years they realized how nonfunctional the layout really was. The (then) two preschool aged children had grown into busy, hungry teenagers with many friends who also liked to hang out at the house. So the family needed a more functional kitchen with better traffic flow, space for daily activities revolving around the kitchen at different times of day, and a kitchen that could accommodate cooking for and serving large groups. Furthermore, the dark, traditional finishes no longer reflected the homeowners’ style. They requested a brighter, more relaxed, coastal style that reflected their love of the seaside cities they like to visit.
Originally, the kitchen was U-shaped with a narrow island in the middle. The island created narrow aisles that bottle-necked at the dishwasher, refrigerator, and cooktop areas. There was a pass-through from the foyer into the kitchen, but the owners never liked that the pass-through was also located so close to the powder room. The awkward proximity was unappealing and made guests feel uncomfortable.
The kitchen’s storage was made up of lots of narrow cabinets, apothecary drawers, clipped corner units, and very few drawers. It lacked useful storage for the larger items the family used on a daily basis. And the kitchen’s only pantry was small closet that had only builder-grade, narrow shelving with no illumination to be able to see the contents inside.
Overall, the kitchen’s lighting plan was poorly executed. Only six recessed cans illuminated the entire kitchen and nook areas. The under cabinet lighting was not evenly distributed either. In fact, the builder had mis-placed the under cabinet lighting around the decorative pilasters which made for choppy, dark cubbies. Further, the builder didn’t include any lighting over the sink or the bar area, which meant whoever was doing the dishes was always in their own shadow. That, coupled with the steep overhang of the game room above made the bar area feel like a dim, cavernous space that wasn’t inviting or task oriented. The kitchen looked out into the main living space, but the raised bar and a narrow wall (which held the only large cabinet in the kitchen) created more of a barrier than a relationship to the living room or breakfast nook. In fact, one couldn’t even see the breakfast nook from the cooktop or sink areas due to its orientation. The raised bar top was too narrow to comfortably sit to either dine at or chat from due to the lack of knee space. The the homeowners confided that the kitchen felt more like a dark, dirty prison than place where the family, or their guests, wanted to gather and commune.
The clients' needs and desires were:
➢ to create a kitchen that would be a space the family loved to be in; to relate to the adjacent spaces all around, and to have better flow for entertaining large groups
➢ to remove the walls between the breakfast nook and living area and to be able to utilize the natural light from the windows in both those areas
➢ to incorporate a functional chopping block for prepping fresh food for home cooked meals, an island with a large sink and drain board, 2 pull out trash cans, and seating for at least the 2 teens to eat or do homework
➢ to design a kitchen and breakfast nook with an airy, coastal, relaxed vibe that blended with the rest of the house's coastal theme
➢ to integrate a layered lighting plan which would include ample general illumination, specific task lighting, decorative lighting, and lots of illuminated storage
➢ to design a kitchen with not only more storage for all the husband’s kitchen gadgets and collection of oils and spices, but smart storage, including a coffee/breakfast bar and a place to store and conceal the toaster oven and microwave
➢ to find a way to utilize the large open space between the kitchen, pantry area, and breakfast nook
Twelve Stones Designs achieved the owner's goals by:
➢ removing the walls between the kitchen and living room to allow the natural light to filter in from the adjacent rooms and to create a connection between the kitchen, nook, and living spaces for a sense of unity and communion
➢ removing the existing pantry and designing 3 large pantry style cabinets with LED tape lights and rollout drawers to house lots of kitchen appliances, gadgets, and tons of groceries. We also took the cabinets all the way up to the 9’ ceiling for additional storage for seasonal items and bulk storage.
➢ designing 2 islands - 1 with a gorgeous black walnut chopping block that houses a drawer for chopping and carving knives and a custom double pull out trash unit for point of use utilization - and 1 that houses the dishwasher, a large Blanco Gourmet sink with integrated drain board, woven baskets for fresh root vegetables and kitchen towels, plenty of drawer storage for kitchen items, and bar seating for up to 4 diners.
➢ closing off the space between the kitchen and the powder room to create a beautiful new private alcove for the powder room as well as adding some decorative storage. This also gave us space to include more tall storage near the new range for precision placement of the husband’s extensive oil and spice collection as well as a location for a combo-steam oven the wife wanted for baking and cooking healthy meals.
The project is enhanced functionally by:
➢ incorporated USB and standard receptacles for the kids’ laptops and phone charging in the large island
➢ designing the small island to include additional open shelving for items used on a daily basis such as a variety of bowls, plates, and colanders. This set up also works well for the husband who prefers to “plate” his dinners in restaurant-style fashion before presenting them to the table.
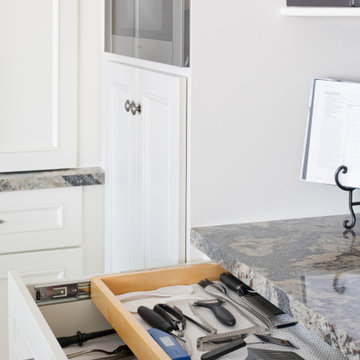
➢ the integration of specific storage units, such as double stacked cutlery drawers, a custom spice pull-out, a Kuerig coffee and tea pod drawer, and custom double stacked utensil drawers
➢ moving the refrigerator to the old oven location - this eliminated the bottle neck as well as created a better relationship to the eating table. It also utilizes the floor space between the pantry, nook, and kitchen
➢ creating a banquet style breakfast nook - this banquette seating not only doubles the amount of seating for large gatherings but it better utilizes the odd space between the kitchen and the previous nook area. It also helps to create a distinct pathway from the mudroom room through the pantry area, kitchen, nook, and living room.
➢ the coffee/breakfast bar area which includes the perfect location for the concealed microwave and toaster oven, convenient storage for the coffee pods and tea accoutrements. Roll-out drawers below also house the smoothie maker, hot water kettle, and a plethora of smoothie-making ingredients such as protein powders, smoothie additives, etc. Furthermore, the drawers below the Keurig house measuring utensil, cutlery, baking supplies and tupperware storage.
➢ incorporating lots of wide drawers and pullouts to accommodate large cookware.
➢ utilizing as much vertical space as possible by building storage to the ceiling which accommodates the family’s abundant amount of serving platters, baking sheets, bakeware, casserole dishes, and additional cutting boards.
The project is enhanced aesthetically by:
➢ new 5-piece Versailles pattern porcelain tile that now seamlessly joins the entire down stairs area together creating a bright, cohesiveness feeling instead of choppy separated spaces - it also adds a coastal feeling
➢ designing a cabinet to conceal the microwave and toaster oven
➢ the coastal influenced light fixtures over the nook table and island
➢ the sandy colors of the Langdon Cambria countertops. The swirling pattern and sparkling quartz pieces remind the homeowner of black-and-tan sandy beaches
➢ the striped banquet seating whose creamy white background and blue-green stripes were the inspiration for the cabinet and wall colors.
➢ All the interior doors were painted black to coordinate with the blacks and grays in the backsplash tile and countertop. This also adds a hint of tailored formality to an otherwise casual space.
➢ the use of WAC's Oculux small aperture LED units for the overhead lighting complimented with Diode LED strips for task lighting under the cabinets and inside the pantry and glass wall cabinets. All of the lighting applications are on separate dimmer switches.
Innovative uses of materials or construction methods by Realty Restoration LLC:
➢ Each 1-1/2” x 3” block of reclaimed end-grain black walnut that makes up the center island chopping block was hand milled and built in the shop. It was designed to look substantial and proportional to the surrounding elements, executed by creating the 4 inch tall top with a solid wood chamfered edge band.
➢ The metal doors on either side of the vent hood were also custom designed for this project and built in the Realty Restoration LLC shop. They are made 1x2, 11-gauge mild steel with ribbed glass. Weighing 60 lbs a piece, heavy duty cabinet hinges were added to support the weight of the door and keep them from sagging.
➢ Under-cabinet receptacles were added along the range wall in order to have a clean, uninterrupted backsplash.
Design obstacles to overcome:
➢ Because we were removing the demising walls between the kitchen and living room, we had to find a way to plumb and vent the new island. We did this by tunneling through the slab (the slab had post tension cables which prevented us from just trenching) to run a new wet vent through a nearby structural wall. We pulled the existing hot and cold lines between upper floor joists and ran them down the structural wall as well and up through a conduit in the tunnel.
➢ Since we were converting from wall overs to a gas range it allowed us to utilize the 220 feed for the wall ovens to provide a new sub panel for all the new kitchen circuits
➢ Due to framing deficiencies inherited from the original build there was a 1-1/2” differential in the floor-to-ceiling height over a 20 foot span; by utilizing the process of cutting and furring coupled with the crown moulding details on the cabinet elevations we were able to mask the problem and provide seamless transitions between the cabinet components.
Evidence of superior craftsmanship:
➢ uniquely designed, one-of-a-kind metal “X” end panels on the large island. The end panels were custom made in the Realty Restoration LLC shop and fitted to the exact dimensions of the island. The welding seams are completely indistinguishable - the posts look like they are cut from a single sheet of metal
➢ square metal posts on the small island were also custom made and designed to compliment and carry through the metal element s throughout the kitchen
➢ the beautiful, oversized end panels on the pantry cabinets which give the breakfast nook a tailored look
➢ integrating a large format 5 piece Versailles tile pattern to seamlessly flow from the existing spaces into the new kitchen space
➢ By constructing a custom cabinet that jogged around a corner we could not remodel (housing the entry way coat closet) we were able to camouflage the adjacent wall offset within the upper and lower cabinets. By designing around the existing jog in the structural walls we accomplished a few things: we were able to find the space to house, and hide, the microwave and toaster oven yet still have a clean cohesive appearance from the kitchen side. Additionally, the owners were able to keep their much needed coat closet and we didn’t have to increase the budget with unnecessary structural work.

 Floorology
Adding carpet to stairs is a great way to prevent slips and falls.
Photo Credit: Kaitlin Brown
Example of a large transitional carpeted l-shaped porcelain tile staircase design in Milwaukee with gray walls and a white front door
Example of a large transitional carpeted l-shaped porcelain tile staircase design in Milwaukee with gray walls and a white front door
 Meraki Home Services
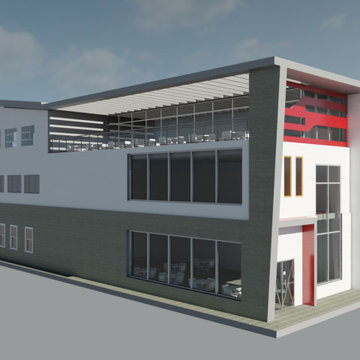
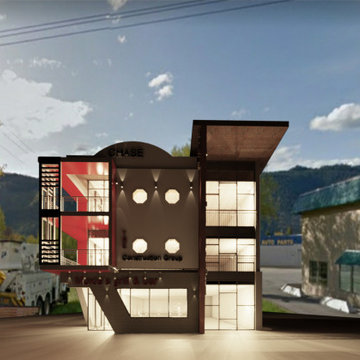
2D, plans, and 3D renderings help to understand plans easy. gives you better understanding of imagination thus we can prevent design and plan mistakes.
 Meraki Home Services
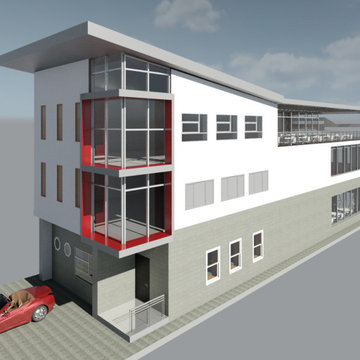
2D, plans, and 3D renderings help to understand plans easy. gives you better understanding of imagination thus we can prevent design and plan mistakes.
 Sequoia Construction Group
Update to second floor deck off master bedroom. Existing deck was rotting with compromised railing system. Removed existing composite decking and rotting joist members and replaced with new Trex composite decking. Additional water proofing and rot prevention methods were implemented to preserve integrity of new decking system. Barret Outdoor Living white aluminum railing system installed with white solar post caps.
 Meraki Home Services
2D, plans, and 3D renderings help to understand plans easy. gives you better understanding of imagination thus we can prevent design and plan mistakes.

 Garage Headquarters
Roaring Twenties Series Doors outperform wood and steel doors on all levels. Highly insulated and 1- 3/4" thick Carriage House Doors built using our durable Vinyl Composite Technology. The door face is precision machined with either a Batten "V" Groove or Architectural Beadboard Design, overlays are laid into pocketed face to prevent water from penetrating the surface. The entire face is laminated to an insulated core.
 Willow Gates Landscaping
This backyard paradise began with a muddy site, with all the grading sloping directly to the proposed poolside patio. The design for this outdoor living area would need to incorporate many challenges:
* The grading issues would be corrected with retaining walls, which would create a warm yet expansive area and provide additional seating.
* The pillars would require careful notching to insert the hardware for the pool gate.
* The patio would need to incorporate stormwater storage underneath.
* The edge of the poolside patio would require stabilization to prevent future settlement adjacent to the concrete pool deck.
 Garage Headquarters
Roaring Twenties Series Doors outperform wood and steel doors on all levels. Highly insulated and 1- 3/4" thick Carriage House Doors built using our durable Vinyl Composite Technology. The door face is precision machined with either a Batten "V" Groove or Architectural Beadboard Design, overlays are laid into pocketed face to prevent water from penetrating the surface. The entire face is laminated to an insulated core.
169