
Search results for "Preventing typical" in Home Design Ideas
 Legrand
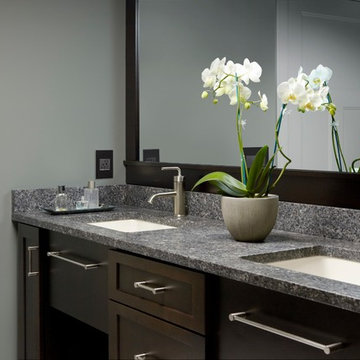
ASTH1532M2: adorne® Touch Switch - Single Pole/3-Way - 15amps - 120V - Magnesium
ADTH700MMTUM2: adorne® Touch™ Wireless Dimmer Switch - 700W - Tru-Universal - Magnesium
ARTR152M4: adorne® Tamper-Resistant Outlet - 15A - 125V - Magnesium
The Touch design features a stunning translucent face - simply touch your finger on the circle to turn lights on and off. Switch supports single-pole and three-way operation.
Easy "1-for-1" installation lets you simply replace your existing switch in just minutes.
All adorne outlets include a tamper-resistant design featuring a patented shutter system, keeping children safe by preventing them from pushing small objects into the outlet. The shutters are molded a dark color that they fade into the background while keeping users safe. Patented shutter system helps prevent improper insertion of foreign objects.
Fits in your existing electrical box and does not require new wires for typical installation. Innovative assembly and snap-in system make it fast and simple to install.
Meant to combined with "AW" series of adorne wall plates.
UL Listed
Voltage: 120VAC
Country: Canada
Limited Lifetime Warranty
 Diehl Concrete
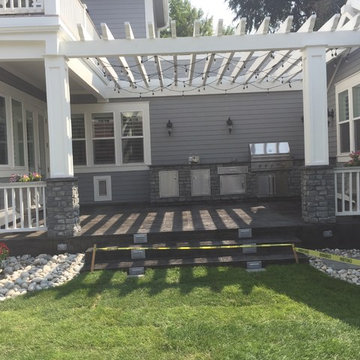
Diehl Concrete is a local Denver business that prides itself in quality decorative work such as custom stamped concrete patios. The owner, Ryan Diehl, plays a hands-on part throughout the entire process. With over 15 years of experience in creating beautiful outdoor spaces, along with his un-compromised integrity, Diehl Concrete is a wise choice for your project.
There are countless examples of his work throughout Colorado, including Denver, Aurora, Brighton, Boulder, and Evergreen. Call today and Ryan Diehl will personally evaluate your project, answer your questions, and provide a free quote.
Benefits of Stamped Concrete Patios:
Affordability: Stamped concrete patios are much more affordable when compared to brick pavers or natural stone. Fortunately, This lower cost doesn’t lack durability or beauty.
Longevity: Concrete typically lasts longer than alternative patio materials. To ensure durability, Diehl Concrete will take the extra steps to reduce cracking. We will take great care in preparing your concrete sub-grade with proper compaction, and road base as well as rebar reinforcement within the concrete. Finally, expansion joints will be strategically placed to minimize and prevent cracking.
Color and Pattern Options: The sky is truly the limit on color choices and patterns for stamped concrete patios.
Shape: Due to its versatility of the substance, concrete offers homeowners the ability to create any type of shape they would like. Would you like curves, planting beds, or even a fire pit incorporated into your stamped concrete patio? No problem.
Low Maintenance: To maintain the look and uphold the durability, a once yearly sealer may be applied. This is something you can do yourself, or we can seal your patio for you.
Increased home resale value. Decorative concrete adds curb appeal and aesthetic value to your home, allowing you to maximize the return on your investment.
 Diehl Concrete
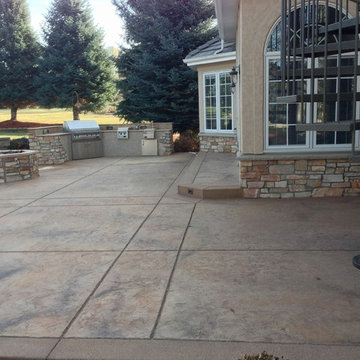
Diehl Concrete is a local Denver business that prides itself in quality decorative work such as custom stamped concrete patios. The owner, Ryan Diehl, plays a hands-on part throughout the entire process. With over 15 years of experience in creating beautiful outdoor spaces, along with his un-compromised integrity, Diehl Concrete is a wise choice for your project.
There are countless examples of his work throughout Colorado, including Denver, Aurora, Brighton, Boulder, and Evergreen. Call today and Ryan Diehl will personally evaluate your project, answer your questions, and provide a free quote.
Benefits of Stamped Concrete Patios:
Affordability: Stamped concrete patios are much more affordable when compared to brick pavers or natural stone. Fortunately, This lower cost doesn’t lack durability or beauty.
Longevity: Concrete typically lasts longer than alternative patio materials. To ensure durability, Diehl Concrete will take the extra steps to reduce cracking. We will take great care in preparing your concrete sub-grade with proper compaction, and road base as well as rebar reinforcement within the concrete. Finally, expansion joints will be strategically placed to minimize and prevent cracking.
Color and Pattern Options: The sky is truly the limit on color choices and patterns for stamped concrete patios.
Shape: Due to its versatility of the substance, concrete offers homeowners the ability to create any type of shape they would like. Would you like curves, planting beds, or even a fire pit incorporated into your stamped concrete patio? No problem.
Low Maintenance: To maintain the look and uphold the durability, a once yearly sealer may be applied. This is something you can do yourself, or we can seal your patio for you.
Increased home resale value. Decorative concrete adds curb appeal and aesthetic value to your home, allowing you to maximize the return on your investment.
Find the right local pro for your project
 Drury Design
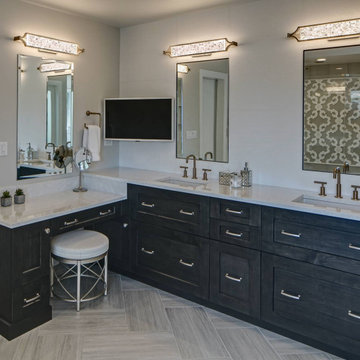
The original idea was to update the tile floor and the tub. That’s it.
A further discussion of wants and needs revealed intentions for an eventual larger shower and an improved vanity storage. It made sense to map out the possibilities and design our update with potential next steps in mind. The process was exciting, ultimately leading to the decision to do a full primary bath remodel.
Design Objectives:
-Maintain existing locations for all major bathroom functions
-Make the shower larger and more open
-Use luxurious materials throughout
-Improve vanity storage and define accessories for specific items
-Incorporate luxury shower fixtures
-Include the latest technology
Design Challenges
-Enlarging the shower in a typical rectangular shape would block the view and light from the alcove windows behind the tub
-Logical placement of the built-in shower caddy and all shower components in accordance with how and where they were to be used
-Keeping the long, back wall free from any shower modules to maintain the decorative tile design
-Combining the owner’s existing smart home system with a comprehensive shower system
-Planning cabinetry for hidden storage and use for various small appliances and make-up
-Integrating expensive shower wall tile with less expensive wall tile for aesthetic and budget purposes
-Incorporating special design features to balance the highly decorative shower tile
Design solutions:
-A clipped corner was planned for the shower bench seat – this allowed for a larger glass wall. The glass wall at the angled bench also brought more natural light into the shower
-Thoughtful shower space design prevented the crowding of features – the shower caddy and handheld shower head were placed on the full-height wall by the shower bench, the regular shower head and body sprays remained on the opposite wall, and the rain head was placed in the center of the shower
-A multi-port DTV system was installed, providing control of all shower components, including chromotherapy and music inside and outside the shower
-The lavish water-jet stone and glass decorative tile was paired with a less-expensive glass tile found in the mosaic
-Pull-out grooming organizers and electrical docking stations were incorporated into the cabinetry
Additional storage was created in the lower corner cabinet
The homeowners are thrilled with their new primary bathroom. Clear goals and carefully evaluated materials informed a fun and functional design that is both thoughtful and sumptuous!
 Editor
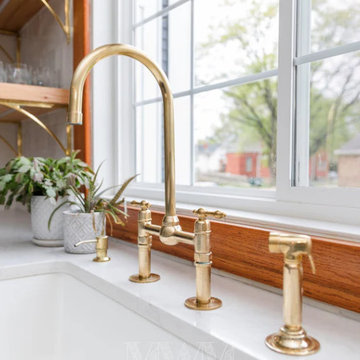
When it comes to selecting fixtures for your kitchen or bathroom, few options offer the blend of elegance, durability, and functionality like brass bridge faucets. These faucets, with their vintage charm and modern efficiency, bring a unique aesthetic and practical benefits to any space. This article explores the appeal of brass bridge faucets, their key features, benefits, and tips on how to choose and maintain them.
The Charm of Brass Bridge Faucets
Classic Aesthetic
Brass bridge faucets are known for their classic, timeless look. The warm, golden hue of brass adds a touch of luxury and sophistication, making these faucets a focal point in any kitchen or bathroom. Their vintage design can seamlessly blend with various décor styles, from rustic to contemporary.
Durability
One of the standout qualities of brass is its durability. Brass is resistant to corrosion and can withstand daily wear and tear, ensuring that your faucet remains in excellent condition for years. This makes brass bridge faucets a long-term investment for your home.
Versatility
Available in various finishes such as polished, brushed, or antique brass, these faucets can complement a wide range of design themes. Whether you want a shiny, reflective finish or a more subdued, matte look, there’s a brass bridge faucet to suit your taste.
Key Features of Brass Bridge Faucets
Elevated Bridge Design
The distinctive feature of bridge faucets is the elevated connecting pipe that links the hot and cold water lines. This bridge not only enhances the faucet's aesthetic appeal but also provides additional clearance, making it easier to clean large pots and pans or to accommodate larger sinks.
Dual Handles
Brass bridge faucets typically feature dual handles, allowing for precise control over water temperature. This functionality ensures a balanced mix of hot and cold water, providing you with the perfect temperature for your needs.
Classic Spout Designs
These faucets often come with high-arc or gooseneck spouts, which are both practical and stylish. The high spout design provides ample space for washing and filling containers, adding to the faucet’s functionality.
Benefits of Brass Bridge Faucets
Visual Appeal
Brass bridge faucets serve as a statement piece in any room. Their elegant design and warm finish add a touch of luxury and can elevate the overall aesthetic of your kitchen or bathroom.
Functionality
Beyond their beauty, brass bridge faucets are highly functional. The dual-handle design allows for precise temperature control, while the elevated bridge offers extra clearance for various tasks. This combination of form and function makes them a practical choice for busy households.
Hygienic Properties
Brass has natural antimicrobial properties, making it a hygienic choice for kitchen and bathroom fixtures. This can be particularly beneficial in spaces where cleanliness is paramount.
Choosing the Right Brass Bridge Faucet
Finish Options
When selecting a brass bridge faucet, consider the finish that best matches your existing décor. Polished brass offers a shiny, reflective surface, while antique brass provides a more vintage, weathered look. Brushed brass has a matte finish that hides fingerprints and water spots.
Coordination with Other Fixtures
Ensure that your brass bridge faucet complements other fixtures in your kitchen or bathroom. Coordinating the faucet with cabinet handles, lighting fixtures, and other hardware can create a cohesive and harmonious look.
Installation Requirements
Check the installation requirements before purchasing a brass bridge faucet. These faucets typically require a three-hole installation, so make sure your sink or countertop is compatible.
Maintenance Tips
Regular Cleaning
To maintain the luster of your brass bridge faucet, clean it regularly with a soft cloth and mild soap. Avoid using abrasive cleaners or scrubbers that can scratch the surface.
Preventing Water Spots
After cleaning, dry the faucet thoroughly to prevent water spots. This is particularly important for polished brass finishes, which are more prone to showing spots and fingerprints.
Addressing Tarnish
Brass can tarnish over time. To address this, use a brass cleaner or a mixture of lemon juice and baking soda to gently polish the surface. Regular polishing can keep your faucet looking its best.
Conclusion
Brass bridge faucets are a beautiful and functional addition to any home. Their timeless design, durability, and practicality make them a worthwhile investment for your kitchen or bathroom. By choosing the right finish and maintaining it properly, you can enjoy the elegance and charm of a brass bridge faucet for years to come. Embrace the classic appeal of brass and elevate the look of your home with this stunning fixture.
 Los Angeles Custom Wine Cellars
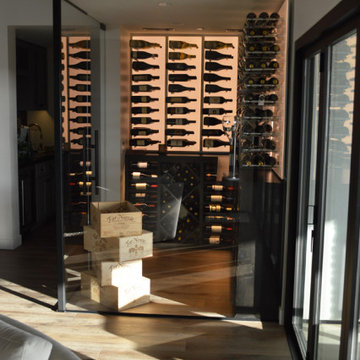
To make the cellar feel like an extension of the living room, we used a frameless, one-door glass wall. The glass used here is specialized and not your typical glass shower door since it should be able to keep the heat out and prevent moisture from forming within the cellar.
Learn more about this project here: https://www.customwinecellarslosangeles.com/glass-wine-room-in-gorgeous-dana-point-home/
Custom Wine Cellar Los Angeles
Los Angeles, California
+1 (323) 825 – 9846
 Drury Design
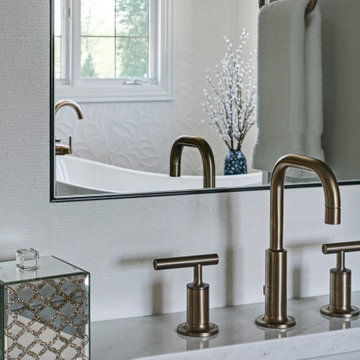
The original idea was to update the tile floor and the tub. That’s it.
A further discussion of wants and needs revealed intentions for an eventual larger shower and an improved vanity storage. It made sense to map out the possibilities and design our update with potential next steps in mind. The process was exciting, ultimately leading to the decision to do a full primary bath remodel.
Design Objectives:
-Maintain existing locations for all major bathroom functions
-Make the shower larger and more open
-Use luxurious materials throughout
-Improve vanity storage and define accessories for specific items
-Incorporate luxury shower fixtures
-Include the latest technology
Design Challenges
-Enlarging the shower in a typical rectangular shape would block the view and light from the alcove windows behind the tub
-Logical placement of the built-in shower caddy and all shower components in accordance with how and where they were to be used
-Keeping the long, back wall free from any shower modules to maintain the decorative tile design
-Combining the owner’s existing smart home system with a comprehensive shower system
-Planning cabinetry for hidden storage and use for various small appliances and make-up
-Integrating expensive shower wall tile with less expensive wall tile for aesthetic and budget purposes
-Incorporating special design features to balance the highly decorative shower tile
Design solutions:
-A clipped corner was planned for the shower bench seat – this allowed for a larger glass wall. The glass wall at the angled bench also brought more natural light into the shower
-Thoughtful shower space design prevented the crowding of features – the shower caddy and handheld shower head were placed on the full-height wall by the shower bench, the regular shower head and body sprays remained on the opposite wall, and the rain head was placed in the center of the shower
-A multi-port DTV system was installed, providing control of all shower components, including chromotherapy and music inside and outside the shower
-The lavish water-jet stone and glass decorative tile was paired with a less-expensive glass tile found in the mosaic
-Pull-out grooming organizers and electrical docking stations were incorporated into the cabinetry
Additional storage was created in the lower corner cabinet
The homeowners are thrilled with their new primary bathroom. Clear goals and carefully evaluated materials informed a fun and functional design that is both thoughtful and sumptuous!
 Armadillo Convertible Room Solutions
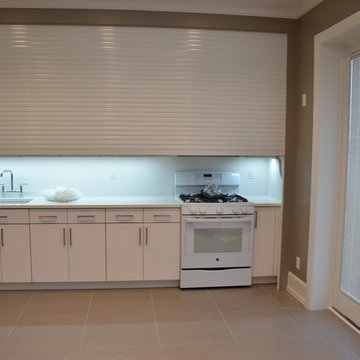
All products are custom made.
Available in different fabrics and colors (extruded aluminum and cold-formed steel). Accordion shutters also available.
Our gates and shutters are designed for privacy and protection. They are built with extruded aluminum for added protection and durability. Traditional gates and shutters are typically built with steel. Aluminum is more aesthetically pleasing and offers maximum security.
Roller gates and shutters are useful throughout the year for privacy, security, and protection from the sun. Many clients install roller gates and shutters over doors and windows. Roller gates and shutters are optimal for hurricane protection and energy saving. They are easy to use and can be raised or lowered with the push of a button.
All gates and shutters are custom designed and are available in a variety of materials, fabrics and colors (extruded or foam-filled).
• Optional: Tension pins to prevent forced entry.
• Optional: Vent holes in slats are optional for ventilation.
 Windy City Painters
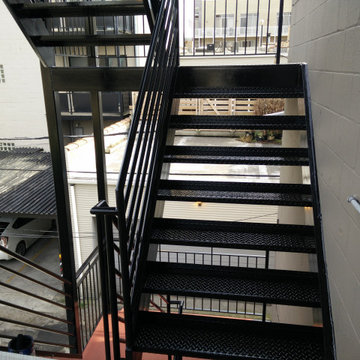
Iron Fence Painting Lincoln Park Chicago - Professional Metal Refinishing
Windy City Painters completed this comprehensive iron fence painting project for a beautiful Lincoln Park greystone property. Lincoln Park's historic architecture demands careful attention to detail, and furthermore, Chicago's harsh weather conditions require professional-grade materials and techniques for lasting protection.
We utilized premium Sherwin-Williams rust inhibiting primer and Benjamin Moore exterior metal paint for maximum durability. Additionally, our team employed specialized rust removal tools and surface preparation equipment to ensure optimal adhesion and longevity.
Our four-step process included complete rust removal and surface cleaning, minor repairs to damaged sections, premium primer application with proper curing time, and final topcoat application using spray and brush techniques for even coverage.
Chicago's unique challenges include extreme temperature fluctuations, salt exposure from winter treatments, and moisture from Lake Michigan. Moreover, older properties often have multiple paint layers requiring careful removal. Therefore, professional expertise ensures proper preparation and material selection.
The results exceeded client expectations with a smooth, durable finish that enhances the property's curb appeal. Subsequently, the fence now provides years of protection while complementing the neighborhood's architectural character perfectly.
Before starting similar projects, homeowners should understand that proper surface preparation accounts for 80% of project success. Additionally, weather conditions significantly impact application timing and results.
See more work and request free estimate at windypainters.com.
Frequently Asked Questions:
Q: How much does iron fence painting cost in Lincoln Park Chicago?
A: Iron fence painting costs vary based on fence size, existing condition, rust damage extent, and preparation requirements needed.
Q: What preparation is required for successful iron fence painting projects?
A: Iron fence painting requires thorough rust removal, surface cleaning, minor repairs, primer application, and proper weather conditions.
Q: How long does professional iron fence painting last in Chicago weather?
A: Professional iron fence painting typically lasts 8-12 years with quality materials, proper preparation, and regular maintenance.
Q: When is the best season for iron fence painting in Chicago?
A: Spring through early fall provides optimal conditions for iron fence painting with appropriate temperature and humidity levels.
Q: Can you match existing colors for iron fence painting restoration projects?
A: Yes, we provide custom color matching services for iron fence painting to complement existing architectural elements perfectly.
Q: Do you warranty iron fence painting work in Lincoln Park?
A: Windy City Painters provides comprehensive warranties on all iron fence painting projects ensuring quality and customer satisfaction.
Q: What makes professional iron fence painting worth the investment cost?
A: Professional iron fence painting ensures proper preparation, quality materials, expert application techniques, and significantly extended fence lifespan.
Q: How do you prevent rust from returning after iron fence painting?
A: Our iron fence painting process includes rust inhibiting primer, quality topcoats, and proper surface preparation for maximum protection.
Q: Can iron fence painting increase Lincoln Park property values significantly?
A: Professional iron fence painting enhances curb appeal, property aesthetics, and market value in desirable Lincoln Park neighborhood.
Q: What safety precautions are necessary during iron fence painting projects?
A: Iron fence painting requires proper ventilation, protective equipment, lead paint testing, and professional safety protocols throughout.
 Degnan Design-Build-Remodel
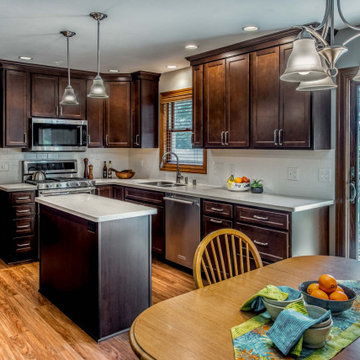
John and Lynn's kitchen original kitchen had honey oak raised panel cabinetry. The typical 1990s floor plan had a u-shaped work area, a lack of pantry cabinets, and a small countertop desk area that went unused. Additionally, the countertop peninsula caused two problems. It prevented access to the dinette table and it contained the dishwasher. Having the dishwasher in the peninsula meant that when it was open,it prevented them from using the kitchen sink.
 SUPERIOR CHIMNEY SERVICES CORPORATION
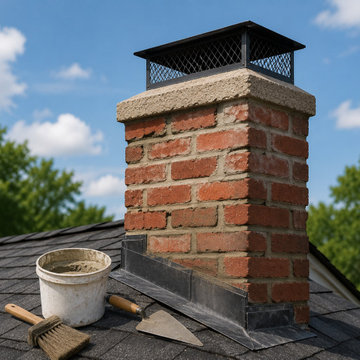
A friend noticed a damp, musty smell coming from her living room fireplace the week after a February thaw. When she called a masonry technician from Superior Chimney, to take a look, and found that water had been working its way behind the bricks for years. What started as a small crack now meant her chimney needed structural repairs before she could safely use it again.
Chimney repairs are any work done to restore the structural and weatherproof condition of a chimney. This can include mortar joint repair, brick replacement, crown repair, flue repair, and cap or flashing replacement. Most Chicagoland homeowners discover the need for chimney repairs often times after winter, when the freeze and thaw cycles have already done its damage. Uncovering the symptoms early is the best way to keep chimney repairs down. Let’s discuss how that can be done.
Why Chicagoland Weather Is Especially Hard on Chimneys
Chicagoland has some of the most polarized weather. One day it’s a blizzard and the next week hot, humid and 100 degrees. That swing in weather conditions and temperatures are the real reasons why chimney repairs are needed.
When moisture from humid and rainy days’ soak into brick and mortar and then freezes, it expands. As it begins to thaw, the materials contract. Repeat that cycle dozens of times in a single Illinois winter and even solid masonry in the chimney starts to crack, spall, and separate from the joints holding it together. This is called the freeze thaw cycle. We’ve talked about it many times over the years, and it continues to be the single biggest reason homes need chimney repairs more often than homes in milder climates.
The Chimney Safety Institute of America (CSIA), the leading nonprofit certifying body for chimney professionals in the United States, notes that water intrusion is one of the most damaging and most preventable problems. If the problem is left to mature, it affects more than the appearance. It compromises the structure itself.
What Do Chimney Repairs Involve?
Not every chimney problem requires the same fix. Chimney repairs generally fall into a few categories. Understanding the difference, helps homeowners have a more informed conversation with the expert technician.
Mortar joint repair or tuckpointing. This involves removing deteriorated mortar between bricks and replacing it with fresh mortar, matched to the original color and texture as closely as possible.
Brick replacement. When individual bricks have spalled, meaning the face has cracked or popped off from trapped moisture, those bricks are removed and replaced.
Crown and cap repair. The crown is the concrete slab at the very top of the chimney. Cracks both big and small let water directly into the chimney flue. Chimney crown repair is often one of the most urgent forms of chimney repairs.
Flashing repair. Flashing is the barrier where the chimney meets the roofline. Loose, damaged or poorly installed flashing is a common source for water leaks. The roof gets the blame as it is the largest piece that covers the house. However, it certainly can be the overlooked chimney.
Flue and liner repair. Cracked flue tiles or damaged liners affect how safely a chimney vents smoke and combustion gases.
When to Know a Chimney Needs Repair
Most chimney damage shows up as small, easy to dismiss way. Let’s take a look at the following list. Be sure to print this out and keep it handy so if/when something happens, you know what to look for.
• Water stains near the fireplace or on the ceiling
• A brownish stain on the wall around your fireplace, or a stain on the ceiling near an exterior chimney. This means water is getting in somewhere it should not.
• Crumbling or missing mortar
• If you can see gaps between bricks, or mortar that flakes off when you touch it
• A leaning or visibly shifting chimney
• A chimney that appears to pull away from the house, even slightly, could indicate a structural issue
• White staining on the brick (efflorescence)
• Chalky white residue left behind as water evaporates out of the masonry. It is a visible sign that moisture is moving through brick
• Rusted damper or firebox components
• Metal parts inside a fireplace that are rusting are a strong indicator that moisture is present
• Debris in the fireplace
• Small chunks of brick, mortar, or tile landing in the firebox
What are the Various Types of Chimney Repair?
This is a compiled list of chimney repairs so you can be aware of what to look for. If you have any questions, contact us directly at 877-244-6349.
Homeowners who schedule chimney repairs at the first sign of trouble typically spend far less than those who wait until water damage reaches the interior of the home. This is a great reason to contact Superior Chimney at 877-244-6349.
Why an Annual Inspection Matters More Than People Think
The CSIA and the National Fire Protection Association both recommend that chimneys, fireplaces, and vents be inspected at least once a year, whether or not the fireplace gets used. This recommendation exists because damage does not take a break just because a chimney sits without any use.
According to data stated by the CSIA, chimney related fires still contribute to tens of thousands of residential fires across the United States each year, and a large share of those incidents can be traced back to deferred maintenance. An annual chimney inspection is what catches the small mortar crack or the hairline crown crack before it turns into a repair bill.
Hiring the Right Company for Chimney Repairs
Not every company who offers chimney repair work has the certified training to diagnose a problem correctly. CSIA certification is the most widely recognized credential in the industry, and it requires technicians to study chimney physics, venting systems, and fire codes. After the studies, the new technician needs to pass an exam and agree to a professional code of ethics.
When you call, be sure to ask:
Are your technicians CSIA certified, and can I verify that certification?
Will you show me photos or video of the damage before starting work?
Does the estimate distinguish between cosmetic repair and structural repair?
At Superior Chimney, we welcome these and other of your questions.
How Chimney Repairs Affect Insurance and Resale
A chimney in poor condition can complicate a home sale or an insurance claim. Home inspectors routinely report on visible mortar loss, leaning chimneys, or missing chimney caps. Some insurers will request proof of repair before renewing a policy on an older home. Addressing chimney repairs proactively protects more than curb appeal. It protects the sale timeline and the claims history associated to the property.
Frequently Asked Questions
How often should a Chicago area chimney be inspected? At least once a year, per CSIA and NFPA guidance, regardless of how often the fireplace is used.
Can chimney repairs be done in winter? Some interior repairs can happen in cold weather, but most masonry repair requires temperatures consistently above freezing. Spring and fall are the most common repair times in the Chicago area.
Is tuckpointing the same thing as chimney repair? Tuckpointing is one type of chimney repair, focused on replacing deteriorated mortar joints.
Does homeowners insurance cover chimney repairs? It depends. Sudden damage from a storm may be covered, while gradual deterioration from lack of maintenance typically is not.
So Finally…
Taking care of your home includes a chimney. Just because you don’t see it every day, doesn’t mean things aren’t happening. Be sure to get a chimney inspection done once per year by a certified and credible company such as Superior Chimney to take care of the issues. Contact us today by calling 877-244-6349.
 K-Build
Luxury Basement Remodel Featuring Spa, Home Gym, Gun Room, and Full Kitchen
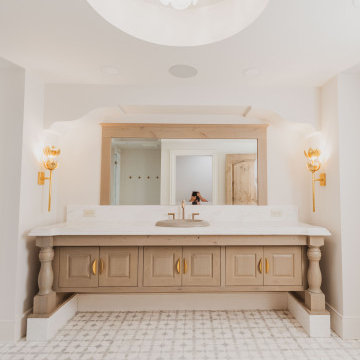
This luxury basement remodel redefines what a lower level can be, transforming unused square footage into a fully immersive lifestyle environment. Designed with intention, precision, and premium materials, this space blends wellness, security, fitness, and entertainment into one cohesive custom basement design that feels elevated, warm, and unmistakably high-end.
From the moment you enter, this luxury basement remodel feels open and expansive. Wide-plank flooring flows seamlessly throughout the space, creating visual continuity while adding warmth rarely seen in traditional basements. Clean architectural lines and thoughtful zoning allow each area to stand on its own while still feeling connected as part of a complete design.
Basement Spa and Sauna Retreat
A standout feature of this luxury basement remodel is the private basement spa, designed to deliver a true retreat experience within the home. The custom glass-enclosed sauna acts as both a functional wellness feature and a striking architectural element. Natural wood surfaces wrap the interior, bringing warmth, texture, and a calming atmosphere that mirrors high-end resort spas.
Integrated LED lighting enhances the natural wood grain while providing soft, ambient illumination. The stone sauna heater anchors the space visually while delivering consistent heat for daily use. Glass walls allow light to flow freely, preventing the space from feeling closed in and reinforcing the open feel of the overall custom basement design.
This basement spa was designed not as an accessory, but as a core component of the luxury basement remodel—supporting health, relaxation, and everyday wellness.
Custom Gun Room and Secure Display Space
Security meets craftsmanship in the custom gun room, a defining element of this luxury basement remodel. Designed to function as both a secure storage solution and a refined display space, the room balances protection with presentation.
Precision-mounted wall panels allow firearms and accessories to be displayed in a clean, organized layout. Integrated LED lighting highlights each piece while adding depth and contrast to the room. Custom wood framing ties the space into the broader custom basement design, ensuring visual consistency throughout the project.
Lower cabinetry provides concealed storage while maintaining a clean, uncluttered appearance. Climate control and security were integrated seamlessly, creating a room that is as practical as it is visually impressive.
Home Gym Basement with Professional Design
This home gym basement was designed to rival commercial fitness facilities while maintaining the comfort and privacy of a residential environment. The layout supports strength training, functional workouts, and cardio without feeling crowded or overwhelming.
Mirrored walls expand the space visually and provide practical training feedback. Heavy-duty flooring absorbs impact and minimizes noise, making the gym ideal for daily use. Overhead, a custom LED grid ceiling delivers even, shadow-free lighting, elevating both functionality and aesthetics.
As part of the overall luxury basement remodel, the gym connects naturally to adjacent spaces, reinforcing the idea that fitness is integrated into everyday living—not isolated or hidden away.
Basement with Full Kitchen and Entertaining Space
Designed for hosting and everyday use, the basement with full kitchen anchors the entertainment zone of this luxury basement remodel. Custom cabinetry offers ample storage while maintaining clean lines and a refined appearance. Premium countertops provide durability and visual impact, serving as both a workspace and gathering point.
Integrated appliances ensure full functionality without disrupting the design. Layered lighting enhances usability and atmosphere, making the kitchen equally suited for casual evenings or large gatherings.
This basement with full kitchen allows the space to function independently from the main level, adding both convenience and long-term value.
Luxury Tile Basement Details
Tile plays a key role throughout this luxury tile basement, serving as a design feature rather than just a finish. Carefully selected tile textures and patterns add depth and visual interest to accent walls and functional areas.
Each tile installation was executed with precision, showcasing clean transitions and expert craftsmanship. The tile selections complement the surrounding wood and stone elements, reinforcing the layered material palette that defines this custom basement design.
Craftsmanship That Defines the Space
What sets this luxury basement remodel apart is the attention to detail in every element. Custom millwork, seamless trim transitions, and intentional lighting design elevate the space beyond typical basement renovations.
Ceilings are treated as design features, walls are crisp and refined, and built-in elements feel integrated rather than added. This level of craftsmanship ensures the basement feels timeless, durable, and thoughtfully designed.
A Custom Basement Design Built for Lifestyle
This project demonstrates how a custom basement design can become one of the most valuable and lived-in areas of a home. By combining a basement spa, secure gun room, home gym basement, basement with full kitchen, and luxury tile finishes, this space delivers unmatched versatility and comfort.
This luxury basement remodel is not simply an upgrade—it is a complete transformation that enhances daily living while adding long-term value.
 Architect
Why Mattress Thickness Is One of the Most Misunderstood Specs
When most people shop for a memory foam mattress, they focus on firmness, materials, and brand. Thickness tends to be an afterthought — or worse, treated as a proxy for quality. The assumption goes: thicker equals better. That assumption is wrong in a meaningful number of cases, and getting it wrong means waking up with exactly the kind of stiffness, pressure pain, or lower back ache you bought a new mattress to avoid.
The right thickness for a memory foam mattress is not a single number. It is a combination of your body weight, your sleep position, and any specific health conditions you are managing. A 14-inch mattress that provides ideal support for a 250-pound side sleeper may cause a 115-pound stomach sleeper to experience spinal misalignment all night. A 10-inch mattress that works perfectly for a back sleeper of average build offers inadequate pressure relief for a heavier side sleeper whose hips need to sink further into the comfort layer before the support base engages.
This guide maps thickness to the factors that actually determine whether a mattress works for your body. It covers the science of mattress layers, the three primary variables (weight, position, condition), and a complete decision table so you can find your ideal thickness without guesswork.
Understanding Mattress Thickness: Layers, Not Just Height
A memory foam mattress’s total thickness is the sum of its individual layers, and those layers serve entirely different functions. Two mattresses that are both 12 inches thick may feel radically different because their comfort layer depths and support core thicknesses are distributed differently.
The Two Parts That Matter
Every memory foam mattress has two functional zones: the comfort layer at the top and the support core at the bottom. The comfort layer — which in quality mattresses consists of gel-infused viscoelastic foam, transition foam, and a cooling cover — is the zone that contours to your body, relieves pressure, and cushions the joints. The support core — high-density foam or pocketed springs in a hybrid — is the zone that keeps the spine aligned and prevents the entire body from sinking into the mattress.
The key relationship is this: the comfort layer must be deep enough for your body’s heaviest pressure points to sink in fully before the firmer support core pushes back. If it is too shallow, those pressure points press against a firm surface and cause localised pain. If the support core is too thin, the whole mattress sags under body weight and the spine loses alignment regardless of how comfortable the top feels.
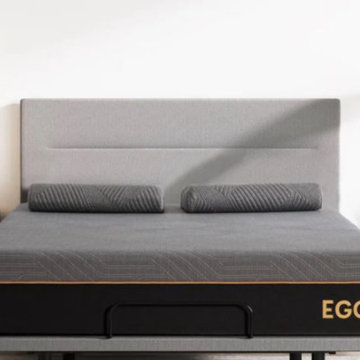
Here is how EGOHOME’s Black series layers map to these functions:
Layer
Material
Function
EGOHOME Technology
Cover (0.5–1")
Fabric + cooling tech
Temperature regulation, hygiene
Anti-heat™ Graphene Cooling Cover
Comfort layer (2–6")
Gel foam, AeroFusion™
Pressure relief, contouring
Copper Gel AeroFusion™ Foam
Transition layer (1–2")
Mid-density foam
Prevents sinkage past comfort zone
BraceSleeper™ Support Foam (upper)
Support core (6–12")
High-density foam or coils
Spinal alignment, edge support
BraceSleeper™ Support Foam (core)
Thickness alone does not tell you how a mattress will perform. A 14-inch mattress with a 2-inch comfort layer and a 12-inch support core will feel firm and supportive. A 14-inch mattress with a 6-inch comfort layer and an 8-inch support core will feel plush and contouring. Always check the comfort layer depth, not just the total inches.
Memory Foam Mattress Thickness Ranges: What Each Category Delivers
Here is a complete breakdown of what to expect from each thickness range and who each suits best:
Thickness
Profile
Best Use Case
Body Weight
Best Sleep Position
6–8"
Low profile
Children, bunk beds, guest rooms, adjustable bases
Under 130 lbs
Kids, lightweight, occasional use
8–10"
Standard-thin
Stomach sleepers, lightweight adults, budget setups
Under 130 lbs
Stomach, lightweight back sleepers
10–12"
Standard
Most adults, back sleepers, back pain relief
130–230 lbs
Back, stomach, combo sleepers
12–14"
High-profile
Side sleepers, plus-size, pressure relief
130–230 lbs+
Side sleepers, hip/shoulder pain
14"+
Premium
Plus-size sleepers, heavy duos, luxury setups
230 lbs+
Plus-size, side sleepers, chronic pain
6–8 Inches: Low-Profile (Specific Use Cases Only)
Low-profile mattresses in the 6 to 8 inch range are designed for specific applications rather than general adult use. They work well on bunk beds and trundle beds where height clearance is limited, for children’s beds where a lower sleep surface is safer, on adjustable bases where the mattress needs to flex significantly, and for lightweight individuals under 130 pounds who need minimal depth to reach the support core. For a standard adult of average build, a mattress under 8 inches is unlikely to provide adequate comfort layer depth for sustained pressure relief.
8–10 Inches: Standard-Thin (Stomach Sleepers and Lightweight Adults)
The 8 to 10 inch range is the practical starting point for most adult use. At this thickness, there is enough comfort layer to provide basic pressure relief without the excessive depth that allows heavier body sections to sink past the support zone. Stomach sleepers in particular benefit from this range: when sleeping face down, the goal is to keep the hips from sinking lower than the shoulders and chest, which would create a downward bow in the lumbar spine. A thinner mattress with a firmer feel prevents this hyperextension more reliably than a thicker, softer model. EGOHOME offers 8-inch memory foam options suited to this profile.
10–12 Inches: Standard (The Sweet Spot for Most Adults)
The 10 to 12 inch range is the most broadly appropriate thickness for adults of standard build. At this depth, a quality memory foam mattress contains enough comfort layer material to contour genuinely around the hips and shoulders without allowing the body to bottom out into the support core. It also contains enough support core depth to maintain spinal alignment under continuous body weight across seven or eight hours. Back sleepers of standard weight (130 to 230 pounds) typically find this range the most supportive, as the lumbar region receives adequate underlying resistance without the excessive softness that taller mattresses can develop under consistent pressure.
12–14 Inches: High-Profile (Side Sleepers and Plus-Size Sleepers)
The 12 to 14 inch range addresses two specific needs: side sleepers who require a deep enough comfort layer to allow the shoulder and hip to sink in while the waist remains supported, and heavier individuals whose body weight requires more foam depth before reaching full support core engagement. For a side sleeper of standard or higher body weight, a comfort layer of less than 4 to 6 inches is often not deep enough for the shoulder to sink fully into an aligned position. The result is an upward lateral bow in the thoracic spine that causes shoulder and upper back pain upon waking. The EGOHOME Black 14-inch Pro and Hybrid models are built specifically for this thickness range.
14 Inches and Above: Premium and Plus-Size
Mattresses at 14 inches or more are appropriate for plus-size sleepers over 230 pounds and for couples where one partner is significantly heavier. At higher body weights, a greater depth of both comfort material and support foam is required because the heavier load compresses the foam more aggressively. A support core that adequately resists a 160-pound sleeper may allow excessive sinkage under a 280-pound sleeper, causing the hips to drop past the point of lumbar support. EGOHOME’s Black 14-inch Firm model includes a 12-inch BraceSleeper™ Support Foam core specifically designed to resist this deep compression under higher body weights.
Thickness by Body Weight: The Primary Determining Factor
Body weight is the single most important variable in thickness selection because it directly determines how far the body sinks into the foam. The same mattress will feel completely different to a 120-pound sleeper versus a 240-pound sleeper, because the heavier person compresses the foam significantly more deeply.
Lightweight Sleepers (Under 130 lbs)
Lightweight sleepers do not need and often cannot benefit from thick mattresses. Because they exert less pressure on the foam, they may not compress a 14-inch mattress deeply enough to feel the support core at all, resulting in a floating sensation with insufficient underlying resistance. For lightweight sleepers, 8 to 10 inches provides adequate comfort layer depth for full pressure relief. The EGOHOME Black 10-inch Classic (medium feel) is the appropriate starting point for this weight category.
Standard-Weight Sleepers (130–230 lbs)
Standard-weight adults represent the broadest population of mattress buyers, and the 10 to 12 inch range was designed specifically for this group. At this weight range, the body compresses the comfort layer meaningfully enough for the foam to contour around pressure points, while the support core remains thick enough to prevent excessive sinkage. The EGOHOME Black 12-inch and the Black 10-inch ranges both address this category, with the 12-inch models being more appropriate for side sleepers who need the extra comfort layer depth.
Plus-Size Sleepers (Over 230 lbs)
Heavier sleepers require 12 to 14 inches at minimum to prevent bottoming out — the point at which body weight compresses through the comfort layer entirely and the sleeper feels the firm support core directly. Bottoming out eliminates pressure relief completely and can significantly worsen joint pain and lower back stiffness. EGOHOME recommends a suggested maximum of 300 pounds per person across their mattress range, and the 14-inch Hybrid and 14-inch Firm models are engineered with the deeper support cores required to handle higher body weights without performance degradation over time.
Thickness by Sleep Position: Matching Depth to Alignment Needs
Side Sleepers: 12 Inches or More
Side sleeping places the body’s heaviest pressure points — the shoulder and hip — in direct contact with the mattress. These points need to sink into the comfort layer deeply enough that the spine remains horizontal from head to toe. If the comfort layer is too thin or too firm, the shoulder cannot descend fully into the mattress, and the spine develops an upward lateral curve between the shoulder and the head. This causes the neck, shoulder, and upper back tension that many side sleepers report upon waking.
Side sleepers of standard weight need at least 12 inches, with a soft to medium-soft comfort layer. EGOHOME’s Black 12-inch Pro (soft feel, 7.5 out of 10 cooling score) is specifically recommended for side sleepers managing back, shoulder, or joint pain. The Black 14-inch Pro (medium-soft, 8 out of 10 cooling) adds additional comfort layer depth for those who need greater pressure relief.
Back Sleepers: 10–12 Inches
Back sleeping is the most spinal-alignment-friendly position because the body’s weight is distributed relatively evenly across the mattress. The primary challenge for back sleepers is lumbar support: the natural inward curve of the lower back creates a gap between the lumbar spine and the mattress surface that must be filled by the foam contouring upward into it. A mattress that is too soft allows the pelvis to sink excessively, flattening this curve and creating lower back compression. A mattress that is too firm cannot conform into the lumbar curve at all.
For back sleepers, 10 to 12 inches with a medium or medium-firm feel provides the optimal combination. EGOHOME’s Black 12-inch Hybrid (medium-firm, 6.5 out of 10 cooling) is specifically noted as ideal for back sleepers, combining pocketed spring zoned support with gel foam contouring for precise lumbar engagement.
Stomach Sleepers: 8–10 Inches
Stomach sleepers face the opposite alignment challenge from side sleepers. Rather than needing the mattress to yield deeply at the joints, they need the mattress to maintain a flat, firm surface that prevents the hips from sinking below the chest. If the hips drop lower than the upper body, the lumbar spine hyperextends into an arched position that compresses the posterior vertebral joints and causes significant lower back pain.
Stomach sleepers need a thinner mattress with a firmer feel. The EGOHOME Black 14-inch Firm is specifically recommended for stomach sleepers and heavier sleepers who need maximum surface resistance. Its 12-inch BraceSleeper™ Support Foam core provides the deep, unyielding base that prevents hip sinkage without requiring a thin mattress that compromises comfort.
Best Thickness for Back Pain: The Medium-Firm 10–12 Inch Principle
For people managing chronic lower back pain, herniated discs, sciatica, or general spinal stiffness, mattress thickness interacts with back health in a specific way that differs from general sleep comfort recommendations.
The key principle for back pain is controlled contouring. You need enough foam depth to relieve pressure at the hips and shoulders, but not so much depth that the foam develops a sag under the heavier sections of the body over time. Excessive thickness combined with a soft comfort layer is one of the most common causes of mattress-induced back pain — the sleeper sinks into a gentle hammock shape that feels comfortable initially but compresses the lumbar discs continuously throughout the night.
10–12 Inches: The Optimal Back Pain Range
A medium-firm mattress of 10 to 12 inches addresses both needs simultaneously. It provides adequate foam depth for genuine pressure relief at the hips and shoulders without the risk of comfort layer collapse that taller, softer mattresses can develop. The support core at this thickness is deep enough to maintain consistent lumbar support from the first night through years of regular use.
For side sleepers with lower back pain, the recommendation extends to 12 inches with a soft feel to ensure the hip can sink into full alignment. For back sleepers with lower back pain, 10 to 12 inches with a medium-firm feel is the target. For stomach sleepers with lower back pain, a firmer feel at any thickness is more important than depth — preventing hip sinkage is the priority.
⚠️ Mattresses over 14 inches with very soft comfort layers are a common hidden cause of lower back pain. The deep softness feels luxurious initially but allows the lumbar region to sag into misalignment through the night. If you sleep on a thick, very soft mattress and wake with lower back stiffness, the mattress — not your position — may be the cause.
Complete Thickness Decision Table: Your Position × Your Weight
Use this table to find your recommended thickness and the matching EGOHOME model:
Sleep Position
Body Weight
Ideal Thickness
EGOHOME Recommendation
Side sleeper
Under 130 lbs
12"
EGOHOME Black 12” Pro (soft, 7.5/10 cool)
Side sleeper
130–230 lbs
12–14"
EGOHOME Black 14” Pro (medium-soft, 8/10 cool)
Side sleeper
Over 230 lbs
14"
EGOHOME Black 14” Hybrid (medium-firm, 8.5/10 cool)
Back sleeper
Under 130 lbs
10"
EGOHOME Black 10” Classic (medium, 6/10 cool)
Back sleeper
130–230 lbs
10–12"
EGOHOME Black 12” Hybrid (medium-firm, 6.5/10 cool)
Back sleeper
Over 230 lbs
12–14"
EGOHOME Black 14” Hybrid (medium-firm, 8.5/10 cool)
Stomach sleeper
Under 130 lbs
8–10"
EGOHOME 8" Memory Foam (firm, standard support)
Stomach sleeper
130–230 lbs
10–12"
EGOHOME Black 10” Hybrid (medium-firm, 6.5/10 cool)
Stomach sleeper
Over 230 lbs
12–14"
EGOHOME Black 14” Firm (firm, 7/10 cool)
Combination
Any weight
10–14"
EGOHOME Black 14” Pro or 14” Hybrid
? If you are between two categories — for example, a 220-pound back sleeper with occasional side sleeping — choose the model suited to your heavier variable. A 12” hybrid model handles the heavier weight and still adapts to position changes. When in doubt, go medium-firm over soft.
EGOHOME Memory Foam Mattresses by Thickness
EGOHOME’s range spans 6 to 14 inches across memory foam and hybrid constructions, with every model carrying CertiPUR-US® and OEKO-TEX® Standard 100 certification, a 10-year warranty, a 100-night home trial, and free shipping and returns across the contiguous U.S.
For 8–10 Inch Needs
The EGOHOME 8-inch memory foam and Black 10-inch Classic and Hybrid models cover the lightweight and stomach sleeper range. The 10-inch Classic offers a medium feel suited to back and side sleepers under 130 pounds. The 10-inch Hybrid adds pocketed spring support for better lumbar engagement and airflow.
For 10–12 Inch Needs
The EGOHOME Black 12-inch range — Classic, Pro, and Hybrid — is the most widely applicable thickness tier. The 12-inch Classic (soft, cool 6/10) suits side sleepers and those with joint pain. The 12-inch Hybrid (medium-firm, cool 6.5/10) is specifically recommended for back sleepers and standard-weight adults across positions. The 12-inch Pro (soft, cool 7.5/10) is the top choice for side sleepers dealing with shoulder or hip pain.
For 12–14 Inch Needs
The EGOHOME Black 14-inch series is the flagship range. The 14-inch Pro (medium-soft, cool 8/10) is designed for side sleepers and pressure-relief-first buyers. The 14-inch Hybrid (medium-firm, cool 8.5/10) handles all sleep positions and is the strongest all-rounder in the range. The 14-inch Firm is built for stomach sleepers and heavier individuals, with a 12-inch BraceSleeper™ Support Foam core that resists sinkage under higher body weights.
Frequently Asked Questions
Is a thicker memory foam mattress always better?
No. Thickness should match your body weight and sleep position, not simply be maximised. A 14-inch mattress with a very soft comfort layer can cause back pain in lightweight sleepers or stomach sleepers by allowing excessive sinkage. A well-calibrated 10-inch mattress will consistently outperform an oversized 14-inch model for the wrong body type.
What thickness of memory foam is good for back pain?
A medium-firm mattress of 10 to 12 inches is the most widely recommended range for lower back pain. It provides enough foam depth for genuine pressure relief without the risk of comfort layer collapse that causes lumbar sagging. Side sleepers with back pain may benefit from 12 inches with a softer feel to ensure hip and shoulder alignment.
What is the minimum thickness for a memory foam mattress for adults?
For most adults, 8 inches is the practical minimum for sustained comfort. Below 8 inches, there is often insufficient comfort layer depth for pressure relief across a full night of sleep. The exception is stomach sleepers who may intentionally choose 8 inches for a firmer surface that prevents hip sinkage.
Does mattress thickness affect how long it lasts?
Yes, indirectly. A mattress that is too thin for the body weight it supports will experience faster comfort layer compression and develop sags and pressure indentations earlier than one appropriately sized for that load. Choosing the correct thickness for your weight extends the usable lifespan of the mattress. EGOHOME mattresses are expected to last 6 to 8 years with proper care, with regular rotation every 3 to 6 months recommended.
Can I use a thick mattress on an adjustable base?
Memory foam mattresses up to 14 inches are generally compatible with adjustable bases, though the mattress should be flexible enough to bend at the head and foot sections without cracking or deforming. EGOHOME mattresses are confirmed compatible with adjustable bases. For very thick or firm mattresses, check the specific flex requirements of your adjustable base before purchasing.
Final Thoughts
The best thickness for a memory foam mattress is not the thickest you can find or the most expensive number on the specification sheet. It is the thickness that aligns precisely with your body weight, your sleep position, and any specific conditions you are managing — then pairs that depth with a comfort layer and support core calibrated to work

 U.S. Wildlife Removal Service
As a 23 year professional in wildlife control, I see hundreds of situations every month with nuisance animals going into places that they don't belong. Some of those places are more common than others. I recently addressed a skunk infestation for a residence in Glen Ellyn, IL. The challenge involved a family of skunks that had taken residence under the front concrete stoop. Concrete and skunks are never a good mix because concrete is porous, when a skunk sprays the odors penetrate and will permeate for months and months as the weather gets warm or humidity rises.
My approach was methodical and focused on humane Glen Ellyn skunk removal.
The process began with the strategic placement of live traps near the stoop, ensuring minimal distress to the animals. These traps are industry standard, designed to safely contain the skunks without harm. Regular monitoring of these traps was a critical part of the process, ensuring the skunks were not confined for an extended period.
Upon successful capture, the skunks were removed and the animal proofing work was next on the list.
Skunk exclusion work, is a critical component in preventing future infestations of skunks, raccoons or opossums. This involved a thorough inspection and sealing of potential entry points with steel mesh buried underground at a specific depth and angle. Skunk-proofing is a vital step in ensuring long-term resolution to wildlife intrusions.
Once the skunks were gone and the area was sealed, we performed an ozone treatment to the basement with a special filter to sub the air, destroying the skunk spray's odor molecules from the air. Typically the reason people discover skunks under the stoop to begin with is because the odor from spraying.
For residents in and around Glen Ellyn experiencing similar issues, we offer humane, effective, and affordable wildlife control solutions. Expertise in skunk removal and exclusion is just a call away!

 Sarlai Home Inc
Solid Teak Wood Bistro Set Folding Table And Chair Set Power Coating Frame Patio Set With Waterproof Navy Cushion.
The main material is solid teak and black metal frame with powder coating. The wood part selects the high quality teak, is one of the typical wood of outdoor products. In addition, the wood is coated with a water-based oil to help the product resist water. The steel parts are coated with powder, which helps prevent rust even when used in rainy weather.
Starting afternoon tea on the beach terrace with the bistro is a memorable memory, or in the small garden corner where the family gathers every weekend.

 Five Star Tree Care
Have you ever looked out at your usually normal tree only to find it draped in hundreds or thousands of eerie looking webs? No, you are not going crazy. Chances are your tree has been visited by seasonal bugs. Typically, Eastern tent caterpillars or fall webworms are the cause of web covered trees. When they visit, they spin nets that resemble spider webs. Five Star Tree Services has put together a quick guide on everything you need to know about web-making caterpillars and how to deal with them.
Eastern Tent Caterpillars vs. Fall Webworms
Both of these pests look similar but there are some differences that set them apart. Eastern tent caterpillars are also called spring webworms. This is mainly because they are often found feeding during the spring seasons, while fall webworms as the name suggest, tend to appear in the autumn months.
The webs of the two pests look different from each other. The eastern tent caterpillar webs have a thick texture that looks like cotton, while the fall webworms have webs that more resemble tulle. Both also prefer to reside in different parts of the tree. Eastern tent caterpillars love to hang out where branches connect, called tree pockets. Fall webworms, on the other hand, like to hang out on the tips of branches.
Each has a different set of preferred tree species for their meals. Fall webworms like more than 100 different types of trees, but they are most often found on:
Black Walnut Trees
Hickory Trees
Wild Cherry Trees
Pecan Trees
Sweetgum Trees
Persimmon Trees
Mulberry Trees
Oak Trees
Pecan Trees
Eastern tent caterpillars also consume many different species of tree, but are most often found on:
Apple Trees
Crabapple Trees
Wild Cherry Trees
Ash Trees
Maple Trees
How to Remove Webworms & Tent Caterpillars
Before you start freaking out about your Halloween tree that suddenly decided to appear in the spring or early fall, it is important to note that these bugs won’t harm your tree. They look gross and will eat a large portion of your leaves, but there are no harmful side effects otherwise.
With that out of the way, getting rid of the webs is pretty simple. You can just remove them by hand and toss them into a bucket of detergent water to prevent sticking. You can also you the end of a stick or broom if you would prefer to avoid touching the sticky webs. For higher branches, we suggest calling a local arborist for assistance to prevent accidental falls.
How to Prevent Webworms & Tent Caterpillar Infestations
If you don’t want to deal with these webs at all, you can prevent an infestation in advance. In the winter, check your trees for tent caterpillar eggs. They are usually reddish in colour and a bit shiny. They can be found along the tree branches and scraped off. Fall webworm eggs look like green clumps and can be found on the bottom of leaves in the summertime. If you are unsure, or if you simply don’t want to deal with the problem on your own, Five Star Tree Services can help. Give us a call at (416) 990-3355 to find out more about our Toronto tree removal and tree care services today.
 Leo’s Magic Glass
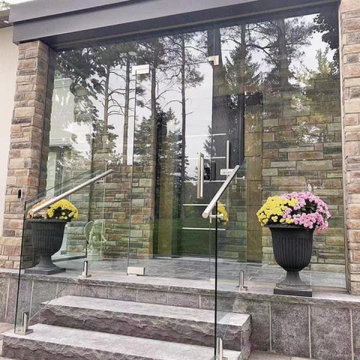
A winter storm door in glass installation typically involves the placement of a glass-enclosed door in the entryway of a home or building, designed specifically to provide an additional layer of insulation and protection against harsh winter weather conditions.
The glass panel in the winter storm door is typically double-paned, which provides an extra layer of insulation and helps to reduce heat loss. This can help to improve energy efficiency and lower heating costs during the winter months.
In terms of installation, a winter storm door in glass is typically mounted on the exterior of an existing entry door, and may feature a variety of design options such as decorative glass, hardware, and finishes. The installation process may involve anchoring the door securely to the frame of the entryway, and ensuring that the door is properly sealed to prevent air leaks and drafts.
Winter storm doors in glass offer several advantages over traditional doors. They can help to improve energy efficiency and lower heating costs, while also providing an extra layer of protection against harsh winter weather conditions. Additionally, they can enhance the overall aesthetic of a home or building, adding a touch of elegance and sophistication to the entryway.
Overall, a winter storm door in glass installation is a popular choice for those seeking to improve energy efficiency and protect against harsh winter weather conditions. With a range of design options available, it's possible to find a winter storm door in glass that perfectly suits your needs and enhances the overall aesthetic of your home or building.
 5 star finishes ltd
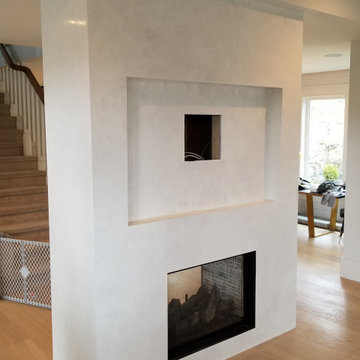
Custom fireplace with the stone removed and new hardi backer board and drywall installed. Metal l bead was installed around the opening and proset 60 used to tape in and finish the entire fireplace for crack prevention and eifs mesh installed around the opening.
Grassello Di Calce product, Venetian plaster fireplace!
Typical install for a non zero clearance fireplace is as follows:
For fireplaces that are non-zero clearance: Use Hardi backer board around the opening, usually half inch and 18 inches around the opening, and then half inch drywall matched well to the hardi backer board seams. DO NOT USE DUROCK BOARD. Do not allow seams of the board to have breaks above the fireplace, preventing cracks by using one continuous piece of hardi board across the top, and placing the joints ideally in the middle of the two sides of the fireplace opening. Then tape in and finish only with Proset 60 drywall compound and use only metal corner beads and cut half the width of a 90 degree corner bead to make a homemade L bead, and fit this in between the drywall and fireplace flange.
Sand everything with an orbital sander and then primer with quartz primer diluted 1-1, and then 30% or undiluted quartz primer, allow to dry 4 hrs, apply adhesive 9 inch mesh etc. as per above with our Italian basecoat 30 in two layers. Wax is definitely not recommended for around hot fireplaces. Stain shield is the best sealer choice for these areas.
This finish was polished to a satin sheen, and was not applied in three layers to produce a mirror finish. This finish was sealed with advanced penetrating sealer and was polished with a wool bonnet and microfiber rags.
2020
Venetian plaster install only, no rebuild or drywall work: $4200
 Leo’s Magic Glass
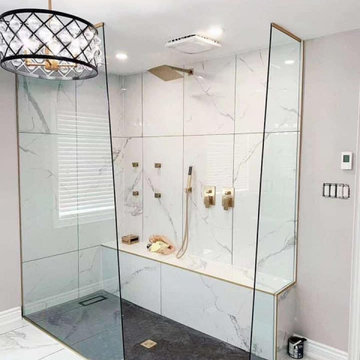
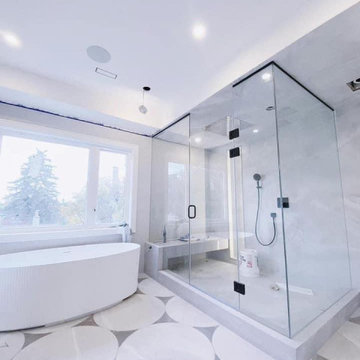
A shower glass installation typically involves the placement of tempered glass panels in a shower enclosure, replacing traditional shower curtains or other non-glass materials. These glass panels may be frameless or framed, and can feature a variety of finishes and patterns to suit different design preferences.
In terms of installation, a shower glass installation typically involves the custom-cutting of the glass panels to fit the specific dimensions of the shower enclosure. The panels are then mounted using specialized hardware or adhesives designed for glass installation, which may require professional installation. The installation process may involve anchoring the glass panels to the wall or floor to ensure they are secure and level.
Shower glass installations offer several advantages over traditional shower materials. They are easy to clean and maintain, as they do not require frequent replacement like shower curtains or liners. Additionally, they create a sleek and modern look that can enhance the overall aesthetic of a bathroom or shower space.
It's worth noting that shower glass installation requires proper ventilation and drainage to prevent the buildup of moisture and minimize the risk of mold or mildew growth. For this reason, it is important to consult with a professional installer to ensure that the installation is done correctly and that proper ventilation is maintained.
Overall, a shower glass installation is a popular choice for those seeking a modern and stylish look for their bathroom or shower space. With a range of design options available, it's possible to find a shower glass solution that perfectly suits your needs and enhances the overall aesthetic of your space.
 Leo’s Magic Glass
A shower glass installation typically involves the placement of tempered glass panels in a shower enclosure, replacing traditional shower curtains or other non-glass materials. These glass panels may be frameless or framed, and can feature a variety of finishes and patterns to suit different design preferences.
In terms of installation, a shower glass installation typically involves the custom-cutting of the glass panels to fit the specific dimensions of the shower enclosure. The panels are then mounted using specialized hardware or adhesives designed for glass installation, which may require professional installation. The installation process may involve anchoring the glass panels to the wall or floor to ensure they are secure and level.
Shower glass installations offer several advantages over traditional shower materials. They are easy to clean and maintain, as they do not require frequent replacement like shower curtains or liners. Additionally, they create a sleek and modern look that can enhance the overall aesthetic of a bathroom or shower space.
It's worth noting that shower glass installation requires proper ventilation and drainage to prevent the buildup of moisture and minimize the risk of mold or mildew growth. For this reason, it is important to consult with a professional installer to ensure that the installation is done correctly and that proper ventilation is maintained.
Overall, a shower glass installation is a popular choice for those seeking a modern and stylish look for their bathroom or shower space. With a range of design options available, it's possible to find a shower glass solution that perfectly suits your needs and enhances the overall aesthetic of your space.
8