
Search results for "Proceeds" in Home Design Ideas
 Betz Pools Limited
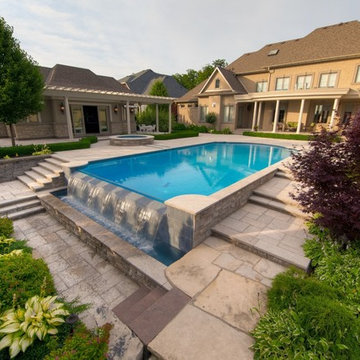
If one lot isn't big enough, you could buy two lots on a corner. That's what this family in Whitby did, and then proceeded to add every possible feature for sumptuous outdoor living. The focal point is infinity pool which is classically aligned with the middle of the yard. (18 x 40 custom rectangular)
 Amanda Martocchio Architecture
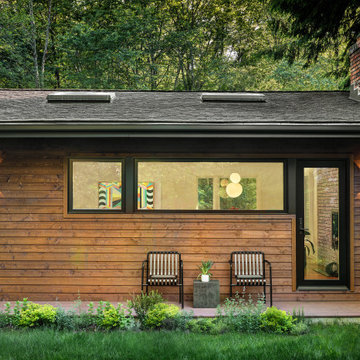
Time had stood still at this 1970s ranch in Armonk when the owners invited us to collaborate with them to transform it into a modern, light-filled home for their young family. The budget was lean, so economy was a primary consideration for every design decision. The challenge was to identify the modest home’s virtues – vaulted ceilings and a lovely backyard – and accentuate them by strategically optimizing available funds.
We were tasked with rectifying a dysfunctional interior stair, connecting to the outdoors with new large windows, and updating the exterior. We focused our attention on a finite set of architectural moves which would have the biggest impact and improve our clients’ daily experience of the home. Detailing was kept simple, using common grade materials and standard components. All exterior walls were revamped with new windows and siding. Although these materials were not particularly costly, thoughtful layout of boards, battens, and openings produced a cohesive, rigorous composition at each facade.
Since the budget would not cover the homeowners’ complete wish list, some items were bracketed for subsequent phases. The challenge was to establish a framework that would allow future work – including a new roof and kitchen renovation – to proceed smoothly.
The homeowners, both scientists, were enthusiastic collaborators, contributing their outstanding design sensibilities to selection of fixtures and finishes. Construction ended just in time for the arrival of their baby – and with that, the transformation of their family home was complete.
 Measuredworks Architecture
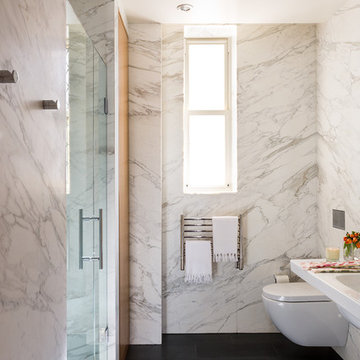
This gut renovation updates a 1,200 SF Classic 5 in an historic prewar building overlooking Gramercy Park. The design is organized around a spine of ribbed white oak proceeding from entry hall to living spaces with southwest views over the park. Concealed doors throughout the apartment provide access to storage, and a hidden door in the ribbed wall leads to the master suite.
Fran Parente
Find the right local pro for your project
 Gardening Angel
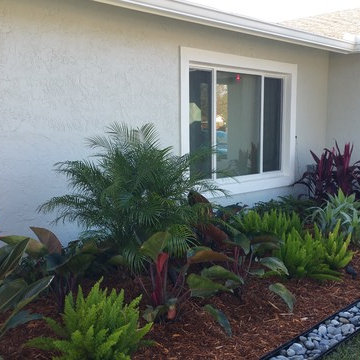
This home had zero front landscape. The client requested low maintenance, succulents and rock elements. The area was not full sun, but had significant morning light and in fact had quite a bit of shade. This was a bit of a challenge to specify plants that could thrive in mixed light, but could handle direct sun for several hours a day. We incorporated some tough but lovely plants that require very little upkeep except to trim off spent/dying leaves to keep them looking clean. By using a rock edging and heavy mulching under the plants, we further reduced maintenance. We added landscape lighting to show off the garden at night and to provide subtle welcoming light to the entry.
 Mariane Wheatley-Miller
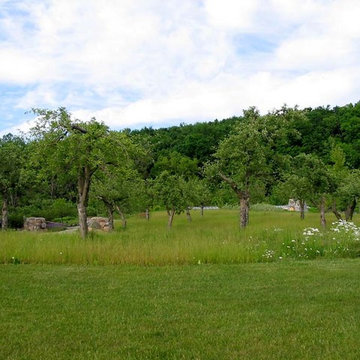
Wild flower meadow next to the lake and apple orchards showcasing Upstate New York apple production. Some areas mowed for entertaining and tents.
Inspiration for a huge rustic drought-tolerant and partial sun front yard stone vegetable garden landscape in New York for spring.
Inspiration for a huge rustic drought-tolerant and partial sun front yard stone vegetable garden landscape in New York for spring.
 Tiffany Brooks, HGTV Host & Interior Designer
Inquire About Our Design Services
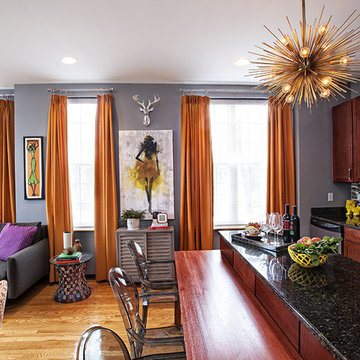
This homeowner loved color. In order to bring in more color, I ditched her yellow and orange walls by painting the room gray, with charcoal trim. I often tell folks in order to pump up the color, we have to bring down the backdrop, and Lori’s condo was my case in point.
And then we proceeded with construction. Yep, construction. I had to figure out a way around the awkward floor plan, and where to put that TV. We decided to rebuild her fireplace to house her TV - it was great way to utilize the unused space.
Marcel Page
 Gallery KBNY
The owner of this historic and landmarked town-home renovation in Hudson Square, originally built in 1826, hired Gallery Kitchen and Bath to fully gut-renovate this 3-unit row-home. The scope of work included a full-scale renovation of the owners unit, including the renovation of the kitchen, one 4-piece master ensuite bathroom, one 3-piece bathroom with a walk-in steam shower, and a beautiful powder room. Additional work in the owners unit also included flooring, electrical upgrade, major plumbing work, new HVAC system, restoration of a fireplace, installation of a fully integrated smart home system and landmarked approved windows.
CELLAR RENOVATION IN NYC LANDMARKED TOWN-HOME
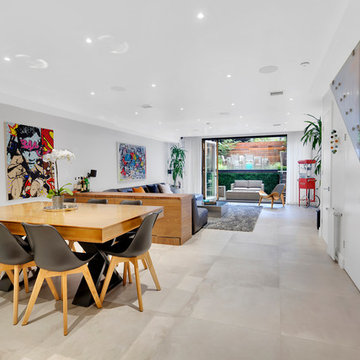
Rounding out the owners unit we renovated the cellar, which was converted into an entertainment space and featured a custom glass curtain wall, along with a custom staircase with an exposed brick wall. During the demolition phase of the cellar, our team discovered 56 wine jugs filled with wine from the prohibition era, leading us to name this project the prohibition house. For the two tenant units, Gallery Kitchen and Bath undertook the renovation of 2 kitchens, 4 bathrooms, new hardwood flooring throughout, along with detailed carpentry work in the entire home.
WHY GALLERY KITCHEN AND BATH
After interviewing multiple contractors, our client decided on Gallery Kitchen and Bath primarily because of our turnkey design, selection, and build process. In a renovation of this magnitude it is crucial to have a centralized full service contractor under one roof to handle all of the aspects and simultaneous moving parts of the project. Decentralizing the entire process by having multiple unaffiliated vendors handle various parts of the process can easily become chaotic, time consuming, and costly.
Because Gallery Kitchen and Bath undertook the entire process, from the design of the entire space to the selection and procurement of all finishes and fixtures, down to the procurement of all permits and LPC filings, it made a seemingly chaotic project a’lot more manageable.
PHASE 1: DESIGN, SELECTION, PROCUREMENT
Our client wanted the renovation to incorporate a fully modern design into his Hudson Square town-house. Being that this is a landmarked property, the exterior facade had to be restored and kept with the original aesthetic, the interior of the home however was a whole different story.
In keeping up with the modern aesthetic, our designers went to work to design a custom kitchen that included fully custom flat panel base cabinets in a white high gloss finish and an absolute matte black appliance/pantry wall. The kitchen design also included a white quartz countertop and backsplash with a waterfall edge island. To bring warmth to the modern kitchen, our designers incorporated a rifted and quartered select oak wood floor in a herringbone pattern, and custom blended stain with matte polyurethane finish. For continuity, the wood floor was also extended throughout the entire owners unit.
In the ensuite bathroom we created a “wet area” which houses a standalone soaking tub as well as a beautiful rainfall shower, completely leveled with the rest of the floor in the bathroom. Some highlights within this space include a tiled square drain, large niche cutouts with a carrera marble accents. Once again, to bring warmth to this modern bathroom, our designers incorporated a floating rustic oak vanity and carrera marble mosaic floor tile.
Last on the list on the owners unit floor was the cellar, which our client wanted to utilize as an entertainment space for his friends and family. During the design phase, we incorporated an open concept layout, wedding the indoor and outdoor space with a custom glass curtain wall. The design also included custom walnut built-ins that serve as a custom wet bar and storage piece.
With the design approved and selections made our office liaisons moved to procure all of the material selections and finishes.
PHASE 2: DEMO
Because this home is almost two centuries old, we had to take extra precaution during the interior demolition phase of the project. One specific area that we had to pay special attention to was the existing brick. Over time the mortar in old brick homes deteriorates and turns into dust – for this reason it was extremely important that a thorough and ongoing inspection of the exteriors and interior walls took place during the demolition of the space.
After 14 30-yard debris containers and 56 wine filled jugs from the prohibition era later , the demolition of this historic Hudson Square town-home came to an end. If you are wondering whether we tried the wine? After notifying the owner we agreed to open one of the jugs and try them together – nothing but vinegar.
PHASE 3: BUILD
One of the challenges in a renovation project of this scope is nailing down the logistics and delivery of fixtures and finish material. Adding to this challenge was a narrow entry door that required us to use a boom truck in order to deliver some of the larger materials on site. To ensure a succinct time schedule, we boomed all of the materials through the 3rd floor for the entire project and worked our renovation work from top floor to cellar. This technique also insured that any unexpected water issues during the renovation process would not damage a finished floor.
With all roughing and framing complete, the Gallery KBNY team proceeded to execute on the design plan.
THE REVEAL
From what was once a dilapidated town-home with nothing but potential, to a glamorous and luxurious modern interior space – the prohibition house was complete. Ready to speak with us about your renovation project? Contact us to schedule your free consultation and let Gallery KBNY show you why our all-inclusive approach to your renovation is the smartest way to renovating in NYC.
 AquaTerra Outdoors
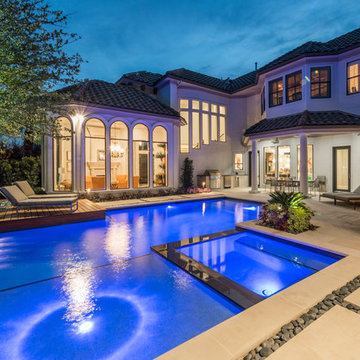
With our vision of transforming their former look into a clean, fresh “Santa Barbara” style, the clients gave us permission to proceed with a new pool and outdoor kitchen design, as well as a new fire pit, additional landscaping and enhanced lighting. Additionally, Aquaterra updated the outdoor appliances, fans, security light fixtures and re-routed some ugly electrical lines.
Wade Griffith Photography
 TKS Design Group
Free ebook, Creating the Ideal Kitchen. DOWNLOAD NOW
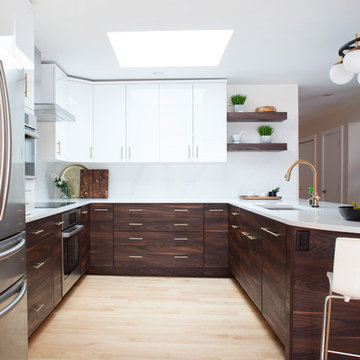
One of my very favorite parts of the design process is space planning and considering all the possible floor plan solutions at the beginning stages of the project. What works for one person as a solution may not be the best solution for the next. What you think you want going into the process, may change once all the space planning options are considered. This was exactly the case for this family. They thought they really wanted an island configuration.
Once we figured out the flow of the work triangle and saw how great a large peninsula would work for the family, we proceeded along those lines. The peninsula not only works great for food prep, it also allows more of a traditional table seating versus an island with everyone lined up in a row — not so great for daily dinner conversation.
To the right of that is a counter depth fridge and a speed oven which gives some flexibility with cooking and reheating smaller meals instead of having to heat the entire oven. An induction cooktop with its easy to clean surface keeps the space looking clean and tidy. Induction heats very quickly to high temperatures so is also wonderful to cook on. To the right of cooktop is a long stretch of countertop perfect for prep space.
Storage was very important to the homeowners. We took our time discussing where spice pull outs and tray dividers would be located, how the corner storage would be addressed and the location of the other items such as trash and recycling cans. We worked as many drawers as possible into the space, as I always recommend drawers over doors and/or roll outs as they offer the most flexibility and ease of use. Customizing these details is time well spent as having a place for everything and everything in its place, just like Mom said, really is the key to a functional and professionally designed kitchen.
The talls and wall cabinets are white acrylic which combined with the white marble look quartz countertops and full height backsplash keep the room feeling light, bright and airy. The wood toned base cabinets are made of a textured laminate that has the look of wood but is a very easy to maintain product. Brushed gold metal on the hardware, faucet and chandelier add a warm touch and ties into the blond maple flooring. The neighboring breakfast room was also remodeled as part of the project and houses a small coffee station.
Designed by: Susan Klimala, CKBD
Photography by: Kari Firak
For more information on kitchen and bath design ideas go to: www.kitchenstudio-ge.com
 Besch Architecture
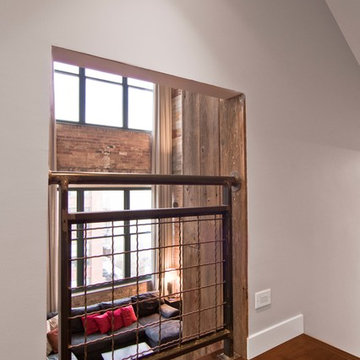
This small opening creates a view to the family room below as one proceeds up to the upper levels on the stairs
Peter Nilson Photography
Inspiration for an industrial medium tone wood floor hallway remodel in Chicago with white walls
Inspiration for an industrial medium tone wood floor hallway remodel in Chicago with white walls
 AquaTerra Outdoors
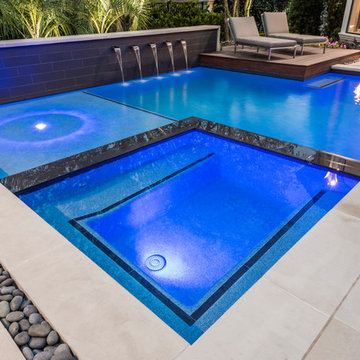
With our vision of transforming their former look into a clean, fresh “Santa Barbara” style, the clients gave us permission to proceed with a new pool and outdoor kitchen design, as well as a new fire pit, additional landscaping and enhanced lighting. Additionally, Aquaterra updated the outdoor appliances, fans, security light fixtures and re-routed some ugly electrical lines.
Wade Griffith Photography
 Sharon Flatley Design
Daniel S Flatley
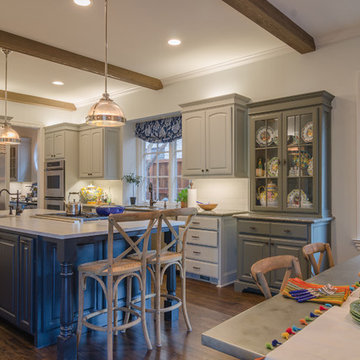
Inspiration for a timeless l-shaped dark wood floor open concept kitchen remodel in Dallas with raised-panel cabinets, beige cabinets, white backsplash, subway tile backsplash, stainless steel appliances, an island and granite countertops
Inspiration for a timeless l-shaped dark wood floor open concept kitchen remodel in Dallas with raised-panel cabinets, beige cabinets, white backsplash, subway tile backsplash, stainless steel appliances, an island and granite countertops
 The Cabinet Store + Culina Design
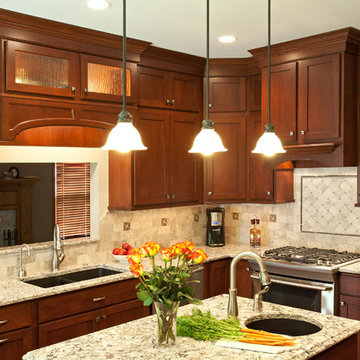
This kitchen of this traditional two story in Apple Valley was transformed from outdated to updated, with better flow and more storage, all within the same footprint. After Ohana Construction gutted the kitchen, took out the soffits, and put in a new floor, The Cabinet Store stepped in to install brand new Showplace Wood Cherry Cabinets to the ceiling, and moved the range and fridge for better traffic flow. We also added a wood vent hood over the new stove, and included a few glass doors on the cabinets for interest. The new countertops in Cambria’s Bellingham tone, compliment the look nicely.

 AquaTerra Outdoors
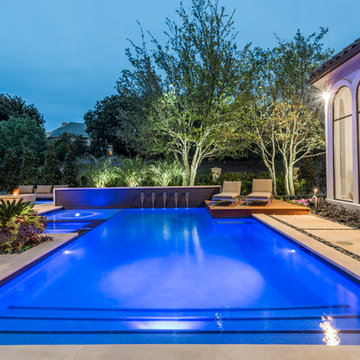
With our vision of transforming their former look into a clean, fresh “Santa Barbara” style, the clients gave us permission to proceed with a new pool and outdoor kitchen design, as well as a new fire pit, additional landscaping and enhanced lighting. Additionally, Aquaterra updated the outdoor appliances, fans, security light fixtures and re-routed some ugly electrical lines.
Wade Griffith Photography
 ED Enterprises, Inc.
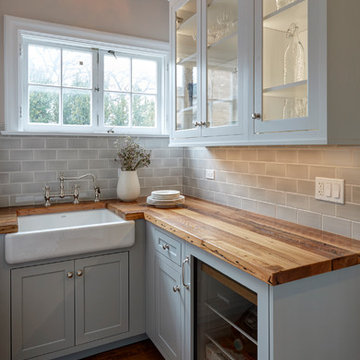
We understood the customer's dream to remove an existing closet and several walls.
We began with the removal of several structural walls and closet. We found that the previous contractor had incorrectly removed structural wood posts. We secured the structural integrity of the building with wood and steel.
We proceeded to expand the opening between
the Kitchen and Butler Pantry, which included relocating waste and water lines from the second floor.
We upgraded the existing electrical and installed a 440-volt electrical system for the entire home.
You can enjoy the illumination of the cabinetry and kitchen, by the pendant lights, recessed lights, under cabinet lights, and curio lights in the glass door cabinets,
Note the brick pattern Subway tile from the counter top to the ceiling, in the kitchen and the Butler Pantry. Take special notice of the decorative tile area above the range.
The chimney style hood was vented to the exterior.
The unique sitting area, near the rear entry, was finished with beadboard paneling and wall cabinets up to the ceiling., trimmed with crown molding.
General Contractor / Remodel: E D Enterprises, Inc.
Michael Alan Kaskel Photography
 TKS Design Group
Free ebook, Creating the Ideal Kitchen. DOWNLOAD NOW
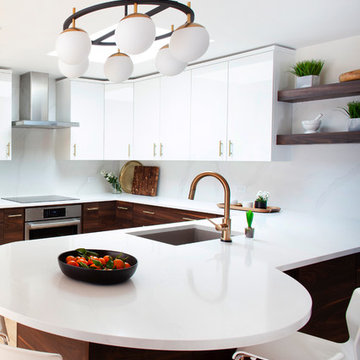
One of my very favorite parts of the design process is space planning and considering all the possible floor plan solutions at the beginning stages of the project. What works for one person as a solution may not be the best solution for the next. What you think you want going into the process, may change once all the space planning options are considered. This was exactly the case for this family. They thought they really wanted an island configuration.
Once we figured out the flow of the work triangle and saw how great a large peninsula would work for the family, we proceeded along those lines. The peninsula not only works great for food prep, it also allows more of a traditional table seating versus an island with everyone lined up in a row — not so great for daily dinner conversation.
To the right of that is a counter depth fridge and a speed oven which gives some flexibility with cooking and reheating smaller meals instead of having to heat the entire oven. An induction cooktop with its easy to clean surface keeps the space looking clean and tidy. Induction heats very quickly to high temperatures so is also wonderful to cook on. To the right of cooktop is a long stretch of countertop perfect for prep space.
Storage was very important to the homeowners. We took our time discussing where spice pull outs and tray dividers would be located, how the corner storage would be addressed and the location of the other items such as trash and recycling cans. We worked as many drawers as possible into the space, as I always recommend drawers over doors and/or roll outs as they offer the most flexibility and ease of use. Customizing these details is time well spent as having a place for everything and everything in its place, just like Mom said, really is the key to a functional and professionally designed kitchen.
The talls and wall cabinets are white acrylic which combined with the white marble look quartz countertops and full height backsplash keep the room feeling light, bright and airy. The wood toned base cabinets are made of a textured laminate that has the look of wood but is a very easy to maintain product. Brushed gold metal on the hardware, faucet and chandelier add a warm touch and ties into the blond maple flooring. The neighboring breakfast room was also remodeled as part of the project and houses a small coffee station.
Designed by: Susan Klimala, CKBD
Photography by: Kari Firak
For more information on kitchen and bath design ideas go to: www.kitchenstudio-ge.com
 Betz Pools Limited
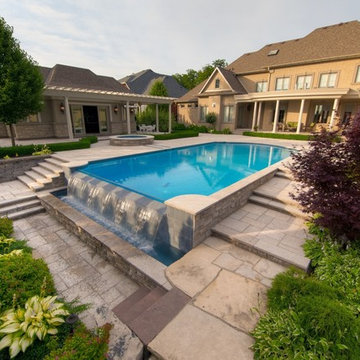
If one lot isn’t big enough, you could buy two lots on a corner. That’s what this family in Whitby did, and then proceeded to add every possible feature for sumptuous outdoor living. The focal point is 18 x 40 custom concrete zero edge infinity pool which is classically aligned with the middle of the yard.
 De Young Properties
With overwhelming support by the community who dug deep and donated, the 2018 Central Valley St. Jude Dream Home Giveaway successfully raised $957,100 for St. Jude Children’s Research Hospital! Since 2007, De Young Properties has been a major donor and builder of 12 St. Jude Dream Homes, helping to raise $11,628,545 to help the kids of St. Jude fight cancer and other life-threatening childhood diseases. One hundred percent of the proceeds will be donated to St. Jude Children’s Research Hospital, which works around the clock to develop cures to save the lives of boys and girls, including children in the San Joaquin Valley.
“We strongly believe in our responsibility to help others, which is why the St. Jude’s Dream Home Giveaway is so important to us and our entire De Young team. We are grateful to our community’s continued support of our business – a community that has given so much to us, which is why we are so passionate about giving back. In fact, we are even more passionate today than we were in 2007 when we first partnered with St. Jude Children’s Research Hospital. We are honored to be a donor and builder of our 12th St. Jude Dream Home in this war against childhood cancer. St. Jude Children’s Research Hospital positively affects the lives of families across the country, in addition to giving us the opportunity to change the life of a local family,” said Paula De Young of De Young Properties. “This amazing pediatric research center, that not only treats life threatening cases in children, also freely gives guidance to doctors around the world and here in the Central Valley. We count ourselves fortunate to be able to help such an important cause”
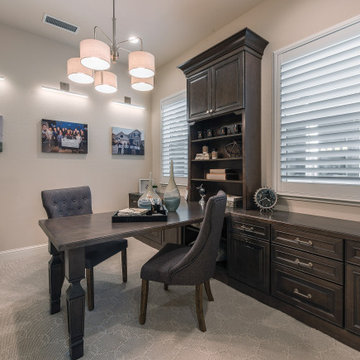
The 2018 St. Jude Dream Home is one of the most popular De Young floorplans, the Residence 210 with a beautiful Cottage elevation, and will offer three bedrooms, two full bathrooms, a formal dining room, spacious den and an open-air courtyard with a gorgeous stone accented fireplace.
With celebrity designer, Michael Moloney, donating his design talent and resources once again as Design Ambassador for this year’s St. Jude Dream Home, the home boasts a long list of special features, including fashionable quartz and granite counters from Granite Mountain Stone Design, premium designer maple cabinetry and professional closet design from KraftMaid Cabinetry and stainless steel Bosch appliances with a gas range, washer, dryer and built-in refrigerator. In addition, premium-grade wood-look porcelain tile floors by Shaw Floors, spacious 10’ ceilings, professional and water efficient front and back yard landscaping, and Energy Star approved Eagle Brand Cool Roof Tile.
The prime Clovis location of the St. Jude Dream Home is in the De Young Trailside at Loma Vista community which is within walking distance to Reagan Educational Center and located within the greater 3,300-acre Loma Vista master-planned community designed by the City of Clovis. In addition, it is a short drive from Clovis Community Medical Center and a variety of entertainment and dining options including the Sierra Vista Mall, The Square at Campus Pointe, Old Town Clovis and even Wild Water Adventure Park. Easy access to Highway 168 and Herndon Avenue can provide a fast work commute during the week and a family outing to Shaver or Huntington lakes on the weekend and even more.
De Young Properties would like to once again thank everyone in the community who contributed their hard-earned dollars to this worthy cause. They are appreciative of everyone who donated, volunteered or purchased a ticket to win this year’s St. Jude Dream Home, and feel privileged to be able to help such an important cause.
 Echohousepainting
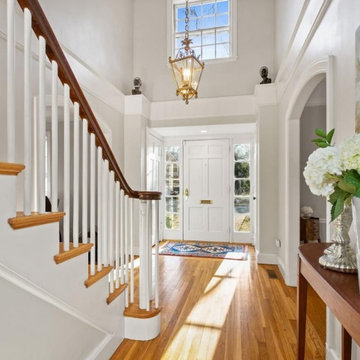
How does EchoHousePainting approach interior painting projects? The answer is short: seriously
We approach it seriously. Even though the interior of your home is not affected by weather conditions that much, we do a thorough assessment before we start working on your project.
We set up a meeting with you and talk about a few things before we proceed to work:
Your color and design preferences;
The color and style of your furniture;
The zoning and function of the room.
Most ultramodern houses we work within the Boston area need an individual approach in their maintaining and fixing. We treat every residential painting project differently and take into consideration the specific details of your property. Moreover, the preparation of any surface where we apply paint on is a priority to us. We want our work to last for a long time. We want to know that we did an impeccable job at your home. It makes us proud and satisfied to know we can guarantee quality. We feel humble and rewarded when our project becomes a visit card, recommending us to other potential customers.
10