
Search results for "Processed" in Home Design Ideas
 User
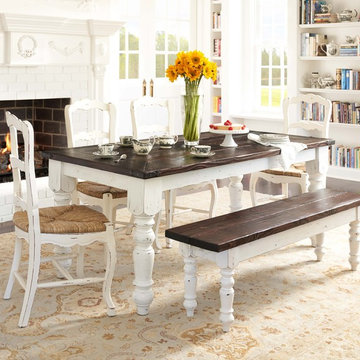
UserThe Meryton Table is inspired by French country kitchens of the past. The table features a sturdy planked top and turned legs.
Tabletop is available in our classic Espresso or Distressed White finish. Optional hammered steel corner brackets in Black or Copper can be added. Light assembly required (comes assembled for local pickup).
All of our tables are handcrafted from solid wood in our woodworking shop in Fort Mill, South Carolina. Our furniture is finished with a multi-step process of distressing and hand-applying varnish to give each piece the look of a cherished antique. Each of our works showcase the natural characteristics of wood, including variations in color, mineral streaks, knots and burls. In addition, our finishing process highlights the organic texture of wood with its pores, ridges, slits and grooves; each piece is a tactile work of art that is truly meant to be appreciated by touch. Every decorative bracket is made from steel, hand-cut and meticulously hammered to create a one-of-a-kind rustic accent for our wood furniture.
Available for local pickup or shipment within 5-7 business days.
DIMENSIONS:
Overall: 72" long x 36" wide x 30" high
Tabletop: 1.5" thick
Apron: 3.5" high
Weight: 132 pounds
CARE AND MAINTENANCE:
Dust with a soft, dry lint-free cloth.
Soak up any water immediately with a soft, dry cloth.
Avoid the use of harsh chemicals or abrasive cleaners.
Photo Credit: Michael Blevins
 Mark Cristofalo & Company
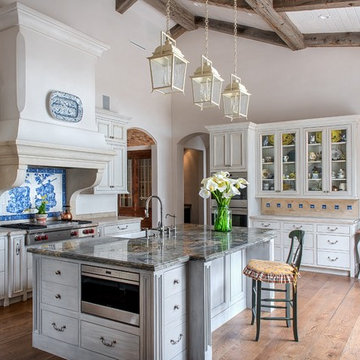
Kitchen - mediterranean l-shaped medium tone wood floor kitchen idea in San Francisco with a farmhouse sink, recessed-panel cabinets, white cabinets, stainless steel appliances and an island
Find the right local pro for your project

 William Hoffman Architect
4 Steps to Achieving a Rewarding Cost Effective Home Renovation
1 Home Renovation an Introduction
A home renovation due to changes in family needs and space requirements can be a challenging, but also a rewarding experience. As a homeowner, gathering and coordinating resources and possibly help from professional consultants are required. Once the construction phase has started, patience, endurance and commitment to follow through are necessary. Despite the challenges, the rewards of a well-planned and successfully completed project are meaningful, adding aesthetic and economic value, also providing the opportunity to personalize a home, encompassing the function, comfort and aesthetics to accommodate individual taste and lifestyle.
A renovation of an existing home is a viable alternative to moving or building a new home, assuming that a home is structurally sound, the expenditure to enlarge or improve can be a cost effective alternative. A home possessing charm, style, historical significance, established landscaping or an exceptional location could be a significant motivation to consider purchasing another home with the intent to renovate.
The complexity of a project could be relatively simple, changing the use of a room, consolidating two rooms into one, or opening up a room to the outdoors. It could also be a more involved task requiring planning, design and construction documents to build a second floor addition, the addition of a new wing or completely gutting the interior. Some projects could be completed in a weekend’s work or more complex projects, using a “Master Plan”, a plan which provides overall guidance; a renovation can be accomplished all at once or divided into manageable projects over a period of time. With the home evolving gradually allowing the renovation to be planned, timed and tailored to meet individual needs and circumstances.
The due diligence phase should precede the decision to renovate whether it’s an existing home or a home that is purchased with the intent to renovate. The due diligence phase will reveal the factors affecting the nature and scope of the project or if a renovation makes sense.
Every renovation project is unique relative to personal requirements, architectural style & construction type. This guide will be helpful in developing an understanding of the preliminary groundwork required to realize a successful project. If properly planned, a home renovation project can be a positive and rewarding experience resulting in a comfortable, practical and an attractive living environment.
The first step of the planning process is documenting the goals and long-range plans referred to as the “Project Program”. This will dictate the nature, scope and feasibility of the project. Providing a guide to achieving defined goals, the timing or phasing of the project and budget required to achieve the desired end result.
2 Documenting Existing Conditions
Once the “Project Program”, has been established, the next step is to determine what there is to work with. This requires documenting the home’s floor plan and site elements which includes drawing an “as built” floor & site plan consisting of the existing exterior walls, interior rooms, doors, windows, etc. and surrounding site elements, landscape and other significant exterior features. Additionally understanding and noting on the “as built” plan, the structural, mechanical and electrical systems as necessary. Gathering the “existing condition” information defines what there is to work with, creating the framework from which to facilitate and organize the decision making process and develop effective “project program” solutions.
3 Evaluating Existing Conditions
The goals and long-range plans have been established, and the existing floor plan and site elements have been documented. Before developing design solutions, the next step is to evaluate existing conditions. The evaluation includes: a detailed analysis of the structural, mechanical and electrical systems, determining the condition of the house, noting functional and aesthetic deficiencies. At the same time recognizing the home’s strengths, assets and evaluating its relationship to its site. The remaining parameters will be defined by the local jurisdiction’s zoning regulations, these regulations will define the “envelope”, within which the proposed project will be required to fit:
•required front, side & rear yard setbacks
•maximum allowable lot coverage & height
The previous three steps have provided the necessary foundation to start the design phase. The goals and long range plans have been established, existing conditions have been documented and the evaluation of what there is to work with are now in place. This will provide the framework from which to facilitate and organize design solutions. The consolidation of this information is manifested in the development of the “Master Plan” which will become the road map by which sound decision-making can be made as a home renovation evolves. Keeping the project, on a linear path, avoiding redundancies and back tracking, on time, within budget, concluding with a well crafted finished product. After all the “up front” research and documentation has been completed, the design phase of the project can now precede, with the creation of diagrammatic design drawings. Organizing interior spaces, taking into account the external elements, prevailing breezes, solar orientation, view, existing outdoor features, etc. Through the development of schematic sketches themes will emerge followed by design development drawings. Wise planning and renovation decisions can save money and time at the same time provide a well crafted finished project. The “Master Plan” provides a strategic path in the planning and decision making process leading to a successful and rewarding home renovation, which will add value and considerable enjoyment, for many years, living in a newly renovated home.
By virtue of having gone through these steps, frustrations sometimes encountered during a home renovation will be minimized, allowing the renovation to be a gratifying and rewarding experience. Being aware of the process allows one to become an “Educated Client,” which is worth quite a bit more than one might realize. The uneducated client may not realize the benefit of going through the planning, evaluation and documentation groundwork. He will only realize its benefits after having completed a prior renovation project. This rational approach keeps the design process on a direct path to achieving prescribed goals.
4 Exploring Design Solutions & Developing a Master Plan
The previous three steps have provided the necessary foundation to start the design phase. The goals and long range plans have been established, existing conditions have been documented and the evaluation of what there is to work with are now in place. This will provide the framework from which to facilitate and organize design solutions. The consolidation of this information is manifested in the development of the “Master Plan” which will become the road map by which sound decision-making can be made as a home renovation evolves. Keeping the project, on a linear path, avoiding redundancies and back tracking, on time, within budget, concluding with a well crafted finished product.
By virtue of having gone through these steps, frustrations sometimes encountered during a home renovation will be minimized, allowing the renovation to be a gratifying and rewarding experience. Being aware of the process allows one to become an “Educated Client,” which is worth quite a bit more than one might realize. The uneducated client may not realize the benefit of going through the planning, evaluation and documentation groundwork. He will only realize its benefits after having completed a prior renovation project. This rational approach keeps the design process on a direct path to achieving prescribed goals.
After all the “up front” research and documentation has been completed, the design phase of the project can now precede, with the creation of diagrammatic design drawings. Organizing interior spaces, taking into account the external elements, prevailing breezes, solar orientation, view, existing outdoor features, etc. Through the development of schematic sketches themes will emerge followed by design development drawings. Wise planning and renovation decisions can save money and time at the same time provide a well crafted finished project. The “Master Plan” provides a strategic path in the planning and decision making process leading to a successful and rewarding home renovation, which will add value and considerable enjoyment, for many years, living in a newly renovated home.


 User
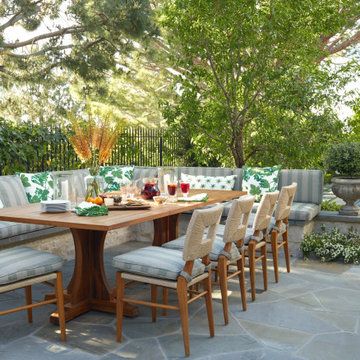
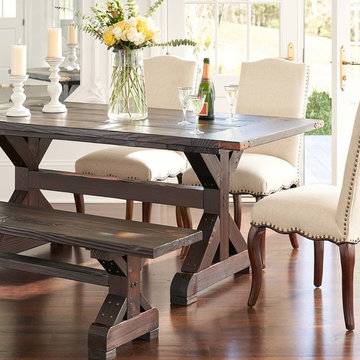
UserThe Carmody Table features a sturdy planked top and trestle legs, and provides comfortable seating for six.
Customize your tabletop and legs, available in either our classic Espresso or White Distressed finish. Optional hammered steel corner brackets in Black or Copper can be added. Light assembly required (comes assembled for local pickup).
All of our tables are handcrafted from solid wood in our woodworking shop in Fort Mill, South Carolina. Our furniture is finished with a multi-step process of distressing and hand-applying layers of varnish to give each piece the look of a cherished antique. Each of our works showcase the natural characteristics of wood, including variations in color, mineral streaks, knots and burls. In addition, our finishing process highlights the organic texture of wood with its pores, ridges, slits and grooves; each piece is a tactile work of art that is truly meant to be appreciated by touch. Every decorative bracket is made from steel, hand-cut and meticulously hammered to create a one-of-a-kind rustic accent for our wood furniture.
Available for local pickup or shipment within 5-7 business days.
DIMENSIONS:
Overall: 72" long x 36" wide x 30" high
Tabletop: 1.5" thick
Apron: 1.5" high
Distance between legs: 48" outside; 42" inside
Weight: 151.6 pounds
CARE AND MAINTENANCE:
Dust with a soft, dry lint-free cloth.
Soak up any water immediately with a soft, dry cloth.
Avoid the use of harsh chemicals or abrasive cleaners.
Photo Credit: Michael Blevins
 Peter Zimmerman Architects
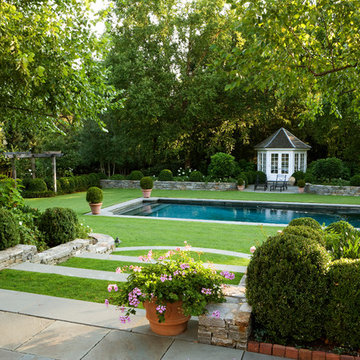
Inspiration for a large traditional full sun backyard stone formal garden in Philadelphia for spring.


 Salt Marsh Contracting
Tyler Davidson
Tyler Davidson
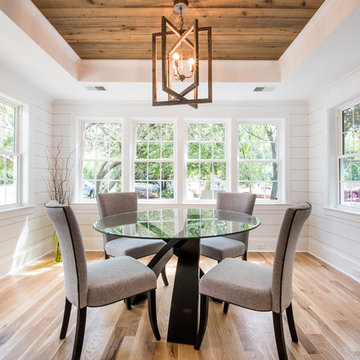
Inspiration for a mid-sized transitional light wood floor kitchen/dining room combo remodel in Charleston with white walls and no fireplace
Inspiration for a mid-sized transitional light wood floor kitchen/dining room combo remodel in Charleston with white walls and no fireplace
 Rogue Home Interiors
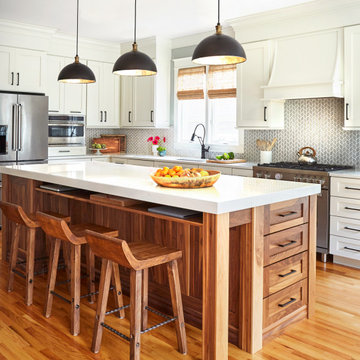
A cozy and functional farmhouse kitchen with warm white cabinets and a rustic walnut island.
Mid-sized country l-shaped medium tone wood floor and brown floor open concept kitchen photo in DC Metro with an undermount sink, shaker cabinets, white cabinets, quartz countertops, gray backsplash, porcelain backsplash, stainless steel appliances, an island and white countertops
Mid-sized country l-shaped medium tone wood floor and brown floor open concept kitchen photo in DC Metro with an undermount sink, shaker cabinets, white cabinets, quartz countertops, gray backsplash, porcelain backsplash, stainless steel appliances, an island and white countertops
 Architecture By George
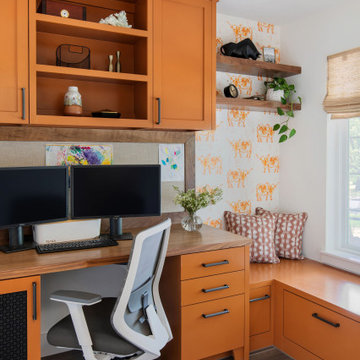
Home office - transitional built-in desk gray floor and wallpaper home office idea in Austin with white walls
 Inouye Design
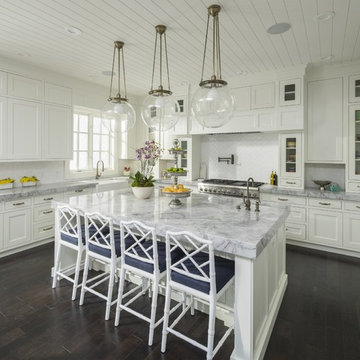
Transitional l-shaped dark wood floor kitchen photo in Salt Lake City with white cabinets, white backsplash, stainless steel appliances and an island
 Azzul Aqua Studio
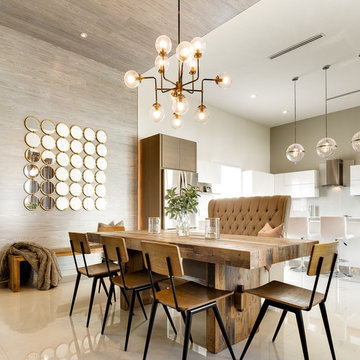
Kitchen/dining room combo - mid-sized transitional porcelain tile kitchen/dining room combo idea in Austin with white walls
 O’Hara Interiors
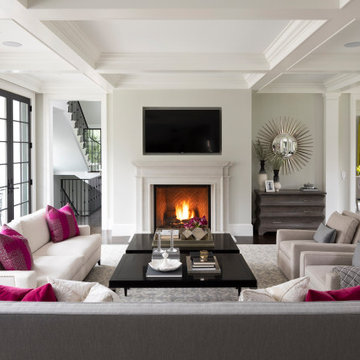
Martha O'Hara Interiors, Interior Design & Photo Styling | Elevation Homes, Builder | Troy Thies, Photography | Murphy & Co Design, Architect |
Please Note: All “related,” “similar,” and “sponsored” products tagged or listed by Houzz are not actual products pictured. They have not been approved by Martha O’Hara Interiors nor any of the professionals credited. For information about our work, please contact design@oharainteriors.com.
 User
UserJessica Delaney
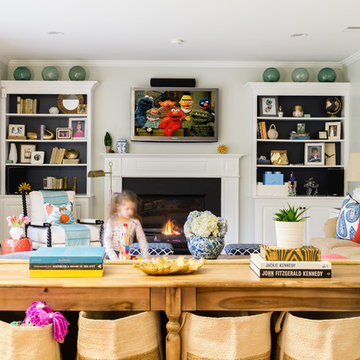
Example of a classic light wood floor living room design in Boston with white walls, a standard fireplace and a wall-mounted tv
Example of a classic light wood floor living room design in Boston with white walls, a standard fireplace and a wall-mounted tv

 Jacqueline Wheeler Interiors
Deborah Triplett Photography
Inspiration for a contemporary gender-neutral concrete floor kids' room remodel in Charlotte with yellow walls
Inspiration for a contemporary gender-neutral concrete floor kids' room remodel in Charlotte with yellow walls
 Aesthetic Answers
Regis Vogt
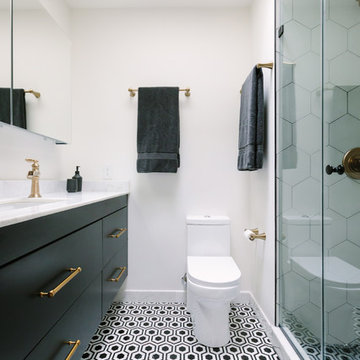
Alcove shower - contemporary white tile multicolored floor alcove shower idea with flat-panel cabinets, black cabinets, white walls, an undermount sink and white countertops
Alcove shower - contemporary white tile multicolored floor alcove shower idea with flat-panel cabinets, black cabinets, white walls, an undermount sink and white countertops
8