
Search results for "Proper functioning" in Home Design Ideas
 Adrienne DeRosa
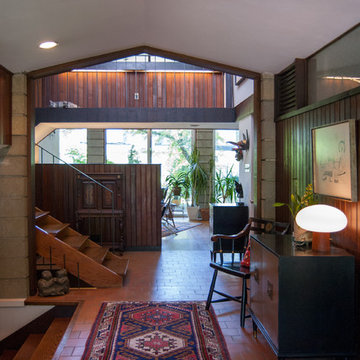
Even as an intimate greeting space, the foyer offers visitors an impressive view of what lies ahead. Repeating materials and a neutral color scheme give the home a sense of flow that feels as natural as the surfaces themselves.
Bobbie found the vintage Turkish rug at auction, while the sideboard was inherited from Matthew's grandmother. With regard to the home's nearly pristine interior, there was not much work to be done. "Making [the house] ours was really a process of filling it with things we love, and not modifying the existing structure," says Bobbie.
Adrienne DeRosa Photography © 2013 Houzz
 Medallion Cabinetry
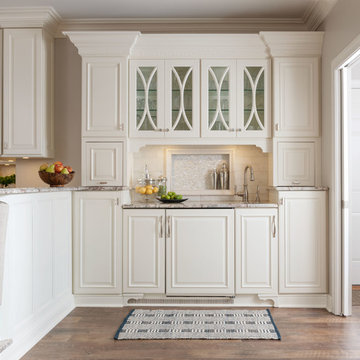
"The homeowners wanted a kitchen that reflected their personalities and cooking styles. Sophisticated but still elegant." designer Rodney Lee of York, PA.
After designing a successful home office space remodel, our same client came back to us to discuss plans and possibilities for their kitchen renovation. After a few discussions with the client, we decided the overall design concept for their kitchen would be “Sophisticated Elegance.” The homeowners wanted a kitchen that reflected their personalities and their cooking styles. Sophisticated but still elegant. The space had to be extremely functional and the color scheme had to have a certain warmth that matched the rest of their home.
The Medallion line has a wide range of architectural elements that helped us achieve that “Sophisticated Elegance”; curved/arched range hood, openings, valances, and corbels and trim. The “Sophistication” lies purely in the detail, the fixtures, the angles in the peninsula, and the changes in height and depth.
We wanted the color scheme to be as warm as possible as it would be in a bright, elegant space. We considered two colors and ended up choosing Divinity over the White Icing. The grey tones in the marble backsplash tile kept the colors modern but warm. We used natural stone versus the more aggregated quartz to maintain the use of natural product and unpredictable patterns and natural elements. We also used a dark rich stain on walnut wood as a good break from all the bright painted finishes. Oak and walnut reflect the “heart” of Pennsylvania and was a great way to maintain the use of natural elements.
The kitchen was divided into individual areas, each one focused on a particular need and/or function. My biggest challenge was transitioning the peninsula into the wet bar/hutch area while maintaining proper separation from the kitchen cabinetry and still tying it into the rest of the space.
A wealth of storage solutions.
•Desk Area. The client wanted a functional work area so we created a furniture look with ogee edging in the walnut, provincial toe space detail in solid walnut, and open display storage at top. The desk has plenty of storage.
•Main Kitchen. We were able to open up this space by creating smart transitions and separations using custom Medallion products that cater to the clients’ lifestyle. Each piece is functional while staying true to the sophisticated elegance design throughout the home.
◦Main Cabinetry: Medallion Gold Wellington Maple Divinity Classic Paint
◦48" uppers around range area; glass eclipse mullion-arched hood design
◦Mixer lift base left of range; drawer warmer with custom panel
•The main work station, or power spot, can hold up to five work stations comfortably. The cook can work within the confines of the peninsula design and access everything needed to prepare complete meals in 1-2 steps. Every cabinet has deluxe roll-out trays and/or drawers, making this kitchen fully accessible. The client wanted to be able to display and stage different pieces and concepts during holidays and gatherings. We chose to go with the more modern Mission arch above the wall oven and fridge, which complimented many of the hard angles and distinct lines used in the kitchen space.
My favorite part of this kitchen remodel came about just by listening to our client talk about how much they adored their daughter’s artwork. After numerous conversations, we landed on installing an artwork wall that was designed as a conversation piece and provides the ability to install different works of art.
 a.d.d. concept + design
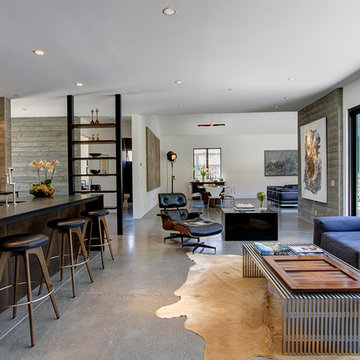
Living room - contemporary open concept concrete floor living room idea in San Francisco with white walls
Find the right local pro for your project
 Vintage Cellars & Saunas
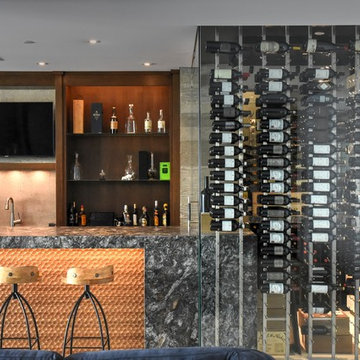
This gorgeous contemporary glass front custom wine cellar in Corona Del Mar, Newport Beach, California is an eye catcher. The sleek, glass ultra modern wine room was a unique and exciting project for our team here at Vintage Cellars. The stone bar extends into the wine cellar itself, but due to mechanical, cooling, and condensation concerns, our expert custom wine cellar team knew that extra measures needed to be taken to ensure the end quality remained top notch.
The bar itself was divided into two sections, one cut section outside to make up the main seating area and the other inside the glass wine room. The stone bar, which is porous, takes up a good portion of the front facing glass panel. Had the bar simply extended into the wine cellar and been sealed off at the joints, the stone would have eventually transferred in enough heat and moisture to cause condensation. Proper wine cellar design and planning enabled this wine cellar to not only look fantastic, but function perfectly as well.
One interesting unique feature in this Corona Del Mar, Newport Beach, Orange County, California glass and metal wine cellar is an extension of floor to ceiling frames mounted to the backside of the stone bar. This feature was made to seamlessly show consistency in floor to ceiling vintageview frames throughout.
Corona Del Mar, Newport Beach, Laguna Beach, Huntington Beach, Newport Coast, Ladera Ranch, Coto De Caza, Laguna Hills, San Clemente, Dana Point, Seal Beach, Laguna Niguel still remain the areas in Orange County that we build wine cellars most often.
Contemporary wine cellars such as this are becoming more and more popular in modern design trends. Interior Design, Architecture, and Construction all play a part in ensuring that the client’s vision comes to reality. This project was no different. Working closely with David Close Homes, Vintage Cellars was able to meet with the client and team involved, determine the ultimate wine cellar wine room wine closet goals, and see them to the finish.
Upon walking into this glass and metal modern contemporary wine cellar, you become quickly surrounded with triple deep bottles from many of the world’s best wineries. On the left below the countertop is a black stained poplar wine racking system for single 750ml bottles. Above lies room for display case storage, room for large format bottles, and label forward vintageview design racking to the ceiling. On the middle wall of this wine room is room for case storage below, similarly with triple deep vintageview floor to ceiling frames dying into more case storage above. On the right side of this wall lies a vertical space for single large format case storage.
Ultra Modern wine cellars such as this are all the rage in contemporary homes in San Diego, Orange County, and Los Angeles. This glass enclosed wine cellar with a sleek modern contemporary racking system is truly a showpiece in this home in Corona Del Mar, Newport Beach, California. Wine Racking, Wine Cellar Cooling, Wine Cellar design, Wine Cellar Build out and Wine Cellar Installation is what Vintage Cellars does best. Timeless Luxury.


 Ashton Renovations
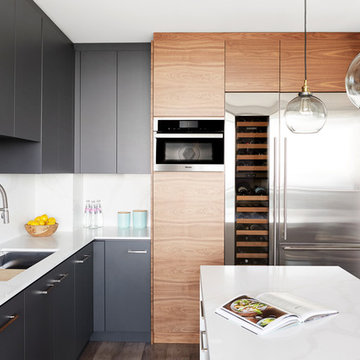
This beautiful Downtown Toronto condo, with magnificent views of the city, and Toronto Island, required some updates to the original kitchen. There were space & storage issues mainly, and much of the upper cabinets were open and not very functional. The kitchen island also needed to be transformed into a functional area with proper storage as well.
Our clients really wanted to transform this space into a beautiful modern kitchen with clean lines and warm wood accents, while including a number of automated features. This was achieved with Sub Zero refrigeration and wine cooling, along with enhanced Miele cooking features. They include an induction stove with steam features, and a built in speed oven.
This kitchen also features touch faucet controls, Casetta Wireless, and Lutron Serena wireless shades to assist with bright southern exposures.
Sponsored
Columbus, OH

Structural Remodeling
Franklin County's Heavy Timber Specialists | Best of Houzz 2020!
 The Artisans Group, Inc.
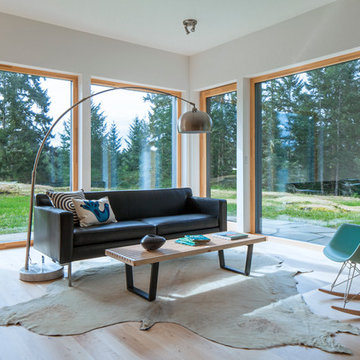
This prefabricated 1,800 square foot Certified Passive House is designed and built by The Artisans Group, located in the rugged central highlands of Shaw Island, in the San Juan Islands. It is the first Certified Passive House in the San Juans, and the fourth in Washington State. The home was built for $330 per square foot, while construction costs for residential projects in the San Juan market often exceed $600 per square foot. Passive House measures did not increase this projects’ cost of construction.
The clients are retired teachers, and desired a low-maintenance, cost-effective, energy-efficient house in which they could age in place; a restful shelter from clutter, stress and over-stimulation. The circular floor plan centers on the prefabricated pod. Radiating from the pod, cabinetry and a minimum of walls defines functions, with a series of sliding and concealable doors providing flexible privacy to the peripheral spaces. The interior palette consists of wind fallen light maple floors, locally made FSC certified cabinets, stainless steel hardware and neutral tiles in black, gray and white. The exterior materials are painted concrete fiberboard lap siding, Ipe wood slats and galvanized metal. The home sits in stunning contrast to its natural environment with no formal landscaping.
Photo Credit: Art Gray
 HUNG HSI STONE CENTER LLC
Overview:
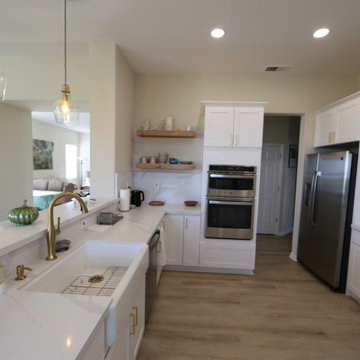
This kitchen remodel project aims to transform the existing kitchen space in Concord into a modern and functional area that meets the needs of the homeowners. The project will involve the removal of old cabinets, the installation of new cabinets, and the addition of a new countertop to enhance both the aesthetics and functionality of the kitchen.
Scope of Work:
Demolition:
Safely remove existing cabinets and countertops.
Dispose of old materials in an environmentally responsible manner.
Cabinet Installation:
Supply and install new cabinets that offer optimal storage solutions and a contemporary design.
Ensure cabinets are securely mounted and aligned properly for durability and ease of use.
Countertop Installation:
Select and install a new countertop that complements the new cabinetry and fits the style of the kitchen.
Ensure proper sealing and finishing to protect against moisture and wear.
Finishing Touches:
Install cabinet hardware (handles and knobs) to enhance functionality and style.
Conduct a thorough cleanup of the work area, ensuring the kitchen is left in pristine condition.
Timeline:
The estimated duration for the project is approximately two weeks, depending on the delivery of materials and any unforeseen circumstances.
Expected Outcome:
The completed kitchen will feature a modern design with improved storage and workspace, providing a welcoming environment for cooking and entertaining. The remodel is expected to increase the overall value of the home while enhancing the daily experience of the homeowners.
Location:
The project will take place in Brentwood, ensuring local suppliers and contractors are utilized to keep the project efficient and community-focused.
We look forward to bringing this kitchen remodel vision to life and creating a beautiful, functional space for the homeowners in Brentwood.
 HUNG HSI STONE CENTER LLC
Overview:
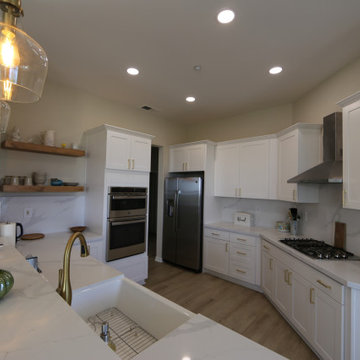
This kitchen remodel project aims to transform the existing kitchen space in Concord into a modern and functional area that meets the needs of the homeowners. The project will involve the removal of old cabinets, the installation of new cabinets, and the addition of a new countertop to enhance both the aesthetics and functionality of the kitchen.
Scope of Work:
Demolition:
Safely remove existing cabinets and countertops.
Dispose of old materials in an environmentally responsible manner.
Cabinet Installation:
Supply and install new cabinets that offer optimal storage solutions and a contemporary design.
Ensure cabinets are securely mounted and aligned properly for durability and ease of use.
Countertop Installation:
Select and install a new countertop that complements the new cabinetry and fits the style of the kitchen.
Ensure proper sealing and finishing to protect against moisture and wear.
Finishing Touches:
Install cabinet hardware (handles and knobs) to enhance functionality and style.
Conduct a thorough cleanup of the work area, ensuring the kitchen is left in pristine condition.
Timeline:
The estimated duration for the project is approximately two weeks, depending on the delivery of materials and any unforeseen circumstances.
Expected Outcome:
The completed kitchen will feature a modern design with improved storage and workspace, providing a welcoming environment for cooking and entertaining. The remodel is expected to increase the overall value of the home while enhancing the daily experience of the homeowners.
Location:
The project will take place in Brentwood, ensuring local suppliers and contractors are utilized to keep the project efficient and community-focused.
We look forward to bringing this kitchen remodel vision to life and creating a beautiful, functional space for the homeowners in Brentwood.
 Lindsey Markel
Photo By: Lindsey Neumann
Cabinetry; Dura Supreme, Camden door style, Maple, Natural, Counters; Zodiaq Quartz, Nutmeg, Sink; Blanco Precision, Faucet; Hansgrohe Focus 2-spray, Tile; Gendai Natural, Color Sanna Natural, Hardware; Top Knobs, Hood; Broan Elite
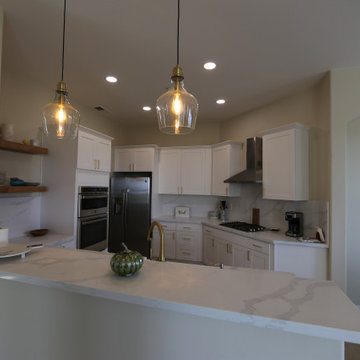 HUNG HSI STONE CENTER LLC
Overview:
This kitchen remodel project aims to transform the existing kitchen space in Concord into a modern and functional area that meets the needs of the homeowners. The project will involve the removal of old cabinets, the installation of new cabinets, and the addition of a new countertop to enhance both the aesthetics and functionality of the kitchen.
Scope of Work:
Demolition:
Safely remove existing cabinets and countertops.
Dispose of old materials in an environmentally responsible manner.
Cabinet Installation:
Supply and install new cabinets that offer optimal storage solutions and a contemporary design.
Ensure cabinets are securely mounted and aligned properly for durability and ease of use.
Countertop Installation:
Select and install a new countertop that complements the new cabinetry and fits the style of the kitchen.
Ensure proper sealing and finishing to protect against moisture and wear.
Finishing Touches:
Install cabinet hardware (handles and knobs) to enhance functionality and style.
Conduct a thorough cleanup of the work area, ensuring the kitchen is left in pristine condition.
Timeline:
The estimated duration for the project is approximately two weeks, depending on the delivery of materials and any unforeseen circumstances.
Expected Outcome:
The completed kitchen will feature a modern design with improved storage and workspace, providing a welcoming environment for cooking and entertaining. The remodel is expected to increase the overall value of the home while enhancing the daily experience of the homeowners.
Location:
The project will take place in Brentwood, ensuring local suppliers and contractors are utilized to keep the project efficient and community-focused.
We look forward to bringing this kitchen remodel vision to life and creating a beautiful, functional space for the homeowners in Brentwood.
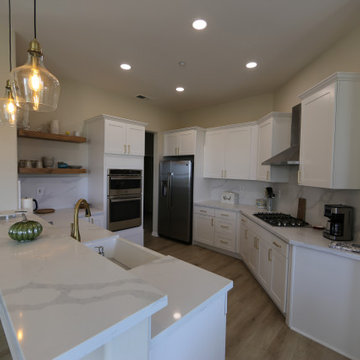 HUNG HSI STONE CENTER LLC
Overview:
This kitchen remodel project aims to transform the existing kitchen space in Concord into a modern and functional area that meets the needs of the homeowners. The project will involve the removal of old cabinets, the installation of new cabinets, and the addition of a new countertop to enhance both the aesthetics and functionality of the kitchen.
Scope of Work:
Demolition:
Safely remove existing cabinets and countertops.
Dispose of old materials in an environmentally responsible manner.
Cabinet Installation:
Supply and install new cabinets that offer optimal storage solutions and a contemporary design.
Ensure cabinets are securely mounted and aligned properly for durability and ease of use.
Countertop Installation:
Select and install a new countertop that complements the new cabinetry and fits the style of the kitchen.
Ensure proper sealing and finishing to protect against moisture and wear.
Finishing Touches:
Install cabinet hardware (handles and knobs) to enhance functionality and style.
Conduct a thorough cleanup of the work area, ensuring the kitchen is left in pristine condition.
Timeline:
The estimated duration for the project is approximately two weeks, depending on the delivery of materials and any unforeseen circumstances.
Expected Outcome:
The completed kitchen will feature a modern design with improved storage and workspace, providing a welcoming environment for cooking and entertaining. The remodel is expected to increase the overall value of the home while enhancing the daily experience of the homeowners.
Location:
The project will take place in Brentwood, ensuring local suppliers and contractors are utilized to keep the project efficient and community-focused.
We look forward to bringing this kitchen remodel vision to life and creating a beautiful, functional space for the homeowners in Brentwood.


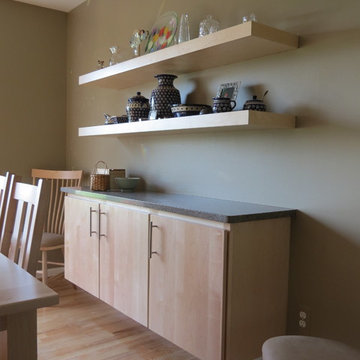 Lindsey Markel
Photo By: Lindsey Neumann
Cabinetry; Dura Supreme, Camden door style, Maple, Natural, Counters; Zodiaq Quartz, Nutmeg, Sink; Blanco Precision, Faucet; Hansgrohe Focus 2-spray, Tile; Gendai Natural, Color Sanna Natural, Hardware; Top Knobs, Hood; Broan Elite
 dRichards Interiors
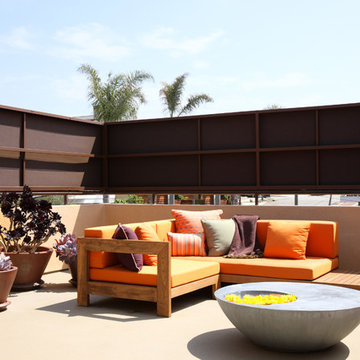
A perfect place to lounge on a warm, sunny day. A custom teak sectional, pillows and a coffee table make this space functional and complete.
Example of a minimalist rooftop rooftop deck design in Los Angeles
Example of a minimalist rooftop rooftop deck design in Los Angeles
 Tobi Fairley Interior Design
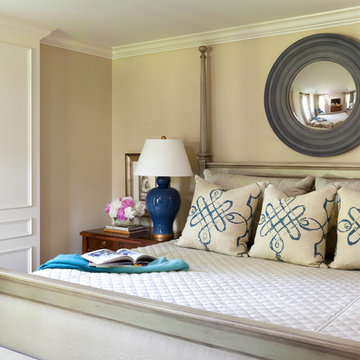
The wall paint is Sherwin-Williams Ramie SW6156, the ceiling and trim is Sherwin-Williams Shoji White SW7042. Bed and chests are Hickory Chair. Lamps are Christopher Spitzmiller. Mirror is Made Goods
 MusaDesign Interior Design
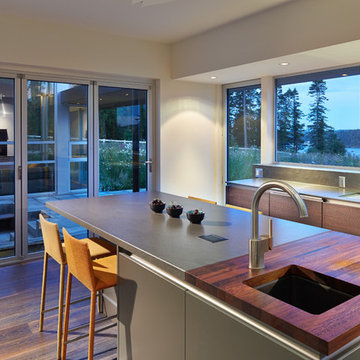
Eating my cereal while looking out at the bay is quite rewarding to me,” says the Owner, who desired a kitchen not only beautiful, but highly functional. The island seats six. The counter around the bar sink is black walnut. (Benjamin Benschneider / The Seattle Times)

 TOC design & construction inc.
DESIGNED BY TOC design
CONSTRUCTION BY TOC design & Construction inc.
PHOTOS BY : Tania Scardellato
I was fortunate to have a young family approach me in desperate need to renovate there only 3 piece bathroom. This space was In dire need of a remodel, with old brown wall to wall tiles and a dated bulky yellow brown single sink vanity.
Storage was a must, lighting a necessity, and proper accessibility to the shower bath area.
We had a tight budget to respect, but a full gut of this bathroom was required. And a good thing too, once we started doing the demolition we noticed that mildew and rotting floors and walls had accumulated throughout the years. Doing it right the first time is no joke when dealing with water and electrical issues.
We discarded all reminisce of old and built from scratch, new walls, new plumbing, new electrical ,new insulation and a new window, a new fan that actually exhausted outside ( I say this laughing as you would be amazed at how many fans are installed but don’t exhaust outside, and you the client would never know unless you go inside the attic space.
Once all the hard stuff was done, the rest is just a matter of smart design. If you have a small bathroom here are some tips to guide you.
10 tips for making a small bathroom feel larger
Is your tiny bathroom cramping your functionality and style, leaving you longing for the enormous bathrooms gracing the pages of design magazines? Even if your bathroom is a fraction of the size, all it takes is some design savvy to make the most of the space you have. Consider these 10 smart tips that will help your bathroom look, feel and function like those larger contenders.
1-Get creative with corners
Space is at a premium in small bathrooms, so it's important to maximize every inch. Corners, for example, provide extra space for shelving, storage units and even hooks. Get creative and install unique design solutions that are not only functional, but also eye-catching. If you love the airiness of floating cabinets, add baskets or decorative boxes under for extra storage. If you are installing floating cabinets insure that they are installed securely to studs or plywood at wall.
2- Let solid colors shine
Busy patterns have a shrinking effect and make small bathrooms seem even smaller. Conversely, light natural hues make a space feel more open. If you're itching to get creative with design, experiment with textures but keep overpowering patterns to a minimum. Tone on tone is the best to achieve this.
3 - Maximize your bathtub
A bathtub takes up a significant portion of the room, but modern, compact options with curved basins, can make the tub feel larger when in use, all while conserving space.
4 - Select a smaller faucet
A faucet is jewelry for the bathroom. And just as accessories can overpower an outfit, a big bulky faucet isn't flattering in a small bath. Single-handle designs conserve counter space, while a wall-mount installation frees it up all together and can create quite the wow-factor, if the budget can accommodate the required changes to plumbing behind the wall.
5 - Make vanity storage simple
If you're in a storage war with your small bathroom, you're not alone in the battle. Toiletries and personal supplies without a place to call home only add clutter and chaos. Store smart with a space-saving vanity, the dual sink vanity shown here, looks quite simple, but in reality it has 4 sets of full extension drawers, and the vanity tower adds extra storage without overpowering the use of space.
6 - Show off the shower
Shower curtains may be pretty, but they interrupt the visual flow of a bathing space and make it feel significantly smaller. In bathrooms with small footprints, opt for a clear glass sliding shower door that doesn't require the clearance of one with a hinged design. Or as shown in this design and for fraction less expensive a half hinged panel installed on a fixed tempered glass panel. If you're embarking on a big remodel, create the illusion of more space by using same tile in the shower that's used throughout; instead of seeing them as two separate zones, the eye will read them as one.
7 - Discover the treasure of hidden storage
Work with a contractor, and you just might find some serious storage potential hidden behind your walls. Whether it's utilizing space between the studs for shallow shelving or a creating a small linen closet by annexing space from an adjacent room, even small additions can make a big difference.
8 - Focal Point
Tile is a beautiful, durable addition to any bathroom. For dainty spaces, consider installing tile at a diagonal to accentuate the focal point or as in this bathroom I used an oversized textured pattern to bring depth to the space at the window wall.
9 - Choose the right lights
Strategically install light to reflect and brighten a small bathroom to make it appear larger. Recessed lighting is an affordable solution for tiny rooms, offering ample light while taking up little space. Wall sconces alongside a mirror also reflect off the walls and make a room feel bright and airy. I always recommend going with LED lighting at 2800 to 3000K.
10 – Accessorize
This is your time to shine in your decorating skills, have fun with your towels, you can change the color scheme daily just by adding pops of color in your accessories, make sure to get items that serve a dual purpose, like baskets, boxes they can always be used as hampers, storing of towels and even a nice display for your guest.
 Kristina Anne Designs
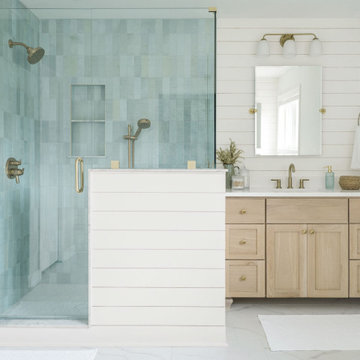
Primary bathroom renovation in Bay Creek, Cape Charles, Virginia. Designed as a serene coastal retreat, this timeless bathroom features custom white oak vanities, shiplap wall detailing, marble-inspired flooring, and a hand-glazed blue and green tile shower inspired by the surrounding bay. Champagne bronze fixtures add warmth and refinement, while integrated storage enhances everyday functionality. Soft coastal tones, natural materials, and thoughtful details create a relaxing, light-filled space that balances luxury, comfort, and practicality.
 gumdesign
Adriano Pecchio
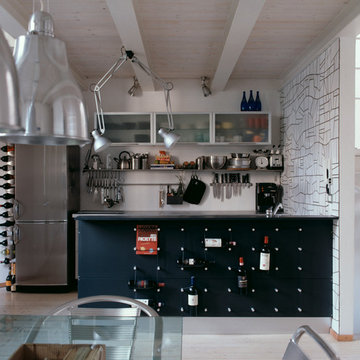
Inspiration for a contemporary single-wall light wood floor eat-in kitchen remodel in Florence with a peninsula, stainless steel appliances, glass-front cabinets and black cabinets
Inspiration for a contemporary single-wall light wood floor eat-in kitchen remodel in Florence with a peninsula, stainless steel appliances, glass-front cabinets and black cabinets
12