
Search results for "Property damage" in Home Design Ideas
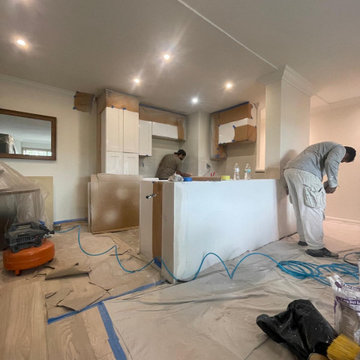
 MA Properties
This Mission Valley condo renovation involved the complete restoration of a 2-bedroom, 2-bathroom condominium following water damage remediation. MA Properties Construction completed drywall replacement, texture matching, interior painting, flooring repairs, trim installation, and finish carpentry to restore the property to move-in-ready condition. The project focused on quality craftsmanship, efficient project management, and long-term durability while enhancing the home's appearance, functionality, and value. Serving Mission Valley and San Diego with professional condo remodeling, renovation, restoration, and general contracting services.

 Five Star Tree Care
Taking care of plants, trees or shrubs may seem easy, but for many homeowners, the task is riddled with complications. For those who have no previous experience with plant or tree care, mistakes can cause damage or even death to the trees. A lack of proper training or a lack of proper information about tree care can do much more harm than good.
We care about your trees and shrubs as much as you care about your property. To help you avoid common mistakes, our team at Five Star Tree Services has created an easy to follow quick start guide for shrubs and tree maintenance. Following this guide will help you take care of your trees and shrubs in-between visits from our trained arborist.
Hire Help
Professional arborists are qualified and the best to trim, plant, maintain trees and to preform shrub trimming in just about any environment. Not only does a professional arborist have the experience, but they also are specially trained in the care and diagnosis of various plant species and diseases. In addition to taking care of your plant life, they will also offer you instructions on how to care for your plants when they are unavailable.
Make sure to take care in who you decide to hire. Instead of choosing the first company you find or the lowest priced plant care service, first you should research their qualifications by asking about how they usually care for trees, what their pruning style is, and how often they plan to visit for seasonal care. If they are not willing to answer your questions or educate you on the proper tree and plant care, keep searching.
Proper Tree Care Starts With You
Tree care starts with the property owner. The moment you chose a tree and how you care for it once it has been planted, will shape its health for the rest of its life. Proper care in the early years will ensure that it grows into a healthy shape and has a long life ahead of it. Working with a certified arborist will ensure that you choose the right trees for your area and that they are planted and care for properly during the early years.
There are many different species and types of plants, shrubs, and trees. Understanding how to care for each one will give you the knowledge needed to help them thrive. Speaking with a skilled professional will allow you to take care of your property effectively and efficiently.
Listen Carefully
As tedious or as boring as tree care instructions may be, it is important to pay close attention and take notes. Understanding the responsibilities you have as a property owner towards the shrubs and trees on your property is the best way to ensure they are well cared for. In the event that you are unsure about what to do or how to care for your plant life, you can always reach out to one of our certified arborists here at Five Star Tree Services.
How We Can Help
Whenever you have any Toronto tree care questions, Five Star Tree Services is here to help. We care about your plant life and are dedicated to offering each of our client’s comprehensive care so that your trees and shrubs will thrive. For more information or to get some tips on taking care of the trees on your property, give us a call at (416) 990-3355 to find out more.

 Tile Doctor Ltd
This detailed Victorian tiled hallway at a property in Camden was overdue some much-needed repair and maintenance. The owners of the property appreciated that original period features like this add a lot of value to a property and asked me to visit the property to quote for renovating it. The property was in a terrace of similar properties most of which appeared to have retained their Victorian character.
I inspected the floor and found there were a couple of loose, cracked, worn and broken tiles that needed to be replaced. In addition, the floor tiles needed a deep clean and then seal to bring back the wow factor. I was confident we could renovate the floor but at that point unsure if we would be able to find exact match replacements for the damaged tiles. Fortunately, Victorian tiles are still in demand and I knew of several companies I could check with so I was confident they could be found.
We discussed how long the work would take and assuming I could source the replacements agreed a price for the full restoration of the floor. After doing some research I managed to find suitable replacements with a company called Original Style and the work was scheduled for the following month.
Firstly, we prepared all areas with protective tapes to threshold edges and skirting.
This was followed by spaying the tiles with a strong dilution of Tile Doctor Remove & Go which is product designed to remove old sealers and coatings. After about ten minutes the tiles were scrubbed with black scrubbing pads and scrubbing brushes. Fresh water was used to rinse the floor and the slurry was extracted using a wet vacuum.
The floor was inspected and then a second clean carried out, this time using Tile Doctor Pro-Clean which is a Tile and Grout cleaning agent. The same process of application was used and after rinsing and extracting the dirt the tiles were given a steam clean. This ensured all the dirt was lifted out of the pores of the tile and the floor was now as clean as it possible could be.
The next step was the remove the loose and cracked tiles using the reclaimed tiles we had sourced earlier. Some cuts were necessary to get the replacements to match the originals but overall the plan worked. A quick drying adhesive was used to secure the tiles so we could apply the grout shortly after. The whole floor was then re-grouted and cleaned off to ensure a good match. The floor was left to dry off overnight, and you could already see it was now looking considerably improved.
Returning the next morning we checked the floor was dry using a moisture meter, this is important as to apply a sealer to damp tiles will lead to a patchy experience. All was well so we were ready to apply the sealer.
To start a single base coat of Tile Doctor Colour Grow sealer was applied to the floor and left to dry. This sealer is an impregnator that protects from within by occupying the pores in the clay tile improving colour in the process. This sealer does leave a matt finish however and the client wanted a subtle shine so one dry it was followed by four coats of Tile Doctor Seal & Go. The combination of the two sealers works really well to add long lasting protection to the tiles and provide the desired finish to the floor.
The floor was much improved, and the client was delighted. The detailed pattern and colours were now much more prominent, and the hallway looked much more inviting for both the owner and their guests. For the aftercare of Victorian tiles, I recommended the use of Tile Doctor Neutral Cleaner which is pH neutral and won’t prematurely erode the life of the sealer.
Nigel Voyce
North London Tile Doctor
Find the right local pro for your project
 NanDro Concrete & Sealants
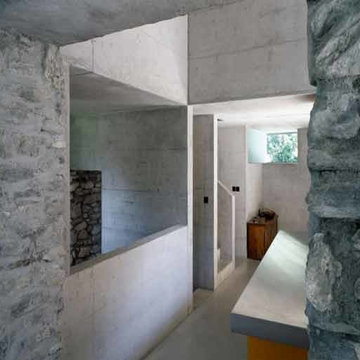
NanDro manufactures and installs environmentally-friendly protective shields, sealants and concrete materials. Our coatings, sealers and materials can be used to defend your surface from harmful environmental elements as well as everyday wear and tear! NanDro also is an applicator and can coat your products in house or out in the field.
NanDro Concrete Shield protects concrete and masonry surfaces from multiple destructive forces. Unprotected concrete surfaces can be damaged by water, salt spray, acid from food/beverages & waste, gum, graffiti, and chloride ion. When coated, the concrete surface will not only be protected from these damaging elements, but will also be aesthetically enhanced with a peel and flake resistant gloss or satin finish.
NanDro Wood Shield is the all in one solution for protecting your everyday wooden surfaces. It protects from UV damage, acid etching, water spots, moisture and other natural decay. These features make it ideal for use not only in the home, but also in industries such as restaurants, marinas, decks, furniture, and the rest of the great outdoors.
NanDro Metal Shield is ideal for protecting, and preserving metal surfaces under various conditions. It provides protection against all types of corrosion from water, salt spray, chemical exposure, as well as other damaging environmental elements. Due to its anti-corrosion properties, the Metal Coat also eliminates the need to polish easily tarnished metals, such as aluminum, copper, and brass. It also provides UV protection for the metal surface and reduces ice adhesion. Also available is the NanDro Stainless Steel Coating.
 Five Star Tree Care
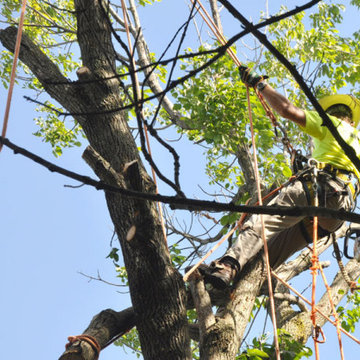
It’s important to make sure that all trees on your property are healthy and in good condition. This means hiring professional tree trimming services to maintain your trees yearly in order to keep them looking beautiful and healthy. In late winter or early spring is the best time to trim your trees. Doing so will help to improve the new growth that happens later in the spring. But fruit bearing trees and damaged trees can benefit from careful pruning in the summer. It takes an expert to skillfully trim trees during the summer without damaging them or causing harm and our team at Five Star Tree Services is just a call away to help you with your tree trimming needs!
Why Trim Your Trees?
By trimming your trees annually, this will not only open up your landscaping, which allows more sunlight to get to your property, but there are many other benefits.
These can include:
-Keep Trees Healthy and Promote Growth
When you trim your trees in the spring, before they start producing buds, this helps to stimulate more new growth, which helps to keep trees in excellent condition. This can be especially important for saplings as it encourages them to fill out nicely and in a controlled and structurally sound way. If you are not maintaining your trees properly, they can become too dense, which causes a bunch of problems. One being that it restricts the amount of sunlight getting to all the leaves and it reduces the amount of nutrient circulation needed to support the tree.
Professional tree pruning properly aids in tree growth and its overall aesthetic. Cutting off unneeded or unwanted branches allows other parts of the tree to grow easier. Ridding the tree of these extra branches also stimulates more leaf and fruit production.
-Increased Safety
Your landscape is affected when you neglect to take care of your trees, along with everything else on your property. If you have any dead trees remaining on your property, not only are you putting yourself at risk of injury, but you are putting your family, neighbours, pedestrians, and guests at risk as well. Dead or damaged branches can also be a hazard as they could fall at any time and impact with anyone standing too close to it, or it can fall on your house, which is another issue altogether, if it causes damage. Luckily, you are able to avoid all of this by simply having regular trimmings that will keep your trees healthy. You also need to make sure that all branches close to power lines are cut. This especially, should only be done by a trained professional in order to avoid potential electrocution.
-Increase Production of Fruit
If you are lucky enough to have a fruit bearing tree, it is especially important to have it professionally trimmed before and after it fruits. Doing so helps to improve its overall health and ability to bear fruit by getting rid of unhealthy branches. New fruit also develops and spurs for bearing fruit for the following year.
-Manage Spreading Diseases
Tree branches that are damaged tend to be prone to diseases which are able to spread to other plants and trees in your yard. Branches that are dead also have the potential to easily fall with any wind and especially during a storm. Severely damaged branches can even fall without reason. When you get your trees trimmed and pruned regularly, this prevents these things from happening. It also prevents spreading disease to other trees. Any disease branches should especially be trimmed if they are close to where kids play, people walk, or by doors.
-Increase the Value of Your Property and Overall Appearance
Continuous maintenance and trilling will improve the aesthetic of your property. It controls clutter and opens up the space of the landscaping. Meaning that the curbside appeal to your property increases. This is especially important if you are planning to sell your house, which will actually raise the value of your property. The first step in enhancing the appearance of your property is properly taking care of your trees. The first thing people see when they pull up to or go past your house is the trees. By simply pruning your trees you can make a good impression on potential buyers and your neighbours as well.
-Safeguarding Your Property
Owning a house is the biggest investment you will probably ever make. Making the effort to maintain and increase its value by keeping it in good condition should be your first priority. By trimming your trees regularly, you will be protecting your investment. Not to mention this also allows you to enjoy a nicely manicured property.
Why Professionals Are Essential
Professionals help to improve the health and overall condition of your trees. Trying to trim or prune your trees when you don’t know how can be detrimental. This is why hiring a professional, who has the right knowledge and tools, is better than trying to do it yourself.
-Cost-Effective
Think of it as a short-term expense for a long-term return on your investment. Allowing professional arborists to do your tree maintenance can potentially help to negate the costs of injuries attained from DIY home improvements related to trees, replacements and repairs.
-Skilled and Experienced
Real tools required for trimming a tree need to be handled properly and by the appropriate people. If a regular person were to try and use these tools, the end result could be injury and property damage. This is especially true for any trimming required around power lines. All professionals will have the right experience and skills required to wield these tools in a safe way. This minimizes the likelihood of hazards, injuries, and life-threatening incidents.
-Proper Tools
Heavy-duty chainsaws, ladders, and protective gear are all needed to safely and properly trim a tree. When you hire a professional, they have all the required tools and more. Meaning that you won’t have to go out and buy these tools yourself. As a professional, they also make sure that their tools are reliable and well-maintained in order to efficiently get the job done well.
-Insured
Professionals are also always insured with liability insurance when doing jobs to cover any damages or injuries attained while working. They are able to also provide a guarantee for the safety of your property and belongings while they are doing a job for you.
How Five Star Tree Services Can Help
Although trimming your tree might seem like an easy job, it’s always best to trust the professionals. Proper execution of the task requires the right skills, experience, and knowledge. Our team at Five Star Tree Services have all of this and more! Give us a call at (416) 990-3355 to enlist us for all your Toronto Tree Trimming needs!
 JWE Remodeling and Roofing
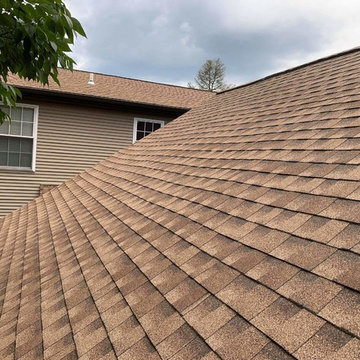
This roof in Hanover PA 17331 suffered damage from hail storms and high wind, so we got it approved for a full replacement by the homeowner's insurance company. We installed a brand new LIFETIME warrantied asphalt shingle roofing system by GAF in their Timberline HD roofing product. This includes new flashing, weatherproofing, waterproofing, drip cap, drip edge, underlayment, etc.
 Five Star Tree Care
When you have found the home of your dreams, having a beautiful tree in the yard is simply an added bonus. Many people specifically search for homes that have one or more trees when considering a new property. Trees are an essential part of our environment, but it is important to note that these beautiful living pieces of art can also be dangerous.
Five Star Tree Services has come across quite a few situations where trees have done some incredible damage to homes. So if you have a tree or several trees on your property, it is important to keep a few things in mind to avoid similar accidents.
Mind the Tree Roots
The roots of a tree help it to grow up straight and tall. They also help to anchor it in its position. While the roots are important in keeping the tree firmly in the ground, they are also one of the leading causes of damage. Roots can move the soil and materials of your foundation which can weaken the overall structure of your home. In addition to the foundation, roots have the strength to break underground pipes as well. Many homeowners with leaking water in their basement or puddles in their lower levels can trace the problem back to roots disturbing the plumbing.
In order to repair these issues, you must call a professional tree care company. In some cases, the roots can be moved from around your plumbing or foundations, but in most cases, tree removal is required.
Dead or Dying Trees
Trees that are on the verge of dying or those that have already died need to be removed as soon as possible. It is important to pay attention to the health of your trees to keep your family and your property safe. The biggest sign of a tree that is at risk of falling over is deep cracks in the trunk and branches. The tree may have died due to old age, diseases, or an infestation. The cause could have also been a result of storm damage. Regardless of the cause, dead trees can tip over and fall on your home or even people who happen to be passing by. Instead of risking your family’s health or your property, have ailing trees removed as soon as possible.
Natural Pests
Pest control is important, especially if you have one or more trees on your property. Trees attract critters no matter how well you maintain them, from owls and squirrels to termites and other bugs. Depending on how close the trees in your yard are to your home, you may need to watch out for pests invading your home. Termites are the most harmful, so it is important to have both your trees and your home inspected on a regular basis. The other pests can be controlled with proper pruning and regular maintenance. Squirrels are the second-largest danger. If they can reach your roof from nearby trees, you will have to worry about holes in your roof, insulation, and even in your foundation.
Taking Care of Your Trees
Trees are an important part of our environment and can add beauty and value to any property. With the right care and regular maintenance from Five Star Tree Services, you can enjoy the beauty of your trees while avoiding the dangers. Give us a call at (416) 990-3355 to find out more about our Toronto tree care services.



 Guangzhou Longlass New Material Co., Ltd
Laminated glass is a safety glass that uses one or more layers of PVB film (polyvinyl butyral) or SGP between two or more pieces of glass. It is made under a special process and is combined into a whole through high temperature and high pressure within a certain period of time.
Longlass Laminated Glass Advantages:
1. We have high class dust-free constant temperature and humidity laminating production line.
2. We are the approved processor by SentryGlass
3. Our products meet the requirements of BS EN12600:2002 Class 1 (C) 1 ,and ANSI Z97.1-2015 Class A ,type 4.
An impact perfbimance test for materials in accordance with BS EN12600:2002 has been performed on the four given samples. The performance classification of the all test samples is Classification 1 (C) 1.
Performance Test
Sample:5mm tempered glass + 1.14 PVB + 5mm tempered glass
Impact Test: In accordance with Clause 5.1 of ANSI Z97.1-2015 Type 4
Thermal Test: In accordance with Clause 5.3 of ANSI Z97.1-2015
The distinguish between PVB & SGP:
1.The shear modulus of SGP is 50 times of that of PVB.
2.The Tear strength of SGP is 5 times of that of PVB.
3.The bearing capacity of SGP is 2 times of that of PVB.
4. The bending of SGP is only 1/4 of that of PVB.
In a word, SGP has better performance than PVB, and it's widely applied in glass path, glass ceiling, glass floor, Stair Treads,etc.
Longlass Laminated Glass Features
Energy saving
When sunlight directly shines on a piece of colorless laminated glass, the PVB interlayer film can absorb most of the heat and only radiate a part of the heat back indoors, making the indoor and outdoor heat difficult to conduct, reducing heat energy consumption, thereby maintaining indoor temperature and saving air conditioning Energy consumption.
Security
it can withstand the penetration of accidental impact. Once the glass is damaged, its fragments will still stick together with the intermediate film, which can avoid personal or property damage caused by the glass falling, and the whole piece of glass remains intact and can continue to withstand impact, wind and rain
Sound insulation
The interlayer film has the function of blocking sound waves, so that the laminated glass can effectively control the transmission of sound and play a good sound insulation effect.
Noise reduction
In the process of sound wave transmission, the glass on both sides of the film is reflected back and forth, and is attenuated and absorbed by the soft film. Generally, the noise can be reduced by 30-40 dB. The thicker the film, the better the noise reduction effect.
Decorative effect
The laminated glass can be sandwiched with various patterns, which can achieve the decorative effect, and there are also decorative effects such as ice glass.
UV resistance
The interlayer film has the function of filtering ultraviolet rays; the special PVB film can make laminated glass weaken the transmission of sunlight, effectively block ultraviolet rays, reduce the fading of indoor fabrics. The color PVB interlayer film has different light transmittance, and can control the ultraviolet and heat gain as needed. It will not block the penetration of visible light .

 Houston Properties
Just minutes from downtown. Very tranquil, quiet, peaceful location nestled among beautiful trees and lavish landscaping. 2400 Julian St, Houston
Light and bright, first floor living, recently remodeled master bath. Large bedrooms and closets, spacious private patio/deck.
Perfect property to add your finishing touches and make your own. Close to major freeways, restaurants and shopping. Additional guest parking. This townhome did not receive any damage from the recent flooding. Seller is open to offers.
For more information email Paige Martin at Paige@HoustonProperties.com or call 713-384-5177.
 NanDro Concrete & Sealants
NanDro manufactures and installs environmentally-friendly protective shields, sealants and concrete materials. Our coatings, sealers and materials can be used to defend your surface from harmful environmental elements as well as everyday wear and tear! NanDro also is an applicator and can coat your products in house or out in the field.
NanDro Concrete Shield protects concrete and masonry surfaces from multiple destructive forces. Unprotected concrete surfaces can be damaged by water, salt spray, acid from food/beverages & waste, gum, graffiti, and chloride ion. When coated, the concrete surface will not only be protected from these damaging elements, but will also be aesthetically enhanced with a peel and flake resistant gloss or satin finish.
NanDro Wood Shield is the all in one solution for protecting your everyday wooden surfaces. It protects from UV damage, acid etching, water spots, moisture and other natural decay. These features make it ideal for use not only in the home, but also in industries such as restaurants, marinas, decks, furniture, and the rest of the great outdoors.
NanDro Metal Shield is ideal for protecting, and preserving metal surfaces under various conditions. It provides protection against all types of corrosion from water, salt spray, chemical exposure, as well as other damaging environmental elements. Due to its anti-corrosion properties, the Metal Coat also eliminates the need to polish easily tarnished metals, such as aluminum, copper, and brass. It also provides UV protection for the metal surface and reduces ice adhesion. Also available is the NanDro Stainless Steel Coating.

 safe ZOnea
Maintaining a pest-free home requires attention throughout the year. Seasonal changes affect pest behavior, and understanding these patterns can save homeowners from costly damage and health hazards. In this guide, we will explore practical strategies for spring pest prevention tips, ensuring your property stays protected through every season. From spotting early signs to implementing proactive measures, these steps empower homeowners to take control before infestations occur.
Understanding Seasonal Pest Patterns
Pests adapt to changing weather, and knowing their patterns helps prevent infestations effectively.
Spring: Awakening Pests
Spring signals the end of winter dormancy for many pests. Rodents, ants, and termites start seeking food and warmth. Effective spring pest prevention tips include:
● Cleaning gutters and removing debris
● Sealing cracks and gaps in exterior walls
● Inspecting wood piles and compost areas
● Monitoring early signs of termite activity
Pro Tip: Conduct a termite inspection or a professional evaluation to catch infestations early before they spread.
Summer: Peak Pest Season
Warm temperatures accelerate pest breeding cycles. For a comprehensive summer pest prevention guide:
● Maintain lawns and trim vegetation away from homes
● Check window and door screens for tears
● Store food in sealed containers
● Inspect water sources that attract mosquitoes
Do You Know? Mosquitoes can lay eggs in a teaspoon of water. Eliminating stagnant water is crucial to reducing their population.
Fall: Preparing for Winter
As temperatures drop, pests search for warm indoor spaces. Key actions include:
● Inspecting for winter rodent entry points
● Sealing attic vents, crawl spaces, and foundation gaps
● Cleaning storage areas to minimize hiding spots
● Checking chimney and fireplace openings
Quick Fact: Rodents can enter homes through openings as small as ¼ inch.
Seasonal Pest Checklist for Homeowners
Creating a structured seasonal pest checklist simplifies preventive measures and ensures nothing is overlooked.
Season
Key Actions
Spring
Inspect for termites, seal exterior gaps, clean gutters, and check compost
Summer
Repair screens, trim vegetation, remove standing water, and secure food
Fall
Seal entry points, inspect attic/crawlspace, clear debris, and prepare storage
Winter
Monitor indoor activity, keep firewood away from walls, and maintain traps
Inspection & Maintenance Tips
● Schedule annual pest inspections by professional Virginia pest control consultation to detect hidden problems
● Keep a log of pest sightings and treatment dates
● Regularly replace weather stripping and caulk cracks
Note: Even small preventive steps, when consistently applied, drastically reduce infestations.
Common Pests and Their Seasonal Behaviors
Understanding how different pests behave each season helps homeowners take timely action to protect their property.
● Ants and Termites: Ants emerge in spring seeking food, while termites become active and can damage wood unnoticed. Early detection is critical.
● Rodents and Mice: Fall and winter increase rodent intrusions. Block all entry points and keep food sealed.
● Mosquitoes and Flies: Summer creates the ideal breeding environment for mosquitoes. Eliminate standing water and use physical barriers like nets.
● Spiders and Other Insects: Seasonal shifts cause spiders to move indoors. Regular vacuuming and decluttering reduce hiding spots.
Eco-Friendly Prevention Methods
● Use natural repellents like peppermint oil or diatomaceous earth
● Encourage beneficial insects, such as ladybugs, to reduce pest populations
● Plant pest-deterring plants near home boundaries, like marigolds or lavender
Integrated Pest Management (IPM)
Adopt an IPM approach by combining physical barriers, monitoring, and environmentally safe treatments. This minimizes chemical use while maintaining a pest-free home.
Quote: “Prevention is the most effective form of pest control.” – National Pest Management Association
Seasonal Pest Prevention Tools
● Snap traps and humane rodent traps
● Sticky traps for insects
● Outdoor perimeter sprays (eco-friendly)
● Moisture meters to detect early termite or mold problems
Pro Tip: Keep tools organized and accessible to act quickly when pest activity is noticed.
Planning: Annual Pest Calendar
Month
Recommended Action
March-April
Spring pest prevention tips: Inspect, seal, clean gutters
June-July
Summer pest prevention guide: Screens, standing water, food storage
September
Seasonal pest checklist: Seal entries, declutter, prep storage
November
Winter rodent entry points: Monitor indoors, maintain traps
Key Takeaways
● Seasonal awareness prevents infestations and property damage
● Consistent inspections and maintenance are essential
● Simple eco-friendly measures can significantly reduce pests
● Use a structured checklist and calendar for effective prevention
Conclusion
Homeowners who stay proactive and follow spring pest prevention tips, along with year-round monitoring, ensure their properties remain safe and comfortable. Using a summer pest prevention guide, checking winter rodent entry points, and maintaining a seasonal pest checklist ensure your home remains safe and comfortable. Remember to combine inspections, physical barriers, and environmentally friendly methods for the best results.
FAQs
Q1: How often should I perform a termite inspection?
A1: Conduct inspections annually, especially in spring, to detect early signs of termite activity and prevent extensive damage.
Q2: Can pests enter my home during winter?
A2: Yes, rodents and insects seek warmth and shelter indoors. Sealing entry points and monitoring for activity is crucial.
Q3: What is the most effective eco-friendly method for pest prevention?
A3: Using natural repellents, encouraging beneficial insects, and eliminating water sources effectively reduces pest populations without chemicals.
Ensure your home is ready for every season. Schedule a professional Virginia pest control consultation or a termite inspection in Suffolk, VA, today and stay ahead of potential infestations.
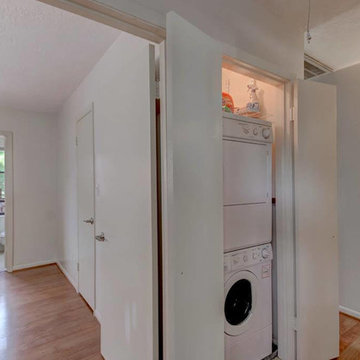 Houston Properties
Just minutes from downtown. Very tranquil, quiet, peaceful location nestled among beautiful trees and lavish landscaping. 2400 Julian St, Houston
Light and bright, first floor living, recently remodeled master bath. Large bedrooms and closets, spacious private patio/deck.
Perfect property to add your finishing touches and make your own. Close to major freeways, restaurants and shopping. Additional guest parking. This townhome did not receive any damage from the recent flooding. Seller is open to offers.
For more information email Paige Martin at Paige@HoustonProperties.com or call 713-384-5177.

 Tile Doctor Ltd
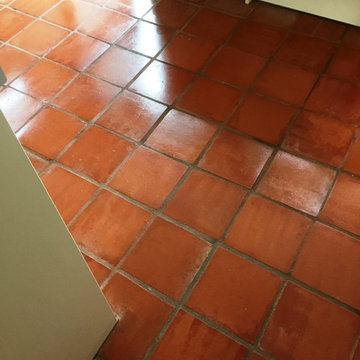
Newly built properties are not without their problems and often take a while to resolve all the snagging which occasionally extends to resolving problems with newly laid tiled floors. At this new property in the village of Malvern, and overlooked by the Malvern hills, the builders had left the Terracotta tiled kitchen floor covered in grout smears (also known as Grout Haze) following installation. They had also neglected to seal the tiles, which was actually quite fortunate in this case as they would have sealed in the grout haze, making it more difficult to remove.
Naturally, the property owner wanted the problem to be resolved as soon as possible, and for me to make the tiles easy to keep clean in future, which can be achieved by sealing the tile.
Before starting work, I made sure to fully protect any exposed woodwork with a plastic sheet covering to protect them from potential damage. I then proceeded to give the floor a thorough clean, using Tile Doctor Remove and Go to clean the floor and eradicate some stains that had been left behind as a result of the building work.
Next, I paid special attention to the grout, where the very visible problem of grout haze had arisen. To neutralise these smears I used Tile Doctor Grout Clean Up, a concentrated phosphoric acid cleaner that can also remove alkaline mineral deposits and efflorescence. Grout Clean Up is only to be used on acid resistant stone, as sensitive stone can suffer from irreparable etching if it comes into contact with the product.
Once completely clean and free of grout smears the floor was thoroughly rinsed with water to remove any trace of product and then dried as much as possible with a wet vacuum, afterwards an air mover was installed to speed up the drying process.
Later that afternoon the floor was dry and I was able to apply a sealer. To do this I opted to use several coats of Tile Doctor Seal and Go Extra, a topical, fully breathable sealer that works really well on Terracotta.
The sealer builds up a layer of protection on the surface of the tiles, protecting against ingrained dirt and stains. Seal and Go Extra also provides a high quality sheen finish which really did well to enhance the look of the Terracotta.
The property owner was exceptionally pleased with the results, and to have this problem dealt with quickly and efficiently, additionally the sealer will ensure the Kitchen floor is easy to keep clean in the future.
 Tile Doctor Ltd
Recently we were asked to quote on restoring a Victorian tiled hallway floor in one of the large houses in the North Wales seaside resort of Rhos-on-Sea. It was a lovely period property that overlooked the sea and the floor a fine example of Victorian tiling and a real asset to the property.
Naturally, we have to take precautions when visiting properties these days, especially when surveying floors inside properties however we have amended our working practices to include more PPE and social distancing and so its not a problem.
On first impressions the floor looked to be in good order however it had some broken and loose tiles that needed replacing and then the floor given a good clean and seal. Fortunately, Victorian tiles are still popular, and you can find replacements, I also know that difficult to source tiles can often be found by asking other Tile Doctors many of whom have quite a collection. A quote was given for the work, which was accepted, and a date set to commence the work which would take three days.
Rhos-on-Sea is a very picturesque town situated between Llandudno and Colwyn Bay by passed by north wales main trunk road A55 leading to the main ferry port of Holyhead to Ireland. When you turn off the A55 into Rhos-on-Sea your transferred to a large seaside promenade with a wide walkway which is used by the towns many retired residents who appreciate the splendid coastal views.
The first job was to cut out and remove the damaged tiles then prepare the subbase with rapid set self-levelling compound to take the new tiles. Once this had set, I was able to cut and fit the replacements. There were a few areas that needed attention and so this work took up by most of the first day.
Once the sealer was dry, we were able to let the owner see the result who was really pleased and apparently has since received many compliments. For aftercare we recommend using Tile Doctor Neutral Cleaner which has a effective neutral pH formula that won’t prematurely erode the sealer with use like stronger products you find in supermarkets.
Andrew Robb
North Wales Tile Doctor
 Tile Doctor Ltd
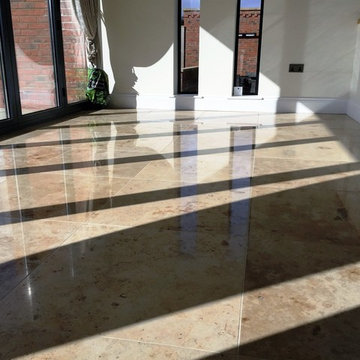
These Marble tiles were installed at a lovely property in North Ferriby by another tile company who although has done a great job laying the floor had neglected to provide the owner with any kind of post-installation maintenance.
Thus the tiles, which covered a large kitchen and hallway area, appeared dull and certainly not up to the standard that could be achieved with the right methods. Funnily enough, the tile company had told the property owner that the stone would need to be sealed, but did not offer to carry out the process themselves.
After conducting their own research, the property owner contacted her local Tile Doctor to see what could be done. I came round to inspect the floor and recommended the floor was polished through a process known as burnishing, followed by the application of a sealer to provide durable protection for the stone.
Burnishing involves the application of diamond encrusted pads with different levels of grit. At Tile Doctor we work with a four pad system that allows us to gradually refine the polish on suitable tiled floors, including Marble and Limestone.
I started the process by applying a Coarse grit burnishing pad across the entire floor lubricated with a little water, the 17 inch pads fit a rotary floor buffing machine and so are relatively straight forward to use but do take time. Following this, I worked my way through the burnishing system, repeating the process with Medium, Fine and Very Fine grit burnishing pads to achieve a brilliant, consistent shine. The floor is given a quick rinse between pads in-order to remove the resultant slurry before starting with the next pad.
The second part of the restoration was to seal the floor to protect the stone against future dirt, stains and damage, which is more common in busy areas of a house like the kitchen. I opted to seal the Marble tiles with two coats of Tile Doctor Ultra Seal.
This is a premium, no-sheen sealer that leaves the Marble with a more natural looking polished appearance. As a solvent-based, penetrating sealer it gets deep into the pores of the stone to protect against stains and ingrained dirt, especially in food preparation areas. To finish off I used the very fine diamond pad just to guarantee the brilliant shine you can see in the photos.
The property owners were exceptionally pleased with the results achieved and will undoubtedly be glad that their lovely Marble tiled flooring is now protected for long-term use. Another satisfied client.
Ronnie Phipps
East Yorkshire Tile Doctor
 Tile Doctor Ltd
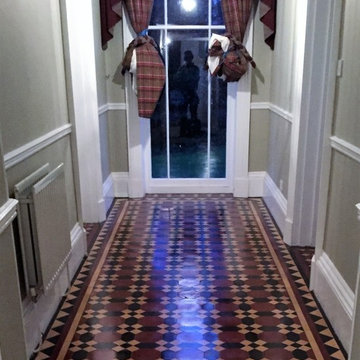
It’s fairly common for owners of older properties – especially houses those that are over 100 years old or more – to find original Victorian tiled flooring hidden underneath carpet. It can wait years for the tiles to be discovered, by which time they have amassed huge amounts of dirt and dust.
Such was the case at this property in Bridlington, a Yorkshire town through which a stream known as the ‘Gypsey Race’ runs, before emptying in the North Sea at the Bridlington Harbour. Interestingly enough, folklore says that when the stream is flowing, bad fortune is at hand. The stream must not have been running on the day that we restored this Victorian hallway, as we managed to achieve some truly fantastic results!!
The hallway had been severely dulled after going years without professional care. We set about giving it the thorough clean and fresh seal that I’d des partly needed. Here’s how we did it.
Our first task was to remove any old, no longer effectual sealer. We did this by liberally applying a strong dilution of our alkaline-based Tile a Doctor Pro Clean, which doubles as a reliable cleaner and a stripper capable of stripping away old sealer. The product was worked into the tiles using a black stripping pad fitted to a 17″ rotary machine, and the process was repeated three times.
I noticed that there was still some stubborn dirt and old sealer around the edges of the hallway, so I used some of our handheld diamond encrusted burnishing blocks to grind it away. To finish the cleaning process, we washed the floor with Tile Doctor pH Neutral Tile Cleaner, leaving it fresh and ready to be sealed once left to dry overnight.
Upon our return to the property the next day, we ran some quick tests to check for any excess moisture (even a small amount could have damaged the performance of the new sealer). Once satisfied with the the condition of the floor, we proceeded to see it with an impregnating sealer, meaning a sealer that penetrates into the pores of the tile to fill them and therefore prevent trapped dirt and ingrained stains.
Our impregnating sealer, Tile Doctor Colour Grow, has the added benefit of being colour intensifying, which really highlights the unique colourful patterns of the tiles. To give the floor a durable sheen finish, as requested by the customer, we also added a coat of Tile Doctor Seal and Go sealer.
The result was a complete transformation of the condition and appearance of this great Victorian tiled hallway. Our customer is very pleased – the floor is now a complete asset to any property, and will now be easier to keep looking great in future.
Ronnie Phipps
East Yorkshire Tile Doctor
 Tile Doctor Ltd
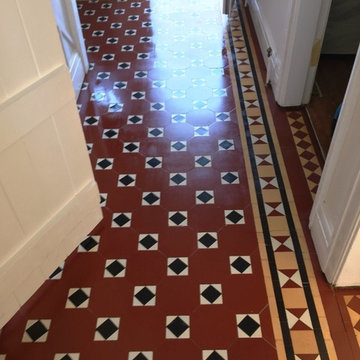
This Victorian tiled hallway was one of the most beautiful Victorian floors I have ever had the pleasure to work on. With the wide range of patterns and colours they are available in, it seems no two Victorian tiled floors are exactly the same, and this uniqueness is part of what makes them so appealing to property owners.
Unfortunately, this floor had been poorly maintained over the years, even suffering from a few loose and missing tiles. There was a thick coating of dust and dirt soiling its appearance, and the property owner was understandably keen to remedy the situation. Having realised that everyday household cleaners are not likely to achieve great results, she asked me to carry out a full professional restoration, including making some repairs where necessary. I was pleasantly surprised to find out that this property was situated in the town of Wyken, which is a few miles outside of Coventry city centre and in fact just down the road from where I live myself!
Before making a start on the cleaning process, it was first necessary to re-fix the small number of loose tiles and replace a single missing tile by the radiator. Fortunately, I’ve been working on these types of floors for some time and have built up a good collection of replacement Victorian tiles so I was able to find one that matched in nicely with the rest of the floor without too much problem.
To clean the tiles, I began by applying a layer of Tile Doctor Oxy-Gel directly into the floor with a small brush. This product is very similar to the popular Tile Doctor Pro Clean: both are strong alkaline cleaners, strippers and degreasers, with the main difference being that Oxy-Clean comes in a gel form, making it easier to control and therefore ideal for precise cleaning, or for application to vertical surfaces. Like Pro Clean and being an alkaline base it is suitable for use on all types of natural stone and tile. The Oxy-Gel was left to soak into the tiles for around ten minutes before being scrubbed in and then rinsed off carefully with water, I then used a wet vacuum to extract the now soiled cleaning solution off the floor.
The next step was to acid wash the floor using Tile Doctor Acid Gel; this served to break down alkaline mineral deposits inherent in the grout along with some excess grout that had been left on the untidily left on tile from installation. It is recommended not to use this product on acid-sensitive soon such as Marble and Limestone as it can cause irreparable etching but its fine on Victorian tiles as long as you don’t leave it on too long.
Finally, the floor was given a rinse with clean water to remove any trace of chemicals from the cleaning and to neutralise the area in preparation for sealing.
I left the floor for 48 hours to dry before returning to the property to seal the tiles. This allowed plenty of time for the floor to dry completely, which is important as any excess moisture can damage the ability of the sealer to protect against dirt and stains.
My choice of sealer for this floor was Tile Doctor High Shine; three coats in total were applied, providing – as the product name suggests – the high shine finish that the customer had requested. The sealer will provide durable surface protection going forward preventing dirt from becoming ingrained into the pores of the tile and ensuring it remains easy to clean and keeping its appearance for some time to come.
As a big fan of Victorian tiles, it was a great pleasure to restore this floor, and my customer was certainly pleased too. It’s amazing how far a little professional maintenance can go to improving the appearance of these fantastic types of floor.
Mick Gayton
Warwickshire Tile Doctor
 Tile Doctor Ltd
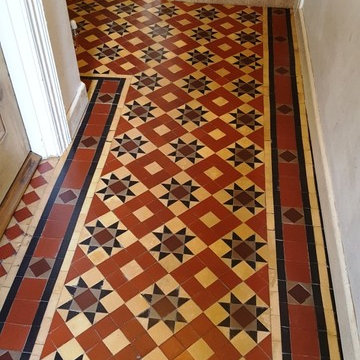
Pontcanna is a popular residential area in the western district of Cardiff, in South East Wales. Known for its rather large houses and spectacular foliage, interestingly enough roughly a quarter of the population are English folk.
I was called down to a property in the area to take a look at a Victorian tiled floor which was in quite poor condition. Along with the typical amount of dirt and muck seen on poorly maintained tiles, there were a number of missing tiles and a fair bit of cement caked on the surface of the floor.
It would require a robust clean, fresh seal, and several repairs to get this floor back into optimum condition.
To begin, I checked for excess moisture problems using a damp meter in various places of the hallway floor and, thankfully, it was showing dry results. Any dampness could have potentially caused problems later on in the restoration process, so it was s good idea to run tests before starting.
Next, I manually scraped as much of the dry paint and cement off the tiles as possible, with no lubrication necessary. I then proceeded to clean the floor with a solution I mixed early, consisting of equal parts Tile Doctor NanoTech HBU and Tile Doctor Pro Clean, rinsing as I went. Both products are designed to tackle heavy soil build-up, with the former uniquely using nano-sized particles (as the product name suggests) to penetrate deep into difficult to reach areas in the tiles in order to lift out ingrained muck.
Following the initial clean, I removed all of the loose tiles and those heavily affected by cement, before retiling as necessary with fresh Victorian tiles, and grouting the whole floor. Of course, these replacement tiles were carefully sourced to ensure consistency, as far as possible, with the original pattern of the floor.
The next day, I went over the whole floor with an application of the acid-based Tile Doctor Grout Clean Up, diluted with a little alkaline Pro Clean to form a cleaning solution. I then used a black pad to scrub the cleaner into the tiles, similarly to the previous day’s cleaning. This was followed by a through rinse with water to neutralise the floor.
It was at this point that I noticed some stubborn cement stains remained so I set about breaking them down using a 60 grade hand held diamond polishing block, and this technique proved successful.
After completing the clean, I left the floor to dry out for roughly 24 hours. Upon my return to the property to seal the tiles, I tested again for moisture. It is recommended to run damp tests before sealing, as excess moisture can cloud the sealer, affecting its performance in the long run.
Fortunately, no dampness was detected and I was proceeded to seal the floor with seven coats of Tile Doctor Seal & Go, which enhances the natural colours in the stone and provides a nice satin gloss appearance, as requested by the customer.
I was extremely pleased with the results of this restoration, as was the customer. The extent of the soil build up and damage was such before the restoration that, after completion, the floor looked like it had been newly laid!
Julian Iancono
South East Wales Tile Doctor
7