
Search results for "Property held" in Home Design Ideas
 Tile Doctor Ltd
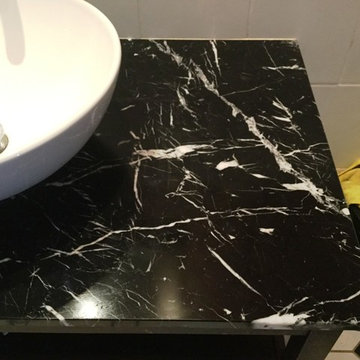
Marble is known for its premium quality, toughness and aesthetic, making it a very popular choice for bathroom countertops, such as this one at a house in Northampton. However just because it’s tough doesn’t mean that Marble can be cleaned with the usual household cleaners. Like all natural stone, Marble is acid sensitive and unsuitable products can have a very damaging effect on its appearance.
In this situation, the property owner had used a limescale remover to remove some unsightly marks from the countertop. Unfortunately, the product was acid-based and instead of making an improvement it just made it worse and caused severe etching.
The first photo above shows the limescale marks from where toiletries have been placed on the side whilst wet. Since Northampton is a hard water area, the limescale deposits over time caused these marks to appear.
The only way to effectively remove the Limestone deposits – while at the same time rectifying the damaged caused by the botched cleaning attempt – was to use a system of hand-held diamond encrusted pads and hand help blocks of various grits to cut back the stone and re-polish it, a process we call burnishing.
Before officially beginning the burnishing process, I ran a few tests to determine the type of pad I would need to use to achieve the best results. I found that, in most areas, I would need to use the Tile Doctor 400 Grit (Coarse) pad to resurface the tile and remove the damaged layer of stone, but in some areas where the etching was worse, I would need to use the 200 Grit (Very Coarse) pad.
After burnishing the affected areas with the Coarse and Very Coarse grit pads, I started to incrementally polish the stone to achieve a high-quality shine, working my up through the Medium, Fine and Very grit pads.
No chemicals were used during this process – only water for lubrication, combined with the six-inch diamond encrusted burnishing pads fitted to a hand-held buffing machine.
The final part of the restoration was to seal the stone to maintain a long-lasting, deep polished appearance. To do this, I used Tile Doctor Shine Powder, which is a crystallising sealer in powder form. The powder is applied directly and combined with water, before being worked into the stone to seal it.
The customer was very happy with the results and the level of shine achieved. I gave the customer a complimentary bottle of Tile Doctor Stone Soap, which is our aftercare cleaner for polished natural stone, along with instructions on periodic maintenance to help maintain the finish we had achieved for as long as possible.
Phil Vissian
Northamptonshire Tile Doctor
 Rochelle Lynne Design
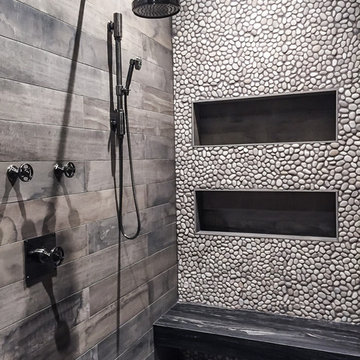
The client's grandkid's shower features Waterworks fixtures with wheel handle controls and a shower slide bar. Wood look tile is very practical and gives a barn wood feeling that contributes to the old west, mine shaft theme. The stone slab bench also mimics wood and the mix of pebble wall tile and hex flooring tiles add to the nostalgic feel. Design by Rochelle Lynne Design, Cochrane, Alberta, Canada
 Unique Home Solutions Inc.
This split level came alive with furniture and colour. When houses remain vacant, purchasers have nothing to look at other than the walls and floors. Open concepts make it difficult for potential purchasers to visualize the space.
If you would like a consultation, give us a call at 514-222-5553. We have worked with realtors, investors, property developers, television shows, house flippers and home owners.
Find the right local pro for your project
 Tile Doctor Ltd
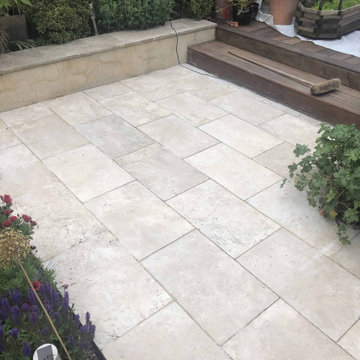
The picture shows an Travertine patio that was installed at a property in Hackney E5 around ten years ago and it had never been sealed. Over the year’s pollution and weather etc had taken its toll on the stone leaving the travertine stained with lichen, dull and grey as opposed to their original white/cream colour. Had the patio been sealed it would have provided some protection from the elements.
I conducted an initial visit where I tested several products to see what would be the most effective and establish what was required. Using that knowledge, I followed up with a written quote which was accepted, and a date arranged to complete the work.
We have adopted new working practices since the COVID-19 epidemic so we can work safely inside or outside but given the excellent weather this year this was an ideal and much easier to maintain social distancing.
During day 1 on site I started by sweeping away loose stones and other debris you typically find on patios. Then Tile Doctor Patio and Brick Driveway cleaner was applied neat to the stone and left for two hours. This is a very strong product designed for use by professionals which cuts through the dirt and was ideal for this situation. There are certain precautions you do need to take when using it such as wearing PPE and you must keep it away from ponds etc.
Using water to lubricate, the solution was then scrubbed into the stone using a coarse 200-grit pad fitted to a rotary machine and followed up with a lot of rinsing and extracting with water and a wet vacuum.
To refine the surface after the coarse Travertine the 200-grit pad I followed with 400, 800 and then 1500-grit burnishing pads in sequence rinsing with water and extracting after each pad was applied. This process is known as burnishing and closes the pores in the stone giving it a polished appearance. By this point the Travertine looked way better and we were starting to get the smooth finish back.
The weather held so the following morning a 3000-grit polishing pad was applied dry to the stone using only a little water. This brings up the appearance of the stone even further and has the added advantage of leaving it dry and ready for sealing.
The client wanted a natural appearance so two coats of Tile Doctor Ultra Seal were applied to seal the stone. Ultra-Seal is an impregnating sealer that soaks into the stone, protecting it from within yet without changing the appearance of the stone leaving a completely natural look.
The client very happy with job and now proud so show off her revamped patio. They hadn’t realised that the patio should have looked like this from the start. For aftercare I recommended they use Tile Doctor Stone Soap, many day to day cleaning products you find in supermarkets can strip off a sealer so if your using something else do check the label first.
Jackson Davis
East London Tile Doctor
 Tile Doctor Ltd
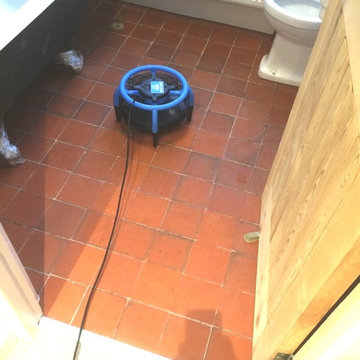
This is a job I recently completed in the small town of Braunstone, which lies just outside the city boundaries of Leicester, Leicestershire. My client wanted a restorative cleaning and sealing service for their very old Quarry tiled bathroom floor, which dates back to the Edwardian period. The floor was suffering from paint and adhesive staining, and was now in dire need of a thorough clean more generally along with a fresh seal to protect it from further damage.
I treated the floor in the first instance Tile Doctor Remove & Go which is a powerful stripper that breaks down old sealers remaining on the floor, as well as inherent paint and adhesive contamination. Remove & Go also contains cleaning properties which allows it to draw out ingrained dirt from the stone, lifting it to the surface. The product was applied to the floor and allowed to dwell for approximately thirty minutes prior to agitation with a hand-held rotary polisher fitted with a small black stripping pad.
The resulting slurry was promptly removed using a wet vacuum machine and our specialist Tile Doctor Acid Gel was then applied to the floor. Acid Gel is a blend of phosphoric and hydrochloric acids in gel form, and is specially formulated to treat grout haze and efflorescence on both wall and floor tiles.
Readers should be aware that this product is not suitable for use on acid-sensitive stone tiles such as Marble, Limestone and Travertine as it can potentially cause severe etching. In this case Acid Gel was left to dwell for ten minutes prior to agitation. This was effective in removing the white efflorescence salt staining that was present in several concentrated areas. Once again, the resulting slurry was vacuumed away, and the entire floor was rinsed with clean water.
The floor was left to dry for roughly twenty four hours before I returned to seal the floor. My choice of sealer in this case was Tile Doctor Colour Grow, a colour enhancing, impregnating sealer. The sealer will help to protect the tiles from soil ingress, and both water and oil based spills.
As you can see from the ‘Before’ and ‘After’ photographs, a marked difference was made to the appearance of this Quarry tiled floor. A professional and carefully thought out approach was taken to tackling the innate problems, particularly relating to efflorescence and paint and adhesive staining, and my client was extremely pleased with the results.
Kay Sylvester
Leicestershire Tile Doctor
 Ashton Renovations
Princess Gardens is a HomeSmith Properties development. Their brochure reads: “Rapid acceptance of Princess Anne Manor and Princess Gardens by the builders and homeowners has been unprecedented. More than 45 discriminating families have moved into the area since May 1955 …If you are looking for the kind of home you and your wife have planned, come to us for advice on a house or a lot in Princess Anne Manor or Princess Gardens.”
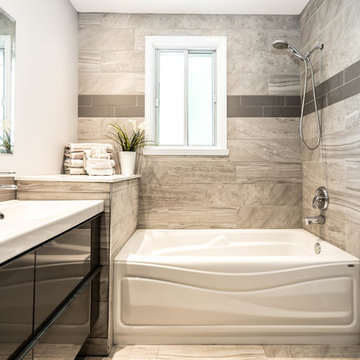
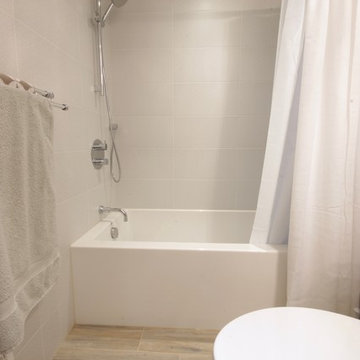
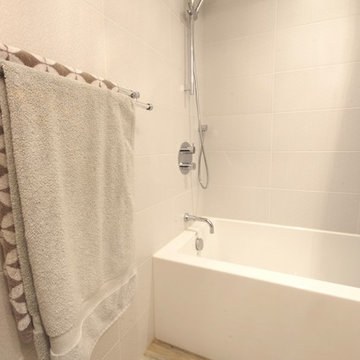
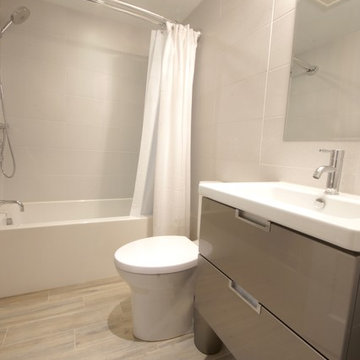
The most notable element of basements in Etobicoke is their size. They are large and open. This space had a lot of potential with its high ceilings and ample space for each element. The finished bathroom includes a clean fully tiled look with grey wood patterned tiles.
 Ashton Renovations
Princess Gardens is a HomeSmith Properties development. Their brochure reads: “Rapid acceptance of Princess Anne Manor and Princess Gardens by the builders and homeowners has been unprecedented. More than 45 discriminating families have moved into the area since May 1955 …If you are looking for the kind of home you and your wife have planned, come to us for advice on a house or a lot in Princess Anne Manor or Princess Gardens.”
The most notable element of basements in Etobicoke is their size. They are large and open. This space had a lot of potential with its high ceilings and ample space for each element. The finished bathroom includes a clean fully tiled look with grey wood patterned tiles.
 Tile Doctor Ltd
Here’s a job I completed just before Christmas last year, at a house in Northampton which has a rich history and mix of architectural styles. The run up to Christmas is always popular as people try to get their household projects finished off in time for celebrating the festive season with family so this is always a busy time for Tile Doctor.
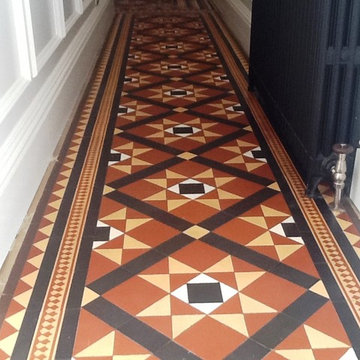
The photos below show a neglected Victorian Quarry tiled floor in need of repair, with cracked tiles along the edges. These were caused by somebody in the past using brute force to remove carpet gripper rods which had been glued to the tiles. These cracks were present around the edges of the entire hallway, however; this particular type of tile is very hard to get hold of. Furthermore, it is a costly process to replace the tiles as the skirting boards would have had to have been removed.
As well as the physical issues the floor had a dull appearance due to the build-up of builder’s dust and the general wearing down of the paintwork over time. I agreed with the client that the best course of action would be to fill the tiles, and paint the damaged tiles using a colour that matched as close as possible. Many of my Tile Doctor colleagues would disagree with this approach opting to source the correct tile and rebuild the damaged section however unfortunately in this case we didn’t have the time or the budget.
My first action was to use a brush and vacuum to remove as much loose debris and dust as possible. I followed this by agitating the tiles with a dilution of Tile Doctor Pro Clean which is a strong alkaline product and safe to use on tile and stone. I use a combination of a coarse burnishing pad fitted to a rotary machine and hand held brushes, in order to get the floor clean. The resulting slurry was then rinsed and removed using a wet vacuum. This process was repeated twice followed by a thorough rinse to ensure any trace of cleaning agent had been removed and the floor neutralised.
As this was such an old property, I then used a steamer to heat up the tiles in order to draw out any contaminants and assist with the drying process. I installed a fan to dry the floor before starting repairs, mixing up some coloured grout and filling all holes and cracks along the edges, including the doormat area.
I allowed the coloured grout to dry overnight, before hand painting the black and Terracotta tiles. These were then given time to dry (about a couple of hours). Following this, I carefully painted in the other colours: brown and cream. The overall effect was quite convincing and you had to look very closely to notice.
Due to the fact that there were other tradesmen working in the house at the time, the floors were sheeted up to protect from additional dust and muck. I then left the house for a week, allowing the floor ample time to dry completely in preparation for sealing.
Upon my return, I took damp meter readings, and once satisfied with the dryness of the tiles, I began the sealing process with the impregnating, colour-enhancing sealer Tile Doctor Colour Grow. The sealer provides both durable surface protection and an aesthetically pleasing matte finish.
The below photos show how the product has enriched the colours with the two coats applied.
The process of restoring this wonderful Victorian Quarry tiled floor was certainly time consuming, but very rewarding. I am exceptionally pleased with the results myself, and my client couldn’t have been happier and I’m sure the newly revitalised hallway will have been a talking point for all their visitors during the Christmas break.
Phil Vissian
Northamptonshire Tile Doctor
 Ashton Renovations
Princess Gardens is a HomeSmith Properties development. Their brochure reads: “Rapid acceptance of Princess Anne Manor and Princess Gardens by the builders and homeowners has been unprecedented. More than 45 discriminating families have moved into the area since May 1955 …If you are looking for the kind of home you and your wife have planned, come to us for advice on a house or a lot in Princess Anne Manor or Princess Gardens.”
The most notable element of basements in Etobicoke is their size. They are large and open. This space had a lot of potential with its high ceilings and ample space for each element. The finished bathroom includes a clean fully tiled look with grey wood patterned tiles.
 Galle Construction Inc
Digital Properties
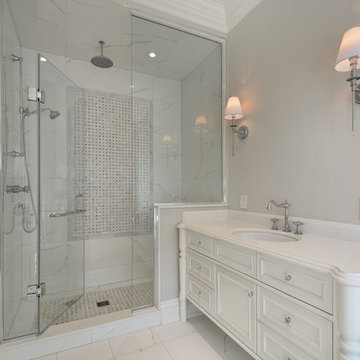
Bathroom - traditional white tile and stone tile marble floor and white floor bathroom idea in Toronto with an undermount sink, furniture-like cabinets, white cabinets, quartz countertops, a one-piece toilet and a hinged shower door
Bathroom - traditional white tile and stone tile marble floor and white floor bathroom idea in Toronto with an undermount sink, furniture-like cabinets, white cabinets, quartz countertops, a one-piece toilet and a hinged shower door
 Tile Doctor Ltd
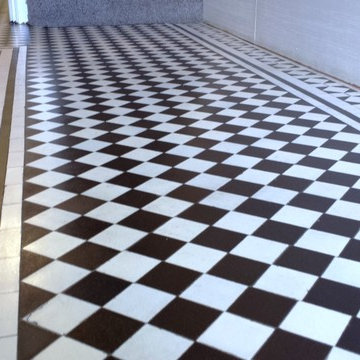
Sometimes you survey a job and you know that if you get the chance to restore it the results will be totally fantastic! This was the case with this Victorian black & white chequer tiled floor in the hallway of a large terraced Victorian house in Cardiff which dated back to around 1900 and was now looking well past its best, I know this because my family used to live in the house opposite. It was a well laid floor with no readings of dampness; I believe it’s imperative you check a floor for dampness before starting so you know what the baseline damp level is and which sealers will work with the floor.
My first action was to hoover the floor and then scrape as much debris off the surface as possible, and then as always I mixed 50/50 Tile Doctor HBU (Heavy Build-Up) remover with Pro-Clean and on this occasion because I wanted the white tiles to become really white I added the same amount of Tile Doctor Grout Clean-Up. This special recipe created a very formidable and strong cleaning solution which is what the job called for. I swept it over the whole floor letting it soak in for about ten minutes and then worked it into the floor using a scrubbing machine fitted with a coarse black pad adding more of the solution to the floor where it was drying out as I went.
The next step was to rinse the floor twice with water and extract the now filthy cleaning solution using a wet vacuum. At this point I inspected the tiles and I could see there were still a few stubborn areas with spots of paint and glue which I addressed with a decorators steam plate together with a scraper and hand held scrubbing pad.
I was now happy that the floor was clean and ready to be sealed, before sealing though it’s important to remove any trace of cleaning solution as it may contaminate the sealer so I gave the floor a thorough rinse and extracted as much of the water as possible to reduce drying times.
I left the floor to dry for 48hrs before coming back to seal the tiles taking a reader on my damp meter first to establish they had indeed dried out. To seal the floor I used eight coats of Tile Doctor Seal & Go which really works well on Victorian tiles and in this case made the whites really stand out.
The customer wanted this floor to look good because they were selling the property and were due to have an open day. The clean tiles really gave the house the wow factor and period features are so desirable these days so I don’t think it will take long to sell.
 STADT
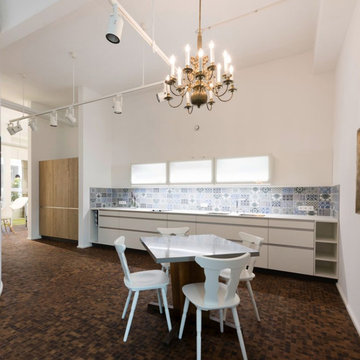
STADTDomino Larch Vulcano- engineered wood flooring. Extremely robust (suitable for ateliers and commercial properties!). Can also be used for raised floors.
Made from specially heat treated larch wood (without chemical additives), assembled in compact ready-to-install elements of end-grain blocks (40 x 40 mm). These are held together on a parquet net.
 Rivergrove
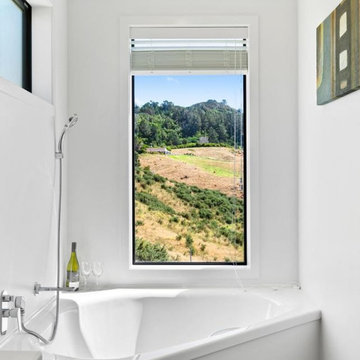
Love the thought of lying in the bath while watching country life outside. White is a classic colour to embrace and highlight the green outside. Waikato proud on a coastal property.
 Tile Doctor Ltd
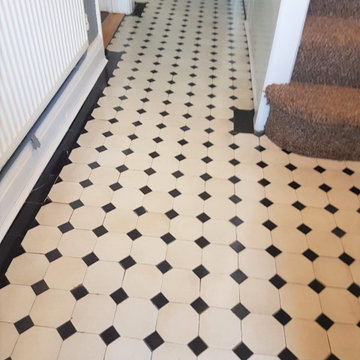
This enquiry from Neath came from an elderly gentleman who was moving into a care home in the near future and wanted his Victorian tiled hallway renovated before the property went on the market. He mentioned he didn’t think it was that dirty however it could do with a clean and reseal.
We arranged to call in one morning and take a look at the tiles and whilst there we completed a test clean so we could provide an accurate price for renovating the floor. For the clean I applied Tile Doctor Pro-Clean, the purpose of this was to see whether and how fast the dirt would shift and also to get an idea of the condition of the floor beneath the layer of dirt.
The test clean went well and the owner was happy to accept our price and suggested that as we had already made a start we might as well continue. Fortunately, there were two of us that day and I only had a couple of other quotes in the area, so I was able to crack on. I should mention this work was done at the beginning of 2020 before the COVID-19 lockdown.
All sorts of detritus gets walked into hallways so we began by using a hand held scraper to take off any anything that sat upon/above the floors surface. This also makes the cleaning process that little bit easier for us. The earlier test clean had enabled us to establish which cleaning methods and products would work best on the floor so it was just a question of putting the plan into action.
The process involved applying a strong dilution of Tile Doctor Pro-Clean to the floor, leaving it to soak in for ten minutes and then working it with a coarse 400-grit diamond pad fitted to a rotary buffer. More water was applied for lubrication where required and the soil produced afterwards was rinsed off and extracted with a wet vacuum. The pad is encrusted with industrial diamonds and cuts into the tile and removes a very thin layer leaving the tile very clean.
After extracting the soil, the floor was inspected, and we noticed that there were a few tiles throughout the floor that needed more work. To deal with these we used hand-held diamond blocks of varying grits to remove the ingrained dirt and bring the tiles back to life.
The client was over the moon with the results of the cleaning and we scheduled a date of the following week to come back and seal the tiles. We also discussed sealers and he had asked if we could leave the floor with a shiny finish. With that in mind we recommended Tile Doctors Seal and Go which works really well on Victorian tiles. It is also water based and so doesn’t produce a smell as it dries.
On our return the floor was given a quick wipe down and once dry sealed with four coats of Tile Doctor Seal and Go which will add protection and make them easy to keep clean.
Once complete the floor looked great and very welcoming, just what you need when selling a property as initial impressions always count.
Adrian Iacono
Swansea Tile Doctor
 JC Property Professionals
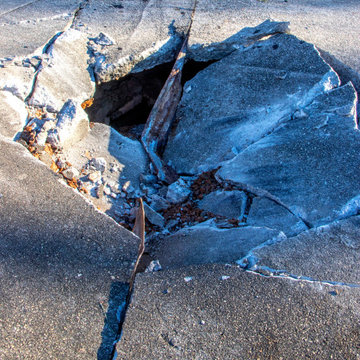
This driveway had held firm since the 1950s but a decayed drainage system created a sinkhole that made this path undrivable. We installed a new drain and pack this driveway tight.

 Sweet Smiling Landscape Design
Located on a steep hill above downtown Ventura, this modern Spanish house features panoramic views of town with the ocean and Channel Islands beyond. While the views are amazing from a large front deck, the steep slope presented some constraints on the landscape design.
Although the property is about a third-of-an-acre, the only useable and open garden space is a small (about 500 square feet) area to the West of the house. The house sits at the back of the property, and another steep hill on the neighboring property behind is held back by a tall retaining wall, leaving just enough room for a narrow, hardscaped patio in the back yard.
Bright plantings along the back of the property delineate the home from the neighboring property, and we chose plantings to help stabilize the soil and further develop the Spanish garden look while creating a lush, inviting feel. Additionally, we added 52 pieces of pottery to soften and add interest to the back garden and patio areas. Succulents, herbs, and California natives fill the pottery along with bright, sweet-smelling, tropical-looking, and climate-appropriate plants.
Slope stabilization was paramount for the front hill. Beyond that, finding plants that would thrive on the steep slope was the next obstacle. Finally, the aesthetics could be addressed, and we worked to find plants that meshed with the architecture—blending plants with white and orange to play off the red-tiled roofs and white-plastered walls that are emblematic of the Spanish style of this house as well as the predominate style of the neighborhood.
The flattish area to the West was designed with the idea of creating a contemporary take on the parterre garden. Reminiscent of Mediterranean gardens, this vegetable and herb garden substitutes formal hedges with formal Corten steel planters to honor the modern Spanish architecture of the house. The citrus, herbs, and vegetables serve the foodie clients well.
 Prime Design and Build
Designing with Intent: Creating Homes That Tell a Story
Have you ever stepped into a home and felt an instant connection, as if the space itself welcomed you? That’s the power of designing with intent—a thoughtful approach that blends beauty with purpose, ensuring every detail has meaning.
We recently worked on a remarkable 1937 home in Palomar Park, California. The project involved reimagining the second floor to create a master bedroom with a walk in closet and master bathroom while preserving the home’s traditional charm. For the homeowners, this house held decades of memories, and our goal was to honor its legacy while creating a space ready for the next chapter.
The Challenge: Balancing Tradition and Modernity
The homeowners wanted their remodeled space to feel fresh and functional without losing its historic character. This meant every decision, from the layout to the materials, had to strike the perfect balance.
We rebuilt the upstairs including reconstruction of the existing bathroom to make an impressive master bathroom and dressing room, and refinished the hardwood floors to preserve the details that tied back to the home’s 1937 roots. By incorporating traditional elements like marble floors and walls in the bathroom , aged wood vanities and new crown molding for the whole upstairs, we ensured the updated design felt authentic and timeless.
3 Tips for Designing with Intent
Whether you’re working with a historic home or starting a new build, designing with intent can elevate your project. Here are three practical tips to help you create a space that’s as meaningful as it is beautiful:
1. Embrace the Home’s Character
Every home has unique features that tell a story. Whether it’s an original fireplace, old wood floors, or a quirky architectural detail, look for ways to celebrate and integrate these elements into your design.
2. Let Function Drive the Design
No matter how stunning a space looks, it needs to work for your lifestyle. Think about how you use each area and design accordingly. A thoughtful layout, smart storage solutions, and durable materials can transform a home from simply beautiful to truly livable.
In this project, reconfiguring the upstairs wasn’t just about aesthetics—it was about creating a layout that served the family’s everyday needs.
3. Personalize Your Space
The best designs reflect the people who live in them. Incorporate personal touches, such as family heirlooms, meaningful colors, or custom features, to make the space truly yours.
For this home, the homeowners were involved in selecting fixtures and materials that resonated with their style, ensuring the final design felt deeply personal.
Why Intentional Design Matters
Designing with intent transforms a house into a home. It’s about more than just aesthetics—it’s about creating a space that feels deeply connected to your story and needs.
At Prime Design and Build, we believe every project should start with understanding your vision. We work closely with our clients to ensure the design reflects their personality, values, and lifestyle.
Let’s Bring Your Vision to Life
If you’ve been dreaming of a home that feels like a true reflection of you, let’s make it happen. Whether it’s updating a historic property or starting fresh, we’re here to guide you through the process with expertise and care.
As I said in our Palomar Park video, “When we come over to your house, we will get to know you so that we can make your home feel like home too.”
Ready to start your journey? Reach out today for a consultation, and let’s design with intent.
 Sunset Property LLC
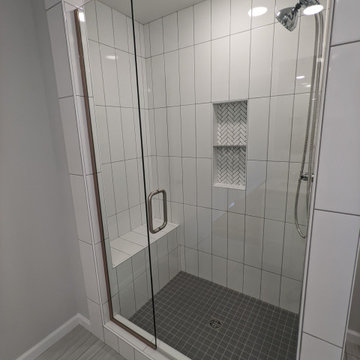
White shower wall tile, shower bench, herringbone shower niche with stainless steel mid shelf, Delta shower head and hand held.
Example of a large transitional master white tile and porcelain tile porcelain tile, gray floor and double-sink bathroom design in Other with shaker cabinets, white cabinets, quartzite countertops, a hinged shower door and a built-in vanity
Example of a large transitional master white tile and porcelain tile porcelain tile, gray floor and double-sink bathroom design in Other with shaker cabinets, white cabinets, quartzite countertops, a hinged shower door and a built-in vanity
 Amelia Hallsworth Photography
Photo: Amelia Hallsworth © 2015 Houzz
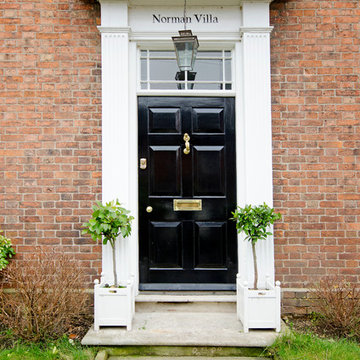
Example of a country entryway design in London
Example of a country entryway design in London

8