
Search results for "Protected method" in Home Design Ideas
 Hillcrest Builders
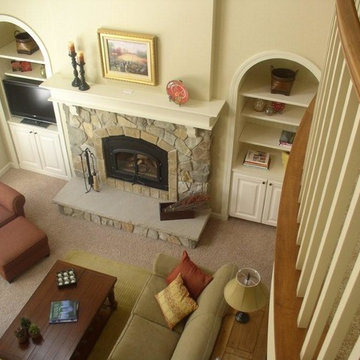
Our client wanted a SIP built home and we incorporated this and many other energy and sustainability features into this home which was in the Sheboygan County Parade of Homes.
Named "The Green Balanced Home", this project was all about creating practical and stunning living spaces that combined with sound environmental building materials and methods. By showcasing an assortment of leading-edge- green technologies, the Green Balanced Home was the talk of the Parade that year. In cooperation with our client, our methodology was:
Start with the site:
1. Protected tree lines
2. Drought resistant vegetation
3. High proportion of natural, plantings versus higher maintenance lawn
4. Optimal home placement on lot for solar exposure
5. Narrower streets
Build a high thermal envelope:
1. R-10 Gold Guard laminated EPS foam under basement, garage, and patio.
2. R-10 Gold Guard laminated EPS foam around exterior foundation walls.
3. R-10 ESP foam "shirt" around foundation
4. R-24 Structural Insulated panels (SIPs) for exterior walls, including garage
5. Sprayed foam in basement box sills and attic separation walls
6. R-15 garage door
7. R-60 blown cellulose attic insulation
Add efficient heating, cooling, ventilation, and electric utilization elements:
1. High efficiency fireplace with auxiliary ducting
2. Pull-out exterior wood-loading drawer
3. Air-to-air heat pump
4. 95% efficient, ultra-quiet variable capacity furnace
5. 19 SEER air conditioner
6. Five zones with programmable thermostats
7. Heat reclamation from hot water usage
8. LED lighting
9. Skylights
10. Energy Star appliances
11. Prep for in-floor heating system
12. Prep for photovoltaic (PV) solar
13. Prep for solar hot water
Incorporate water conservation:
1. Rain water recapture for toilet flushing and irrigation
2. Motion activated hot water circulation system
3. Power flush toilets
4. Dual flush toilets
Create high indoor air quality:
1. HEPA and UV filters
2. Air-to-air exchanger
3. Ultra-quiet bathroom fans with moisture sensor activation
Integrate sustainable, efficient materials:
* Expanded polystyrene (ESP) foam that does not emit HCFC "greenhouse" gases
* Oriented strand board (OSB) based siding, trim, and shutters
* SIPs panels that contain ESP an OSB
* Carpeting pads made from recycled materials
* Stewardship-certified cabinet manufacturing
* Job site recycling and reduce waste with SIPs
 Tile Doctor Ltd
If you have a tiled shower area in your home, it’s very likely you’ve experienced problems with the grout becoming excessively dirty and ridden with displeasing black spots of mould. The underlying issue is due to inadequate ventilation which can be a real problem in modern insulated houses and occasionally the grout can get so imbued with contamination that the problem needs to be resolved professionally.
In the case of this Ceramic tiled shower area, located at a property in Galgate, Lancashire, mould had turned the grout black and had got into the sealant strip around the base. The property owner had tried using the run-of-the-mill cleaning products you can buy in superstores, but they simply couldn’t get the job done. So, she contacted me to see what could be done.
At Tile Doctor, we come across the problem of mouldy shower tiles very often. Excess soaps and shampoos – many of which contain chemicals that harmful to the grout – can quickly build-up if not removed, causing mould and soap scum to emerge quickly, and before you know it, you have a problem like this one.
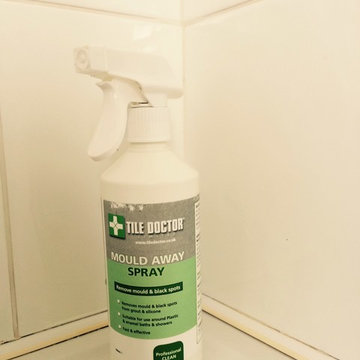
Thankfully, with the right strength product and cleaning methods, mould can be removed quite easily. The cleaning product used here was Tile Doctor Mould Away, which does what it says on the bottle and can quickly remove mould and black spots from grout and silicone. I applied Mould Away to the grout and surrounding Ceramic tiles and left it to dwell for a short period, before starting to clean the affected areas carefully using soft nail brushes and a small amount of water.
Sometimes it is necessary to repeat this process several times to achieve the best possible results, but in this case two attempts was all it took to get the grout looking like new once again.
Following the cleaning, the area was rinsed thoroughly with water, before bring dried off quickly with a heat gun on a low setting. I then sealed the grout with a single coat of Tile Doctor Wall Grout Sealer, which is a water-based sealer designed to protect against water, oil and acid-based contaminants, and stop them from spoiling the appearance of the grout. It also provides a transparent finish that does not diminish the original colouring of the grout. To add the finishing touches, I polished off the Ceramic tiles as these were already fully glazed and did not require any extra sealer.
The before and after photos are a testament to how significantly the condition and appearance of the grout was quickly improved and needless to say, the customer was very satisfied with the result.
Russell Taylor
Lancashire Tile Doctor
 EasyHeat
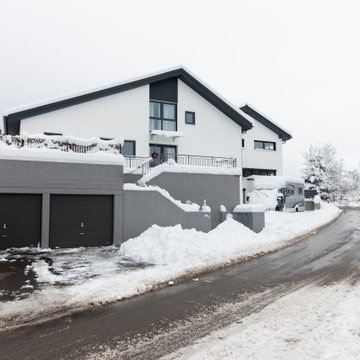
In concrete, asphalt or under paving stone, you can count on EasyHeat™ snow melting systems to clear the way. Highly efficient and more economical than most other snow and ice removal methods, our snow melting systems automatically eliminate snow and freezing rain on contact, helping to keep the surface clear and maintenance free, 24 hours a day, 7 days a week.
Find the right local pro for your project
 Maydha Home Builder
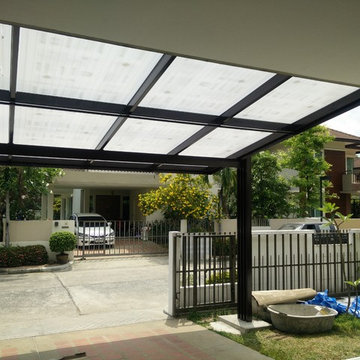
Extension of garage roof
Problem; Existing roof garrage was not cover 2 cars. Natural light is required during day time as well as heat protection. New structure can not be solidly attached to exisiting ones due to their defferent ratio of settlement.
Solution; Applied light weight roof material on its light gage steel frame. "PLEGLAS" Heatstop Cool Blue a celled acrylic with their translucent and heat stop use to be a roofing material due to its caracteristic and their 30 years warantee of yellowing.
Attachment to exisiting was also matter to its construction. Hinge method was applied to take the their load transferred to existing beam. Part of the load was bared by piles and pile caps a both columns.
Credit; Pete Dannett
 Vanguard Doors
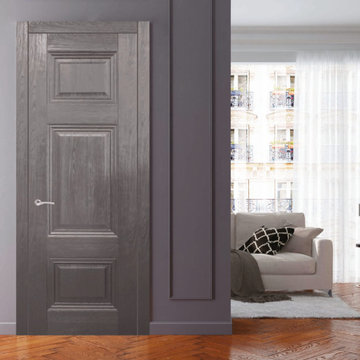
Triplex Doors are important part of the interior. And it is crucial to be attentive while choosing one. Each of us is guided by our own tastes and preferences while selecting a door for the rooms of our apartment (or for our home). You can choose simple wooden door or door with a glass. And if you have decided to buy door with a glass, the best choice is triplex door. Triplex glass is a several layer glass, which is made with the help ofpressing while heating. There are different variations of triplex, for example, there are types of glass, which are soundproof or have electric heating, etc. Triplex is produced with a special technique: in between two glass a specific membrane is placed, after which they are being glued at a certain pressure and temperature. Triplex doors are famous for their strength and long lasting operational term. The protective function of these doors is that they absorb ultraviolet lights, but at the same time let in a normal daylight. They don't require an extraordinary care. All these characteristics make doors with triplex convenient for usage. Doors with triplex glass can be applied in various ways. With the help of diverse designs and saturated colors, they will be perfect for bathroom, kitchen, living room and bedroom. It is possible to choose not only transparent but also frosted glass. The feature of these doors is that they expand the space and also scatter the light. It is also very important to point out the fact, that due to the manufacturing method and used materials, doors with triplex are ecologically clean.
 EasyHeat
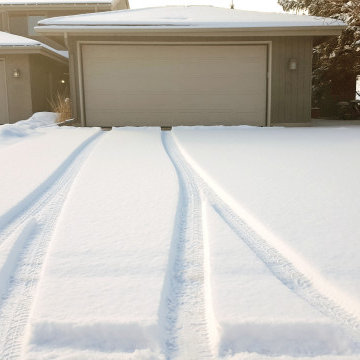
In concrete, asphalt or under paving stone, you can count on EasyHeat™ snow melting systems to clear the way. Highly efficient and more economical than most other snow and ice removal methods, our snow melting systems automatically eliminate snow and freezing rain on contact, helping to keep the surface clear and maintenance free, 24 hours a day, 7 days a week.
 EasyHeat
In concrete, asphalt or under paving stone, you can count on EasyHeat™ snow melting systems to clear the way. Highly efficient and more economical than most other snow and ice removal methods, our snow melting systems automatically eliminate snow and freezing rain on contact, helping to keep the surface clear and maintenance free, 24 hours a day, 7 days a week.
Sponsored
Sunbury, OH

J.Holderby - Renovations
Franklin County's Leading General Contractors - 2X Best of Houzz!
 Hillcrest Builders
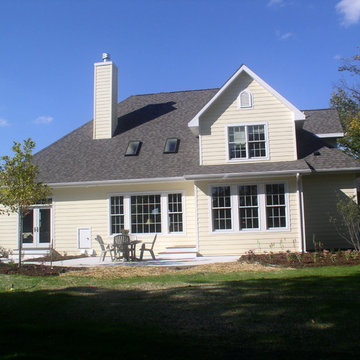
Our client wanted a SIP built home and we incorporated this and many other energy and sustainability features into this home which was in the Sheboygan County Parade of Homes.
Named "The Green Balanced Home", this project was all about creating practical and stunning living spaces that combined with sound environmental building materials and methods. By showcasing an assortment of leading-edge- green technologies, the Green Balanced Home was the talk of the Parade that year. In cooperation with our client, our methodology was:
Start with the site:
1. Protected tree lines
2. Drought resistant vegetation
3. High proportion of natural, plantings versus higher maintenance lawn
4. Optimal home placement on lot for solar exposure
5. Narrower streets
Build a high thermal envelope:
1. R-10 Gold Guard laminated EPS foam under basement, garage, and patio.
2. R-10 Gold Guard laminated EPS foam around exterior foundation walls.
3. R-10 ESP foam "shirt" around foundation
4. R-24 Structural Insulated panels (SIPs) for exterior walls, including garage
5. Sprayed foam in basement box sills and attic separation walls
6. R-15 garage door
7. R-60 blown cellulose attic insulation
Add efficient heating, cooling, ventilation, and electric utilization elements:
1. High efficiency fireplace with auxiliary ducting
2. Pull-out exterior wood-loading drawer
3. Air-to-air heat pump
4. 95% efficient, ultra-quiet variable capacity furnace
5. 19 SEER air conditioner
6. Five zones with programmable thermostats
7. Heat reclamation from hot water usage
8. LED lighting
9. Skylights
10. Energy Star appliances
11. Prep for in-floor heating system
12. Prep for photovoltaic (PV) solar
13. Prep for solar hot water
Incorporate water conservation:
1. Rain water recapture for toilet flushing and irrigation
2. Motion activated hot water circulation system
3. Power flush toilets
4. Dual flush toilets
Create high indoor air quality:
1. HEPA and UV filters
2. Air-to-air exchanger
3. Ultra-quiet bathroom fans with moisture sensor activation
Integrate sustainable, efficient materials:
* Expanded polystyrene (ESP) foam that does not emit HCFC "greenhouse" gases
* Oriented strand board (OSB) based siding, trim, and shutters
* SIPs panels that contain ESP an OSB
* Carpeting pads made from recycled materials
* Stewardship-certified cabinet manufacturing
* Job site recycling and reduce waste with SIPs
 Tile Doctor Ltd
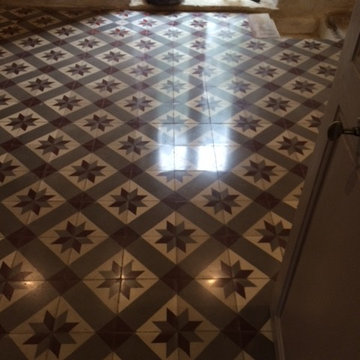
It’s not often that we get called abroad for a job, but when we do, it’s always a fantastic experience. We have done a few jobs abroad in the past, including the restoration of Terracotta tiled restaurant floor at a hotel in Addis Ababa, Ethiopia. This job was closer to home at a chateau in the town of Arcis-le-Ponsart near Reims, located in the Champagne-Ardenne region of North Eastern France. As its name suggests, the Champagne-Ardenne region is famous for its champagne.
The owner of the chateau was, in fact, an English property developer. He asked us to work on two floors: a Terracotta tiled hallway, and a French Victorian tiled floor. The French style of Victorian tiles are actually made of encaustic cement rather than clay, so we were excited to have the chance to work on something a bit out of the ordinary.
It was going to be a long trip, so after packing the van with the necessary equipment and Tile Doctor products Heidi and I set off to France via the Channel Tunnel. Fortunately, we avoided any disruptions both on the way there and the way back!
On arrival at the chateau, we immediately spent two hours running tests on the two floors to determine the most effective processes. We had four days in which to complete the job, so it was essential to make sure our methods were correct before beginning to avoid any unwelcome surprises later on!
After running the tests, we set about cleaning the Victorian tiles using a combination of clean water and diamond burnishing pads. No damage was done to the tiles, and they polished up well. Following the cleaning process, we began sealing the floor using Tile Doctor Colour Grow, a sealer which helps to bring out the colour in the stone while also providing durable surface protection. We were only able to apply one coat of sealer, however, as the second coat kept smearing, preventing the shine from settling in – this was despite testing the process earlier. Nonetheless, we resolved to polish off the one coat we could apply with a fine burnishing pad. Thankfully, the results were still very good.
The Terracotta tiled hallway had no sealer, and so it had, over time, become very dirty. We cleaned the tiles using a solution of one part Tile Doctor Pro Clean to five parts clean water, in combination with a couple of black burnishing pads.
As you can see from the pictures, the combination really helped to lift out the ingrained dirt, leaving the tiles looking at their best again. The floor took three days to dry completely before we could begin the sealing process. Once the floor was dry enough to seal, we applied eight coats of Tile Doctor Seal & Go, which is suitable for use on a variety of internal, unsealed porous surfaces.
It was a long and exhausting week but the client was delighted with the results on both floors and left the following comments, he also mentioned using Tile Doctor in the future to work on the other properties he is developing.
“Thanks for yours and Heidi’s work in renovating our floors. It was also great to meet you guys and I hope you have enjoyed your visit to champagne and will come back some time. “
 Hillcrest Builders
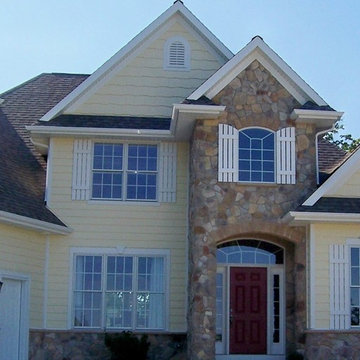
Our client wanted a SIP built home and we incorporated this and many other energy and sustainability features into this home which was in the Sheboygan County Parade of Homes.
Named "The Green Balanced Home", this project was all about creating practical and stunning living spaces that combined with sound environmental building materials and methods. By showcasing an assortment of leading-edge- green technologies, the Green Balanced Home was the talk of the Parade that year. In cooperation with our client, our methodology was:
Start with the site:
1. Protected tree lines
2. Drought resistant vegetation
3. High proportion of natural, plantings versus higher maintenance lawn
4. Optimal home placement on lot for solar exposure
5. Narrower streets
Build a high thermal envelope:
1. R-10 Gold Guard laminated EPS foam under basement, garage, and patio.
2. R-10 Gold Guard laminated EPS foam around exterior foundation walls.
3. R-10 ESP foam "shirt" around foundation
4. R-24 Structural Insulated panels (SIPs) for exterior walls, including garage
5. Sprayed foam in basement box sills and attic separation walls
6. R-15 garage door
7. R-60 blown cellulose attic insulation
Add efficient heating, cooling, ventilation, and electric utilization elements:
1. High efficiency fireplace with auxiliary ducting
2. Pull-out exterior wood-loading drawer
3. Air-to-air heat pump
4. 95% efficient, ultra-quiet variable capacity furnace
5. 19 SEER air conditioner
6. Five zones with programmable thermostats
7. Heat reclamation from hot water usage
8. LED lighting
9. Skylights
10. Energy Star appliances
11. Prep for in-floor heating system
12. Prep for photovoltaic (PV) solar
13. Prep for solar hot water
Incorporate water conservation:
1. Rain water recapture for toilet flushing and irrigation
2. Motion activated hot water circulation system
3. Power flush toilets
4. Dual flush toilets
Create high indoor air quality:
1. HEPA and UV filters
2. Air-to-air exchanger
3. Ultra-quiet bathroom fans with moisture sensor activation
Integrate sustainable, efficient materials:
* Expanded polystyrene (ESP) foam that does not emit HCFC "greenhouse" gases
* Oriented strand board (OSB) based siding, trim, and shutters
* SIPs panels that contain ESP an OSB
* Carpeting pads made from recycled materials
* Stewardship-certified cabinet manufacturing
* Job site recycling and reduce waste with SIPs
 Soak Barrel Co. – Cedar Hot Tubs & Outdoor Saunas
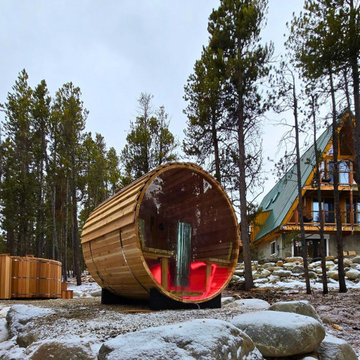
This panoramic outdoor sauna is handcrafted from solid Western Red Cedar and designed for long-term durability in outdoor environments.
Western Red Cedar naturally resists moisture, mold, and decay, making it significantly more stable and reliable than many common wood species used in outdoor construction. Unlike standard softwoods, cedar handles temperature changes and humidity with minimal movement, helping the structure remain tight and stable over time.
The panoramic window creates an open and relaxing atmosphere while maintaining efficient heat retention and even temperature distribution throughout the sauna.
One of the main advantages of cedar construction is the simple and natural maintenance. The exterior can be protected with standard wood oils or sealers if desired, while the interior typically requires only basic cleaning and ventilation.
Built using solid cedar components and traditional construction methods, this sauna is designed to perform reliably for 15–20+ years outdoors, providing a natural and durable alternative to mass-produced units.
 Tile Doctor Ltd
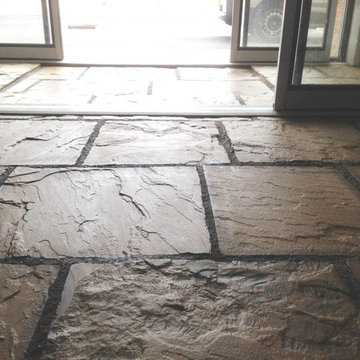
We work on a lot of residential tile installations but also cover commercial properties too, such as this new farm office which was in the process of being built in the market town of Driffield, East Yorkshire where a Flagstone tiled floor had been laid at the entrance. Driffield is known as the ‘Capital of the Yorkshire Wolds’ and lies near the source of the River Hull.
The farm office project was very big and, with the pressure on to complete it in time, the floor had been laid without being sealed first. As a result, the floor was getting dirty very easily, and was proving difficult to keep clean. It was clear that the Flagstone tiles would need to be cleaned and sealed, and I was called upon to get the job done.
To clean the floor I first mixed a 50:50 solution of clean water and Tile Doctor Pro Clean. Pro Clean is a high-alkaline cleaner which is safe to use on a wide range of natural stone floors. The cleaning solution was worked in using a rotary machine fitted with a black buffing pad which proved an effective method, lifting off the dust and residue that had been left on the surface of the Flagstone tiles during the course of construction work.
The excess residue was extracted using a wet-vac machine. I then repeated the whole process over again several times in order to get the floor as clean as possible.
To seal the floor I used a combination of two different Tile Doctor sealers. Firstly, I applied a layer of Tile Doctor Colour Grow to the floor. This colour intensifying sealer is specially formulated to enhance the fantastic natural colours in the stone, while at the same time providing durable surface protection.
The floor was then finished off with a couple of coats of Tile Doctor Seal & Go. This added to the stain resistance of the floor, while also delivering a very nice subtle shine on the surface.
All signs of building work have been removed from the stone floor and it is now looking presentable ready for the opening of the new office, the combination sealer applied to the floor will also make sure it stays that way for some time to come.
Ronnie Phipps
East Yorkshire Tile Doctor
 Ravenscourt Landscaping and Design LLC
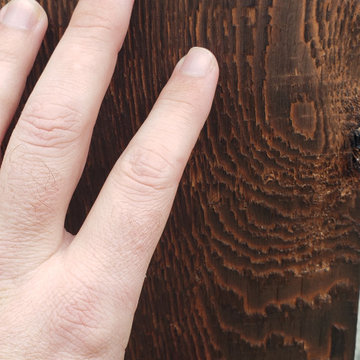
Yakisugi (焼杉) is a traditional Japanese method of wood preservation. Yaki means to heat with fire, and sugi is cypress.[1][2] It is referred to in the West as burnt timber cladding and also known as shou sugi ban (焼杉板) which uses the same kanji characters but an incorrect pronunciation. The ban character means "plank". By slightly charring the surface of the wood without combusting the whole piece, the wood becomes water-proof through the carbonisation and is thus more durable.[3][4] It also protects against insects, as well as making the wood fire retardant.[5] - Wikipedia
16