
Search results for "Purchasing decisions" in Home Design Ideas
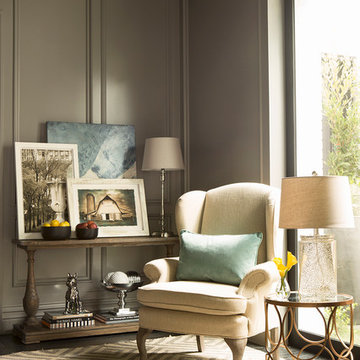

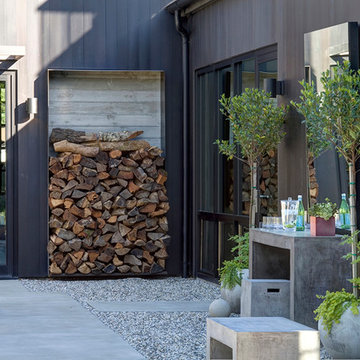

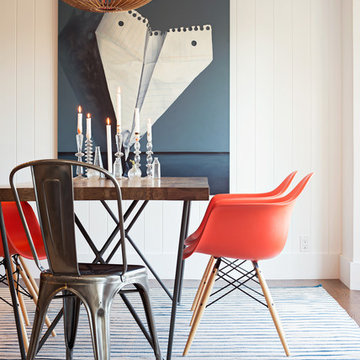
 Regan Baker Design Inc.
Stylish brewery owners with airline miles that match George Clooney’s decided to hire Regan Baker Design to transform their beloved Duboce Park second home into an organic modern oasis reflecting their modern aesthetic and sustainable, green conscience lifestyle. From hops to floors, we worked extensively with our design savvy clients to provide a new footprint for their kitchen, dining and living room area, redesigned three bathrooms, reconfigured and designed the master suite, and replaced an existing spiral staircase with a new modern, steel staircase. We collaborated with an architect to expedite the permit process, as well as hired a structural engineer to help with the new loads from removing the stairs and load bearing walls in the kitchen and Master bedroom. We also used LED light fixtures, FSC certified cabinetry and low VOC paint finishes.
Regan Baker Design was responsible for the overall schematics, design development, construction documentation, construction administration, as well as the selection and procurement of all fixtures, cabinets, equipment, furniture,and accessories.
Key Contributors: Green Home Construction; Photography: Sarah Hebenstreit / Modern Kids Co.
Find the right local pro for your project

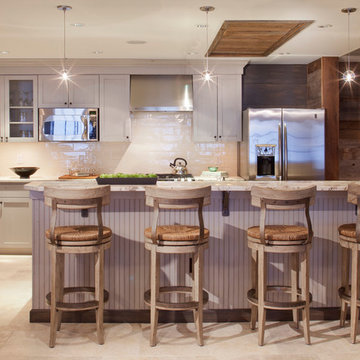
 kPd Studios | Kristine Pivarnik Design, LLC
Mountain style kitchen photo in Denver with beige cabinets and a peninsula
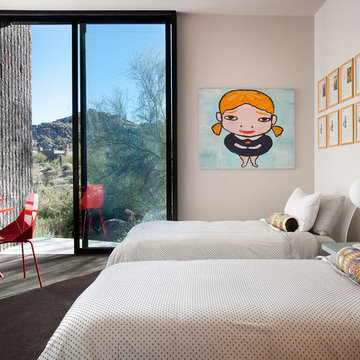
 Drewett Works
Believe it or not, this award-winning home began as a speculative project. Typically speculative projects involve a rather generic design that would appeal to many in a style that might be loved by the masses. But the project’s developer loved modern architecture and his personal residence was the first project designed by architect C.P. Drewett when Drewett Works launched in 2001. Together, the architect and developer envisioned a fictitious art collector who would one day purchase this stunning piece of desert modern architecture to showcase their magnificent collection.
The primary views from the site were southwest. Therefore, protecting the interior spaces from the southwest sun while making the primary views available was the greatest challenge. The views were very calculated and carefully managed. Every room needed to not only capture the vistas of the surrounding desert, but also provide viewing spaces for the potential collection to be housed within its walls.
The core of the material palette is utilitarian including exposed masonry and locally quarried cantera stone. An organic nature was added to the project through millwork selections including walnut and red gum veneers.
The eventual owners saw immediately that this could indeed become a home for them as well as their magnificent collection, of which pieces are loaned out to museums around the world. Their decision to purchase the home was based on the dimensions of one particular wall in the dining room which was EXACTLY large enough for one particular painting not yet displayed due to its size. The owners and this home were, as the saying goes, a perfect match!
Project Details | Desert Modern for the Magnificent Collection, Estancia, Scottsdale, AZ
Architecture: C.P. Drewett, Jr., AIA, NCARB | Drewett Works, Scottsdale, AZ
Builder: Shannon Construction | Phoenix, AZ
Interior Selections: Janet Bilotti, NCIDQ, ASID | Naples, FL
Custom Millwork: Linear Fine Woodworking | Scottsdale, AZ
Photography: Dino Tonn | Scottsdale, AZ
Awards: 2014 Gold Nugget Award of Merit
Feature Article: Luxe. Interiors and Design. Winter 2015, “Lofty Exposure”
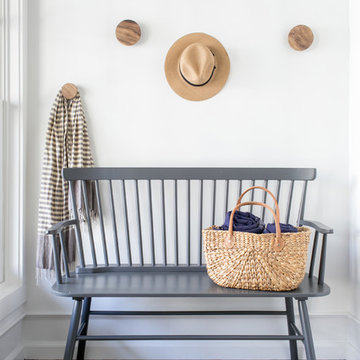
 Chango
Interior Design, Custom Furniture Design, & Art Curation by Chango & Co.
Photography by Raquel Langworthy
Shop the East Hampton New Traditional accessories at the Chango Shop!

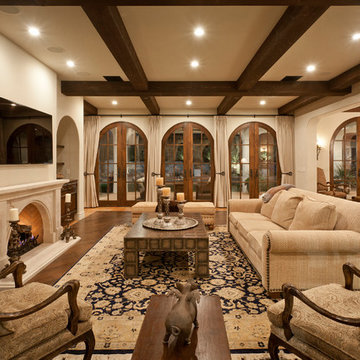
 Marsha Cain Designs
Tuscan dark wood floor family room photo in Phoenix with beige walls, a standard fireplace, a stone fireplace and a wall-mounted tv
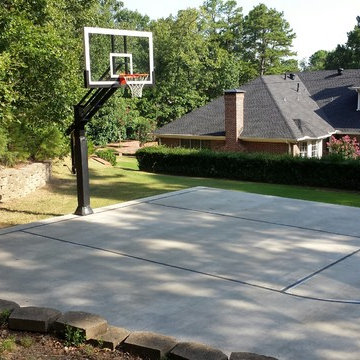
 Pro Dunk Hoops
David had these great comments to contribute with his photos... "We had a concrete pro pour the slab, with J-bolts placed, and then saw in expansion joints.My son and I put up the goal using your instruction. It was really pretty simple to do. We have enjoyed it. I really appreciate the high quality of the of the goal. It still looks new, after more than a year of use and constant sun and weather exposure. This was a good purchase decision. IMO you have the best product out there." This is a Pro Dunk Platinum Basketball System that was purchased in December of 2010. It was installed on a 28 ft wide by a 48 ft deep playing area in Little Rock, AR. Browse all of David T's photos navigate to: http://www.produnkhoops.com/photos/albums/david-28x48-pro-dunk-platinum-basketball-system-117/

 Karla Trincanello, CID, Interior Decisions, Inc.
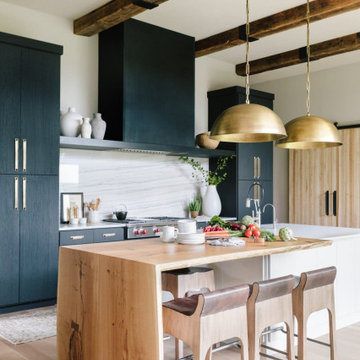
This was a renovation project that expanded the kitchen by using the space that was an adjacent laundry room. Contemporary kitchen with large 'waterfall island' as the centerpiece to dine, storage beneath and refrigerator/freezer drawers along with microwave drawer. Quartz was used for the island,counter and stove backsplash as a slab.in calacutta pattern, perimeter is also a quartz in a coordinated darker color. stainless steel hood with textured grayish white cabinetry. breakfast area is used mostly as a sitting area to watch TV and be a part of the kitchen but the cocktail table converts to dining height as well as expands for additional dining table space and seating is then becomes a dining banquette.area. Butler pantry is new area added and widened entry to dining room. Design by Karla Trincanello.
photo by Wing Wong Memories LLC

 William Hoffman Architect
4 Steps to Achieving a Rewarding Cost Effective Home Renovation
1 Home Renovation an Introduction
A home renovation due to changes in family needs and space requirements can be a challenging, but also a rewarding experience. As a homeowner, gathering and coordinating resources and possibly help from professional consultants are required. Once the construction phase has started, patience, endurance and commitment to follow through are necessary. Despite the challenges, the rewards of a well-planned and successfully completed project are meaningful, adding aesthetic and economic value, also providing the opportunity to personalize a home, encompassing the function, comfort and aesthetics to accommodate individual taste and lifestyle.
A renovation of an existing home is a viable alternative to moving or building a new home, assuming that a home is structurally sound, the expenditure to enlarge or improve can be a cost effective alternative. A home possessing charm, style, historical significance, established landscaping or an exceptional location could be a significant motivation to consider purchasing another home with the intent to renovate.
The complexity of a project could be relatively simple, changing the use of a room, consolidating two rooms into one, or opening up a room to the outdoors. It could also be a more involved task requiring planning, design and construction documents to build a second floor addition, the addition of a new wing or completely gutting the interior. Some projects could be completed in a weekend’s work or more complex projects, using a “Master Plan”, a plan which provides overall guidance; a renovation can be accomplished all at once or divided into manageable projects over a period of time. With the home evolving gradually allowing the renovation to be planned, timed and tailored to meet individual needs and circumstances.
The due diligence phase should precede the decision to renovate whether it’s an existing home or a home that is purchased with the intent to renovate. The due diligence phase will reveal the factors affecting the nature and scope of the project or if a renovation makes sense.
Every renovation project is unique relative to personal requirements, architectural style & construction type. This guide will be helpful in developing an understanding of the preliminary groundwork required to realize a successful project. If properly planned, a home renovation project can be a positive and rewarding experience resulting in a comfortable, practical and an attractive living environment.
The first step of the planning process is documenting the goals and long-range plans referred to as the “Project Program”. This will dictate the nature, scope and feasibility of the project. Providing a guide to achieving defined goals, the timing or phasing of the project and budget required to achieve the desired end result.
2 Documenting Existing Conditions
Once the “Project Program”, has been established, the next step is to determine what there is to work with. This requires documenting the home’s floor plan and site elements which includes drawing an “as built” floor & site plan consisting of the existing exterior walls, interior rooms, doors, windows, etc. and surrounding site elements, landscape and other significant exterior features. Additionally understanding and noting on the “as built” plan, the structural, mechanical and electrical systems as necessary. Gathering the “existing condition” information defines what there is to work with, creating the framework from which to facilitate and organize the decision making process and develop effective “project program” solutions.
3 Evaluating Existing Conditions
The goals and long-range plans have been established, and the existing floor plan and site elements have been documented. Before developing design solutions, the next step is to evaluate existing conditions. The evaluation includes: a detailed analysis of the structural, mechanical and electrical systems, determining the condition of the house, noting functional and aesthetic deficiencies. At the same time recognizing the home’s strengths, assets and evaluating its relationship to its site. The remaining parameters will be defined by the local jurisdiction’s zoning regulations, these regulations will define the “envelope”, within which the proposed project will be required to fit:
•required front, side & rear yard setbacks
•maximum allowable lot coverage & height
The previous three steps have provided the necessary foundation to start the design phase. The goals and long range plans have been established, existing conditions have been documented and the evaluation of what there is to work with are now in place. This will provide the framework from which to facilitate and organize design solutions. The consolidation of this information is manifested in the development of the “Master Plan” which will become the road map by which sound decision-making can be made as a home renovation evolves. Keeping the project, on a linear path, avoiding redundancies and back tracking, on time, within budget, concluding with a well crafted finished product. After all the “up front” research and documentation has been completed, the design phase of the project can now precede, with the creation of diagrammatic design drawings. Organizing interior spaces, taking into account the external elements, prevailing breezes, solar orientation, view, existing outdoor features, etc. Through the development of schematic sketches themes will emerge followed by design development drawings. Wise planning and renovation decisions can save money and time at the same time provide a well crafted finished project. The “Master Plan” provides a strategic path in the planning and decision making process leading to a successful and rewarding home renovation, which will add value and considerable enjoyment, for many years, living in a newly renovated home.
By virtue of having gone through these steps, frustrations sometimes encountered during a home renovation will be minimized, allowing the renovation to be a gratifying and rewarding experience. Being aware of the process allows one to become an “Educated Client,” which is worth quite a bit more than one might realize. The uneducated client may not realize the benefit of going through the planning, evaluation and documentation groundwork. He will only realize its benefits after having completed a prior renovation project. This rational approach keeps the design process on a direct path to achieving prescribed goals.
4 Exploring Design Solutions & Developing a Master Plan
The previous three steps have provided the necessary foundation to start the design phase. The goals and long range plans have been established, existing conditions have been documented and the evaluation of what there is to work with are now in place. This will provide the framework from which to facilitate and organize design solutions. The consolidation of this information is manifested in the development of the “Master Plan” which will become the road map by which sound decision-making can be made as a home renovation evolves. Keeping the project, on a linear path, avoiding redundancies and back tracking, on time, within budget, concluding with a well crafted finished product.
By virtue of having gone through these steps, frustrations sometimes encountered during a home renovation will be minimized, allowing the renovation to be a gratifying and rewarding experience. Being aware of the process allows one to become an “Educated Client,” which is worth quite a bit more than one might realize. The uneducated client may not realize the benefit of going through the planning, evaluation and documentation groundwork. He will only realize its benefits after having completed a prior renovation project. This rational approach keeps the design process on a direct path to achieving prescribed goals.
After all the “up front” research and documentation has been completed, the design phase of the project can now precede, with the creation of diagrammatic design drawings. Organizing interior spaces, taking into account the external elements, prevailing breezes, solar orientation, view, existing outdoor features, etc. Through the development of schematic sketches themes will emerge followed by design development drawings. Wise planning and renovation decisions can save money and time at the same time provide a well crafted finished project. The “Master Plan” provides a strategic path in the planning and decision making process leading to a successful and rewarding home renovation, which will add value and considerable enjoyment, for many years, living in a newly renovated home.
 Rogue Home Interiors
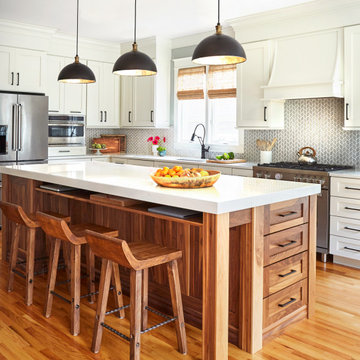
A cozy and functional farmhouse kitchen with warm white cabinets and a rustic walnut island.
Mid-sized country l-shaped medium tone wood floor and brown floor open concept kitchen photo in DC Metro with an undermount sink, shaker cabinets, white cabinets, quartz countertops, gray backsplash, porcelain backsplash, stainless steel appliances, an island and white countertops
Mid-sized country l-shaped medium tone wood floor and brown floor open concept kitchen photo in DC Metro with an undermount sink, shaker cabinets, white cabinets, quartz countertops, gray backsplash, porcelain backsplash, stainless steel appliances, an island and white countertops

Sponsored
Sunbury, OH

J.Holderby - Renovations
Franklin County's Leading General Contractors - 2X Best of Houzz!

 Schweitzer Design & Build, Inc.
The Vine Studio
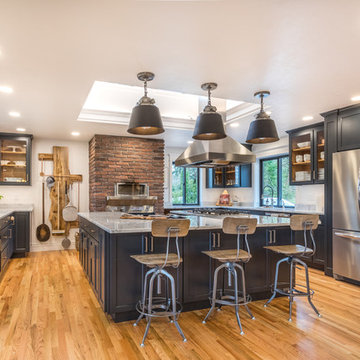
Example of a mountain style medium tone wood floor kitchen pantry design in Portland with an island, shaker cabinets, black cabinets, marble countertops, stainless steel appliances and gray countertops
Example of a mountain style medium tone wood floor kitchen pantry design in Portland with an island, shaker cabinets, black cabinets, marble countertops, stainless steel appliances and gray countertops
 Bark House
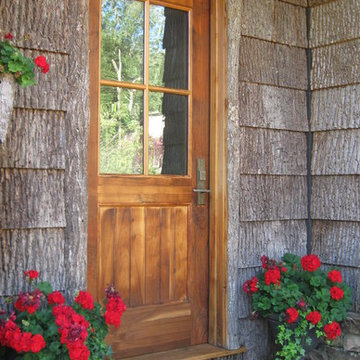
Standard Grade
Thickness: ½” minimum to 7/8” maximum
Width: Random widths from 6” minimum to 48” maximum
Length: 13”, 18”, or 26”.
Custom sizing available
Certified Kiln Dried and Heat Sterilized
Precision Squared for Ease in Installation
FSC Controlled Wood or FSC 100% Pure
Cradle to Cradle Gold CM Certified for exterior use
Automatic Full LEED Point Qualifier
ASTM E-84 -05 Class B Fire Rating
Meets California VOC Emission Standards
No Minimum Order Required
Sponsored
Sunbury, OH
J.Holderby - Renovations
Franklin County's Leading General Contractors - 2X Best of Houzz!
 Daniel Mackey Construction, Inc
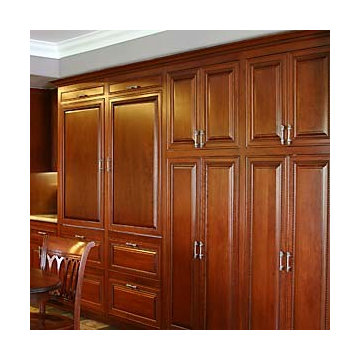
For customers wishing to make purchase decisions as part of a healthy lifestyle, we offer environmentally responsible Green-Core by Crystal. Crystal employs many quality craftsmen that help us create the custom cabinetry that meets your specific needs.
 Graf Developments
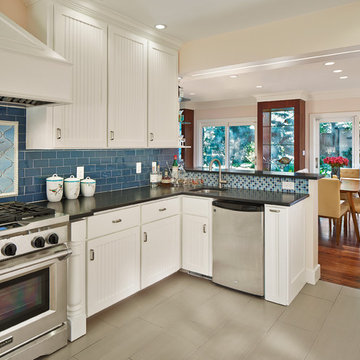
Kitchen remodel in a Dallas home built in 1924. Still has traditional styling, but with today's features such as pot filler, professional range, and LED lighting throughout.
 Pro Dunk Hoops
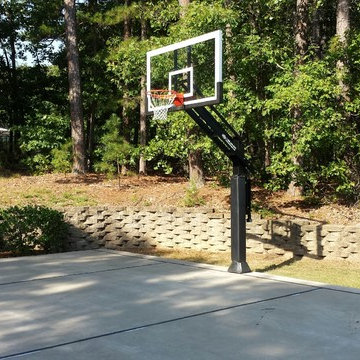
David had these great comments to contribute with his photos... "We had a concrete pro pour the slab, with J-bolts placed, and then saw in expansion joints.My son and I put up the goal using your instruction. It was really pretty simple to do. We have enjoyed it. I really appreciate the high quality of the of the goal. It still looks new, after more than a year of use and constant sun and weather exposure. This was a good purchase decision. IMO you have the best product out there." This is a Pro Dunk Platinum Basketball System that was purchased in December of 2010. It was installed on a 28 ft wide by a 48 ft deep playing area in Little Rock, AR. Browse all of David T's photos navigate to: http://www.produnkhoops.com/photos/albums/david-28x48-pro-dunk-platinum-basketball-system-117/
8