
Search results for "Quick brush" in Home Design Ideas
 JHW Properties
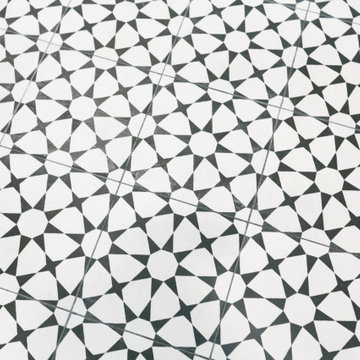
Contemporary bathroom inside our Sherman Oaks home remodel. Features Moroccan tile floors and black & white vanity, countertops and cabinetry. Glass sliding door to shower/tub combination with inset soap box featuring continuation of Moroccan tile. White subway tile in shower.

 Jon Allen Fine Metal Art
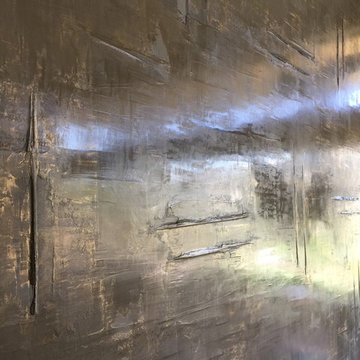
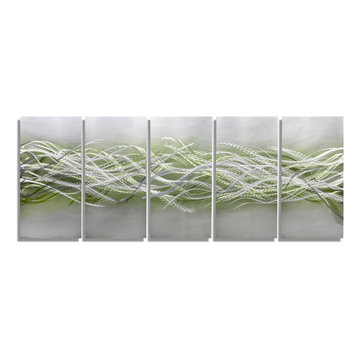
Blades of Spring by Jon Allen - Energy is depicted and a sense of motion and movement is truly conveyed in 'Blades of Spring'. Green is woven throughout this mostly silver five panel piece of original hand-etched metal artwork. This abstract metal wall art measuring 64" x 24" x 2" (162.56 cm x 60.96 cm x 5.08 cm) overall including suggested 1" spacing between panels.
My unique, abstract metal wall sculpture is the perfect metal accent to add excitement and intrigue to your decor. This handmade piece of original artwork features beautiful silver and green tones and will be that modern touch you've been searching for. My signature-defined hand textured intricacies and carvings into the metal capture and reflect surrounding light sources creating enhanced interaction with dramatic illusions of depth and 3D movement as viewed from different angles. Hang it in your living room, bedroom, kitchen, bathroom, office, or outdoors. This abstract metal art will wow and impress your guests. Display under natural lighting or make this original artwork the show stopping centerpiece of any room with track lighting or gallery spot lights for dramatic effect. Lighting and other environmental factors interact with metal artwork in a unique, organic way.
Find the right local pro for your project

 Art and Atmosphere
This bathroom wall was color washed and then the bamboo pattern was painted over it.
Inspiration for a small asian 3/4 green tile ceramic tile bathroom remodel in New York with green walls
Inspiration for a small asian 3/4 green tile ceramic tile bathroom remodel in New York with green walls
 JUMA architects
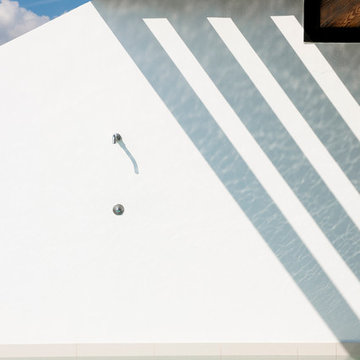
This commission involved the renovation and conversion of two duplex apartments into one single residence/retreat. The two existing external stairs were removed and replaced by a single internal staircase. This intervention made it possible to create one large outdoor area and maximise the existing view. The steel canopies and wooden sun terraces act as visual links between the two original living units. In collaboration with Minimum Arquitectura.
Foto's © Verne en Raül Candales Franch
 Jon Allen Fine Metal Art
Tropics by Jon Allen is an abstract take on a nature inspired painting. It has a vaguely floral undertone but in very unexpected and delightful colors. Jon truly captures the spirit of the tropics with these beautiful, bright colors. Hand-painted on aluminum, this stunning abstract piece will complement any contemporary or modern, decor.
Number of Pieces: 1
Dimensions: 35" x 24" x 2" off the wall
Care & Cleaning: Clean with a soft cloth and plain soap & water
Other Features: Hardware is pre-installed for simple hanging and art will “float” 2” off the wall
 Jon Allen Fine Metal Art
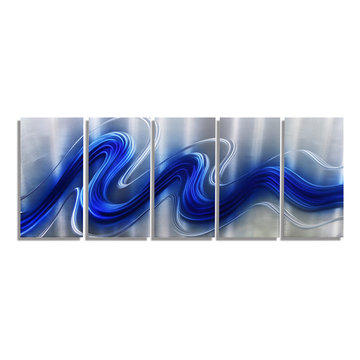
Electric Blue by Jon Allen - a stunning, handmade abstract metal wall painting that spans five panels in cobalt blue and silver. It measures 64" x 24" x 2" (162.56 cm x 60.96 cm x 5.08 cm) including suggested 1" spacing between the panels.
'Electric Blue' is a unique, brightly colored metal painting is the perfect abstract metal accent to add excitement and intrigue to your decor. It's a handmade piece of original artwork that features beautiful blue tones and is a three-dimensional wall sculpture that will be that modern touch every home needs. My hand textured intricacies and carvings into the metal capture and reflect surrounding light sources creating enhanced interaction with dramatic illusions of depth and 3D movement as viewed from different angles. Hang it in your living room, bedroom, kitchen, bathroom, office, or outdoors under covered areas like your patio or pool area. This abstract metal art will delight your guests!
Sponsored
Sunbury, OH

J.Holderby - Renovations
Franklin County's Leading General Contractors - 2X Best of Houzz!




 Red Rock Design-Build and Red Rock Pools and Spas
A contemporary roof top pool with grand views of some of AZ most iconic mountains. The outer edge is constructed with large acrylic panels installed by Hammerhead International, and the tile is a Bisazza Blend. Photos are by Michael Duerinckx.
 Advance Design Studio, Ltd.
After six years of living in their Huntley IL home, Chris and Meghan were tired of their dark, dingy, outdated kitchen and it was finally time for a long-anticipated change. “The kitchen is the place where we live, it’s where we do everything,” Meghan said. “It was important that it be a space where we wanted to be.” Meghan loves cooking and enjoys including their girls in healthy meal prepping, this led them to want a brighter, more enjoyable kitchen with increased functionality and improved storage.
For Chris especially, the laundry room was an entirely dysfunctional eyesore. “We had a washer and a dryer, but it was all kind-of cobbled together!” Chris said. “There were always laundry piles everywhere, we weren’t really sure what we wanted to do in there, but it was time for us to make a change.” The mess of the space was stressful every time they walked in the door from the garage each day. Kids’ backpacks and shoes piled up haphazardly in the makeshift boot-bench closet left the family feeling disorganized and stressed. They needed space for folding clothes and locker cubbies to help keep the family organized.
Having known Christine and Todd in the Huntley community for years, Chris and Meghan were familiar with their work. “We already trusted them personally and having seen their projects for years we knew they did top notch work. After we reviewed the initial round of designs, we knew that hiring them was definitely the right choice,” Meghan and Chris said. Although Chris had done a lot of work in their home himself, the kitchen and laundry room renovation was such a large undertaking that he didn’t want to steal time away from his family to spend what would surely be many long weekends doing the job himself. “That would not have been a wise choice for us,” Chris laughed.
“Our designer, Michelle was very, very, easy to work with; anything we wanted to see or weren’t sure about, she went above and beyond to make this easy for us. She was easy to get hold of and always quick to respond,” the couple said. Michelle pulled ideas that mirrored the couple’s taste and style and was adept at directing the couple to limited choices that didn’t overwhelm them and kept the process moving. “I have a hard time making decisions. Michelle made the decision-making process so easy. I loved how she listened to what I liked and then presented three great options for me to choose from,” Meghan said.
The main objectives for the kitchen were better storage solutions, they wanted the space to reflect their lifestyle and taste, and they wanted it to last for years with low maintenance. One of the first steps in creating a more functional kitchen was relocating the refrigerator, creating an improved workflow for the busy family.
“We didn’t know that we could even move the refrigerator to a new location where it is now, that was something that we never would have thought of,” Chris said. “The new refrigerator location makes the kitchen feel so much bigger. We didn’t add any space, but our whole kitchen with the new design just seems like it’s so much larger than before!” Meghan said.
The perimeter mist colored cabinets helped warm and brighten the entire room, while the graphite colored cabinets on the island added contrast. Using this fresh, clean color palette satisfied the couple’s desire for a bright space that was the exact opposite of what they had before. Organization accessories were also added to the cabinets such as a spice drawer tray and roll outs to create hidden convenience.
“I absolutely love the hidden spices – it makes cooking so much more enjoyable!” Chris said. “And all the pull outs, and the double trash bin, who would think you could get so excited about organization!” the couple said in unison.
One thing they hated in their original kitchen was how dark the space felt. Added lighting on the ceiling with the new light fixtures combined with the lighter cabinetry colors throughout solved this problem. “Our new kitchen has this warm, almost cozy feeling that our old kitchen never had, it’s just a space that I love spending my time in now,” Meghan said. The light airy feeling was accentuated with the use of floating white shelves on either side of the decorative range hood. “We have so much cabinetry space, the new design is amazing we actually have more storage space than we will ever need,” Meghan said.
The island was extended to create more work surface and added space for stool seating. “The new island changes how we live. Now the kids can be in the kitchen with us, doing homework, eating breakfast, and the three of us have special dinners there when Chris is working late,” Meghan said.
The Carrara Marmi Quartz countertops were chosen because they are, not only beautiful, but are made from hard-working material that doesn’t require maintenance. The white subway tile backsplash that wraps to the ceiling behind the focal point cooktop range/hood compliments the crisp white countertops perfectly, while brushed brass hardware and light fixtures keep the design fresh and new.
The couple had a few fears at the beginning of the project, as most homeowners do. Their biggest fear was being out of their kitchen and laundry room for an extended time. The crew made it very easy for the family to work in a limited space keeping the washer and dryer hooked up the majority of the time, and also getting appliances working with minimal downtime.
“They above and beyond accommodated us to get us through the process,” Meghan said. “They did a great job making sure we were as comfortable as possible throughout the process,” Chris added.
“Our project manager DJ did a great job. He was very good at updating us on schedule changes, getting guys in as quickly as possible. Everyone that stepped in the house was nice and did great work,” said Chris. They thought Advance’s carpenter was phenomenal and were impressed when he took a conceptual idea from a photograph and worked with designer Michelle to create a one of a kind range/hood that has become the topic of conversation with friends and family who visit the new kitchen. “He was in our house literally every day for several weeks. He was easy to work with and good at what he did,” Meghan and Chris said.
The focal point of the kitchen; a hand-crafted, custom-built ventilation hood was clad with handpicked reclaimed barnwood. Advance Design’s carpenter built the framework and the cladding to create a one-of-a-kind design element that the couple loves.
“I think it was especially fun for him to create something unique from scratch, showcasing his talent in this area,” Meghan said. “I love that my kitchen is not like everyone else’s. I got to pick out the wood on my hood and watch it being built and was able to choose what pieces of wood went where on it. It’s totally unique.”
Red Oak flooring was toothed-in throughout the kitchen and the rest of the first floor anywhere changes were made. Then the whole floor was refinished to tone down the orange undertones in the existing floor stain, ultimately changing the color complexion of the entire first floor. The result is a completely new feeling to the entire home.
Renovating the laundry room was extremely important to Meghan and Chris, but they had trouble visualizing what the possibilities were for the seemingly small space. Michelle produced beautiful 3D illustrations that helped them envision the space in a whole new way.
“I must have told Michelle 100 times that I am a visual person, seeing the designs in 3D made it so easy to make decisions and see what we could really do with our space,” Meghan said.
A dividing wall and doorway were removed between the existing laundry room and hallway formerly containing a coat closet, providing space to design specialized graphite colored cabinetry matching the kitchen island to house custom storage cubbies for each family member. Adding the tall utility cabinetry in the new laundry area helped solve the storage issue, tucking away cleaning supplies, household items, and even the cat got its own cubby.
“I love how everything is now hidden in its own space. I can’t tell you how much I hated coming home and seeing everything sitting around on counters,” Chris said.
Electrical outlets were planned for the inside of utility cabinets, so devices could charge in hidden locations. Stacking the washer and dryer allowed for wider countertop space to provide a folding area and a special space for clothes to hang. “The way I do laundry has been completely transformed! I can actually fold clothes and hang them now right out of the washer and dryer,” Meghan said.
“The end result in the kitchen and the laundry/mud room was an updated light and bright space, with a smarter work flow that better meets the needs of this family,” Michelle said.
“I would totally recommend Advance Design,” Meghan said. “Sometimes I sit and just look at my kitchen and laundry room and think ‘Wow, I can’t believe I get to live here!’ It’s an understatement to say we love our new space.”
 Habanero Architecture, PLLC
The project’s goal is to introduce more affordable contemporary homes for Triangle Area housing. This 1,800 SF modern ranch-style residence takes its shape from the archetypal gable form and helps to integrate itself into the neighborhood. Although the house presents a modern intervention, the project’s scale and proportional parameters integrate into its context.
Natural light and ventilation are passive goals for the project. A strong indoor-outdoor connection was sought by establishing views toward the wooded landscape and having a deck structure weave into the public area. North Carolina’s natural textures are represented in the simple black and tan palette of the facade.

 k+co LIVING - Interiors by Karen B Wolf
Photography: Christian Garibaldi
Example of a mid-sized transitional enclosed and formal carpeted living room design in New York with gray walls, a standard fireplace, a stone fireplace and no tv
Example of a mid-sized transitional enclosed and formal carpeted living room design in New York with gray walls, a standard fireplace, a stone fireplace and no tv
Sponsored
Sunbury, OH
J.Holderby - Renovations
Franklin County's Leading General Contractors - 2X Best of Houzz!

 Kristina Crestin Design
Photographer: Jamie Salomon
Art: Jules Place
Inspiration for a contemporary home office remodel in Boston
Inspiration for a contemporary home office remodel in Boston

 ARTO
ARTOGood Looking View & Tile .
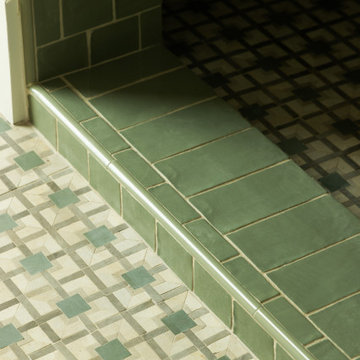
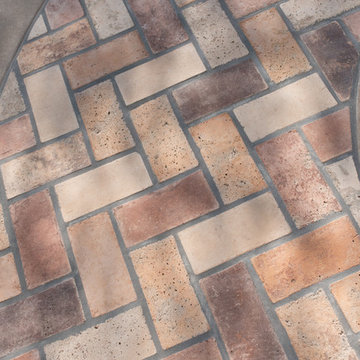
While ARTO products are made in Los Angeles County, California, we are happy to ship our product worldwide! We work onsite with concrete, terra-cotta and ceramic. We build brick, tile and architectural elements for residential and commercial environments. We pride ourselves on providing perfectly imperfect product that gives a feel of rustic elegance.



 Five Star Tree Care
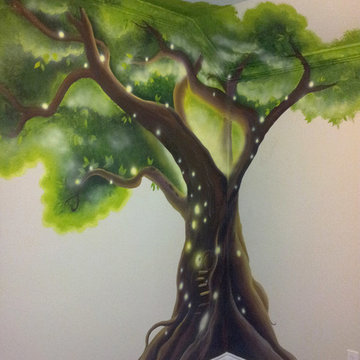
Winter has arrived and this means many months of snow and ice are ahead. When trees shed their leaves and go dormant for the winter, this is like how bears hibernate; they are both sleeping through the cold and waiting until the warm spring weather comes back. But unlike hibernating bears, who are safe and snuggled up in a warm cave somewhere, trees are left to withstand the harsh, cold elements throughout the entire winter. This means that they are more impacted than you might believe.
It is easier for mature trees to be able to handle the long winter months due to their extensive root system and thick bark. But saplings and other newly planted trees are not yet fully equipped with these natural defenses to handle the cold. No matter if you have new or older trees, following our tips will help them prosper during the cold Canadian winter ahead. Our team at Five Star Tree Services has come up with some winter maintenance essentials for your trees that will give them an extra hand over the winter.
One Last Water
Getting one last good watering in before the ground freezes is helpful to newly planted and young trees. Always make sure to water your tree slowly and gently. This allows the water to seep down into the root system as opposed to it running off the top and freezing.
Apply Mulch
When you use mulch, it acts like a barrier between the tree roots and the cold snow, it helps to insulate it. When you are applying mulch, make sure you spread it around the base of the tree so that it is no more than 3 inches deep. You also need to make sure to spread the mulch all the way to the drip line surrounding the tree. Make sure to not exceed 3 inches around your entire tree and keep the mulch away from the trunk of the tree.
Wrap Tree Trunks
There is a condition called sunscalding that can occur during the winter months. This happens when there is a temperature change that happens quickly. You might notice it when the sun warms the trees, which thaws the bark but during the night, when it gets cold again, it causes the melted water in the bark to rupture, causing cracks in the tree’s trunk. Young trees are especially susceptible to this happening. To help stop this from happening, it is best to wrap your trees with tree wraps or a plastic guard. It is advisable to wrap the trunk from the ground up and stop just below the first branch.
Shelter Your Trees
Young or newly planted trees are fairly defenseless for the first handful of years. Older and more mature trees have had time to develop a strong root system and hardy bark that help to protect them against things like animals and the freezing cold. If you want to help your little sapling along this winter, you can build a shelter that can handle having snow piled on it. You can also periodically use a broom to brush off the snow that accumulates on a tree’s branches. But try to avoid breaking off any ice that has formed on the branches, as this can actually end up hurting the tree if you accidentally break one of its branches instead.
Keep Road Salt Away
It’s no big secret that the use of road salt is detrimental to trees. When it gets on them, the end result come springtime is a dead tree, or at least, a severely damaged one. As much as you can, protect your trees and limit their exposure to salt over the winter.
Protect Your Trees
Winter is not only limiting for trees, but for a lot of other animals as well. This includes rabbits, mice, moles, squirrels, and other furry little creatures, who like to use trees as a food source during the summer months. During the winter, this food is now cut off when the trees go dormant. This only leaves the tree’s bark as an alternative food source for these critters. They seem to especially like young tree bark to chew on over the winter. In order to stop this from happening, you need to protect the bark with things like a fence surrounding your tree, wrapping the trunk with a plastic guard or hardware cloth.
Winter Pruning
The best time to prune any tree is during the winter months when the tree is dormant. Pruning allows you to rid the tree of any excess branches and control disease. Winter pruning is highly beneficial and lets your tree improve branch development in the spring.
Don’t Use
Always make sure to avoid products that are known to hurt trees, especially ones containing sodium chloride. Products like that cause negative reactions in trees or any plants, as it hinders their water intake. Instead, look for products that have potassium, calcium, and magnesium chloride.
How Five Star Tree Services Can Help
For newly planted and young trees, it is especially important to help them through the winter as best you can. We here at Five Star Tree Services are here to help you get your trees through the winter. If you require Toronto Tree Care, make sure to give us a call at (416) 990-3355.
 Tile Doctor Ltd
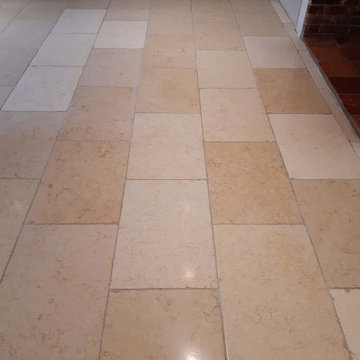
Earlier this year I was invited over to a property in the village of Silfield near Wymondham in Norfolk to inspect a Limestone tiled floor. Now I don’t usually quote my clients, but this is how the owner of the property had described the floor in the enquiry I received from Tile Doctor.
“Grout Black, where tiles have divots, dirt is encased,
plus no shine to floor, sealant non-existent.”
The problems listed were quite comprehensive and having had chance to survey the floor we found them to be quite accurate and really could not disagree with her comments! The Limestone tiles had been laid throughout the Kitchen diner and it was clear the sealer had worn off completely allowing dirt to become ingrained in the Limestone tiles and especially the grout which had turned black.
I understood from the owner that the grout lines should have been a pale cream colour rather than the black it was now, additionally the natural pitting in the Limestone was full of the same black contaminants. I ran a quick water test on the tiles to see if there was a seal present and it confirmed that if there had ever been one it was now completely compromised. The lack of sealer had allowed all liquid spills and dirt to soak straight into the tile making it dirty and exceedingly difficult to clean.
A large birthday celebration party had been planned and our client was desperate for the floor to be brought back to life beforehand. Although I couldn’t start immediately due to other commitments, it was able to return in time to get the floor clean for the party.
Our first job was to tackle the severe soiling trapped in the pits and grout lines. To do this a very strong dilution (2:1 ratio) of Tile Doctor Pro-Clean was applied to the floor and left to soak into the tile and grout for about 10 minutes. Then is was scrubbed into the tiles with help from a rotary buffer fitted with a soft/medium long-bristled nylon brush. The resulting slurry was then power rinsed with 60-degree hot water and extracted with our 400psi machine which jetted out all the black, oily contaminants from the grout and pits.
The floor was speed dried with the assistance of a large air mover. Once dry to the touch our attention was turned to filling the now exposed pitts in the Limestone tiles and two cracks with an appropriately coloured fast cure epoxy compound. Having allowed the filler time to reach full hardness, we ground down the excess material with 100 and 200 grit hand burnishing blocks in preparation for the next stage.
We find the best way to renovate the appearance of stone is to use a process called burnishing which hones the stone and beings up the polish. For this you need a set of 17-inch diamond encrusted burnishing pads. The pads fit the rotary buffer and are applied to the floor in sequence from 400, 800 and then 1500 grit using water to lubricate the process. The waster turns into a slurry as you work, and this is then rinsed off the floor with water after each pad and extracted using a wet vacuum. The floor was then left to dry thoroughly overnight with the assistance of our large capacity dehumidifier.
Returning the following day, we thoroughly vacuumed the floor to remove any remaining powder and grit left from the previous day’s wet work before spray burnishing the surface with a Tile Doctor 3000-grit diamond pad. This last pad really beings up the polished appearance of the Limestone and gave the tiles a deep and rich shine.
This last pad is applied without water and so leaves the floor dry and ready to for a new sealer to be applied. Our sealer of choice was Tile Doctor Ultra Seal, it’s a premium penetrating sealer that soaks into the pores of the stone protecting it from within. Ultra-Seal doesn’t alter the natural appearance of the stone giving it undetectable protection from staining. Having allowed the sealed floor to dry with the assistance of our air mover, the whole area was buffed using a white buffing pad and a small amount of finely sprayed water to remove any light smearing before vacuuming once again to finish.
My client was delighted with the result and left the following feedback for us:
“Totally renewed two flooring areas in our house to what looks like a recently laid floor. I have already had so many compliments without even telling people it had been professionally cleaned! Nick and Sue are always very easy to have about, inconspicuous and hard working. Absolutely delighted with the outcome and would recommend without hesitation. Thank you so much!”
For aftercare cleaning I recommended Tile Doctor Stone Soap, its designed for cleaning polished stone floors and will help build-up the patina. It’s a neutral pH product so won’t prematurely erode the sealer like many tile cleaning products you find in supermarkets which are really sold for cleaning glazed ceramic tiles not sealed natural stone.
Nick White
Norfolk Tile Doctor


39