
Search results for "Reduce failing" in Home Design Ideas

 Southern Staircase
Stainless Steel custom spiral stair with wood treads.
Staircase - modern wooden spiral open staircase idea in Atlanta
Staircase - modern wooden spiral open staircase idea in Atlanta
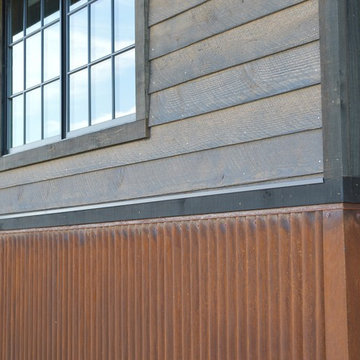
 Montana Timber Products
Horizontal siding: Product - ranchwood™. Color - Southern. Profile - 1x8 square edge lap.
Trim: Product - ranchwood™. Color - Tackroom. Profile - 1x4 and 1x6 square edge.
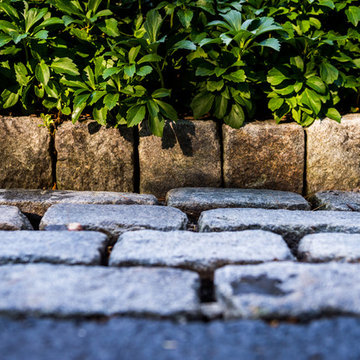
 Terren Landscapes
Stephen Govel Photography
Inspiration for a timeless home design remodel in Philadelphia
Inspiration for a timeless home design remodel in Philadelphia
Find the right local pro for your project

 Balzer & Tuck Architecture
These exterior stairs run from the patio space on the walk out basement, up to the deck on the main floor and feature a contemporary cable railing.
Staircase - contemporary straight open staircase idea in Boston
Staircase - contemporary straight open staircase idea in Boston




 An Aesthetic Pursuit
Lianna Taratin
Example of a mid-sized minimalist open concept light wood floor living room design in New York with a wall-mounted tv and multicolored walls
Example of a mid-sized minimalist open concept light wood floor living room design in New York with a wall-mounted tv and multicolored walls


 Morph Industries Ltd
Morph Industries has been in operation since October 2007. In that time we have worked on many high end residences in Vancouver and Whistler area as our main focus for our architectural division.
We have a strong background in heavy structural steel as well as being self taught at stainless ornamental work and finishing. We are very proud to be able to fabricate some of the most beautiful ornamental metal work in the industry.
We are one of the only companies that is able to offer in-house ornamental stainless, aluminum and glass work as well as being fully certified for structural steel.

 Scott Mehaffey, landscape architect
Inspiration for a mid-sized mid-century modern partial sun courtyard stone garden path in Chicago for spring.
Inspiration for a mid-sized mid-century modern partial sun courtyard stone garden path in Chicago for spring.

 Landwell Design + Build Co.
The landscape around this Mediterranean style home was transformed from barren and unusable to a warm and inviting outdoor space, cohesive with the existing architecture and aesthetic of the property. The front yard renovation included the construction of stucco landscape walls to create a front courtyard, with a dimensional cut flagstone patio with ground cover joints, a stucco fire pit, a "floating" composite bench, an urn converted into a recirculating water feature, landscape lighting, drought-tolerant planting, and Palomino gravel. Another stucco wall with a powder-coated steel gate was built at the entry to the backyard, connecting to a stucco column and steel fence along the property line. The backyard was developed into an outdoor living space with custom concrete flat work, dimensional cut flagstone pavers, a bocce ball court, horizontal board screening panels, and Mediterranean-style tile and stucco water feature, a second gas fire pit, capped seat walls, an outdoor shower screen, raised garden beds, a trash can enclosure, trellis, climate-appropriate plantings, low voltage lighting, mulch, and more!

 Wagner & Company Landscape Construction & Design
Inspiration for a large traditional backyard water fountain landscape.

 All Marble Tiles
Thassos White Marble 3x6 Subway Tile and 12x12 Marble Tile http://goo.gl/wrxQC7
http://AllMarbleTiles.com/


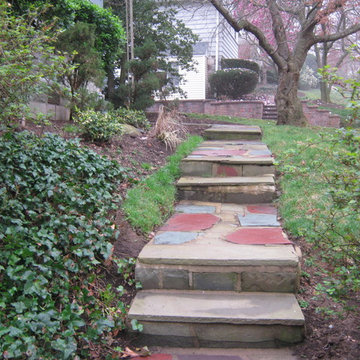
 Pennsylvania Landscape & Nursery Association
Terren Landscapes http://www.terrenlandscapes.com
2014 PLNA Awards for Landscape Excellence Winner
Category: Residential $60,000-$120,000
Award Level: Silver
Project Description:
We were contracted by the family to create a master plan for the property. They
were experiencing extreme drainage and erosion problems due to the surrounding properties’
drastic grade changes. Erosion had caused the rear lawn to sink in various areas and the existing
rear patio spaces were failing. The client wanted to rebuild their patios and walkways, repave
their driveway and give their home more visual appeal. Most importantly, they wanted an
environmentally friendly solution.
Our design solution was to create a rain garden that would slow storm water runoff, allow
for percolation, and promote infiltration, while permitting excess clean water to enter the storm
drain at the street with slower velocity. The rain garden acts as a temporary holding space that
allows the earth to slowly absorb water, rather than overwhelm the nearby storm drain. Our first
objective was to conduct a percolation test to determine the amount of clay soil that needed to be
removed before reaching the sandy loam layer. A percolation test and storm water calculations
were generated to accommodate a 1” rain event. Based on our calculations and the small size of
the property, we determined a depth of 18” was necessary for optimal holding capacity. We
removed 18” of clay soil until a layer of sandy loam was encountered. Next, the soil was amended
with compost and sand to create a highly porous planting media for the basin of the garden. We
piped the three existing rear downspouts to the rain garden area to capture for infiltration and
alleviate runoff throughout the rear lawn and patio space. We installed an 18” wide over-flow
standpipe at a 24” depth into the ground that outlets to a stone swale that carries the water to the
property edge. As an added means of holding the maximum amount of water, we designed the
standpipe to sit 14” above grade. The height of this standpipe allows this rain garden to capture
14” of water before reaching the overflow capacity. We placed geotextile fabric to help reduce
migration of the stones into the soil and aid in the prevention of weeds and erosion. We heavily
planted the rain garden to further aid in absorption and to attract local wildlife. A native plant
palette of butterfly weed, Panicum, Joe-Pye weed, and asters form a colorful backdrop while the
basin was filled with obligate wetland plants such as royal ferns, irises and cardinal flowers. The
upper edges in the foreground are planted with Echinacea, Rudbeckia and Monarda, satisfying
the local bird community and adding bright seasonal colors. This garden effectively collects and
cleanses rainwater while creating a habitat for birds, frogs, and butterflies.
Our next challenge was to redesign the existing patios and walkways without increasing
impervious surfaces. According to township regulations this property was currently at its
maximum capacity, therefore we designed the front and rear patios with a slightly smaller
footprint to decrease their existing impervious surfaces.
New planting beds were designed throughout the entire property. Plants were chosen that
were tolerant of specific site conditions. For the rear yard, we choose a backdrop of witch hazel
and hollies to provide an evergreen screen as well as early spring color. We placed hydrangea
throughout to add summer color. We planted ostrich fern under the existing spruce tree to create
a lush floor. This area became an additional backdrop for the rain garden as well as a screen for
the neighboring property. We choose a combination of ‘Blue Star’ juniper and creeping jenny to
soften the existing rear wall with creepers. Around the rear patio areas we choose a combination
of Liatris, Rudbeckia and ‘Lo and Behold’ butterfly bush. This combination of plants works in
harmony with the rain garden and attracts additional butterflies.
For the front of the property we worked with an existing Japanese maple that provided
dense shade. We choose a shade-tolerant combination of Heuchera, Astilbe, ferns and hostas for
this area. We added more hydrangeas to the front foundation of the house to provide lush
layering of plant material and visual interest with additional summer blooms.
Overall, we were able to exceed the client’s needs and expectations in transforming their
property into a colorful paradise that attracts wildlife from season to season. The plant palette
provides seasonal interest and the rain garden has successfully decreased storm water runoff.
The new hardscape surfaces were designed and built with a slightly smaller footprint to decrease
impervious surfaces. This project is a positive example of how all properties, regardless of size,
can make an ecological difference by decreasing impervious surfaces and maintaining proper
storm water management.
Photo Credit:
Terren Landscapes

 Windy City Painters
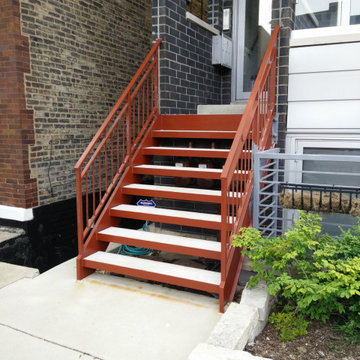
Does your iron fence look like Chicago winters have been winning the battle for years? That slow orange spread across pickets and rails is not just an eyesore - it is active corrosion undermining the structural integrity of metalwork that frames some of Chicago's most architecturally significant residential properties. Windy City Painters addresses iron fence rust at the source, using professional-grade rust conversion chemistry and direct-to-metal coatings engineered for the specific abuse Chicago's climate delivers.
PROJECT OVERVIEW
This project involved a heavily rusted ornamental iron fence on a Chicago North Side residential property. Rust had progressed beyond surface oxidation into moderate pitting on lower rails, a pattern Windy City Painters sees frequently on properties within blocks of treated roadways where salt drift accelerates corrosion. The scope included mechanical descaling, chemical rust conversion, DTM priming, and a durable gloss topcoat matched to the original fence color.
MATERIALS AND PRODUCTS
Ospho Rust Converter: A phosphoric acid-based treatment that chemically reacts with iron oxide, converting it to iron phosphate - a stable, paintable compound. Corroseal Water-Based Rust Converter is an alternative for situations requiring lower VOC handling. Rust-Oleum Professional DTM Primer and Sherwin-Williams DTM Acrylic Coating serve as the primary coating system, formulated for direct metal adhesion with built-in rust inhibitors. For structurally compromised sections, welding is coordinated before any chemical or coating work begins.
THE PROCESS
Step 1 - Mechanical Preparation: Wire wheel grinding on an angle grinder removes loose rust scale, mill scale, and flaking paint. For advanced pitting, Windy City Painters deploys a needle gun descaler, which impacts the metal surface thousands of times per minute to drive scale from deep cavities. This step determines whether the fence can be coated or needs welding first.
Step 2 - Chemical Rust Conversion: Ospho or Corroseal is brushed onto all remaining rust surface. These products do not simply seal rust - they react with it. The conversion process takes 24 hours to fully cure before topcoating. Skipping this step is the single most common reason iron fence paint jobs fail prematurely.
Step 3 - DTM Priming: Sherwin-Williams DTM or Rust-Oleum DTM primer is applied by brush to ensure full penetration around decorative elements, picket tips, and weld joints. Spray application is used on open sections for even film build. DTM formulations bond directly to prepared metal without a separate shop primer.
Step 4 - Finish Coating: A DTM topcoat in gloss or semi-gloss provides the final weather barrier. Gloss is preferred for iron fencing because the harder surface sheds water more effectively and resists dirt adhesion between maintenance cycles. Windy City Painters applies two finish coats for maximum film thickness.
CHICAGO-SPECIFIC CHALLENGES
Chicago's freeze-thaw cycle is the primary enemy of iron fence coatings. Water infiltrates micro-cracks in paint film, freezes, expands, and delaminate coating from beneath. Properties on the North Side and Near West Side also contend with lake-effect humidity that keeps metal surfaces damp for extended periods, slowing cure times and promoting under-film corrosion if preparation is inadequate. Greystones and Victorian brownstones typically feature ornate cast iron or wrought iron fencing with complex geometries that trap moisture and demand hand-brush application to fully coat recesses.
WHAT TO EXPECT LONG-TERM
A properly prepared and coated iron fence in Chicago should hold 5-8 years before requiring recoating. Annual inspection of weld joints, picket tips, and base rails closest to grade will identify early rust return. Addressing small spots with touch-up converter and primer extends service life significantly between full recoats.
PRO TIPS
Tip 1: Never pressure wash a rusted iron fence immediately before painting. Water drives moisture into pits and delays the surface drying needed for chemical converter adhesion. Allow 48 hours of dry weather before prep begins.
Tip 2: Picket tips and rail ends are the first failure points. These end-grain equivalent areas on metal concentrate corrosion. Ask your painter to apply an extra brush coat to every tip and terminus.
Tip 3: Black is the traditional and most durable color choice for iron fencing. Dark pigments absorb UV rather than reflecting it, reducing thermal cycling stress on the paint film at color change boundaries.
FAQ
Q: What does iron fence painting cost in Chicago?
A: Most residential iron fence painting in Chicago ranges from $400 to $1,200 depending on linear footage, rust severity, prep method required, and whether structural welding is needed before Windy City Painters can coat the surface.
Q: How do I know if my fence needs a welder before painting?
A: If you can press a screwdriver through a rail or picket, the metal wall has failed. Windy City Painters inspects all fencing before quoting and identifies weld-required sections so repairs happen before any coating investment.
Q: Is Ospho or Corroseal better for my fence?
A: Both convert rust effectively. Ospho is solvent-based and fast-acting, preferred for heavy rust. Corroseal is water-based with lower odor, preferred in enclosed or residential settings where off-gassing is a concern. Windy City Painters selects based on site conditions.
Q: Can iron fence painting be done in winter in Chicago?
A: Application requires temperatures above 50 degrees Fahrenheit for DTM coatings to cure properly. Most iron fence painting in Chicago runs April through October, with scheduling flexibility based on extended warm stretches.
Q: How do I maintain my fence between professional recoats?
A: Inspect annually in spring. Sand any rust spots to bare metal with 80-grit paper, apply Ospho, let cure 24 hours, then spot-prime with DTM primer and touch up with finish coat. Windy City Painters offers maintenance inspections.
Q: Do you paint courtyard building fences and coach house gates?
A: Yes. Multi-unit courtyard buildings and coach houses are common in the North Side neighborhoods Windy City Painters serves. We coordinate with property managers and HOAs for larger perimeter fence projects.
Q: How long after painting can I touch the fence?
A: DTM coatings are typically dry to touch in 2-4 hours and hard dry in 24 hours. Full cure for maximum hardness takes 7 days. Windy City Painters advises against pressure washing or heavy contact during that cure window.
Visit windypainters.com to request your free iron fence assessment and project quote.


8