
Search results for "Reduce molding" in Home Design Ideas

 Designed 2 Sell
Large transitional master light wood floor bedroom photo in Richmond with gray walls and no fireplace

 Nathan Taylor for Obelisk Home
The interior of the home went from Colonial to Classic Lodge without changing the footprint of the home. Columns were removed, fur downs removed that defined space, fireplace relocated, kitchen layout and direction changed, breakfast room and sitting room flip flopped, study reduced in size, entry to master bedroom changed, master suite completely re-arranged and enlarged, custom hand railing designed to open up stairwell, hardwood added to stairs, solid knotty alder 8’ doors added, knotty alder crown moldings added, reclaimed beamed ceiling grid, tongue and groove ceiling in kitchen, knotty alder cabinetry, leather finish to granite, seeded glass insets, custom door to panty to showcase an antique stained glass window from childhood church, custom doors and handles made for study entry, shredded straw added to wall texture, custom glazing done to all walls, wood floor remnants created an antique quilt pattern for the back wall of the powder bath, custom wall treatment created by designer, and a mixture of new and antique furnishing were added, all to create a warm, yet lived in feeling for this special family.
A new central stone wall reversed with an over scaled fireplace and reclaimed flooring from the East became the anchor for this level of the home. Removing all the “divisions” of space and using a unified surface made unused rooms, part of the daily living for this family. The desire to entertain large group in a unified space, yet still feel like you are in a cozy environment was the driving force for removing divisions of space.
Photos by Randy Colwell

 Architectural Craftsmen
Matt Kocourek Photography
Transitional u-shaped dark wood floor and brown floor kitchen photo in Kansas City with an undermount sink, recessed-panel cabinets, gray cabinets, stainless steel appliances, an island and white countertops
Transitional u-shaped dark wood floor and brown floor kitchen photo in Kansas City with an undermount sink, recessed-panel cabinets, gray cabinets, stainless steel appliances, an island and white countertops
Find the right local pro for your project

 The Fabric Loft
This dining room in New Hope was a challenge. There is a regular window and an arched window next to each other. The customer wanted to be able to close the drapes on the arched window, but most times have them open and not cover the beautiful molding. The next challenge was what to do with the regular window as a compliment. The Fabric Loft designed a roman shade for the regular window and mounted it 4 inches above so that the heights of both window treatments would be the same. The draperies were fabricated as a pinch pleat drape, but the fullness was reduced so that the window would be fully exposed when it was open. The customer was very happy.


 Buytilesandmore
Katavia Charcoal Oak 2MM 6 in. x 48 in. Luxury Vinyl Tile features a backdrop of Grays and greiges, accented by subtle graining and knots for an authentic wood look in a low maintenance vinyl plank. This innovative glue-down vinyl flooring has a 6 MIL wear layer, is backed by warranty, and it’s suitable for all grade-levels. You can feel confident using it throughout your home—even in the basement. Supremely durable and gorgeous, Katavia Charcoal Oak vinyl tile flooring is perfect for busy families who don’t want to sacrifice style for practicality. Coordinating vinyl flooring trim pieces including end caps, stair noses, reducers, and T-molding are available to give your residential or light-commercial indoor LVT project a professional, seamless finish.

 Code Construction
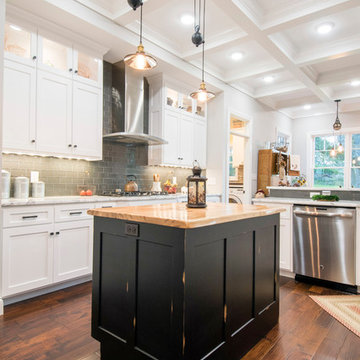
Enclosed kitchen - large transitional u-shaped limestone floor and beige floor enclosed kitchen idea in Tampa with a farmhouse sink, beaded inset cabinets, white cabinets, granite countertops, white backsplash, an island, subway tile backsplash and paneled appliances


 Paula McDonald Design Build & Interiors
Removing or reducing barriers helps add light and create a better flow between spaces. To achieve an open kitchen, dining-living room and entertaining space, this small Upper East Side apartment required a gut renovation. By removing the walls, changing the sink location, creating custom cabinets to maximize storage, adding seating as an Island Table and upgrading lighting and finishes, we created a glamorous and highly functional contemporary apartment.
 Paula McDonald Design Build & Interiors
We packed all of the luxuries of a larger home into this compact urban apartment renovation. From the spaceous kitchen/living room to the sophisticated bathroom, this small home has it all. We removed walls to open up the kitchen into the large living and dining room, perfect for entertaining. The kitchen includes full size stainless steel appliances, porcelain floor tile, quartz countertops, a glass tile mosaic backsplash, and custom Shaker style island and cabinets in a white satin finish. Midway through the project we decided to install a new through the wall integrated heating and air-conditioning (PTAC) system incorporating the building steam system, which required building and architectural approval. By removing the window air conditioners, we completely improved the light and aesthetic. Tapping into the building's steam heat system also saves money. For another budget saver, we dressed up its factory metal cover by wrapping the baseboard around it.

 Designing Interiors Inc
Marina Storm
Home gym - mid-sized contemporary gray floor home gym idea in Chicago with gray walls
Home gym - mid-sized contemporary gray floor home gym idea in Chicago with gray walls
 Buytilesandmore
Glenridge Coastal Mix 6 in. x 48 in. Luxury Vinyl Tile features a dusky Gray palette with darker knots and graining for an authentic coastal wood look in a low maintenance vinyl plank. This innovative glue-down vinyl flooring is backed by warranty and suitable for all grade-levels, so feel confident using it throughout your home—even in the basement. Supremely durable and gorgeous, Glenridge Coastal Mix vinyl tile flooring is perfect for busy families who don’t want to sacrifice style for practicality. Coordinating vinyl flooring trim pieces including end caps, stair noses, reducers, and T-molding are available to give your residential or light-commercial indoor LVT project a professional, seamless finish.
 McCabe By Design LLC
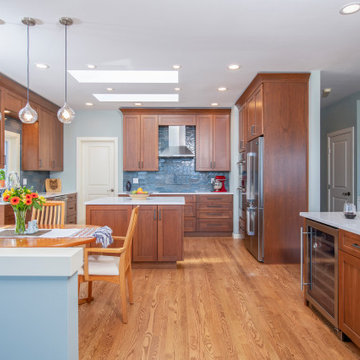
The original island size was reduced to create wider walkways. The smaller more streamlined island enables the owners to have ample room to cook together, and without the bulk of the larger island, the entire Kitchen is more spacious, visually and functionally.

 Carlton Edwards
The Cherry Road project is a humble yet striking example of how small changes can have a big impact. A meaningful project as the final room to be renovated in this house, thus our completion aligned with the family’s move-in. The kitchen posed a number of problems the design worked to remedy. Such as an existing window oriented the room towards a neighboring driveway. The initial design move sought to reorganize the space internally, focusing the view from the sink back through the house to the pool and courtyard beyond. This simple repositioning allowed the range to center on the opposite wall, flanked by two windows that reduce direct views to the driveway while increasing the natural light of the space.
Opposite that opening to the dining room, we created a new custom hutch that has the upper doors bypass doors incorporate an antique mirror, then led they magnified the light and view opposite side of the room. The ceilings we were confined to eight foot four, so we wanted to create as much verticality as possible. All the cabinetry was designed to go to the ceiling, incorporating a simple coat mold at the ceiling. The west wall of the kitchen is primarily floor-to-ceiling storage behind paneled doors. So the refrigeration and freezers are fully integrated.
The island has a custom steel base with hammered legs, with a natural wax finish on it. The top is soapstone and incorporates an integral drain board in the kitchen sink. We did custom bar stools with steel bases and upholstered seats. At the range, we incorporated stainless steel countertops to integrate with the range itself, to make that more seamless flow. The edge detail is historic from the 1930s.
There is a concealed sort of office for the homeowner behind custom, bi-folding panel doors. So it can be closed and totally concealed, or opened up and engaged with the kitchen.
In the office area, which was a former pantry, we repurposed a granite marble top that was on the former island. Then the walls have a grass cloth wall covering, which is pinnable, so the homeowner can display photographs, calendars, and schedules.

 MD Flooring Solutions, LLC
- To move furniture
- To move 2 appliances
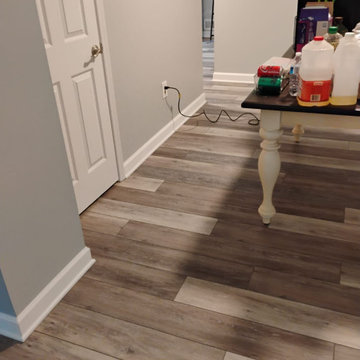
First level: hallway, closets, laundry, kitchen, playroom, family room:
- Take Up, Remove & Haul Away Baseboards, Laminate, 12x12 Peel & Stick/Glued Down Tile, Carpet & VCT from floors.
- To Level Floors using self-leveling concrete.
- To install underlayment
- To Install click and lock floating, glueless, LVP on floors
- To install LVP underneath 2 appliances
- To install Baseboards
- To Install Shoe Molding
- To Install 3x reducers
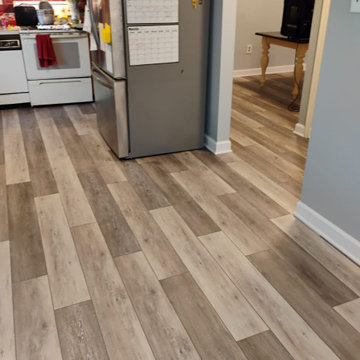 MD Flooring Solutions, LLC
- To move furniture
- To move 2 appliances
First level: hallway, closets, laundry, kitchen, playroom, family room:
- Take Up, Remove & Haul Away Baseboards, Laminate, 12x12 Peel & Stick/Glued Down Tile, Carpet & VCT from floors.
- To Level Floors using self-leveling concrete.
- To install underlayment
- To Install click and lock floating, glueless, LVP on floors
- To install LVP underneath 2 appliances
- To install Baseboards
- To Install Shoe Molding
- To Install 3x reducers
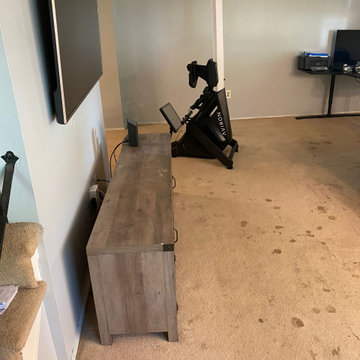 MD Flooring Solutions, LLC
- To move furniture
- To move 2 appliances
First level: hallway, closets, laundry, kitchen, playroom, family room:
- Take Up, Remove & Haul Away Baseboards, Laminate, 12x12 Peel & Stick/Glued Down Tile, Carpet & VCT from floors.
- To Level Floors using self-leveling concrete.
- To install underlayment
- To Install click and lock floating, glueless, LVP on floors
- To install LVP underneath 2 appliances
- To install Baseboards
- To Install Shoe Molding
- To Install 3x reducers
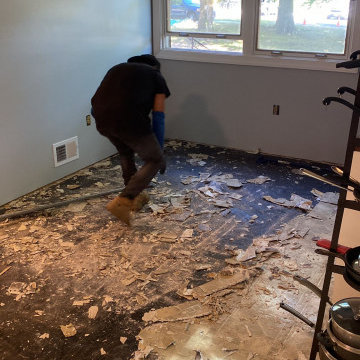 MD Flooring Solutions, LLC
- To move furniture
- To move 2 appliances
First level: hallway, closets, laundry, kitchen, playroom, family room:
- Take Up, Remove & Haul Away Baseboards, Laminate, 12x12 Peel & Stick/Glued Down Tile, Carpet & VCT from floors.
- To Level Floors using self-leveling concrete.
- To install underlayment
- To Install click and lock floating, glueless, LVP on floors
- To install LVP underneath 2 appliances
- To install Baseboards
- To Install Shoe Molding
- To Install 3x reducers
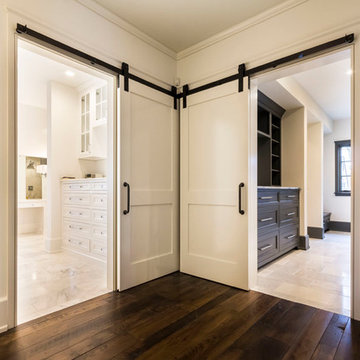

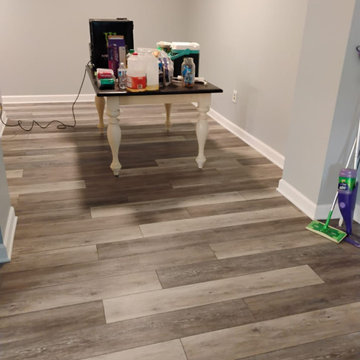 MD Flooring Solutions, LLC
- To move furniture
- To move 2 appliances
First level: hallway, closets, laundry, kitchen, playroom, family room:
- Take Up, Remove & Haul Away Baseboards, Laminate, 12x12 Peel & Stick/Glued Down Tile, Carpet & VCT from floors.
- To Level Floors using self-leveling concrete.
- To install underlayment
- To Install click and lock floating, glueless, LVP on floors
- To install LVP underneath 2 appliances
- To install Baseboards
- To Install Shoe Molding
- To Install 3x reducers
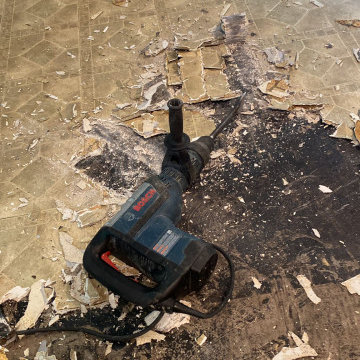 MD Flooring Solutions, LLC
- To move furniture
- To move 2 appliances
First level: hallway, closets, laundry, kitchen, playroom, family room:
- Take Up, Remove & Haul Away Baseboards, Laminate, 12x12 Peel & Stick/Glued Down Tile, Carpet & VCT from floors.
- To Level Floors using self-leveling concrete.
- To install underlayment
- To Install click and lock floating, glueless, LVP on floors
- To install LVP underneath 2 appliances
- To install Baseboards
- To Install Shoe Molding
- To Install 3x reducers
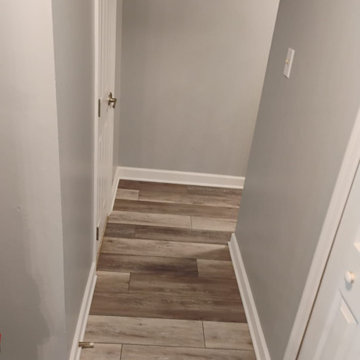 MD Flooring Solutions, LLC
- To move furniture
- To move 2 appliances
First level: hallway, closets, laundry, kitchen, playroom, family room:
- Take Up, Remove & Haul Away Baseboards, Laminate, 12x12 Peel & Stick/Glued Down Tile, Carpet & VCT from floors.
- To Level Floors using self-leveling concrete.
- To install underlayment
- To Install click and lock floating, glueless, LVP on floors
- To install LVP underneath 2 appliances
- To install Baseboards
- To Install Shoe Molding
- To Install 3x reducers
24