
Search results for "Reduce projects" in Home Design Ideas

 Mottram Architecture
Timber frame homes offer unique challenges during a remodel. What often makes them beautiful and attractive to most homeowners, also makes them challenging for space requirements.
Context: The lovely couple that owned this home were struggling with some interesting floor plan challenges that just didn't work for their family. The loved the beautiful timbers and woodwork of their home, but the dramatically sloping ceilings on the second floor, particularly in the bathroom, just didn't work for this 1 1/2 bath home. Needing to use the skylight to approach the toilet was a less then ideal scenario. Although the bathroom footprint was more then adequate, the sloped ceiling only made half of the space useable. Check out the Before/After post on our blog to see the photos of the house pre-renovation. As much as they loved all the wood features in their home, another challenge they had was light. The wood ceiling made everything inside the house darker, even with a fantastic array of south facing windows, there were spaces in the home that felt dark and small. When they contacted us they wanted to know how could they make their brighter and more inviting, were there solutions to the 2nd floor sloped ceiling issues, and if they were going to do all of this work, how could they make their home more comfortable and efficient. A nagging water leak in the upstairs bathroom spurred them into action and here is how we solved their dilemma.
Conclusion: First, we added a little dormer to the rear of the house so we could get full headroom in nearly all of the upstairs bathroom! Then we decided to extend that dormer one more timber bay over to create a walk in closet with natural light and plenty of space. Since we were contemplating energy efficiency, we resolved a nagging issue that is present in a lot of timber frame construction, air tightness. Commonly found in timber frame construction, fiberglass insulation is installed in the rafter bays and board ceilings are installed over top. Unfortunately, board ceilings are anything but air tight, and fiberglass insulation needs to be in an airtight cavity for maximum effectiveness. So we were able to solve two issues at the same time for this homeowner. We removed the board ceiling and fiberglass insulation, we dense packed the rafter bays with cellulose insulation, and installed sheetrock in place of the boards. The boards were salvaged for re-use by the homeowner, and the space and light quality was dramatically improved. Some may think that losing the board ceiling took something away from the space, but what you'll see in the pictures is that it highly accentuates the heavy timbers and really makes them stand out in a beautiful way. Now with this added airtightness, better insulation, and brighter space, the homeowner hardly runs their wood stove, and it's so quiet in the space, an added bonus from changing the insulation. It became necessary to also add a sheetrock ceiling to the living room to hide the plumbing from the new bathroom layout above. Changing this ceiling gave the homeowner some real quality lighting that was lacking in the living room before. The brighter ceiling and new lighting layout completely transforms the living room into a space you want to hang out, even though the layout didn't change at all. When the homeowner saw the finished spaces she said "I can't believe this is my house, I want to live in this house"
Energy Efficiency: I touched a little on the efficiency above, but like all projects done with Mottram Architecture, we always want to leave you with a little extra. Timber frame construction with board ceilings and fiberglass insulation are notoriously leaky! If you want to know what we think about fiberglass insulation, check our our blog post on Why Fiberglass Insulation Sucks. By installing cellulose insulation and covering it with sheetrock we were able to greatly reduce the heat flowing out of this home. It not only improves cashflow it improves the comfort level in the space. Who wants to sit in their living room and feel a draft? Let us remind you, we are not saying cellulose insulation is an air barrier, we use the sheetrock to help with that, but it does significantly reduce the air flow over fiberglass insulation. And when we reduce the airflow, we reduce the heat flow. And when we reduce the heat flow, we reduce the need to re-heat that drafty air from outside. When it comes to energy efficiency the first and best place to start is air infiltration. We greatly reduced the air infiltration with the new insulation, but we also added a hat and warm boots. What I mean by that is, we improved the insulation in the roof, and we installed insulation in the basement. Maybe it's a silly analogy, but when you think about keeping warm, we always start with the hat and boots! With sustainability in mind, the next project will be to add a deck to the front of this house with rain catchment barrels from the metal roof. They are planning to plant a garden in the spring and the rain catchment system will help to irrigate the new garden.
Builder: East Shore Builders
Photographer: Michael Eric Berube

 Astria Fireplaces
With its flush hearth floor design, dramatic flame and ember bed presentation along with industry leading heating performance, the Montebello DLX ST provides multiple possibilities for making your living area warm and inviting.
• Dramatic louverless construction gives the fireplace a clean, traditional masonry look and provides the ability to finish right up to the opening.
• Tall ceramic-glass opening provides an exceptional view of the logs and flame.
• The high-definition charred split-oak log set is cast from real wood for an authentic look.
• Platinum embers enhance the glow of the fire.
• Light- and dark-tinted outdoor kits trimmed in stainless steel are available for indoor/outdoor application. The dark-tinted version provides enhanced ambiance from inside the room by creating an infinity effect while reducing glare from the outside environment.
• Outdoor window kit tested and listed to ASTM commercial window standard for air infiltration, water resistance, structural integrity and thermal resistance (U-Value/CRF).

 ZeroEnergy Design
Lincoln Farmhouse
LEED-H Platinum, Net-Positive Energy
OVERVIEW. This LEED Platinum certified modern farmhouse ties into the cultural landscape of Lincoln, Massachusetts - a town known for its rich history, farming traditions, conservation efforts, and visionary architecture. The goal was to design and build a new single family home on 1.8 acres that respects the neighborhood’s agrarian roots, produces more energy than it consumes, and provides the family with flexible spaces to live-play-work-entertain. The resulting 2,800 SF home is proof that families do not need to compromise on style, space or comfort in a highly energy-efficient and healthy home.
CONNECTION TO NATURE. The attached garage is ubiquitous in new construction in New England’s cold climate. This home’s barn-inspired garage is intentionally detached from the main dwelling. A covered walkway connects the two structures, creating an intentional connection with the outdoors between auto and home.
FUNCTIONAL FLEXIBILITY. With a modest footprint, each space must serve a specific use, but also be flexible for atypical scenarios. The Mudroom serves everyday use for the couple and their children, but is also easy to tidy up to receive guests, eliminating the need for two entries found in most homes. A workspace is conveniently located off the mudroom; it looks out on to the back yard to supervise the children and can be closed off with a sliding door when not in use. The Away Room opens up to the Living Room for everyday use; it can be closed off with its oversized pocket door for secondary use as a guest bedroom with en suite bath.
NET POSITIVE ENERGY. The all-electric home consumes 70% less energy than a code-built house, and with measured energy data produces 48% more energy annually than it consumes, making it a 'net positive' home. Thick walls and roofs lack thermal bridging, windows are high performance, triple-glazed, and a continuous air barrier yields minimal leakage (0.27ACH50) making the home among the tightest in the US. Systems include an air source heat pump, an energy recovery ventilator, and a 13.1kW photovoltaic system to offset consumption and support future electric cars.
ACTUAL PERFORMANCE. -6.3 kBtu/sf/yr Energy Use Intensity (Actual monitored project data reported for the firm’s 2016 AIA 2030 Commitment. Average single family home is 52.0 kBtu/sf/yr.)
o 10,900 kwh total consumption (8.5 kbtu/ft2 EUI)
o 16,200 kwh total production
o 5,300 kwh net surplus, equivalent to 15,000-25,000 electric car miles per year. 48% net positive.
WATER EFFICIENCY. Plumbing fixtures and water closets consume a mere 60% of the federal standard, while high efficiency appliances such as the dishwasher and clothes washer also reduce consumption rates.
FOOD PRODUCTION. After clearing all invasive species, apple, pear, peach and cherry trees were planted. Future plans include blueberry, raspberry and strawberry bushes, along with raised beds for vegetable gardening. The house also offers a below ground root cellar, built outside the home's thermal envelope, to gain the passive benefit of long term energy-free food storage.
RESILIENCY. The home's ability to weather unforeseen challenges is predictable - it will fare well. The super-insulated envelope means during a winter storm with power outage, heat loss will be slow - taking days to drop to 60 degrees even with no heat source. During normal conditions, reduced energy consumption plus energy production means shelter from the burden of utility costs. Surplus production can power electric cars & appliances. The home exceeds snow & wind structural requirements, plus far surpasses standard construction for long term durability planning.
ARCHITECT: ZeroEnergy Design http://zeroenergy.com/lincoln-farmhouse
CONTRACTOR: Thoughtforms http://thoughtforms-corp.com/
PHOTOGRAPHER: Chuck Choi http://www.chuckchoi.com/
Find the right local pro for your project

 Design Builders & Remodeling Inc.
Design Builders & Remodeling is a one stop shop operation. From the start, design solutions are strongly rooted in practical applications and experience. Project planning takes into account the realities of the construction process and mindful of your established budget. All the work is centralized in one firm reducing the chances of costly or time consuming surprises. A solid partnership with solid professionals to help you realize your dreams for a new or improved home.
 Mottram Architecture
Timber frame homes offer unique challenges during a remodel. What often makes them beautiful and attractive to most homeowners, also makes them challenging for space requirements.
Context: The lovely couple that owned this home were struggling with some interesting floor plan challenges that just didn't work for their family. The loved the beautiful timbers and woodwork of their home, but the dramatically sloping ceilings on the second floor, particularly in the bathroom, just didn't work for this 1 1/2 bath home. Needing to use the skylight to approach the toilet was a less then ideal scenario. Although the bathroom footprint was more then adequate, the sloped ceiling only made half of the space useable. Check out the Before/After post on our blog to see the photos of the house pre-renovation. As much as they loved all the wood features in their home, another challenge they had was light. The wood ceiling made everything inside the house darker, even with a fantastic array of south facing windows, there were spaces in the home that felt dark and small. When they contacted us they wanted to know how could they make their brighter and more inviting, were there solutions to the 2nd floor sloped ceiling issues, and if they were going to do all of this work, how could they make their home more comfortable and efficient. A nagging water leak in the upstairs bathroom spurred them into action and here is how we solved their dilemma.
Conclusion: First, we added a little dormer to the rear of the house so we could get full headroom in nearly all of the upstairs bathroom! Then we decided to extend that dormer one more timber bay over to create a walk in closet with natural light and plenty of space. Since we were contemplating energy efficiency, we resolved a nagging issue that is present in a lot of timber frame construction, air tightness. Commonly found in timber frame construction, fiberglass insulation is installed in the rafter bays and board ceilings are installed over top. Unfortunately, board ceilings are anything but air tight, and fiberglass insulation needs to be in an airtight cavity for maximum effectiveness. So we were able to solve two issues at the same time for this homeowner. We removed the board ceiling and fiberglass insulation, we dense packed the rafter bays with cellulose insulation, and installed sheetrock in place of the boards. The boards were salvaged for re-use by the homeowner, and the space and light quality was dramatically improved. Some may think that losing the board ceiling took something away from the space, but what you'll see in the pictures is that it highly accentuates the heavy timbers and really makes them stand out in a beautiful way. Now with this added airtightness, better insulation, and brighter space, the homeowner hardly runs their wood stove, and it's so quiet in the space, an added bonus from changing the insulation. It became necessary to also add a sheetrock ceiling to the living room to hide the plumbing from the new bathroom layout above. Changing this ceiling gave the homeowner some real quality lighting that was lacking in the living room before. The brighter ceiling and new lighting layout completely transforms the living room into a space you want to hang out, even though the layout didn't change at all. When the homeowner saw the finished spaces she said "I can't believe this is my house, I want to live in this house"
Energy Efficiency: I touched a little on the efficiency above, but like all projects done with Mottram Architecture, we always want to leave you with a little extra. Timber frame construction with board ceilings and fiberglass insulation are notoriously leaky! If you want to know what we think about fiberglass insulation, check our our blog post on Why Fiberglass Insulation Sucks. By installing cellulose insulation and covering it with sheetrock we were able to greatly reduce the heat flowing out of this home. It not only improves cashflow it improves the comfort level in the space. Who wants to sit in their living room and feel a draft? Let us remind you, we are not saying cellulose insulation is an air barrier, we use the sheetrock to help with that, but it does significantly reduce the air flow over fiberglass insulation. And when we reduce the airflow, we reduce the heat flow. And when we reduce the heat flow, we reduce the need to re-heat that drafty air from outside. When it comes to energy efficiency the first and best place to start is air infiltration. We greatly reduced the air infiltration with the new insulation, but we also added a hat and warm boots. What I mean by that is, we improved the insulation in the roof, and we installed insulation in the basement. Maybe it's a silly analogy, but when you think about keeping warm, we always start with the hat and boots! With sustainability in mind, the next project will be to add a deck to the front of this house with rain catchment barrels from the metal roof. They are planning to plant a garden in the spring and the rain catchment system will help to irrigate the new garden.
Builder: East Shore Builders
Photographer: Michael Eric Berube



Sponsored
Columbus, OH

Snider & Metcalf Interior Design, LTD
Leading Interior Designers in Columbus, Ohio & Ponte Vedra, Florida
 Everything Home
We closed off the open formal dining room, so it became a den with artistic barn doors, which created a more private entrance/foyer. We removed the wall between the kitchen and living room, including the fireplace, to create a great room. We also closed off an open staircase to build a wall with a dual focal point — it accommodates the TV and fireplace. We added a double-wide slider to the sunroom turning it into a happy play space that connects indoor and outdoor living areas.
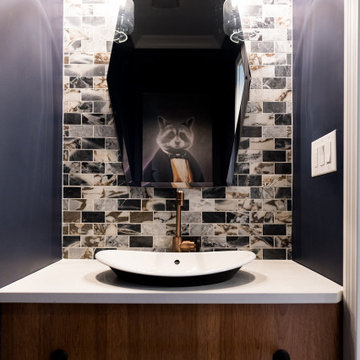
We reduced the size of the entrance to the powder room to create mudroom lockers. The kitchen was given a double island to fit the family’s cooking and entertaining needs, and we used a balance of warm (e.g., beautiful blue cabinetry in the kitchen) and cool colors to add a happy vibe to the space. Our design studio chose all the furnishing and finishes for each room to enhance the space's final look.
Builder Partner – Parsetich Custom Homes
Photographer - Sarah Shields
---
Project completed by Wendy Langston's Everything Home interior design firm, which serves Carmel, Zionsville, Fishers, Westfield, Noblesville, and Indianapolis.
For more about Everything Home, click here: https://everythinghomedesigns.com/
To learn more about this project, click here:
https://everythinghomedesigns.com/portfolio/hard-working-haven/
 Green Home Systems
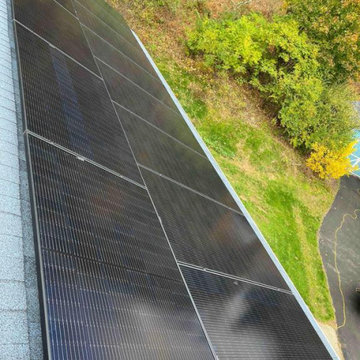
 recently completed a successful solar project in Bloomsburg, PA for Eric M. The project was completed in a few months and consisted of 5.04 kW of solar panels installed on the flat roof of Eric’s home.
Eric chose Green Home Systems for their competitive pricing and wide selection of solar panels. He was also impressed with their warranty and customer service. After researching online, Eric decided to go solar to reduce his utility bill, increase the value of his home, and take advantage of the easy payment terms offered by Green Home Systems.
The installation process began with an inspection of the roof to ensure it was suitable for mounting the solar panels. The inspections revealed that some minor repairs were needed before installation could begin. Green Home Systems team quickly repaired any damage to the roof and got to work installing the panels.
Once the installation was complete, Eric quickly noticed a reduction in his monthly utility bills as well as an increase in the value of his home due to having clean energy sources available. He also was very pleased with how quickly and efficiently Green Home Systems completed the project.
The team at Green Home Systems is dedicated to providing customers with top-notch service and quality products at competitive prices. We strive to make your transition from traditional energy sources to renewable energy sources as smooth as possible by providing support throughout every step of the process. If you're looking for a reliable and cost-effective way to generate clean energy for your home or business, contact us today!
 Traditions Landscape Group
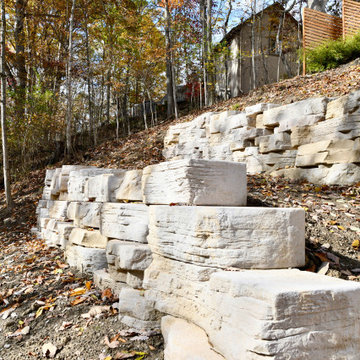
This landscape project features a series of tiered retaining walls constructed with High Format Rosetta Outcroppings, designed to stabilize a sloped backyard while improving the overall appearance of the landscape. Installed for a homeowner in Westerville, Ohio, the retaining wall system addresses significant hillside erosion while creating a structured and visually appealing outdoor environment.
The project includes three distinct tiers of Rosetta Outcropping retaining walls, strategically installed along the back hillside to help control soil movement and reduce erosion. The large-scale stone appearance of the Rosetta Outcroppings provides the look of natural quarried stone while offering the structural strength required for retaining wall applications in sloped terrain.
Each tier of the retaining wall system helps slow water runoff and stabilize the hillside by creating stepped levels across the slope. This tiered approach not only improves erosion control but also adds dimension and depth to the backyard landscape.
The textured surfaces and natural stone character of the High Format Rosetta Outcroppings blend naturally with the surrounding greenery, allowing the retaining walls to complement the existing landscape while providing essential structural support.
Retaining wall systems like this are commonly used throughout Westerville, Ohio and Central Ohio to address drainage challenges and hillside erosion. By incorporating professionally installed retaining walls, homeowners can transform unstable slopes into functional, attractive landscape features while protecting their property from ongoing soil loss.
Projects like this demonstrate how thoughtfully designed retaining walls in Westerville, Ohio can provide both practical erosion control and long-term landscape enhancement for homes throughout Central Ohio.
 Reico Kitchen & Bath
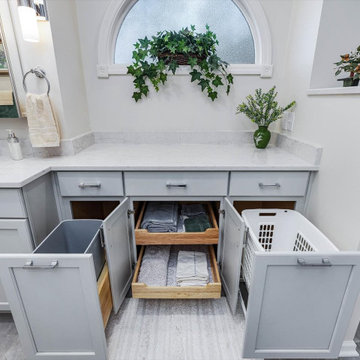
Nancy Knickerbocker of Reico Kitchen and Bath in Southern Pines, NC designed a primary bathroom featuring Merillat Masterpiece cabinetry’s Gannon door style in Evercore with a Moonshine finish.
Selections for bathroom include Silestone Quartz in a Pearl Jasmine finish vanity countertops along with fixtures and accessories from Kohler and Moen.
The shower features 12x24 and 2x2 Bakersfield Pumice floor tile, shower floor tile and 10x12 Bianco shower wall tile.
The client emphasized Nancy's pivotal role in the remodel's success. "She was respectful of our budget, our needs (more handicap-friendly and storage space, fewer doors) and was knowledgeable about what was and wasn’t doable in our situation. Her excellent design suggestions took into consideration our choices for cabinets, fixtures, countertops, flooring and etc. She was interested and always available to help throughout the entire project," said the client.
Nancy highlighted the bathroom's outdated features from the era of the garden tub. "The homeowner wanted to add storage, enlarge the shower and overall update the bathroom. By removing the tub, we added a cabinet with two roll-out shelves, a trash cabinet, and laundry hamper cabinet. Kohler mirrored medicine cabinets added personal storage above the sinks. To allow easier access to the bathroom, the entry door was widened. As a result, the vanity needed to be reduced to 18” deep."
"The Kohler Veticyl 13” square sink was the perfect choice for the limited space! The shower insert was replaced with a tile shower, a glass panel and large door. We also removed the water closet door and reduced the height of the wall. There is still privacy and allows for easier access to the area. My favorite part of the project is the area where the tub was once located. The cabinetry and the arched window are lovely!” said Nancy.
Photo courtesy of ShowSpaces Photography.


 Keuka Studios, Inc
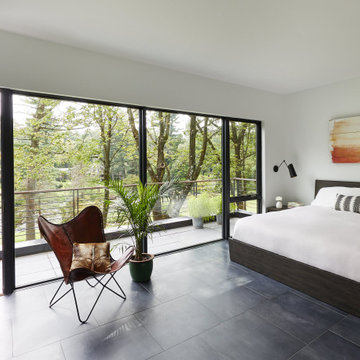
Modern bedroom with floor-to-ceiling windows leading out to the deck. the deck railing is a modern horizontal round bar railing.
Floating Stairs and Railings by Keuka Studios

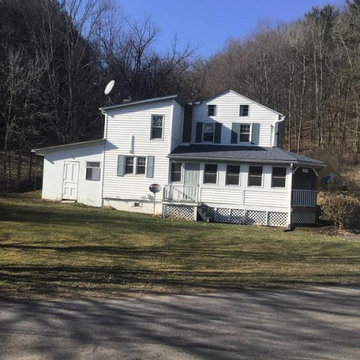 Green Home Systems
 recently completed a successful solar project in Bloomsburg, PA for Eric M. The project was completed in a few months and consisted of 5.04 kW of solar panels installed on the flat roof of Eric’s home.
Eric chose Green Home Systems for their competitive pricing and wide selection of solar panels. He was also impressed with their warranty and customer service. After researching online, Eric decided to go solar to reduce his utility bill, increase the value of his home, and take advantage of the easy payment terms offered by Green Home Systems.
The installation process began with an inspection of the roof to ensure it was suitable for mounting the solar panels. The inspections revealed that some minor repairs were needed before installation could begin. Green Home Systems team quickly repaired any damage to the roof and got to work installing the panels.
Once the installation was complete, Eric quickly noticed a reduction in his monthly utility bills as well as an increase in the value of his home due to having clean energy sources available. He also was very pleased with how quickly and efficiently Green Home Systems completed the project.
The team at Green Home Systems is dedicated to providing customers with top-notch service and quality products at competitive prices. We strive to make your transition from traditional energy sources to renewable energy sources as smooth as possible by providing support throughout every step of the process. If you're looking for a reliable and cost-effective way to generate clean energy for your home or business, contact us today!

 Altura Architects
This room is a grand two-story room with a generous window that frames distant mountain views to the back of the house. With such a grand room, it needed bold features, which is why we designed a statement fireplace with stone surround and horizontal reclaimed barn wood extending up the wall.
Photography by Todd Crawford.
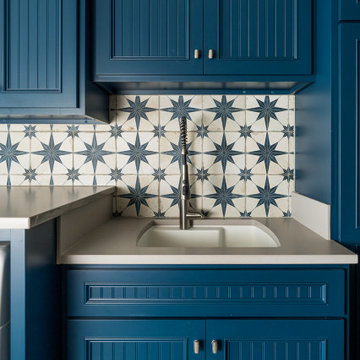 Everything Home
We closed off the open formal dining room, so it became a den with artistic barn doors, which created a more private entrance/foyer. We removed the wall between the kitchen and living room, including the fireplace, to create a great room. We also closed off an open staircase to build a wall with a dual focal point — it accommodates the TV and fireplace. We added a double-wide slider to the sunroom turning it into a happy play space that connects indoor and outdoor living areas.
We reduced the size of the entrance to the powder room to create mudroom lockers. The kitchen was given a double island to fit the family’s cooking and entertaining needs, and we used a balance of warm (e.g., beautiful blue cabinetry in the kitchen) and cool colors to add a happy vibe to the space. Our design studio chose all the furnishing and finishes for each room to enhance the space's final look.
Builder Partner – Parsetich Custom Homes
Photographer - Sarah Shields
---
Project completed by Wendy Langston's Everything Home interior design firm, which serves Carmel, Zionsville, Fishers, Westfield, Noblesville, and Indianapolis.
For more about Everything Home, click here: https://everythinghomedesigns.com/
To learn more about this project, click here:
https://everythinghomedesigns.com/portfolio/hard-working-haven/
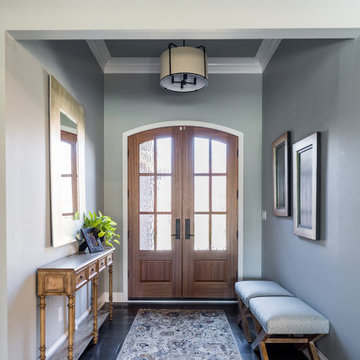 Everything Home
We closed off the open formal dining room, so it became a den with artistic barn doors, which created a more private entrance/foyer. We removed the wall between the kitchen and living room, including the fireplace, to create a great room. We also closed off an open staircase to build a wall with a dual focal point — it accommodates the TV and fireplace. We added a double-wide slider to the sunroom turning it into a happy play space that connects indoor and outdoor living areas.
We reduced the size of the entrance to the powder room to create mudroom lockers. The kitchen was given a double island to fit the family’s cooking and entertaining needs, and we used a balance of warm (e.g., beautiful blue cabinetry in the kitchen) and cool colors to add a happy vibe to the space. Our design studio chose all the furnishing and finishes for each room to enhance the space's final look.
Builder Partner – Parsetich Custom Homes
Photographer - Sarah Shields
---
Project completed by Wendy Langston's Everything Home interior design firm, which serves Carmel, Zionsville, Fishers, Westfield, Noblesville, and Indianapolis.
For more about Everything Home, click here: https://everythinghomedesigns.com/
To learn more about this project, click here:
https://everythinghomedesigns.com/portfolio/hard-working-haven/
Sponsored
Delaware, OH

Buckeye Basements, Inc.
Central Ohio's Basement Finishing ExpertsBest Of Houzz '13-'21

 Nick Skenteridis-master craftsman-project manager
Cristallo quartzite vanity top with mitered edge profile and integrated mitered sink.
Technical specialties/characteristics :
-Built on internal reinforced/waterproof structure.
-Specific dimensions with absolute accuracy.
-All cutting on the sink opening and miters by hand watercut for maximum
accuracy and reducing of material loss in order to use the cut out for matching the flow on the two of the inner sides exactly .
-Adjustment water cutting by hand absolutely necessary on side miters for perfection.
-Use of appropriate glues and matching to have small tight miters everywhere.

 Smith & Sons Renovations & Extensions New Zealand
This executive home in the Christchurch Port Hills underwent some major works including the installation of a new kitchen, a new laundry and new media room. Soundproofing was also on the client's wishlist so solutions were found in the installation of new windows and a ventilation system. The exterior cladding and upper level deck and balustratde were also replaced.
Internally a new kitchen and laundry room was designed in conjunction with kitchen designer Nicky Claridge. Contrasting black and white handle-free cabinetry was chosen for the kitchen and an engineered oak floor. A white central bench maintains the black and white theme and provides a central entertaining space and the large wallpaper panel behind the clear splashback completes this kitchen's unique look. The laundry was designed to produce an efficient and functional space with maximum storage.
The new media room included an overhead projection on to a specially imported screen from the US which linked to the client's computer network to allow for gaming as well as movies. The hallway was also painted and specialty wallpaper was chosen for redecoration of a further 2 rooms in the house.
Externally the home was re-clad on the second storey, the existing polystyrene cladding system was removed and replaced with a barrier to provide bracing and sound and air seals. On top of this the large panel James Hardie Oblique board was chosen to give the traditional ship-lap style in keeping with the original building. The decking outside on the upper level balcony was also replaced with a hard wearing and low maintenance synthetic deck material by Outdure. The new balustrade was a bespoke steel to match the traditional look of the building and was manufactured by Christchurch Wrought Iron.
All of the windows were replaced on the upper level of the house. Working with the client and the glass supplier Fairview Windows, the aim was to produce a glass configuration that reduced traffic noise as much as possible. The new windows were installed with sound seals to further reduce sound as much as possible.
A mechanical ventilation system was also installed to allow the internal environment to be well ventilated without opening the windows and doors, creating a quieter and healthier home.
Working with Smith & Sons Christchurch Port Hills to project manage the various renovation works, the client achieved many changes and improvements to their home.
 Mottram Architecture
Timber frame homes offer unique challenges during a remodel. What often makes them beautiful and attractive to most homeowners, also makes them challenging for space requirements.
Context: The lovely couple that owned this home were struggling with some interesting floor plan challenges that just didn't work for their family. The loved the beautiful timbers and woodwork of their home, but the dramatically sloping ceilings on the second floor, particularly in the bathroom, just didn't work for this 1 1/2 bath home. Needing to use the skylight to approach the toilet was a less then ideal scenario. Although the bathroom footprint was more then adequate, the sloped ceiling only made half of the space useable. Check out the Before/After post on our blog to see the photos of the house pre-renovation. As much as they loved all the wood features in their home, another challenge they had was light. The wood ceiling made everything inside the house darker, even with a fantastic array of south facing windows, there were spaces in the home that felt dark and small. When they contacted us they wanted to know how could they make their brighter and more inviting, were there solutions to the 2nd floor sloped ceiling issues, and if they were going to do all of this work, how could they make their home more comfortable and efficient. A nagging water leak in the upstairs bathroom spurred them into action and here is how we solved their dilemma.
Conclusion: First, we added a little dormer to the rear of the house so we could get full headroom in nearly all of the upstairs bathroom! Then we decided to extend that dormer one more timber bay over to create a walk in closet with natural light and plenty of space. Since we were contemplating energy efficiency, we resolved a nagging issue that is present in a lot of timber frame construction, air tightness. Commonly found in timber frame construction, fiberglass insulation is installed in the rafter bays and board ceilings are installed over top. Unfortunately, board ceilings are anything but air tight, and fiberglass insulation needs to be in an airtight cavity for maximum effectiveness. So we were able to solve two issues at the same time for this homeowner. We removed the board ceiling and fiberglass insulation, we dense packed the rafter bays with cellulose insulation, and installed sheetrock in place of the boards. The boards were salvaged for re-use by the homeowner, and the space and light quality was dramatically improved. Some may think that losing the board ceiling took something away from the space, but what you'll see in the pictures is that it highly accentuates the heavy timbers and really makes them stand out in a beautiful way. Now with this added airtightness, better insulation, and brighter space, the homeowner hardly runs their wood stove, and it's so quiet in the space, an added bonus from changing the insulation. It became necessary to also add a sheetrock ceiling to the living room to hide the plumbing from the new bathroom layout above. Changing this ceiling gave the homeowner some real quality lighting that was lacking in the living room before. The brighter ceiling and new lighting layout completely transforms the living room into a space you want to hang out, even though the layout didn't change at all. When the homeowner saw the finished spaces she said "I can't believe this is my house, I want to live in this house"
Energy Efficiency: I touched a little on the efficiency above, but like all projects done with Mottram Architecture, we always want to leave you with a little extra. Timber frame construction with board ceilings and fiberglass insulation are notoriously leaky! If you want to know what we think about fiberglass insulation, check our our blog post on Why Fiberglass Insulation Sucks. By installing cellulose insulation and covering it with sheetrock we were able to greatly reduce the heat flowing out of this home. It not only improves cashflow it improves the comfort level in the space. Who wants to sit in their living room and feel a draft? Let us remind you, we are not saying cellulose insulation is an air barrier, we use the sheetrock to help with that, but it does significantly reduce the air flow over fiberglass insulation. And when we reduce the airflow, we reduce the heat flow. And when we reduce the heat flow, we reduce the need to re-heat that drafty air from outside. When it comes to energy efficiency the first and best place to start is air infiltration. We greatly reduced the air infiltration with the new insulation, but we also added a hat and warm boots. What I mean by that is, we improved the insulation in the roof, and we installed insulation in the basement. Maybe it's a silly analogy, but when you think about keeping warm, we always start with the hat and boots! With sustainability in mind, the next project will be to add a deck to the front of this house with rain catchment barrels from the metal roof. They are planning to plant a garden in the spring and the rain catchment system will help to irrigate the new garden.
Builder: East Shore Builders
Photographer: Michael Eric Berube
66