
Search results for "Reduce room" in Home Design Ideas

 Kohn Shnier architects
This single family home sits on a tight, sloped site. Within a modest budget, the goal was to provide direct access to grade at both the front and back of the house.
The solution is a multi-split-level home with unconventional relationships between floor levels. Between the entrance level and the lower level of the family room, the kitchen and dining room are located on an interstitial level. Within the stair space “floats” a small bathroom.
The generous stair is celebrated with a back-painted red glass wall which treats users to changing refractive ambient light throughout the house.
Black brick, grey-tinted glass and mirrors contribute to the reasonably compact massing of the home. A cantilevered upper volume shades south facing windows and the home’s limited material palette meant a more efficient construction process. Cautious landscaping retains water run-off on the sloping site and home offices reduce the client’s use of their vehicle.
The house achieves its vision within a modest footprint and with a design restraint that will ensure it becomes a long-lasting asset in the community.
Photo by Tom Arban
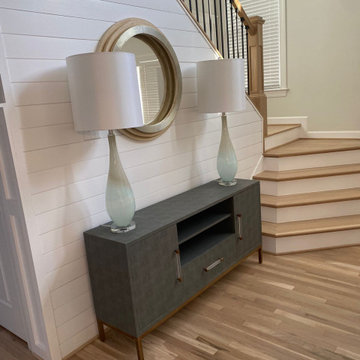
 MD Flooring Solutions, LLC
1x coat of Stain: Pickled Oak
- 1x coat Bona classic or intense sealer
- 2nd coat Commercial Grade Bona Traffic HD
- 3rd Coat Commercial Grade Bona Traffic HD
Finish: Satin
- To move 8x pieces of furniture out and back in from first level: front foyer, hallway, living room & dining room, family room, kitchen, closets
- Sand and refinish 2-1/4" Prefinished white oak hardwood floors in first level: front foyer, hallway, living room & dining room, family room, kitchen, closets - 968.06 sqft
- To remove Bevels from floors in first level: front foyer, hallway, living room & dining room, family room, kitchen, closets - 968.06 sqft
- To move Fridge Only and sand and refinish the area underneath it.
- To Sand & Refinish Transition: 3LFT of reducer kitchen to garage
- To Install Unfinished White Oak stained to match Shoe Molding in first level: front foyer, hallway, living room & dining room, family room, kitchen, closets

 Fireplaces 'N' Fixin's
Hand assembled in the USA from beautiful European castings, the Rockport™ Hybrid-Fyre® from Lopi is one of the cleanest burning and most efficient stoves in the world! Hybrid-Fyre® is an award winning technology designed by Lopi® to use less wood, burn hotter fires for longer, and reduce emissions. In the end, you save money while also minimizing your environmental impact.
Features you’re going to love include: cleverly concealed bypass damper for smoke free startups and reloading; a single easy-to-use air operating control gives you full command over your burn; the large standard ash pan makes cleanup effortless; full cast iron convection chamber; and a 400 CFM fan that expedites heated air into your home.
The Rockport™ is also compatible with GreenStart™ – a Lopi exclusive and a must for the modern wood burner. Simply load your wood and push a button! Be sure to ask your Lopi® dealer for a demo.
Photo by Travis Industries.
Find the right local pro for your project

 Addison Homes
Daylighting is an essential element of this Active House-certified home. VELUX venting solar skylights bring plenty of daylight indoors, reducing the use of artificial lights while also providing natural ventilation to improve indoor air quality. (Stephanie Ellen for Addison Homes)

 Whistler Builder
Our client planned to spend more time in this home and wanted to increase its livability. The project was complicated by the strata-specified deadline for exterior work, the logistics of working in an occupied strata complex, and the need to minimize the impact on surrounding neighbours.
By reducing the deck space, removing the hot tub, and moving out the dining room wall, we were able to add important livable space inside. Our homeowners were thrilled to have a larger kitchen. The additional 500 square feet of living space integrated seamlessly into the existing architecture.
This award-winning home features reclaimed fir flooring (from the Stanley Park storm), and wood-cased sliding doors in the dining room, that allow full access to the outdoor balcony with its exquisite views.
Green building products and processes were used extensively throughout the renovation, which resulted in a modern, highly-efficient, and beautiful home.
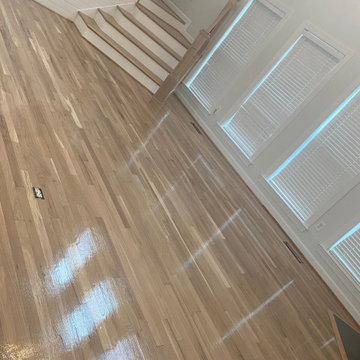 MD Flooring Solutions, LLC
1x coat of Stain: Pickled Oak
- 1x coat Bona classic or intense sealer
- 2nd coat Commercial Grade Bona Traffic HD
- 3rd Coat Commercial Grade Bona Traffic HD
Finish: Satin
- To move 8x pieces of furniture out and back in from first level: front foyer, hallway, living room & dining room, family room, kitchen, closets
- Sand and refinish 2-1/4" Prefinished white oak hardwood floors in first level: front foyer, hallway, living room & dining room, family room, kitchen, closets - 968.06 sqft
- To remove Bevels from floors in first level: front foyer, hallway, living room & dining room, family room, kitchen, closets - 968.06 sqft
- To move Fridge Only and sand and refinish the area underneath it.
- To Sand & Refinish Transition: 3LFT of reducer kitchen to garage
- To Install Unfinished White Oak stained to match Shoe Molding in first level: front foyer, hallway, living room & dining room, family room, kitchen, closets
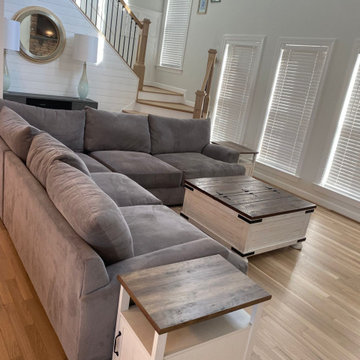 MD Flooring Solutions, LLC
1x coat of Stain: Pickled Oak
- 1x coat Bona classic or intense sealer
- 2nd coat Commercial Grade Bona Traffic HD
- 3rd Coat Commercial Grade Bona Traffic HD
Finish: Satin
- To move 8x pieces of furniture out and back in from first level: front foyer, hallway, living room & dining room, family room, kitchen, closets
- Sand and refinish 2-1/4" Prefinished white oak hardwood floors in first level: front foyer, hallway, living room & dining room, family room, kitchen, closets - 968.06 sqft
- To remove Bevels from floors in first level: front foyer, hallway, living room & dining room, family room, kitchen, closets - 968.06 sqft
- To move Fridge Only and sand and refinish the area underneath it.
- To Sand & Refinish Transition: 3LFT of reducer kitchen to garage
- To Install Unfinished White Oak stained to match Shoe Molding in first level: front foyer, hallway, living room & dining room, family room, kitchen, closets

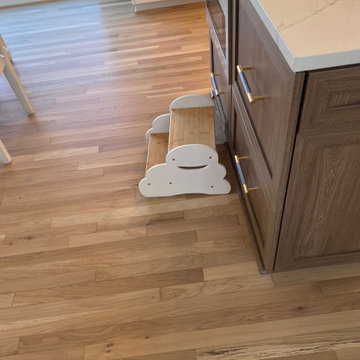 MD Flooring Solutions, LLC
1x coat of Stain: Pickled Oak
- 1x coat Bona classic or intense sealer
- 2nd coat Commercial Grade Bona Traffic HD
- 3rd Coat Commercial Grade Bona Traffic HD
Finish: Satin
- To move 8x pieces of furniture out and back in from first level: front foyer, hallway, living room & dining room, family room, kitchen, closets
- Sand and refinish 2-1/4" Prefinished white oak hardwood floors in first level: front foyer, hallway, living room & dining room, family room, kitchen, closets - 968.06 sqft
- To remove Bevels from floors in first level: front foyer, hallway, living room & dining room, family room, kitchen, closets - 968.06 sqft
- To move Fridge Only and sand and refinish the area underneath it.
- To Sand & Refinish Transition: 3LFT of reducer kitchen to garage
- To Install Unfinished White Oak stained to match Shoe Molding in first level: front foyer, hallway, living room & dining room, family room, kitchen, closets

 Florida Tile, Inc.
WexfordHDP is a warm, artisanal fabric look brought to life with proprietary High Definition Porcelain® technology by Florida Tile. The graphic is a beautiful representation of burlap that includes semblances of interlacing fabric strands and subtle nuances of pattern shift. A light punch and specialized glaze create a soft appearance and delicate texture that combine for a fashionable statement – perfect for any commercial or residential application.This color body glazed porcelain tile comes in multiple formats – 24x24, 12x24, 8x24, and 3.75x12, all rectified. Classic colors of Linen- a creamy off-white, Muslin- a light beige, Burlap- a medium taupe, Wool- a light blue/gray, and Tweed- a dark gray, all complement one another, allowing you to mix and match to create a uniquely inspired space. Two mixed-color rhomboid mosaics come in either light or dark mixes. A straightstack mosaic and bullnose are also available in all five colors.Made in the USA in our GreenSquared® certified Advanced Manufacturing Center in Lawrenceburg, KY, WexfordHDP contains 40% pre-consumer recycled content. It meets the DCOF AcuTest requirements to be installed in wet areas and is GREENGUARD® and Porcelain Tile certified. Incorporated into the tile surface is Microban® antimicrobial technology that works continuously to inhibit bacteria growth, improve visible cleanliness, and reduce odors.

 Mottram Architecture
Timber frame homes offer unique challenges during a remodel. What often makes them beautiful and attractive to most homeowners, also makes them challenging for space requirements.
Context: The lovely couple that owned this home were struggling with some interesting floor plan challenges that just didn't work for their family. The loved the beautiful timbers and woodwork of their home, but the dramatically sloping ceilings on the second floor, particularly in the bathroom, just didn't work for this 1 1/2 bath home. Needing to use the skylight to approach the toilet was a less then ideal scenario. Although the bathroom footprint was more then adequate, the sloped ceiling only made half of the space useable. Check out the Before/After post on our blog to see the photos of the house pre-renovation. As much as they loved all the wood features in their home, another challenge they had was light. The wood ceiling made everything inside the house darker, even with a fantastic array of south facing windows, there were spaces in the home that felt dark and small. When they contacted us they wanted to know how could they make their brighter and more inviting, were there solutions to the 2nd floor sloped ceiling issues, and if they were going to do all of this work, how could they make their home more comfortable and efficient. A nagging water leak in the upstairs bathroom spurred them into action and here is how we solved their dilemma.
Conclusion: First, we added a little dormer to the rear of the house so we could get full headroom in nearly all of the upstairs bathroom! Then we decided to extend that dormer one more timber bay over to create a walk in closet with natural light and plenty of space. Since we were contemplating energy efficiency, we resolved a nagging issue that is present in a lot of timber frame construction, air tightness. Commonly found in timber frame construction, fiberglass insulation is installed in the rafter bays and board ceilings are installed over top. Unfortunately, board ceilings are anything but air tight, and fiberglass insulation needs to be in an airtight cavity for maximum effectiveness. So we were able to solve two issues at the same time for this homeowner. We removed the board ceiling and fiberglass insulation, we dense packed the rafter bays with cellulose insulation, and installed sheetrock in place of the boards. The boards were salvaged for re-use by the homeowner, and the space and light quality was dramatically improved. Some may think that losing the board ceiling took something away from the space, but what you'll see in the pictures is that it highly accentuates the heavy timbers and really makes them stand out in a beautiful way. Now with this added airtightness, better insulation, and brighter space, the homeowner hardly runs their wood stove, and it's so quiet in the space, an added bonus from changing the insulation. It became necessary to also add a sheetrock ceiling to the living room to hide the plumbing from the new bathroom layout above. Changing this ceiling gave the homeowner some real quality lighting that was lacking in the living room before. The brighter ceiling and new lighting layout completely transforms the living room into a space you want to hang out, even though the layout didn't change at all. When the homeowner saw the finished spaces she said "I can't believe this is my house, I want to live in this house"
Energy Efficiency: I touched a little on the efficiency above, but like all projects done with Mottram Architecture, we always want to leave you with a little extra. Timber frame construction with board ceilings and fiberglass insulation are notoriously leaky! If you want to know what we think about fiberglass insulation, check our our blog post on Why Fiberglass Insulation Sucks. By installing cellulose insulation and covering it with sheetrock we were able to greatly reduce the heat flowing out of this home. It not only improves cashflow it improves the comfort level in the space. Who wants to sit in their living room and feel a draft? Let us remind you, we are not saying cellulose insulation is an air barrier, we use the sheetrock to help with that, but it does significantly reduce the air flow over fiberglass insulation. And when we reduce the airflow, we reduce the heat flow. And when we reduce the heat flow, we reduce the need to re-heat that drafty air from outside. When it comes to energy efficiency the first and best place to start is air infiltration. We greatly reduced the air infiltration with the new insulation, but we also added a hat and warm boots. What I mean by that is, we improved the insulation in the roof, and we installed insulation in the basement. Maybe it's a silly analogy, but when you think about keeping warm, we always start with the hat and boots! With sustainability in mind, the next project will be to add a deck to the front of this house with rain catchment barrels from the metal roof. They are planning to plant a garden in the spring and the rain catchment system will help to irrigate the new garden.
Builder: East Shore Builders
Photographer: Michael Eric Berube
 EDR Design Build
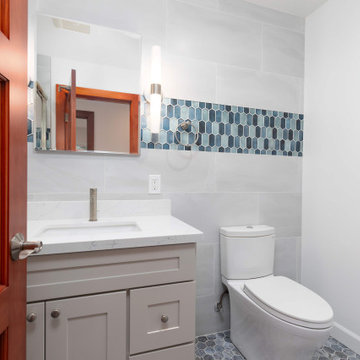
Integrated design-build services combining architectural design with construction management under single contract. EDR Design Build eliminates traditional separation between design and construction phases, reducing project delays and cost overruns. Services include conceptual design, permitting coordination, material selection, quality control, and budget management. Streamlined communication reduces change orders and accelerates project delivery compared to traditional general contracting methods.
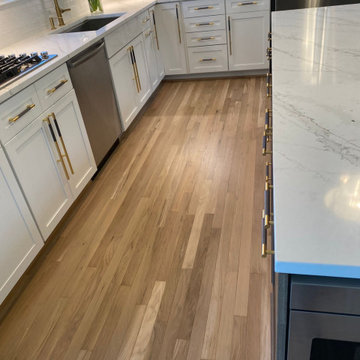 MD Flooring Solutions, LLC
1x coat of Stain: Pickled Oak
- 1x coat Bona classic or intense sealer
- 2nd coat Commercial Grade Bona Traffic HD
- 3rd Coat Commercial Grade Bona Traffic HD
Finish: Satin
- To move 8x pieces of furniture out and back in from first level: front foyer, hallway, living room & dining room, family room, kitchen, closets
- Sand and refinish 2-1/4" Prefinished white oak hardwood floors in first level: front foyer, hallway, living room & dining room, family room, kitchen, closets - 968.06 sqft
- To remove Bevels from floors in first level: front foyer, hallway, living room & dining room, family room, kitchen, closets - 968.06 sqft
- To move Fridge Only and sand and refinish the area underneath it.
- To Sand & Refinish Transition: 3LFT of reducer kitchen to garage
- To Install Unfinished White Oak stained to match Shoe Molding in first level: front foyer, hallway, living room & dining room, family room, kitchen, closets
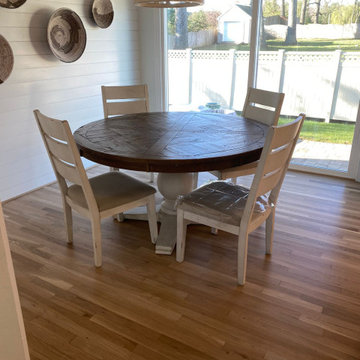 MD Flooring Solutions, LLC
1x coat of Stain: Pickled Oak
- 1x coat Bona classic or intense sealer
- 2nd coat Commercial Grade Bona Traffic HD
- 3rd Coat Commercial Grade Bona Traffic HD
Finish: Satin
- To move 8x pieces of furniture out and back in from first level: front foyer, hallway, living room & dining room, family room, kitchen, closets
- Sand and refinish 2-1/4" Prefinished white oak hardwood floors in first level: front foyer, hallway, living room & dining room, family room, kitchen, closets - 968.06 sqft
- To remove Bevels from floors in first level: front foyer, hallway, living room & dining room, family room, kitchen, closets - 968.06 sqft
- To move Fridge Only and sand and refinish the area underneath it.
- To Sand & Refinish Transition: 3LFT of reducer kitchen to garage
- To Install Unfinished White Oak stained to match Shoe Molding in first level: front foyer, hallway, living room & dining room, family room, kitchen, closets
Sponsored
Westerville, OH

Custom Home Works
Franklin County's Award-Winning Design, Build and Remodeling Expert
 Mottram Architecture
This custom piece of cabinetry was specially designed and built by the homeowner's father!
Timber frame homes offer unique challenges during a remodel. What often makes them beautiful and attractive to most homeowners, also makes them challenging for space requirements.
Context: The lovely couple that owned this home were struggling with some interesting floor plan challenges that just didn't work for their family. The loved the beautiful timbers and woodwork of their home, but the dramatically sloping ceilings on the second floor, particularly in the bathroom, just didn't work for this 1 1/2 bath home. Needing to use the skylight to approach the toilet was a less then ideal scenario. Although the bathroom footprint was more then adequate, the sloped ceiling only made half of the space useable. Check out the Before/After post on our blog to see the photos of the house pre-renovation. As much as they loved all the wood features in their home, another challenge they had was light. The wood ceiling made everything inside the house darker, even with a fantastic array of south facing windows, there were spaces in the home that felt dark and small. When they contacted us they wanted to know how could they make their brighter and more inviting, were there solutions to the 2nd floor sloped ceiling issues, and if they were going to do all of this work, how could they make their home more comfortable and efficient. A nagging water leak in the upstairs bathroom spurred them into action and here is how we solved their dilemma.
Conclusion: First, we added a little dormer to the rear of the house so we could get full headroom in nearly all of the upstairs bathroom! Then we decided to extend that dormer one more timber bay over to create a walk in closet with natural light and plenty of space. Since we were contemplating energy efficiency, we resolved a nagging issue that is present in a lot of timber frame construction, air tightness. Commonly found in timber frame construction, fiberglass insulation is installed in the rafter bays and board ceilings are installed over top. Unfortunately, board ceilings are anything but air tight, and fiberglass insulation needs to be in an airtight cavity for maximum effectiveness. So we were able to solve two issues at the same time for this homeowner. We removed the board ceiling and fiberglass insulation, we dense packed the rafter bays with cellulose insulation, and installed sheetrock in place of the boards. The boards were salvaged for re-use by the homeowner, and the space and light quality was dramatically improved. Some may think that losing the board ceiling took something away from the space, but what you'll see in the pictures is that it highly accentuates the heavy timbers and really makes them stand out in a beautiful way. Now with this added airtightness, better insulation, and brighter space, the homeowner hardly runs their wood stove, and it's so quiet in the space, an added bonus from changing the insulation. It became necessary to also add a sheetrock ceiling to the living room to hide the plumbing from the new bathroom layout above. Changing this ceiling gave the homeowner some real quality lighting that was lacking in the living room before. The brighter ceiling and new lighting layout completely transforms the living room into a space you want to hang out, even though the layout didn't change at all. When the homeowner saw the finished spaces she said "I can't believe this is my house, I want to live in this house"
Energy Efficiency: I touched a little on the efficiency above, but like all projects done with Mottram Architecture, we always want to leave you with a little extra. Timber frame construction with board ceilings and fiberglass insulation are notoriously leaky! If you want to know what we think about fiberglass insulation, check our our blog post on Why Fiberglass Insulation Sucks. By installing cellulose insulation and covering it with sheetrock we were able to greatly reduce the heat flowing out of this home. It not only improves cashflow it improves the comfort level in the space. Who wants to sit in their living room and feel a draft? Let us remind you, we are not saying cellulose insulation is an air barrier, we use the sheetrock to help with that, but it does significantly reduce the air flow over fiberglass insulation. And when we reduce the airflow, we reduce the heat flow. And when we reduce the heat flow, we reduce the need to re-heat that drafty air from outside. When it comes to energy efficiency the first and best place to start is air infiltration. We greatly reduced the air infiltration with the new insulation, but we also added a hat and warm boots. What I mean by that is, we improved the insulation in the roof, and we installed insulation in the basement. Maybe it's a silly analogy, but when you think about keeping warm, we always start with the hat and boots! With sustainability in mind, the next project will be to add a deck to the front of this house with rain catchment barrels from the metal roof. They are planning to plant a garden in the spring and the rain catchment system will help to irrigate the new garden.
Builder: East Shore Builders
Photographer: Michael Eric Berube
Michael Eric Berube, Maine Virtual Home Tours

 JandB Kitchen Designs
AS MENTIONED ABOVE, WE HAD TO DO STRUCTURAL AND CABINET MODS. TO ALLOW ROOM WHERE FRIDGE AND CABINET MEET IN WALL.....BASICALLY, WE REDUCED CABINET DEPTH AND MOVED STUDS FOR FRIDGE PLACEMENT.
 Preferred Kitchen & Bath
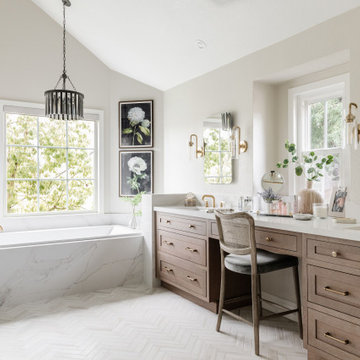
A platform tub and shower were hidden behind an intrusive wing wall and crammed into a corner, respectively. We reduced the wing wall to pony height, bringing the new, more streamlined built-in tub into harmony with the rest of the space. At the same time, expanding the shower into the closet and making it frameless, added room, light and beauty to the arrangement. A double vanity with a makeup space enjoys natural light from a window, while a trio of stone finishes, including veined quartz and two separate textures of marble, come together, creating a subtle palette.

 NewWest Homes
Paradise Cove features our popular New Spirit cedar and stucco paneling exterior in an abstract design which has been created to complement a contemporary focus on symmetrical windows and doors. It features a shed roof pitch that has a corner focus of stacked windows that are oriented towards a panoramic ocean view.
The heart of the home includes an open concept kitchen with spacious 3 panel sliding door which opens up to provide access to a large deck for outside dining and relaxation. It has 3 bedrooms and 2 1/2 baths with a bonus room office/den to make room for extra guests.
Milgard windows and doors provide quality double pane energy-star ratings, while pumice insulation, inside and out, provides sound proofing and is the ultimate choice for reducing any utility bills.
Sponsored
Columbus, OH

Wannemacher Interiors
Customized Award-Winning Interior Design Solutions in Franklin Cnty OH


 User
Industrial style meets Mid-Century Modern in this contemporary two-storey home design, which features zones for multi-generational living, a cool room, library and a walkway that overlooks a private central garden. The design has incorporated passive solar design elements and a side entry to reduce wastage. Featured on contemporist.com, the go-to website for all things design, travel and art, It generated global attention with it’s bold, organic design and eclectic mix of furniture, fixtures and finishes, including Spotted Gum cladding, concrete and polished plaster.

 Quadra-Fire Wood & Pellet Stoves
The smartest wood stove you'll ever use.
Introducing Quadra-Fire Adventure Series steel wood stoves, equipped with Smart Burn Technology™ (SBT). The only stoves that deliver on:
PERFORMANCE
- Smart Burn Technology™ delivers controllable, efficient heat and a clean burn
Reduces your home heating costs by up to 50%
EASY OPERATION
The only stove with Smart Burn Technology that:
- Maintains the temperature of your room with a programmable thermostat
- Automatically adjusts your stove, eliminating all manual air controls
- Tells you when to add more wood
- Allows you to load the wood, light the fire and walk away
127