
Search results for "Reduced tips" in Home Design Ideas
 User
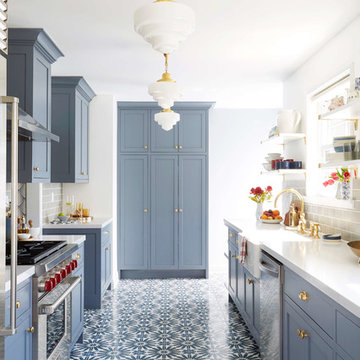
User"big al" cement encaustic tile in federal blue/nautical blue/ white make a fascinating focal point within the clean lines of this updated kitchen by emily henderson. inspired by the grand palace located in Granada Spain, big al, takes this classic arabesque motif and gives it the grandeur befitting of this palatial estate. shop here: https://www.cletile.com/products/big-al-8x8-stock?variant=52702594886
 Boren Construction
Michael Stadler - Stadler Studio
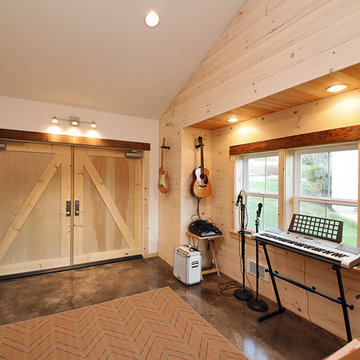
Mid-sized urban concrete floor and gray floor family room photo in Seattle with no fireplace, beige walls and a music area
Mid-sized urban concrete floor and gray floor family room photo in Seattle with no fireplace, beige walls and a music area
 McGuire + Co. Kitchen & Bath
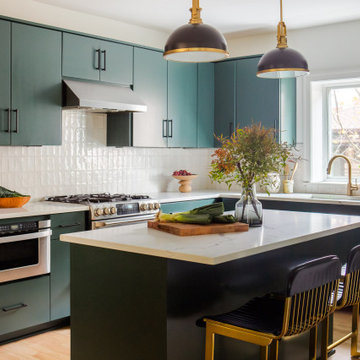
Design-build kitchen, powder room, and butler’s pantry remodel in an 1890 Victorian home in Wakefield, MA. Full renovation included reconfiguring the powder room layout and opening a load-bearing wall between the kitchen and dining room to improve flow and functionality.
Kitchen remodel features frameless full overlay cabinetry in Steel Blue, quartz countertops (Alleanza Dolomiti Extra), beveled crackle tile backsplash, and hardwood flooring. Island addition replaces freestanding table and adds prep space with microwave drawer. Full-height wall cabinets maximize kitchen storage. Historic-inspired details include ogee-edge countertops, bridge-style faucet in English Bronze, decorative corbels, polished nickel hardware, and industrial-style sconces.
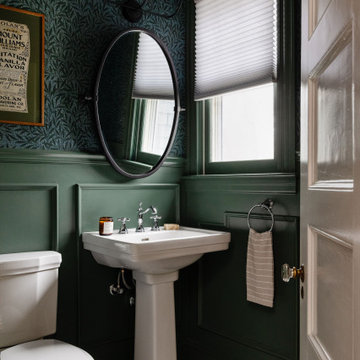
Powder room renovation includes reduced footprint layout, basketweave floor tile, applied molding, wallpaper, and vintage-inspired plumbing fixtures in chrome.
Butler’s pantry remodel features inset cherry cabinetry in a coffee stain finish, quartz countertops, glass-front cabinets, beverage fridge, bar sink, and wallpapered cabinetry interiors. Designed as a functional wet bar and storage extension off dining room.
Style: Traditional / Victorian kitchen remodel, historic home renovation, design-build remodeling contractor Wakefield MA.
Find the right local pro for your project

 Searl Lamaster Howe Architects
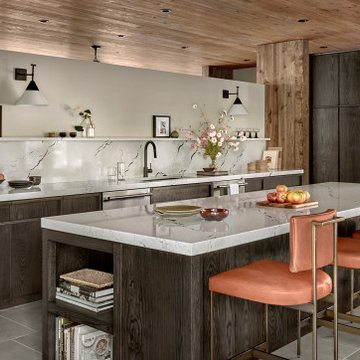
Inspiration for a large country single-wall porcelain tile, gray floor and wood ceiling open concept kitchen remodel in Other with an undermount sink, flat-panel cabinets, dark wood cabinets, quartz countertops, white backsplash, quartz backsplash, stainless steel appliances, an island and white countertops

 True North Builders, Inc.
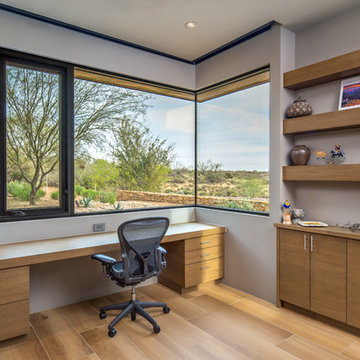
Home office - contemporary built-in desk light wood floor and beige floor home office idea in Phoenix with gray walls
 LMOH Home
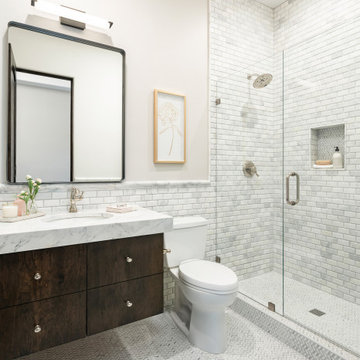
A merge of modern lines with classic shapes and materials creates a refreshingly timeless appeal for these secondary bath remodels. All three baths showcasing different design elements with a continuity of warm woods, natural stone, and scaled lighting making them perfect for guest retreats.

 WINN Design+Build
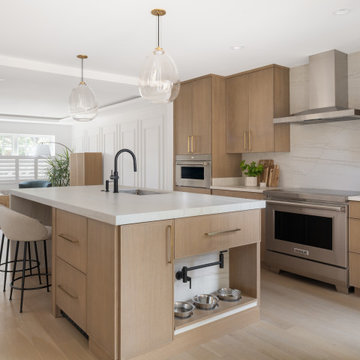
The new kitchen features custom white oak cabinetry, quartz countertops, and an oversized island that serves as the home’s true gathering point.
Eat-in kitchen - mid-sized contemporary galley light wood floor, brown floor and tray ceiling eat-in kitchen idea in DC Metro with an undermount sink, flat-panel cabinets, light wood cabinets, quartz countertops, white backsplash, quartz backsplash, stainless steel appliances, an island and white countertops
Eat-in kitchen - mid-sized contemporary galley light wood floor, brown floor and tray ceiling eat-in kitchen idea in DC Metro with an undermount sink, flat-panel cabinets, light wood cabinets, quartz countertops, white backsplash, quartz backsplash, stainless steel appliances, an island and white countertops
 Alexandra Crafton
Photo: Alexandra Crafton © 2016 Houzz
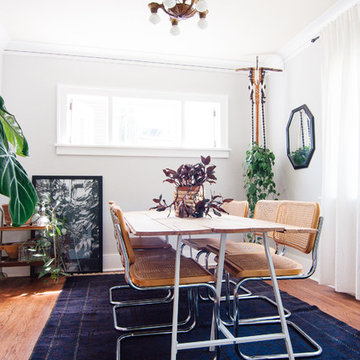
Inspiration for an eclectic light wood floor dining room remodel in Portland with white walls
Inspiration for an eclectic light wood floor dining room remodel in Portland with white walls
 SHM Architects
Photography: Nathan Schroder
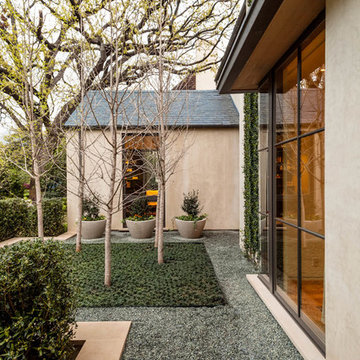
Inspiration for a contemporary gravel landscaping in Dallas.
Inspiration for a contemporary gravel landscaping in Dallas.
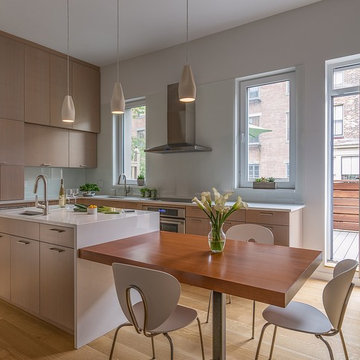
 ZeroEnergy Design
This renovated brick rowhome in Boston’s South End offers a modern aesthetic within a historic structure, creative use of space, exceptional thermal comfort, a reduced carbon footprint, and a passive stream of income.
DESIGN PRIORITIES. The goals for the project were clear - design the primary unit to accommodate the family’s modern lifestyle, rework the layout to create a desirable rental unit, improve thermal comfort and introduce a modern aesthetic. We designed the street-level entry as a shared entrance for both the primary and rental unit. The family uses it as their everyday entrance - we planned for bike storage and an open mudroom with bench and shoe storage to facilitate the change from shoes to slippers or bare feet as they enter their home. On the main level, we expanded the kitchen into the dining room to create an eat-in space with generous counter space and storage, as well as a comfortable connection to the living space. The second floor serves as master suite for the couple - a bedroom with a walk-in-closet and ensuite bathroom, and an adjacent study, with refinished original pumpkin pine floors. The upper floor, aside from a guest bedroom, is the child's domain with interconnected spaces for sleeping, work and play. In the play space, which can be separated from the work space with new translucent sliding doors, we incorporated recreational features inspired by adventurous and competitive television shows, at their son’s request.
MODERN MEETS TRADITIONAL. We left the historic front facade of the building largely unchanged - the security bars were removed from the windows and the single pane windows were replaced with higher performing historic replicas. We designed the interior and rear facade with a vision of warm modernism, weaving in the notable period features. Each element was either restored or reinterpreted to blend with the modern aesthetic. The detailed ceiling in the living space, for example, has a new matte monochromatic finish, and the wood stairs are covered in a dark grey floor paint, whereas the mahogany doors were simply refinished. New wide plank wood flooring with a neutral finish, floor-to-ceiling casework, and bold splashes of color in wall paint and tile, and oversized high-performance windows (on the rear facade) round out the modern aesthetic.
RENTAL INCOME. The existing rowhome was zoned for a 2-family dwelling but included an undesirable, single-floor studio apartment at the garden level with low ceiling heights and questionable emergency egress. In order to increase the quality and quantity of space in the rental unit, we reimagined it as a two-floor, 1 or 2 bedroom, 2 bathroom apartment with a modern aesthetic, increased ceiling height on the lowest level and provided an in-unit washer/dryer. The apartment was listed with Jackie O'Connor Real Estate and rented immediately, providing the owners with a source of passive income.
ENCLOSURE WITH BENEFITS. The homeowners sought a minimal carbon footprint, enabled by their urban location and lifestyle decisions, paired with the benefits of a high-performance home. The extent of the renovation allowed us to implement a deep energy retrofit (DER) to address air tightness, insulation, and high-performance windows. The historic front facade is insulated from the interior, while the rear facade is insulated on the exterior. Together with these building enclosure improvements, we designed an HVAC system comprised of continuous fresh air ventilation, and an efficient, all-electric heating and cooling system to decouple the house from natural gas. This strategy provides optimal thermal comfort and indoor air quality, improved acoustic isolation from street noise and neighbors, as well as a further reduced carbon footprint. We also took measures to prepare the roof for future solar panels, for when the South End neighborhood’s aging electrical infrastructure is upgraded to allow them.
URBAN LIVING. The desirable neighborhood location allows the both the homeowners and tenant to walk, bike, and use public transportation to access the city, while each charging their respective plug-in electric cars behind the building to travel greater distances.
OVERALL. The understated rowhouse is now ready for another century of urban living, offering the owners comfort and convenience as they live life as an expression of their values.
Photography: Eric Roth Photo


 Industrial Projects
Creating a comfortable outdoor living space is a priority for many homeowners and DIY enthusiasts. With rising summer temperatures, installing a shade tarp in your backyard offers an affordable and effective solution for sun protection. We’ve developed this detailed, step-by-step guide to help you confidently install a shade tarp that not only shields you from the sun but also adds aesthetic appeal to your outdoor area.
Benefits of Installing a Backyard Shade Tarp
Before diving into the installation process, let’s explore the key benefits of having a backyard shade tarp:
Provides UV Protection: Keeps your family and guests safe from harmful sun exposure.
Reduces Outdoor Temperatures: Creates a cooler, more enjoyable outdoor space.
Protects Outdoor Furniture: Extends the life of patio furniture by reducing sun damage.
Enhances Outdoor Aesthetics: Adds a modern, stylish look to your yard.
Budget-Friendly: More affordable compared to permanent structures like pergolas.
Materials and Tools You’ll Need
To begin your DIY backyard shade project, gather the following materials and tools:
Materials:
Shade tarp (UV-resistant and breathable)
Sturdy posts or existing structures (trees, fences, walls)
Mounting hardware (eye bolts, D-rings, turnbuckles, snap hooks)
Nylon or polyester rope, or stainless-steel wire
Concrete (if installing new posts)
Tools:
Power drill
Measuring tape
Level
Ladder
Wrench or adjustable spanner
Post hole digger (if installing new posts)
Step 1: Plan Your Shade Tarp Layout
The first step in installing your backyard shade tarp is careful planning. Take time to assess your outdoor area and answer these key questions:
Where is the sun’s path throughout the day?
What size and shape of tarp best suits your space?
Will you anchor the tarp to existing structures or install new posts?
What height do you want the tarp to sit at for maximum shade and airflow?
Pro Tip: Use string or garden hoses to visualize the tarp layout on the ground before making permanent decisions.
Step 2: Measure and Mark Anchor Points
Once you’ve determined the tarp’s location and orientation:
Measure the tarp dimensions.
Mark the exact points where each corner of the tarp will be anchored.
Ensure that the anchor points are at least 5–10% longer than the tarp size to allow for tensioning and slight adjustments.
Consider slope angles for water runoff. Aim for at least a 20-degree angle to prevent water pooling on the tarp.
Step 3: Install Support Posts (If Necessary)
If your backyard lacks existing anchor points like trees or fences, you’ll need to install sturdy support posts:
Dig post holes at least 24 inches deep and 8-12 inches wide for stability.
Set posts in concrete, making sure they remain plumb and level.
Allow the concrete to cure for at least 24–48 hours before applying tension from the tarp.
We recommend using pressure-treated wood, galvanized steel poles, or aluminum posts for longevity and strength.
Step 4: Install Mounting Hardware
With your anchor points ready, it’s time to install the necessary hardware:
Attach eye bolts or pad eyes securely into walls, posts, or other fixed structures.
For added flexibility and adjustability, install turnbuckles or tensioners to fine-tune the tarp’s tightness.
Connect snap hooks, D-rings, or carabiners to make assembly and disassembly easier.
Make sure all hardware is rated for outdoor use to prevent rust and corrosion.
Step 5: Attach and Tension the Shade Tarp
Now it’s time for the most satisfying part—mounting the shade tarp:
Begin by attaching one corner of the tarp to an anchor point.
Gradually attach the remaining corners, moving diagonally for even tension.
Adjust each connection point using your turnbuckles, ropes, or cables.
Pull the tarp tight enough to avoid sagging, but not so tight that it risks tearing.
Check that the tarp maintains the desired slope for rainwater runoff and adjust tension as needed.
Step 6: Final Adjustments and Safety Check
Before enjoying your new shaded area:
Inspect all anchor points and hardware for stability.
Test the tarp’s tension and make adjustments for even distribution.
Ensure that no sharp edges or loose connections remain that could damage the tarp or pose a safety hazard.
Confirm that the tarp is secure in windy conditions by giving it a gentle tug.
If you live in an area with frequent high winds, consider removing the tarp during storms to prevent damage.
Step 7: Enjoy Your Shaded Backyard Oasis
Once installed, your backyard shade tarp provides a comfortable and protective space for outdoor gatherings, relaxation, or family activities. You can decorate underneath with outdoor furniture, string lights, or potted plants to create a personalized outdoor retreat.
Maintenance Tips for Long-Lasting Shade Tarp Performance
To extend the life of your shade tarp, follow these maintenance guidelines:
Regularly check for wear and tear, especially around anchor points and seams.
Clean the tarp periodically with mild soap and water to prevent mildew buildup.
Store the tarp indoors during harsh weather seasons if it's not designed for year-round use.
Tighten hardware as needed to maintain proper tension and avoid sagging.
By following these simple care steps, your shade tarp will continue to deliver years of sun protection and outdoor comfort.
Conclusion: Upgrade Your Outdoor Space with a DIY Shade Tarp
Installing a shade tarp in your backyard is a cost-effective and rewarding DIY project. With careful planning, quality materials, and proper installation techniques, you’ll enjoy cool, shaded outdoor living all season long. This step-by-step guide ensures your project goes smoothly from start to finish.
 Inchoate
Photos by Brian Reitz, Creative Vision Studios
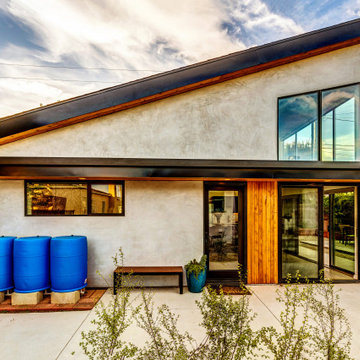
Example of a small trendy gray one-story stucco house exterior design in Los Angeles with a shed roof
Example of a small trendy gray one-story stucco house exterior design in Los Angeles with a shed roof

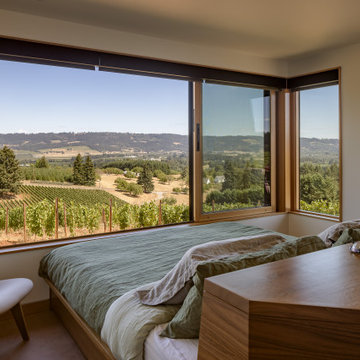
 Prentiss Balance Wickline Architects
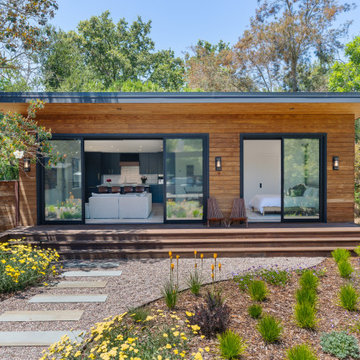
A bold choice to place the foot of the bed against the wall pays dividends, turning the main bedroom into a sleeping porch just by opening the large sliding windows. Photography: Andrew Pogue Photography.
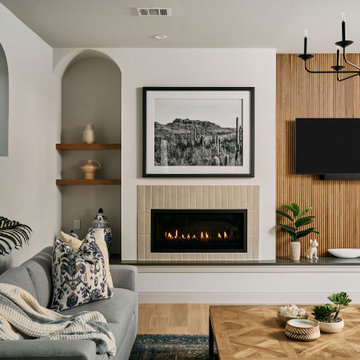
 Kelley Design Group
Living room with arched windows and an open concept and a built in fireplace and tv wall
Inspiration for a transitional light wood floor and beige floor living room remodel in Austin with white walls, a standard fireplace, a tile fireplace and a wall-mounted tv
Inspiration for a transitional light wood floor and beige floor living room remodel in Austin with white walls, a standard fireplace, a tile fireplace and a wall-mounted tv
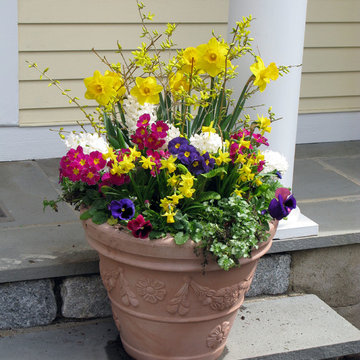
 Austin Ganim Landscape Design, LLC
This spring container has been planted with a variety of perennials (English primrose & Lamium), annuals (pansies), bulbs (daffodils & hyacinths) and incorporates freshly cut forsythia branches.
Austin Ganim Landscape Design, LLC
2