
Search results for "Reduced" in Home Design Ideas
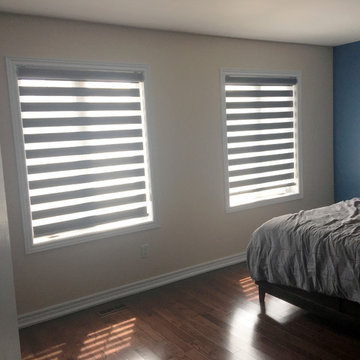
 Trendy Blinds & Closets
Our Deluxe Combi Room Darkening shades have a patented design that reduces the gap between the front shade and back shade to reduce the amount of light coming in through the gaps between. Its a very well priced solution that works for most people who sleep at night.

 Drury Design
THE SETUP
Sam’s client had lived in her downtown townhome home for less than a year when she decided to remodel the spacious second level. This open area consisted of three sections: a TV and fireplace zone, a sparsely furnished dining area, and a dominant central kitchen. The kitchen featured a long back wall with three segmented sections and a massive island housing the cooktop. She found the kitchen’s functionality lacking and its presence overwhelming – it dominated the entire floor, regardless of where you stood.
Design objectives:
- Reconfigure key kitchen elements (sink, cooktop, oven) while minimizing the kitchen’s visual impact
- Optimize the kitchen’s back wall, eliminating existing dead space
- Create a purposeful, well-defined dining area
- Establish a distinct, comfortable living area
- Reuse existing appliances and flooring
- Maintain an overall modern design aesthetic
THE REMODEL
Design challenges to be solved:
- Redesign the island to reduce its overwhelming presence
- Create a comfortable, dedicated living room within the available space
- Establish a distinct, inviting dining area within spatial constraints
- Enhance kitchen functionality and style without dominating the entire floor
THE RENEWED SPACE
Design solutions:
- Sam created raised end caps for the island. This separated the kitchen from adjacent living and dining areas while focusing the kitchen’s functionality. The new sink location offers ample workspace, allowing the cook to interact with guests seated at the island. The redesigned island also provides additional storage.
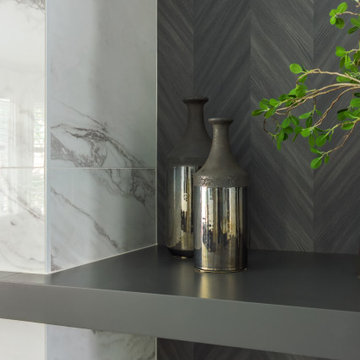
- For the living area, Sam opted for a functional-yet-minimalist approach. Large-format tile creates a natural stone look for the fireplace and TV wall. The recessed TV and extended fireplace shelf maintain a sleek profile. - Artistic wallpaper adds depth and texture, while the intentional lack of extensive shelving keeps the space open and distinct.
- Sam transformed the dining area’s blank wall into a feature, adding a unique dry bar with counter space, open shelves, cabinet storage and a beverage fridge. - - - Wallpaper behind and above the bar contributes to the area’s personality. A mirror adds depth while pendant lights add style and visual interest.
Relocating the cooktop to the back wall facilitates hidden ventilation, reducing visual clutter. Sam balanced transitional and modern elements for a contemporary yet comfortable feel. The digital control panel on the convection cooktop maintains a sleek look, while the wall oven is now at an easy-to-use height. ----- Mirrored base cabinet fronts and a paneled fridge prevent cabinetry monotony.
The redesign has delighted Sam’s client, achieving her main goal of creating a more inviting and visually appealing space. Each section now has its own visual personality and functionality while harmonizing within a monochromatic palette. The entire floor offers wow-factor pop upon first glance, with each area maintaining its distinct character while contributing to a cohesive, modern aesthetic.
Find the right local pro for your project
 AirField Systems, LLC
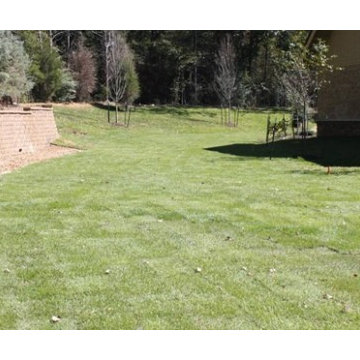
AirField installed an AirPave grass fire lane for their porous flexible paving at Baptist Trinity Residential Hospice, creating a beautiful, functional, ecological friendly solution to facility access.
An installation of an AirField Systems grass fire lane at Baptist Trinity Residential Hospice brings green building benefits and incredible strength to a beautiful new facility. A time lapse photo series highlight the installation process of the 6,747 PSI sand filled 100% recycled geocell technology, providing the strength of asphalt and concrete while relieving some of the burden of costly storm sewers and drainage.
This new installation highlights the benefits of paving with grass, as well as the comparative ease of installation. Concrete and asphalt surfaces occupy twice the area of buildings and are the most detrimental to clean water. Concrete and asphalt surfaces dominate the landscape of our urban environments and prevent rainwater from being filtered naturally. They send harmful polluted water straight into our streams, rivers and lakes. In urban America, concrete and asphalt pavements produce two thirds of our excess water runoff. They are responsible for significant hydrocarbon pollutants on our ground and in our water, causing ground water decline, and resulting in local water shortages. These concrete and asphalt surfaces also create huge increases in temperature known as the urban “heat island effect”.
The pollution caused by impervious surfaces deteriorate the quality of our storm water runoff and create large overflows that our storm sewer systems cannot handle. It is also important to realize that the urban forest force is drastically diminishing, causing CO2 levels to rise, which in turn causes global warming. With all the negative influences of impervious pavements now is the time to turn our attention to alternatives for the benefit of the environment.
From fire lanes, overflow, and event parking, to temporary and stadium parking, reinforced grass parking systems deliver the same strength and durability of asphalt and concrete without the negative affects mentioned above. These incredibly strong geocells reinforce grass parking, prevent rutting from traffic, protect turf roots, and promote beautiful grass. Reinforced grass parking structures, also know as grass pavements, enhance the environment by naturally filtering auto and truck liquids such as oil drippings, antifreeze overflows and many other leaks and spills. They also help with air pollutants after they have been knocked to the ground by rainwater and greatly reduce hot surface temperatures thus fighting global warming and the “heat island effect”. Grass pavements allow our groundwater to be naturally replenished, the roots of trees to breathe, and they help our streams and rivers flow cleanly in dry hot summers. A large part of the solution to urban environmental problems is under our feet. By paying appropriate attention to the everyday materials on which we walk and drive, we can replenish renewable resources, restore the natural regenerative processes, and produce a cleaner, healthier, safer, more sustainable world in which we must live. Porous pavements are potentially the most important development in urban watersheds since the invention of storm sewers. By routing rainwater directly into the earth as nature intended, the need for costly storm water structures can be drastically reduced.
Reinforced grass parking has built in permeable spaces through which water and air can pass. Although some porous paving materials are nearly indistinguishable from nonporous materials in construction and superficial appearance, their environmental effects are qualitatively exponential. They allow air, water and heat to dissipate into the environment naturally helping to save the planet.
AirField reinforced grass parking provides beauty and comfort, and with the unbeatable price and performance of AirDrain you can’t go wrong. AirDrain is the reinforced grass pave system the industry has trusted for years !!!
Airfield Systems, LLC 8028 North May Avenue Oklahoma City, OK 73120 405-359-3775
Installer – GREENPRO Landscapes Kevin James 9847 Stewart Rd Arlington, TN 38002

 Reico Kitchen & Bath
Nancy Knickerbocker of Reico Kitchen and Bath in Southern Pines, NC designed a primary bathroom featuring Merillat Masterpiece cabinetry’s Gannon door style in Evercore with a Moonshine finish.
Selections for bathroom include Silestone Quartz in a Pearl Jasmine finish vanity countertops along with fixtures and accessories from Kohler and Moen.
The shower features 12x24 and 2x2 Bakersfield Pumice floor tile, shower floor tile and 10x12 Bianco shower wall tile.
The client emphasized Nancy's pivotal role in the remodel's success. "She was respectful of our budget, our needs (more handicap-friendly and storage space, fewer doors) and was knowledgeable about what was and wasn’t doable in our situation. Her excellent design suggestions took into consideration our choices for cabinets, fixtures, countertops, flooring and etc. She was interested and always available to help throughout the entire project," said the client.
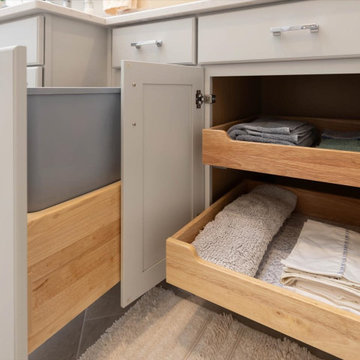
Nancy highlighted the bathroom's outdated features from the era of the garden tub. "The homeowner wanted to add storage, enlarge the shower and overall update the bathroom. By removing the tub, we added a cabinet with two roll-out shelves, a trash cabinet, and laundry hamper cabinet. Kohler mirrored medicine cabinets added personal storage above the sinks. To allow easier access to the bathroom, the entry door was widened. As a result, the vanity needed to be reduced to 18” deep."
"The Kohler Veticyl 13” square sink was the perfect choice for the limited space! The shower insert was replaced with a tile shower, a glass panel and large door. We also removed the water closet door and reduced the height of the wall. There is still privacy and allows for easier access to the area. My favorite part of the project is the area where the tub was once located. The cabinetry and the arched window are lovely!” said Nancy.
Photo courtesy of ShowSpaces Photography.
 LBC Lighting
Van Buren Pendant
By Tech Lighting
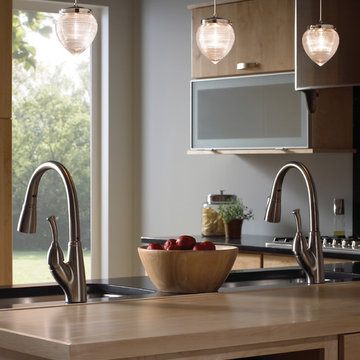
Acorn-shaped Holophane prismatic glass diffuses light throughout the pendant to reduce glare and enhance visual comfort. Directs majority of light downward. Also allows specifically controlled amount of light to pass through sides, increasing light levels in the space and reducing contrast between task and general lighting.
 United Porte Inc
Furthermore, VDom Doors insulate your home from extreme weather conditions, as well as unwanted animals, insects, and dust from entering.
Our doors have several superior features:
- Single sheet of metal is used in construction. No welded seams are best as these can significantly weaken the structural integrity of the entranceway. Our doors are also more resilient to mechanic damage, such as sledgehammer strikes.
- The advantage of a single, non-welded door is that it reduces interior internal condensation. Over time, condensation can negatively affect the door mechanisms.
- Stiffening Ribs: These non-visible details add to our door's security.
- Quality insulation serves to reduce unwanted external noise, as well as protect against extreme heat, and severe cold.
- Italian Hinges Combi Arialdo: Hacking are often carried out at the side of a door's hinges. A better feature is utilizing hinges with ball bearings and installed anti-cuts.
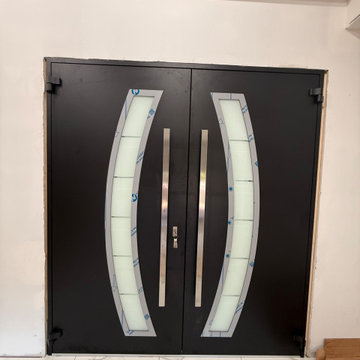
Introducing the Deux collection of modern exterior entrance doors in a sleek black enamel color. Expertly crafted from a single sheet of metal with a sturdy metal frame and threshold, these doors offer both style and security for your home.
The exterior design features a vertical insert of stainless steel and frosted glass, creating a striking and contemporary look that will enhance the curb appeal of any home. The black enamel color provides a sophisticated and modern feel, perfect for those who want to make a bold statement with their entrance.
The interior design also boasts a vertical insert of stainless steel and frosted glass, creating a cohesive and stylish look throughout the home.
The Deux collection of modern front doors is ideal for homeowners who want to elevate the look of their home's exterior while also ensuring the safety and security of their property. And with our easy ordering process and user-friendly website, you can have your new door delivered right to your doorstep.
Upgrade your home's curb appeal and make a bold statement with the Deux collection of modern exterior entrance doors in black enamel. Order yours today and experience the perfect combination of style and function.
Model - 6500 Deux
Color - Black
Door thickness - 3 1/4"
Frame thickness - 4"
Exterior design - Vertical insert of the stainless steel and frosted glass. Coating of the door - Moisture resistant MDF layer 2/3", black enamel.
Interior design - Vertical insert of the stainless steel and frosted glass. Coating of the door - black enamel.
Hardware included:
- Metal frame 4" thick
- Metal threshold.
- Plate-type, primary lock for armoured type of steel doors, locked by 3 key turns, doors are captured in 3 places. The lock has replaceable core and 5 keys.
- Cylinder K2.
- Hinges Combi Arialdo.
- Turnknob for lock.
- Armor plate for the lock.
- Stainless steel Handle
To maintain the warranty, a canopy is required over the door.
 Greenlite Window Fashions
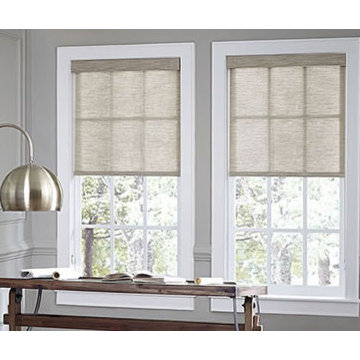
Stop the Sun and Keep the View! Excellent Energy Efficiency. Reduces UV, heat & glare. Reduces the fading of furniture, flooring and art!
Living room photo in Toronto
Living room photo in Toronto
 Douglas Custom Homes
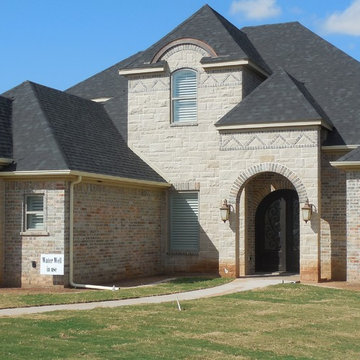
4 Meadow Green Court, Wichita Falls, TX
FEATURED HOME IN THE PARADE OF HOMES.
4885 Total SF Under Roof
3500 sq. ft. Living Area
½ Acre, Cul-de-Sac location
Two story, 4 Bedroom, 3 ½ Baths, Study, Formal Dining Room & Bonus Room
Two, two-car Garages and Large Rear Patio
(Master bedroom, Study & 4th bedroom all located on first floor)
Amenities Include:
• Kitchen
• Stainless Wolf, Sub-Zero & Scottsman Appliances:
o 36" Gas cook top & range; cast iron grates and sealed burners
o Energy Star qualified dishwasher, with purge filtration system
o 1200 watt Microwave Oven
o 15" Scottsman ice maker
o 36" Sub-Zero Counter depth Refrigerator
• Large, Open design, with prep island and floating sink island
• Quartz countertops.
• 42" high Knotty Alder custom cabinets.
• Under cabinet lighting
• Oversized Breakfast area with large windows
• Great Room, 19' 6" x 17' with wood burning fireplace and gas starter.
• Great Room wired for surround sound.
• Formal Dining Room with large picture window.
• Master Bedroom, 16' x 17' with double layered crown molding.
• Master Bath has 60" whirlpool tub & 4' x 6' shower
o Quartz counter top, double sinks and framed mirrors
o Walk in master closet with lots of shelving & rods
• Study / Office has coffered wood beam ceiling.
• Bonus Room upstairs, 15' x 21'
• Laundry room includes sink, cabinets and bench seating.
• Rear Patio, 18" 6" x 14' 4" includes built-in roll top, stainless Grill.
• Rinnai Tank-less high capacity hot water system.
• Two, Two-car Garages (4 stalls) with twin door openers & insulated doors. Expanded Driveway.
• Foam wall and sub-floor insulation.
• Outdoor roll-top Grill.
• Radiant barrier roof decking to reduce attic heat
• Vapor barrier house wrap diminishes moisture accessibility and drafts
• Low E tilt out windows reduce radiant heat and harmful UV rays
• 14 Seer, high efficient, HVAC unit with zone controls. Natural gas heater and electronic thermostat.
• Security System on all exterior doors and operating windows.
• Landscaping includes Bermuda grass, automatic sprinklers, Oak trees, shrubs, and 6' wood privacy fence with concrete curbing.
• On site Water well;
• Price $497000.
 Paradise Found Construction
The homes in Heritage Hills in Chapel Hill, NC are representative of the popularity and explosive growth of American Home Ownership that occurred during the economic expansion that followed the end of WW II. They were designed and built to foster the benefits and sense of “community”, where families could come together and share theirs and their children’s lives. They are typically in very desirable locations within their larger communities, and remodeling them with modern amenities, increasing the performance and efficiency of them, and having them Green Certified (independent third-party verified) makes them extremely attractive to buyers, and helps to raise other property values within the neighborhood.
Green Certified Remodeled Homes offer significant value and advantage in the marketplace over similar homes in their area, which is especially important as a new, younger era of home buyers enter the market. Current trends suggest that younger (as well as many “seasoned”) homeowners are interested in smaller, more efficient (and thus affordable) homes situated closer to shopping, their work, entertainment opportunities, and access to the economic and environmental benefits of mass transit.
These older homes also offer an additional value that is continuing to gain visibility and appreciation in the market place. They were built from lumber from slower-growth trees (denser and harder wood), and as such offer superior structural support compared to the same home built using lumber from today’s faster-growing (softer and less-dense wood) trees.
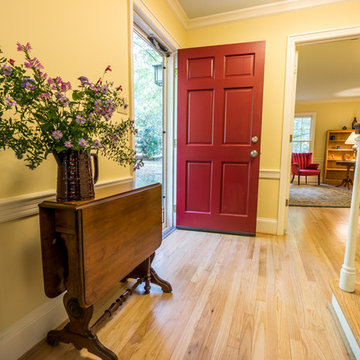
Robin and Kent had lived in their 2-story Gambrel Roof home in Heritage Hills since 1994. The house was structurally sound, due in large part to the old-growth (and denser) yellow pine that was used in its framing. They loved the quiet neighborhood, its sense of community and amenities, and their home. It suited their life-style and needs; and they had decided that they would remain in the home. It was showing its age, and was in need of general repairs and maintenance, and its energy, water, and indoor air quality performance was continuing to increase their ongoing cost of ownership.
Robin loved the screen porch that looked out on their private and nicely landscaped back yard, but she wanted to be able to use it in the colder months of the year. She was unsatisfied with the kitchen and the mud room / laundry room, and the darkness of other living spaces. A previous water leak in the laundry room had resulted in a large patch of mold that had compromised flooring, wall board, and insulation and contributed to the homes reduced indoor air quality.
The home lacked insulation in the crawl, and inadequate insulation in the attic. The single HVAC unit had been replaced a few years earlier with a more efficient unit, but with a single programmable thermostat control on the first floor and aging and un-insulated ducting, the second floor was often over-heated in the summer months.
The original wood windows had begun to deteriorate and were drafty and inefficient, and the original wood-burning fireplace was an open conduit for escaping conditioned air as well as an inlet for wood-smoke smelling air being pulled into the home. The siding had been replaced a few years earlier with a cement-fiber product, but the exterior wood trim was compromised and beginning to look unsightly. Its original architecture had been altered over the years in ways that presented ongoing maintenance and durability issues, as well as disrupting the elegance of the original design.
Kent has worked for over 30 years in the Environmental Sciences field, and is considered to be a national expert in understanding the sources of, and human exposure to pollutants in indoor environments. He had always been very conscious and cautious about the effects on indoor air quality that the construction, furnishings, and products used in home had on him and his family.
Project Goals
Increase the performance of their home by improving energy efficiency by at least 40% and lowering their natural gas and electric utility costs.
Increase the performance of their home by reducing water usage by at least 40% and lowering the water utility costs.
Increase the comfort of their home that was being compromised by an inadequate HVAC design, inadequate insulation, inefficient and compromised wood windows, and copious air intrusions and drafts.
Improve the healthiness of the homes indoor air quality that was being compromised by an open wood-burning fireplace, and prior water intrusion that had allowed colonies of mold to thrive.
Create a new Kitchen, Family Room, Home Office, Mudroom, and Laundry Room that featured some of the latest designs and trends and harmonized with the rest of the homes charm.
Increase the usefulness and aesthetics of the screened porch by creating a warm and inviting semi-conditioned 3-Season Room that extended the times during the year that it was comfortable.
Introduce day-lighting into areas of the home that were dark and uninviting.
Brighten and harmonize all of the interior finishes.
Protect and restore the exterior of the home with superior-performing products and finishes.
Achieve Gold Level Green Home Certification in conformance with the ICC 700-2012 National Green Building Standards (NGBS).
 Sweet Smiling Landscape Design
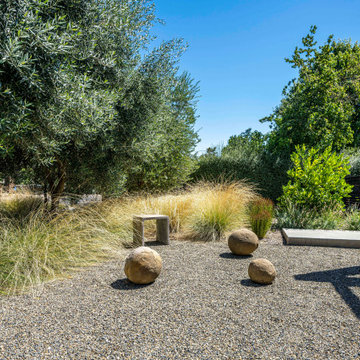
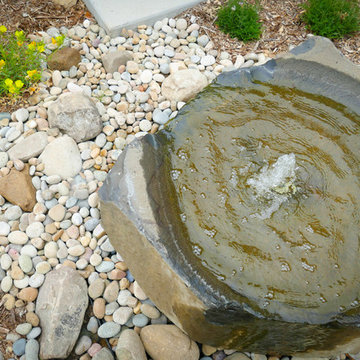
The backyard of this house was a no-man’s land when the owners moved in. With little more than a few established trees and a big, noisy air-conditioning unit, the yard was an almost open canvas bordering the Los Padres National Forest in a high-fire zone. We installed a large infiltration swale to capture as much rainfall as possible from the house rain gutters, so the water can be stored in the soil where plants can access it, reducing the amount of irrigation this landscape needs. Plantings obscure the air-conditioning unit, and a water feature was installed so the sound of trickling water would drown-out its sound. The plants we chose are drought tolerant and attractive to native birds and insects. We paid special attention to the plantings nearest to the house, keeping them fairly low growing as to not create a fire ladder beneath the eves. The plants also hold a good deal of moisture in their stems and leaves and are easily kept free of desiccated material, making them fire-wise plants that can actually reduce the chances of the property burning in the event of a nearby wildfire.
 User
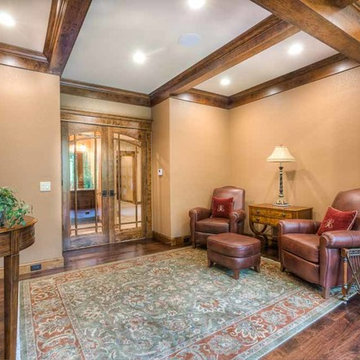
UserThis home features our Quiet Seal interior door. The perimeter weatherstrip helps to greatly reduce sound transmission throughout the home. It's an available option for all Waudena Millwork interior door styles and available in three colors. Quiet Seal assists in reducing air and light infiltration and provides a smoother operation with no more slamming doors.
The doors in this photo feature an arch top with 9-lite prairie grille in a Natural Birch wood species with custom stain.
 Alleen Custom Window Treatments
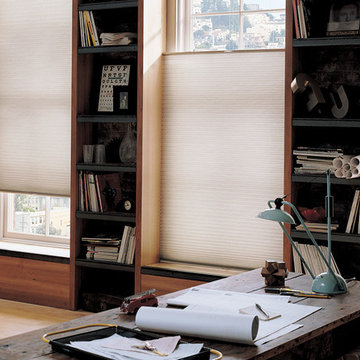
There is nothing else in the market like the Duette® Architella™ Honeycomb Shade Collection. These shades have a state-of-the-art, patented, honeycomb-within-a-honeycomb design offering the industry’s highest level of energy efficiency. Architella™ shades provide three insulating air pockets that deliver energy efficiency in every climate and every season, dramatically reducing heating and cooling costs. In fact, these shades are so energy efficient, they can reduce energy loss up to 50 percent. Available at Alleen's Custom Window Treatment locations
 Reico Kitchen & Bath
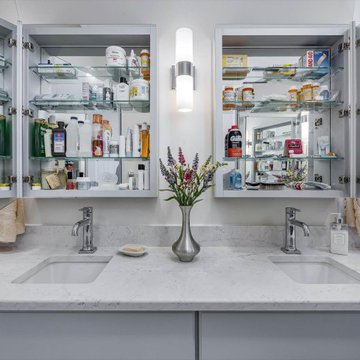
Nancy Knickerbocker of Reico Kitchen and Bath in Southern Pines, NC designed a primary bathroom featuring Merillat Masterpiece cabinetry’s Gannon door style in Evercore with a Moonshine finish.
Selections for bathroom include Silestone Quartz in a Pearl Jasmine finish vanity countertops along with fixtures and accessories from Kohler and Moen.
The shower features 12x24 and 2x2 Bakersfield Pumice floor tile, shower floor tile and 10x12 Bianco shower wall tile.
The client emphasized Nancy's pivotal role in the remodel's success. "She was respectful of our budget, our needs (more handicap-friendly and storage space, fewer doors) and was knowledgeable about what was and wasn’t doable in our situation. Her excellent design suggestions took into consideration our choices for cabinets, fixtures, countertops, flooring and etc. She was interested and always available to help throughout the entire project," said the client.
Nancy highlighted the bathroom's outdated features from the era of the garden tub. "The homeowner wanted to add storage, enlarge the shower and overall update the bathroom. By removing the tub, we added a cabinet with two roll-out shelves, a trash cabinet, and laundry hamper cabinet. Kohler mirrored medicine cabinets added personal storage above the sinks. To allow easier access to the bathroom, the entry door was widened. As a result, the vanity needed to be reduced to 18” deep."
"The Kohler Veticyl 13” square sink was the perfect choice for the limited space! The shower insert was replaced with a tile shower, a glass panel and large door. We also removed the water closet door and reduced the height of the wall. There is still privacy and allows for easier access to the area. My favorite part of the project is the area where the tub was once located. The cabinetry and the arched window are lovely!” said Nancy.
Photo courtesy of ShowSpaces Photography.

 Industrial Projects
Creating a comfortable outdoor living space is a priority for many homeowners and DIY enthusiasts. With rising summer temperatures, installing a shade tarp in your backyard offers an affordable and effective solution for sun protection. We’ve developed this detailed, step-by-step guide to help you confidently install a shade tarp that not only shields you from the sun but also adds aesthetic appeal to your outdoor area.
Benefits of Installing a Backyard Shade Tarp
Before diving into the installation process, let’s explore the key benefits of having a backyard shade tarp:
Provides UV Protection: Keeps your family and guests safe from harmful sun exposure.
Reduces Outdoor Temperatures: Creates a cooler, more enjoyable outdoor space.
Protects Outdoor Furniture: Extends the life of patio furniture by reducing sun damage.
Enhances Outdoor Aesthetics: Adds a modern, stylish look to your yard.
Budget-Friendly: More affordable compared to permanent structures like pergolas.
Materials and Tools You’ll Need
To begin your DIY backyard shade project, gather the following materials and tools:
Materials:
Shade tarp (UV-resistant and breathable)
Sturdy posts or existing structures (trees, fences, walls)
Mounting hardware (eye bolts, D-rings, turnbuckles, snap hooks)
Nylon or polyester rope, or stainless-steel wire
Concrete (if installing new posts)
Tools:
Power drill
Measuring tape
Level
Ladder
Wrench or adjustable spanner
Post hole digger (if installing new posts)
Step 1: Plan Your Shade Tarp Layout
The first step in installing your backyard shade tarp is careful planning. Take time to assess your outdoor area and answer these key questions:
Where is the sun’s path throughout the day?
What size and shape of tarp best suits your space?
Will you anchor the tarp to existing structures or install new posts?
What height do you want the tarp to sit at for maximum shade and airflow?
Pro Tip: Use string or garden hoses to visualize the tarp layout on the ground before making permanent decisions.
Step 2: Measure and Mark Anchor Points
Once you’ve determined the tarp’s location and orientation:
Measure the tarp dimensions.
Mark the exact points where each corner of the tarp will be anchored.
Ensure that the anchor points are at least 5–10% longer than the tarp size to allow for tensioning and slight adjustments.
Consider slope angles for water runoff. Aim for at least a 20-degree angle to prevent water pooling on the tarp.
Step 3: Install Support Posts (If Necessary)
If your backyard lacks existing anchor points like trees or fences, you’ll need to install sturdy support posts:
Dig post holes at least 24 inches deep and 8-12 inches wide for stability.
Set posts in concrete, making sure they remain plumb and level.
Allow the concrete to cure for at least 24–48 hours before applying tension from the tarp.
We recommend using pressure-treated wood, galvanized steel poles, or aluminum posts for longevity and strength.
Step 4: Install Mounting Hardware
With your anchor points ready, it’s time to install the necessary hardware:
Attach eye bolts or pad eyes securely into walls, posts, or other fixed structures.
For added flexibility and adjustability, install turnbuckles or tensioners to fine-tune the tarp’s tightness.
Connect snap hooks, D-rings, or carabiners to make assembly and disassembly easier.
Make sure all hardware is rated for outdoor use to prevent rust and corrosion.
Step 5: Attach and Tension the Shade Tarp
Now it’s time for the most satisfying part—mounting the shade tarp:
Begin by attaching one corner of the tarp to an anchor point.
Gradually attach the remaining corners, moving diagonally for even tension.
Adjust each connection point using your turnbuckles, ropes, or cables.
Pull the tarp tight enough to avoid sagging, but not so tight that it risks tearing.
Check that the tarp maintains the desired slope for rainwater runoff and adjust tension as needed.
Step 6: Final Adjustments and Safety Check
Before enjoying your new shaded area:
Inspect all anchor points and hardware for stability.
Test the tarp’s tension and make adjustments for even distribution.
Ensure that no sharp edges or loose connections remain that could damage the tarp or pose a safety hazard.
Confirm that the tarp is secure in windy conditions by giving it a gentle tug.
If you live in an area with frequent high winds, consider removing the tarp during storms to prevent damage.
Step 7: Enjoy Your Shaded Backyard Oasis
Once installed, your backyard shade tarp provides a comfortable and protective space for outdoor gatherings, relaxation, or family activities. You can decorate underneath with outdoor furniture, string lights, or potted plants to create a personalized outdoor retreat.
Maintenance Tips for Long-Lasting Shade Tarp Performance
To extend the life of your shade tarp, follow these maintenance guidelines:
Regularly check for wear and tear, especially around anchor points and seams.
Clean the tarp periodically with mild soap and water to prevent mildew buildup.
Store the tarp indoors during harsh weather seasons if it's not designed for year-round use.
Tighten hardware as needed to maintain proper tension and avoid sagging.
By following these simple care steps, your shade tarp will continue to deliver years of sun protection and outdoor comfort.
Conclusion: Upgrade Your Outdoor Space with a DIY Shade Tarp
Installing a shade tarp in your backyard is a cost-effective and rewarding DIY project. With careful planning, quality materials, and proper installation techniques, you’ll enjoy cool, shaded outdoor living all season long. This step-by-step guide ensures your project goes smoothly from start to finish.
 GiCor lodging projects ltd.
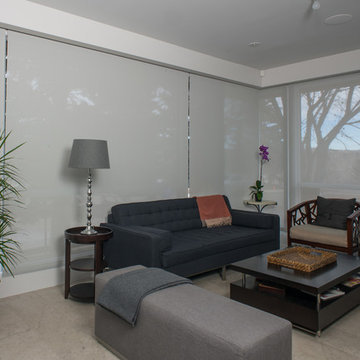
Description: Installation of Mechoshade motorized screen roller shades throughout this residence. This property is on a corner lot and therefore needs privacy from all 4 sides. The client installed a Control4 system and incorporated the window coverings into the project by way of the Mechoshade IQ motors and wireless zigbee cards.
The installation included a 1% open screen fabric for all bedrooms to provide both privacy and some ambient light within these rooms. A 3% open screen cloth was used for all living spaces to reduce heat and glare while maintaining a comfortable level of lighting and views throughout the home.
This installation also incorporated the new Mechoshade corner bracket system which staggers the roller shades into the corner, (one above the other) to reduce the light gaps down to less than 1”. Considering that the windows had only silicone between the glazing in the corners, this bracket was paramount in maintaining the best degree of privacy possible. A custom MDF pocket was created at the ceiling (approx. 10” deep) to house the shading system. Combined with a custom painted aluminum closure panel at the bottom of the shade pocket, the shades were barely visible thru a narrow slot at the back wall when they were in the opened position.
 Paragon Pools
AFTER...
Amazing Backyard Transformations! Pool Renovation from dull to Dazzling!
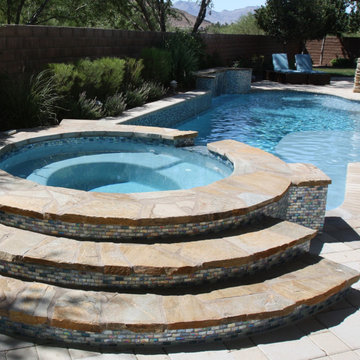
This amazing transformation is the result of a pool renovation by Paragon Pools in Las Vegas.
The homeowner was seeking to update the pool with a more vibrant look. The pool renovation included a redesign of the spa spillway, new tile, new interior finish, and flagstone accents on the spa, spa steps, and seating bench.
Before and after photos.
Designers:
Joseph Michael Vassallo, CBP, PHTA Fellow, PHTA Builder of the Year 2012
Joseph Anthony Vassallo, CBP, PHTA Builder of the Year 2021
If your pool is more than 10 years old… you could benefit from a pool renovation.
New technology:
• Reduce utility consumption with energy efficient equipment, LED lights, and remote connectivity with smart phone app
• Better health by reducing chemical use with the introduction of UV and Ozone water quality systems and
• Improve safety with the latest safety devices and by replacing old drains with VGB compliant drains
What about an overall facelift to enhance the appearance and versatility of the backyard space.
• Is the interior finish/plaster chipping or stained?
• Do you have missing, cracked, or calcified tile?
• Discolored, uneven, or chipped decks?
• Water features that no longer work?
• Do you lack in-pool sitting space for your family and guests?
• Have you dreamed of having a wet deck to place a lounger on?
• Would you love to have a swim up bar for entertaining?
Serving these areas and communities: Lake Las Vegas * Boulder City * Henderson * Seven Hills * Anthem * MacDonald Highlands * MacDonald Ranch * Silverado Ranch * Green Valley Ranch * Inspirada * Southern Highlands * Summerlin * Sun City * Aliante * North Las Vegas * Sky Canyon * Centennial Hills * Providence * Spring Valley * Paradise, and others.
 Zabitat, Door Glass Replacement
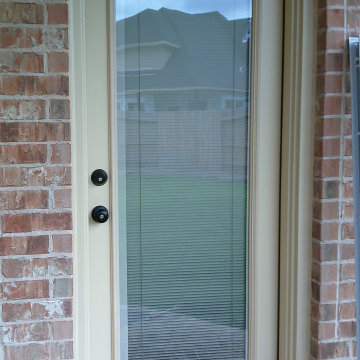
Because they’re protected between glass, Enclosed blinds retain their ‘like new’ look over time and with repeated use. They stay clean and free of damage from kids, pets, and anything else that might come into contact with your doorglass. No dusting, no tangled or dangling cords, and no crimped or dented blinds. The thermally sealed doorglass can be used in doors to meet ENERGY STAR criteria, giving you energy savings and long-term value, too. They reduce heat loss in the winter and solar heat gain in the summer. Our offering includes energy-saving Low-E glass options and impact-resistant, triple-glazed doorglass that safeguards against high winds, offers sound suppression, and reduces heat transmission. With our Light-Touch Blinds, a single-touch control lets you choose the perfect light or privacy level. The ergonomically considered design places the fingertip control within easy reach to tilt, raise, and lower blinds the entire length of the doorglass—with only the slightest movement required. Privacy channels on each side of the doorglass eliminate light gaps when the blinds are closed—no streetlight shadows or sunlight glare. Easy to clean, no dusting required. Light and Privacy Control.

110