
Search results for "Regular season" in Home Design Ideas

 Designs by Debra Cruz
Photo Credit: Christy Armstrong www.homepix.com
Ribbons behind regular decor will give them an immediate dose of the season. You can also add seasonal art to frames to really boost the Christmas spirit.
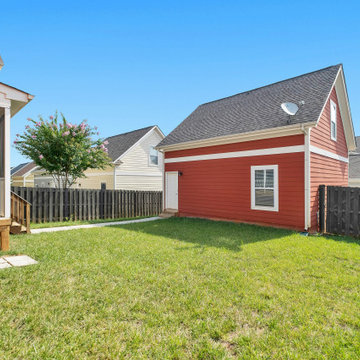
 Cyrus landscaping
Cyrus Landscaping delivers reliable lawn services tailored for Calgary homeowners, keeping your yard lush and pristine through every season. From weekly mowing and edging to weed control and seasonal fertilizing, our expert team handles all the details so you enjoy a healthy, vibrant lawn without the hassle. Serving Northeast Calgary and Airdrie with flexible $150–$250 monthly plans that cover regular visits and complete care

 Calla Angel
• Made from 100% Premium Cotton Voile; Filling: 100% Fine Polyester
• 100% Handmade Luxury Quilt. Whole-cloth construction
• Machine wash friendly
• Ultra soft and light. Versatile for all season use.
• Luxury quilts featured with buoyant bubble design, 100% handmade. Quilts and shams made of 100% cotton voile. Compared to regular cotton fabric, it is softer and lighter. Perfect for all-season use. The quilts come in multiple astonishing colors. One among these will blend seamlessly into your well appointed bedroom.
Find the right local pro for your project
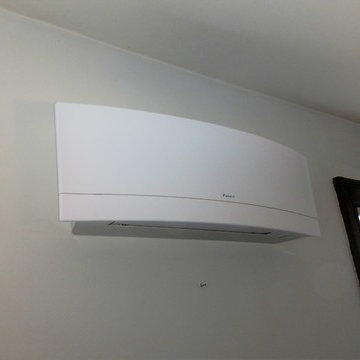
 Pacific HVAC Air Conditioner
 two dust filters and two air quality filters
Example of a classic home design design in New York
Example of a classic home design design in New York
 Garden Designs by Kristen
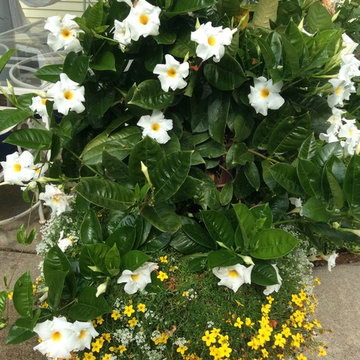
White mandevilla vine with yellow bidens and alyssum in a container
This is an example of a tropical landscaping in Boston.
This is an example of a tropical landscaping in Boston.

 Southern Living Plant Collection
Small very double flowers appear in clusters along stems early in the sasanqua season. Forms a dense, upright, nearly columar shrub.
FEATURES
Bloom/Feature
Plant Type Shrubs
Evergreen or Deciduous Evergreen
USDA Zones 7, 8, 9
Zone Detail Hardy to 5°F USDA zones 7-9
Key Features
Use
Exposure Full sun to part shade
Bloom Season Salmon-rose blooms in the fall
Dimension 6-8' H x 3-4' W
Growth Rate Vigorous
CARE
Water Regular water
Soil Type Rich, acidic, moist, well-drained soil
Fertilizer Early spring
Pruning Shape in early spring
PLANTING INSTRUCTIONS
• water before planting
• plant in full sun to part shade
• dig hole 3X the width of pot
• backfill and plant 1”-2” above soil level
• water and add more soil if needed
• mulch plants
 SwimEx Incorporated
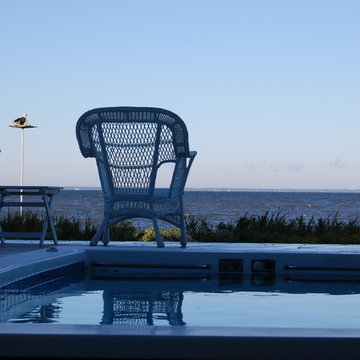
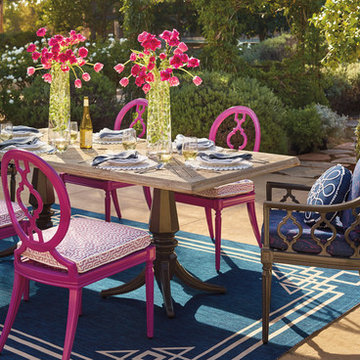
Swimming against the backdrop of a dazzling sunset is a regular occurrence for this swim spa owner. Night after night and season after season, each breathtaking view is better than the one before. And this homeowner is lucky enough to enjoy them all from his own home swim spa. Once installed, notice how he added a pergola over the pool to complete this stunning installation.


 Industrial Projects
Creating a comfortable outdoor living space is a priority for many homeowners and DIY enthusiasts. With rising summer temperatures, installing a shade tarp in your backyard offers an affordable and effective solution for sun protection. We’ve developed this detailed, step-by-step guide to help you confidently install a shade tarp that not only shields you from the sun but also adds aesthetic appeal to your outdoor area.
Benefits of Installing a Backyard Shade Tarp
Before diving into the installation process, let’s explore the key benefits of having a backyard shade tarp:
Provides UV Protection: Keeps your family and guests safe from harmful sun exposure.
Reduces Outdoor Temperatures: Creates a cooler, more enjoyable outdoor space.
Protects Outdoor Furniture: Extends the life of patio furniture by reducing sun damage.
Enhances Outdoor Aesthetics: Adds a modern, stylish look to your yard.
Budget-Friendly: More affordable compared to permanent structures like pergolas.
Materials and Tools You’ll Need
To begin your DIY backyard shade project, gather the following materials and tools:
Materials:
Shade tarp (UV-resistant and breathable)
Sturdy posts or existing structures (trees, fences, walls)
Mounting hardware (eye bolts, D-rings, turnbuckles, snap hooks)
Nylon or polyester rope, or stainless-steel wire
Concrete (if installing new posts)
Tools:
Power drill
Measuring tape
Level
Ladder
Wrench or adjustable spanner
Post hole digger (if installing new posts)
Step 1: Plan Your Shade Tarp Layout
The first step in installing your backyard shade tarp is careful planning. Take time to assess your outdoor area and answer these key questions:
Where is the sun’s path throughout the day?
What size and shape of tarp best suits your space?
Will you anchor the tarp to existing structures or install new posts?
What height do you want the tarp to sit at for maximum shade and airflow?
Pro Tip: Use string or garden hoses to visualize the tarp layout on the ground before making permanent decisions.
Step 2: Measure and Mark Anchor Points
Once you’ve determined the tarp’s location and orientation:
Measure the tarp dimensions.
Mark the exact points where each corner of the tarp will be anchored.
Ensure that the anchor points are at least 5–10% longer than the tarp size to allow for tensioning and slight adjustments.
Consider slope angles for water runoff. Aim for at least a 20-degree angle to prevent water pooling on the tarp.
Step 3: Install Support Posts (If Necessary)
If your backyard lacks existing anchor points like trees or fences, you’ll need to install sturdy support posts:
Dig post holes at least 24 inches deep and 8-12 inches wide for stability.
Set posts in concrete, making sure they remain plumb and level.
Allow the concrete to cure for at least 24–48 hours before applying tension from the tarp.
We recommend using pressure-treated wood, galvanized steel poles, or aluminum posts for longevity and strength.
Step 4: Install Mounting Hardware
With your anchor points ready, it’s time to install the necessary hardware:
Attach eye bolts or pad eyes securely into walls, posts, or other fixed structures.
For added flexibility and adjustability, install turnbuckles or tensioners to fine-tune the tarp’s tightness.
Connect snap hooks, D-rings, or carabiners to make assembly and disassembly easier.
Make sure all hardware is rated for outdoor use to prevent rust and corrosion.
Step 5: Attach and Tension the Shade Tarp
Now it’s time for the most satisfying part—mounting the shade tarp:
Begin by attaching one corner of the tarp to an anchor point.
Gradually attach the remaining corners, moving diagonally for even tension.
Adjust each connection point using your turnbuckles, ropes, or cables.
Pull the tarp tight enough to avoid sagging, but not so tight that it risks tearing.
Check that the tarp maintains the desired slope for rainwater runoff and adjust tension as needed.
Step 6: Final Adjustments and Safety Check
Before enjoying your new shaded area:
Inspect all anchor points and hardware for stability.
Test the tarp’s tension and make adjustments for even distribution.
Ensure that no sharp edges or loose connections remain that could damage the tarp or pose a safety hazard.
Confirm that the tarp is secure in windy conditions by giving it a gentle tug.
If you live in an area with frequent high winds, consider removing the tarp during storms to prevent damage.
Step 7: Enjoy Your Shaded Backyard Oasis
Once installed, your backyard shade tarp provides a comfortable and protective space for outdoor gatherings, relaxation, or family activities. You can decorate underneath with outdoor furniture, string lights, or potted plants to create a personalized outdoor retreat.
Maintenance Tips for Long-Lasting Shade Tarp Performance
To extend the life of your shade tarp, follow these maintenance guidelines:
Regularly check for wear and tear, especially around anchor points and seams.
Clean the tarp periodically with mild soap and water to prevent mildew buildup.
Store the tarp indoors during harsh weather seasons if it's not designed for year-round use.
Tighten hardware as needed to maintain proper tension and avoid sagging.
By following these simple care steps, your shade tarp will continue to deliver years of sun protection and outdoor comfort.
Conclusion: Upgrade Your Outdoor Space with a DIY Shade Tarp
Installing a shade tarp in your backyard is a cost-effective and rewarding DIY project. With careful planning, quality materials, and proper installation techniques, you’ll enjoy cool, shaded outdoor living all season long. This step-by-step guide ensures your project goes smoothly from start to finish.



 Mayflower Construction Group
As we approach the holiday season, we decided to take a break from our regularly scheduled blogs to focus on aspects of renovating that aren’t as frequently discussed. Remodeling is one of the biggest home improvement industries in our country that allows many small contractors an opportunity for tremendous success with the right business plan and team. Likewise, it allows homeowners to transform their living spaces into gorgeous rooms worthy of being featured in magazines and social media profiles.
Give our Christmas letter a read and see how the holiday season is the best time to start preparing for a home improvement project.
Use the QR code or link below to view our blog!
https://mayflowerva.com/a-holiday-letter-from-mayflower/
 Anthony J. Vallée
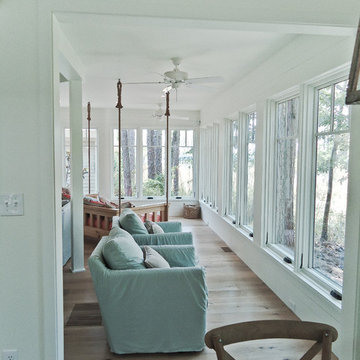
The client was excited to purchase a home in the beautiful resort of Sandestin, but was not pleased with the dark interiors, heavy mouldings, tile floors, dated fixtures and heavy feel of the interior of the home. We solved their problems by completely renovating the interiors. Ceilings were raised, floors were replaced, cabinetry and fixtures were replaced and a problem area in the living room was solved. They now have the open, clean, airy beach home of their dreams and I couldn't be more pleased with how this home turned out for them.
anthony vallee

Photo: Curtis Clark, via Wikimedia Commons, licensed under Creative Commons Attribution-ShareAlike 2.5 Generic
Design ideas for a landscaping in Other.
Design ideas for a landscaping in Other.


 Joseph Spierer Architects, Inc.
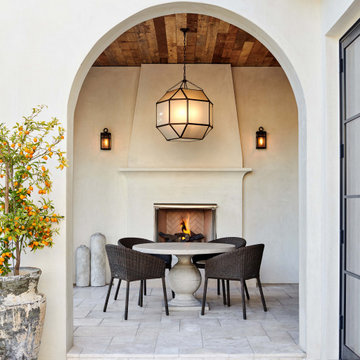
This home's patio includes an intimate outdoor space for relaxing and entertaining.
Inspiration for a mid-sized modern backyard tile patio remodel in Los Angeles with a fireplace and a roof extension
Inspiration for a mid-sized modern backyard tile patio remodel in Los Angeles with a fireplace and a roof extension


 Markham Garage Doors Ltd
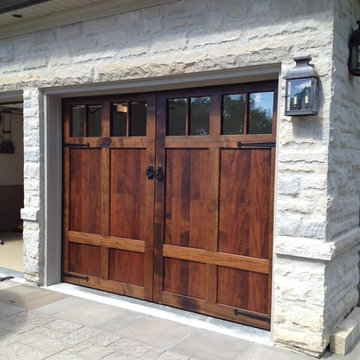
This is a beautiful designed garage door by the architect which we had custom built for the home builder. The doors were made of flat panel inlays and as a result of surface area and exposure is a maintenance intensive design as the panels open and contract with the weather changes and the moisture changes throughout the season. That said the look cannot be duplicated without those downsides and with regular attention maintenance as all wood product require this door has one of a kind curb appeal and gets a lot of attention.
 Landscape Projects, Inc.
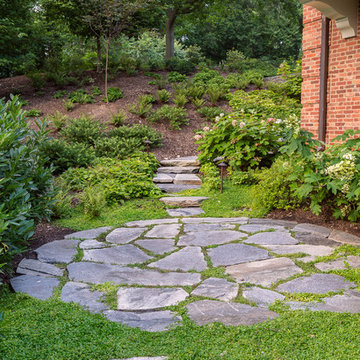
Landscape design by Caroline Ervin Landscape Design. A small random-stone landing space connects a rustic stone path and steps. Blooming oakleaf hydrangeas and perennials, along with azaleas, provide seasonal interest. Photo © Melissa Clark Photography. All rights reserved.


14