
Search results for "Removable" in Home Design Ideas
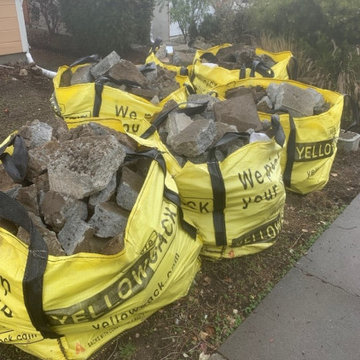

 Best Possible Removal Service In London
What You Should Know About Fuel Tanks
Home heating solutions can encompass electrical, gas, solar and oil based systems. When one talks about oil tanks that are used as home heating systems, there are a few important things to keep in mind.
Start with the installer
A high-quality, professional and expert installer of oil or fuel tanks can certainly help you make the decision on which type of tank is the best for your property. When you decide on underground fuel tanks, you should make sure that they are:
• Compliant with all statutory requirements.
• Made of steel and polyurethane.
• Covered by guarantee.
• Supported by backfill material, leak detection systems and tank supports.
Aboveground fuel tanks are easier to maintain simply because they are more accessible. Even the smallest of oil or fuel leaks can be detected almost immediately. But even here, an installer should give you premium quality tanks. These tanks:
• Should have secondary containment.
• Should be corrosion resistant.
• Should have proper support as well.
Installation
Installation for both – underground and above ground tanks is a technical and complex process. The installation process for both will start with a technician visiting your home and making an assessment of aspects such as:
• Measuring the space.
• Taking stock of the distance from your home to the tank, pipes and so on.
• The supports needed for the tank and so on.
If it is an above ground tank, then it may also need bollards to protect it from vehicles. An underground tank will need containment sumps and drop tubes and so on.
The combination of components will be decided by the installer and you can certainly ask for a complete breakup of the same and get the costs for the same as well.
Remediation
Repair and remediation of above and underground tanks is a critical task. In fact, many problems associated with underground fuel storage tanks can be eliminated if the home owner invests time and resources into periodic analysis and examination of the same.
A fuel tank that has been installed above the ground will be easier to access but repair and remediation of both types of tanks will entail:
• Soil sampling.
• Extent of oil contamination.
• Assessment of leaks and the extent and number of the same.
• Drawing up a plan for dealing with all problem areas.
Removal
Every fuel tank has a shelf life. At some point of time or the other, the fuel tank will need to be removed. When it comes to above ground installations, the removal company will need to assess the type of fuel and the knowhow on emptying the tank completely.
The tank will also need to be cleaned completely before being loaded on to a vehicle that can take it away to a recycling unit or disposal unit. Underground tanks can be removed or closed or treated as abandoned depending on the condition of the tank and official licenses. For instance, a tank can be treated as closure in place if the removal of the same is going to compromise the safety of structures above the ground.

 Becker Building & Remodeling Inc.
Wall between kitchen and dining was removed for easy flow and combining of spaces. Extra doorway to mudroom removed. All new cabinets, pantry, ref,wall micro (not shown). Engr quartz countertops, tile splash, natural oak floating shelves, site finished red oak stained floors.
Find the right local pro for your project
 Jefferson Street Designs
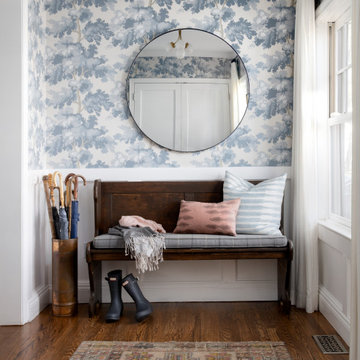
Transitional medium tone wood floor, brown floor and wallpaper entryway photo in DC Metro
 The Jack + Mare | Portland Design & Build
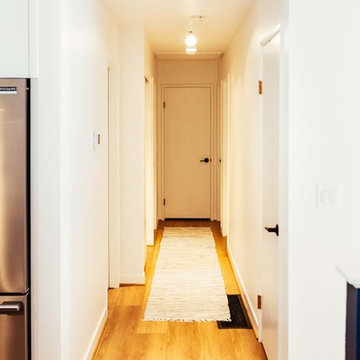
Split Level 1970 home of a young and active family of four. The main pubic spaces in this home were remodeled to create a fresh, clean look.
The Jack + Mare demo'd the kitchen and dining room down to studs and removed the wall between the kitchen/dining and living room to create an open concept space with a clean and fresh new kitchen and dining with ample storage. Now the family can all be together and enjoy one another's company even if mom or dad is busy in the kitchen prepping the next meal.
The custom white cabinets and the blue accent island (and walls) really give a nice clean and fun feel to the space. The island has a gorgeous local solid slab of wood on top. A local artisan salvaged and milled up the big leaf maple for this project. In fact, the tree was from the University of Portland's campus located right where the client once rode the bus to school when she was a child. So it's an extra special custom piece! (fun fact: there is a bullet lodged in the wood that is visible...we estimate it was shot into the tree 30-35 years ago!)
The 'public' spaces were given a brand new waterproof luxury vinyl wide plank tile. With 2 young daughters, a large golden retriever and elderly cat, the durable floor was a must.
project scope at quick glance:
- demo'd and rebuild kitchen and dining room.
- removed wall separating kitchen/dining and living room
- removed carpet and installed new flooring in public spaces
- removed stair carpet and gave fresh black and white paint
- painted all public spaces
- new hallway doorknob harware
- all new LED lighting (kitchen, dining, living room and hallway)
Jason Quigley Photography


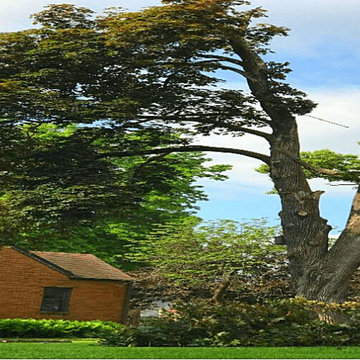
 Tracstar Tree Experts
RESIDENTIAL AND COMMERCIAL TREE CARE NORFOLK VA
Your Hampton Roads Virginia area trees need maintenance. It’s as simple as that. Whether it’s Norfolk VA stump grinding, tree removal Norfolk VA, tree trimming Norfolk VA, or plant heath care your home deserves the best to maintain your beautiful landscape. We started our company with one mission: provide the great people of Norfolk VA with professional, honest, and expert-level tree care. In addition, we were founded in 2002 by a navy veteran that had a passion for working with and climbing trees! Since then, we have built our team with training and certifications to lead the industry forward. Tracstar Tree Experts is here to help with any of your tree service Norfolk VA needs, big or small, we can handle it all!


 Tracstar Tree Experts
RESIDENTIAL AND COMMERCIAL TREE CARE HAMPTON VA
Your Hampton Roads Virginia area trees need maintenance. It’s as simple as that. Whether it’s Hampton VA stump grinding, tree removal Hampton VA, tree trimming Hampton VA, or plant heath care your home deserves the best to maintain your beautiful landscape. We started our company with one mission: provide the great people of Hampton VA with professional, honest, and expert-level tree care. In addition, we were founded in 2002 by a navy veteran that had a passion for working with and climbing trees! Since then, we have built our team with training and certifications to lead the industry forward. Tracstar Tree Experts is here to help with any of your tree service Hampton VA needs, big or small, we can handle it all!
 Tile Doctor Ltd
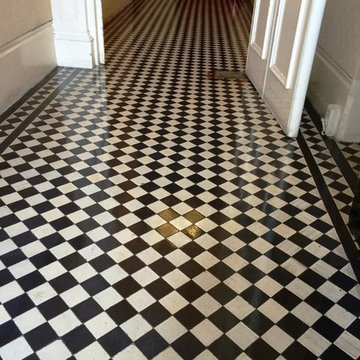
Recently, I was asked to do some Tile Doctoring at Palmeira Square, in the seaside city of Brighton and Hove, to restore the Victorian tiled floor of one of the downstairs offices. Palmeira Square is a residential area which was first developed in the mid-19th century during the reign of Queen Victoria, so many of the buildings feature some fantastic original Victorian tile floors. Although there are many large terraced houses and even mansions in the area, some of the buildings have been converted into offices for commercial use. My client, who leased the downstairs office, managed to persuade the other tenants to employ professional help to restore the tiles, and so I was asked to come in to clean and seal the floor to get it back to looking its best.
With Palmeira Square being quite a lively area, I made sure to fence off the front door area from the wandering public. My first job was to apply Tile Doctor Remove & Go to the floor, a heavy duty stripper, multi-purpose stripper that was able to remove the stubborn marks, stains and ingrained dirt on and between the tiles. In particular, Remove & Go helped to remove some rust stains I found near the door hinges.
I left the product to sit and work its magic for twenty minutes, and during this time I began cleaning the floor using a buffing pad, which is suitable for use on all types of floor (except polished stone), and a solution of Tile Doctor Pro-Clean diluted with water. The combination of a buffing pad and Pro-Clean helped to remove the general dirt and grime that had built up over time in this high traffic area of the office. After the cleaning was complete, the black tiles appeared grey because any remaining sealer had been removed. However, the colour would return after resealing the tiles, which was my next job.
I returned to the office after two days to seal the Victorian tile floor. To do this, I needed to use Tile Doctor Seal & Go, which meant I had to ask the office workers to keep off the floor for most of the day. This is because I needed to apply six coats of Seal & Go to the floor, and each coat takes roughly fourty minutes to dry. Seal & Go provides a stain-resistant surface seal and a durable low-sheen finish, which will help keep this floor looking great for a long time, even with a high traffic of workers coming in and out of the office.
Luckily, it was a warm day outside, and the floor dried quickly, leaving a shiny, deep black surface. Both my client and I were very happy with the result. The client was also pleasantly surprised to see that I had been able to remove the rust stains near the door.
 Tile Doctor Ltd
During an inspection for alteration work, this customer from Cheshunt discovered what appeared to be an original encaustic tiled floor under the hallway carpet. Keen to work out what it was, and have it restored, I was asked to pop round and look.
I went over as requested to survey the hallway floor and confirm their suspicions. The carpet had been secured with gripper rods glued onto the floor and that came away easily enough. Underneath, the tiles had been covered with self-levelling cement which had to be carefully scraped away to reveal the tiles.
I ran a test to see if the cement leveller could be easily removed and using a combination of a scraper with Tile Doctor Pro-Clean, I was able to confirm the tiled floor was indeed salvageable. The house was Edwardian, and the tiles had been laid in a classic black and white geometric pattern typical of the period so I suspect the floor was indeed original.
I worked out a quote to restore the whole floor including the removal of the cement, deep cleaning and then sealing the tiles. Without removing all the cement, it would be difficult to price for replacing broken tiles, but I suspected there may be a few as its quite usual for a floor of this age. Keen to have the floor restored we were given the go-ahead and a date scheduled for the work to start.
The first step was to remove all the carpet and gripper rod so we could see the full extent of the self-levelling screed. Once done it was a case of carefully chipping and scraping away to break up the cement until the tiled floor had been fully revealed. Its slow and detailed work but quite rewarding when the tiled floor is finally revealed. The tiles had survived well under the carpet and cement but as suspected a few repairs and replacement would be needed.
With all the cement brushed away work moved onto cleaning which started with a strong dilution of Tile Doctor Pro-Clean applied to the floor and left to soak in for fifteen minutes the scrubbed in with a rotary machine fitted with a Black pad. A lot of soiling is generated from this which is rinsed off with water and extracted with a wet vacuum. The floor was then inspected and the process repeated where required.
The next step was to treat the tiles to an acid wash using Tile Doctor Grout Clean-up. This is applied as before and has several benefits including dissolving the remaining cement residue and neutralising the pH of the floor after the use of Tile Doctor Pro-Clean which is a strong alkaline.
The floor was then inspected and the broken tiles carefully removed so they could be replaced. This is delicate work as lifting a tile can sometimes upset its neighbour and before you know it the size of the work has tripled. Replacement tiles were then cut to fit the existing geometric pattern and secured into place with a rapid set adhesive and grouted in.
Once the replacement tile and grout had set, the floor was given a light clean using Tile Doctor Neutral Tile Cleaner and then left to dry out overnight.
The next day the tiles were sealed using a single coat of Tile Doctor Colour Grow and the followed up with give coats of Tile Doctor Seal & Go. Colour Grow is an impregnator that soaks into the pores of the tile protecting it from within and improving colour, where as Seal and Go adds a nice subtle sheen to the tiles. Both products are breathable which is an important feature with old floors that don’t have a damp proof membrane.
For aftercare I recommended Neutral Tile Cleaner which is a gentle but effective tile cleaning product that won’t damage the sealer.
Robert Voyce
Hertfordshire TIle Doctor
 Tile Doctor Ltd
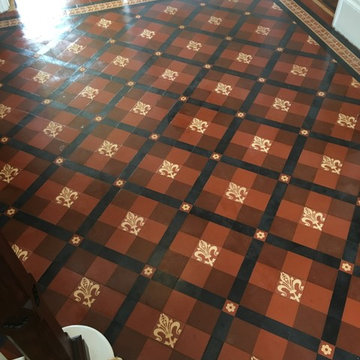
It’s always a great surprise to find old tiled flooring hidden underneath carpet or linoleum which appears especially common with 19th century properties where it’s not unusual for the owners to uncover fantastically patterned, original Victorian tiled floors and, naturally, they want to restore them to their former glory. If you have a property of this type you might want to look under the carpets.
The majority of the time, however, these tiles have been covered up for decades, allowing for thick layers of muck to build-up and are invariably damaged carpet grippers, surface glue and adhesive tape.
This was pretty much the case with this customer who lives in the town of Warminster and was keen to have her own newly discovered Victorian hallway brought back to life, and called me down to see what could be done. Upon arrival at the property, I determined that the tiles would definitely require a very deep clean, including the remove of numerous glue stains, followed by the application of a new seal.
Before I could begin the deep cleaning process, I needed to remove the carpet grippers and surface glue, attempting to remove as much as possible by hand using a scraper.
For the particularly stubborn areas, I applied Tile Doctor Remove & Go, a powerful stripper specially designed to break down adhesives and solvents, and left it to dwell for 20 minutes to eat through the glue deposits. I then attached a black pad to a rotary machine and scrubbed the area thoroughly to clean the affected areas, before removing the resulting slurry using a wet vacuum and rinsed with clean water.
Once I was satisfied that all of the glue had been removed, I proceeded to soak the floor using a solution of the high alkaline cleaner known as Tile Doctor Pro Clean. This is a versatile product that can be used on a wide range of natural stone floors to deal with heavy soil build-up.
I left the Pro-Clean to dwell for ten minutes, and then scrubbed it into the tiles to remove the ingrained dirt and also to break down any old and ineffectual seals. The floor was then once again rinsed thoroughly with clean water which was then extracted using a wet vacuum before being left to dry for a couple of days.
Upon our return to the property I immediately tested the floor for damp using a damp meter. This is an extremely important test to carry out before sealing any kind of tiled flooring, due to the fact that excess moisture left over from cleaning can cloud the sealer and damage its ability to protect against dirt and stains.
Thankfully, the damp test revealed no excess moisture, and I was able to proceed with sealing the tiles. My choice of sealer was Tile Doctor Seal and Go, a water-based topical sealer that simultaneously provides both a stain resistant surface seal and a durable and aesthetically pleasing low sheen finish, also being water based it doesn’t give off a smell as it dries.
This is a very cost effective product that is highly suitable for use on Victorian and Quarry tiles, I applied five costs to achieve the desired finish.
The customer was very pleased with the final results. It’s always satisfying to restore original Victorian tiled floors to looking their best once again – and this one was no exception.
Stuart Ford
Wiltshire Tile Doctor
 Tile Doctor Ltd
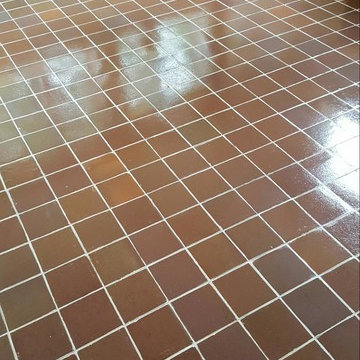
It’s always a good idea to double-check any tile cleaning advice you receive with a professional. Sometimes advice can be inaccurate and cause more problems than good. Such was the case with this customer, who lives in the small town of Appleton near Warrington. He had been advised by his builder to use brick acid to remove carpet glue from a newly discovered Quarry tiled floor. Taking the advice, he had washed the floor several times with a solution of brick acid diluted with water. But while this seemed to successfully remove the carpet glue, it also severely discoloured the grout lines, leaving the entire floor looking grubby and unappealing.
The customer was just about to go on holiday, and asked me to see what could be done to restore the floor’s appearance while he was gone. With the house to myself, I got to work.
My first job was to strip the floor property to remove old sealers present on the tile using a strong dilution of our high alkaline cleaner, Tile Doctor Pro Clean. We use this cleaner on all types of tile and natural stone due to its versatility and consistency.
I spread the solution onto the floor and left to dwell for twenty minutes before scrubbing with a black pad fitted to a floor rotary machine. This process also removed the years of dirt and dust that had penetrated through the recently removed carpet. I also paid attention to the grout lines giving them a good scrub with a stiff grout brush, but the acid staining proved to be impossible to remove completely.
While I’m not sure exactly how long the floor had been covered by carpet, it’s safe to say a deep clean had been long, long overdue. Once I had cleaned the floor to a high standard, I used a wet-vac to remove the now dirty cleaning solution from the floor, before leaving it to dry off completely overnight.
Upon my return to the property the next day, I tested to make sure the floor was dry enough to seal, which is important as excess moisture can cloud the sealer and damage its performance.
Once satisfied, I applied one coat of Tile Doctor Colour Grow, which is our impregnating sealer designed to really bring out the natural colours in the tile, followed by two coats of Tile Doctor Seal and Go to give the tiles a stain resistant, low-sheen finish.
After this was dry I coloured the grout lines with a matching Tile Doctor Grout Colourant to cover and hide the damage the acid had caused to the grout lines. Finally, I gave the floor three more coats of Seal and Go to add the finishing touches.
My customer returned from holiday to find a completely transformed floor. Looking at the before and after photos, it is easy to see why he was more than happy with the result! Another satisfied customer.
Alastair Robb
West Cheshire Tile Doctor
 Tile Doctor Ltd
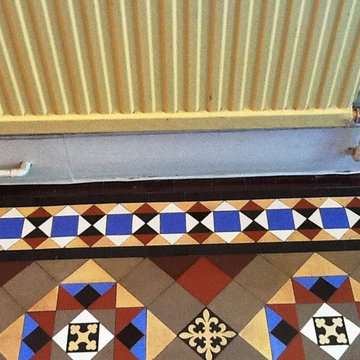
This customer from Bedford, the county town of one of England’s smallest counties Bedfordshire, called me out because they have bought a house and, upon lifting the glued down carpet, had discovered a beautiful Victorian tiled floor. They decided to call me in to see if this original feature could be restored to its former glory having already tried household products to remove the glue and clean the tiles with limited success.
We often find customers who discover old tiles under carpet or linoleum struggle with the standard cleaning products available in supermarket which are only designed for everyday cleaning. The products Tile Doctor sells are far stronger; naturally however to achieve the best results it also helps if you have the right equipment, knowledge and experience and that where we come in.
I popped round to take a look at the floor and having tackled quite a few of these restorations before was confident we could restore the floor so a quote was given and the work was booked in for the next week.
My first course of action was to vacuum the floor to remove any loose debris. This gave me a better picture of the condition of the floor overall, and so I could assess how best to proceed. I opted for our tried and trusted method of applying a diluted solution of Tile Doctor Pro-Clean, which is a very reliable high alkaline cleaner suitable for all types of natural stone and tile. The solution was applied with a pump-up sprayer and left to dwell for 20 minutes to seep into the pores of the tile.
Next, I worked the solution into the tiles using a black scrubbing pad fitted to a rotary machine and hand brushes. The resulting cleaning slurry was then rinsed off – and I found that this had removed most of the glue and surface dirt. There were a few stubborn deposits of glue remaining, but I was able to remove them by using hand brushes and scrapers in combination with Tile Doctor Remove and Go, which is as its name suggest can remove most things including old sealers, epoxy grout haze, urethane coatings, synthetic finishes, adhesives and event paint.
Even after this there were still some patches of glue, so I decided to spray the whole floor with Remove and Go and worked it into the stubborn areas with brushes. I left it to dwell for 15 minutes and then rinsed the floor with a wet pick-up extraction machine. This did the job and the floor was left fresh and clean, ready to be sealed once it had dried.
The floor was left to dry for several days, which is typically necessary for old tiled floors that don’t have a damp proof membrane installed. The customer wanted the floor to look traditional and therefore requested a matt finish. This was achieved by applying two coats of Tile Doctor Colour Grow, which is also breathable thereby allowing any damp to evaporate as gases through the sealer, without affecting the finish.
As I previously mentioned, floors of this age can sometimes have damp issues, so this sealer is ideal for these older floors. Colour Grow is an impregnating sealer, meaning it penetrates the pores of the stone to fill them and prevent trapped dirt. It also intensifies the colours in the tiles to really bring them to life.
The customer was shocked and amazed by the great results as she thought nothing could be done to restore such an old floor. Before leaving the property, I gave her some maintenance instructions to help her keep the floor looking its best in the future. Another satisfied customer!
David Vissian
Bedfordshire Tile Doctor

 Tile Doctor Ltd
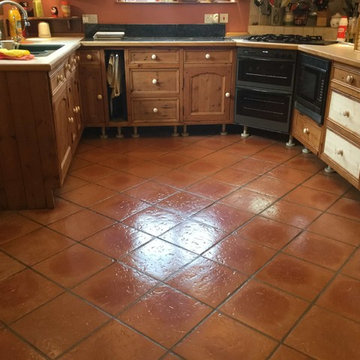
This Terracotta tiled floor was installed in the kitchen of a cottage in the small village of Maidford near Towcester. The tiles were not looking their best and the owner of the property realised it was time to do something about it and contacted Tile Doctor to have the floor stripped and resealed. Stripping and Sealing tile and stone floors is our bread and butter so I was more than happy to pop round and survey the floor which was approximately 9m2.
The grout had darkened with dirt and the previous tile sealer was failing so dirt was now getting ingrained in the Terracotta making it difficult to clean in places and leading to a patchy appearance. We discussed the work involved, my quote was accepted, and a date agreed for me to return and complete the work which would take two days, one to clean and one to seal.
After tidying up the Kitchen and removing the kickboards from underneath the kitchen units I set about working on cleaning and stripping the Terracotta floor of old sealers. To start I tested a small area with a strong dilution of Tile Doctor Wax Away. Wax was quite often used on Terracotta so I figured this product would be a good place to start. My suspicions were proved correct, and I found this to be the best product for removing the many layers of sealant on the floor. Wax Away is a new alkaline product by Tile Doctor and ideal for cleaning clay-based tiles such as Terracotta.
With my sights set on the rest of the floor Wax Away was scrubbed into the tile using a 17” rotary floor scrubbing machine and a black scrubbing pad running on a slow speed which helps to reduce splashing. This activity soon brought the dirt off the floor and the soiled cleaning solution was removed using a wet vacuum and the floor was rinsed down with clean water. The cleaning process was repeated a couple of times until I was happy with the floor, a stiff hand brush was then used along the grout lines with a dilution of Tile Doctor Pro-Clean to clean up the grout.
After rinsing and extracting the floor again the floor was inspected, and I noticed there were a few stubborn paint splashes on the tiles. I managed to remove these and these by spot treating the affected area with Tile Doctor Remove and Go and a steamer to lift the stain out of the clay tile. Once happy the floor was clean it was given a thorough rinse to neutralise it and remove any trace of cleaning products and then left it to dry.
I allowed the floor to dry for several days before returning to seal the Terracotta using numerous coats of Tile Doctor Seal and Go which is an ideal sealer for Terracotta and provides durable stain protection together with a low sheen finish. Terracotta is by its nature very porous and so it’s not unknown for it to take up to nine coats of sealer, which can take some time to apply as like paint you have to wait until it’s dry before it will take the next coat.
The customer was so impressed by the results I achieved in their kitchen they decided to go ahead and book me in to carry out this process throughout the whole of the ground floor which included lounge, study and hallway.
Phil Vissian
Northamptonshire Tile Doctor
 Dry-Tech Water Damage Flood Restoration Services
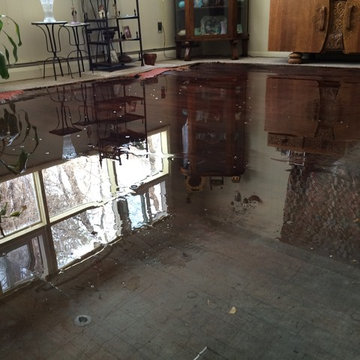
Contact Dry-Tech Water Damage Restoration Services for fast 24/7 emergency water damage restoration, mold remediation and smoke and fire damage in the western suburbs of Philadelphia and surrounding areas. Our IICRC trained restoration specialists are qualified and have the equipment to handle any size restoration job. At Dry-Tech Water Damage Restoration Services, we know water, mold and/or smoke and fire damage can be overwhelming for you and costly to your home or commercial building, so our restoration specialists will work with you step-by-step through the entire process.
Call 610-304-5117 to Contact Us Today! Dry-Tech Restoration Services 24 hr Service, Basement Flood, Basement Water Removal, Broken Pipes, Building Drying, Carpet Cleaning, Carpet Drying, Carpet Extraction, Carpet Repair, Carpet Restoration,
Carpet Water Extraction, Cleaning, Damage Repair, Damage Restoration, Dehumidification, Disaster Restoration, Disinfecting, Drying, Emergency Service, Extraction,
Fire, Fire Restoration, Flood, Flood Clean Up, Flood Damage, Flood Damage Repair, Flood Restoration, Flood Water Removal, Flooded Basement, Floor Drying, Free Estimates,
Leak Detection, Moisture, Odor Removal, Plumbing, Plumbing Repairs, Rain Damage, Remediation, Repairs, Restorations, Roof Leak, Sanitizing, Sewage Clean Up,
Sewage Extraction, Sewage Removal, Sewer Back Up, Sewer Damage Restoration,Smoke, Smoke Damage Repair, Smoke Removal, Steam Cleaning, Storm Damage Repair,
Structural Drying, Sump Pump Failure, Tile Cleaning, Toilet Overflow, Upholstery Cleaning, Wall Drying, Water Damage Clean Up, Water Damage Company,
Water Damage Repair, Water Damage Restoration, Water Drying, Water Extraction, Water Removal, Wind Damage, Wet Carpet, Wood Floor Drying, Wet Basement http://www.restore-911.com
 Tile Doctor Ltd
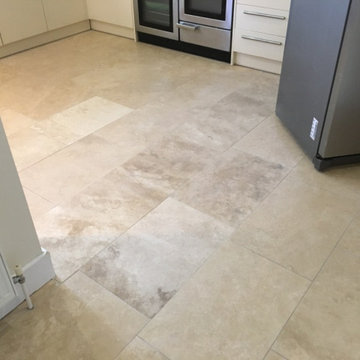
This client from Cobham contacted me in despair, she was quite concerned about her Travertine tiled floor which was cracking. She had the Kitchen and Dining room tiled with Travertine six years ago and recently several cracks had begun to appear in a long line crossing five tiles.
Several holes had also begun to appear and across the threshold to the kitchen from the dining area a serious lip had formed where a tile had risen above its neighbour causing a trip hazard.
After removing a tile from an unobtrusive area, I began to see where the issues lay. The tiler had dabbed the adhesive. This mean that instead of spreading the adhesive equally across the tile and floor they had splurged four lumps in each corner then set the tile down. This is poor working practice that will sooner or later become apparent. It means the areas were no adhesive was applied are eventually compromised resulting in cracking. This could take years or weeks to surface.
After some discussion we decided that I would remove and replace six tiles in total. The client was happy for me to go ahead and agreed a cost for the works to be done.
Returning the following week, firstly I had to remove the grout. This was done with a handheld Fein tool fitted with an oscillating blade. I thought this would be good experience from my son during the holidays, so I took him along and whilst I was working on the grout, he was able to gather the dust in a vacuum cleaner.
Next, I started to remove the cracked tiles with a chisel, starting from the cracks where the tiles would be weakest. This was noisy and messy work which required ear defenders and safety goggles. The process took several hours with the help of my son on general assistance duties. Once the tiles were removed this just left the remaining adhesive attached to the floor to get removed. This was the hardest part of the job, a lot of hammer and chisel work with as much dust gathered as possible to try and contain the mess. I had warned the customer that a considerable amount of mess would be produced and request that she should remove as much items as possible and to tape up her cupboards. Finally, I filled several holes in the sub floor so I would have a flat surface to lay the new tiles on. I left it there for the night to solidify.
Returning the next day, I began laying the replacement tiles down. Colour matching replacement tiles is a difficult task as Travertine is a natural product and colours vary greatly so these were a pretty good match.
Once the adhesive had set, I grouted in the newly laid tiles and once that was dry set about applying a sealer. For this I used two coats of Tile Doctor Ultra Seal which is an impregnating sealer that doesn’t alter the colour of the stone. This would ensure they were nicely protected and hopefully the client will not experience any further issues.
She was very happy with the result and was pleased the floor no long looked unsightly or posed a tripping hazard.
Rupert Mcleod
West Surrey Tile Doctor
 Tracstar Tree Experts
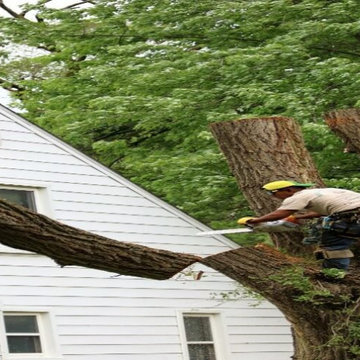
RESIDENTIAL AND COMMERCIAL TREE CARE NORFOLK VA
Your Hampton Roads Virginia area trees need maintenance. It’s as simple as that. Whether it’s Norfolk VA stump grinding, tree removal Norfolk VA, tree trimming Norfolk VA, or plant heath care your home deserves the best to maintain your beautiful landscape. We started our company with one mission: provide the great people of Norfolk VA with professional, honest, and expert-level tree care. In addition, we were founded in 2002 by a navy veteran that had a passion for working with and climbing trees! Since then, we have built our team with training and certifications to lead the industry forward. Tracstar Tree Experts is here to help with any of your tree service Norfolk VA needs, big or small, we can handle it all!
 Tracstar Tree Experts
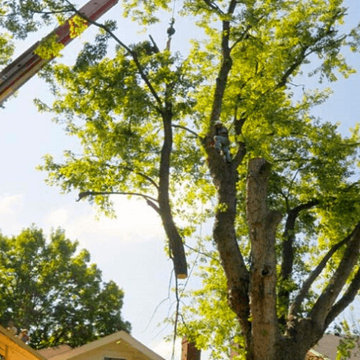
RESIDENTIAL AND COMMERCIAL TREE CARE HAMPTON VA
Your Hampton Roads Virginia area trees need maintenance. It’s as simple as that. Whether it’s Hampton VA stump grinding, tree removal Hampton VA, tree trimming Hampton VA, or plant heath care your home deserves the best to maintain your beautiful landscape. We started our company with one mission: provide the great people of Hampton VA with professional, honest, and expert-level tree care. In addition, we were founded in 2002 by a navy veteran that had a passion for working with and climbing trees! Since then, we have built our team with training and certifications to lead the industry forward. Tracstar Tree Experts is here to help with any of your tree service Hampton VA needs, big or small, we can handle it all!
 Tile Doctor Ltd
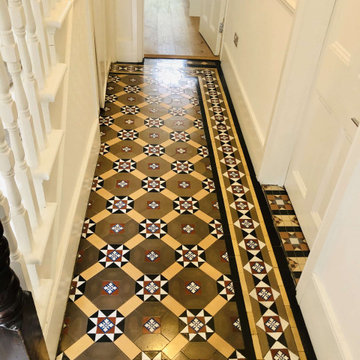
This customer had just moved into a property in Chesham around eighteen months ago. During that time, they had completely renovated the property and in the process had pulled up the hallway carpet to discover a lovely Victorian tiled floor which appeared to be in good condition but very dirty. Period features like these can add a lot of value to a house these days and so they decided to investigate having it professionally cleaned and contacted me for a quote.
Although I can give some indication of price over the phone you never know exactly what to expect so my preference is to visit the property a conduct a test clean. It’s a little trickier to do this now due to COVID-19 but using a combination of PPE, maximum ventilation and social distancing measures I was able to work on the floor. The tiles were in good order with no replacements needed so my focus would be removing carpet adhesive and ingrained dirt. The test went well, and I followed up with a quotation which was accepted, and a date arranged to do the work.
I had worked out previously that the quickest was to deep clean the floor and remove the glue and any old seal was to apply Tile Doctor Remove and Go which as its name suggests is a coatings removed designed for Tiled floors. My method was to spray strong a dilution of Remove and Go onto the Victorian tiles and leave it to soak in for fifteen minutes. Then it was scrubbed in with a black scrubbing pad fitted to a rotary machine. The soil was rinsed off using a minimal of water and extracted with a wet vacuum.
Once the floor had dried, I inspected the tiles and could see more work would be needed to get the white tiles really sparkling. For this I went over the floor using a 200-grit resurfacing pad using water to lubricate the process, I also used handheld burnishing blocks of different grits to do the edges. With this extra effort and another rinse with water to remove the soil the floor looked great, and so I left for the day so it could dry out ready for sealing.
I came back the next day and started by taking moisture readings with a damp meter to ensure the tiles were dry and ready for sealing. This is important as you don’t want to apply sealer to a damp tile and old floors can suffer from damp issues due to the lack of a damp proof membrane.
All was well with the floor, so I was able to move straight onto sealing which started with the application of a single coat of Tile Doctor Colour Grow. This is an impregnating sealer that soaks into the pores of the tile enhancing colour and adding protection. Once this had dried, I followed up with another seven coats of Tile Doctor Seal and Go which adds further protection and leaves a nice subtle sheen to the tiles. This product works really well on old Victorian Tiles like these and being water based it doesn’t leave a smell as it dries.
Andrew Newstead
South Buckinghamshire Tile Doctor
 Tile Doctor Ltd
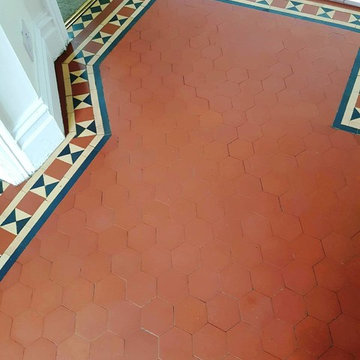
From The 1860s Victorian tiled floors started to appear in public buildings and by the 1890s they had become an essential feature in the most ordinary Victorian terraced houses. Although these floors fell out of fashion during the 1960s and ’70s, when many of them were covered over, they are now being rediscovered by their present owners and this is exactly what happened to my customer in the village of Littleover.
The customer had attempted to clean the floor by themselves but they couldn’t archive the result wanted, fortunately they discovered the Derbyshire Tile Doctor and after their call I went over and did a test for cleaning to make sure I can archive the needed results. They were happy with what they saw, so they booked me in to complete the work.
For cleaning the hallway I used a strong dilution of Tile Doctors Pro Clean which is strong multi-purpose high-alkaline cleaner. I left the Pro Clean to dwell for 10 minutes and then worked it in the tiles by using a strong black scrubbing pad fitted to my rotary machine. After scrubbing I rinsed the floor several times with clean water to remove any trace of cleaning product from the floor.
After successfully cleaning the hall I moved on to the porch which still had some old topical sealer on less walked areas. On these areas I had to use Tile Doctors own very effective stripper Remove and Go. Remove and Go has a long dwell time to remove any given sealer or wax so I left it to soak in for fifteen minutes followed by scrubbing it in with black pad fitted to rotary machine. The next step was to wash off the residue with water which was then removed using a wet vacuum.
Following this the tiles were given a rinse with Tile Doctor Grout Clean-up which is an acid based product that can remove grout smears and mineral deposits. Last step before sealing was to give the floor a thorough wash down with clean water to remove any cleaning product left on the tiles and then I left the floor to dry overnight.
Next day when I returned I used my damp tester to make sure that the floor is completely dry. Luckily for me floor was all dry and I started sealing. For sealing I used Tile Doctors Colour Grow Sealer which is colour enhancing breathable sealer. I applied 2 coats of the sealer and after every coat I polished off the excess with clean cotton cloths.
The result was really good and my customer was very happy with the work and said that now the floor looks transformed.
Tony Olmet
Derbyshire Tile Doctor
39