
Search results for "Removable" in Home Design Ideas

 Tracstar Tree Experts
RESIDENTIAL AND COMMERCIAL TREE CARE HAMPTON VA
Your Hampton Roads Virginia area trees need maintenance. It’s as simple as that. Whether it’s Hampton VA stump grinding, tree removal Hampton VA, tree trimming Hampton VA, or plant heath care your home deserves the best to maintain your beautiful landscape. We started our company with one mission: provide the great people of Hampton VA with professional, honest, and expert-level tree care. In addition, we were founded in 2002 by a navy veteran that had a passion for working with and climbing trees! Since then, we have built our team with training and certifications to lead the industry forward. Tracstar Tree Experts is here to help with any of your tree service Hampton VA needs, big or small, we can handle it all!

 Tile Doctor Ltd
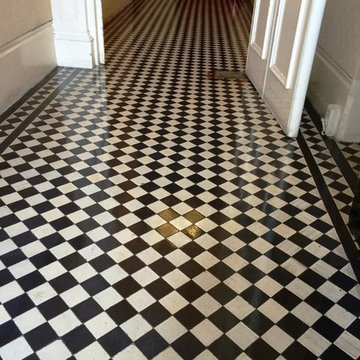
During an inspection for alteration work, this customer from Cheshunt discovered what appeared to be an original encaustic tiled floor under the hallway carpet. Keen to work out what it was, and have it restored, I was asked to pop round and look.
I went over as requested to survey the hallway floor and confirm their suspicions. The carpet had been secured with gripper rods glued onto the floor and that came away easily enough. Underneath, the tiles had been covered with self-levelling cement which had to be carefully scraped away to reveal the tiles.
I ran a test to see if the cement leveller could be easily removed and using a combination of a scraper with Tile Doctor Pro-Clean, I was able to confirm the tiled floor was indeed salvageable. The house was Edwardian, and the tiles had been laid in a classic black and white geometric pattern typical of the period so I suspect the floor was indeed original.
I worked out a quote to restore the whole floor including the removal of the cement, deep cleaning and then sealing the tiles. Without removing all the cement, it would be difficult to price for replacing broken tiles, but I suspected there may be a few as its quite usual for a floor of this age. Keen to have the floor restored we were given the go-ahead and a date scheduled for the work to start.
The first step was to remove all the carpet and gripper rod so we could see the full extent of the self-levelling screed. Once done it was a case of carefully chipping and scraping away to break up the cement until the tiled floor had been fully revealed. Its slow and detailed work but quite rewarding when the tiled floor is finally revealed. The tiles had survived well under the carpet and cement but as suspected a few repairs and replacement would be needed.
With all the cement brushed away work moved onto cleaning which started with a strong dilution of Tile Doctor Pro-Clean applied to the floor and left to soak in for fifteen minutes the scrubbed in with a rotary machine fitted with a Black pad. A lot of soiling is generated from this which is rinsed off with water and extracted with a wet vacuum. The floor was then inspected and the process repeated where required.
The next step was to treat the tiles to an acid wash using Tile Doctor Grout Clean-up. This is applied as before and has several benefits including dissolving the remaining cement residue and neutralising the pH of the floor after the use of Tile Doctor Pro-Clean which is a strong alkaline.
The floor was then inspected and the broken tiles carefully removed so they could be replaced. This is delicate work as lifting a tile can sometimes upset its neighbour and before you know it the size of the work has tripled. Replacement tiles were then cut to fit the existing geometric pattern and secured into place with a rapid set adhesive and grouted in.
Once the replacement tile and grout had set, the floor was given a light clean using Tile Doctor Neutral Tile Cleaner and then left to dry out overnight.
The next day the tiles were sealed using a single coat of Tile Doctor Colour Grow and the followed up with give coats of Tile Doctor Seal & Go. Colour Grow is an impregnator that soaks into the pores of the tile protecting it from within and improving colour, where as Seal and Go adds a nice subtle sheen to the tiles. Both products are breathable which is an important feature with old floors that don’t have a damp proof membrane.
For aftercare I recommended Neutral Tile Cleaner which is a gentle but effective tile cleaning product that won’t damage the sealer.
Robert Voyce
Hertfordshire TIle Doctor
 Tile Doctor Ltd
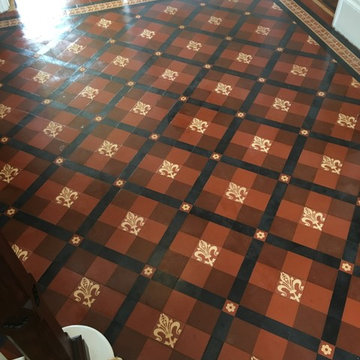
Recently, I was asked to do some Tile Doctoring at Palmeira Square, in the seaside city of Brighton and Hove, to restore the Victorian tiled floor of one of the downstairs offices. Palmeira Square is a residential area which was first developed in the mid-19th century during the reign of Queen Victoria, so many of the buildings feature some fantastic original Victorian tile floors. Although there are many large terraced houses and even mansions in the area, some of the buildings have been converted into offices for commercial use. My client, who leased the downstairs office, managed to persuade the other tenants to employ professional help to restore the tiles, and so I was asked to come in to clean and seal the floor to get it back to looking its best.
With Palmeira Square being quite a lively area, I made sure to fence off the front door area from the wandering public. My first job was to apply Tile Doctor Remove & Go to the floor, a heavy duty stripper, multi-purpose stripper that was able to remove the stubborn marks, stains and ingrained dirt on and between the tiles. In particular, Remove & Go helped to remove some rust stains I found near the door hinges.
I left the product to sit and work its magic for twenty minutes, and during this time I began cleaning the floor using a buffing pad, which is suitable for use on all types of floor (except polished stone), and a solution of Tile Doctor Pro-Clean diluted with water. The combination of a buffing pad and Pro-Clean helped to remove the general dirt and grime that had built up over time in this high traffic area of the office. After the cleaning was complete, the black tiles appeared grey because any remaining sealer had been removed. However, the colour would return after resealing the tiles, which was my next job.
I returned to the office after two days to seal the Victorian tile floor. To do this, I needed to use Tile Doctor Seal & Go, which meant I had to ask the office workers to keep off the floor for most of the day. This is because I needed to apply six coats of Seal & Go to the floor, and each coat takes roughly fourty minutes to dry. Seal & Go provides a stain-resistant surface seal and a durable low-sheen finish, which will help keep this floor looking great for a long time, even with a high traffic of workers coming in and out of the office.
Luckily, it was a warm day outside, and the floor dried quickly, leaving a shiny, deep black surface. Both my client and I were very happy with the result. The client was also pleasantly surprised to see that I had been able to remove the rust stains near the door.
Find the right local pro for your project
 Tile Doctor Ltd
It’s always a great surprise to find old tiled flooring hidden underneath carpet or linoleum which appears especially common with 19th century properties where it’s not unusual for the owners to uncover fantastically patterned, original Victorian tiled floors and, naturally, they want to restore them to their former glory. If you have a property of this type you might want to look under the carpets.
The majority of the time, however, these tiles have been covered up for decades, allowing for thick layers of muck to build-up and are invariably damaged carpet grippers, surface glue and adhesive tape.
This was pretty much the case with this customer who lives in the town of Warminster and was keen to have her own newly discovered Victorian hallway brought back to life, and called me down to see what could be done. Upon arrival at the property, I determined that the tiles would definitely require a very deep clean, including the remove of numerous glue stains, followed by the application of a new seal.
Before I could begin the deep cleaning process, I needed to remove the carpet grippers and surface glue, attempting to remove as much as possible by hand using a scraper.
For the particularly stubborn areas, I applied Tile Doctor Remove & Go, a powerful stripper specially designed to break down adhesives and solvents, and left it to dwell for 20 minutes to eat through the glue deposits. I then attached a black pad to a rotary machine and scrubbed the area thoroughly to clean the affected areas, before removing the resulting slurry using a wet vacuum and rinsed with clean water.
Once I was satisfied that all of the glue had been removed, I proceeded to soak the floor using a solution of the high alkaline cleaner known as Tile Doctor Pro Clean. This is a versatile product that can be used on a wide range of natural stone floors to deal with heavy soil build-up.
I left the Pro-Clean to dwell for ten minutes, and then scrubbed it into the tiles to remove the ingrained dirt and also to break down any old and ineffectual seals. The floor was then once again rinsed thoroughly with clean water which was then extracted using a wet vacuum before being left to dry for a couple of days.
Upon our return to the property I immediately tested the floor for damp using a damp meter. This is an extremely important test to carry out before sealing any kind of tiled flooring, due to the fact that excess moisture left over from cleaning can cloud the sealer and damage its ability to protect against dirt and stains.
Thankfully, the damp test revealed no excess moisture, and I was able to proceed with sealing the tiles. My choice of sealer was Tile Doctor Seal and Go, a water-based topical sealer that simultaneously provides both a stain resistant surface seal and a durable and aesthetically pleasing low sheen finish, also being water based it doesn’t give off a smell as it dries.
This is a very cost effective product that is highly suitable for use on Victorian and Quarry tiles, I applied five costs to achieve the desired finish.
The customer was very pleased with the final results. It’s always satisfying to restore original Victorian tiled floors to looking their best once again – and this one was no exception.
Stuart Ford
Wiltshire Tile Doctor
 Pearl Remodeling
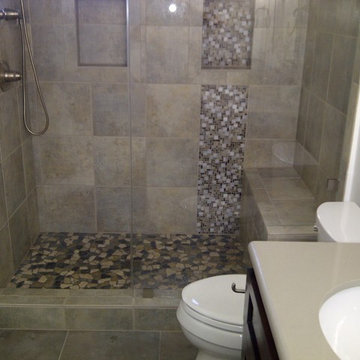
Turning a 3' stand up shower and a single sink vanity to a 5' shower with dual sink vanity and heated floors.
Mid-sized trendy 3/4 gray tile and porcelain tile porcelain tile alcove shower photo in Los Angeles with an undermount sink, shaker cabinets, dark wood cabinets, quartz countertops, a two-piece toilet and gray walls
Mid-sized trendy 3/4 gray tile and porcelain tile porcelain tile alcove shower photo in Los Angeles with an undermount sink, shaker cabinets, dark wood cabinets, quartz countertops, a two-piece toilet and gray walls
 Archuleta Builders
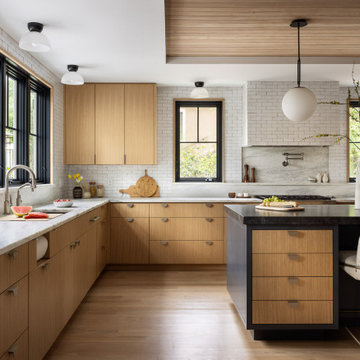
Example of a minimalist l-shaped medium tone wood floor, brown floor, tray ceiling and wood ceiling kitchen design in New York with an undermount sink, flat-panel cabinets, medium tone wood cabinets, white backsplash, stainless steel appliances, an island and white countertops
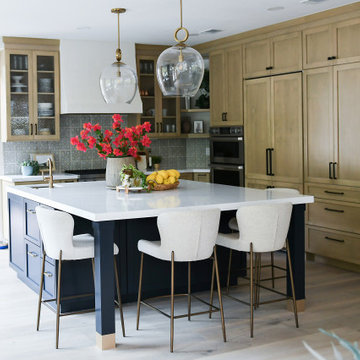
 Lori Ramsay Design
Our Modern Santa Barbara Style Kitchen underwent a huge transformation that opened the kitchen to the family room and formal dining room to create spaces that are more livable and functional as well as beautiful.


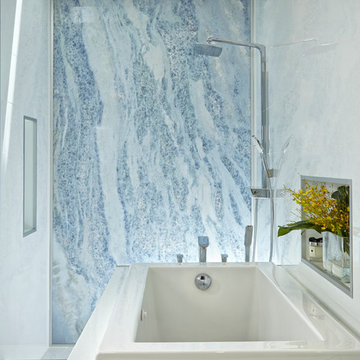
 J Design Group - Interior Designers Miami - Modern
Home and Living Examiner said:
Modern renovation by J Design Group is stunning
J Design Group, an expert in luxury design, completed a new project in Tamarac, Florida, which involved the total interior remodeling of this home. We were so intrigued by the photos and design ideas, we decided to talk to J Design Group CEO, Jennifer Corredor. The concept behind the redesign was inspired by the client’s relocation.
Andrea Campbell: How did you get a feel for the client's aesthetic?
Jennifer Corredor: After a one-on-one with the Client, I could get a real sense of her aesthetics for this home and the type of furnishings she gravitated towards.
The redesign included a total interior remodeling of the client's home. All of this was done with the client's personal style in mind. Certain walls were removed to maximize the openness of the area and bathrooms were also demolished and reconstructed for a new layout. This included removing the old tiles and replacing with white 40” x 40” glass tiles for the main open living area which optimized the space immediately. Bedroom floors were dressed with exotic African Teak to introduce warmth to the space.
We also removed and replaced the outdated kitchen with a modern look and streamlined, state-of-the-art kitchen appliances. To introduce some color for the backsplash and match the client's taste, we introduced a splash of plum-colored glass behind the stove and kept the remaining backsplash with frosted glass. We then removed all the doors throughout the home and replaced with custom-made doors which were a combination of cherry with insert of frosted glass and stainless steel handles.
All interior lights were replaced with LED bulbs and stainless steel trims, including unique pendant and wall sconces that were also added. All bathrooms were totally gutted and remodeled with unique wall finishes, including an entire marble slab utilized in the master bath shower stall.
Once renovation of the home was completed, we proceeded to install beautiful high-end modern furniture for interior and exterior, from lines such as B&B Italia to complete a masterful design. One-of-a-kind and limited edition accessories and vases complimented the look with original art, most of which was custom-made for the home.
To complete the home, state of the art A/V system was introduced. The idea is always to enhance and amplify spaces in a way that is unique to the client and exceeds his/her expectations.
To see complete J Design Group featured article, go to: http://www.examiner.com/article/modern-renovation-by-j-design-group-is-stunning
Living Room,
Dining room,
Master Bedroom,
Master Bathroom,
Powder Bathroom,
Miami Interior Designers,
Miami Interior Designer,
Interior Designers Miami,
Interior Designer Miami,
Modern Interior Designers,
Modern Interior Designer,
Modern interior decorators,
Modern interior decorator,
Miami,
Contemporary Interior Designers,
Contemporary Interior Designer,
Interior design decorators,
Interior design decorator,
Interior Decoration and Design,
Black Interior Designers,
Black Interior Designer,
Interior designer,
Interior designers,
Home interior designers,
Home interior designer,
Daniel Newcomb
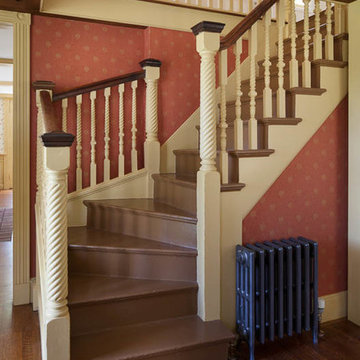

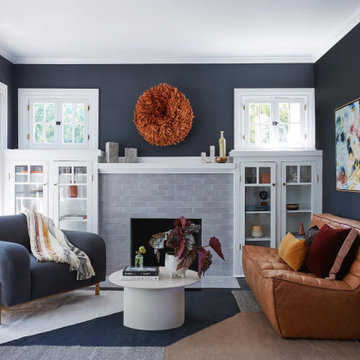

 The Jack + Mare | Portland Design & Build
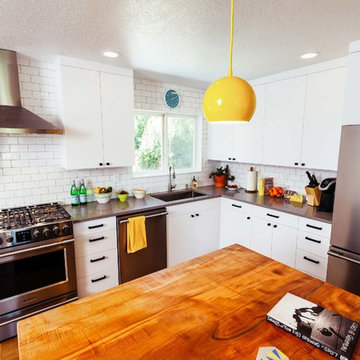
Split Level 1970 home of a young and active family of four. The main public spaces in this home were remodeled to create a fresh, clean look.
The Jack + Mare demo'd the kitchen and dining room down to studs and removed the wall between the kitchen/dining and living room to create an open concept space with a clean and fresh new kitchen and dining with ample storage. Now the family can all be together and enjoy one another's company even if mom or dad is busy in the kitchen prepping the next meal.
The custom white cabinets and the blue accent island (and walls) really give a nice clean and fun feel to the space. The island has a gorgeous local solid slab of wood on top. A local artisan salvaged and milled up the big leaf maple for this project. In fact, the tree was from the University of Portland's campus located right where the client once rode the bus to school when she was a child. So it's an extra special custom piece! (fun fact: there is a bullet lodged in the wood that is visible...we estimate it was shot into the tree 30-35 years ago!)
The 'public' spaces were given a brand new waterproof luxury vinyl wide plank tile. With 2 young daughters, a large golden retriever and elderly cat, the durable floor was a must.
project scope at quick glance:
- demo'd and rebuild kitchen and dining room.
- removed wall separating kitchen/dining and living room
- removed carpet and installed new flooring in public spaces
- removed stair carpet and gave fresh black and white paint
- painted all public spaces
- new hallway doorknob harware
- all new LED lighting (kitchen, dining, living room and hallway)
Jason Quigley Photography
 McGuire + Co. Kitchen & Bath
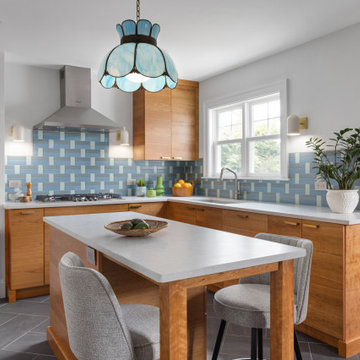
Mid-century modern kitchen in Medford, MA, with cherry cabinetry, a small workstation island, quartz countertops, and a custom tile backsplash in shades of blue. We reused the client's vintage blue glass light fixture. Project also includes a mudroom and powder room.












40