
Search results for "Remove popular" in Home Design Ideas

 Michael Nash Design, Build & Homes
Built in the early 1950s, this small urban townhouse is located in North Old Town Alexandria in an area currently undergoing major redevelopment. The neighborhood is popular with, and affordable for, young people and families, and very convenient to Washington, DC.
In its heyday, the townhouse touted a stately brick exterior, plaster walls, tongue and groove wood flooring and beautiful wooden staircase. Sixty years later, however, the homeowners were faced with crumbling masonry, sagging floors, a double layer of wallpaper over the plaster walls, a crumbling staircase, a dysfunctional kitchen and small, dark second floor rooms. Additionally, the basement had a low ceiling, moldy and cinder block walls, no plumbing and a large boiler taking up most of the space.
The homeowners’ goal was to restore the exterior’s historic look while creating an interior up-to-date for the 21st Century. To turn their vision into reality, they turned to Michael Nash Design, Build & Homes.
Design Solutions
To maintain the townhome’s historic exterior, the Michael Nash team carefully removed, salvaged, restored and reused existing brick masonry. Matching fascia boards and windows were combined with existing windows to complete the exterior renovation.
All interior walls were gutted and reframed. New electrical work, new insulation and new drywall were installed. Much of the home’s original trim was salvaged and reused, as was a piece of art glass, all to keep a bit of the past in the renovation.
The sagging subfloors were fixed, new hard wood floors were installed and a new staircase and railing were designed in a style similar to the original.
The solid wall between the kitchen and the dining room was removed, plumbing was relocated for a new sink location and the kitchen got expanded with an island into the dining room. Closet and plumbing stacks were relocated to allow a new space for fridge. Stainless steel appliances, granite countertops and custom cabinetry highlight the new modern kitchen.
The plan called for redesigning the three bedrooms on the second floor to allow a larger bathroom, walk-in closet and wider hallways. In addition to new roofing, a large skylight was installed to allow natural light into the bathroom and the upper hallway.
The basement was totally revamped. New plumbing was put in place for a full bathroom, laundry room and a den. New e-grass window was installed in the basement to bring this basement up to current building codes.
This homeowners love the neighborhood and now their home gives them the opportunity to stay in the same location.
 Michael Nash Design, Build & Homes
Built in the early 1950s, this small urban townhouse is located in North Old Town Alexandria in an area currently undergoing major redevelopment. The neighborhood is popular with, and affordable for, young people and families, and very convenient to Washington, DC.
In its heyday, the townhouse touted a stately brick exterior, plaster walls, tongue and groove wood flooring and beautiful wooden staircase. Sixty years later, however, the homeowners were faced with crumbling masonry, sagging floors, a double layer of wallpaper over the plaster walls, a crumbling staircase, a dysfunctional kitchen and small, dark second floor rooms. Additionally, the basement had a low ceiling, moldy and cinder block walls, no plumbing and a large boiler taking up most of the space.
The homeowners’ goal was to restore the exterior’s historic look while creating an interior up-to-date for the 21st Century. To turn their vision into reality, they turned to Michael Nash Design, Build & Homes.
Design Solutions
To maintain the townhome’s historic exterior, the Michael Nash team carefully removed, salvaged, restored and reused existing brick masonry. Matching fascia boards and windows were combined with existing windows to complete the exterior renovation.
All interior walls were gutted and reframed. New electrical work, new insulation and new drywall were installed. Much of the home’s original trim was salvaged and reused, as was a piece of art glass, all to keep a bit of the past in the renovation.
The sagging subfloors were fixed, new hard wood floors were installed and a new staircase and railing were designed in a style similar to the original.
The solid wall between the kitchen and the dining room was removed, plumbing was relocated for a new sink location and the kitchen got expanded with an island into the dining room. Closet and plumbing stacks were relocated to allow a new space for fridge. Stainless steel appliances, granite countertops and custom cabinetry highlight the new modern kitchen.
The plan called for redesigning the three bedrooms on the second floor to allow a larger bathroom, walk-in closet and wider hallways. In addition to new roofing, a large skylight was installed to allow natural light into the bathroom and the upper hallway.
The basement was totally revamped. New plumbing was put in place for a full bathroom, laundry room and a den. New e-grass window was installed in the basement to bring this basement up to current building codes.
This homeowners love the neighborhood and now their home gives them the opportunity to stay in the same location.
 Tile Doctor Ltd
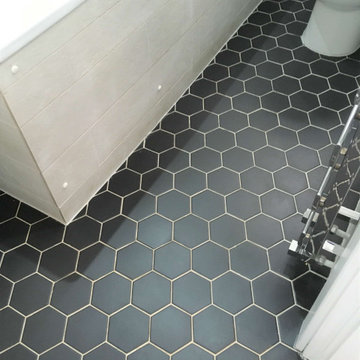
The pictures showed are of an Encaustic Cement tiled floor that had been installed in the bathroom of a property in Twickenham. At the time the tiles were installed, they did not seal them and had since accumulated dirt, especially in the grout lines.
Encaustic cement tiles have become extremely popular in the last few years with many beautiful artistic often geometric patterns available to choose from. The very nature of the cement-based tile however does make it slightly porous, and if left unsealed dirt will become ingrained in the tile making it difficult to remove and keep clean. Like grout they do therefore need to be sealed in order to keep them looking at their best for longer.
Now we normally recommend using diamond encrusted burnishing pads when renovating Encaustic Cement tiles however in this case the face of the tiles were not too bad and it was really the grout that needed the most attention. So, to cut the cost for customer, I advised a straightforward alkaline scrub clean and seal.
To clean the tile and grout I sprayed the floor with a strong dilution of Tile Doctor Pro-Clean and left it to soak into the dirt for ten minutes. Space in the bathroom was quite tight so instead of using a mechanical floor scrubber I scrubbed the tile and grout by hand working the alkaline cleaning solution into the pores to release the grout in dirt.
After scrubbing the floor was rinsed with a little water and the soil removed with a wet vacuum. Afterwards the floor was inspected, and any stubborn areas retreated with repeat of the process. After a final rinse, the floor was dried as much as possible with the wet vacuum.
Fortunately, the weather has been amazing of late and so it did not take long for the floor to dry, being a small space and a little encouragement from a heat gun always helps. Removing excess moisture before sealing is essential as even a small amount can cloud the sealer resulting in an uneven appearance.
Once satisfied that the floor was dry, I proceeded to seal it by applying a couple two coats of Tile Doctor Colour Grow across the Encaustic tile and grout. As an impregnating sealer Colour Grow penetrates the pores of the cement occupying the space and thus prevent any dirt from becoming ingrained there. Colour Grow’s colour intensifying properties also helped to deepen the black colour of the tile enhancing the contrast between the tiles and grout.
Now the floor has been properly sealed it will be far easier for the customer to keep them clean in future. For maximum longevity of the sealer I recommend maintenance cleaning with Tile Doctor Neutral Cleaner. Don’t be tempted to use supermarket cleaning products without reading the label first, many are simply too strong for cleaning sealed surfaces and will strip off the sealer prematurely leaving the tiles unprotected.
Jonathan Oldham
South Middlesex Tile Doctor
Find the right local pro for your project
 Michael Nash Design, Build & Homes
Built in the early 1950s, this small urban townhouse is located in North Old Town Alexandria in an area currently undergoing major redevelopment. The neighborhood is popular with, and affordable for, young people and families, and very convenient to Washington, DC.
In its heyday, the townhouse touted a stately brick exterior, plaster walls, tongue and groove wood flooring and beautiful wooden staircase. Sixty years later, however, the homeowners were faced with crumbling masonry, sagging floors, a double layer of wallpaper over the plaster walls, a crumbling staircase, a dysfunctional kitchen and small, dark second floor rooms. Additionally, the basement had a low ceiling, moldy and cinder block walls, no plumbing and a large boiler taking up most of the space.
The homeowners’ goal was to restore the exterior’s historic look while creating an interior up-to-date for the 21st Century. To turn their vision into reality, they turned to Michael Nash Design, Build & Homes.
Design Solutions
To maintain the townhome’s historic exterior, the Michael Nash team carefully removed, salvaged, restored and reused existing brick masonry. Matching fascia boards and windows were combined with existing windows to complete the exterior renovation.
All interior walls were gutted and reframed. New electrical work, new insulation and new drywall were installed. Much of the home’s original trim was salvaged and reused, as was a piece of art glass, all to keep a bit of the past in the renovation.
The sagging subfloors were fixed, new hard wood floors were installed and a new staircase and railing were designed in a style similar to the original.
The solid wall between the kitchen and the dining room was removed, plumbing was relocated for a new sink location and the kitchen got expanded with an island into the dining room. Closet and plumbing stacks were relocated to allow a new space for fridge. Stainless steel appliances, granite countertops and custom cabinetry highlight the new modern kitchen.
The plan called for redesigning the three bedrooms on the second floor to allow a larger bathroom, walk-in closet and wider hallways. In addition to new roofing, a large skylight was installed to allow natural light into the bathroom and the upper hallway.
The basement was totally revamped. New plumbing was put in place for a full bathroom, laundry room and a den. New e-grass window was installed in the basement to bring this basement up to current building codes.
This homeowners love the neighborhood and now their home gives them the opportunity to stay in the same location.
 Nathan's Deluxe Wallpaper Installation
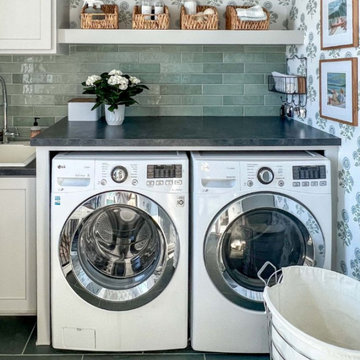
Laundry Room Wallpaper Installation in Smyrna, GA
Turn your laundry room from drab to delightful with professional wallpaper installation designed for busy households in Smyrna. We specialize in durable, moisture-resistant wallcoverings that combine Southern charm with practical functionality.
Why Wallpaper Your Smyrna Laundry Room?
✔ Georgia-Tough Materials – Mold-resistant vinyl wallpaper for humid climates
✔ Cheerful Work Space – Bright patterns make chores more enjoyable
✔ Easy Maintenance – Wipeable surfaces stand up to detergent splashes
✔ Custom Storage Solutions – Designs that complement shelving/hampers
Popular Smyrna Laundry Room Styles:
? Southern Charm – Gingham checks or peach blossom motifs
? Modern Farmhouse – Shiplap-effect or subtle linen textures
? Bold & Bright – Citrus prints or happy geometric patterns
? Vintage Inspired – Retro laundry day advertisements
Our Specialized Services Include:
✅ Appliance-Fit Installation – Precise cuts around washers/dryers
✅ Humidity-Control Adhesives – Prevents bubbling in moist environments
✅ Peel-and-Stick Options – Ideal for apartments or rental homes
✅ Complete Wall Prep – Repairing drywall imperfections for smooth results
The Smyrna Advantage:
• Local Design Expertise – We know what works in Georgia homes
• Quick Turnaround – Most projects completed in just one day
• Material Samples – Try before you buy with our mobile sample kit
Serving: Smyrna, Vinings, Marietta & surrounding Cobb County areas
 Story Homes
Jacuzzis were popular when this two-story 4-bedroom home was built in 1983. The owner was an architect who helped design this handicapped-accessible home with beautiful backyard views. But it was time for a master bath update. There were already beautiful skylights and big windows, but the shower was cramped and the Jacuzzi with its raised floor just wasn’t working.
The project began with the removal of the Jacuzzi, the raised floor, and all the associated plumbing. Next, the old shower, vanity, and everything else was stripped right down to the studs.
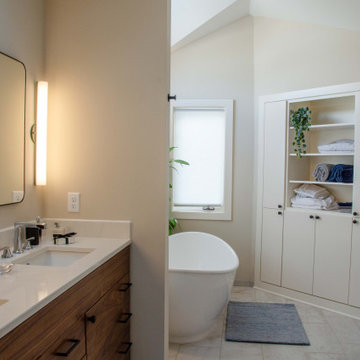
The before-during-after photos show how a deep built-in cabinet was created by “borrowing” some space from the master bedroom. A wide glass pocket door is installed in the adjacent wall.
Without the Jacuzzi this space has become a large, bright, warm place for long baths. Tall ceilings and skylights make this room big and bright. The floor features 12” x 24” stone tile and in-floor heating, with complimentary 2” X 2” tiles for the shower.
The white free-standing tub looks great with polished chrome floor-mounted tub filler and hand shower. With several live plants, this room is often used as a comfortable space for relaxing soaks on cold winter days. (Photos taken on Dec. 22)
On the other side of the room is a large walk-in shower. Additional shower space was gained by removing a built-in cabinet and relocating the plumbing. Glass doors and panels enclose the new shower, and white subway wall tile is the perfect choice.
But the bath’s centerpiece could arguably be the beautifully crafted vanity. Solid walnut doors and drawers are constructed so that the grain matches and flows, like a work of art or piece of furniture.
The vanity is finished with a white quartz countertop and two under-mounted sinks with polished chrome fixtures. Two big mirrors with three tall warm-colored lights make this both a functional and beautiful room.
The result is amazing. A great combination of good ideas and thoughtful construction.
 Michael Nash Design, Build & Homes
Built in the early 1950s, this small urban townhouse is located in North Old Town Alexandria in an area currently undergoing major redevelopment. The neighborhood is popular with, and affordable for, young people and families, and very convenient to Washington, DC.
In its heyday, the townhouse touted a stately brick exterior, plaster walls, tongue and groove wood flooring and beautiful wooden staircase. Sixty years later, however, the homeowners were faced with crumbling masonry, sagging floors, a double layer of wallpaper over the plaster walls, a crumbling staircase, a dysfunctional kitchen and small, dark second floor rooms. Additionally, the basement had a low ceiling, moldy and cinder block walls, no plumbing and a large boiler taking up most of the space.
The homeowners’ goal was to restore the exterior’s historic look while creating an interior up-to-date for the 21st Century. To turn their vision into reality, they turned to Michael Nash Design, Build & Homes.
Design Solutions
To maintain the townhome’s historic exterior, the Michael Nash team carefully removed, salvaged, restored and reused existing brick masonry. Matching fascia boards and windows were combined with existing windows to complete the exterior renovation.
All interior walls were gutted and reframed. New electrical work, new insulation and new drywall were installed. Much of the home’s original trim was salvaged and reused, as was a piece of art glass, all to keep a bit of the past in the renovation.
The sagging subfloors were fixed, new hard wood floors were installed and a new staircase and railing were designed in a style similar to the original.
The solid wall between the kitchen and the dining room was removed, plumbing was relocated for a new sink location and the kitchen got expanded with an island into the dining room. Closet and plumbing stacks were relocated to allow a new space for fridge. Stainless steel appliances, granite countertops and custom cabinetry highlight the new modern kitchen.
The plan called for redesigning the three bedrooms on the second floor to allow a larger bathroom, walk-in closet and wider hallways. In addition to new roofing, a large skylight was installed to allow natural light into the bathroom and the upper hallway.
The basement was totally revamped. New plumbing was put in place for a full bathroom, laundry room and a den. New e-grass window was installed in the basement to bring this basement up to current building codes.
This homeowners love the neighborhood and now their home gives them the opportunity to stay in the same location.


 Citrine® Quartz Stone, Inc
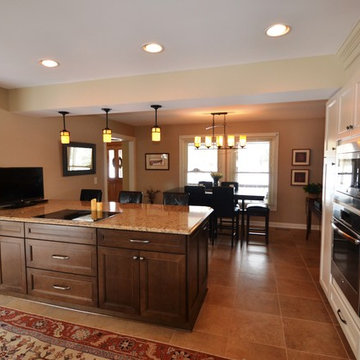
You say you don’t know what color can match your kitchen or bath decor, because your floor is beige or black or some other color that no one match, your cabinets are dark brown or who knows what and your appliance are stainless steel or you have a kaleidoscope of colors and you are all confused because nothing looks good, Don’t despair, Introducing Kashmir White, Stock # PW-987 comes in 119” X 56“ Citrine® Quartz Stone, Inc. and it is more affordable then you think.
As you already may know, quartz is one of the hardest materials on earth, making it more durable than granite, marble or soapstone. Only diamond, sapphire, and topaz are stronger than quartz. However, since no counter tops are made from those elements, quartz is the king of the counter top because of its durability luminescence and elegance. Citrine® Quartz is 94% natural quartz and only 6% resin it will never require any sanding, sealing or polishing, and unlike granite or marble they do not accumulate molds or soap scum when property maintained. They are sure to always remain just as glossy and smooth as the first day they were installed, and we back it up with a LIFETIME WARRANTY.
Citrine® Quartz Stone has drastically risen in popularity and has even began to supplant the natural stones. Consumer Reports rates it as “The best counter tops material”. Citrine® quartz is the ideal option for a stress-free counter top, if you are remodeling your kitchen, bathroom, office or even building a new one.
We can also fabricate if you provide the drawings with measurements to our email; quartz@citrineus.com our estimator will contact you with a preliminary estimate.
Citrine® Quartz tip # 002 Our Master Quartz installers use miter joints, which reduces the use of grout or caulk by about 80% and gives the aesthetics of one continuous flowing slab.
Customer’s tip # 138 Use Hope’s Perfect Granite Spray it is 100% streak free and will give your luminous Quartz a mirror like finish.
Customer’s tip # 150 Use Isopropyl alcohol to remove ink marks by rubbing on the affected area with a cloth. No cleaning required after removal.
 Michael Nash Design, Build & Homes
Built in the early 1950s, this small urban townhouse is located in North Old Town Alexandria in an area currently undergoing major redevelopment. The neighborhood is popular with, and affordable for, young people and families, and very convenient to Washington, DC.
In its heyday, the townhouse touted a stately brick exterior, plaster walls, tongue and groove wood flooring and beautiful wooden staircase. Sixty years later, however, the homeowners were faced with crumbling masonry, sagging floors, a double layer of wallpaper over the plaster walls, a crumbling staircase, a dysfunctional kitchen and small, dark second floor rooms. Additionally, the basement had a low ceiling, moldy and cinder block walls, no plumbing and a large boiler taking up most of the space.
The homeowners’ goal was to restore the exterior’s historic look while creating an interior up-to-date for the 21st Century. To turn their vision into reality, they turned to Michael Nash Design, Build & Homes.
Design Solutions
To maintain the townhome’s historic exterior, the Michael Nash team carefully removed, salvaged, restored and reused existing brick masonry. Matching fascia boards and windows were combined with existing windows to complete the exterior renovation.
All interior walls were gutted and reframed. New electrical work, new insulation and new drywall were installed. Much of the home’s original trim was salvaged and reused, as was a piece of art glass, all to keep a bit of the past in the renovation.
The sagging subfloors were fixed, new hard wood floors were installed and a new staircase and railing were designed in a style similar to the original.
The solid wall between the kitchen and the dining room was removed, plumbing was relocated for a new sink location and the kitchen got expanded with an island into the dining room. Closet and plumbing stacks were relocated to allow a new space for fridge. Stainless steel appliances, granite countertops and custom cabinetry highlight the new modern kitchen.
The plan called for redesigning the three bedrooms on the second floor to allow a larger bathroom, walk-in closet and wider hallways. In addition to new roofing, a large skylight was installed to allow natural light into the bathroom and the upper hallway.
The basement was totally revamped. New plumbing was put in place for a full bathroom, laundry room and a den. New e-grass window was installed in the basement to bring this basement up to current building codes.
This homeowners love the neighborhood and now their home gives them the opportunity to stay in the same location.
 Michael Nash Design, Build & Homes
Built in the early 1950s, this small urban townhouse is located in North Old Town Alexandria in an area currently undergoing major redevelopment. The neighborhood is popular with, and affordable for, young people and families, and very convenient to Washington, DC.
In its heyday, the townhouse touted a stately brick exterior, plaster walls, tongue and groove wood flooring and beautiful wooden staircase. Sixty years later, however, the homeowners were faced with crumbling masonry, sagging floors, a double layer of wallpaper over the plaster walls, a crumbling staircase, a dysfunctional kitchen and small, dark second floor rooms. Additionally, the basement had a low ceiling, moldy and cinder block walls, no plumbing and a large boiler taking up most of the space.
The homeowners’ goal was to restore the exterior’s historic look while creating an interior up-to-date for the 21st Century. To turn their vision into reality, they turned to Michael Nash Design, Build & Homes.
Design Solutions
To maintain the townhome’s historic exterior, the Michael Nash team carefully removed, salvaged, restored and reused existing brick masonry. Matching fascia boards and windows were combined with existing windows to complete the exterior renovation.
All interior walls were gutted and reframed. New electrical work, new insulation and new drywall were installed. Much of the home’s original trim was salvaged and reused, as was a piece of art glass, all to keep a bit of the past in the renovation.
The sagging subfloors were fixed, new hard wood floors were installed and a new staircase and railing were designed in a style similar to the original.
The solid wall between the kitchen and the dining room was removed, plumbing was relocated for a new sink location and the kitchen got expanded with an island into the dining room. Closet and plumbing stacks were relocated to allow a new space for fridge. Stainless steel appliances, granite countertops and custom cabinetry highlight the new modern kitchen.
The plan called for redesigning the three bedrooms on the second floor to allow a larger bathroom, walk-in closet and wider hallways. In addition to new roofing, a large skylight was installed to allow natural light into the bathroom and the upper hallway.
The basement was totally revamped. New plumbing was put in place for a full bathroom, laundry room and a den. New e-grass window was installed in the basement to bring this basement up to current building codes.
This homeowners love the neighborhood and now their home gives them the opportunity to stay in the same location.
 Tile Doctor Ltd
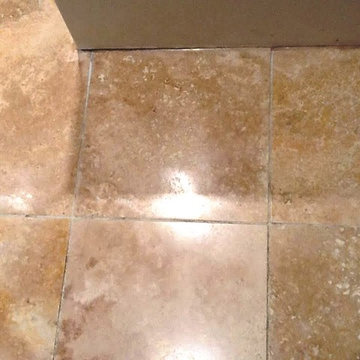
Earlier this month I was in the town of Northampton, to see a client who had reported a problem with her Travertine kitchen tiles. Basically the grout between the tiles was badly stained, to the point of appearing almost black.
The Travertine tiles were also in need of some maintenance, and so I was commissioned to provide a clean, polish and a fresh seal. Travertine is a popular choice for kitchen flooring due to its relatively high durability and distinct features. My task was to get this floor back to looking its best.
My priority was to address the badly stained grout so I cleaned the grout lines by hand using a combination of hand brushes and Tile Doctor Grout Clean-Up. The surface was pre-wet with water, before a solution of Grout-Clean Up and clean water was applied to the surface. The brushes were then used to agitate the solution. Grout Clean-Up contains a mix of concentrated phosphoric acid and cleaner designed to penetrate below the surface of the grout to remove grout stains, smears and mineral deposits.
As you can see from the photos, Grout Clean-Up made an immediate difference to the appearance of the tiles. This product is suitable for use on masonry and acid resistant surfaces. After completing the clean, I gave the floor a thorough rinse to neutralise the floor after cleaning and removed as much of the water as possible using a wet vacuum.
Following this, I paid attention to the tiles themselves, cleaning them to achieve a polished effect by using a system of burnishing pads. Tile Doctor burnishing pads comprise a set of four pads varying in grit type, from Coarse and Medium to Fine and Very Fine. I applied all four pads in turn to the floor, stopping to rinse the floor in between each. The result was a high quality polished finish.
I then left the floor to dry completely overnight, before commencing the seal the next day. My choice of sealing product was Tile Doctor Colour Grow which is a colour intensifying sealer that both enhances the natural appearance of the stone and provides a durable surface seal.
My client was very pleased with the finished product, and left the following comment on the Tile Doctor feedback system: “efficiently done”, yielding “good results”.
Phil Vissian
Northamptonshire Tile Doctor

 Kitchen Design Concepts
It’s amazing how new countertops, backsplash, appliances and a fresh coat of paint on the walls can change the look of an entire kitchen. With a kitchen that already had good bones, it’s a true case of what we like to call “lipstick and makeup.” The kitchen cabinetry was already white so we left the color as is, but even so, the space resulted in an even brighter environment. The main goals for the space was to improve the kitchen design aesthetically and also improve it’s functionality. We went out with the old and in with the new all while keeping the cabinetry! Want to see how we gave this space a makeover? Read on below!
But first, check out the space before the remodel
Cabinets
As mentioned above, we maintained the white cabinets but we also removed the black painted cabinets by the wall oven and replaced it with a new microwave and oven. This resulted in a more seamless look by removing the random black cabinets. Also, already having white cabinets gave us a taste of what the space was going to become.
Countertops
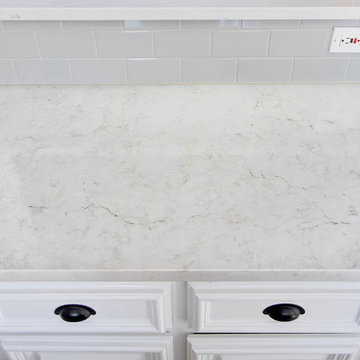
Replacing the countertops probably had the biggest impact on the space. Overall, it enhanced the space and also gave the kitchen a brighter quality. The new countertops are a 3cm Caesarstone London Grey. This a popular option because it has a marble-like look, but is much stronger than marble. The countertops really tied the whole space together!
Backsplash
Previously, the kitchen only had a 4” splashlette matching the countertop, so incorporating a tile backsplash was a major requirement for our clients and overall an upgrade to the space. The featured tiles are a 3×6 Desert Grey tiles from Daltile installed in a bricklay to the left and right of the sink, and and by the opening into the family room. The grey tone on the backsplash is a wonderful accent to the space!
Fixtures and Fittings
Lastly, it wouldn’t be complete without new fixtures and fittings! With new stainless steel appliances, the sink and faucet follow suit and match the finish. All from Blanco, we have a Stellar Super Single Bowl sink in a stainless steel refined brush finish, and a Grace II Pull-down faucet in a satin nickel finish.
Sponsored
Fredericksburg, OH

High Point Cabinets
Columbus' Experienced Custom Cabinet Builder | 4x Best of Houzz Winner
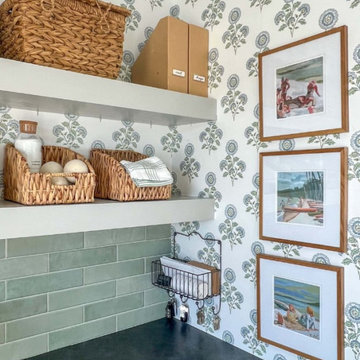 Nathan's Deluxe Wallpaper Installation
Laundry Room Wallpaper Installation in Smyrna, GA
Turn your laundry room from drab to delightful with professional wallpaper installation designed for busy households in Smyrna. We specialize in durable, moisture-resistant wallcoverings that combine Southern charm with practical functionality.
Why Wallpaper Your Smyrna Laundry Room?
✔ Georgia-Tough Materials – Mold-resistant vinyl wallpaper for humid climates
✔ Cheerful Work Space – Bright patterns make chores more enjoyable
✔ Easy Maintenance – Wipeable surfaces stand up to detergent splashes
✔ Custom Storage Solutions – Designs that complement shelving/hampers
Popular Smyrna Laundry Room Styles:
? Southern Charm – Gingham checks or peach blossom motifs
? Modern Farmhouse – Shiplap-effect or subtle linen textures
? Bold & Bright – Citrus prints or happy geometric patterns
? Vintage Inspired – Retro laundry day advertisements
Our Specialized Services Include:
✅ Appliance-Fit Installation – Precise cuts around washers/dryers
✅ Humidity-Control Adhesives – Prevents bubbling in moist environments
✅ Peel-and-Stick Options – Ideal for apartments or rental homes
✅ Complete Wall Prep – Repairing drywall imperfections for smooth results
The Smyrna Advantage:
• Local Design Expertise – We know what works in Georgia homes
• Quick Turnaround – Most projects completed in just one day
• Material Samples – Try before you buy with our mobile sample kit
Serving: Smyrna, Vinings, Marietta & surrounding Cobb County areas
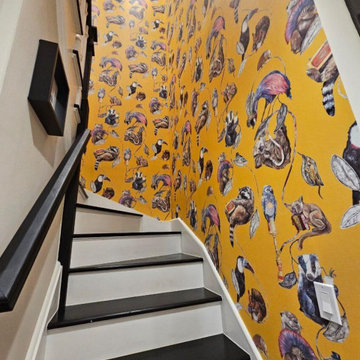
 Cozy Wallcoverings
Staircase Wallpaper Installation in San Rafael, CA
Transform your staircase into a stunning focal point with our custom wallpaper installation services in San Rafael. We specialize in high-impact wallcoverings that turn ordinary stairwells into extraordinary design statements, perfect for Marin County homes.
Why Wallpaper Your San Rafael Staircase?
✔ Dramatic Visual Impact – Create a breathtaking first impression
✔ Space-Enhancing Designs – Vertical patterns that elevate ceilings
✔ Marin County Style – Luxe textures and nature-inspired motifs
✔ Durable Finishes – Scratch-resistant materials for high-traffic areas
Popular Staircase Styles in San Rafael:
? Wine Country Elegance – Vineyard landscapes or olive branch patterns
? Modern Bay Area – Architectural lines or concrete-look textures
? Redwood Inspired – Organic wood grains and forest elements
? Art Gallery – Overscale florals or abstract watercolors
Our Staircase-Specific Services:
✅ Precision Alignment – Flawless pattern flow on angled walls
✅ Extra-Durable Vinyls – Withstands handrail contact
✅ Lighting Considerations – Reflective finishes for dark stairwells
✅ Safety-First Installation – Secure scaffolding for tricky heights
The San Rafael Advantage:
• Local Design Expertise – Familiar with Marin County aesthetics
• Historic Home Experience – Gentle techniques for older properties
• 3D Visualization – Preview your design before installation

 Cassoni Furniture & Accessories
- GLOW IN SECTIONAL. Warm as modern sofas oversize mats timeless and territorial boundaries find their ideal habitat modern houses and places of our most popular today. Sessions with large soft feather padding in the two versions of 39''3/8 and 51''1/8. Combined in a wide range of solutions. Islands, peninsulas, central and lateral elements with and without armrests on which throw large pillows from the original fabrics and colors. Decorative elements that enhance the smooth lines of these sofas with removable covers that can change appearance with our creativity.
126''W x 51''D x 26''H.
- GLOW IN COFFEE TABLE. All the natural beauty of wood tables from geometry and material by the strong.
41''W x 22''D x 12''H.
35''W x 18''D x 10''H.
- BAG FLOOR LAMP. Lamps in thermoplastic expansion in the glossy colours: white, black.
26''3/4W x 11''3/8D x 55''1/8H.

 Care Free Homes, Inc.
This beautiful colonial in Marion, Massachusetts is even more gorgeous with its new GAF Timberline HD roof!
There is more to a roof than shingles – in fact there are several components to a professionally installed GAF Lifetime Roofing System. Here is the anatomy of our Marion homeowner’s roof:
GAF Timberline HD Shingles Marion, MAGAF Timberline HD Roof Shingles: A beautiful architectural shingle at an affordable price! This is our most popular roof shingle here at Care Free Homes! Our Marion customer selected the classic color, Charcoal. This high performance shingle features a 130 mph wind rating and highest possible fire rating.
Underlayment: A felt/paper product that is installed over the entire roof deck, underlayment provides an additional layer of protection between the roof deck and the roof shingles.
Ice Dam and Water Shield: After a brutal winter and unprecedented snow fall, many New England homes suffered damage from ice dams. Ice Dam and Water Shield provides added protection for eves, rakes, valleys as well as flashed areas around vent pipes, chimneys, dormers, and skylights. Whether it’s a winter wonderland or a hurricane, this homeowner will not have to worry about ice dams or driving rain.
GAF Timberline HD, Marion, MA Dormers
Premium Aluminum Drip Edge: Installed along the rakes, drip edge serves several purposes. It improves the efficiency of water shedding, prevents leaking from a wind-driven rain as well as movement between the deck and fascia boards. Drip edge also keeps pesky insects from infiltrating the space between the roof deck and the fascia boards. With a choice of three colors, white, brown and gray, it provides a finished look for a roof.
GAF Pro-Start Eave/Rake Starter Strip: Every story has a beginning and every roof should have a starter strip. Here in New England we’ve got to have our roof be tougher than mother nature. To prevent shingle blow off, an ultra-adhered starter strip properly secures shingles in place during a storm. In contrast, the amateur roofer will often use cut-up shingles as a starter course. This weakened “starter course” lowers the wind resistance of a roof and makes it more susceptible to both wind and water damage. With straighter edges, Dura-Grip adhesive, and outstanding warranties – starter strip will provide beauty, performance and peace of mind.
GAF Cobra Ridge Vent: Ridge vents provide necessary airflow to remove excess heat and moisture in an attic. It inhibits the growth of mold and protects the health of the homeowners as well as their stored possessions. A properly vented attic will also protect homes in harsh winter climates from ice damming.
Why wait? Contact us today and make your house a Care Free home!
Sponsored
Fredericksburg, OH
High Point Cabinets
Columbus' Experienced Custom Cabinet Builder | 4x Best of Houzz Winner
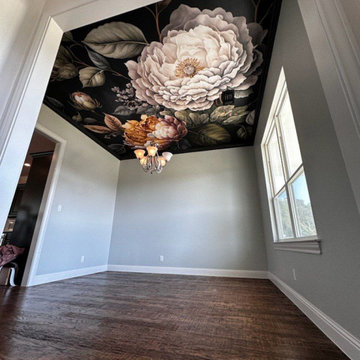
 K&D Wallcovering
Wallpaper Installation – Ceiling in Northbrook
Elevate your fifth wall with stunning ceiling wallpaper installation in Northbrook. As your local wallpaper specialist, I create breathtaking overhead statements that transform ordinary rooms into extraordinary spaces with:
✔ Ceiling-Specific Expertise
Lightweight vinyl wallpaper designed for overhead application
Specialized adhesives for secure, long-lasting holds
Precise pattern alignment for visual continuity
✔ Northbrook-Approved Solutions
Architectural-grade materials for Chicagoland homes
Fade-resistant finishes for sunlit rooms
Low-VOC options for family-safe installations
✔ Signature Ceiling Services
Tray ceiling treatments with dimensional effects
Coffered ceiling enhancements
Wallpaper repair for existing installations
Why Northbrook Homeowners Choose Us:
✔ Scaffold-Free Installation – Specialized equipment for minimal disruption
✔ Free Design Consultation – Digital previews of your ceiling design
✔ HOA Compliance Knowledge – Understanding local community standards
✔ 1-Day Transformations – Most projects completed same-day
Popular Northbrook Ceiling Styles:
• Classic Elegance – Subtle damask or metallic patterns
• Modern Drama – Bold geometrics or oversized florals
• Nature Inspired – Cloudscapes or celestial designs
• Architectural Enhancement – Faux tin tile or wood beam effects
Serving All of Northbrook – From Techny to Downtown high-rises.
 Kitchen Design Concepts
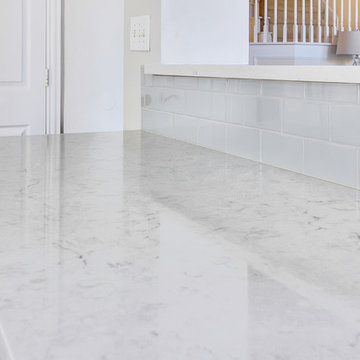
It’s amazing how new countertops, backsplash, appliances and a fresh coat of paint on the walls can change the look of an entire kitchen. With a kitchen that already had good bones, it’s a true case of what we like to call “lipstick and makeup.” The kitchen cabinetry was already white so we left the color as is, but even so, the space resulted in an even brighter environment. The main goals for the space was to improve the kitchen design aesthetically and also improve it’s functionality. We went out with the old and in with the new all while keeping the cabinetry! Want to see how we gave this space a makeover? Read on below!
But first, check out the space before the remodel
Cabinets
As mentioned above, we maintained the white cabinets but we also removed the black painted cabinets by the wall oven and replaced it with a new microwave and oven. This resulted in a more seamless look by removing the random black cabinets. Also, already having white cabinets gave us a taste of what the space was going to become.
Countertops
Replacing the countertops probably had the biggest impact on the space. Overall, it enhanced the space and also gave the kitchen a brighter quality. The new countertops are a 3cm Caesarstone London Grey. This a popular option because it has a marble-like look, but is much stronger than marble. The countertops really tied the whole space together!
Backsplash
Previously, the kitchen only had a 4” splashlette matching the countertop, so incorporating a tile backsplash was a major requirement for our clients and overall an upgrade to the space. The featured tiles are a 3×6 Desert Grey tiles from Daltile installed in a bricklay to the left and right of the sink, and and by the opening into the family room. The grey tone on the backsplash is a wonderful accent to the space!
Fixtures and Fittings
Lastly, it wouldn’t be complete without new fixtures and fittings! With new stainless steel appliances, the sink and faucet follow suit and match the finish. All from Blanco, we have a Stellar Super Single Bowl sink in a stainless steel refined brush finish, and a Grace II Pull-down faucet in a satin nickel finish.
 Revival House
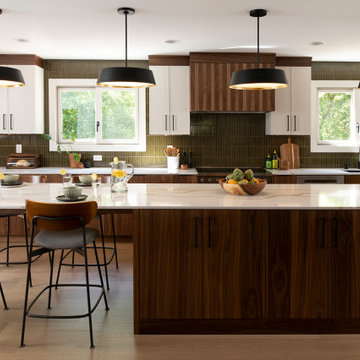
This kitchen remodel of a 70’s home reflects the character of the existing home and some design features of that era while giving it a fresh, modern look. The client wanted the remodeled space to blend in with the rest of the home, retaining some of the 1970’s character while including all the best features of today’s kitchens.
Removing the wall separating the informal eating area from the family room provided a nice open space allowing for a larger kitchen footprint and plenty of light throughout.
A combination of Decor's Dove Wing painted and Natural stained Walnut cabinetry was chosen. The dark walnut, slab lower cabinets unite the kitchen with the darker wood theme found throughout the home, while the white, slim-shaker upper cabinets give the space a light and airy feeling. The beautiful vertical grain of the walnut is the foundation of a theme that is echoed throughout the space: tall & thin vertical lines without bulk or needless ornamentation. The unique design detail gives the kitchen a great balance of depth and character while still brightening the space. Walnut crown molding throughout defines the space and ties everything together.
The vertical-set green Japanese tile from Virginia Tile, also characteristic of the 1970’s, serves as the backsplash and fills the range wall. The tall & slim theme is underscored by several design elements from the vertical tile and tall cabinet pulls in matte black from Top Knobs, to the thin quartz countertops, skinny shaker cabinet door style, and tall, slim refrigerator doors, all meant to eliminate excess bulk and lighten up the space.
An impressive focal point in this kitchen is the custom walnut reeded hood, designed to reflect a popular 1970’s feature. Narrow walnut shelves below the white upper cabinets near the refrigerator provide a nice surprise to the eye. An extra long island, decked in polished 2cm Corian Quartz countertop in Novello, provides ample seating, storage, and task space, making it an ideal surface for serving, eating, meal prep, gathering, and entertaining. The client desired a long island with comfortable counter seating at one end for a family of five, including space for a baby’s high chair.
High-end Bosch appliances and functional storage were also priorities. The dry bar on the opposite wall features additional storage and an Elica beverage refrigerator, framed by tall walnut larder cabinets on each end. The white larder cabinet doors pocket into the sides, revealing beautiful finished walnut interiors.
Wall cabinets feature Decor’s integrated under-cabinet lighting, while puck lights illuminate the beverage center counter. This kitchen is bursting with integrated storage. Many deep drawers feature interior double drawers making smaller items more accessible. Decor’s spice drawer to the right of the range keeps spices organized, while divided tray storage on the left of the range keeps these taller items handy.
While the design is inspired by the 1970’s, it exemplifies the best of the 2020’s, and the new space is open, bright, and functional for this family with young children.
28