
Search results for "Remove stubborn" in Home Design Ideas
 Tile Doctor Ltd
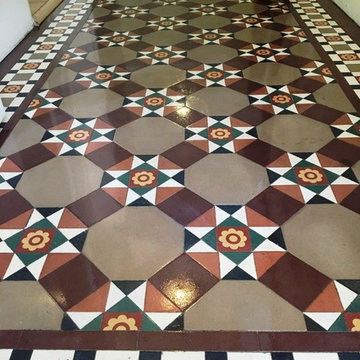
Esher is a small suburb in Surrey, situated just outside London. It was a fashionable area to live in amongst royalty and the aristocracy in the Victorian period, and during this time many buildings were built.
One such building has since been turned into a block of separate flats, and some of the flats still contain the original Victorian tiles in the hallway. I was contacted by one of these flat owners about restoring their tiles back to the best possible condition. Interestingly this customer’s tiles were part of a larger floor that had been divided between two flats.
I began the restoration by spreading Tile Doctor Remove and Go across the entire set of tiles. Remove and Go is a heavy-duty stripper that helped to loosen and remove old glue deposits where carpet had been laid over the tile, it will also strip off old sealers and release ingrained muck.
The Remove and Go was worked into the tile and grout with a stiff brush and then the soiled solution rinsed off and extracted using a wet vacuum. I followed by this applying a coarse 200-grit diamond encrusted burnishing pad, fitted to a handheld buffer, to grind away the particularly stubborn dirt and stains to restore the appearance of the stone. Afterwards, I rinsed the tiles again with water and soaked up the resultant slurry with a wet vacuum.
I noticed that there remained several ingrained stains dotted across the floor, so to remove these I aggressively burnished the affected areas with a very coarse 50-grit handheld diamond block. This essentially removed the very top layer of the stone, taking with it the ingrained marks.
Next, I dried the area with a large blower and heat gun. Under normal circumstances, 48 hours needs to pass before the tiles can be sealed, but as this was a small area I was able to dry it very quickly. After carrying out a damp test, I determined the tiles were ready to be sealed.
To seal the Victorian Tiles, I applied six coats of Tile Doctor Seal and Go sealer, which provides a high-quality sheen finish, as well as plenty of protection for the future. Tile Doctor have a range of suitable sealers available including Colour Grow which provides a matte finish – it’s just a matter of personal choice for the customer.
The outcome of the restoration was fantastic and the customer was very pleased, leaving the following testimonial.
“Promptly organised, delivered when promised. Good looking job when complete. Well done.”
Rupert Mcleod
West Surrey Tile Doctor
 Tile Doctor Ltd
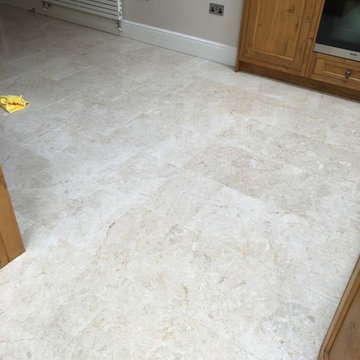
Marble tiles can be tumbled in large drums to achieve an aged and softened effect, and this can look very nice providing that the stone is adequately maintained.
In the case of this floor at a property in Twickenham South West London, the Marble tiles that had been laid over five years ago, and in that time the sealer had worn down offering the floor little protection. Dirt had now become ingrained in the pores of the stone and grout, and a deep clean and fresh seal were required to restore the stone’s original colour and lustre. The property owner asked me to complete the job and I was more than happy to oblige.
To begin the restoration, I applied both Tile Doctor Pro-Clean, which is a high alkaline cleaner, and Tile Doctor Remove and Go, which a heavy-duty stripper and remover, to the floor and scrubbed the products in using a scrubbing pad fitted to a professional rotary machine.
The chemical solvents in the Remove and Go helped to break down any old sealer that remained inside the stone, allowing the Pro Clean to then work its magic on the stubborn ingrained dirt the customer had struggled to remove previously. Some of the deeper veins and grout lines I chose to scrub by hand to ensure the fullest and most meticulous clean possible.
The resulting soiled cleaning solution was then pressure rinsed with water and the soil extracted with a wet-vacuum, leaving a completely clean floor that was now ready to be sealed using a new sealant.
I returned to the property the following day after allowing the Marble tiles to dry fully. Drying the tiles is a crucial part of the restoration process, since even a small quantity of excess moisture can cloud the sealer and prevent it from working to its fullest capabilities.
I applied two coats of our solvent-based impregnating sealer known as Tile Doctor Colour Grow. As the name of the product suggests, Colour Grow not only protects the tiles against ingrained soil, it also thoroughly lifts and enhances the natural colours in the stone.
The new seal will make it easy for our customer to maintain the floor, making daily cleaning easier. It will also protect the stone against the nasty spillages that are common in kitchens and living rooms.
The customer was thrilled with the much-improved appearance of the Marble tiles and is very reassured that they will now stay in great condition for a long time. Another satisfied client!
Jonathan Oldham
South Middlesex Tile Doctor


Find the right local pro for your project
 Floor Coverings International-Central Kentucky
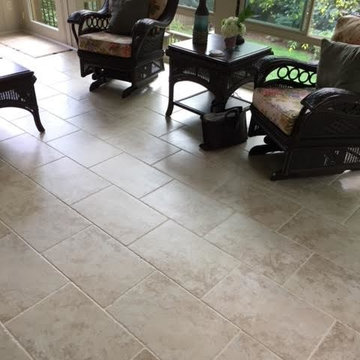
Example of a large classic porcelain tile sunroom design in Other with a standard ceiling
 New Eco Landscapes
Photography by Anthony Crisafulli
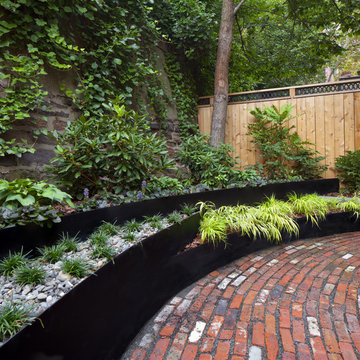
Inspiration for a small eclectic shade backyard brick retaining wall landscape in New York.
Inspiration for a small eclectic shade backyard brick retaining wall landscape in New York.
 An Orange Moon
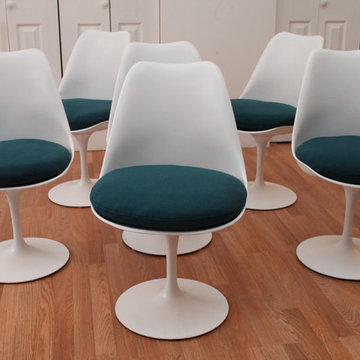
Lynne & Ty McDaniel Eero Saarinen TULIP chairs.
Inspiration for a mid-sized 1950s medium tone wood floor kitchen/dining room combo remodel in Chicago
Inspiration for a mid-sized 1950s medium tone wood floor kitchen/dining room combo remodel in Chicago
 Anna Addison Photography
Photo: Anna Addison Photography © 2013 Houzz
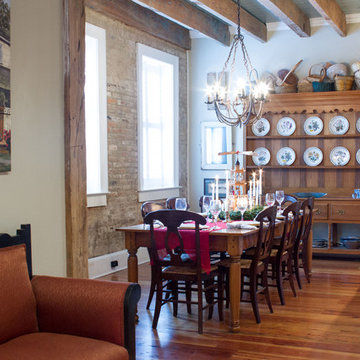
Elegant dining room photo in New Orleans
Elegant dining room photo in New Orleans


 All Surface Restoration
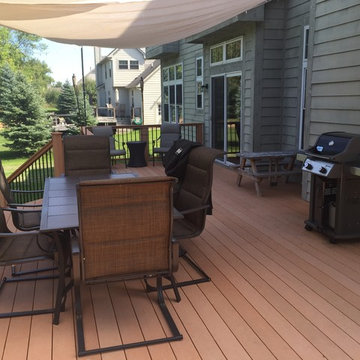
Trex deck after pressure cleaning using a "soft wash" process which eliminates stubborn stains like mold, mildew & dirt from the pores of the trex surface.
 EncoreGarage of Ohio & West Pennsylvania
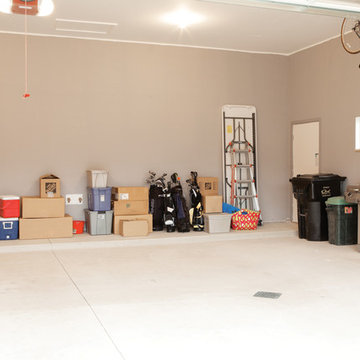
Before EncoreGarage of Ohio Garage Makeover
Example of a shed design in Cleveland
Example of a shed design in Cleveland

 Kyle Hunt & Partners, Incorporated
Classic lake charm is felt from the moment you arrive. This cedar shingle coastal home has a relaxed breezy feel that is enjoyed year-round with a busy family schedule and a love for entertaining. The main level includes an open kitchen layout, shiplap paneling at the entry and staircase, and a sunroom with a beautiful wood ceiling and beam detail that connects to a screen porch with a built-in grilling area for serving up casual summer meals. Wire-brushed white oak flooring flows throughout most of the home.
 All Surface Restoration
We are experts in soft washing of composite decks to remove stubborn stains such as black mold, mildew & dirt. Michigan residents can request a free estimate at:
http://surfacerestoration.com/services/composite-deck-restoration/
or call 248-475-0004

 Sunbrella
In Seabrook, Wash., home of the 2013 Sunset Idea Town, designer Brian Paquette married coastal charm with big city style in this imaginative morning room.
In a colorful flight of fancy, a whimsical wingback chair by CR Laine makes a bold statement against the modern wallpaper when upholstered in Canvas Melon with contrast welting in Trax Emerald and lumbar pillow in Canvas. On the neighboring CR Laine sofa, throw pillows in Cathedral Ocean, available through Silver State, mimic the graphic elements of the wallpaper and mirror the color palette of the wingback chair.
Upholstered in Timor Tamale, sturdy movable cubes can be rearranged on a whim to serve as an ottoman, additional seating, a coffee table or whatever your imagination can dream.
 Degnan Design-Build-Remodel
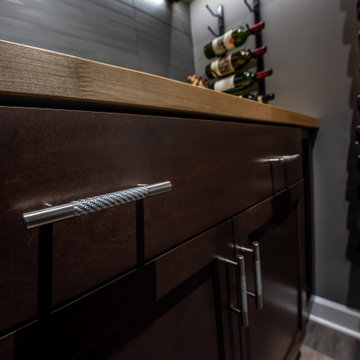
A butcher block countertop in the wine cellar is the ideal surface for removing stubborn corks and pouring wine into expensive stemware. It also provides guests easy access to snacks during events.

 Marble Doctors LLC
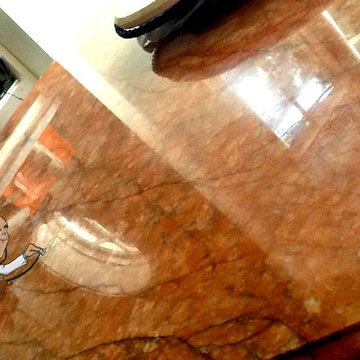
Before Photos shows etched and scratched surface:
Installing,Refinishing, Repairing and Maintaining of Natural Stone and Other Man Made Solid Surfaces in Both Commercial & Residential Settings
Company Overview
Marble Doctors are a specialized company that has been perfecting the stone trade for many years and has developed a reputation for true craftsmanship. As an individually owned company since 2008, the Marble Doctors will give you the personalized service you need and the expertise you desire. We understand that stone is an investment and a luxury, so we want to help you protect your investment and keep your stone looking its best for the longest time possible
Description
Dull Spots - Marble, Travertine, Granite, Terrazzo and other solid surfaces. Polished out to return a mirrored finish
White Spots - Stubborn spots removed once and for all via marble, limestone and travertine polishing and restoration
Scratches - Honed out to restore a smooth mirrored appearance.
Chips & Cracks - Repaired and blended to virtually disappear.
Grout - Repaired and cleaned.
 On Cleaning Services
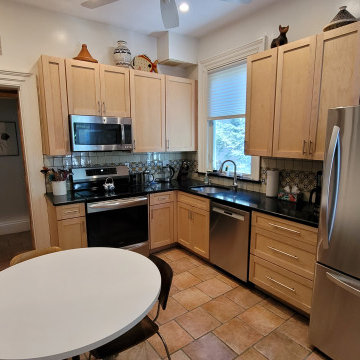
Transform your kitchen into a gleaming oasis of cleanliness with our meticulous residential kitchen cleaning services. Our team of expert cleaners is dedicated to restoring your culinary space to its pristine state, ensuring a hygienic and inviting environment for you and your loved ones.
Our Comprehensive Kitchen Cleaning Services:
Meticulous Appliance Cleaning: We'll tackle your stovetop, oven, refrigerator, microwave, and dishwasher, eliminating grease, grime, and stubborn stains for spotless appliances that shine like new.
Countertop Detailing: We'll meticulously clean and disinfect your countertops, removing spills, crumbs, and bacteria to leave them sparkling clean and ready for culinary creations.
Cabinet Care: We'll gently wipe down your cabinets, both inside and out, removing dust, fingerprints, and smudges to restore their luster and enhance the overall appearance of your kitchen.
Floor Cleaning: We'll sweep, mop, and sanitize your kitchen floors, eliminating dirt, debris, and sticky spills to leave them gleaming and spotless.
Waste Disposal: We'll responsibly remove all trash and recycling from your kitchen, ensuring a clutter-free and hygienic environment.
Additional Services:
Deep Cleaning: We offer deep cleaning services for those particularly grimy areas, such as behind the stove and under the refrigerator.
Range Hood Cleaning: We'll tackle the grease and grime buildup in your range hood, ensuring proper ventilation and reducing fire hazards.
Oven Deodorization: We'll eliminate lingering cooking odors from your oven, leaving it smelling fresh and clean.
Benefits of a Professionally Cleaned Kitchen:
Enhanced Hygiene: A clean kitchen promotes a healthier environment, reducing the risk of foodborne illnesses and allergies.
Reduced Stress: A tidy kitchen contributes to a more relaxing and enjoyable cooking experience.
Improved Appearance: A sparkling clean kitchen enhances the overall aesthetic of your home.
Increased Property Value: A well-maintained kitchen can boost the value of your property in case of a future sale.
Choose ON Cleaning Services for:
Unmatched Expertise: Our team of experienced cleaners is equipped with the knowledge and skills to handle even the toughest cleaning challenges.
Eco-Friendly Products: We use safe and environmentally friendly cleaning products that are gentle on your surfaces and the environment.
Flexible Scheduling: We offer flexible scheduling to accommodate your busy schedule.
Satisfaction Guarantee: We are committed to your satisfaction and guarantee exceptional results.
Contact us today 508 247 0045 to schedule your residential kitchen cleaning service and experience the joy of a sparkling clean kitchen!
 Tile Doctor Ltd
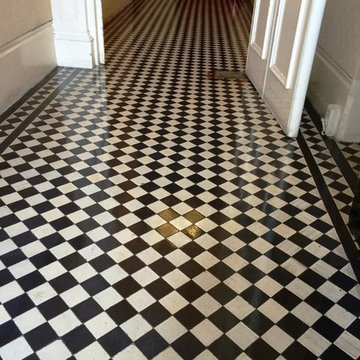
Recently, I was asked to do some Tile Doctoring at Palmeira Square, in the seaside city of Brighton and Hove, to restore the Victorian tiled floor of one of the downstairs offices. Palmeira Square is a residential area which was first developed in the mid-19th century during the reign of Queen Victoria, so many of the buildings feature some fantastic original Victorian tile floors. Although there are many large terraced houses and even mansions in the area, some of the buildings have been converted into offices for commercial use. My client, who leased the downstairs office, managed to persuade the other tenants to employ professional help to restore the tiles, and so I was asked to come in to clean and seal the floor to get it back to looking its best.
With Palmeira Square being quite a lively area, I made sure to fence off the front door area from the wandering public. My first job was to apply Tile Doctor Remove & Go to the floor, a heavy duty stripper, multi-purpose stripper that was able to remove the stubborn marks, stains and ingrained dirt on and between the tiles. In particular, Remove & Go helped to remove some rust stains I found near the door hinges.
I left the product to sit and work its magic for twenty minutes, and during this time I began cleaning the floor using a buffing pad, which is suitable for use on all types of floor (except polished stone), and a solution of Tile Doctor Pro-Clean diluted with water. The combination of a buffing pad and Pro-Clean helped to remove the general dirt and grime that had built up over time in this high traffic area of the office. After the cleaning was complete, the black tiles appeared grey because any remaining sealer had been removed. However, the colour would return after resealing the tiles, which was my next job.
I returned to the office after two days to seal the Victorian tile floor. To do this, I needed to use Tile Doctor Seal & Go, which meant I had to ask the office workers to keep off the floor for most of the day. This is because I needed to apply six coats of Seal & Go to the floor, and each coat takes roughly fourty minutes to dry. Seal & Go provides a stain-resistant surface seal and a durable low-sheen finish, which will help keep this floor looking great for a long time, even with a high traffic of workers coming in and out of the office.
Luckily, it was a warm day outside, and the floor dried quickly, leaving a shiny, deep black surface. Both my client and I were very happy with the result. The client was also pleasantly surprised to see that I had been able to remove the rust stains near the door.
 Tile Doctor Ltd
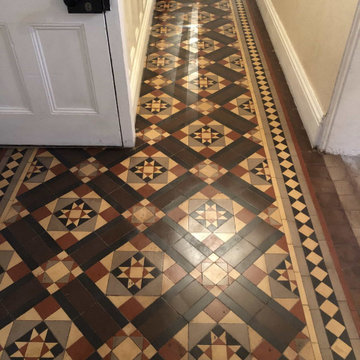
I received this Tile Doctor enquiry from a customer in the historic market town of Kidderminster who had a Victorian Minton Tiled hallway floor that had been covered in carpet for a long time. The carpet had since been removed and now the floor was fully exposed you could see it was covered in carpet glue and dirty with ingrained grime.
I arranged an appointment to inspect the floor thoroughly and provide a quote; you can never be sure what issues you might find, so surveying the floor first ensures I can give an accurate price. As anticipated the entire floor was covered in thick glue, fortunately apart from a few loose tiles the floor was in good order. I explained to the client the process I would use on the floor and that I was confident the floor could be restored for them. My quote was accepted, and we arranged a date to carry out the work.
I often get customers claiming to have an original Minton Tiled floor however there were many manufacturers creating similar patterns at the end of the 19th century, the only way to be certain is to lift a tile and look to see what’s stamped on the back. In this case we had a few loose ones that needed relaying, so I was able to confirm that quite easily.
I arrived on the booked day and the first step was to tape up the surrounding area to prevent any damage from splashing. I was then ready to tackle the glue. I applied a strong solution of Tile Doctor Remove and Go and covered the floor with industrial cling film to allow the solution to get to work without drying out. The film was removed after an hour and then the Remove and Go was worked into the tiles using a coarse 200-grit milling pad to cut through the glue and resurface the tiles.
Afterwards the floor was rinsed with water and the soil removed with a wet vacuum. Some of the glue proved very stubborn to remove and had to be dealt with carefully by hand using an industrial scraper, sometimes a bit of elbow grease is the only way to get the job done.
The floor was then given an Acid Rinse with Tile Doctor Acid Gel, this is designed to further clean the tiles and counter any efflorescent salts that might be present in the tiles due to the lack of damp proof membrane.
After another rinse and soil removal I turned my attention to the loose tiles which were secured by removing the tile, scraping out the adhesive and re-fixing. The appearance of the floor was much improved after day and the floor was then left overnight to dry out in preparation or the sealing process.
Returning the next day, I first checked the floor was dry using a damp meter. Once I was satisfied it was dry, I started to seal the floor. I had selected to use Tile Doctor Seal and Go Extra for sealing. It adds a richness to the colour of the tiles and a subtle sheen finish. I applied three coats, waiting for each one to dry before applying the next.
The pattern on the floor was really nice and the colours were now very vibrant. The client was very pleased and left a great review copied below:
“Our floor wasn’t easy as it had some form of coating on it which was difficult to remove but Mark took a lot of time to ensure the surface was thoroughly clean before the sealant was put down. Very pleased with how it looks. K. B, Kidderminster”
Mark Conway
Worcestershire Tile Doctor
 Tile Doctor Ltd
This ground floor flat in the City of Oxford had been converted from a shop which as you can imagine, was quite complex. One significant element involved in the conversation was the restoration of an old Quarry tiled floor which ran through the main hallway and had for many years been covered in a commercial linoleum covering.
When the linoleum covering was removed, the sheer amount of glue which had been used to affix it had completely ruined the appearance and condition of the Quarry tiles. There was also a lot of concrete in the bathroom, and our client was keen to have this removed in the hope that the tiles beneath were salvageable.
My first task at the property was to deal with the adhesive. I covered the entire floor area with Tile Doctor Remove and Go and then covered it with a plastic sheet and leaving it to soak into the glue and break it down overnight. Remove and Go is powerful stripper with a long-dwell time, formulated to break down adhesives and paint stains, amongst other coatings.
I returned the next day and, removing the plastic sheeting, I scrubbed the floor with a carbon brush attached to a rotary floor scrubber to remove the huge glue deposits. I worked in sections, rinsing each area of the floor with water after it had been scrubbed. Once I had finished the entire floor there was still some glue remaining, so I covered it again with a solution of Remove and Go combined with Tile Doctor HBU Nanotech, which utilises nano-sized particles to get underneath tough stains, dissolve them, and lift them out. I left this solution on the floor for about two hours to dwell and scrubbed it again.
During the next day of work, I used a very coarse 100 grit diamond burnishing pad to manually grind away the remaining stubborn bits of glue. Paying attention to the bathroom, I used a 50-grit coarse milling pad followed up with a 100-grit diamond burnishing pad to do the same to the area of concrete.
The next part of the process was to use Tile Doctor Grout Clean Up to acid wash the floor. This was successful in removing the last bits of cement and the remaining residue of the glue. To complete the cleaning process, I then rinsed the floor with plenty of water and vacuumed up any soiled solution.
I opted to leave the floor alone for a couple of days to fully dry off so that it could be sealed upon my return. This is crucial as any moisture or damp issues can damage the performance of the sealer and expose the floor to further ingrained dirt and staining.
To seal the floor, I used Tile Doctor Colour Grow. This is an impregnating sealer that also enhances the natural reddish shades in the Quarry. I applied two coats of the sealer, giving the floor the natural look matte finish the customer desired.
The customer was very impressed with the results of this thorough restoration. She even left the following feedback:
“I cannot recommend this service enough. The Oxford Tile Doctor (Barry) was a superstar: he cleaned up the tiles in my hallway, which were covered in a very thick layer of glue, and removed concrete from the tiles. They now look superb and I’m really happy with the outcome. Barry was always on time, considerate, and kept me up to date. The quote for the job was exactly right. I would not hesitate to recommend him.”
 Tile Doctor Ltd
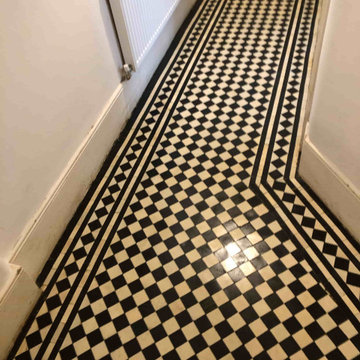
This property was in theLadbroke Grove area of West London near Kensington. The client had found an old and probably original black and white checkered pattern Victorian tiled floor under their cork tiled flooring. They also reported that it was badly damaged so I thought it would be best if I paid them a visit first to see how extensive the damage was and whether it was repairable. The floor was in a quite a state, the tiles were covered in glue from the cork and had several areas had been back filled with cement.
I reassured them that the damage could be rectified, and that it would be possible to completely restore the floor back to a good standard. I would have to remove the glue, remove the cement that had been used to level the floor and replace with reclaimed tiles to match. They were relieved to find out it could be done and happy with my quote I was instructed to go ahead with the work.
We started by taping up the skirting boards to protect the woodwork. With this done attention was turned to the glue which was softened using a strong dilution of Tile Doctor Remove and Go so it could be carefully scraped off. Multiple techniques and tools were needed to remove the glue including hand-held scrappers and a black pad fitted to a buffing machine. For the stubborn areas steam was applied to help lift the adhesive out the tile.
Once all the glue was removed the floor was rinsed and the alkaline cleaner neutralised with Tile Doctor Grout Clean Up which further cleaned the tiles and removed old traces of grout from the floor. Old floors like this generally don’t have a damp proof membrane underneath so the acids in the Grout Clean-up also counter any efflorescent salts trapped in the tile.
Once this was completed the slurry was removed with a wet vacuum and left to fully dry out overnight.
The following day focus turned to repairing the areas of the floor where the tiles were missing or broken. The main issue being the cemented areas, we see this a lot with Victorian Hallways and generally what happens is a heating engineer digs out the floor to install pipework. Not being tilers, your average plumber then repairs the floor with a self-levelling cement that brings the level up to the surface of the tile so it can be covered with lino, carpet of in this case cork.
The sub floor was then rebuilt with rapid setting self-levelling compound but this time to below the level of the tile.
Once the new base was dry it was a just a question of re-tiling with the replacement tiles to match the original checkered pattern. The replacement reproduction tiles were sourced from Original Features in Crouch End North London. After grouting we left the floor to dry out over the weekend.
When we returned to seal the floor our first step was to check the floor was dry using a moisture meter. This is critical as the sealant will not cure correctly if there is too much moisture in the floor. In this case the extra two days we had allowed had done its job and the test had confirmed it was ready to accept a sealer.
The client wanted the floor finish not to be too shiny once sealed so we opted to seal with two coats of Tile Doctor Seal and Go Extra. This is good choice for old Victorian floors such as this example as it’s special acrylic-based formula allows for moisture vapour transmission which as mentioned previously is a concern where no damp proof membrane has been installed.
I’m please to confirm my clients were delighted with the result, as you can see from the pictures the black and white floor restoration makes for a dramatic entrance well in keeping with the style of the property. For aftercare I recommended the use of Tile Doctor Neutral Tile Cleaner which will keep the tiles in good condition going forward without damaging the new sealer.
Jackson Davis
Central London Tile Doctor
 Tile Doctor Ltd
It’s always a great surprise to find old tiled flooring hidden underneath carpet or linoleum which appears especially common with 19th century properties where it’s not unusual for the owners to uncover fantastically patterned, original Victorian tiled floors and, naturally, they want to restore them to their former glory. If you have a property of this type you might want to look under the carpets.
The majority of the time, however, these tiles have been covered up for decades, allowing for thick layers of muck to build-up and are invariably damaged carpet grippers, surface glue and adhesive tape.
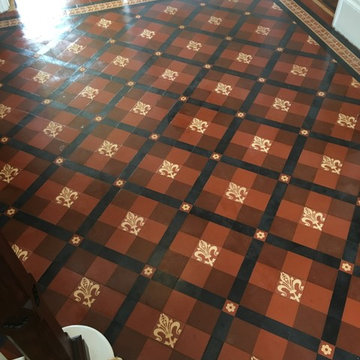
This was pretty much the case with this customer who lives in the town of Warminster and was keen to have her own newly discovered Victorian hallway brought back to life, and called me down to see what could be done. Upon arrival at the property, I determined that the tiles would definitely require a very deep clean, including the remove of numerous glue stains, followed by the application of a new seal.
Before I could begin the deep cleaning process, I needed to remove the carpet grippers and surface glue, attempting to remove as much as possible by hand using a scraper.
For the particularly stubborn areas, I applied Tile Doctor Remove & Go, a powerful stripper specially designed to break down adhesives and solvents, and left it to dwell for 20 minutes to eat through the glue deposits. I then attached a black pad to a rotary machine and scrubbed the area thoroughly to clean the affected areas, before removing the resulting slurry using a wet vacuum and rinsed with clean water.
Once I was satisfied that all of the glue had been removed, I proceeded to soak the floor using a solution of the high alkaline cleaner known as Tile Doctor Pro Clean. This is a versatile product that can be used on a wide range of natural stone floors to deal with heavy soil build-up.
I left the Pro-Clean to dwell for ten minutes, and then scrubbed it into the tiles to remove the ingrained dirt and also to break down any old and ineffectual seals. The floor was then once again rinsed thoroughly with clean water which was then extracted using a wet vacuum before being left to dry for a couple of days.
Upon our return to the property I immediately tested the floor for damp using a damp meter. This is an extremely important test to carry out before sealing any kind of tiled flooring, due to the fact that excess moisture left over from cleaning can cloud the sealer and damage its ability to protect against dirt and stains.
Thankfully, the damp test revealed no excess moisture, and I was able to proceed with sealing the tiles. My choice of sealer was Tile Doctor Seal and Go, a water-based topical sealer that simultaneously provides both a stain resistant surface seal and a durable and aesthetically pleasing low sheen finish, also being water based it doesn’t give off a smell as it dries.
This is a very cost effective product that is highly suitable for use on Victorian and Quarry tiles, I applied five costs to achieve the desired finish.
The customer was very pleased with the final results. It’s always satisfying to restore original Victorian tiled floors to looking their best once again – and this one was no exception.
Stuart Ford
Wiltshire Tile Doctor
2