
Search results for "Required sign up" in Home Design Ideas
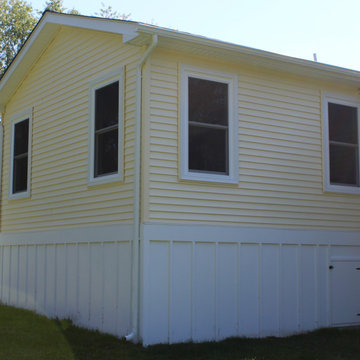
 Talon Construction Inc.
Designing and building a kitchen addition is a complex process that involves multiple steps and considerations. Here is a general outline to help you get started on your kitchen addition project:
Define Your Goals and Budget:
• Determine the purpose of the kitchen addition. Is it for more cooking space, a dining area, or a combination of both?
• Establish a realistic budget for your project. Consider all costs, including construction, permits, materials, and furnishings.
Hire a Design Professional:
• Seek the services of a design build company who specializes in kitchen additions.
• Discuss your vision, needs, and budget with the design professional to create a design concept.
Site Evaluation:
• Assess the existing space and structural condition of your home to ensure it can support the addition.
• Consider factors like zoning regulations, setbacks, and building codes.
Design Development:
• Collaborate with your design professional to refine the concept, including the layout, size, and architectural style.
• Choose materials, finishes, and fixtures that fit your design and budget.
Obtain Permits:
• Consult with your local design build contractor to determine the necessary permits and approvals.
• Prepare and submit all required documents, including architectural drawings and engineering plans.
Create Construction Documents:
• Work with your design build professional to develop detailed construction drawings and specifications.
• These documents will serve as a guide for contractors during construction.
Hire a design build contractor:
• Check references, credentials, and licenses before selecting a contractor.
• Sign a detailed contract that outlines the scope of work, timeline, and payment schedule.
Construction Phase:
• Demolition: If needed, remove any existing structures or walls.
• Foundation: Construct the foundation for the addition.
• Framing: Build the structural framework of the addition.
• Plumbing, Electrical, and HVAC: Install or update utilities as required.
• Insulation: Ensure proper insulation for energy efficiency.
• Drywall and Finish Work: Complete the walls and ceilings.
• Flooring and Cabinetry: Install flooring and kitchen cabinets.
• Appliances and Fixtures: Add appliances, plumbing fixtures, and lighting.
• Paint and Finish: Apply paint and finishes to achieve the desired look.
• Final Inspection: Schedule inspections to ensure compliance with building codes.
Final Inspections and Approvals:
• Arrange for final inspections to ensure the addition meets all safety and code requirements.
• Obtain any necessary certificates of occupancy or compliance.
Move In and Enjoy:
• Once all inspections and approvals are received, you can move into your new kitchen addition and start enjoying it.
Remember that every kitchen addition project is unique, so adapt this outline to your specific needs and circumstances. Consulting with professionals and obtaining the required permits and inspections is crucial to a successful and safe project.
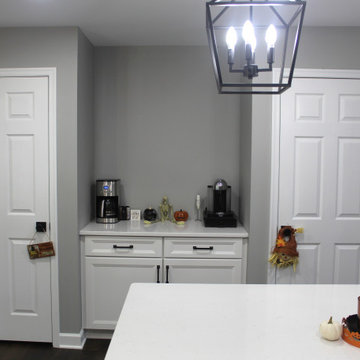 Talon Construction Inc.
Designing and building a kitchen addition is a complex process that involves multiple steps and considerations. Here is a general outline to help you get started on your kitchen addition project:
Define Your Goals and Budget:
• Determine the purpose of the kitchen addition. Is it for more cooking space, a dining area, or a combination of both?
• Establish a realistic budget for your project. Consider all costs, including construction, permits, materials, and furnishings.
Hire a Design Professional:
• Seek the services of a design build company who specializes in kitchen additions.
• Discuss your vision, needs, and budget with the design professional to create a design concept.
Site Evaluation:
• Assess the existing space and structural condition of your home to ensure it can support the addition.
• Consider factors like zoning regulations, setbacks, and building codes.
Design Development:
• Collaborate with your design professional to refine the concept, including the layout, size, and architectural style.
• Choose materials, finishes, and fixtures that fit your design and budget.
Obtain Permits:
• Consult with your local design build contractor to determine the necessary permits and approvals.
• Prepare and submit all required documents, including architectural drawings and engineering plans.
Create Construction Documents:
• Work with your design build professional to develop detailed construction drawings and specifications.
• These documents will serve as a guide for contractors during construction.
Hire a design build contractor:
• Check references, credentials, and licenses before selecting a contractor.
• Sign a detailed contract that outlines the scope of work, timeline, and payment schedule.
Construction Phase:
• Demolition: If needed, remove any existing structures or walls.
• Foundation: Construct the foundation for the addition.
• Framing: Build the structural framework of the addition.
• Plumbing, Electrical, and HVAC: Install or update utilities as required.
• Insulation: Ensure proper insulation for energy efficiency.
• Drywall and Finish Work: Complete the walls and ceilings.
• Flooring and Cabinetry: Install flooring and kitchen cabinets.
• Appliances and Fixtures: Add appliances, plumbing fixtures, and lighting.
• Paint and Finish: Apply paint and finishes to achieve the desired look.
• Final Inspection: Schedule inspections to ensure compliance with building codes.
Final Inspections and Approvals:
• Arrange for final inspections to ensure the addition meets all safety and code requirements.
• Obtain any necessary certificates of occupancy or compliance.
Move In and Enjoy:
• Once all inspections and approvals are received, you can move into your new kitchen addition and start enjoying it.
Remember that every kitchen addition project is unique, so adapt this outline to your specific needs and circumstances. Consulting with professionals and obtaining the required permits and inspections is crucial to a successful and safe project.


Find the right local pro for your project

 INTEGRITY DESIGN, LLC
Example of a large mountain style kitchen design in Las Vegas with marble backsplash, stainless steel appliances and an island

 ForeverLawn, Inc.
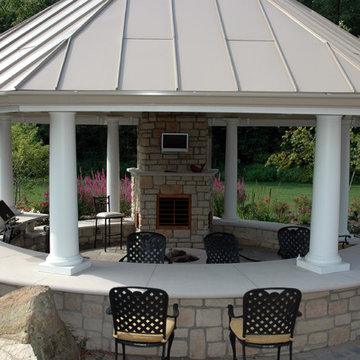
This beautiful 11,000 square foot playground area at the Child Development Center of Natrona County was installed by ForeverLawn Central Wyoming, featuring Playground Grass™ Ultra by ForeverLawn®. This project is made up of three separate playgrounds, each designed with a specific age group in mind. The playgrounds were previously surfaced with rubber tiles that were beginning to curl, and the facility was looking for the perfect solution with plenty of benefits. Some of the children in the care of this child development center have special needs, so the playgrounds are required by the county to have fall height protection. Playground Grass meets the ASTM 1292 fall specifications as well as the ASTM 1951 ADA accessibility specifications. In addition, some of the children have electronic medical devices, making Playground Grass Ultra the perfect fit for these playgrounds because of the XStatic™ antistatic technology.


Sponsored
Columbus, OH
Free consultation for landscape design!

Peabody Landscape Group
Columbus' Reliable Landscape Design & Contracting


 Venetian Stairs
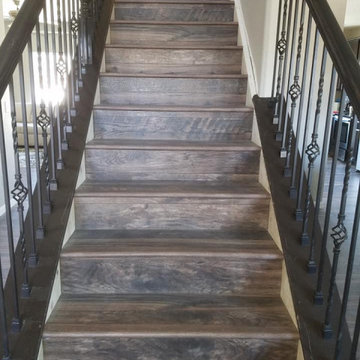
This customer was having hardwood flooring installed so we removed the existing handrails and newels and then let the hardwood floor company install there flooring. We then returned to reinstall the Newel posts and railing with our PC18/1, PC18/2, and the PC33/2 Scroll all in our Old world Copper. Additionally we sanded and refinished the newel posts and railing to match the new hardwood flooring.


 Julie - Carpet Mill Store of Milwaukee
Julie J. Mayhew
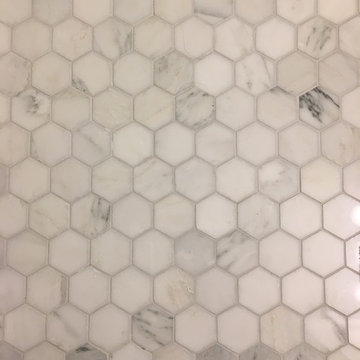
Inspiration for a small timeless white tile and stone tile marble floor home design remodel in Milwaukee with flat-panel cabinets, white cabinets, a two-piece toilet, green walls, an undermount sink and marble countertops
Inspiration for a small timeless white tile and stone tile marble floor home design remodel in Milwaukee with flat-panel cabinets, white cabinets, a two-piece toilet, green walls, an undermount sink and marble countertops

 Red Chair Designs
Living in a small space requires use of every square inch. In this bathroom the toilet brush and plunger are hidden behind a cabinet door. The cabinet is recessed in the wall under the built-in shelves. The homeowner's friend developed this product and sells them at Home Depot.
Project by Red Chair Designs in Denver, CO.
 Deborah Kipp's Decorative Painting (Austin Texas)
CLOSE-UP VIEW
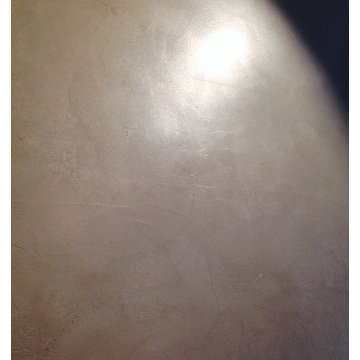
This master bath makeover starts with bare walls that have been floated out smooth over the sheetrock. Then we hand applied a beautiful custom tinted, soft grey Venetian plaster. After two coats of plaster, the walls were waxed and buffed. This process seals the plaster, leaving a long-lasting finish. The finished product is subtle and undeniably beautiful! I’ve included a close-up view of the finish below.
Sponsored
Delaware, OH

Buckeye Basements, Inc.
Central Ohio's Basement Finishing ExpertsBest Of Houzz '13-'21




 Amanda Kirkpatrick Photography
Kitchen - mid-sized cottage light wood floor kitchen idea in New York with a farmhouse sink, shaker cabinets, yellow cabinets, soapstone countertops, black backsplash, stone slab backsplash, stainless steel appliances, an island and black countertops

 Kinship Architecture
Blackened steel railings and stringer covers.
Minimalist wooden metal railing staircase photo in New York with wooden risers
Minimalist wooden metal railing staircase photo in New York with wooden risers



 Jim Cuccias And Sons General Contractors
GROIN VAULT CROSS WITH CROWN MOLDING, LED LIGHTS IN THE CROWN MOLDING AND VENIETIAN PLASTER
Example of a minimalist bedroom design in New York
Example of a minimalist bedroom design in New York

 Georgia Krapf
Custom Ship Ladder shaft with canting wall with hidden light. Translucent wall behind ship ladder to silhouette stair.
Example of a minimalist staircase design in San Francisco
Example of a minimalist staircase design in San Francisco
249