
Search results for "Resolved" in Home Design Ideas
 Tile Doctor Ltd
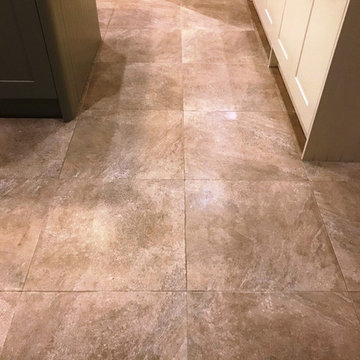
This request came from a client who lives in the Newcastle district of Jesmond who was unhappy with the appearance of their Textured Porcelain floor tiles. The problem was that the Porcelain Tiles were grouted in whilst the underfloor heating was switched on. This resulted in the grout drying out quicker than expected and the tiler struggled to get the excess grout off the tiles. To rectify the problem, the tiler tried to get the dried grout off with acid, but it didn’t work, and the floor was left looking dark and dull. Unable to rectify the problem the client was left with a disappointing pale floor and had searched around the internet for a solution.
Normally grout smears like these (aka Grout Haze) can be removed with an acidic product and Tile Doctor sell Grout Clean-up specially for this purpose. However, some grouts contain acid resistant polymers which need to broken down first. Fortunately, we have a solution for everything tile related and the system we use does not affect the main grout lines only the excess grout. I called in to do a site visit and having surveyed the problem I was confident it could resolved, I gave them a price for the work and agreed a date to return to do the job.
My first task was to spray the tiles with Tile Doctor Remove and Go, this was left to soak into the tile for around ten minutes before being scrubbed in. Remove and Go is a coatings remover that is safe to use on tile and grout; normally we use it to remove old sealers but in this case I applied it to break down the polymers. To work the product into the tile I use a buffing machine fitted with a black scrubbing pad, the mechanical advantage this gives makes the job a lot quicker. Then the slurry generated is rinsed off with water and removed with a wet vacuum. The floor was then left to dry for 30 minutes.
We were then able to remove the excess grout which was done by applying Tile Doctor Grout Clean-Up which I mentioned earlier. The process was the same, i.e. using the buffing machine and a wet vacuum to scrub the floor and extract the soil. The floor was rinsed with water to remove any trace of the products used and dried as much as possible using the wet vacuum. The underfloor heating really helped at this point to dry out the floor.
Once the floor was fully dry including the grout lines a single thin coat of Tile Doctor Colour Grow sealer was applied. The tiles were textured porcelain, so the dirt gets trapped into the textured surface if it is not sealed. We usually find one coat of Tile Doctor Colour Grow is more than enough for this, anything that hadn’t soaked in after three to five minutes was then polished off with clean dry cloths.
The client was very happy with the floor and pleased that the excess grout had been cleaned up and the floor looked as it should. Before leaving I recommended the use a pH Neutral tile cleaner for general cleaning such as Tile Doctor Neutral Tile Cleaner. There is no point sealing the tiles only to have it stripped off later with the use of a bleach based cleaner.
Raf Barrett
Tyneside Tile Doctor
 Crystal Kitchen + Bath
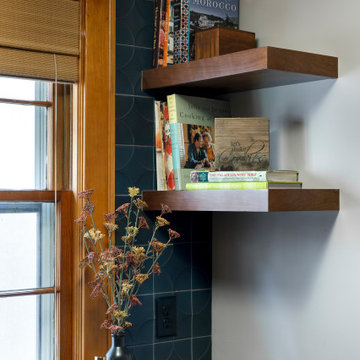
The goal for this 1939 Tudor-style story-and-a-half home was to create a kitchen that offered the conveniences, storage, and performance of a modern workspace while preserving the warmth, craftsmanship, and vintage charm that made the home special. The client, an avid home cook, wanted the room to feel as though it had always belonged to the house, with thoughtful upgrades that respected the original architecture rather than competing with it. Just as important, she needed a more efficient layout with enough storage for small appliances, so everyday cooking would no longer require carrying items up from the lower level.
Several existing conditions shaped the design approach. The kitchen retained original, amber-stained birch woodwork that the client wished to keep, and the compact footprint was interrupted by six doorways and two windows, none of which were to be moved, altered, or replaced. A previous flooring update had left the door casings undercut too short, creating visible gaps where the casing met the floor. The existing vintage 40-inch range also lacked proper ventilation, yet the client wished to accommodate a refrigerator, dishwasher, cooktop, double ovens, built-in microwave, and effective venting above the cooktop into the new kitchen layout.
To honor the original millwork, beaded inset-style cherry cabinetry was selected in a soft, hand-rubbed finish that will deepen over time and develop a natural patina. Charcoal-gray soapstone countertops complement the cabinetry while reinforcing the historic character of the home with an organic, timeworn texture. The former breakfast nook was transformed into a butler’s pantry, adding valuable base cabinet storage and expanded work surfaces for frequently used small appliances. Also in the butler’s pantry, a single upper cabinet was paired with open shelves to give an open, airy feeling while adding character and practical storage. A classic single-bowl apron-front workstation sink contributes both period-appropriate character and practical prep and cleanup function.
Because the home’s openings were such a defining feature, the design worked within the existing architecture instead of altering it. Custom plinth blocks were created for each doorway to extend the original casing gracefully down to the new natural red oak flooring, resolving the earlier construction issue while adding a detail that feels authentic to the age of the house. Despite the number of door and window openings, the new layout provides a significantly more functional, built-in kitchen with an improved work triangle for serious cooking.
Appliance placement was carefully planned to deliver the requested performance without overwhelming the small room. Three cooking functions (double ovens & microwave) were consolidated into one location with a GE Café double oven featuring Advantium Technology, while the client’s compact 31-inch refrigerator was reused to preserve space. A sleek 30-inch induction cooktop provides efficient cooking, and a Vent-A-Hood ARS ductless vent hood supplies needed ventilation without requiring a duct run to the exterior.
The finish palette balances richness, texture, and historical sensitivity. A deeply textured navy backsplash tile adds depth and dramatic shadow play against the soapstone, while wallpaper in the back entry echoes the tile’s geometric pattern to visually connect the adjoining spaces. Oil-rubbed bronze cabinet hardware and light fixtures enhance the warmth of the cherry cabinetry and complete the antique-inspired feel.
Lighting was layered to make the compact kitchen brighter, more useful, and more inviting. Vintage-style semi-flush ceiling fixtures establish the overall tone, while dimmable puck lights highlight select areas and undercabinet task lighting keeps work surfaces well illuminated.
The completed kitchen now feels both highly functional and deeply rooted in the home’s history. Rich cherry cabinetry, velvety soapstone, natural red oak flooring, navy tile, bronze accents, and carefully preserved birch trim work together to create a warm, cohesive space that celebrates timeless craftsmanship. By increasing storage, improving workflow, integrating modern appliances, and respecting the Tudor home’s original character, the design achieves the client’s vision: a kitchen that feels personal, practical, historically appropriate, and as though it has always been there.
 Michael Nash Design, Build & Homes
This four-story townhome in the heart of old town Alexandria, was recently purchased by a family of four.
The outdated galley kitchen with confined spaces, lack of powder room on main level, dropped down ceiling, partition walls, small bathrooms, and the main level laundry were a few of the deficiencies this family wanted to resolve before moving in.
Starting with the top floor, we converted a small bedroom into a master suite, which has an outdoor deck with beautiful view of old town. We reconfigured the space to create a walk-in closet and another separate closet.
We took some space from the old closet and enlarged the master bath to include a bathtub and a walk-in shower. Double floating vanities and hidden toilet space were also added.
The addition of lighting and glass transoms allows light into staircase leading to the lower level.
On the third level is the perfect space for a girl’s bedroom. A new bathroom with walk-in shower and added space from hallway makes it possible to share this bathroom.
A stackable laundry space was added to the hallway, a few steps away from a new study with built in bookcase, French doors, and matching hardwood floors.
The main level was totally revamped. The walls were taken down, floors got built up to add extra insulation, new wide plank hardwood installed throughout, ceiling raised, and a new HVAC was added for three levels.
The storage closet under the steps was converted to a main level powder room, by relocating the electrical panel.
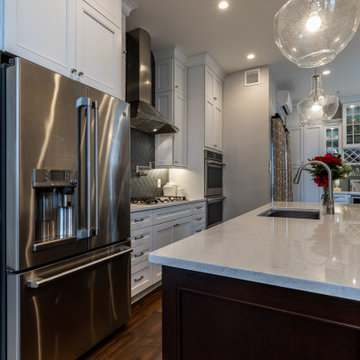
The new kitchen includes a large island with new plumbing for sink, dishwasher, and lots of storage placed in the center of this open kitchen. The south wall is complete with floor to ceiling cabinetry including a home for a new cooktop and stainless-steel range hood, covered with glass tile backsplash.
The dining room wall was taken down to combine the adjacent area with kitchen. The kitchen includes butler style cabinetry, wine fridge and glass cabinets for display. The old living room fireplace was torn down and revamped with a gas fireplace wrapped in stone.
Built-ins added on both ends of the living room gives floor to ceiling space provides ample display space for art. Plenty of lighting fixtures such as led lights, sconces and ceiling fans make this an immaculate remodel.
We added brick veneer on east wall to replicate the historic old character of old town homes.
The open floor plan with seamless wood floor and central kitchen has added warmth and with a desirable entertaining space.
Find the right local pro for your project
 Talie Jane Interiors & Construction
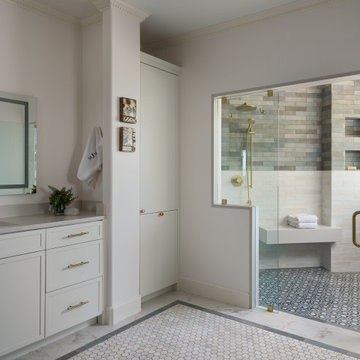
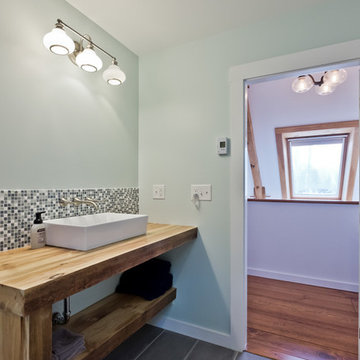
The existing layout presented challenges, particularly the acute angles and centrally placed glass block feature, while also accommodating an ambitious program: a full laundry area, separate his-and-hers vanities and closets, a private toilet room, and a spacious shower with dual shower heads alongside a tub. To resolve this, the design introduces a wet room that consolidates the bathing functions and frees up the central footprint. This approach opens the space and allows for a functional laundry island with a washer and dryer, generous countertop space for folding, and integrated storage for cleaning supplies and household equipment, improving both flow and usability.
 Mottram Architecture
Timber frame homes offer unique challenges during a remodel. What often makes them beautiful and attractive to most homeowners, also makes them challenging for space requirements.
Context: The lovely couple that owned this home were struggling with some interesting floor plan challenges that just didn't work for their family. The loved the beautiful timbers and woodwork of their home, but the dramatically sloping ceilings on the second floor, particularly in the bathroom, just didn't work for this 1 1/2 bath home. Needing to use the skylight to approach the toilet was a less then ideal scenario. Although the bathroom footprint was more then adequate, the sloped ceiling only made half of the space useable. Check out the Before/After post on our blog to see the photos of the house pre-renovation. As much as they loved all the wood features in their home, another challenge they had was light. The wood ceiling made everything inside the house darker, even with a fantastic array of south facing windows, there were spaces in the home that felt dark and small. When they contacted us they wanted to know how could they make their brighter and more inviting, were there solutions to the 2nd floor sloped ceiling issues, and if they were going to do all of this work, how could they make their home more comfortable and efficient. A nagging water leak in the upstairs bathroom spurred them into action and here is how we solved their dilemma.
Conclusion: First, we added a little dormer to the rear of the house so we could get full headroom in nearly all of the upstairs bathroom! Then we decided to extend that dormer one more timber bay over to create a walk in closet with natural light and plenty of space. Since we were contemplating energy efficiency, we resolved a nagging issue that is present in a lot of timber frame construction, air tightness. Commonly found in timber frame construction, fiberglass insulation is installed in the rafter bays and board ceilings are installed over top. Unfortunately, board ceilings are anything but air tight, and fiberglass insulation needs to be in an airtight cavity for maximum effectiveness. So we were able to solve two issues at the same time for this homeowner. We removed the board ceiling and fiberglass insulation, we dense packed the rafter bays with cellulose insulation, and installed sheetrock in place of the boards. The boards were salvaged for re-use by the homeowner, and the space and light quality was dramatically improved. Some may think that losing the board ceiling took something away from the space, but what you'll see in the pictures is that it highly accentuates the heavy timbers and really makes them stand out in a beautiful way. Now with this added airtightness, better insulation, and brighter space, the homeowner hardly runs their wood stove, and it's so quiet in the space, an added bonus from changing the insulation. It became necessary to also add a sheetrock ceiling to the living room to hide the plumbing from the new bathroom layout above. Changing this ceiling gave the homeowner some real quality lighting that was lacking in the living room before. The brighter ceiling and new lighting layout completely transforms the living room into a space you want to hang out, even though the layout didn't change at all. When the homeowner saw the finished spaces she said "I can't believe this is my house, I want to live in this house"
Energy Efficiency: I touched a little on the efficiency above, but like all projects done with Mottram Architecture, we always want to leave you with a little extra. Timber frame construction with board ceilings and fiberglass insulation are notoriously leaky! If you want to know what we think about fiberglass insulation, check our our blog post on Why Fiberglass Insulation Sucks. By installing cellulose insulation and covering it with sheetrock we were able to greatly reduce the heat flowing out of this home. It not only improves cashflow it improves the comfort level in the space. Who wants to sit in their living room and feel a draft? Let us remind you, we are not saying cellulose insulation is an air barrier, we use the sheetrock to help with that, but it does significantly reduce the air flow over fiberglass insulation. And when we reduce the airflow, we reduce the heat flow. And when we reduce the heat flow, we reduce the need to re-heat that drafty air from outside. When it comes to energy efficiency the first and best place to start is air infiltration. We greatly reduced the air infiltration with the new insulation, but we also added a hat and warm boots. What I mean by that is, we improved the insulation in the roof, and we installed insulation in the basement. Maybe it's a silly analogy, but when you think about keeping warm, we always start with the hat and boots! With sustainability in mind, the next project will be to add a deck to the front of this house with rain catchment barrels from the metal roof. They are planning to plant a garden in the spring and the rain catchment system will help to irrigate the new garden.
Builder: East Shore Builders
Photographer: Michael Eric Berube
 Soft Square Naples
Knoll Inc
www.softsquare.com
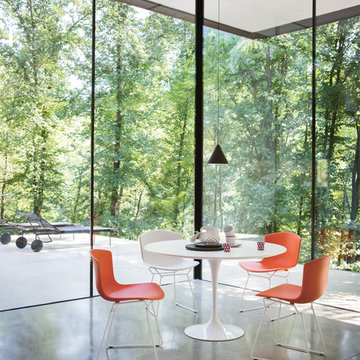
Saarinen Dining Table - 42" Round by Eero Saarinen 1957
With the Pedestal Collection, Eero Saarinen resolved the "ugly, confusing, unrestful world" underneath tables and chairs. The collection is a defining accomplishment of modern design and a timeless addition to your home—a true classic.
 Kitchen Architecture Ltd
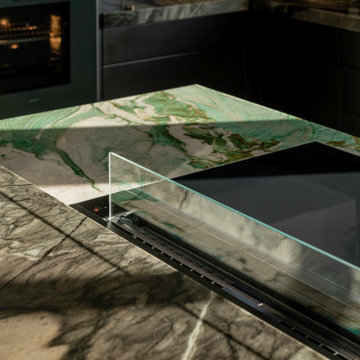
A flush fitting rising glass ventilation unit is integrated seamlessly with the hob and boasts a state-of-the-art automatic splash guard. Challenging ducting and venting requirements are resolved with collaborative solutions.
 Atelier Angélique
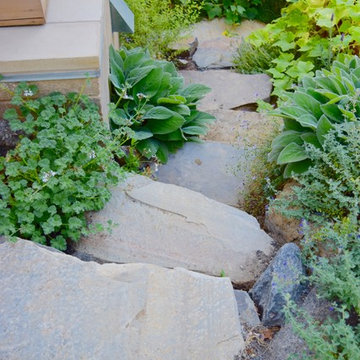
This was a steep transition of terrain with out much room. We were able to resolve this with an artistic and functional pathway leading to two raised beds. This area receives all day sun and is a perfect location for a vegetable garden and low maintenance plants.
 Automotive Locksmith
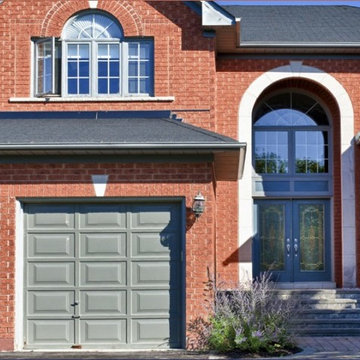
We have been providing top notch garage door services for over 10 years now. We always aim to provide hundred percent satisfaction to all of our clients by providing quick, friendly and professional garage door services at fair price. To be able to do this, we make sure that our highly regarded garage door technicians are well trained and knowledgeable in the garage door industry.
We can effectively resolve any garage door problems you might be having right now, from simple repair, parts installation to the most complex garage door issues. Our team of technicians can deal with different garage door systems like section and panel, tilt-up, roll-up, overhead and more.
With our decades in the garage door industry, we have established the reputation of providing its customers with good service and fair prices as well as giving accurate solution in every garage door problem that you have.
Residential Garage Door
Commercial Garage Door
Garage Door Openers
Garage Door Parts
Garage Door Accessories
Garage Door Tuneup
Garage Door Maintenance
Emergency Garage Door
Call Us: (805) 342-0085
Visit Us: http://805commercialgaragedoors.com/overhead-door-parts
 Michael Nash Design, Build & Homes
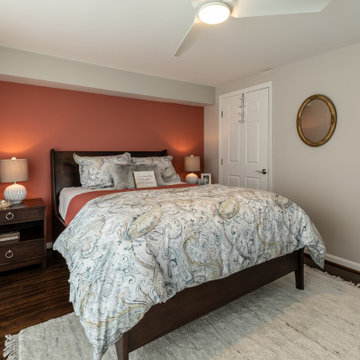
This four-story townhome in the heart of old town Alexandria, was recently purchased by a family of four.
The outdated galley kitchen with confined spaces, lack of powder room on main level, dropped down ceiling, partition walls, small bathrooms, and the main level laundry were a few of the deficiencies this family wanted to resolve before moving in.
Starting with the top floor, we converted a small bedroom into a master suite, which has an outdoor deck with beautiful view of old town. We reconfigured the space to create a walk-in closet and another separate closet.
We took some space from the old closet and enlarged the master bath to include a bathtub and a walk-in shower. Double floating vanities and hidden toilet space were also added.
The addition of lighting and glass transoms allows light into staircase leading to the lower level.
On the third level is the perfect space for a girl’s bedroom. A new bathroom with walk-in shower and added space from hallway makes it possible to share this bathroom.
A stackable laundry space was added to the hallway, a few steps away from a new study with built in bookcase, French doors, and matching hardwood floors.
The main level was totally revamped. The walls were taken down, floors got built up to add extra insulation, new wide plank hardwood installed throughout, ceiling raised, and a new HVAC was added for three levels.
The storage closet under the steps was converted to a main level powder room, by relocating the electrical panel.
The new kitchen includes a large island with new plumbing for sink, dishwasher, and lots of storage placed in the center of this open kitchen. The south wall is complete with floor to ceiling cabinetry including a home for a new cooktop and stainless-steel range hood, covered with glass tile backsplash.
The dining room wall was taken down to combine the adjacent area with kitchen. The kitchen includes butler style cabinetry, wine fridge and glass cabinets for display. The old living room fireplace was torn down and revamped with a gas fireplace wrapped in stone.
Built-ins added on both ends of the living room gives floor to ceiling space provides ample display space for art. Plenty of lighting fixtures such as led lights, sconces and ceiling fans make this an immaculate remodel.
We added brick veneer on east wall to replicate the historic old character of old town homes.
The open floor plan with seamless wood floor and central kitchen has added warmth and with a desirable entertaining space.
 Morpurgo Architects
Morpurgo Architects was retained by a Fortune 100 CEO and his wife, owners of this grand brick manor house, to renovate the lower level of their home and increase the existing area for a spa and entertainment. Above this new space, we created an expansive deck, accessible from the kitchen and the first floor living areas.
Our firm surmounted numerous challenges presented by the significant height of the deck and our clients’ desire for immediacy to the pond below. We mitigated and resolved the height differences by designing a system of stairs and platforms that provide overlooks to the landscape, thereby facilitating transitions among the many levels.
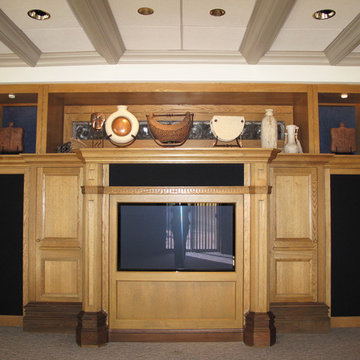
Between the first floor and the lower level, we have constructed a mezzanine that is situated between two levels of stairs. This spacious landing prompts one to pause and view the family room through a wood-arched ceiling, with flanking wood display cases, before entering this well-appointed social area that contains the family room with a fireplace, pub, billiard room and solarium. A separate apartment, full-service cabana with kitchen and two bathrooms, sauna and a gym were also developed to satisfy the owner’s program.
Morpurgo Architects is known for its fastidious detailing, exemplified in this magnificent home by walnut-blasted oak paneling and built-ins that the firm designed to enhance the family’s entertainment space.
 Michael Nash Design, Build & Homes
2011 NARI CAPITAL COTY FINALIST AWARD WINNER
Project Scope--
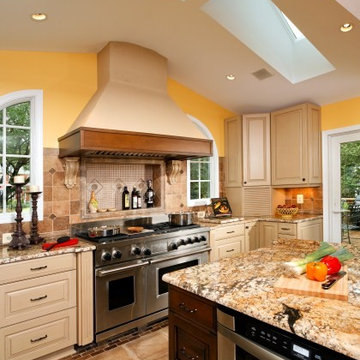
The owners of this 1990’s colonial home were seeking to convert the existing space-constricted builder-grade kitchen into a generously-apportioned Tuscan-style country kitchen with lots of natural light, high-end appointments and a warmly textured interior design concept. Among other features they sought a mid-room island that would house critical appliances, complete the work triangle and provide dining counter space for three. They also wanted to include a professional-grade gas range.
Challenges--
Situated between dining room and family room, the existing kitchen was small and poorly planned. The sink faced a blank wall and the appliances were inadequate for the owner’s gourmet cooking ambitions.
To create the desired footprint, the contractor, Michael Nash Design, Build & Homes, created a plan that called for consolidating square footage in several rooms adjacent to the kitchen. This entailed removing two load bearing walls– one between the kitchen and dining room, a second separating the kitchen and family room– and shifting loads to newly installed structural supports carefully concealed within the resultant “open” floor plan.
To accommodate new appliances (and work efficiencies) called for by this radically altered space plan, the design located the new professional gas range and other key features in the footprint formerly occupied by the breakfast room, a change that takes advantage of opportunities for a higher cathedral ceiling, better natural lighting and greater space.
Solutions--
With this space plan resolved, the design team could now eliminate a picture window on the west elevation, designing a new elevation to accommodate a stucco cooktop flanked by a pair of custom Palladium windows. A side elevation slider was replaced with a French door.
Infrastructure considerations included introducing gas lines needed for the 48” Viking cooktop range and re-routing plumbing. The 5’ x 9’ granite-surfaced custom designed island includes the primary kitchen sink, a dishwasher, microwave and dining overhang that provided seating for up to four.
On another wall, the design called for installing ceiling flush “beaded” display pantries with open bookcases, and routed-in plumbing for a water fountain, a faucet and an ice-making machine.
Glazed maple and cherry cabinetry increased available storage by over 50%. A recessed space was also created for a built-in vertical wine rack. Style-appropriate terra cotta tiling with mosaic bordering detailing extends into the home’s foyer. Other finishing work elements include crown molding with rounded turn posts and corbels.
 Allscape Patio & Landscape
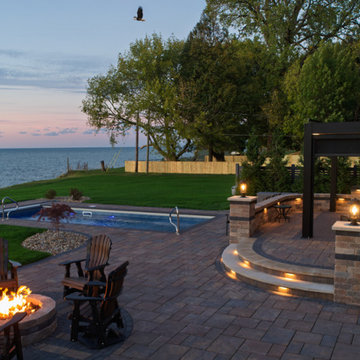
A complete outdoor living environment designed and built for a lakefront property in Northeast Ohio, where the water view had to remain the organizing element of the entire space.
The plan is built around a multi-level paver patio set on a concrete base — a construction method that holds line and elevation through freeze-thaw cycles rather than settling over time. Curved steps with integrated riser lighting connect the upper terrace to the lower patio, and a seat wall with column piers defines the transition without closing off the view.
A motorized pergola anchors the upper level, positioned against the home and detailed to match its lines. Beneath it, a full outdoor kitchen with stainless appliances sits under cover, with a lounge area alongside it. The lower terrace carries a gas fire pit and seating, oriented so the lake stays in view from every position.
The in-ground pool was set into the grade between the patio and the lawn, with paver coping and surround carried through in the same material palette so the pool reads as part of the environment rather than a separate installation.
Patio, pool, pergola, kitchen, fire feature, and lighting were designed together and installed by Allscape Patio. Every element was planned in relation to the others, which is what allows a space of this size to feel resolved rather than assembled.
Scope: multi-level paver patio on concrete, in-ground swimming pool, motorized pergola, outdoor kitchen, gas fire pit, seat walls and column piers, landscape lighting.
 Forward Design Build Remodel
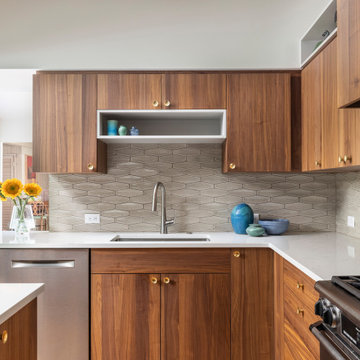
Our clients came to us with specific remodeling goals: to create a more functional mid-century home with an updated and larger kitchen, to resolve the public circulation through their master bedroom, have a unified feel versus a house with multiple additions, and expanded views of the lovely Huron River, which is right outside their backyard.
Our solutions focused on creating a new circulation system that reconnects the entire floor plan into a cohesive whole, and reinforces the connection to the outdoor courtyards.
 Patricia Delaney
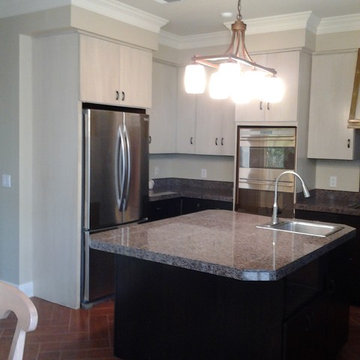
Remodeled kitchen (see before pictures). The client wanted to lighten the dark kitchen but wasn't interested in a light cabinet color. This issues was resolved by painting/glazing the upper cabinets light and adding black glaze to the lower cabinets. Upper cabinets were painted with Annie Sloan Chalk Paint (base Old Ochre, "glazed" over with Coco and Graphite).
 ASVInteriors
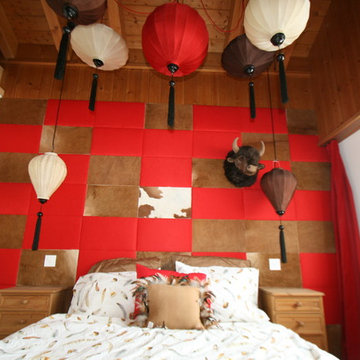
A huge ceiling space with a mezzaine is resolved by adding lighting that is beautiful to look at from above, below and standing
www.asvinteriors.com
Inspiration for a mid-sized eclectic guest medium tone wood floor bedroom remodel in Other with red walls
Inspiration for a mid-sized eclectic guest medium tone wood floor bedroom remodel in Other with red walls
 Bailiwick Interior Design
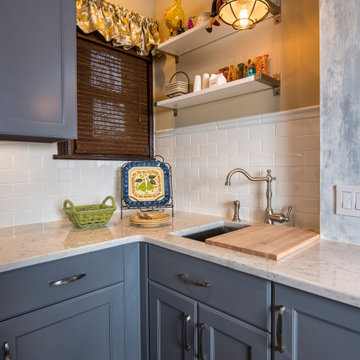
Historic properties require special skill and vision. With a nod to the period style of this home and modern updates, we created an extremely functional kitchen within a small footprint. The property was gutted top to bottom and structural issues resolved. Playing with natural textures, faux elements and neutral colors, the blend of old and new make this little kitchen a powerhouse!
 KCBR Design | Remodel
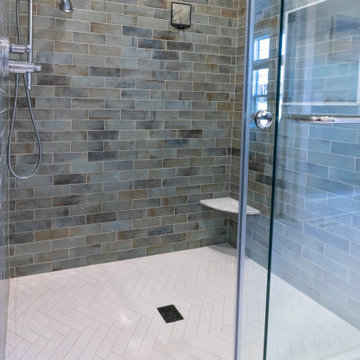
What began as a leaking shower became an opportunity to fully refresh this primary bathroom, resolving underlying issues while elevating the overall design.
A newly built shower anchors the space, paired with updated flooring that instantly brightens and refines the room. The herringbone floor pattern introduces movement and texture, while bold wall tile creates contrast and a strong visual statement, striking a balance between character and cohesion.
Beyond aesthetics, the remodel focused on delivering a durable, functional solution that will stand the test of time. Every detail was approached with intention, ensuring the space not only looks refreshed but performs seamlessly for daily use.
Completed just in time for spring, the result is a primary bathroom that feels clean, polished, and thoughtfully reimagined.
 Luce Spaces LLC
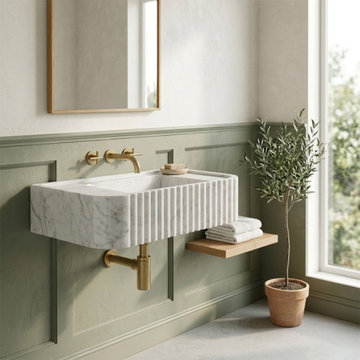
Carrara White Marble Fluted Wall-Mount Sink (28")
A masterful translation of geology into built form. This 28" wall-mount basin pairs the characteristic grey veining of premium Carrara marble with a precisely executed fluted exterior profile. The vertical ribbing generates a rhythm of light and shadow, giving the solid stone volume a striking geometric presence against a flat wall plane.
Finished with a honed surface to temper reflectivity and engineered with a solid deck for wall-mount faucet configurations, it acts as a fully resolved architectural element rather than a simple replicated object.
For current availability, technical specifications, and direct ordering of this 28" fluted model, visit our LUCE SPACES official website
 Soft Square-Modern & Contemporary Furniture Store
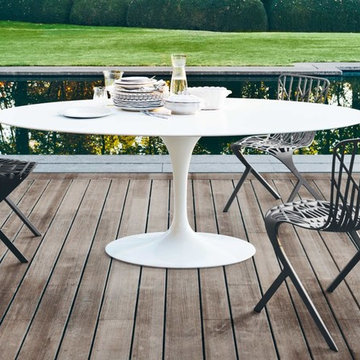
With the Pedestal Collection, Eero Saarinen resolved the "ugly, confusing, unrestful world" underneath tables and chairs. The collection is a defining accomplishment of modern design and a timeless addition to your home—a true classic.
www.softsquare.com
49