
Search results for "Rinsing" in Home Design Ideas
 Nor-Son Custom Builders
Scott Amundson Photography
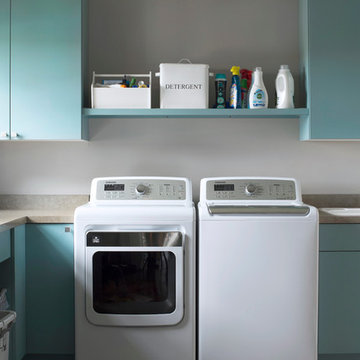
Transitional dedicated laundry room photo in Minneapolis with flat-panel cabinets, blue cabinets, a drop-in sink, a side-by-side washer/dryer, laminate countertops and beige countertops
Transitional dedicated laundry room photo in Minneapolis with flat-panel cabinets, blue cabinets, a drop-in sink, a side-by-side washer/dryer, laminate countertops and beige countertops
 User
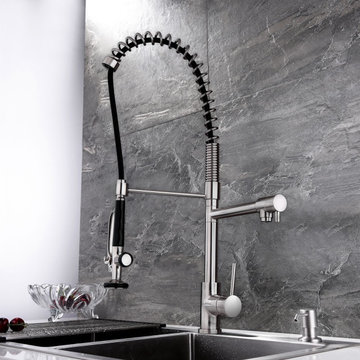
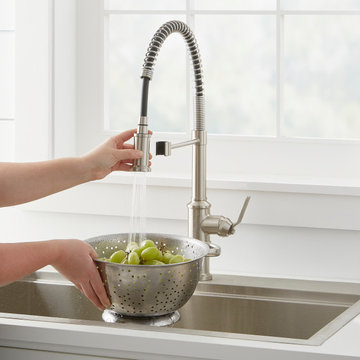
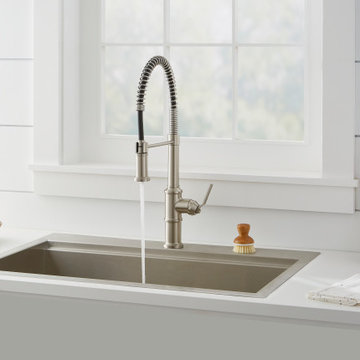
UserOur latest commercial kitchen faucet has an open coil spout with a sleek look perfect for the modern kitchen. With a perfect blend of utility and beauty, this versatile design will take your kitchen hardware to a new height with exceptional ergonomics and unparalleled efficiency. The 360-degree swivel design can reach every corner of the sink and provide water at easy access, while a pull-down spray and an aerated spout allow you to go from washing dishes to filling pots and pans. A clean brushed nickel finish will give a cool, new look to any kitchen. Bring home this impressive and innovative kit.
- Constructed from solid brass for durability and reliability.
- Finished in a high quality, corrosion resistant brushed nickel.
- Features a 360-degree swiveling pre-rinse spout design.
- The sprayer and aerator spout can work simultaneously and individually.
- Includes a braided pullout hose for greater reach.
- Not suitable for low pressure. Minimum required water pressure is 0.05 MPa (0.5 bar).
- All mounting hardware and hot/cold waterlines are included.
 Rautmann Custom Homes
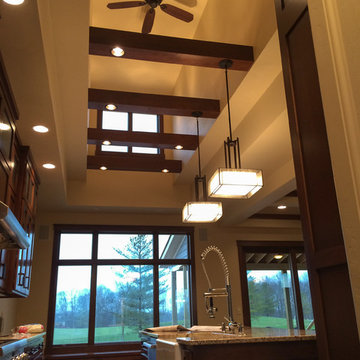
Example of a mid-sized transitional l-shaped medium tone wood floor open concept kitchen design in Milwaukee with a farmhouse sink, recessed-panel cabinets, medium tone wood cabinets, granite countertops, beige backsplash, ceramic backsplash, stainless steel appliances and an island
Find the right local pro for your project
 Davey Constructions
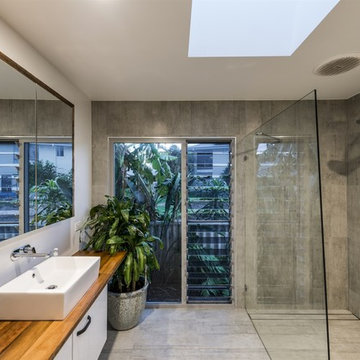
Mid-sized trendy kids' gray tile and ceramic tile ceramic tile and gray floor bathroom photo in Gold Coast - Tweed with white cabinets, a vessel sink, wood countertops, a one-piece toilet, gray walls, brown countertops and flat-panel cabinets

 dRemodeling Design-Build
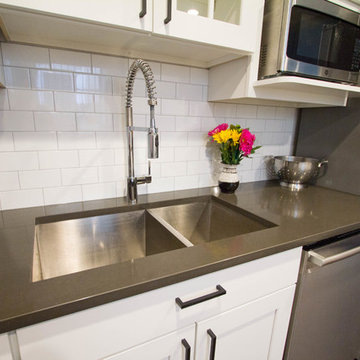
An industrial pre-rinse sink faucet in chrome greatly compliments the space, adding on another layer of detail to the space and to compliment this huge double-bowl sink.

 Restaurant Equipment Parts
Order T&S Brass 0133ADF12B Pre Rinse Wall Mount W/ Add-On today! Shop Restaurant Equipment Parts & Accessories at PartsFe with same-day shipping, available at the best prices.

 株式会社アステック
1988年に創業し、ホテル・旅館・介護施設・個人住宅・マンション向けにオーダー浴槽をはじめ、デザイン浴槽、ユニットバス、シャワーユニット等、独自の開発に基づくオリジナルな設計思想をもとに、お風呂まわりをトータルにサポートする浴槽メーカーです。
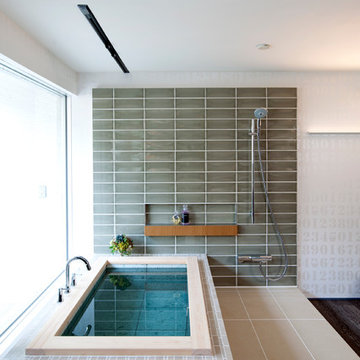
Minimalist bathroom photo in Tokyo
Minimalist bathroom photo in Tokyo
 Soda Pop Design Inc.
Stephani Buchman Photography
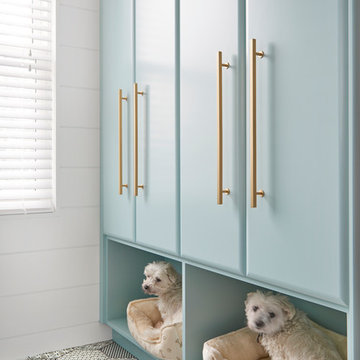
Inspiration for a transitional laundry room remodel in Toronto with blue cabinets and white walls
Inspiration for a transitional laundry room remodel in Toronto with blue cabinets and white walls

 Woodale
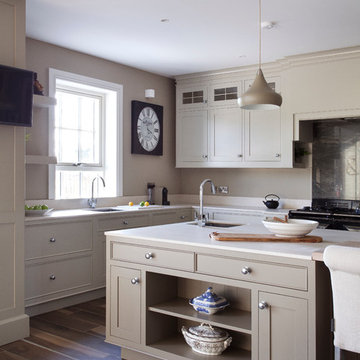
Eat-in kitchen - huge transitional l-shaped ceramic tile eat-in kitchen idea in Dublin with an integrated sink, beaded inset cabinets, stainless steel appliances and an island
 Tile Doctor Ltd
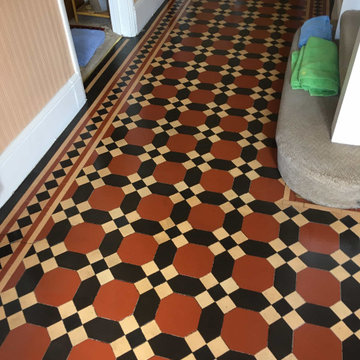
This Victorian floor in Twickenham, Middlesex was in good physical condition for its age but needed a good deep clean. Our customer had informed us that they had never cleaned or sealed the floor in the sixteen years that they had lived there so it was well overdue.
I went over to survey the floor and completed a test clean on a small section of tiling to see which products/techniques would work best. I like to do this as it demonstrates to the client what can be done, and it allows me to come up with an accurate price for doing the work.
As you can see from the pictures, there was quite a difference in the test patch compared to the rest of the floor. Years of foot traffic from the street had taken its’ toll and the floor was very dirty. Luckily, the floor was in very good condition and had not worn too badly.
Once they had seen the test patch, they were confident that it would be worth go ahead with my quote. It would ensure that the period feature was retained for many years to come. The colours on the floor were quite faded so it would be nice to get it restored.
I started the cleaning process by first taping up the surrounding skirting boards and doors to ensure they were protected from potential splashing. Cleaning involved spraying the Victorian tiles with a strong dilution of Tile Doctor Pro-Clean which is a dedicated Tile and Grout cleaning product. This was left to soak in for about ten minutes and then scrubbed in using a black pad fitted to a heavy-duty rotary scrubber.
This gives the floor a good mechanical scrub and works wonders releasing the ground-in dirt and soil from the tiles. The strong dilution of Pro-Clean will also remove any remaining sealers from the tile, however after sixteen years I doubted there would much trace of sealer left. Once done the floor was rinsed with water and all the soils removed with a wet vacuum.
Following the initial clean the colours were already much stronger. Next step however was to improve on that by giving the floor an acid rinse using Tile Doctor Grout Clean-Up. This removes mineral deposits and generally brightens up the appearance of the tile. After another round of scrubbing the floor was rinsed with our high-pressure washer and then vacuumed, extracting all of the dirty water and dirt away in one go. The floor was looking a lot better and was left to dry overnight.
After allowing the floor to dry overnight, we returned the next day to seal the floor. First, checking the floor was dry using the damp meter. Floors of this age can take a little longer to dry as there is no damp-proof membrane so it’s always worth checking as applying a sealer to damp tiles is not a good idea.
Once I was satisfied it was dry eight coats of Tile Doctor Seal and Go sheen finish sealer were applied. This takes a while to do as each coat needs to dry before applying the next. The sealer will protect the Victorian tiles for dirt and stains, it also enhanced the colours in the tile and will make it easier to keep the floor clean going forward.
My client was very pleased with the floor and mentioned that they should have called me in sooner! For aftercare cleaning I recommended Tile Doctor Neutral Clean which is an effective cleaner with a neutral pH, its designed for cleaning tiles without degrading the sealer.
Jonathan Oldham
South Middlesex Tile Doctor
 Tile Doctor Ltd
This Tumbled Travertine tiled floor at a beautiful house in Horley had been poorly maintained through the years using the wrong type of sealer which quickly wore down allowing dirt to become ingrained in the stone. The owner had become concerned about the state of the tiles and decided it was time to call in an expert that could restore the tiles to a condition that complimented the environment in which it was situated.
Travertine is known for being very distinctive in character and very durable, making it a very popular choice for tiled flooring in properties worldwide. However, the stone does require regular professional maintenance and polishing to keep it looking it top shape and home owners rarely realise this when they decide to have it installed. Fortunately, in the UK at least you can rely on your local tile doctor to maintain it for you.
The first part of the job involved giving the floor a thorough clean to remove what was left of old sealers and any polishing compounds that remained on the floor. Before beginning that however I brought in all my equipment and products into the house and then prepped the area by taping up the woodwork to protect it during the renovation process.
To remove what was left of the old sealers and other coatings still present on the floor a strong solution of Tile Doctor Remove and Go was applied to the floor and left to soak in for about ten minutes before being actively worked in with a rotary machine fitted with a black scrubbing pad. The solution turned black with the soil as it was lifted out of the pores of the stone and it was then rinsed off with water and extracted with a wet vacuum.
Following this, we moved on to a process we know as burnishing that hones the stone and brings up the polished appearance. Working in sections due to the size of the floor It involves the application of a series of diamond encrusted burnishing pads from coarse through to very fine.
The coarse 400-grit pad fitted to the rotary floor buffer and run over the floor using only water for lubrication. The water turns into a slurry as the pad does its job removing dirt and this has to be rinsed off the floor and extracted with the wet vacuum before applying the next pad. The process was then repeated with medium 800 grit pad for an initial polish followed by the Fine 1500 grit pad for the second polish using water for lubrication and rinsing and extracting in between each pad.
The last pad is a very fine 3000 grit pad for the final polish and is applied with only a little water sprayed onto the floor using a technique we call a Spray Burnish. This last pad really brings up the polished appearance of the stone.
To bring up the appearance of the stone even further and add a really durable polish Tile Doctor Shine Powder was applied. This is a crystallising powder sealer that ensures a very high shine and a tough, durable finish. This powder is applied directly to the tiles in combination with approximately ½ a litre of water and a soft white buffing pad.
Last step was to add to the protection provided by the Shine Powder with two coats of Tile Doctor Ultra-Seal which is a natural look sealer that doesn’t change the look of the stone and is applied to the stone and grout. This sealer works by seeping into the stone, occupying the pores and preventing dirt from becoming ingrained.
The customer was ecstatic with the results, being particularly pleased that she got the floor looking the way she originally wanted without significant expense, not to mention stress.
Michael Conlon
East Surrey Tile Doctor
 Tile Doctor Ltd
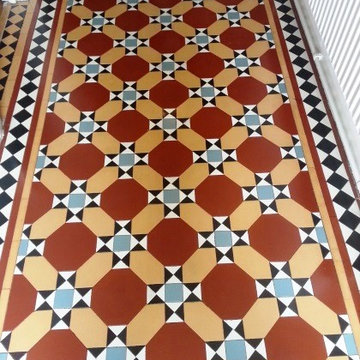
We were asked to restore a beautiful geometric Victorian tiled floor. The property had been used as a letting house and the floor had been used and abused for many years, just given an occasional mop over from time to time.
The new owners wanted to revive the colours and deal with the neglect. Step one was to put down the tile doctor pro clean alkaline cleaning solution and to let it dwell for a period of around twenty minutes.
We gave the solution plenty of dwell time before setting up our low speed rotary machine, underneath it we used a black pad to agitate and help loosen the ingrained dirt.
Once completed we set up our powerful rinsing tool which is attached to a machine fixed into our van, by doing this we do not need to dispose of any dirty water on your property but instead we take it away with us and dispose of it in the proper manner in an appropriate disposal point.
After rinsing the floor came up very well but we still felt it could be better, we used a steamer coupled with HBU Nanotech and a scraper to remove various deposits of paint and other sticky residue which had set over time.
After thoroughly rinsing the floor again we left the floor to dry for 4 days, Victorian tiles along with other earth based tiles are very absorbent and need to dry thoroughly and fully.
On our return we tested for damp ensuring the floor was dry enough to seal.
To seal the floor we used two coats of colour grow impregnating sealer, once the sealer had dried we then began sealing the floor using seal and go.
After applying several thin coats of seal and go, the floor reached the desired appearance.
A combination of Pro clean, hbu nanotech, colour grow and seal and go with a little bit of care from your local tile doctor restored this old uncared for floor back to the prime of its life.
 Tile Doctor Ltd
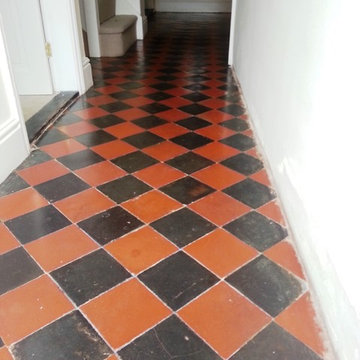
Details below of a restorative clean and seal that I recently completed on a Quarry tiled hallway at a house in the small village of Riseley, North Bedfordshire.
The floor was a mix of fantastic black and red tiles; however, it had lost its character after a long period without professional maintenance. My client commissioned me to strip off the old sealer from the floor and replace it, but not before providing a thorough clean, including tackling some adhesive staining and inherent grout haze.
The first task involved mixing our high alkaline cleaner, known as Tile Doctor Pro-Clean, with water to form a strong solution. The solution was applied to the tiled floor and left to dwell for a short period. This dwelling time allows for the Pro-Clean to seep into the stone to get underneath the ingrained dirt and lift it out. Pro-Clean also contains stripping properties, and thus helped to break down the old (and now ineffectual) sealer.
After completing this initial clean I rinsed the floor using a standard mop and bucket method. With the old sealer removed, it became evident that there was also plaster residue marking the tiles, as well as inherent grout haze on the surface of the tile probably from the original installation. To tack these problems I used Tile Doctor Grout Clean-Up, which is an acid-based cleaner that dissolves the adhesive and the grout. Being an acid you have to be careful and ensure the floor is rinsed thoroughly after use and if you’re considering using this product yourself read the label and make sure you use the right protective equipment.
After the floor was thoroughly rinsed with water it was dried as much as possible using a wet vacuum which literally sucks the water off the floor. The floor was then left to dry for four days, with the help of several air movers. By the time I returned to the house, the floor was completely dry and ready to take the seal.
I opted to use a combination of sealers, including one coat of our colour enhancing, impregnating sealer, known as Colour Grow, followed by three coats of Tile Doctor Seal & Go to provide a truly robust and aesthetically pleasing surface seal.
The photographs demonstrate the finished results better than words can and I think you will agree the floor is quite transformed.
Andrew Evans
Bedfordshire Tile Doctor
 Tile Doctor Ltd
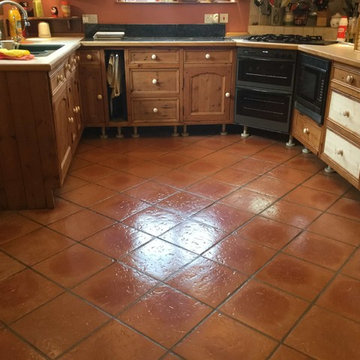
This Terracotta tiled floor was installed in the kitchen of a cottage in the small village of Maidford near Towcester. The tiles were not looking their best and the owner of the property realised it was time to do something about it and contacted Tile Doctor to have the floor stripped and resealed. Stripping and Sealing tile and stone floors is our bread and butter so I was more than happy to pop round and survey the floor which was approximately 9m2.
The grout had darkened with dirt and the previous tile sealer was failing so dirt was now getting ingrained in the Terracotta making it difficult to clean in places and leading to a patchy appearance. We discussed the work involved, my quote was accepted, and a date agreed for me to return and complete the work which would take two days, one to clean and one to seal.
After tidying up the Kitchen and removing the kickboards from underneath the kitchen units I set about working on cleaning and stripping the Terracotta floor of old sealers. To start I tested a small area with a strong dilution of Tile Doctor Wax Away. Wax was quite often used on Terracotta so I figured this product would be a good place to start. My suspicions were proved correct, and I found this to be the best product for removing the many layers of sealant on the floor. Wax Away is a new alkaline product by Tile Doctor and ideal for cleaning clay-based tiles such as Terracotta.
With my sights set on the rest of the floor Wax Away was scrubbed into the tile using a 17” rotary floor scrubbing machine and a black scrubbing pad running on a slow speed which helps to reduce splashing. This activity soon brought the dirt off the floor and the soiled cleaning solution was removed using a wet vacuum and the floor was rinsed down with clean water. The cleaning process was repeated a couple of times until I was happy with the floor, a stiff hand brush was then used along the grout lines with a dilution of Tile Doctor Pro-Clean to clean up the grout.
After rinsing and extracting the floor again the floor was inspected, and I noticed there were a few stubborn paint splashes on the tiles. I managed to remove these and these by spot treating the affected area with Tile Doctor Remove and Go and a steamer to lift the stain out of the clay tile. Once happy the floor was clean it was given a thorough rinse to neutralise it and remove any trace of cleaning products and then left it to dry.
I allowed the floor to dry for several days before returning to seal the Terracotta using numerous coats of Tile Doctor Seal and Go which is an ideal sealer for Terracotta and provides durable stain protection together with a low sheen finish. Terracotta is by its nature very porous and so it’s not unknown for it to take up to nine coats of sealer, which can take some time to apply as like paint you have to wait until it’s dry before it will take the next coat.
The customer was so impressed by the results I achieved in their kitchen they decided to go ahead and book me in to carry out this process throughout the whole of the ground floor which included lounge, study and hallway.
Phil Vissian
Northamptonshire Tile Doctor
8