
Search results for "Safety issues" in Home Design Ideas
 Bloomin Blinds of North Charlotte
Discover how premium light-filtering materials and smart-home automation can secure street-level entryway glass without losing natural daylight.
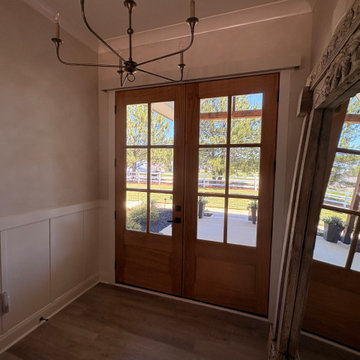
Choosing the right window treatments for a home's front entrance is one of the most challenging design decisions a homeowner can face. The front door is the focal point of a home's curb appeal, often featuring expansive glass panels or side-by-side double doors designed to make a grand architectural statement.
During the day, these large glass features are an asset, flooding entryways and foyers with beautiful natural daylight. However, for homes situated on busy local roads or highly trafficked street-level lots, the dynamic completely changes once the sun goes down.
The moment interior lights are switched on in the evening, a stark contrast is created with the dark outdoors. This creates a severe privacy issue, leaving the entire foyer completely exposed to passing traffic and pedestrians. Finding a solution that delivers absolute evening privacy without permanently plunging the front entrance into darkness during the day requires understanding how modern window treatment materials and operating systems interact.
Light-Filtering vs. Blackout Fabrics
The first step in solving street-level privacy is selecting the correct fabric type. Many homeowners mistakenly assume they need heavy, opaque blackout shades to secure their home from outside eyes at night. While blackout fabrics certainly block 100% of the view, they also block 100% of the natural daylight during the day, forcing you to constantly raise and lower the shades just to see inside your own foyer.
A more effective approach for entryways utilizes premium light-filtering materials. These specialized fabrics are engineered with a precise, tight weave that operates on the principles of directional light and optical density.
Daytime Functionality: When the sun is shining outside, the exterior light levels are significantly higher than the interior light levels. The light-filtering fabric diffuses the intense, direct sunlight into a soft, ambient glow throughout the entryway. This keeps the home bright, eliminates harsh glares, and protects interior hardwood flooring, paint, and trim from damaging UV rays.
Night-Time Functionality: At night, the lighting dynamic reverses. The interior foyer lights make the inside bright, while the outside is dark. Because of the specialized tight weave, the fabric blocks the transmission of clear shapes and details. To a person standing out on the street or driving by on a busy road, the view inside is completely obstructed, delivering total privacy when the family is home for the evening.
Challenges of Front Door Installations
Securing privacy for a double wide front entrance introduces unique structural hurdles that standard windows do not face. Traditional blinds with hanging cords or manual pull chains are poorly suited for front doors. They disrupt the clean architectural lines of a grand foyer, create a safety hazard, and can easily get tangled or damaged when the doors are opened and closed.
The window treatments must be mounted high and wide enough above the door trim to ensure that the front doors can swing open and close freely without ever catching on the fabric or the lower hem bar.
How We Applied These Principles in Sherrills Ford, NC
Applying these exact educational principles to real-world homes is what Cole and I do every day at Bloomin' Blinds of North Charlotte. We recently worked with a homeowner in Sherrills Ford whose beautiful new construction property sat on a highly trafficked road. They loved their double wide front door entrance but felt entirely too exposed to the street at night.
We brought our mobile showroom directly to their driveway. This allowed us to hold up premium light-filtering fabric samples directly against their entryway glass, matching the materials perfectly to their home's natural lighting, interior paint, and trim before making a single cut.
To solve their street-level privacy issue, we custom-built and installed two matching light-filtering roller shades, mounting them flawlessly side-by-side above the front door frame. To keep the home’s interior design completely cohesive, we carried the exact same style to the back of the house, installing a matching single roller shade on the rear door.
Smart Home Window Automation at Your Fingertips
Because entryway windows can be tall and awkward to reach manually, our family team integrated advanced smart-home motorization into this Sherrills Ford project.
Beyond the convenience of a handheld remote control, these automated roller shades feature seamless Wi-Fi integration. The homeowners can control their privacy through a dedicated smartphone app or link the system directly to their existing voice-activated smart home networks, including Amazon Alexa, Google Assistant, and Apple HomeKit.
This allows for complete hands-free window automation. The clients can program custom daily routines—such as setting the front entry shades to automatically lower exactly at sunset—or simply use a voice command to secure the foyer instantly from the comfort of the couch.
 Cherry City Interiors & Design
Materials and interior paint selected by Cherry City Interiors & Design
Freestanding bathtub - mid-sized contemporary master beige tile and ceramic tile porcelain tile freestanding bathtub idea in Portland with shaker cabinets, dark wood cabinets, white walls, a drop-in sink and tile countertops
Freestanding bathtub - mid-sized contemporary master beige tile and ceramic tile porcelain tile freestanding bathtub idea in Portland with shaker cabinets, dark wood cabinets, white walls, a drop-in sink and tile countertops
 Bloomin Blinds of North Charlotte
Discover how premium light-filtering materials and smart-home automation can secure street-level entryway glass without losing natural daylight.
Choosing the right window treatments for a home's front entrance is one of the most challenging design decisions a homeowner can face. The front door is the focal point of a home's curb appeal, often featuring expansive glass panels or side-by-side double doors designed to make a grand architectural statement.
During the day, these large glass features are an asset, flooding entryways and foyers with beautiful natural daylight. However, for homes situated on busy local roads or highly trafficked street-level lots, the dynamic completely changes once the sun goes down.
The moment interior lights are switched on in the evening, a stark contrast is created with the dark outdoors. This creates a severe privacy issue, leaving the entire foyer completely exposed to passing traffic and pedestrians. Finding a solution that delivers absolute evening privacy without permanently plunging the front entrance into darkness during the day requires understanding how modern window treatment materials and operating systems interact.
Light-Filtering vs. Blackout Fabrics
The first step in solving street-level privacy is selecting the correct fabric type. Many homeowners mistakenly assume they need heavy, opaque blackout shades to secure their home from outside eyes at night. While blackout fabrics certainly block 100% of the view, they also block 100% of the natural daylight during the day, forcing you to constantly raise and lower the shades just to see inside your own foyer.
A more effective approach for entryways utilizes premium light-filtering materials. These specialized fabrics are engineered with a precise, tight weave that operates on the principles of directional light and optical density.
Daytime Functionality: When the sun is shining outside, the exterior light levels are significantly higher than the interior light levels. The light-filtering fabric diffuses the intense, direct sunlight into a soft, ambient glow throughout the entryway. This keeps the home bright, eliminates harsh glares, and protects interior hardwood flooring, paint, and trim from damaging UV rays.
Night-Time Functionality: At night, the lighting dynamic reverses. The interior foyer lights make the inside bright, while the outside is dark. Because of the specialized tight weave, the fabric blocks the transmission of clear shapes and details. To a person standing out on the street or driving by on a busy road, the view inside is completely obstructed, delivering total privacy when the family is home for the evening.
Challenges of Front Door Installations
Securing privacy for a double wide front entrance introduces unique structural hurdles that standard windows do not face. Traditional blinds with hanging cords or manual pull chains are poorly suited for front doors. They disrupt the clean architectural lines of a grand foyer, create a safety hazard, and can easily get tangled or damaged when the doors are opened and closed.
The window treatments must be mounted high and wide enough above the door trim to ensure that the front doors can swing open and close freely without ever catching on the fabric or the lower hem bar.
How We Applied These Principles in Sherrills Ford, NC
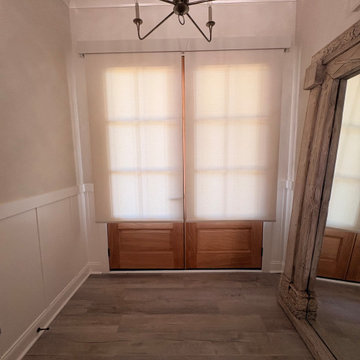
Applying these exact educational principles to real-world homes is what Cole and I do every day at Bloomin' Blinds of North Charlotte. We recently worked with a homeowner in Sherrills Ford whose beautiful new construction property sat on a highly trafficked road. They loved their double wide front door entrance but felt entirely too exposed to the street at night.
We brought our mobile showroom directly to their driveway. This allowed us to hold up premium light-filtering fabric samples directly against their entryway glass, matching the materials perfectly to their home's natural lighting, interior paint, and trim before making a single cut.
To solve their street-level privacy issue, we custom-built and installed two matching light-filtering roller shades, mounting them flawlessly side-by-side above the front door frame. To keep the home’s interior design completely cohesive, we carried the exact same style to the back of the house, installing a matching single roller shade on the rear door.
Smart Home Window Automation at Your Fingertips
Because entryway windows can be tall and awkward to reach manually, our family team integrated advanced smart-home motorization into this Sherrills Ford project.
Beyond the convenience of a handheld remote control, these automated roller shades feature seamless Wi-Fi integration. The homeowners can control their privacy through a dedicated smartphone app or link the system directly to their existing voice-activated smart home networks, including Amazon Alexa, Google Assistant, and Apple HomeKit.
This allows for complete hands-free window automation. The clients can program custom daily routines—such as setting the front entry shades to automatically lower exactly at sunset—or simply use a voice command to secure the foyer instantly from the comfort of the couch.
Find the right local pro for your project
 Bloomin Blinds of North Charlotte
Discover how premium light-filtering materials and smart-home automation can secure street-level entryway glass without losing natural daylight.
Choosing the right window treatments for a home's front entrance is one of the most challenging design decisions a homeowner can face. The front door is the focal point of a home's curb appeal, often featuring expansive glass panels or side-by-side double doors designed to make a grand architectural statement.
During the day, these large glass features are an asset, flooding entryways and foyers with beautiful natural daylight. However, for homes situated on busy local roads or highly trafficked street-level lots, the dynamic completely changes once the sun goes down.
The moment interior lights are switched on in the evening, a stark contrast is created with the dark outdoors. This creates a severe privacy issue, leaving the entire foyer completely exposed to passing traffic and pedestrians. Finding a solution that delivers absolute evening privacy without permanently plunging the front entrance into darkness during the day requires understanding how modern window treatment materials and operating systems interact.
Light-Filtering vs. Blackout Fabrics
The first step in solving street-level privacy is selecting the correct fabric type. Many homeowners mistakenly assume they need heavy, opaque blackout shades to secure their home from outside eyes at night. While blackout fabrics certainly block 100% of the view, they also block 100% of the natural daylight during the day, forcing you to constantly raise and lower the shades just to see inside your own foyer.
A more effective approach for entryways utilizes premium light-filtering materials. These specialized fabrics are engineered with a precise, tight weave that operates on the principles of directional light and optical density.
Daytime Functionality: When the sun is shining outside, the exterior light levels are significantly higher than the interior light levels. The light-filtering fabric diffuses the intense, direct sunlight into a soft, ambient glow throughout the entryway. This keeps the home bright, eliminates harsh glares, and protects interior hardwood flooring, paint, and trim from damaging UV rays.
Night-Time Functionality: At night, the lighting dynamic reverses. The interior foyer lights make the inside bright, while the outside is dark. Because of the specialized tight weave, the fabric blocks the transmission of clear shapes and details. To a person standing out on the street or driving by on a busy road, the view inside is completely obstructed, delivering total privacy when the family is home for the evening.
Challenges of Front Door Installations
Securing privacy for a double wide front entrance introduces unique structural hurdles that standard windows do not face. Traditional blinds with hanging cords or manual pull chains are poorly suited for front doors. They disrupt the clean architectural lines of a grand foyer, create a safety hazard, and can easily get tangled or damaged when the doors are opened and closed.
The window treatments must be mounted high and wide enough above the door trim to ensure that the front doors can swing open and close freely without ever catching on the fabric or the lower hem bar.
How We Applied These Principles in Sherrills Ford, NC
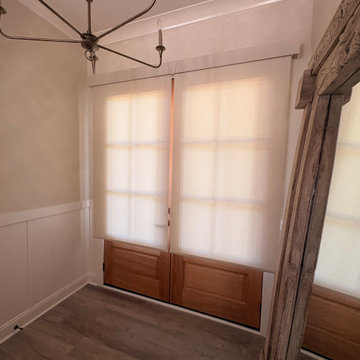
Applying these exact educational principles to real-world homes is what Cole and I do every day at Bloomin' Blinds of North Charlotte. We recently worked with a homeowner in Sherrills Ford whose beautiful new construction property sat on a highly trafficked road. They loved their double wide front door entrance but felt entirely too exposed to the street at night.
We brought our mobile showroom directly to their driveway. This allowed us to hold up premium light-filtering fabric samples directly against their entryway glass, matching the materials perfectly to their home's natural lighting, interior paint, and trim before making a single cut.
To solve their street-level privacy issue, we custom-built and installed two matching light-filtering roller shades, mounting them flawlessly side-by-side above the front door frame. To keep the home’s interior design completely cohesive, we carried the exact same style to the back of the house, installing a matching single roller shade on the rear door.
Smart Home Window Automation at Your Fingertips
Because entryway windows can be tall and awkward to reach manually, our family team integrated advanced smart-home motorization into this Sherrills Ford project.
Beyond the convenience of a handheld remote control, these automated roller shades feature seamless Wi-Fi integration. The homeowners can control their privacy through a dedicated smartphone app or link the system directly to their existing voice-activated smart home networks, including Amazon Alexa, Google Assistant, and Apple HomeKit.
This allows for complete hands-free window automation. The clients can program custom daily routines—such as setting the front entry shades to automatically lower exactly at sunset—or simply use a voice command to secure the foyer instantly from the comfort of the couch.

 FLOORIANS
Wool Carpet runner on stairs, serge binding on edges. Natural colour, Grey colour,
natural fiber,
Mid-sized minimalist carpeted straight staircase photo in Toronto with carpeted risers
Mid-sized minimalist carpeted straight staircase photo in Toronto with carpeted risers



 Tailored Living / Premier Garage of Naperville
Two unique storage racks above the garage doors allowing accessibility both with the door open or closed. These are great for seasonal items that only come down once a year. Great for plastic bins to store items as well
 Talon Construction Inc.
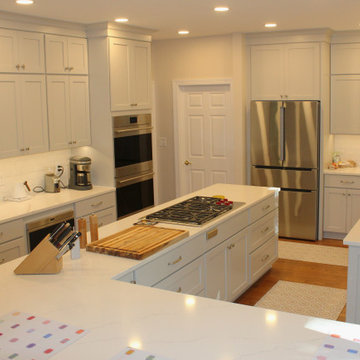
Renovating an open kitchen can be an exciting project that can improve the functionality, aesthetics, and value of your home. Here are some steps to guide you through the process:
Planning and Design:
Define your goals and budget for the renovation.
Determine the layout of your open kitchen. Consider factors like the work triangle (the relationship between the stove, sink, and refrigerator) and the flow of traffic.
Choose a design style and color scheme that suits your preferences and complements the rest of your home.
Research and Inspiration:
Collect inspiration from magazines, websites, and social media platforms to get ideas for your open kitchen design.
Create a mood board or vision board to help you visualize the final look.
Hiring Professionals:
Depending on the scale of your renovation, you may need to hire professionals, such as architects, interior designers, contractors, and electricians. Make sure to check references and get multiple quotes.
Demolition and Structural Work:
If your renovation involves structural changes, like removing walls, this is the time to do it. Ensure that the necessary permits are obtained.
Plumbing and Electrical Work:
Update or reconfigure plumbing and electrical systems as needed. This may include adding or moving outlets, switches, and lighting fixtures.
Cabinetry and Countertops:
Choose and install new kitchen cabinets and countertops. This is a significant part of your renovation and will greatly influence the kitchen's appearance and functionality.
Appliances:
Update or install new kitchen appliances, including the refrigerator, stove, oven, microwave, and dishwasher.
Flooring:
Select and install flooring that is suitable for a kitchen, such as hardwood, tile, laminate, or vinyl. Ensure it complements the overall design.
Backsplash and Wall Finishes:
Install a backsplash that matches your design and protects your walls. Consider materials like tile, glass, or stainless steel.
Lighting:
Choose and install various types of lighting, including ambient, task, and accent lighting. Pendant lights above an island or breakfast bar can add style and functionality.
Paint and Finishing Touches:
Paint the walls and ceiling in the colors you've selected. Add finishing touches like hardware, window treatments, and decorative elements.
Furniture and Accessories:
Bring in furniture, such as a dining table and chairs, barstools, and any other pieces you need to complete the space. Decorate with accessories like artwork, plants, and decorative items.
Final Inspection and Cleanup:
Ensure that all work meets safety and building code requirements. Clean the entire area thoroughly.
Enjoy Your New Kitchen:
Once the renovation is complete and everything is in its place, enjoy your beautiful, functional open kitchen.
Remember that open kitchen renovations can be complex and may require careful planning. It's essential to stay within your budget, communicate with your contractors and designers, and be flexible as unexpected issues may arise during the process. Ultimately, a well-executed open kitchen renovation can enhance the heart of your home and improve your overall living space.

 Talon Construction Inc.
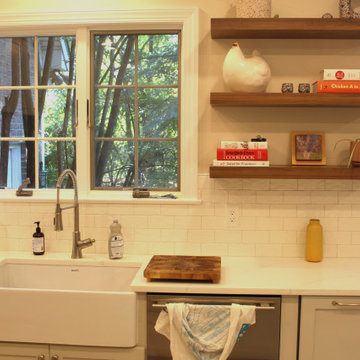
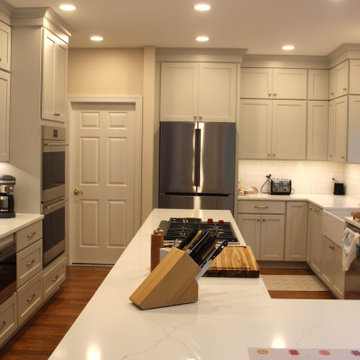
Renovating an open kitchen can be an exciting project that can improve the functionality, aesthetics, and value of your home. Here are some steps to guide you through the process:
Planning and Design:
Define your goals and budget for the renovation.
Determine the layout of your open kitchen. Consider factors like the work triangle (the relationship between the stove, sink, and refrigerator) and the flow of traffic.
Choose a design style and color scheme that suits your preferences and complements the rest of your home.
Research and Inspiration:
Collect inspiration from magazines, websites, and social media platforms to get ideas for your open kitchen design.
Create a mood board or vision board to help you visualize the final look.
Hiring Professionals:
Depending on the scale of your renovation, you may need to hire professionals, such as architects, interior designers, contractors, and electricians. Make sure to check references and get multiple quotes.
Demolition and Structural Work:
If your renovation involves structural changes, like removing walls, this is the time to do it. Ensure that the necessary permits are obtained.
Plumbing and Electrical Work:
Update or reconfigure plumbing and electrical systems as needed. This may include adding or moving outlets, switches, and lighting fixtures.
Cabinetry and Countertops:
Choose and install new kitchen cabinets and countertops. This is a significant part of your renovation and will greatly influence the kitchen's appearance and functionality.
Appliances:
Update or install new kitchen appliances, including the refrigerator, stove, oven, microwave, and dishwasher.
Flooring:
Select and install flooring that is suitable for a kitchen, such as hardwood, tile, laminate, or vinyl. Ensure it complements the overall design.
Backsplash and Wall Finishes:
Install a backsplash that matches your design and protects your walls. Consider materials like tile, glass, or stainless steel.
Lighting:
Choose and install various types of lighting, including ambient, task, and accent lighting. Pendant lights above an island or breakfast bar can add style and functionality.
Paint and Finishing Touches:
Paint the walls and ceiling in the colors you've selected. Add finishing touches like hardware, window treatments, and decorative elements.
Furniture and Accessories:
Bring in furniture, such as a dining table and chairs, barstools, and any other pieces you need to complete the space. Decorate with accessories like artwork, plants, and decorative items.
Final Inspection and Cleanup:
Ensure that all work meets safety and building code requirements. Clean the entire area thoroughly.
Enjoy Your New Kitchen:
Once the renovation is complete and everything is in its place, enjoy your beautiful, functional open kitchen.
Remember that open kitchen renovations can be complex and may require careful planning. It's essential to stay within your budget, communicate with your contractors and designers, and be flexible as unexpected issues may arise during the process. Ultimately, a well-executed open kitchen renovation can enhance the heart of your home and improve your overall living space.
 Talon Construction Inc.
Renovating an open kitchen can be an exciting project that can improve the functionality, aesthetics, and value of your home. Here are some steps to guide you through the process:
Planning and Design:
Define your goals and budget for the renovation.
Determine the layout of your open kitchen. Consider factors like the work triangle (the relationship between the stove, sink, and refrigerator) and the flow of traffic.
Choose a design style and color scheme that suits your preferences and complements the rest of your home.
Research and Inspiration:
Collect inspiration from magazines, websites, and social media platforms to get ideas for your open kitchen design.
Create a mood board or vision board to help you visualize the final look.
Hiring Professionals:
Depending on the scale of your renovation, you may need to hire professionals, such as architects, interior designers, contractors, and electricians. Make sure to check references and get multiple quotes.
Demolition and Structural Work:
If your renovation involves structural changes, like removing walls, this is the time to do it. Ensure that the necessary permits are obtained.
Plumbing and Electrical Work:
Update or reconfigure plumbing and electrical systems as needed. This may include adding or moving outlets, switches, and lighting fixtures.
Cabinetry and Countertops:
Choose and install new kitchen cabinets and countertops. This is a significant part of your renovation and will greatly influence the kitchen's appearance and functionality.
Appliances:
Update or install new kitchen appliances, including the refrigerator, stove, oven, microwave, and dishwasher.
Flooring:
Select and install flooring that is suitable for a kitchen, such as hardwood, tile, laminate, or vinyl. Ensure it complements the overall design.
Backsplash and Wall Finishes:
Install a backsplash that matches your design and protects your walls. Consider materials like tile, glass, or stainless steel.
Lighting:
Choose and install various types of lighting, including ambient, task, and accent lighting. Pendant lights above an island or breakfast bar can add style and functionality.
Paint and Finishing Touches:
Paint the walls and ceiling in the colors you've selected. Add finishing touches like hardware, window treatments, and decorative elements.
Furniture and Accessories:
Bring in furniture, such as a dining table and chairs, barstools, and any other pieces you need to complete the space. Decorate with accessories like artwork, plants, and decorative items.
Final Inspection and Cleanup:
Ensure that all work meets safety and building code requirements. Clean the entire area thoroughly.
Enjoy Your New Kitchen:
Once the renovation is complete and everything is in its place, enjoy your beautiful, functional open kitchen.
Remember that open kitchen renovations can be complex and may require careful planning. It's essential to stay within your budget, communicate with your contractors and designers, and be flexible as unexpected issues may arise during the process. Ultimately, a well-executed open kitchen renovation can enhance the heart of your home and improve your overall living space.
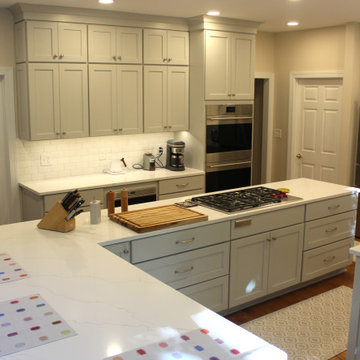 Talon Construction Inc.
Renovating an open kitchen can be an exciting project that can improve the functionality, aesthetics, and value of your home. Here are some steps to guide you through the process:
Planning and Design:
Define your goals and budget for the renovation.
Determine the layout of your open kitchen. Consider factors like the work triangle (the relationship between the stove, sink, and refrigerator) and the flow of traffic.
Choose a design style and color scheme that suits your preferences and complements the rest of your home.
Research and Inspiration:
Collect inspiration from magazines, websites, and social media platforms to get ideas for your open kitchen design.
Create a mood board or vision board to help you visualize the final look.
Hiring Professionals:
Depending on the scale of your renovation, you may need to hire professionals, such as architects, interior designers, contractors, and electricians. Make sure to check references and get multiple quotes.
Demolition and Structural Work:
If your renovation involves structural changes, like removing walls, this is the time to do it. Ensure that the necessary permits are obtained.
Plumbing and Electrical Work:
Update or reconfigure plumbing and electrical systems as needed. This may include adding or moving outlets, switches, and lighting fixtures.
Cabinetry and Countertops:
Choose and install new kitchen cabinets and countertops. This is a significant part of your renovation and will greatly influence the kitchen's appearance and functionality.
Appliances:
Update or install new kitchen appliances, including the refrigerator, stove, oven, microwave, and dishwasher.
Flooring:
Select and install flooring that is suitable for a kitchen, such as hardwood, tile, laminate, or vinyl. Ensure it complements the overall design.
Backsplash and Wall Finishes:
Install a backsplash that matches your design and protects your walls. Consider materials like tile, glass, or stainless steel.
Lighting:
Choose and install various types of lighting, including ambient, task, and accent lighting. Pendant lights above an island or breakfast bar can add style and functionality.
Paint and Finishing Touches:
Paint the walls and ceiling in the colors you've selected. Add finishing touches like hardware, window treatments, and decorative elements.
Furniture and Accessories:
Bring in furniture, such as a dining table and chairs, barstools, and any other pieces you need to complete the space. Decorate with accessories like artwork, plants, and decorative items.
Final Inspection and Cleanup:
Ensure that all work meets safety and building code requirements. Clean the entire area thoroughly.
Enjoy Your New Kitchen:
Once the renovation is complete and everything is in its place, enjoy your beautiful, functional open kitchen.
Remember that open kitchen renovations can be complex and may require careful planning. It's essential to stay within your budget, communicate with your contractors and designers, and be flexible as unexpected issues may arise during the process. Ultimately, a well-executed open kitchen renovation can enhance the heart of your home and improve your overall living space.
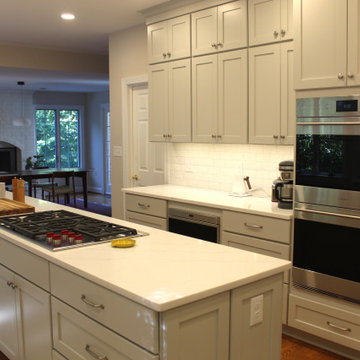 Talon Construction Inc.
Renovating an open kitchen can be an exciting project that can improve the functionality, aesthetics, and value of your home. Here are some steps to guide you through the process:
Planning and Design:
Define your goals and budget for the renovation.
Determine the layout of your open kitchen. Consider factors like the work triangle (the relationship between the stove, sink, and refrigerator) and the flow of traffic.
Choose a design style and color scheme that suits your preferences and complements the rest of your home.
Research and Inspiration:
Collect inspiration from magazines, websites, and social media platforms to get ideas for your open kitchen design.
Create a mood board or vision board to help you visualize the final look.
Hiring Professionals:
Depending on the scale of your renovation, you may need to hire professionals, such as architects, interior designers, contractors, and electricians. Make sure to check references and get multiple quotes.
Demolition and Structural Work:
If your renovation involves structural changes, like removing walls, this is the time to do it. Ensure that the necessary permits are obtained.
Plumbing and Electrical Work:
Update or reconfigure plumbing and electrical systems as needed. This may include adding or moving outlets, switches, and lighting fixtures.
Cabinetry and Countertops:
Choose and install new kitchen cabinets and countertops. This is a significant part of your renovation and will greatly influence the kitchen's appearance and functionality.
Appliances:
Update or install new kitchen appliances, including the refrigerator, stove, oven, microwave, and dishwasher.
Flooring:
Select and install flooring that is suitable for a kitchen, such as hardwood, tile, laminate, or vinyl. Ensure it complements the overall design.
Backsplash and Wall Finishes:
Install a backsplash that matches your design and protects your walls. Consider materials like tile, glass, or stainless steel.
Lighting:
Choose and install various types of lighting, including ambient, task, and accent lighting. Pendant lights above an island or breakfast bar can add style and functionality.
Paint and Finishing Touches:
Paint the walls and ceiling in the colors you've selected. Add finishing touches like hardware, window treatments, and decorative elements.
Furniture and Accessories:
Bring in furniture, such as a dining table and chairs, barstools, and any other pieces you need to complete the space. Decorate with accessories like artwork, plants, and decorative items.
Final Inspection and Cleanup:
Ensure that all work meets safety and building code requirements. Clean the entire area thoroughly.
Enjoy Your New Kitchen:
Once the renovation is complete and everything is in its place, enjoy your beautiful, functional open kitchen.
Remember that open kitchen renovations can be complex and may require careful planning. It's essential to stay within your budget, communicate with your contractors and designers, and be flexible as unexpected issues may arise during the process. Ultimately, a well-executed open kitchen renovation can enhance the heart of your home and improve your overall living space.
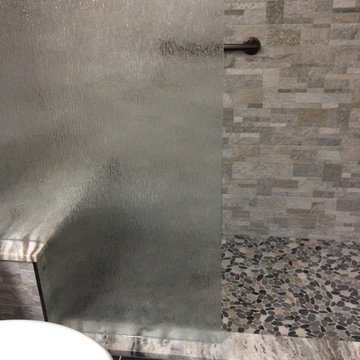
 Kristina Bruno
Mid-sized elegant master green tile and porcelain tile bathroom photo in Orlando with a drop-in sink, raised-panel cabinets, medium tone wood cabinets, quartz countertops and white walls
 MW Design Workshop
Josiah Zukowski
Staircase - mid-sized modern carpeted straight carpeted staircase idea in Portland with white walls and carpeted risers
Staircase - mid-sized modern carpeted straight carpeted staircase idea in Portland with white walls and carpeted risers
 Te Tile LLC
Inspiration for a mid-sized timeless kitchen remodel in New York with an undermount sink, shaker cabinets, white cabinets, marble countertops, white backsplash and ceramic backsplash

 User
UserFashionista in Dupont maximizes storage in her small walk in closet.
Example of a small trendy closet design in DC Metro
Example of a small trendy closet design in DC Metro
 Iron Mountain Construction
Kyle Bryant - Speeds Photo
Example of a mountain style staircase design in Portland
Example of a mountain style staircase design in Portland


 Simply Perfect
Many homeowners have their own ideas about how light or dark their home interiors should be. Some folks love nothing more than sunny, light-filled rooms. Other people adore their comforting, softly-lit spaces.
While light levels can be a matter of personal preference, lighting can also be a powerful tool for shaping the mood, emotional tone and usage of every room. In fact, lighting is just as important as furnishings.
Lighting Tips
1. Stay Warm
Cool light looks brighter to the eye and can seem more like daylight. It can also make your home feel like a hospital or grocery store, which is not what we’re going for. Warm light is softer and creates a more relaxed mood. That’s what you want in your home.
2. Yes, You Can
We’re big fans of can lighting. These in-ceiling lights draw zero attention to themselves while creating a foundation for excellent interior lighting. We add lamps for emphasis and mood in particular areas and put everything on a dimmer switch (see #3). This formula gives you maximum flexibility.
3. The Great Dimmer
What did people do before the dimmer switch was invented? We suspect they shielded their eyes or huddled together in the dark because there was nothing inbetween. We use dimmer switches everywhere except the bathroom. Controlling the level of every light in your home allows you to create the right mood for the moment every time.
4. Beam Me Up
We’re head over heels in love with this stunning raw wood beam wrapped with light bulbs on cords. Flip one dimmer switch and all the lights go on, at the exact intensity level you choose. The can lights in the ceiling gently illuminate the room, so this fabulous fixture can serve its true purpose—which is to create an irresistibly inviting space and a found-object, vintage vibe.
5. Open Bulb Policy
Many of our light fixtures feature exposed bulbs. Once upon a time, light bulbs might have been ugly, but clear Edison bulbs, showing the filaments within, are themselves works of art. In a chandelier with an open, orb structure, candelabra bulbs are reminiscent of candle flames. A small lamp with a square metal base and a single bulb takes the open concept one step further.
6. Double Up
Above a long dining table or bar, consider using multiple light fixtures. Especially with hanging light fixtures, we tend to think of putting just one in the middle. But lighting only the center of a long table would leave some of your dinner guests in the dark while others take the spotlight.
7. Reflections
Reflections off mirrors, glass and tile bring a secondary light source into play and add a soft, beautiful touch. Candles create particularly compelling reflections.
8. Looking Up
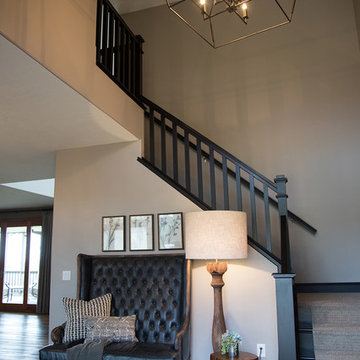
In high, open spaces, a light fixture can help balance the space, bringing the eye downward and helping make the area less cavernous and more inviting.
9. Looking Out
Lighting is also a safety issue. Make sure you can turn on the stair lights at the top and the bottom of the stairs. Incorporate the flexibility to light up the room you’re entering before you get there, so you aren’t stumbling around in the dark, trying to find the switch.
10. How Low Can You Go?
While low light may be flattering, people tend to err on the side of too little light, rather than too much. Turn up that dimmer a notch more than you would normally and you may like what you see. Having sufficient light is particularly important in areas such as basements, where there may be little to no natural light.
18